1 2
XLR99
XLR99 GRM+ Memberand HalfDork
12/6/15 4:01 p.m.

Some of you may remember my thread from a few weeks ago: /Thread

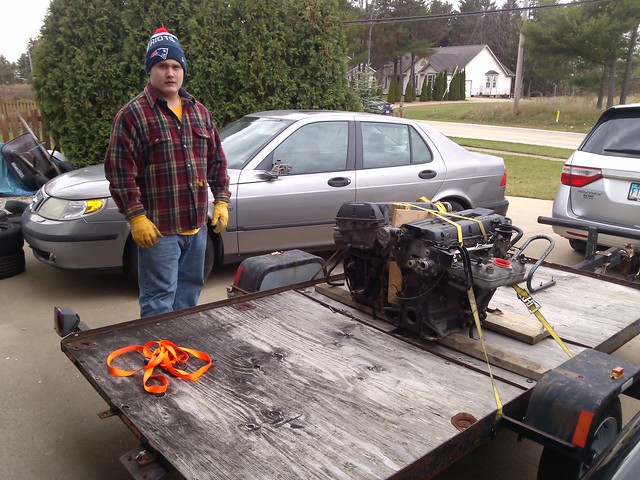
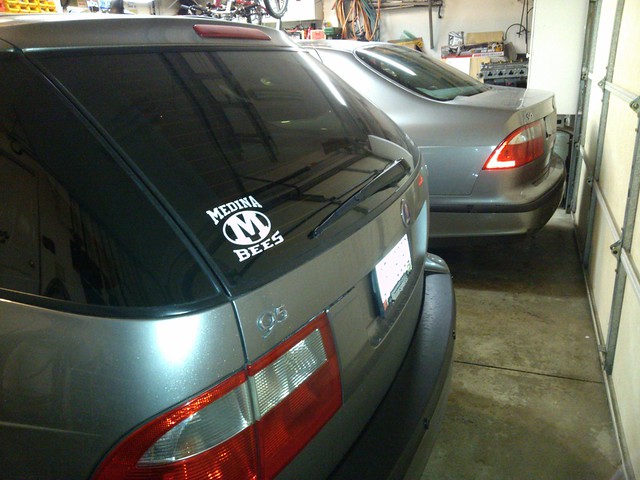
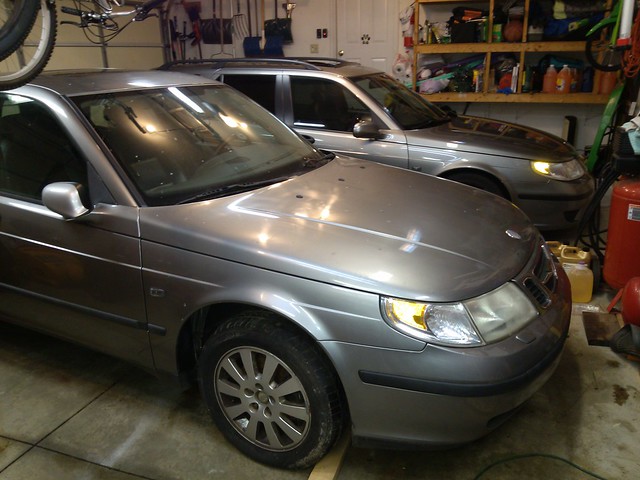
Before it degenerated into a bunch of angry jealous people bashing the Patriots , we got to this point: The Arrival... (Car is behind the Pats hat ) \Unloaded\\" />

Sometime after dragging the car home, the possible vision changed from a ridiculous overboosted driveshaft-twisting thing, into a sedate near-luxury sedan. I know, it's strange.

My son has been talking up the GRM Challenge, saying 'we could make it into a challenge car' for whatever ridiculous blown out car he finds on CL. So my wife looks at me and says ' I bet you can't turn that heap into a car I'd drive for under $2016.

Challenge Accepted...

bgkast
bgkast GRM+ Memberand UberDork
12/6/15 4:06 p.m.

Should be easy. I bet you can do it for half using Challenge rules.

Robbie
Robbie GRM+ Memberand SuperDork
12/6/15 4:17 p.m.

Awesome!

I just can't believe how cheap Saab stuff is right now, though admittedly I might be in my 'honeymoon' new car phase.

XLR99
XLR99 GRM+ Memberand HalfDork
12/6/15 7:33 p.m.

OK while my son rocks himself to sleep in the corner after the Pats game , I'll drop a few more lines about this project.
BGkast, I'm fairly sure I can get it running and functional for $1008. I figure it will be entertaining (to me, at least) to play it like a challenge car, despite it being my own household challenge. We're a bit strange here.

However, making it wife-compliant may require some more coin for cosmetics, bluetooth/entertainment stuff, etc. We'll see how that goes. Plus I may end up in witness protection once my Panther and fleet of '70s Saabs and parts arrives .

The overall goal is to replace things with known issues like subframe bushings, the stupid coolant bypass valve, etc so we end up with a decent reliable car. As I just discovered, those things plus some of the other things like the alternator are far easier without the engine in place.

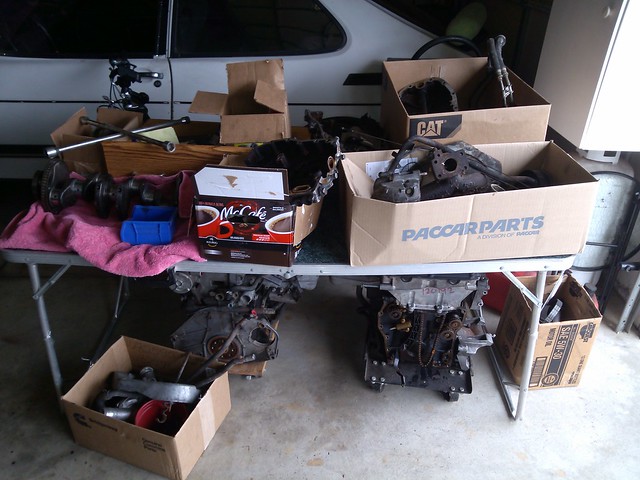
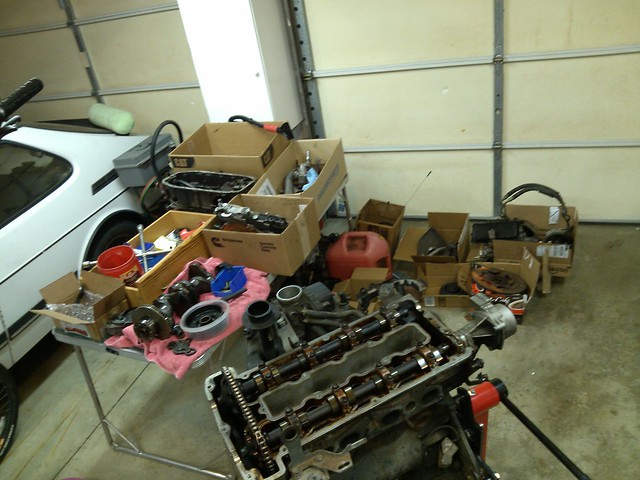
So, I did some sorting of stuff while getting the other car finished. I have two of almost everything, but only one throttle body. It looks really, really disorganized and random, but it's actually organized by systems at this point: Pile of Parts

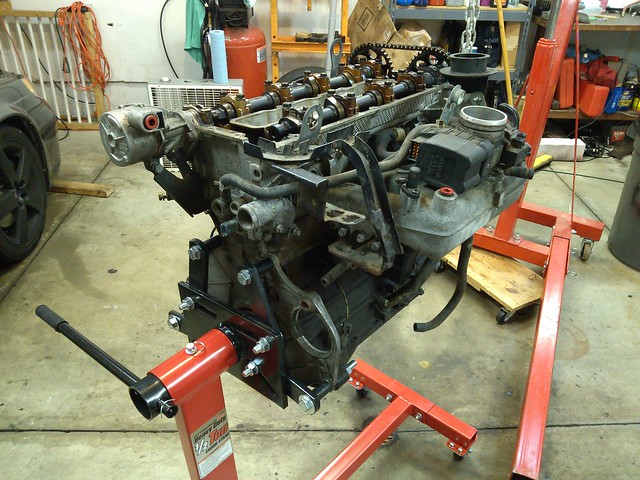
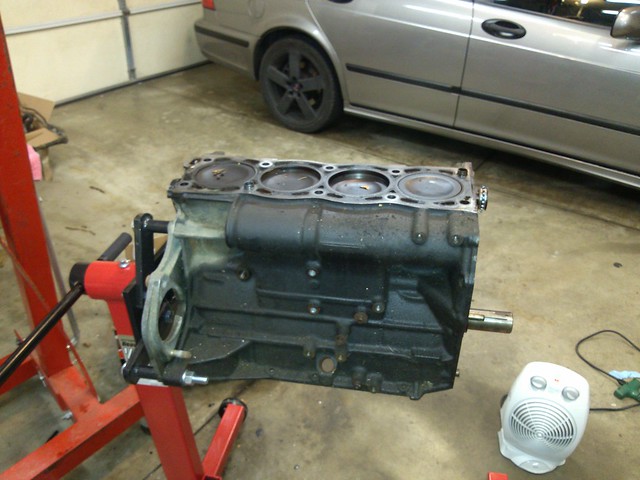
Engine #1 on the stand: Engine #1

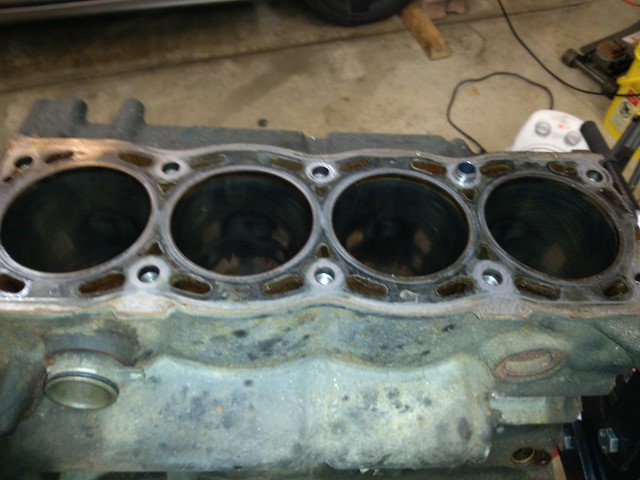
After removing the timing chain, balance shafts, and head:

1206151125b

The experienced Saabist will note that I still have the aluminum rear cover on the engine at this point. Shortly after this, I discovered that you will not be removing the crank this way . Sooo, dropped the block back onto the little roller cart, pulled off the rear cover with main seal, and lifted it back up on the stand. Live and learn...

An hour later:

1206151225

1206151224c

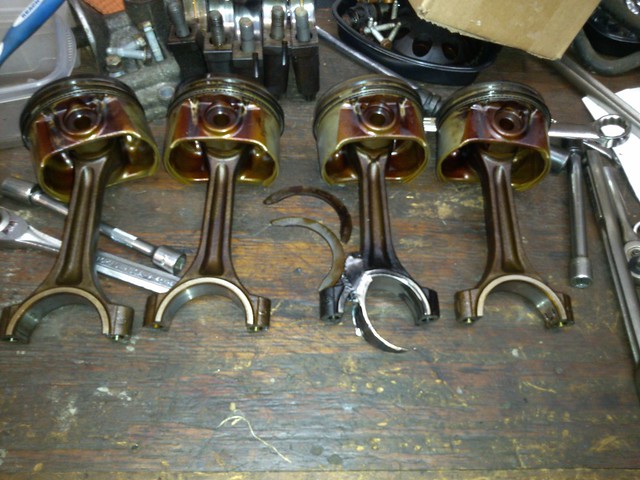
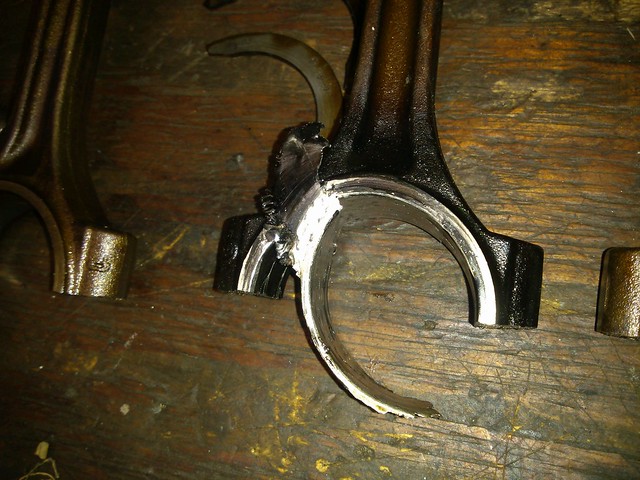
Oh my :

1206151224

1206151224a

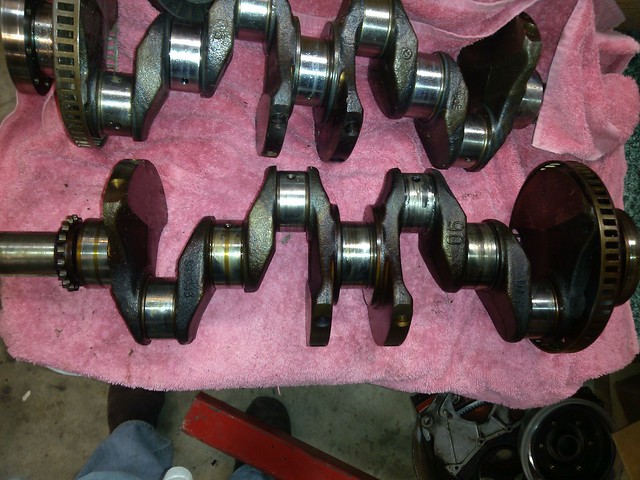
And the cranks. Engine #2 crank is on top, #1 on the bottom.
1206151226

XLR99
XLR99 GRM+ Memberand HalfDork
12/7/15 4:39 a.m.

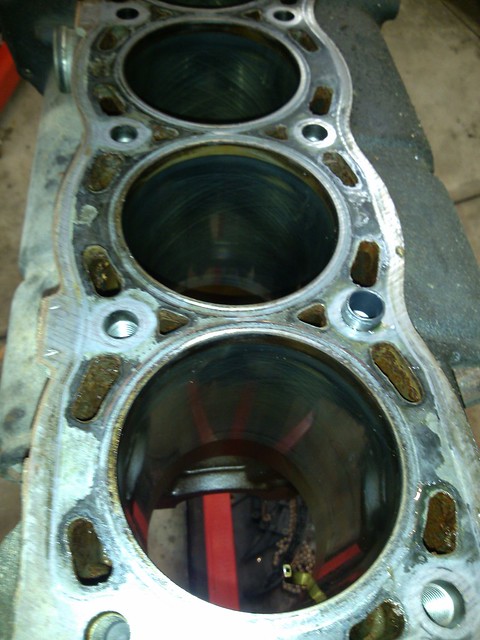
So having identified the issue, I'm thinking the crank is toast, literally. The #3 rod is noticeably darkened relative to the others. Does this amount of heat afect the heat treatment of the crank? I'm leaning towards using the other crank anyway, just curious.The bores still have crosshatching visible. However, on all 4, there is some scuffing from the piston skirts. Not very deep, I can't snag a nail on it.

After my son tears down the other engine, I'm hoping to entice Pat to come over and give an expert opinion of whats usable or not.

XLR99
XLR99 GRM+ Memberand HalfDork
12/7/15 6:56 p.m.

No pics today, just a word of advice: when utilizing teenagers to disassemble things, DON'T walk back in the house leaving them unsupervised while stripping the intake, brackets and stuff off of an engine. Even if you've given strict instructions, and provided a box of baggies and sharpie to label them as they come off the engine. Apparently he got caught up in the excitement of tearing it down.

I came out a half hour later and most of the hardware was on the floor, apart from some bolts that stayed attached to the magnetic dish on the side of the block after gravity overcame magnetism and dragged most of them through the event horizon and onto the floor.

Discussion went kind of like this:

"What Happened out here?"

"What?"

"What's up with the bolts all over the floor?"

"What?"

"How are you going to figure out which bolt fits where in a few weeks?"

"Uh, I dunno. I figured you'd know where they go. So when's dinner going to be ready? I haven't eaten in like an hour."

XLR99
XLR99 GRM+ Memberand HalfDork
12/8/15 7:47 p.m.

Today we took advantage of warm weather to move stuff. My son had a few friends with similarly large biceps stop over to push cars around and take turns dead lifting engine parts, the hoist, etc.

At some point, all edible food disappeared from the house .

So, end of the day, we have this: 1208151749a

1208151751

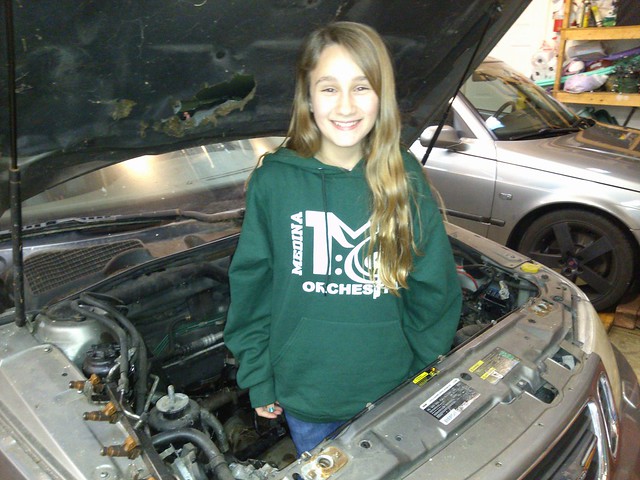
And a slight twist on the obligatory 'standing in the engine bay' picture: 1208151815a

XLR99
XLR99 GRM+ Memberand HalfDork
12/12/15 8:08 p.m.

All of my minions have bailed on me . I had to do all the scut work myself this weekend. Actually my daughter had 8 friends sleep over last night, and my ears are still ringing. My son wisely escaped a few miles away, out of earshot, and wouldn't let me come with him .

I could hear them shrieking from the garage.

With the compressor running.

With earbuds in.

Yesterday before the horde of screaming girls descended upon us, we moved the ancient parts washer upstairs to the garage and loaded it with a 5 gallon can of the TSC washer solvent. It works very well on grease and grime, but doesn't touch varnish or sludge. No pictures because I was running out of gloves and didn't want to trash my phone.

However, as mentioned in the 'things I learned today' thread, eye protection is recommended. The output was very low, so I started troubleshooting, taking off my face shield in the process because it was berkleying hot in the garage.

I used the blow gun to shoot ~20psi thru the hard line, and discovered it was still patent. A slug of solvent blasted out, hit the lid at just the right angle and plastered me in the face . Fortunately, no harm no foul because I got my eyes closed in time.

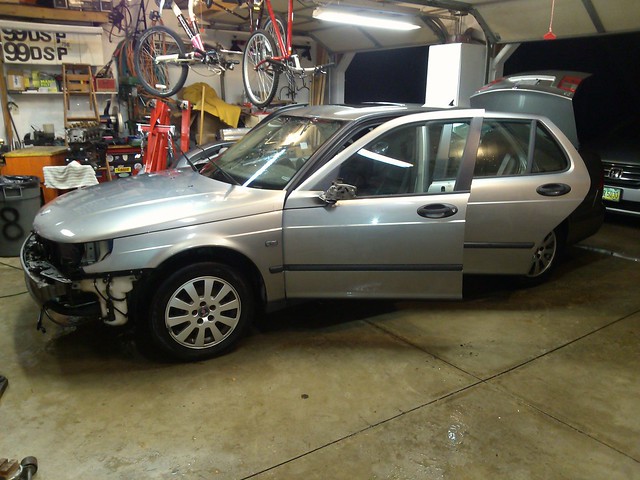
After washing up, I made the executive decision to do something else for awhile. I figured that I should get the car washed while it's nice and warm out, and will be 20 and snowing by next weekend.

The PO's house has pine trees all around, so I cleaned out about 30lb of pine needles and sap over a period of about 5 hours. Used up a gallon of purple power, a bottle of GooGone, and almost a whole bottle of Pre.

I really, really hate pine trees!

So, here we are at the end of the day: 2015-12-12_08-59-19
mndsm
mndsm MegaDork
12/12/15 8:40 p.m.

Ive recently moved into a home populated with one of those teen girl things. This one is pretty quiet. However, theres a sweet16 on my horizon and i was just notified i am chef dujour because i can clone chipotle. (Its her party, i just make food). Im not sure theres enough booze in the world for this.

XLR99
XLR99 GRM+ Memberand HalfDork
12/12/15 9:12 p.m.

LOL, I should use my daughter to power a wind turbine. Non stop chatter all day long, but ridiculously, frighteningly smart. She set the state high score on one of the many standardized tests in 5th grade last year . No clue where she came from. What a blessing.

We had one calm, quiet girl at the party, but she left early . We were sad.

My condolences; no, there is not enough alcohol to drown it out. I tried after the compressor/earbuds combo failed.

nedc
nedc New Reader
12/13/15 10:20 a.m.

The description of the girl's sleep over made me LOL. Enjoy the screaming girl and her friends while it lasts. In her next phase, she will be extremely embarrased by you and anything you do and will not acknowledge you as her parent in public! But that phase will pass too...

XLR99
XLR99 GRM+ Memberand HalfDork
12/13/15 12:08 p.m.

Glad to provide a bit of parental humor, or possible flashbacks for those whose kids are older . I know things will be changing soon . So far my 16y/o will still acknowledge us in public, but there's a list of things we're 'not allowed to do' such as yelling, using cowbell or airhorn when they announce his name at football games.

Now to convince them that wet sanding is fun...

XLR99
XLR99 GRM+ Memberand HalfDork
12/13/15 6:10 p.m.

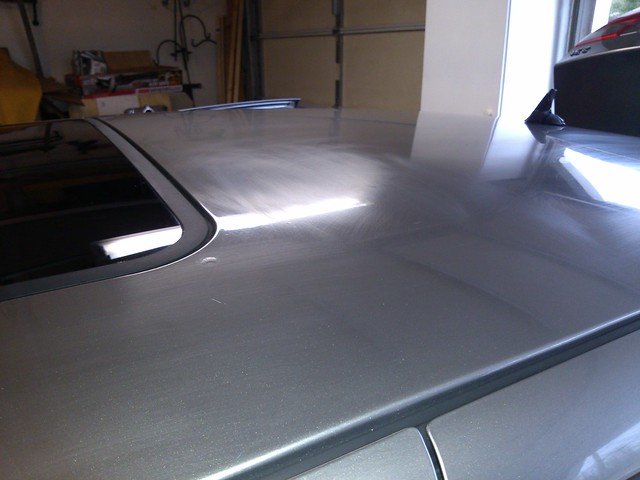
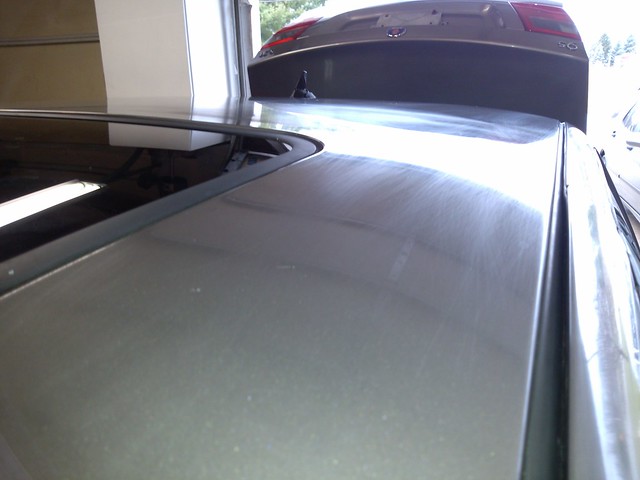
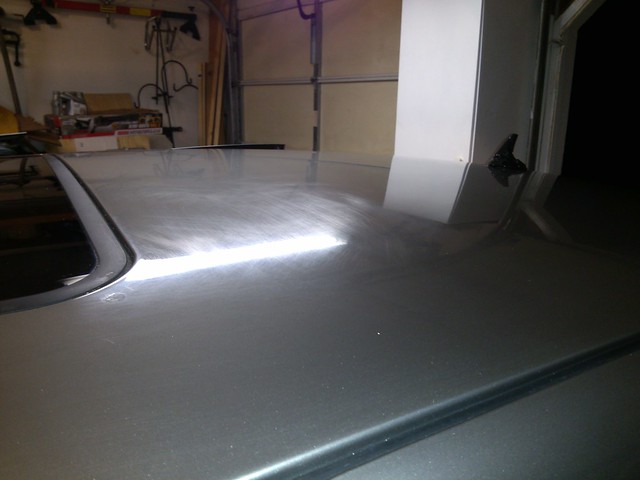
Several hours of wet sanding later, and the pictures look about the same . In person the roof looks and feels much better than at 8am, but still visible scratches. Before: 1213150926a 1213150926

I started with 2000 grit on a sanding block, then used rubbing compound, followed by polishing compound, Scratch-X, then wax, done by hand. The trunk lid and one of the quarter panels look much better, but the roof still looks marginal, despite feeling nice and smooth.

1213151757

Any ideas? Is this a job for an orbital polisher rather than hand buffing? Should I strip the wax off and start over with 2000 and 2500 grit, or will that just add more scratches to buff out?

thedanimal
thedanimal Reader
12/14/15 9:25 a.m.

An orbital will be your friend in this case. I'd say no more than 2000 grit to start with, though generally I find 1200-1600 grit is usually the sweet spot with wetsanding. I would definitely recommend an orbital buffer or a DA Polisher Like this one My steps would be as follows - Wetsand (start at 2000 maybe try a small spot of 1200-1600 to see if it'll come out how you want) compound with a pad made for compound or a wool pad, I'd then use a cutting polish with a medium density pad, then I'd follow up with a light density pad with polish, then wax. Here's an example of that exact procedure on a Lexus LS460 I did for a customer. It wasn't perfect you can see the "clean" side was hammered with rock chips. but I think with just your scratches should come out good in this.
XLR99
XLR99 GRM+ Memberand HalfDork
12/14/15 8:09 p.m.

Thank you for the input Danimal! Now to figure out how to sneak in an orbital and accessories this week...

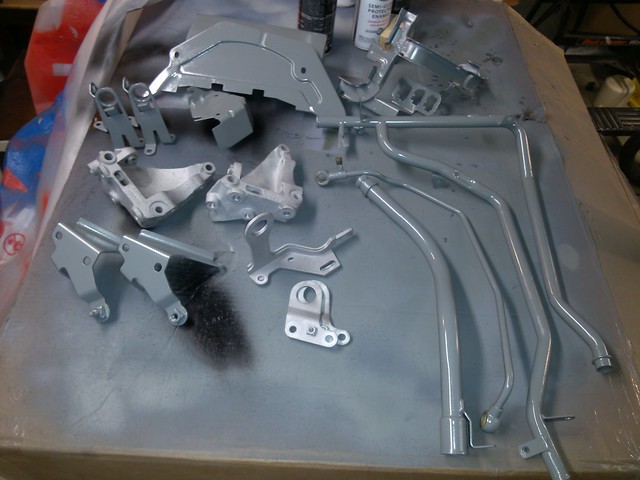
I switched gears again and bead blasted & painted a bunch of brackets and coolant tubes for an hour this evening. Spent $30.06 on engine primer/paint, sandpaper and more paint prep.

I'm waiting for my son to finish finals this week to get the other engine torn apart; then we'll see what can be pieced together.

XLR99
XLR99 GRM+ Memberand HalfDork
12/19/15 2:26 p.m.

The end result of a few hours of blasting and repainting some brackets and coolant tubes. I've discovered that my minions enjoy using the bead blaster. I ended up taking back paint detail after someone wouldn't follow directions properly. We'll give her the reins back with the next batch.

I'll powder coat the lifting eyes to give a bit more abrasion resistance.

1219151511a

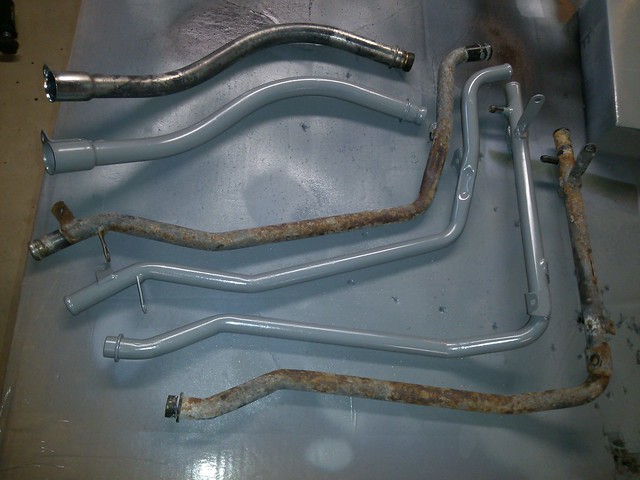
And here's a before/after comparison of the tubes. I ended up finishing both of the small things I have two of, but the tubes take a bit more effort. The top tubes are dipstick tubes; the unfinished one was wire wheeled first; started off looking as crusty as the coolant tubes.

1219151514

I'm using VHT Ford Gray. It's pretty close to Lycoming Gray, which I like because it makes it a bit brighter than black, as well as easier to find leaks.

XLR99
XLR99 GRM+ Memberand HalfDork
12/19/15 6:18 p.m.

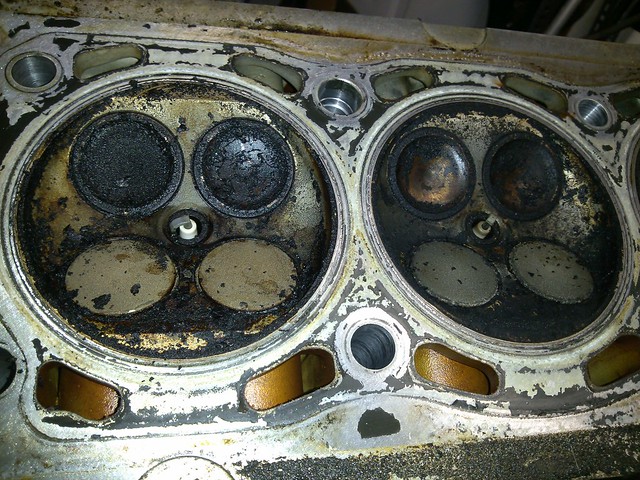
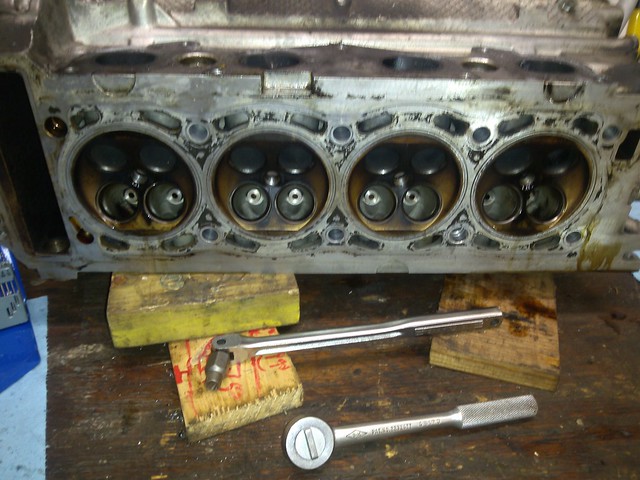
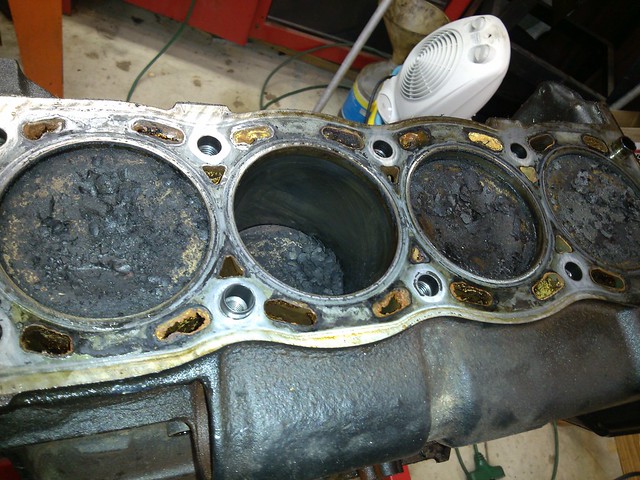
I finally gave up on the larger minion and pulled apart engine #2 myself. Pulled the head and saw this: 1219151755a

Lots of soft carbon, most of which wipes off with a rag.
What concerns me more is the coolant galleys, some of which are mostly blocked off by petrified dexcool at the head gasket. Not sure if this is an issue or not.

The bores look a bit better than the other engine, with no carbon ridge at the top. They also have the same light scuffing on the sides in mid-bore from the piston skirts, same as the other engine. You can see them, but not catch a nail on them.

The head on first view: 1219151755d

XLR99
XLR99 GRM+ Memberand HalfDork
12/21/15 9:41 p.m.

I'm having some aggravation with flickr right now. Without pics to back me up, I think I've ruled out the head from engine #2 based on how the cam journals look.
I popped the caps off on both heads this evening. On engine #2 several of the caps, as well as the cams themselves, have quite a bit of scoring that I can catch a nail on. Kind of disappointing since it looked better on the outside.

I'm off work tomorrow so hopefully I can get some pics up for the hive to opinionize about.

bgkast
bgkast GRM+ Memberand UberDork
12/21/15 11:08 p.m.

bleh, that carbon build up is yucky. Must be a T7 car.

XLR99
XLR99 GRM+ Memberand HalfDork
12/22/15 5:03 a.m.

Yes it's gross . Actually most of that just wiped off, but that's the head with the nasty looking journals, so it may be toast anyway as we'll see in a moment. Pat made the mistake of answering my email , so I'll have him take an in-person look at all of this stuff when he gets some time.

I'm starting to think this was not the best plan...

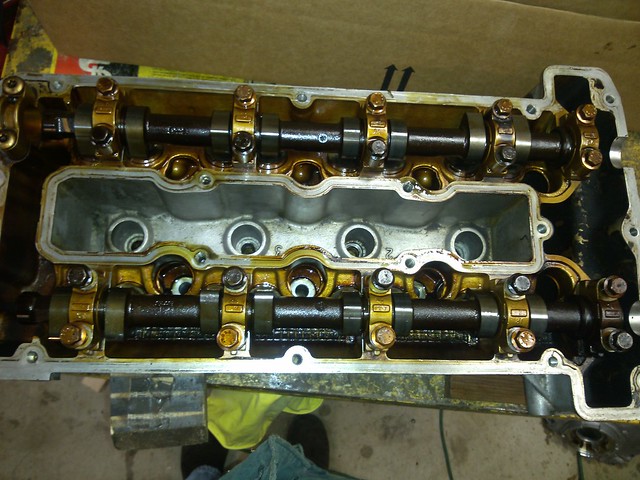
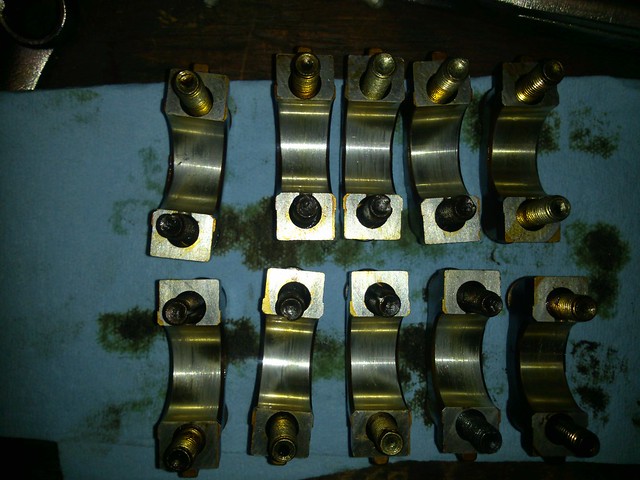
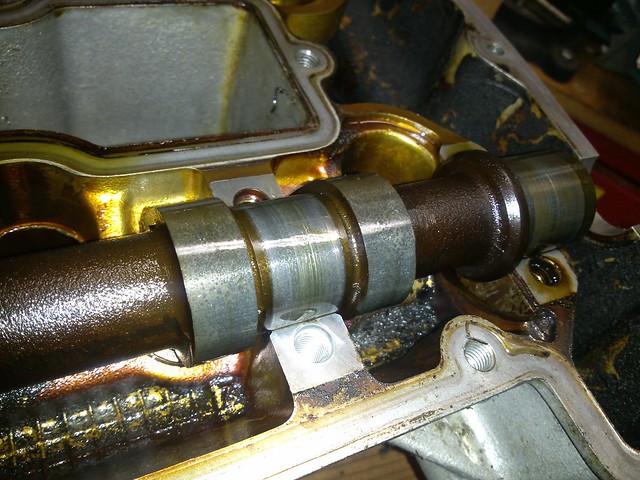
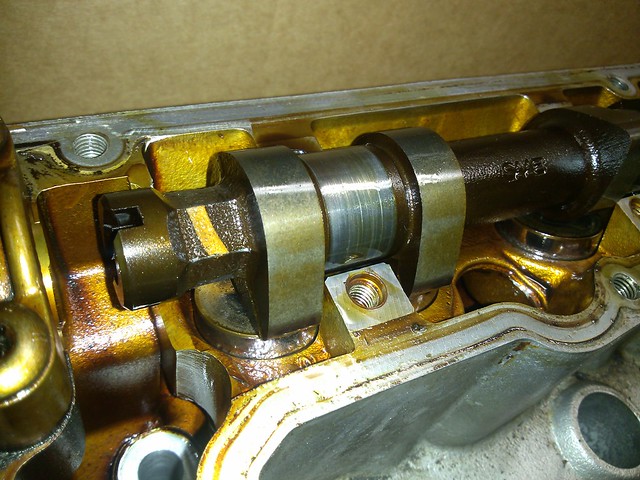
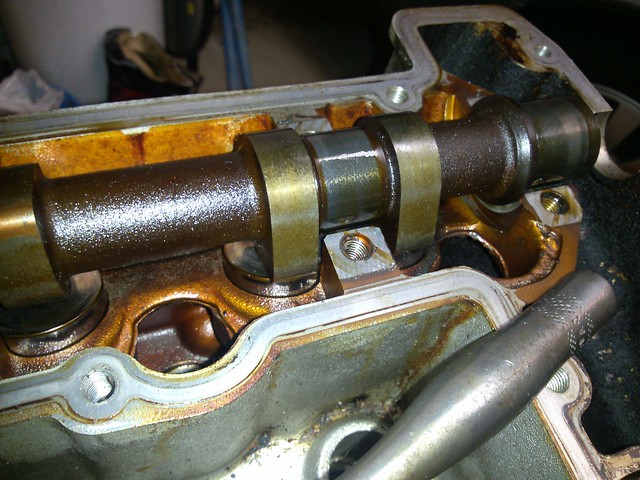
I was able to get my pictures uploaded last night. I started with head #2, thinking that it looked better externally, and that sludge was not it's cause of death. Head #2 Bearing caps off: #2 Cam caps off

Bearing surfaces of the caps. That's actually a scratch or something on the upper left cap, and I can feel those scratches on all the other ones as well .

#2 caps inside

Intake cam journals: #2 Intake journal

Exhaust cam journal. This one is the mate to the cam cap with the deep lateral scratch. #2 exhaust cam journal

OK, looks like we're done here...

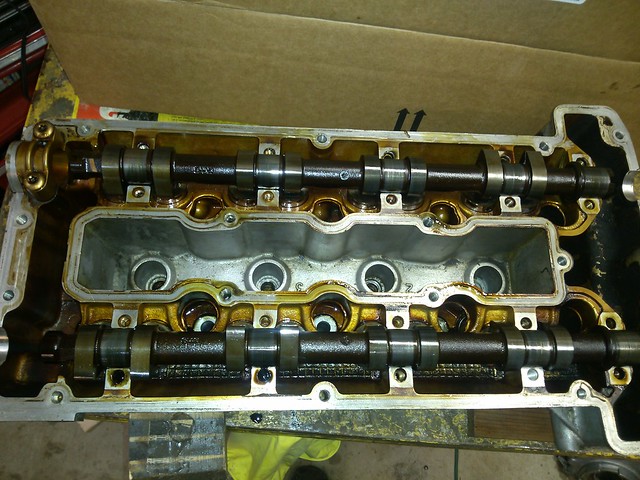
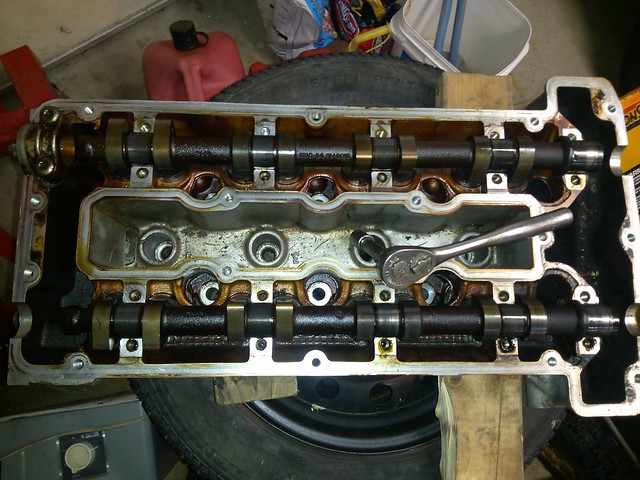
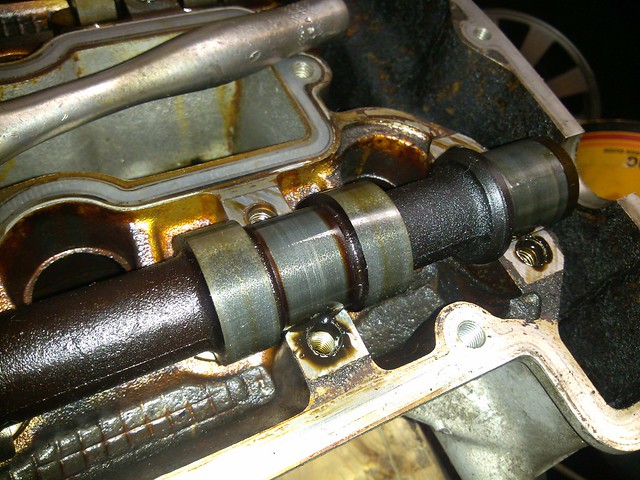
So, onto head #1, because, why not go out of order? #1 Cam caps off

Gutters look more gross without other things blocking your view: #1 Cams out

Exhaust bearing journal: #1 Exh cam journal

Intake bearing journal: #1 Exh cam journal again

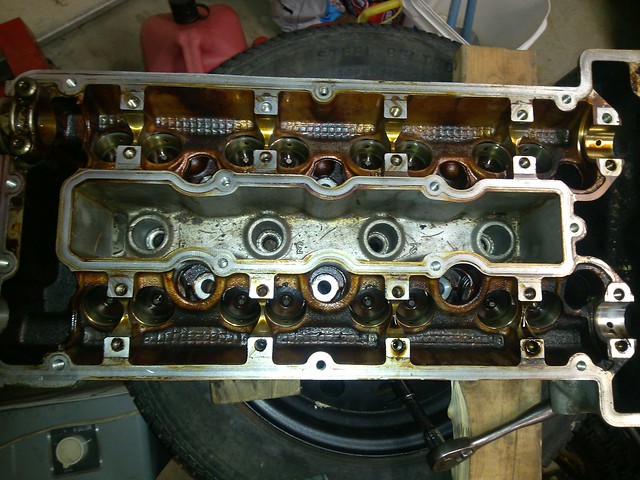
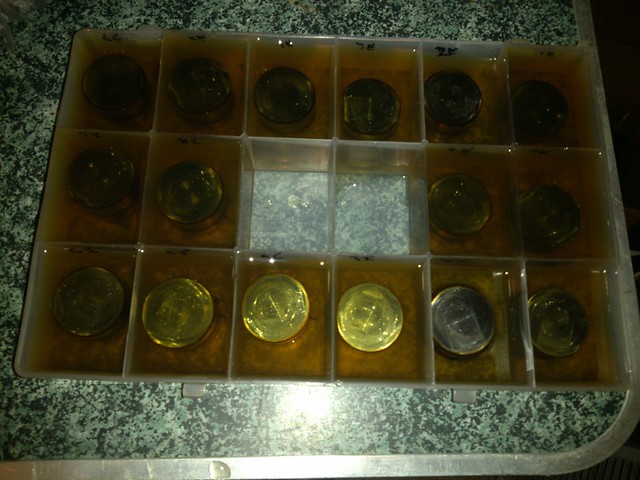
Lifters: Lifters

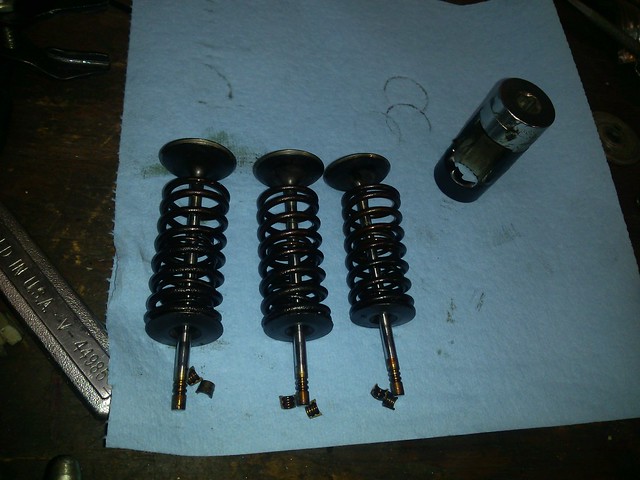
I started pulling valves out last night. Valves coming out...

So the cam bearings from the original engine look better. Those scratches aren't nearly as deep, and I can't catch a nail on any of them. So far the valves on #3&4 look OK. I haven't measured stem diameters yet, though.

Mezzanine
Mezzanine HalfDork
12/22/15 10:36 a.m.

I've handled a few of these heads, and both of yours are usable. Apparently most all of them look like that; I've taken worse into the local SAAB shop, and they assured me there isn't anything to worry about. Consider those scratches "oil galleries".

XLR99
XLR99 GRM+ Memberand HalfDork
12/22/15 7:39 p.m.

In reply to Mezzanine: Thank you for the input! I was a bit bummed last night after seeing the scratches on both of them. Would you do anything with that lateral scratch on the one cap like crocus cloth or fine sandpaper?
I ended up taking the other head apart all the way anyway, so it's a bit academic. I'm using this as a learning experience anyway since I've never done anything this ambitious/stupid before. Well, check that, I've done a lot of stupid things, never anything this ambitious.

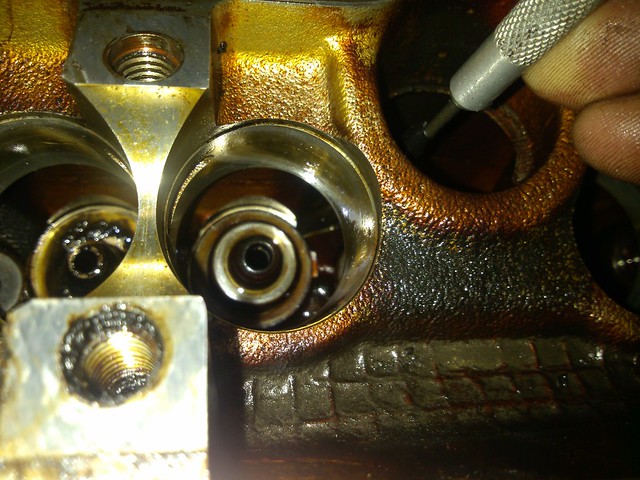
Today before Star Wars I finished pulling out the valves and seals. The Haynes manual helpfully says that you can pull the seals with a pair of pliers. Not really in this case. They're a combined seal/spring seat, and they seem to build up suction from oil behind the seat.

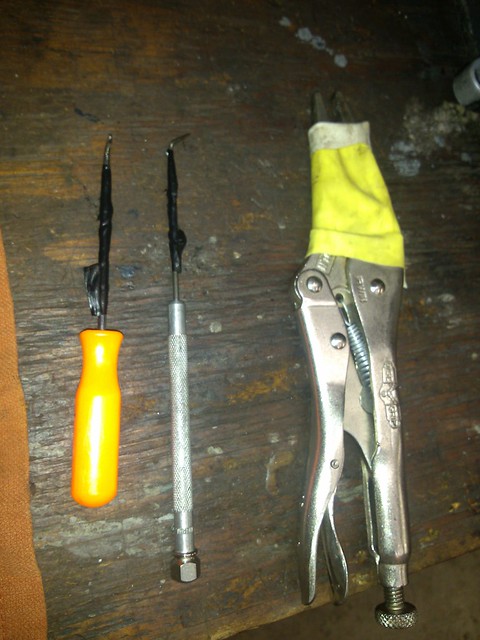
Fortunately there's a little relief machined into the head by each seat, so you can get a 90 probe behind it. 1222151253

I labored for several hours creating these finely crafted tools with guarded shafts, to get the job done while protecting the lifter journals from getting scratched. 1222151247

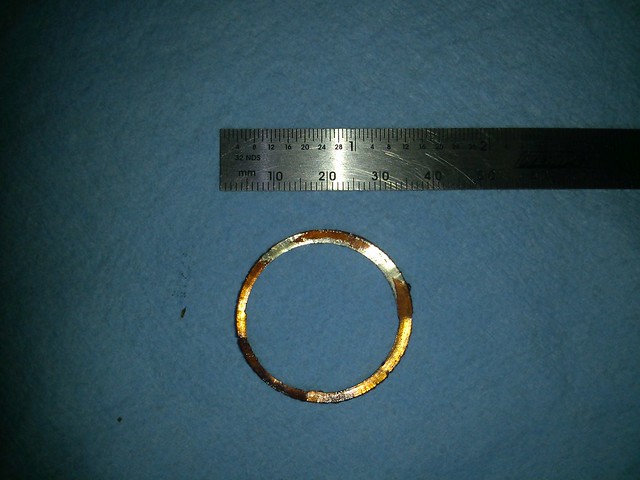
A bit more excitement; I found a bonus part in the 'hangar deck' . No clue what it's from. Made of copper, and it's too big to be part of a spring seat, or anything else in the head. Wierd. 1222151251a

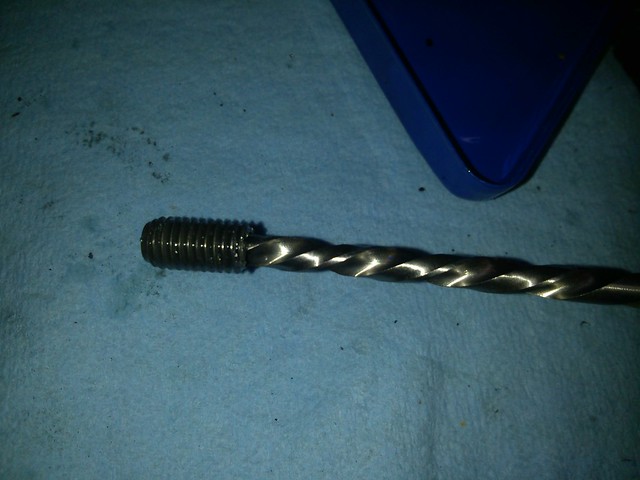
Used my HF left hand drills to dispatch a broken exhaust stud. 1222151313

Ready to visit the machine shop: 1222151319

(Bonus old artwork from my daughter on one of the blocks )

chiodos
chiodos HalfDork
12/22/15 9:49 p.m.

That round washer looking thing could be what the spring rests on. Idk what their called but a lot of times they stay stuck to the bottom of the springs but sometimes they stay in the head. Just a washer so the steel valve spring doesn't kill the aluminum head.

XLR99
XLR99 GRM+ Memberand HalfDork
12/23/15 9:12 a.m.

It's a bit too big to be a spring seat. On this car the seat and seal are one piece. If you look at the first pic above, the valve on the left has the seat/seal removed and the one on the right is still in place.

XLR99
XLR99 GRM+ Memberand HalfDork
12/23/15 7:06 p.m.

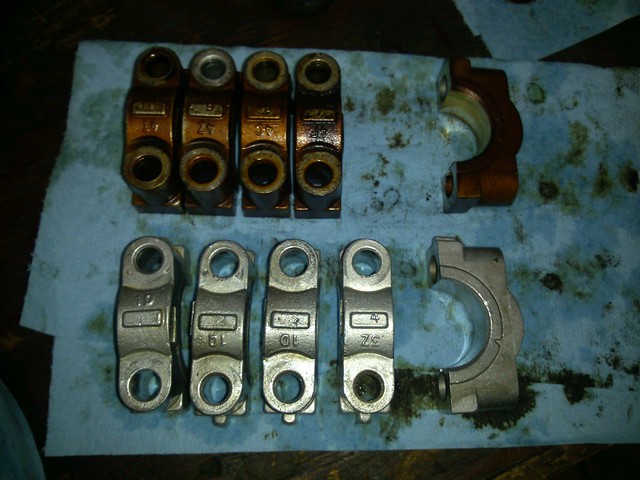
While bored before things got busy at work this morning, I researched how to clean carbon, sludge and varnish for a few minutes. Came up with Berryman's ChemDip, which was in stock at the AutoZone I pass on my way home.

Quick experiment with a set of cam bearing caps: Before/After ChemDip

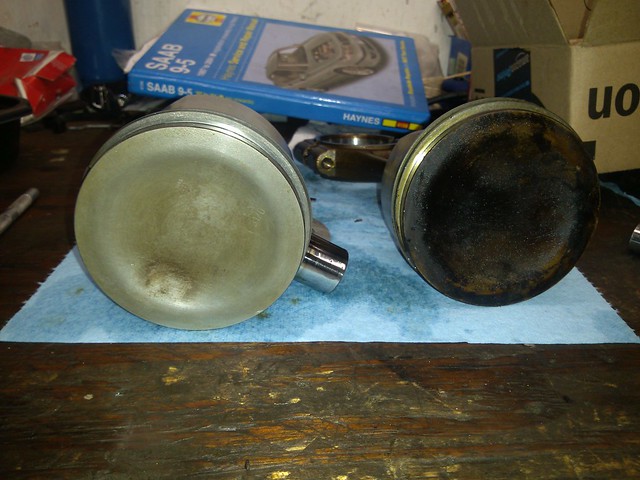
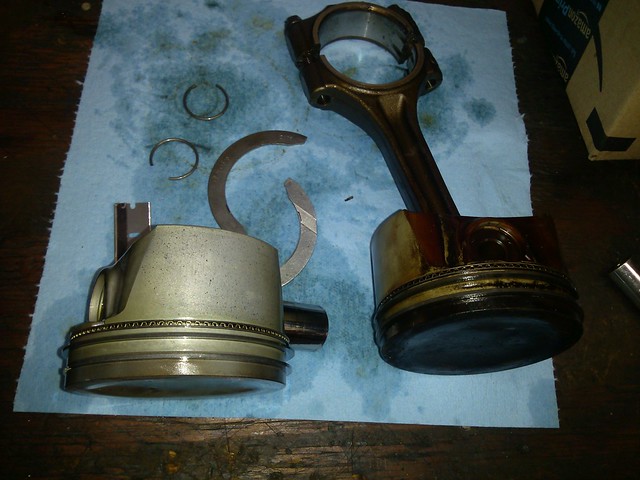
And the second victim: Piston Crowns before & after Pistons before & after chem dip

These soaked for ~30 minutes each. Pulled them out a few times and used a toothbrush on some of the sludge deposits. The piston took a bit longer to get the carbon deposits inside the ring grooves softened up and cleaned out.

1 2

You'll need to log in to post.

Our Preferred Partners
9yL1ifdLSJsTueLFuosqSnf2SMc2JcnrDdbll6NqlAapH8FvF0G6OXY5bakGCWDq