
f6sk
New Reader
5/13/14 10:36 a.m.
f6sk
New Reader
5/14/14 8:55 a.m.
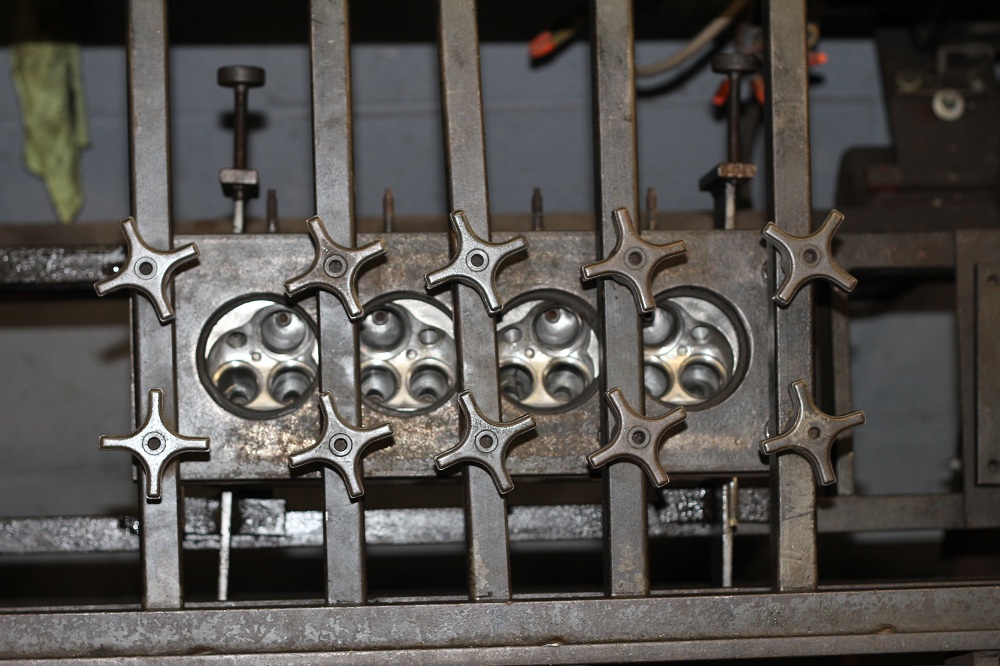
Technically I should have done this before I did anything. But I didn't see anything to worry about. The pressure testing machine fills the coolant system full of compressed air. There are different size plates for various cylinder heads. If there are any cracks they will be visible by spraying soapy water on the heads and looking for the bubbles

f6sk
Reader
5/17/14 9:22 a.m.
I wanted to make sure I didn't have any problems , so I chased the spark plug threads just in case.

I also put a back cut on the valves to taper the flow. It is the shiny angle close to the stem

Installed the valve stem seals. Put the valves in first to use as a guide and then used a deep well socket to tap them down.

I also gasket matched the ports. I didn't go nuts.
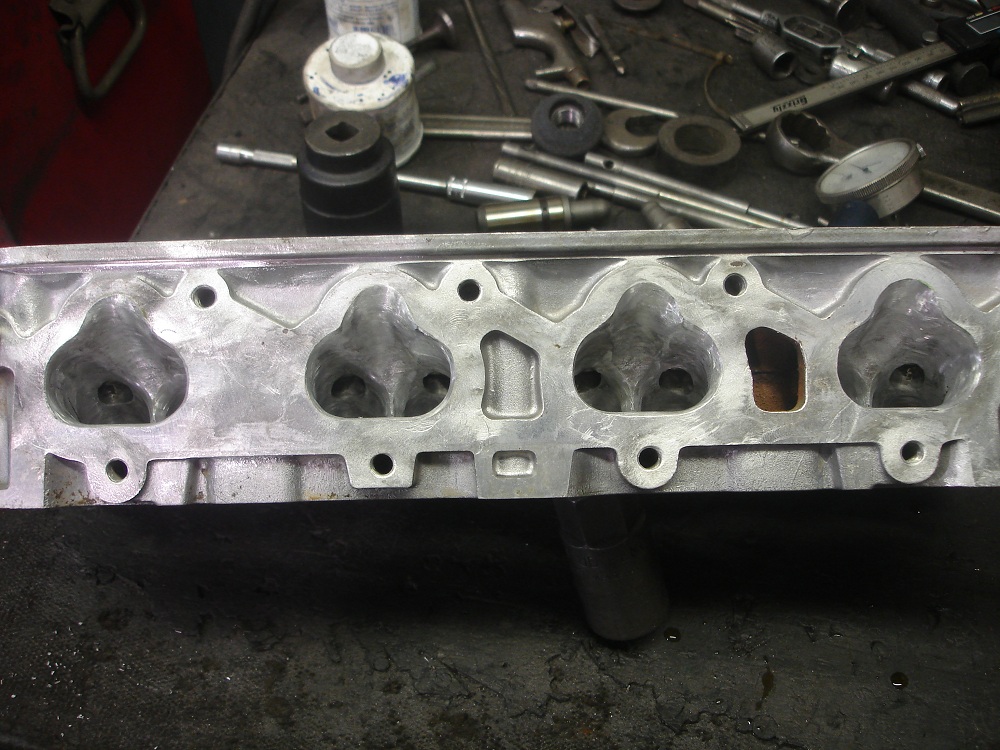
Next I moved on to the exhaust side and CRAP!
https://www.youtube.com/embed/_mXr5aGVqgs
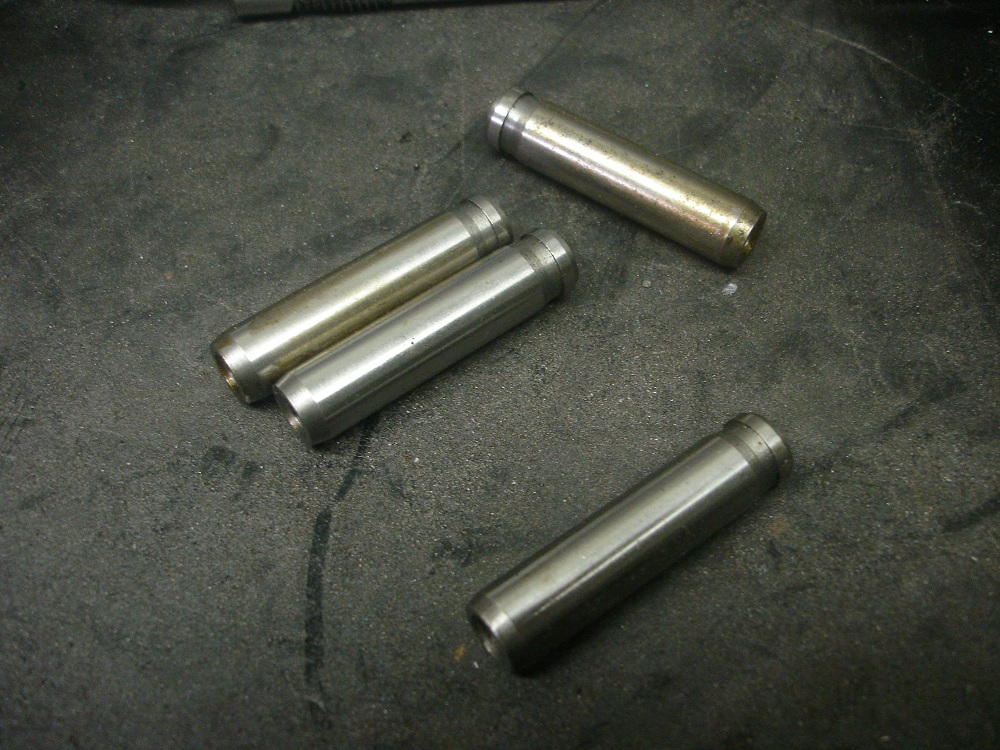
I should have caught that when I cut the ex seats. That means I have to replace the guides. And that means I'll have to recut the seats I just cut because they will be just a little bit off.
I banged the old ones out with a hammer, and banged the new ones in.
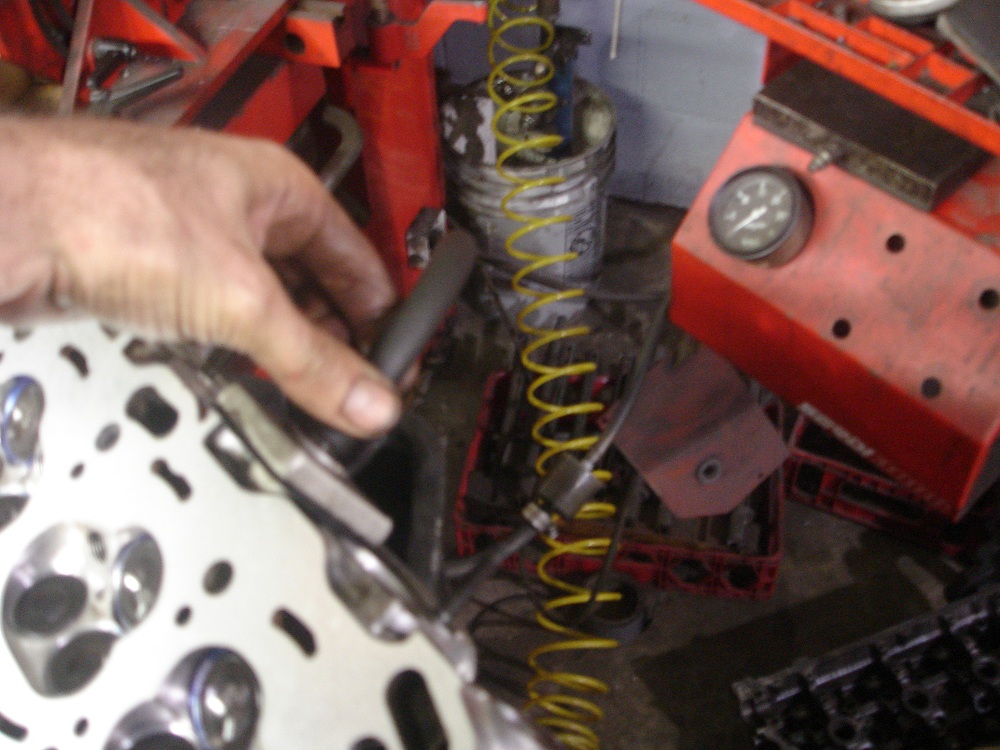
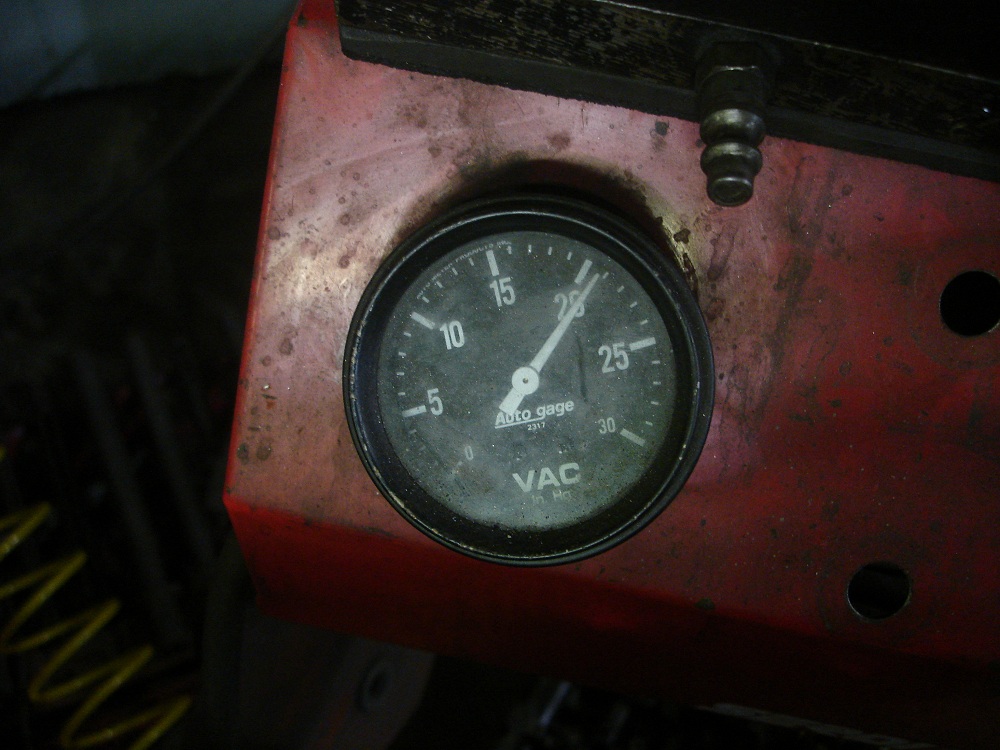
Got it all assembled, and tested on the vacuum testing machine. It pulls a suction on each port to test how well the valves seal. Perfection is 22, so I want to see 20 or better.
Next up the head resurfacer

f6sk
Reader
5/19/14 10:07 p.m.
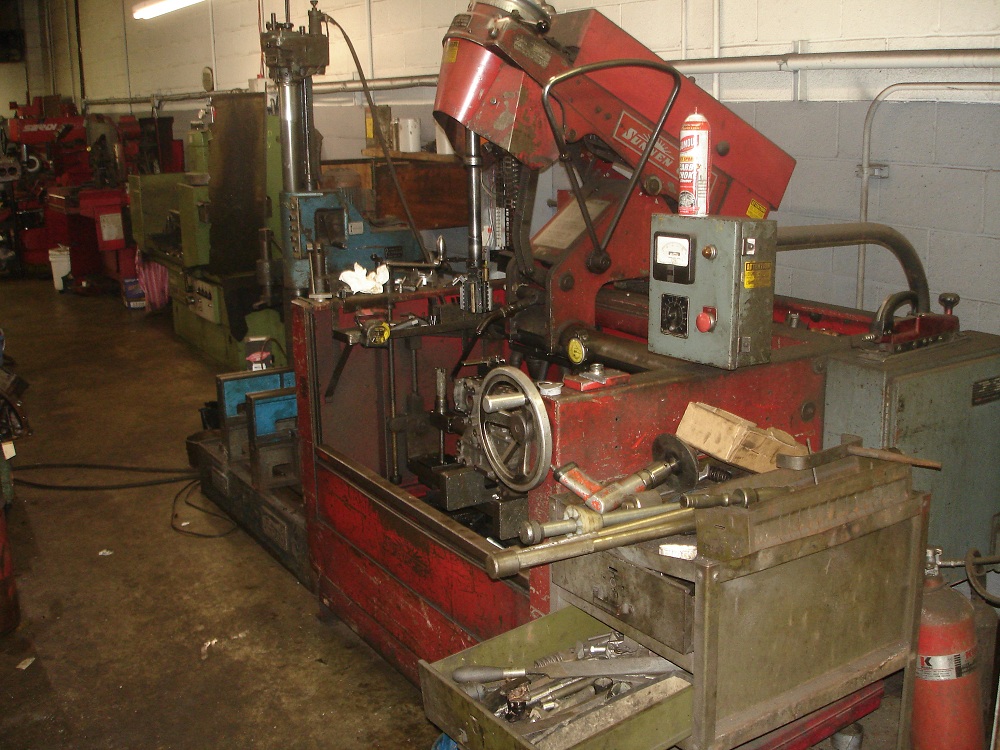
I bolted the head to the machine. It is the best machine in the shop. It uses a diamond bit and a cutter head spinning as fast as a female ice skater. The cutter head stays in one place and the table slides back and forth underneath it.
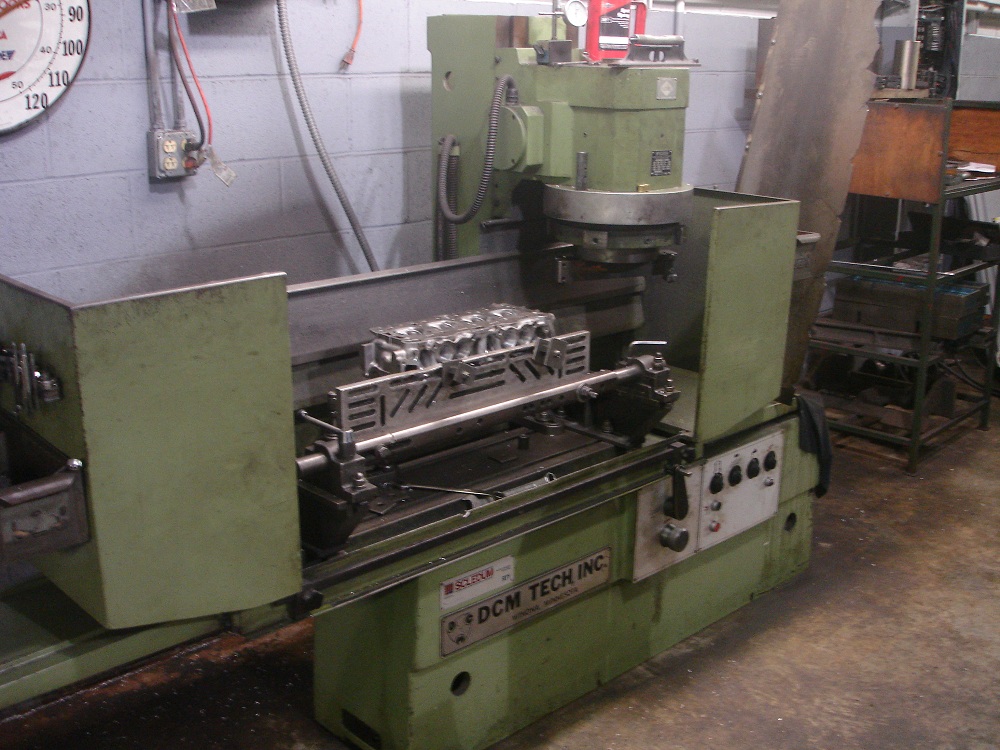 This is the head bolted to the cheeses board.
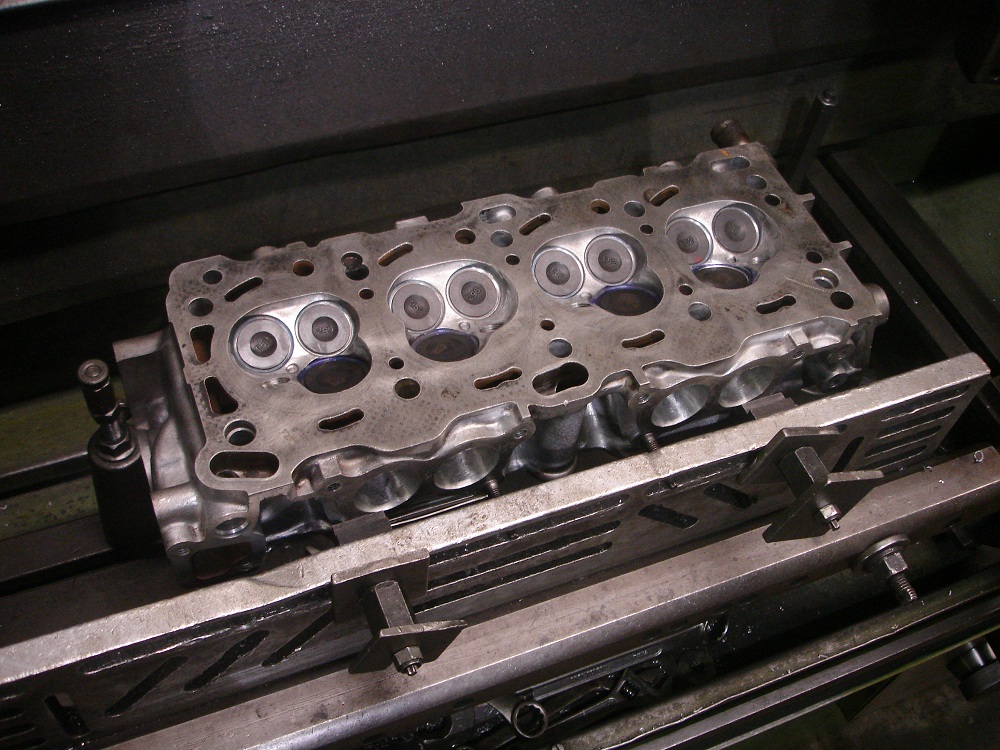
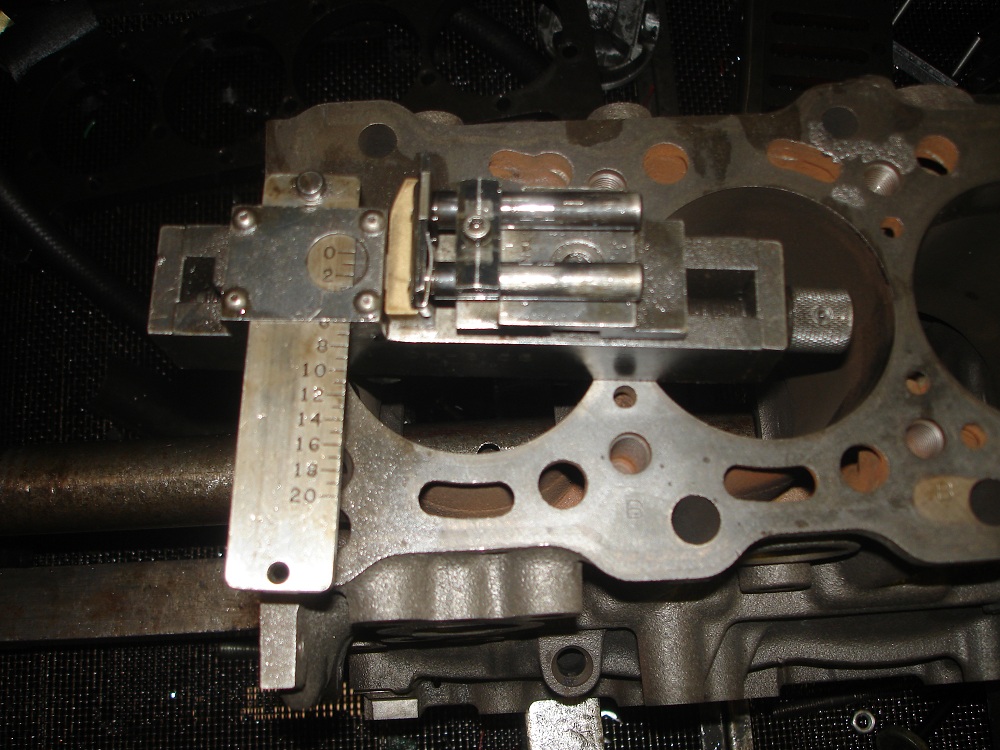
I ran a dial indicator back and forth along the head surface to check for level while I adjust it.
 A screw jack is used underneath the head to level it font to back.
The machine on and turning.
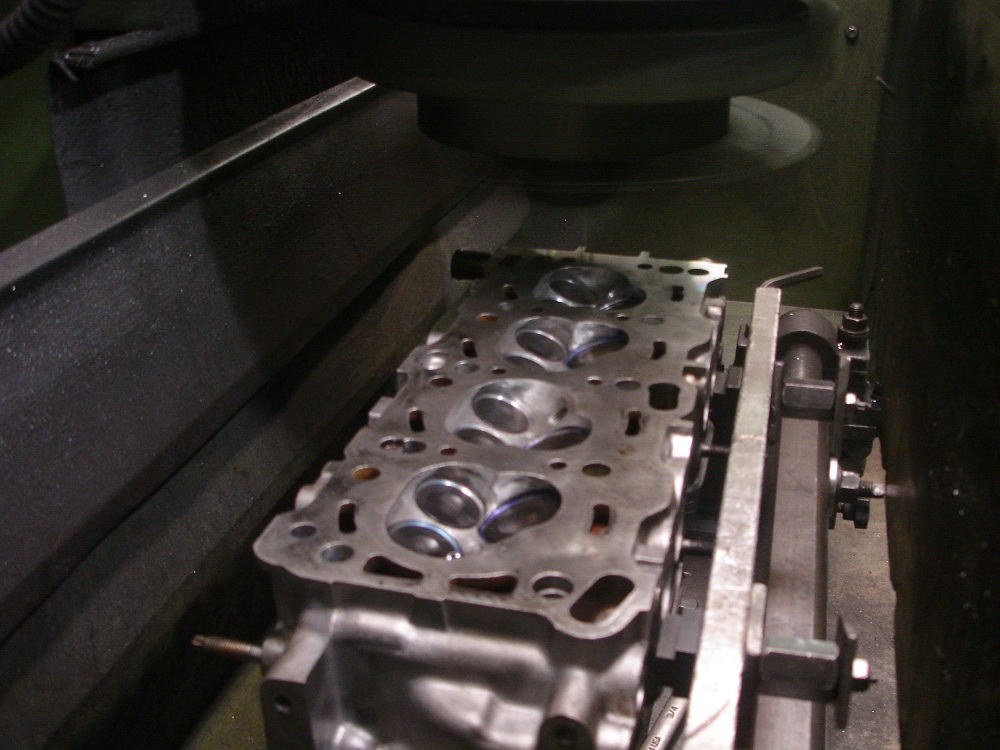
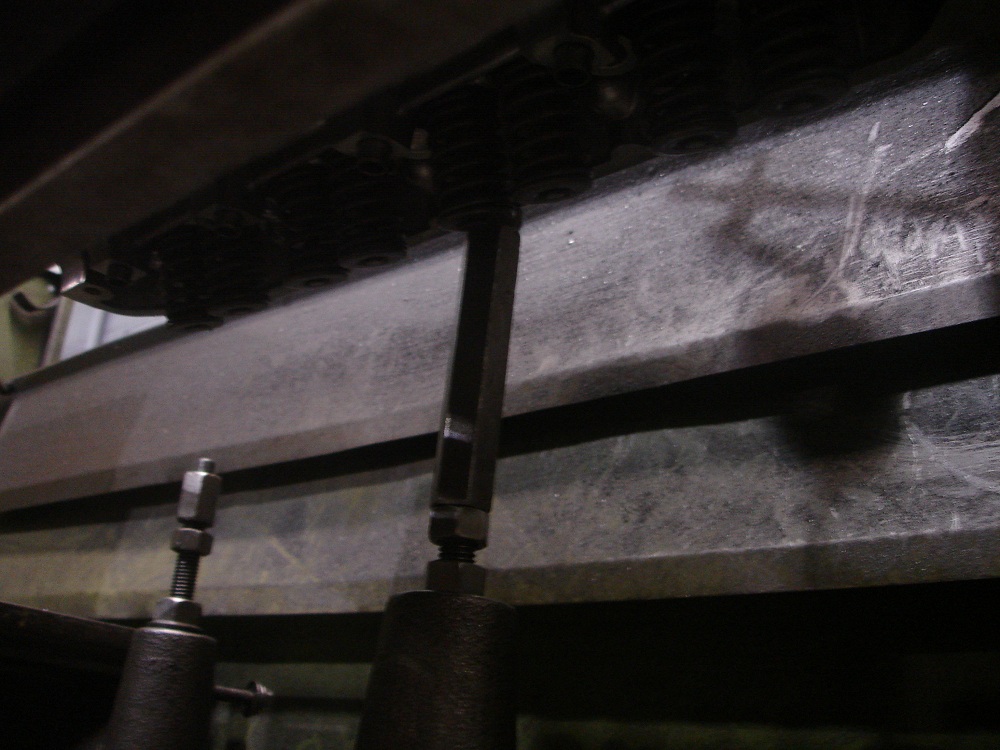
The head was definitely warped. Notice the shiny freshly cut section to the left and the dull uncut portion to the lower middle.
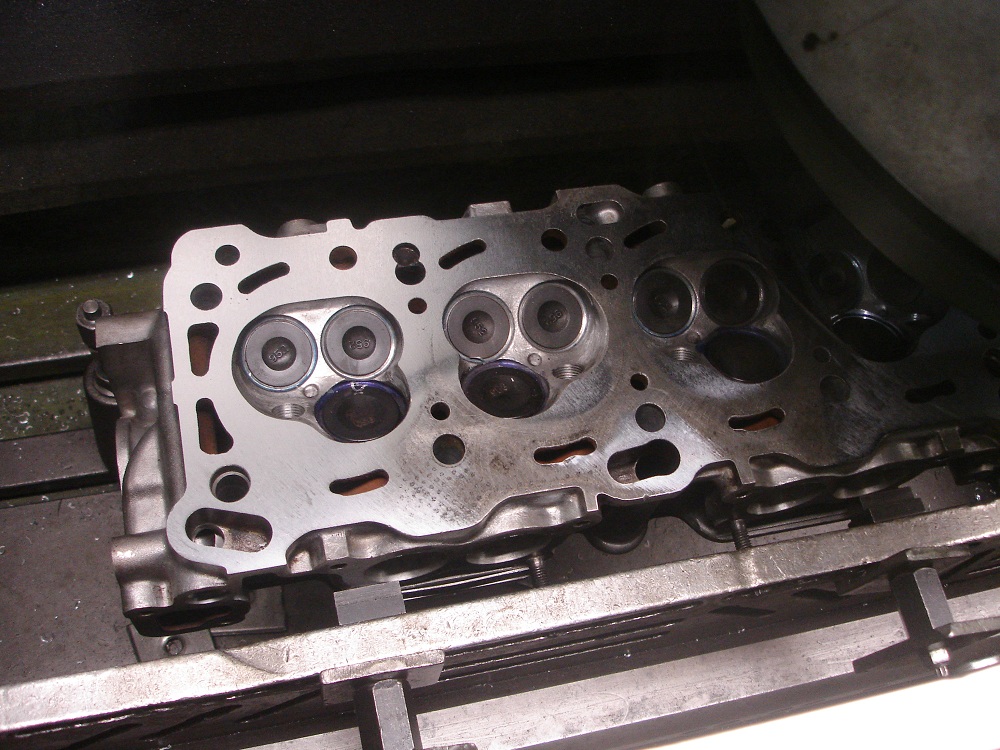 3rd pass notice how it is starting to true up on the far right
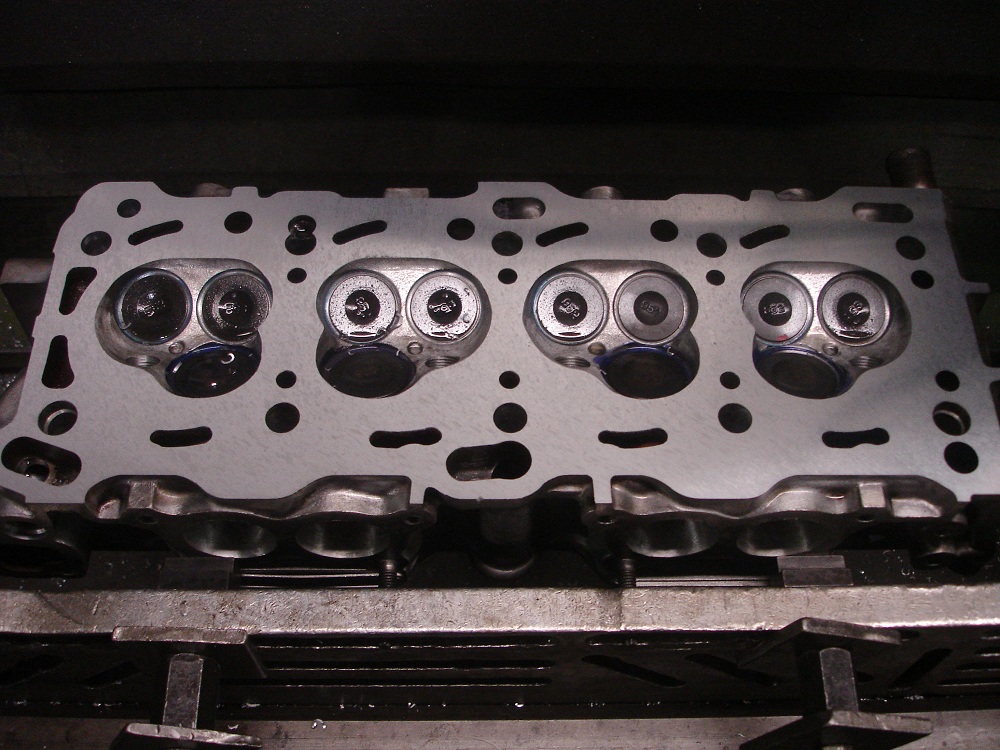
 All done. So pretty.
Next up pistons and rods.
f6sk
Reader
5/20/14 11:58 a.m.
Thanks! It isn't an LS swap, but that isn't really what I'm going for. I just don't want to be one of those guys with the half finished project car in the garage
This is a behind the scenes peak. It's great! When you don't know what you're doing or you forget, you do stuff in the wrong order. I've done it plenty of times too.
f6sk
New Reader
5/23/14 3:28 p.m.
Piston pressing time.
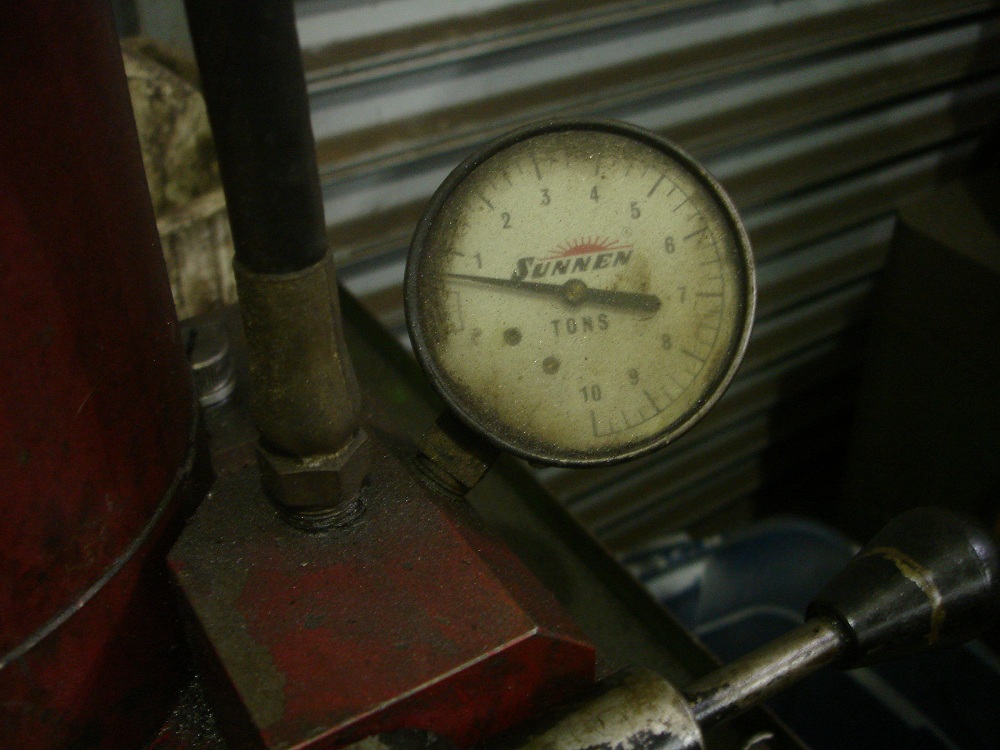
 This is the piston press. It uses a hydraulic pump/press to push the pin out of the piston. There are various fixtures to accommodate all the different sizes and styles of pistons and pins.
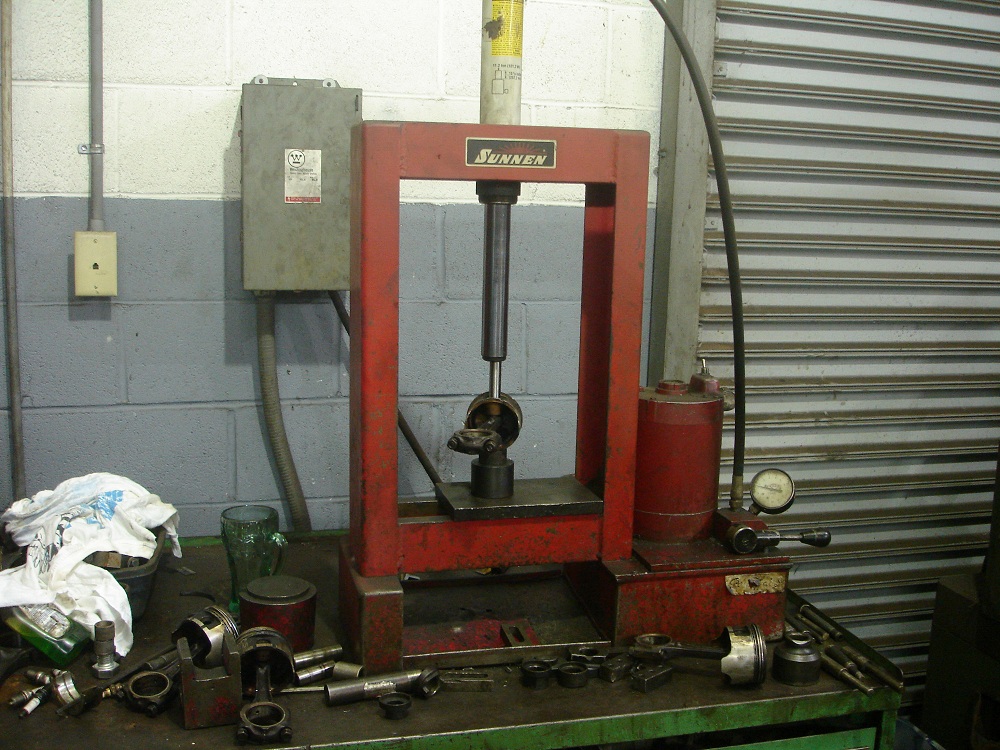 This is the scariest machine in the shop. You'll set up the piston on the fixtures and start pressing. Down comes the ram. The pump changes pitch as the pressure increases and at the climax, around 4 tons, it goes BANG! and one of two things happen. Either the piston explodes into several pieces, or the pin jumps through with a hop as it presses out. You never quite know what will happen.
 Well mine wound not press. I've NEVER had a pin not go all the way through. The machine normaly works at 4 tons, so when this thing went all the way to ten tons, I was freaking out and standing way off to the side because I just knew it was going to explode. But nope.
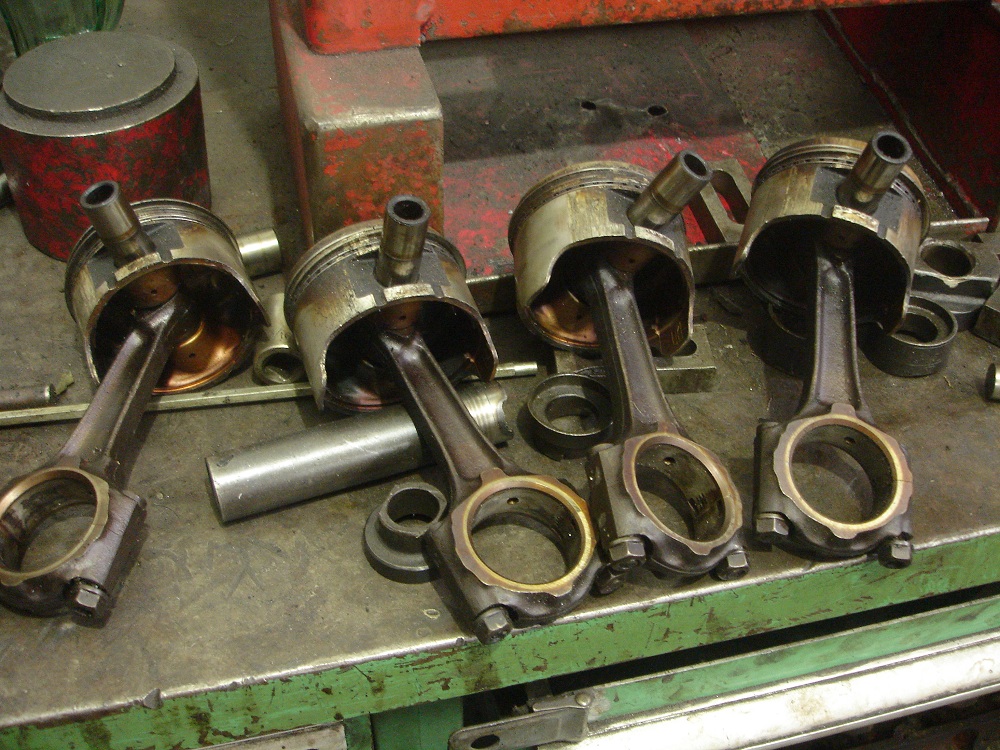
Since it wouldn't go and I had to get them off I decided to put some heat on them. This was a mistake. The heat caused the pin to gaul and ruin the rod. So I pressed them on the Big 20 ton press.

Then I bought some used rods....

Vigo
PowerDork
5/23/14 7:14 p.m.
f6sk wrote:
I never intended to take over the family machine shop. I had moved an hour away from Charleston to Columbia. My father sold the machine shop and retired. However the man he sold it to was having financial trouble. He had not paid his rent in 2 years. The landlord had taken possession of the shop and equipment and offered to sell it back to my dad. So, my dad calls me and asks if I want it. He said either I take it, or he is going to get it back up to operational and sell it again.
So, I took it.
As a kid I never paid attention at the shop. I always pictured myself doing something different. But here I am, figuring it out as I go. Please forgive me if it looks like I don't know what I'm doing, because I don't know what I'm doing.
Uhhhhhh...
This thread just got FLIPPIN AWESOME.
Vigo
PowerDork
5/23/14 7:21 p.m.
First automotive job i ever had was a summer job in a machine shop when i was 15 and i can still remember the piston pin press being the scariest thing in the shop. 
f6sk
New Reader
5/24/14 12:45 p.m.
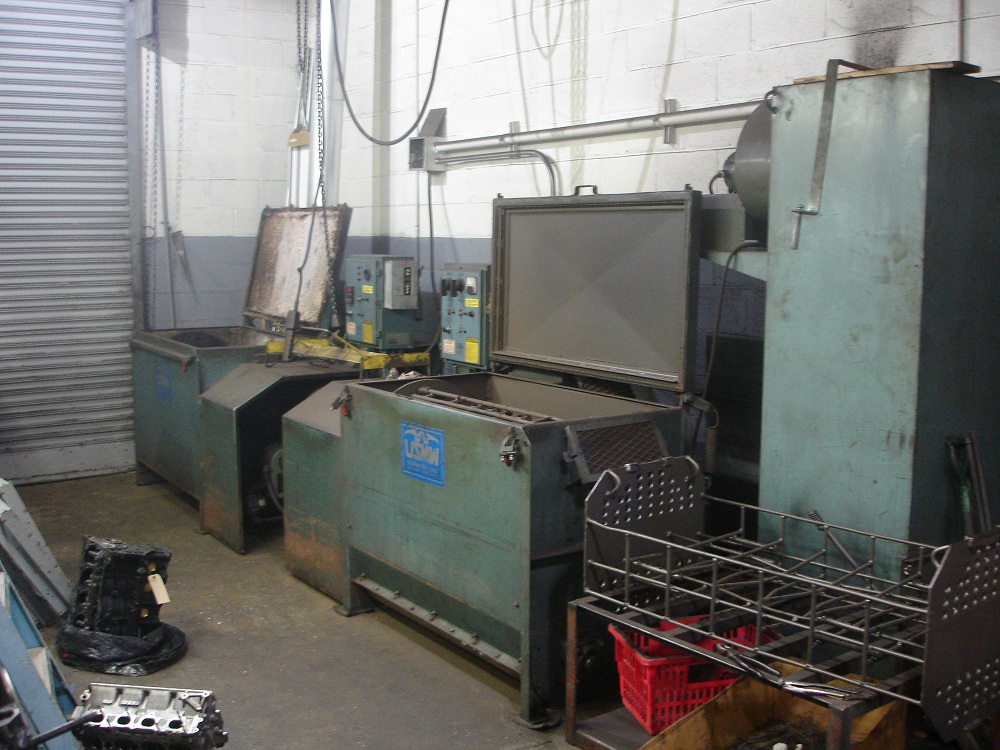
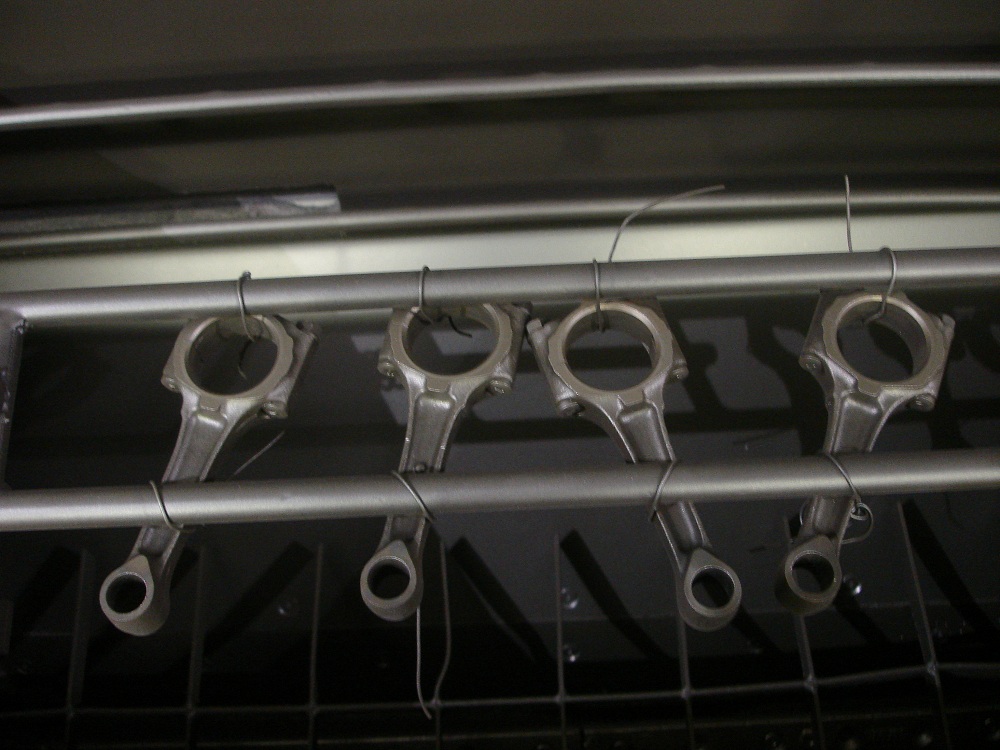
This is the blaster. It slings steel shot while the parts are rotated inside the machine. They say it helps relieve molecular stress on rods and strengthens them. I just like how clean they come out.
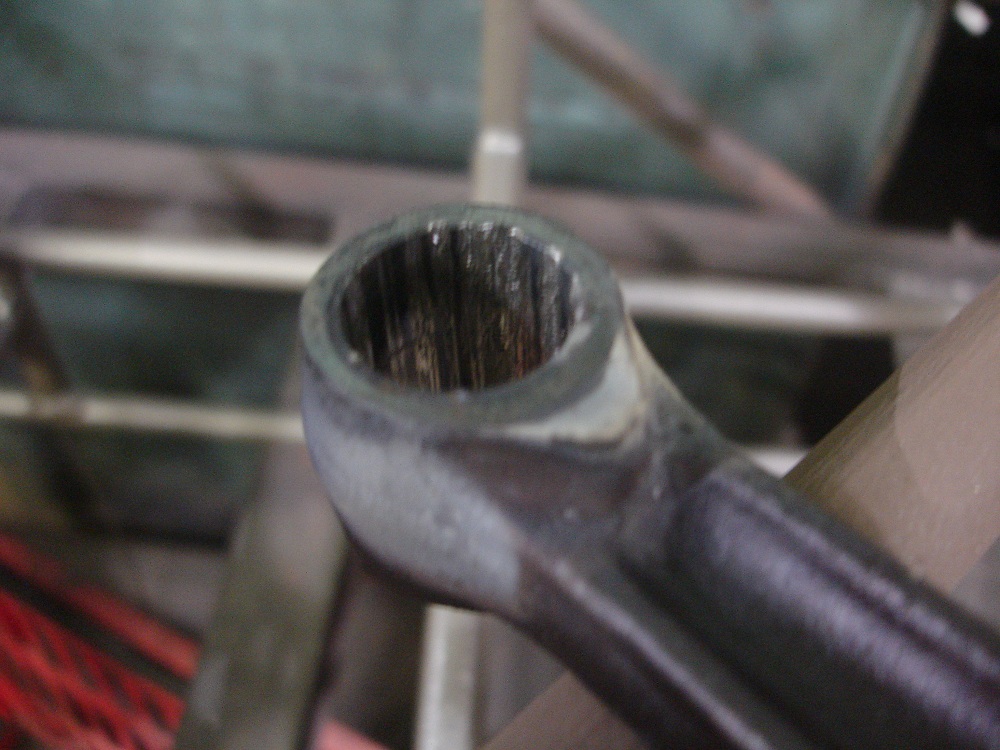
 Rods before
 Rods after
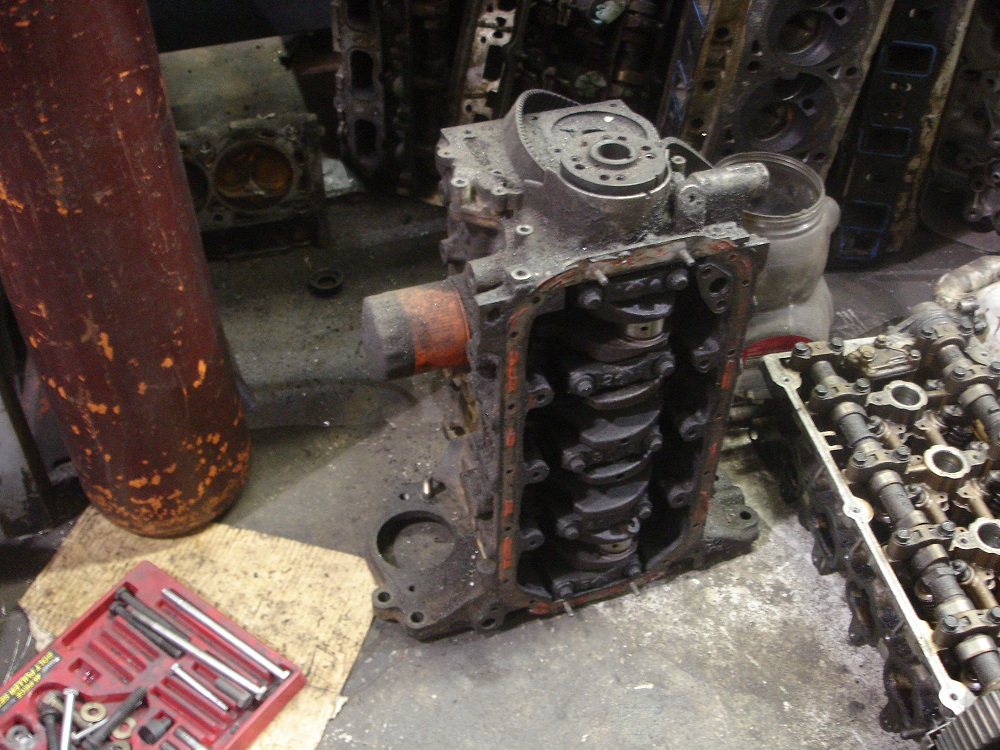
Next up the block!
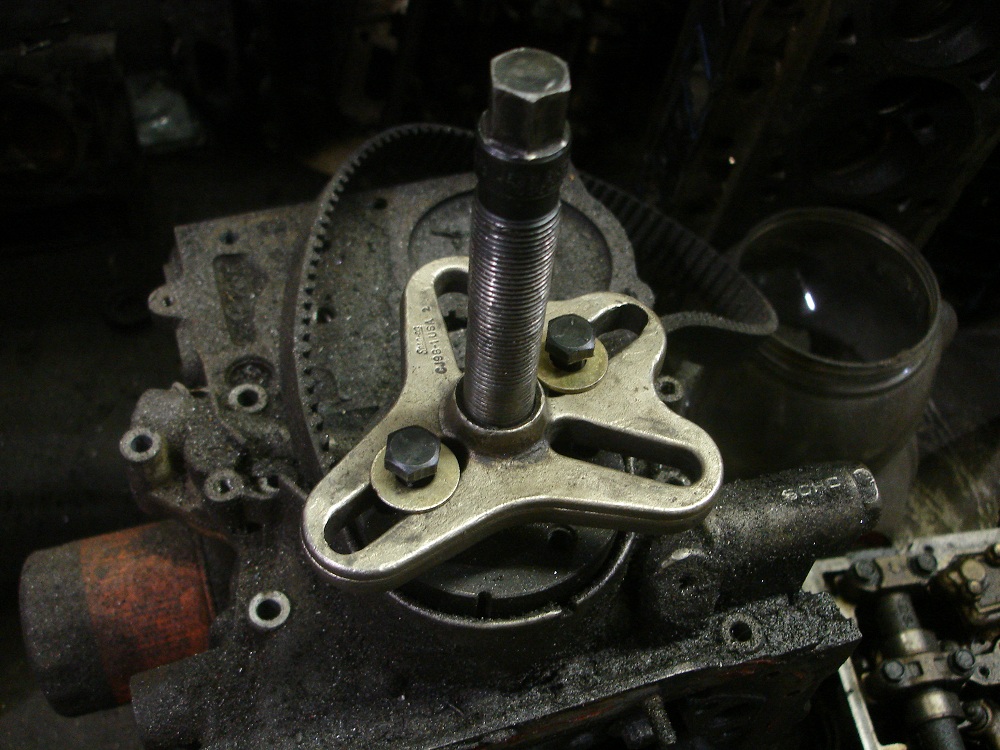
I was told that I could just pry off the balancer with a screwdriver but it wasn't happening. So I got out the trusty balancer puller
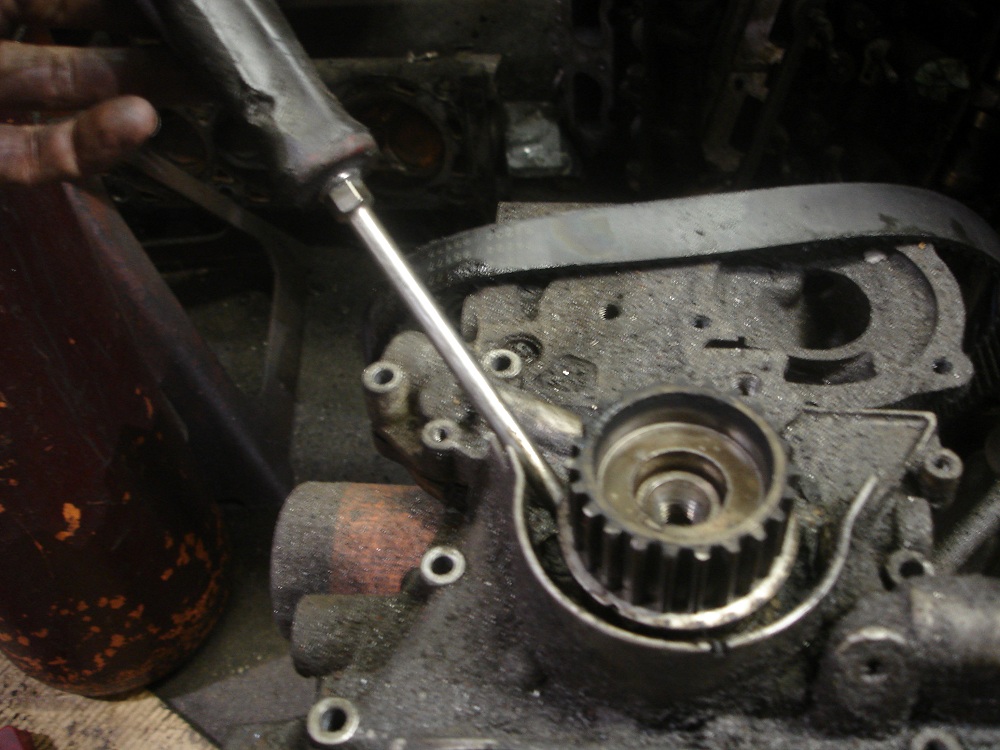
I was then able to pop the gear off with a screwdriver
Yeah, awesome thread. I am SOOOO jealous of all the shop equipment!!

Beagle
New Reader
5/24/14 6:36 p.m.
I think more than one of us really appreciates the insight into the shop and processes. Thread definitely delivers!
f6sk
New Reader
5/25/14 9:58 a.m.
Thanks guys. This is an old school machine shop. It was top of the line in 1978, but there is much better equipment out there now. (And it is really expensive). But we get by.
The same machine I used to clean the rods will be used again, except I'll be adding a step. The machine on the far left is a cooker.
It heats the engine parts up to 800 degrees and turns all the old oil and sludge crispy black. Then you put it into the blaster to knock all the crispy bits off and it looks like new metal.
The Block striped and wired into the basket. the "Before" shot
 After:

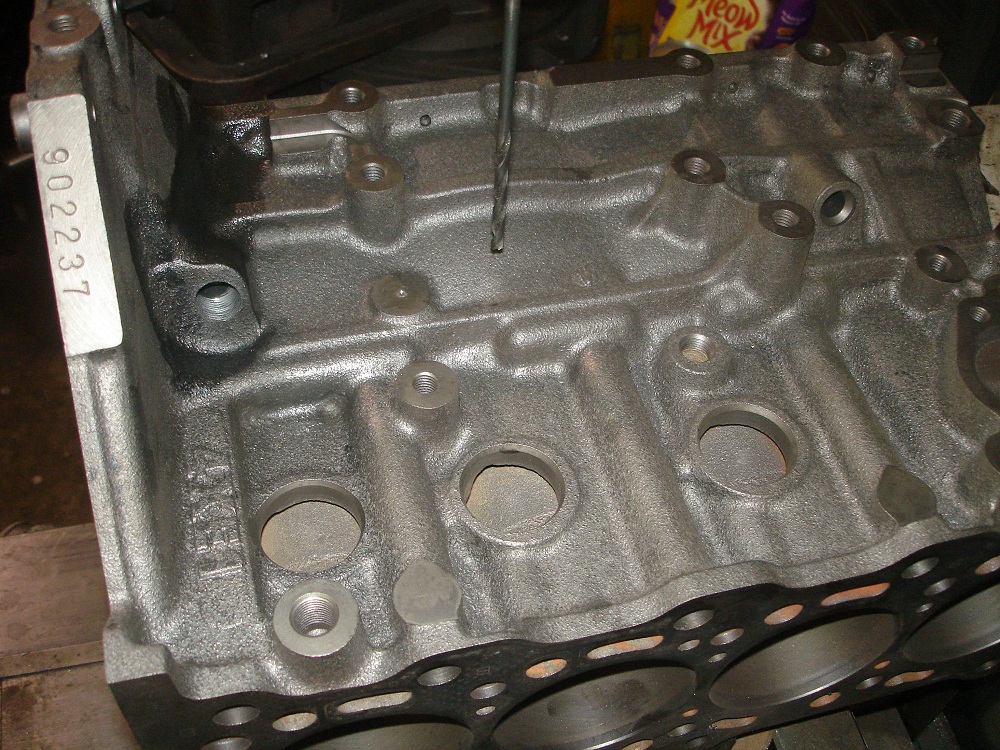
Now that it is clean I need to drill it for the turbo oil drain. The 4XE1 block is used in all models including the turbo model. So there is a place for the oil drain, I just have to drill and tap it.
 a 12 point socket will turn a tap in a pinch.
 View from the underside
f6sk
New Reader
5/26/14 6:34 a.m.
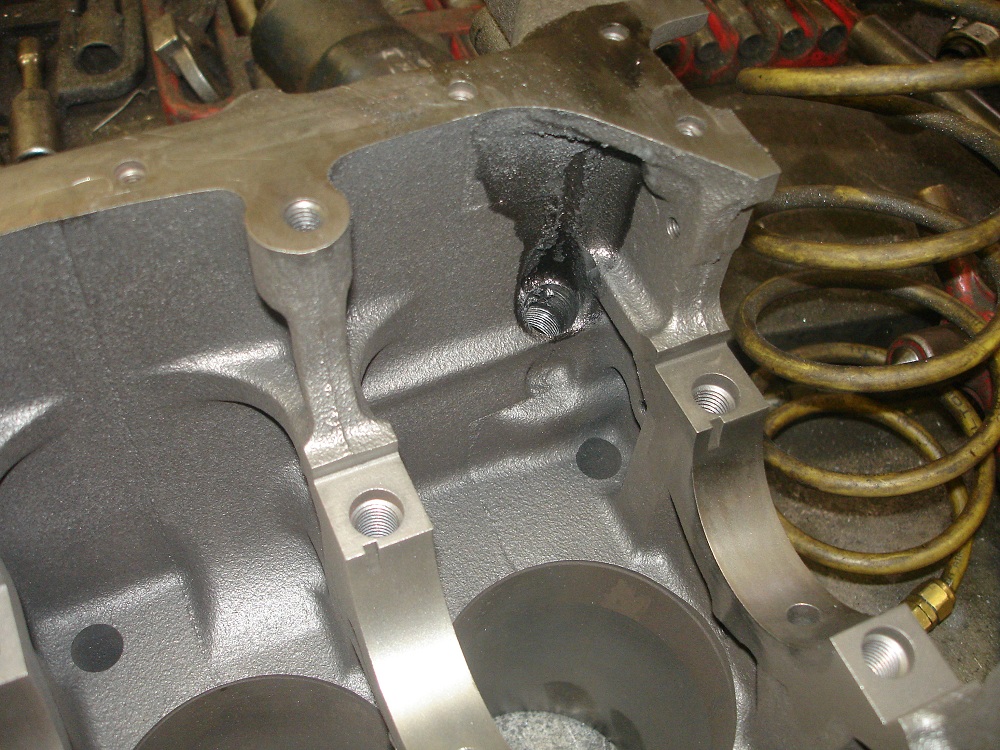
I needed an oil supply for the turbo. Rather than putting a "T" on the oil pressure sensor, I wanted to drill in the factory oil supply location. This was nuts! The hole would be over 4 inches and have to be accurate.
This is the milling machine. It is a glorified drill press.

I center punched the location leveled the best I could and prayed.
 I used a slightly smaller drill bit than finial size incase I was a bit off. But it worked! You can see the bit poking through. ( a little off but hey)

Next up boring and honing
this makes me appreciate the money that a good shop would charge to PROPERLY do a head.
f6sk
New Reader
5/27/14 11:13 a.m.
what everyone else said already... thanks for the details and "behind the curtain" machine shop pics and explanation. Great build!
f6sk
New Reader
5/28/14 11:37 a.m.
Time to deck the block.This is the same machine that cut the head, except the fixture is removed. I used the clamps on either end to hold the block in place, and the pink paper to shim it level.
 The before shot
 The machine on and turning
 After
After
 So nice!
 This is a chamfer cone. It takes the sharp edge off the cylinders so the rings will go in.

I took a minimal amount off. It cleaned up in two passes. But I can now feel good about turning up the boost!
f6sk
New Reader
5/29/14 11:49 a.m.
This thread is incredible. I'd be your best friend if you were local.
I just noticed that the combustion chambers are pretty similar on your head to what i'm working with. 12v heads are so weird. I want to have custom pistons made to match the chambers better. Bet there's gigantic power to be gained there.
f6sk
Reader
5/29/14 2:42 p.m.
I think that would be great as long as you don't turbo it. I worry about raising the compression ratio.
Its is funny. There is a guy on one of the Honda forums who wants to prove that turboing a high compression motor can be done. He is spending a ton of money using the best stuff. He built 13:1 engine turboed and made a ton of power on the dyno..... right before it blew up.
Your honing machine is much more sophisticated than mine!

Love this thread!!


 These are the valve seat cutting stones. They come in assorted sizes and grits. Most are cut 45 degrees on one side and 22.5 on the other.
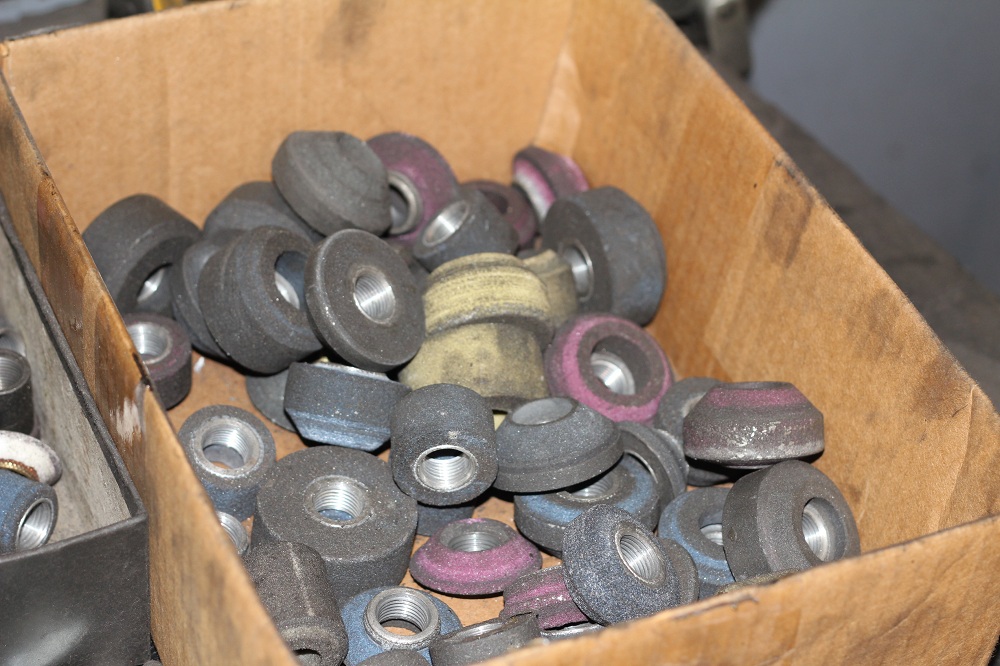
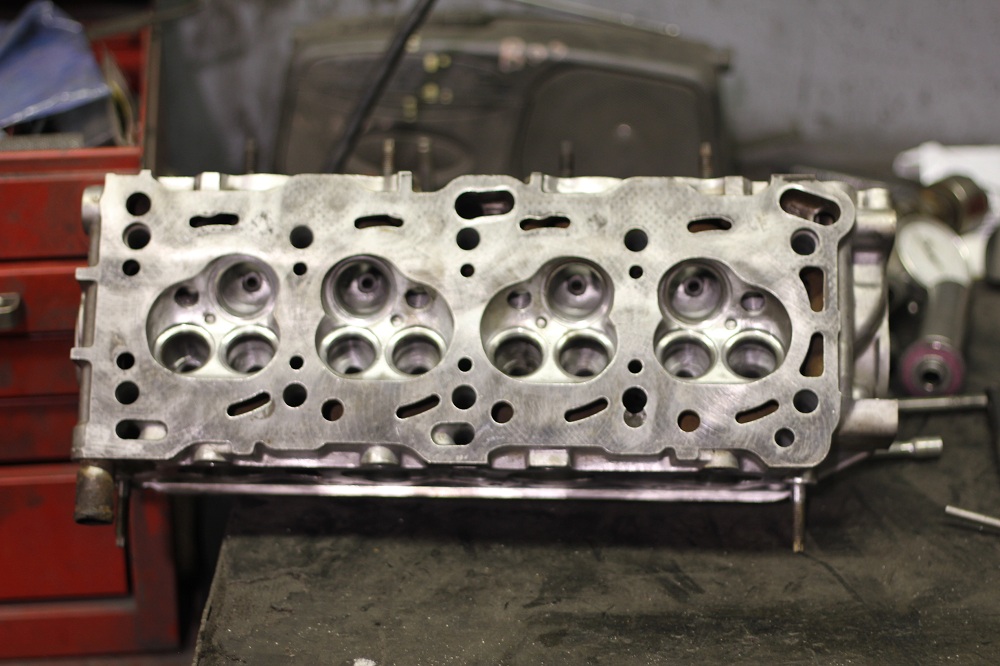
 Note the shiny ring around the lower valve seats.
 Put some machinist blue die so I can see what has and has not been cut.
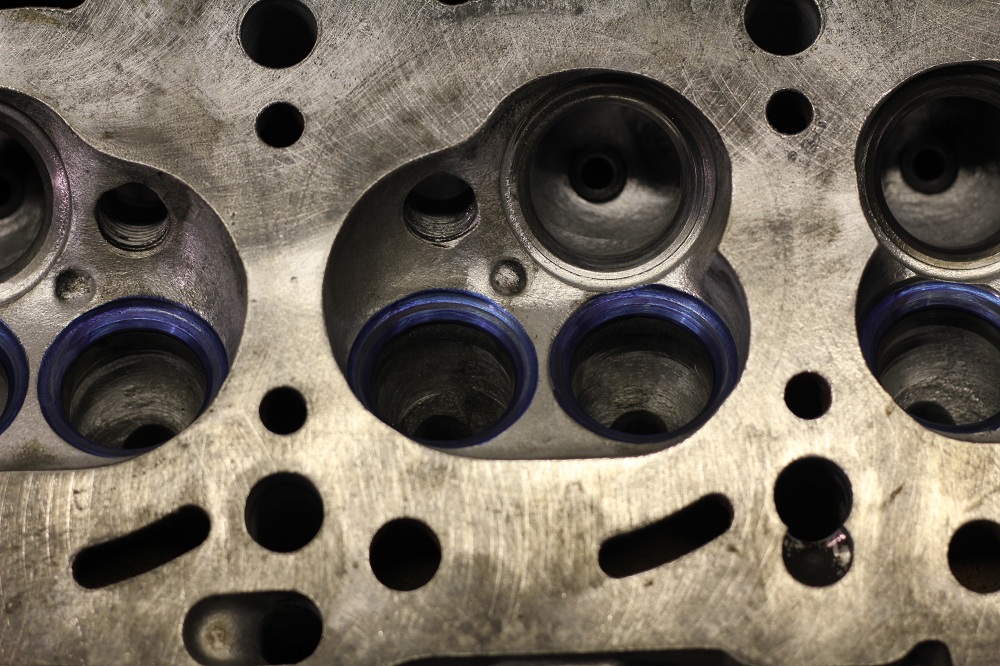 The upper shiny ring is the "narrowing" cut. It eases the flow from 45 to 22.5 degrees and keeps the seat from being too wide.
 I wanted to get a true 3 angle valve job, so I cut the inner section of the seat with a 60 degree stone. This turned out to be unnecessary. I cut so little off, and even cut too much off of one.
 All done. So pretty. (And poorly focused)


 Those are the stones in the upper left corner
 You have to set up for each block. This jig sets the head for the stone size. The brass bits ride in the cylinders for alignment
 The machine on and turning.
 all done
 note the cross hatch pattern.
 Well not technically done. I actually quit here and had the guy who has been doing this longer than me come in and finish. There is a button on the machine called dwell. It "dwells" at the bottom of the cylinder because there is more wear at the top, so it has to take more off the bottom to compensate. I was good at the top, good at the bottom, but tight in the middle. It was a excellent learning experience for him to show me how to get the bow out of the middle.
 This is the crankshaft grinding machine. Luckily I won't have to grind mine.
 I did chuck it up in the machine to polish it though.


