f6sk
Reader
8/15/14 7:22 p.m.
Ordered a set of clear bumper lenses off of ebay. They fit an 86-93 mazda pick up and will fit with a little massaging

I tore a CV boot when I had disconnected the tie rods and had the CV turned way to the side. I had never messed with a CV axel before, so I watched some youtube video and replaced the boot. The new boot is softer and thinner than the one I tore. Hopefully thinner means more flexable, and not weaker.

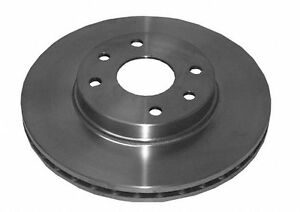
I also ordered some new rotors. They fit the Isuzu Impulse RS and will need som modification to make them work. They'll be larger, but thatwill also require me to step up to a 15in wheel.
f6sk
Reader
8/18/14 8:29 p.m.
My new bumper lights came in. They are an almost perfect fit! Even the screw holes are in the exact right location. I'll have to massage a bit off the ends to get it just right.

The Isuzu I-Mark shares its engine with the Geo Storm. But that's not all. IT has a very similar brake setup too. The storm GSI brake rotor is larger. The calipers are a direct fit.... as long as you enlarge the mounting holes.
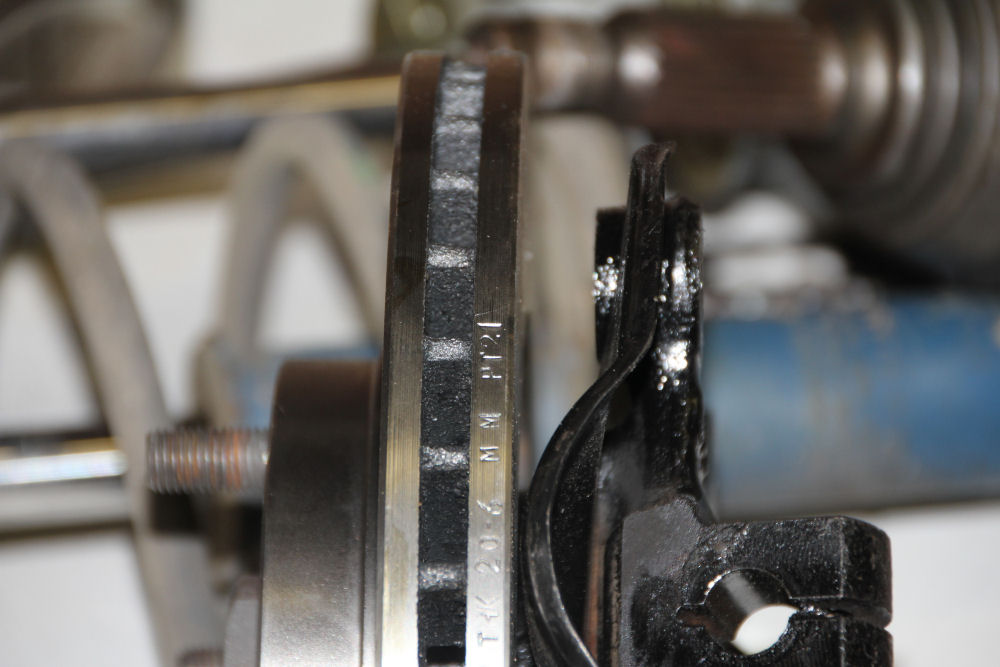
 I'll have to either make a shim to go behind the rotor, or stum a bit off the caliper mount. The new rotors are thicker

Ordered new non-lotus ball joints. They aren't the same. So, I ordered an Impulse ball joint, also different - the impulse has a fatter rod. But, all three were the same bolt pattern, and thickness. Although, the I-Mark lotus one was longer, and at a different angle.
Impulse left, Std I-Mark Center, Original I-Mark Lotus right

I had to swap out my struts to put the engine in. (I had to be able to roll it to get it in position)
f6sk
Reader
8/20/14 7:59 p.m.
I was waiting on a new AN line to come in. The oil supply line behind the exaust is a little to close to the exaust. I ordered a 45 deg one to give more clearance. It was literally resting on the heat shield. It looks like it ships from China....
I had to trim a bit off, but the clear bumper lights look OEM.
 I also swapped in the new struts keeping the original springs, and left the original brakes in place for now. I wanted to take a look at the rears for myself so I could decide how I wanted to go.
Then This Happened ............ AWESOME VIDEO
It took me a while to get the CG smoke just right...
After looking at this picture I want to shave the front plate holder off the bumper
The clear bumper lights look awesome! Definitely love the progress throughout this thread. Nothing wrong with China parts... well sometimes. Sometimes it's the only option anymore 
f6sk
Reader
8/22/14 7:21 p.m.
I had a few isues to work out once I got the car running.

I took it for the first real drive around the block. It felt really boggy and the idle was high. When I pressed the gas the turbo would spool like it was under load but the car wouldn't go anywhere. I messed with the timing.
I installed my power steering adapter but it leaks

The turbo did not have the vacuum line from the turbo to waste gate actuator.

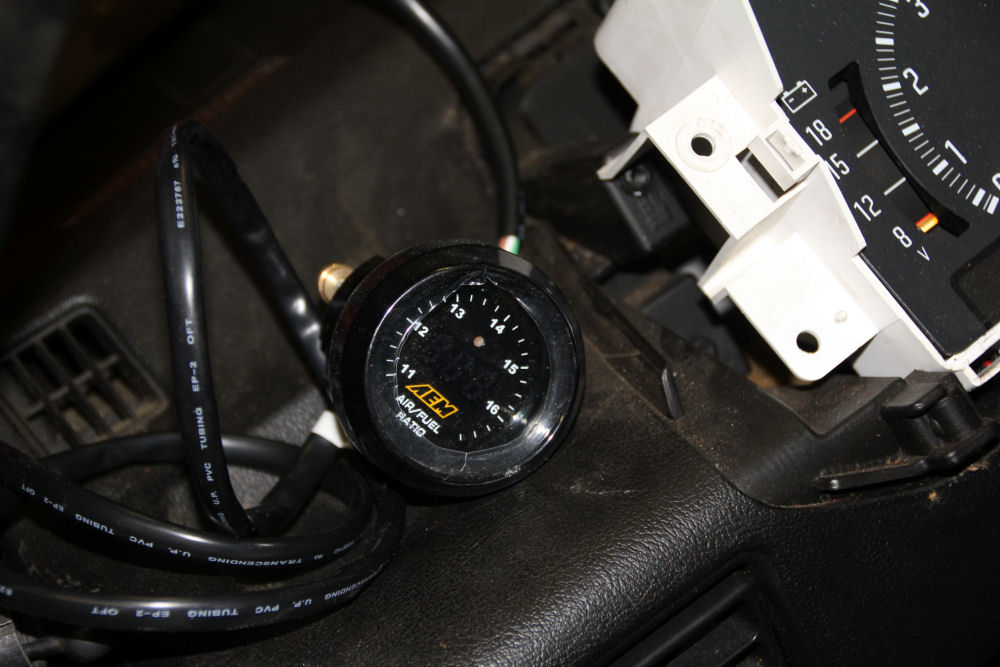
I ran the line to my AEM wide band. Looked like was running very rich (not surprising with my bogging issue). But I liked the gauge. I also purchased the line for my boost gauge.
After the two laps around the block, I parked it in the drive way and walked back to the garage. While I was in side I heard this hissing sound. I turned around to look for the noise and saw a billow of steam coming from under the hood. Upon closer inspection, my radiator had a pin hole that was pissing onto my exhaust manifold. DAMN! It was the one major component that I didn't replace during the rebuild. Still, I'd rather find it now parked in my driveway than stranded on the side of the interstate. So, a new radiator was $125 plus shipping. The question then became, what about an aftermarket radiator for close to the same price? Perhaps a half radiator to make room for future fantasy big turbo?

f6sk wrote:
I took it for the first real drive around the block. It felt really boggy and the idle was high. When I pressed the gas the turbo would spool like it was under load but the car wouldn't go anywhere. I messed with the timing.
This description sounds exactly like what used to happen whenever I would blow the vacuum line to the ECU off. Ran like crap, barely took throttle and built 2psi at idle but never generated more than 4psi at WOT. Fouled plugs like crazy.
Granted this was on megasquirt but....
f6sk
Reader
8/24/14 2:48 p.m.
I'm thinking the high idle and the boggy feel might be related
f6sk
Reader
8/24/14 2:58 p.m.
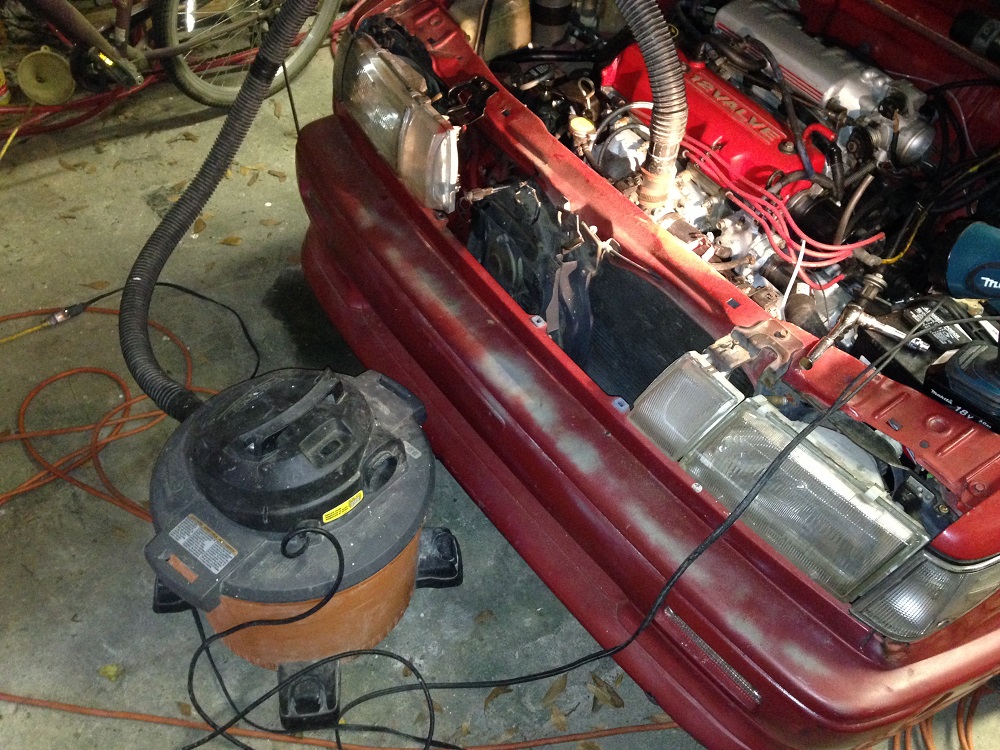
Vacuum cleaner boost!.... err no
Drilling for the boost control...yes! I didn't want to get the shaving down inside while I drilled.
Before:

After:

One of the best investments on this project has been the 1/4 and 3/8 pipe taps. I've used them for a bunch of different fittings.
DONE!
 I love this little boost controller. It was the only one I could find that was a straight through design rather than angled "L" shape.
NOW TURN UP THE BOOST!
Bravo Sir! I wish I could have had access to a shop like this when I was trying to build a turbo 5M-GE.
f6sk
Reader
8/25/14 7:36 p.m.
Check it out! Got a new Honda half radiator

It is so small. I can't believe these can cool without issue. But, everybody said they're ok.
I know from reading other people's build threads that I had to cut off the lower outlet and move it to the side.

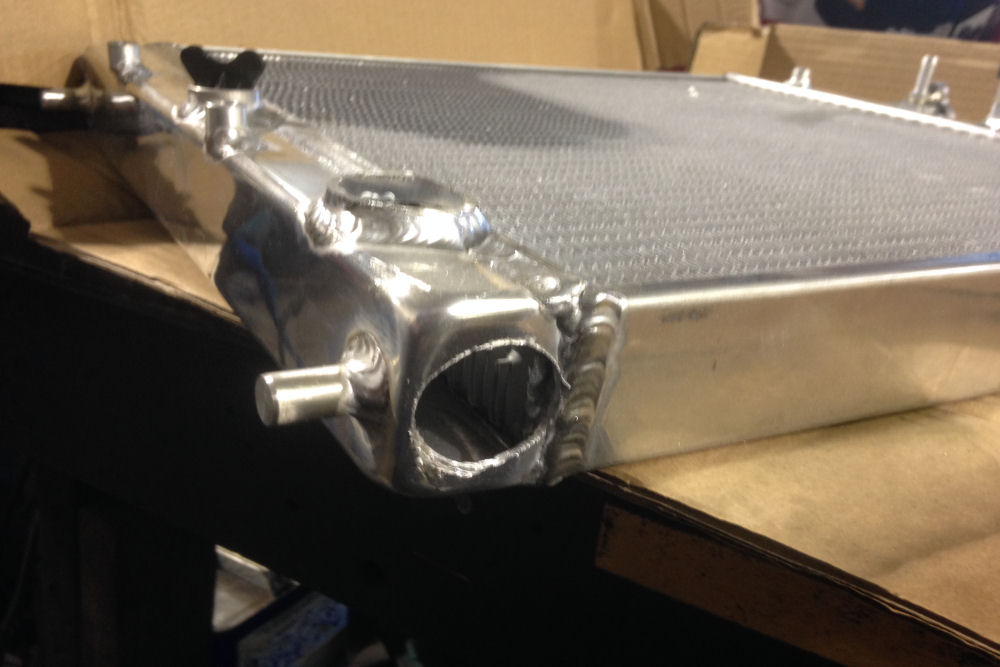
I used and extra thick piece of aluminum so I can put my fan switch sensor there.

Way harder than it shoulda been. I had a difficult time getting the nice puddle of molten aluminum like those guys on youtube. I have the best machine money can buy....and I suck at it. Oh well, I pressure tested it and after a few corrections it held.

After taking everything off the front I set it in thinking I was done. WRONG. It was way taller than the front bar and sat directly in the path of the CAI and top mount IC.

First step was to drill the lower holes to get it down a bit:
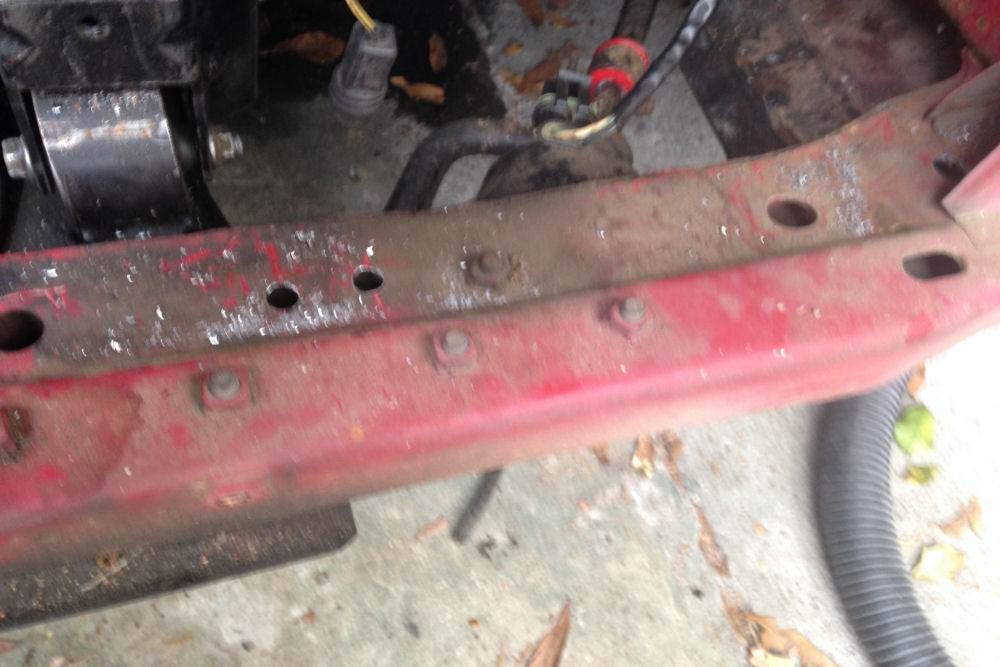
But that wasn't enough, So I had to notch the front bar.
Before:
After:

And after all of that, I still couldn't get everything in like I wanted. The top outlet hit the IC. So, I either had to cut the nipple and angle it off to one side, or cut the nipple and re-position it on the side closer to the battery.


One day I'll upgrade to big turbo and this should help me make room for it.
f6sk
Reader
8/28/14 7:37 p.m.
There is virtually zero aftermarket performance parts for these cars. You have to adapt things from other cars or build it yourself. I bought this strut bar off of e-bay. It fits a Honda. It is perfect for length, I'll just have to fab up some brackets to mount it. Still, for $24 I think it is awesome.


Getting this thing welded was a lot of work. I was crawling under the house on my belly pulling wire just to plug up the welding machine. Nasty cob webs, animal bones, and old bricks, but I got it done.
All of that to make these crappy welds.
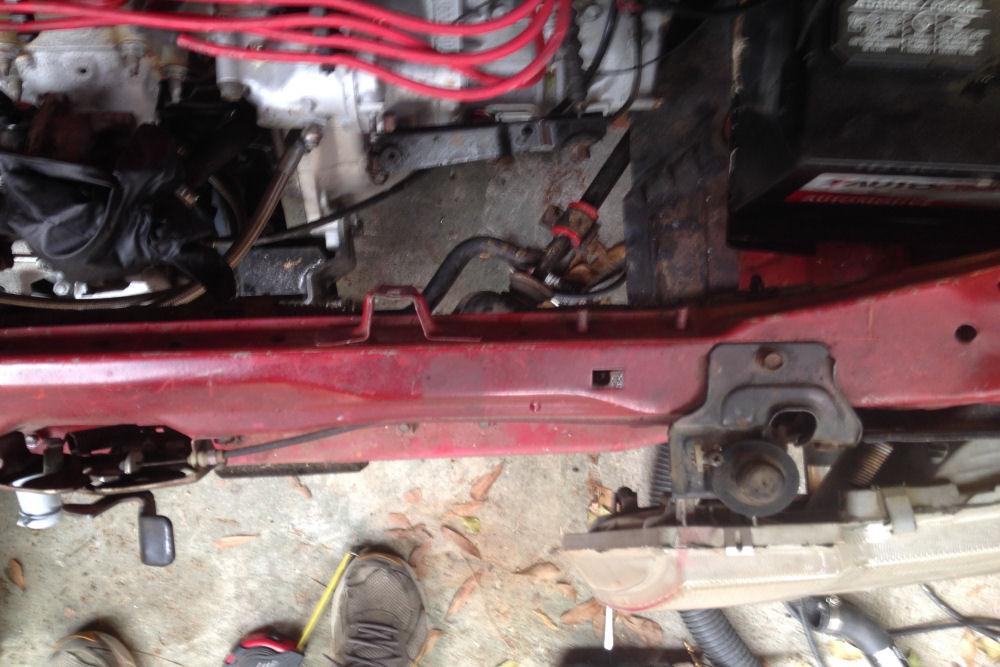
I wanted to box in the piece I just cut out for a few reasons. There is a wire that runs behind there and I wanted to protect it. I didn't want it to bend when I leaned on it. Plus it just looks better, more finished.

Note the hose nipple I relocated to the far right. This ended up working out well. I needed to add one more fitting to the radiator, and the original nipple block-off worked perfect for this. Sanded and painted.

Fan installed. I will replace the zip tie with a Honda radiator mount the next time I go to the junkyard.

Lots of room to the left for a future turbo upgrade.
f6sk
Reader
8/29/14 7:44 p.m.
Since I had the whole front of the car apart I went ahead and fixed my bumper and front end.
This part was bent and full of chips. So I filled sanded and painted.

Originally I bought some Bondo brand bumper repair from the local auto parts store. It was $12 for 0.5 ounces. Ouch, I found online that NAPA sells a two part epoxy for $70 that is 12 ounces and better meets my needs. There was no way the little tube would be enough. (Plus it was $24 per ounce)

I watched a video on you tube. They said to drill a hole at each end to terminate the crack. Scuff andthen apply epoxy to both sides with a mesh on the back side.
 This is the right stuff for the job, since it is flexible when it dries.
 I'll need to get some paint mixed. The little spray can at the parts store wont be enough either.
Next up more sanding and a second layer of epoxy.
f6sk
Reader
9/2/14 7:14 p.m.
The problem with fixing and painting your bumper is that once you fix one part, you feel like you should fix other parts. Then you start filling scratches, then nicks, then chips, and before you know it you've striped the whole bumper and added a skim coat of filler
It is really hard not to be anal and try to get every single imperfection out. I mean, I don't want to do this again later on.... but this thing has TONS of imperfections after 26 years.
I cut the front plate holder off and will fill the holes.
.JPG) After a second coat my crack repair was done. You can see more scratches on the right side that I need to fill.
After a second coat my crack repair was done. You can see more scratches on the right side that I need to fill.
.JPG) The color red the auto parts store says is the correct color match is too dark. The previous owner painted the fender with it and it sucks.
The color red the auto parts store says is the correct color match is too dark. The previous owner painted the fender with it and it sucks.
.JPG) I went ahead and bought some red for a GM car that I like and seemed close.
I went ahead and bought some red for a GM car that I like and seemed close.
.JPG)
I had never painted a car before. The goal was to use what I learned painting the bumper and apply it to a whole car paint job.
Man I love this thread. Keep it up!

saruken
New Reader
9/4/14 4:52 p.m.
Man this has been such an inspirational read. Thank you for sharing your trials with this little beastie with us. I've learned a lot, and I know I'm going to be coming back to this thread to re-learn it once I forget it again.
f6sk
Reader
9/4/14 7:57 p.m.
Thanks, I find myself going back to it myself trying to rember how I took things apart...
Bumper painted. If the goal was to create an orange peel finish, then I rock. Unfortunately I've got a lot of sanding and polishing ahead of me.

I used a singe stage paint. The paint store recommended it. They said that it was what they used back then. So no need for a clear coat just a min of 3 layers of paint with hardener built in. The first coat I accidentally mixed too much reducer. I caught my mistake and remixed it for the final 2.

After I sand out the dust and runs for the first 3 coats I'll do another final coat and buff/polish.
Thanks for the motivation. 
What kind of primer for the bumpers? Special filler for plastic aside from the epoxy repair?
This is in the future for my Metro bumpers. I've seen several turn out great but the color always seems darker on the Metro's I've been looking at.
f6sk
Reader
9/5/14 5:25 a.m.
The paint store told me not to use a standard gray primer on the bumper. They said it was not flexible enough and would spider crack. They sold me a can of adhesion promoter to spray on 15 mins before the paint. I used a thin layer of epoxy repair as my filler. (I also used the adhesion promoter before applying the epoxy)
Can you do the super informative posts on eetsanding and buffing like you did on the machine work? I have to do a lot as well on my project and like the way you explain things.
f6sk
Reader
9/5/14 12:02 p.m.
I'm glad you like my posts, but I don't feel like I'm knowledgeable enough to demonstrate the proper method. I've never done ANY paint work before. (unlike engine work) I watched several you-tube videos in preparation, read some articles, and had an extended conversation with the guys at the paint store. I asked them what they would use, and if there was a product that would do a better job or make my life easier. I just tried to imitate what I saw others do.
f6sk
Reader
9/5/14 12:10 p.m.
Like I said this is my first ever paint job and I was bound to screw up, and I did. I tried to wet sanded the bumper down. Wow, what a horrible orange peel I had. I tried 1000 grit first, not enough. Then 800, not enough. then 400, nope. Finally busted out the 220 just to get it back to flat. After reading I think I had too little air pressure. It seems I was putting out large amounts of paint with little pressure and made it glopy/lumpy.

We appreciate your mistakes too!