
600 mile update.... the gremlins have been defeated....... I think.
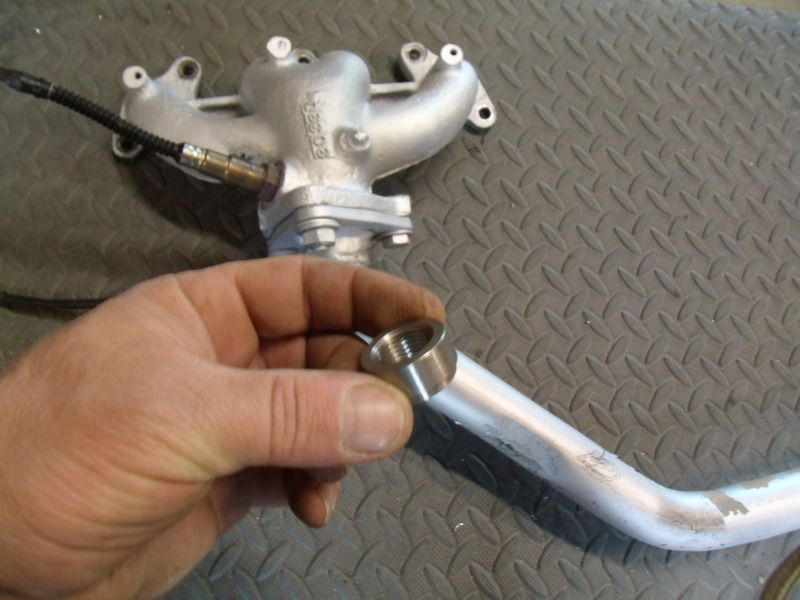 Based on a lot of reading, it is recommended the wide band sensor be mounted down stream and not on the exhaust manifold. Since the wide band was acting funny, I figured it was time to get off my lazy butt and move it.
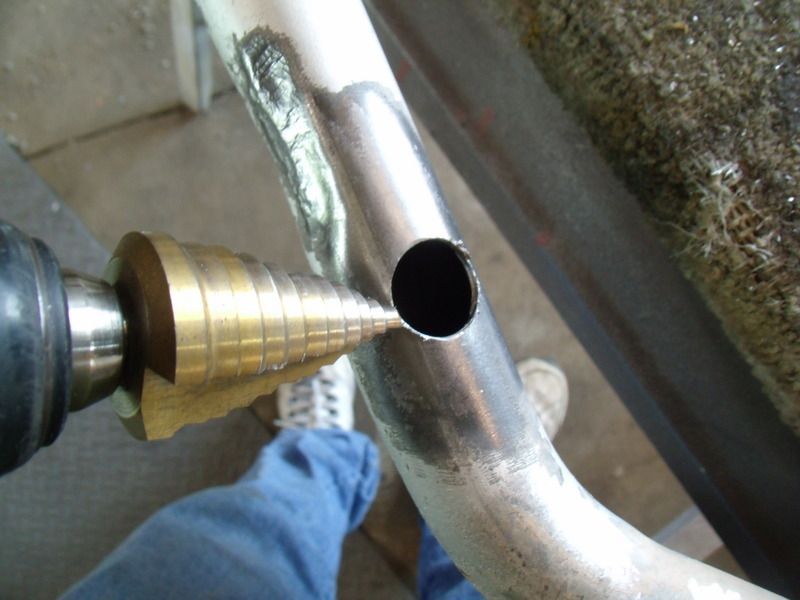 El'cheapo step drill makes a new hole in the head pipe. This location works out to be 18 inches from the exhaust ports on the head and is in the right clock position.
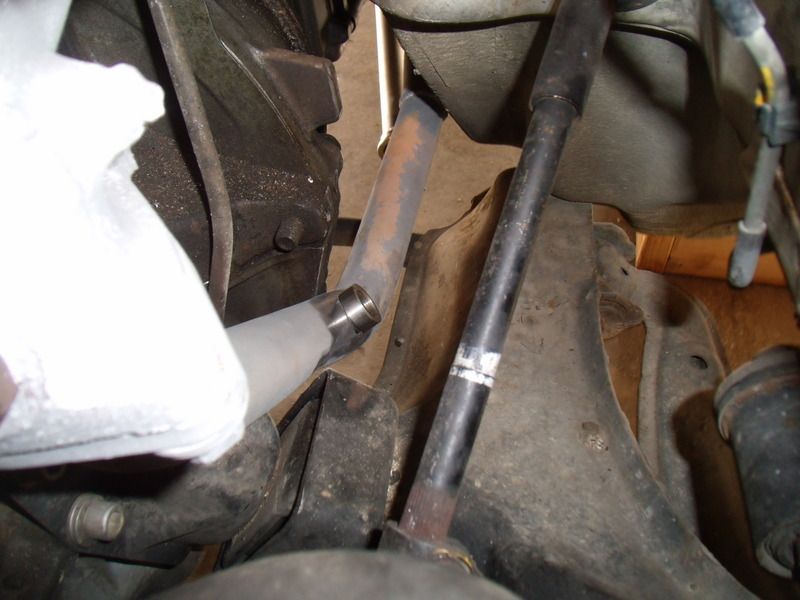 Looks good, time to weld it...
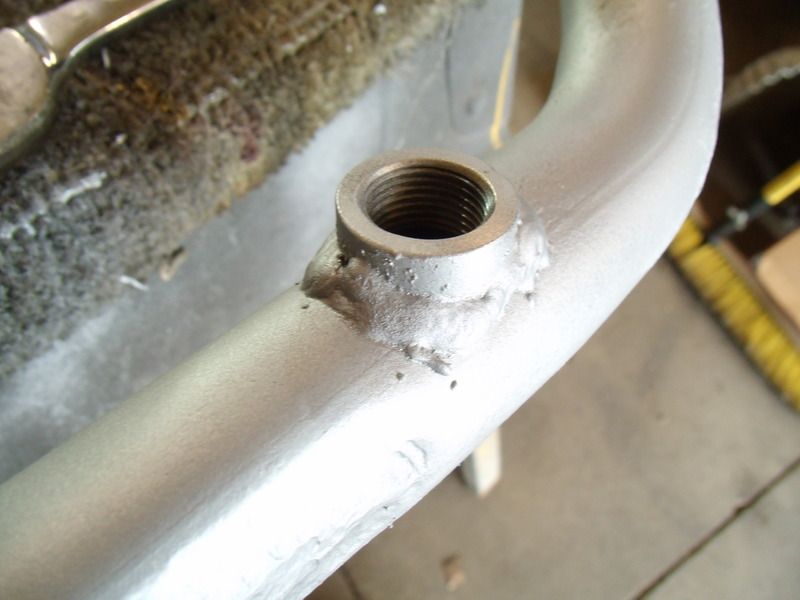 times like this, I wish I had a tig welder. Meh... good enough.
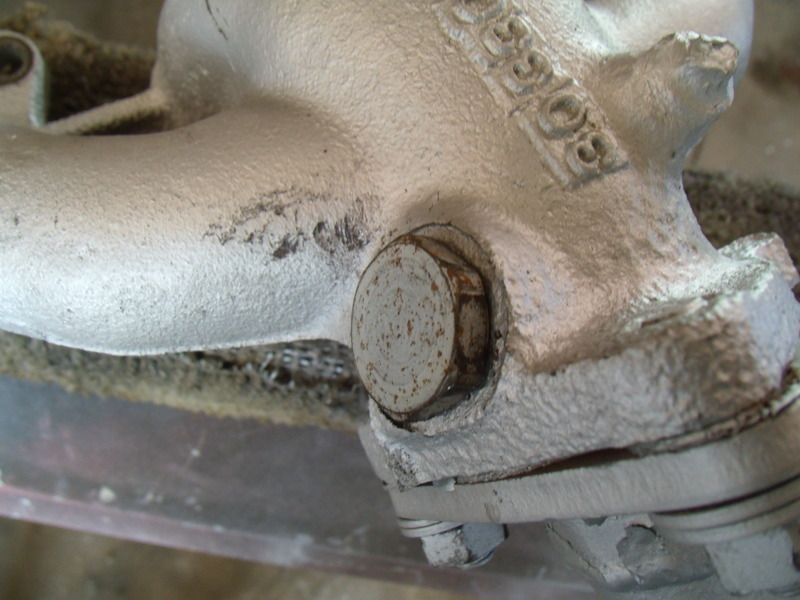 Manifold capped.
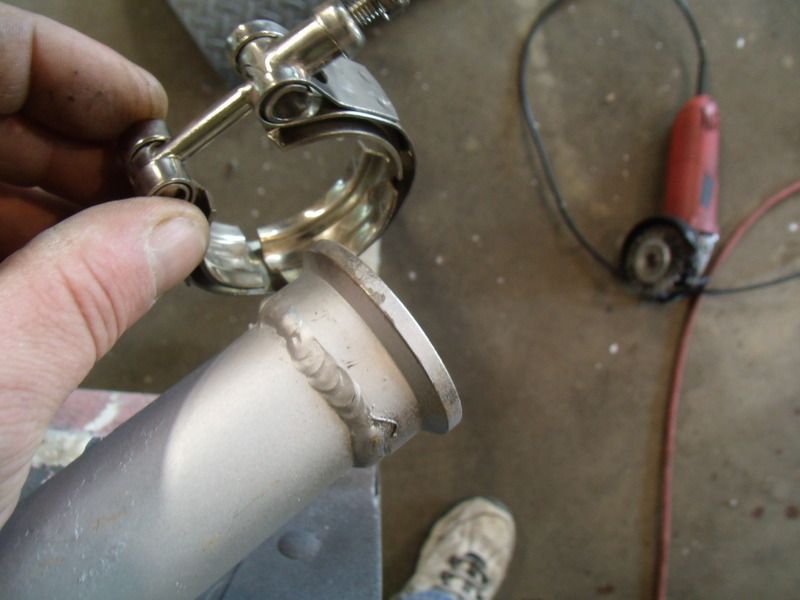 A tiny V-clamp was sourced to connect the head pipe to the rest of the exhaust system. These V-clamps are awesome!
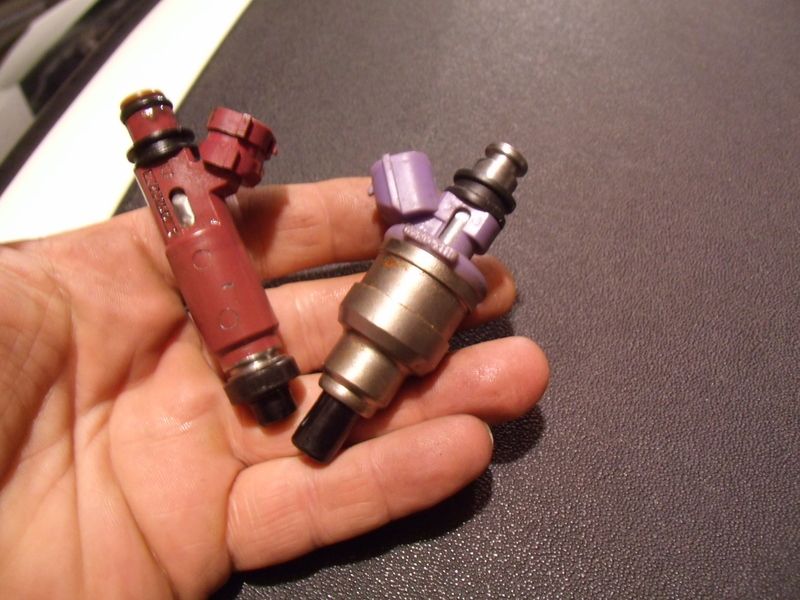 After moving the sensor, the air fuel was still wacky. Time to punt. The new'ish EV-6 injectors were pulled and the old EV-1 injectors were put back in service..... Long story short... nope that didn't fix E36 M3. Running out of ideas...
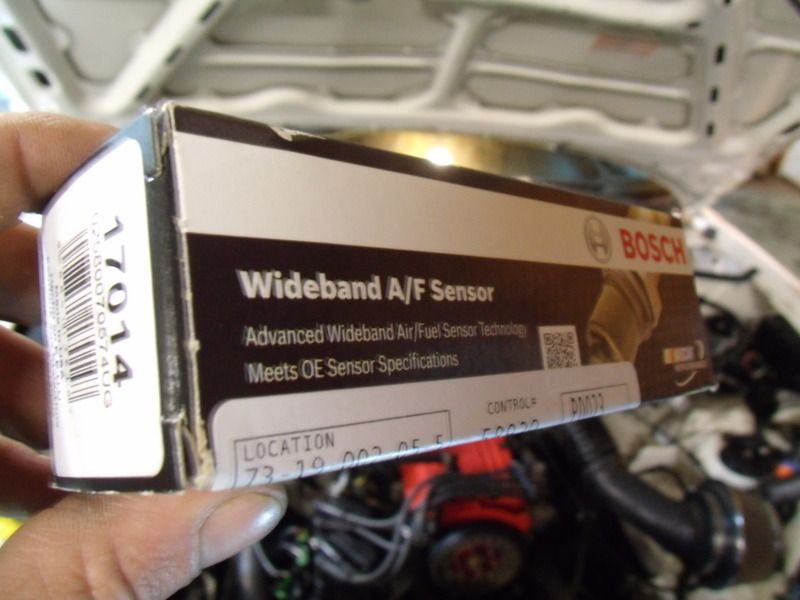 Although the sensor checks out OK, I went ahead and sourced a new one locally. $54.00 latter and a new sensor is in my grubby hands. I find it interesting that a wide band sensor was available in my little podunk town. Normally E36 M3 like this is special order. Anyway, the new sensor fixed the problem
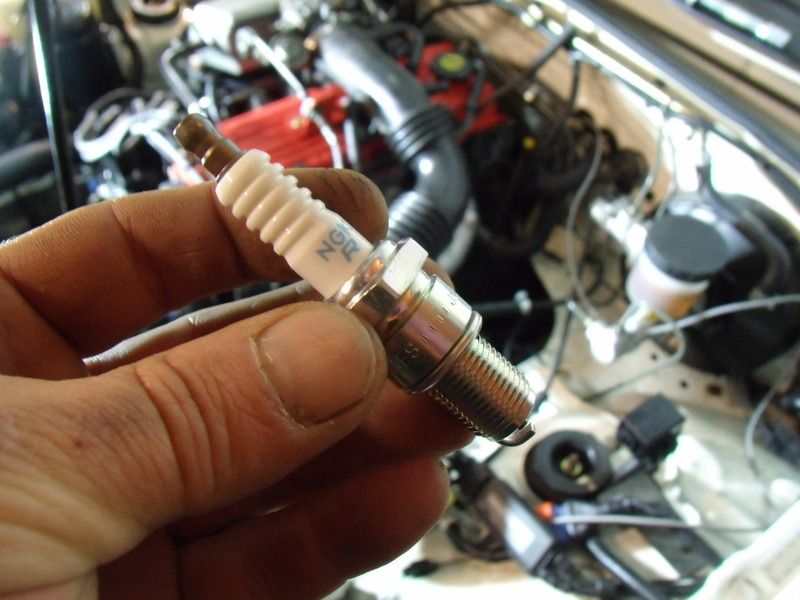 Fresh Smark flugs top off the little engine and the car was happy again.
So, no new data has been collected but the car is running the best it has ever run. The engine pulls hard enough to over power the clutch when the car launches and again the clutch gives up on the 1-2 shift. Overall the clutch seems healthy but it ain't got the stones when the little B3 is pushed hard. This sort of pisses me off because I cannot evaluate the performance by the numbers. At some point I reckon the clutch will need an upgrade.
Stay tuned.
I try to limit my posts in your threads, because I really don't want to come across as the gushing fanboi I am of you and your projects. So here is my carefully measured post reminding you just how much I enjoy reading your adventures. 

Are you seeing different readings with the O2 in the proper location now?
Dude, this is super cool.
Two things I did that gained me noticeable mpg bumps in my Daewoo project were swapping from the stock 1.5 to a 2.0 and adding a full flat bottom.
With the engine swap I think the biggest difference was in how I drove. With the stock engine, I needed to shift north of 3k rpm to keep up with traffic. With the 2L, I was shifting well under 2k. I don't know how you drive, but my hyper miling technique is to drive at full throttle and short shift. Like, forth gear at 1400 rpm before I'm out of the intersection. The bigger displacement made that a lot more feasible. I just read this entire thread and I kept wondering if there was a cheap/parts swap way to stroke your 1.3.
Anyway, the swap took me from averaging 25 ish to averaging 28 ish.
The flatbottom bumped me to 31 - 33 mpg.
This is my favorite thing on the Internet.

RossD
UltimaDork
5/13/16 7:52 a.m.
Doc Brown wrote:
[...]
Anyway, according to megasquirt the engine is running a tad bit on the cold side. This frustrates me to no end.
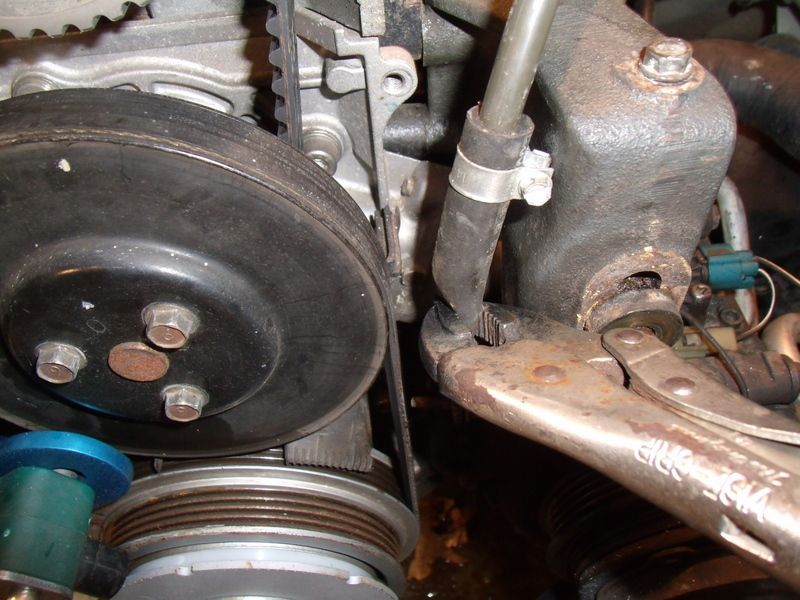 After some experimenting, I discovered that pinching this coolant hose makes the engine run hotter... I don't quite understand what is going on, but it appears I need to do some more experiments.
Stay tuned!
I'm guessing you're familiar with the hydraulic-electronic analogy ( https://en.wikipedia.org/wiki/Hydraulic_analogy ) so if you add in some restriction (like a globe valve so it's tuneable) to redirect the flow.
And unlike Mezzanine, I don't mind letting you know, way too often, that I think your projects are great!

I'm glad 'ya folks are enjoying the adventure. I'm confident the car will hit the 50 MPG goal this year..
In reply to Mezzanine:
Moving the wide band down stream didn't seem to help the failing sensor. The new sensor seems to be working just fine, but I'm not sure if it has anything to do with the location. Ultimately the new position should be better because of less heat. ... at least that is what the Internet says.
In reply to DaewooOfDeath:
The flat bottom may not be doable for the complete belly of this Miata. While the car isn't hella flush, it does sit a bit on the low side. I have a tough time getting over speed bumps and random dead animals. I'm thinking of doing something with the rear subframe when I pull it to do the bushings and diff swap.
Increasing the engine size is possible with a different block. I seem to recall various Mazdas came with a 1.4 and 1.5 SOHC engine. I think the 323 that I snatched the valve cover from has a larger engine. I actually debated on going back and pulling the engine. the Jury is still deciding on what to do.
As far as driving technique, its nothing special... just jump in and drive. Lately I have been running the engine harder to get and idea of how much power its developing. I fear the clutch can't take much more abuse so Iv'e had to tone it down a bit.
In reply to RossD:
Thanks for reminding me of that! I did a quick experiment a few weeks ago and pinched one of the hard cooling lines and the results were disastrous. The car overheated within a few miles.... so I reversed the mod and promptly forgot. Yes, I do need to go back and try that again with an adjustable valve of some sort.
While I'm here, I reckon I'll give a quick update. The datalog files are suggesting the car is getting between 48 to 55 MPG at steady state 2500 RPM (55 MPH). The high speed files also look slightly better than last year. Unfortunately I don't have solid numbers yet, but things are looking good.

DaewooOfDeath wrote:
Dude, this is super cool.
Two things I did that gained me noticeable mpg bumps in my Daewoo project were swapping from the stock 1.5 to a 2.0 and adding a full flat bottom.
With the engine swap I think the biggest difference was in how I drove. With the stock engine, I needed to shift north of 3k rpm to keep up with traffic. With the 2L, I was shifting well under 2k. I don't know how you drive, but my hyper miling technique is to drive at full throttle and short shift. Like, forth gear at 1400 rpm before I'm out of the intersection. The bigger displacement made that a lot more feasible. I just read this entire thread and I kept wondering if there was a cheap/parts swap way to stroke your 1.3.
Anyway, the swap took me from averaging 25 ish to averaging 28 ish.
The flatbottom bumped me to 31 - 33 mpg.
The core of what you are saying is still a MAJOR debate in drawing rooms at all OEM's. Getting the right combination of displacement to weight and drag, especially when you factor in boost, and all of the new compromises that brings up- how all that works with gear ratios, compression, type of cam profile, the way of cam timing, EGR or not, etc etc etc.
It's a very hard debate to figure out, especially when you have to factor in the noise factor of how people drive.
Doc- you may not need a bigger engine- you will know that after you start driving it. What I can suggest is to see if you can come up with a pretty accurate torque estimate- so that you can track torque and fuel flow and start collecting brake spec fuel consumption. Once you see where you drive in that map, you'll see what things you need to trim.
Not that it helps this project much, given that my Miata's mileage was consistent top up or down, the major fuel economy issue was the engine speed and not vehicle drag. So at a minimum, a smaller engine and/or a lower gear set at 70mph is perfect.
One other thing that we have to deal with that Doc doesn't- we've not figured out how to do lean burn without having big emissions issues. We can make engine that burn well at +20:1, but like diesel, the NOx is hard to deal with.

Vigo
PowerDork
5/14/16 4:27 p.m.
The engine pulls hard enough to over power the clutch when the car launches and again the clutch gives up on the 1-2 shift. Overall the clutch seems healthy
Maybe that clutch is 'good' for something else but it is apparently 'bad' for your car. But at least the fact that it operates normally means there's nothing further to diagnose.. simply swap in a stronger replacement and go back to 'assessing performance'!
In reply to Vigo:
I'm sort of happy the engine is too powerful for the clutch but at the same time I'm not looking forward to the upgrade. I suspect the clutch will get fixed sooner than latter, but first I need to sort out a few things.

So I'm a big dumb ass...Somehow I managed to put the crank trigger wheel on backwards . Amazingly enough the engine ran pretty good
Anyway, tuning the ignition maps was driving me bonkers so I went ahead and double checked the crank wheel and sure enough it was backwards. This would explain a few things.....
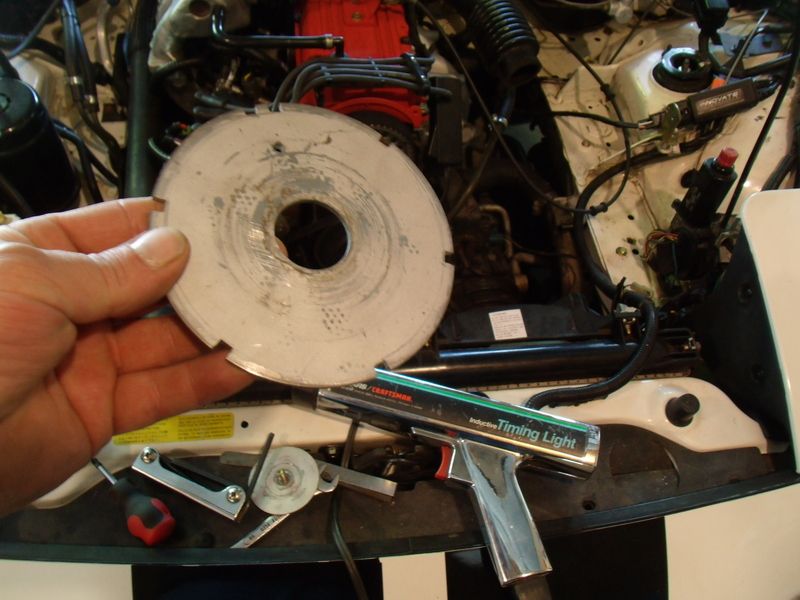 Arggg!
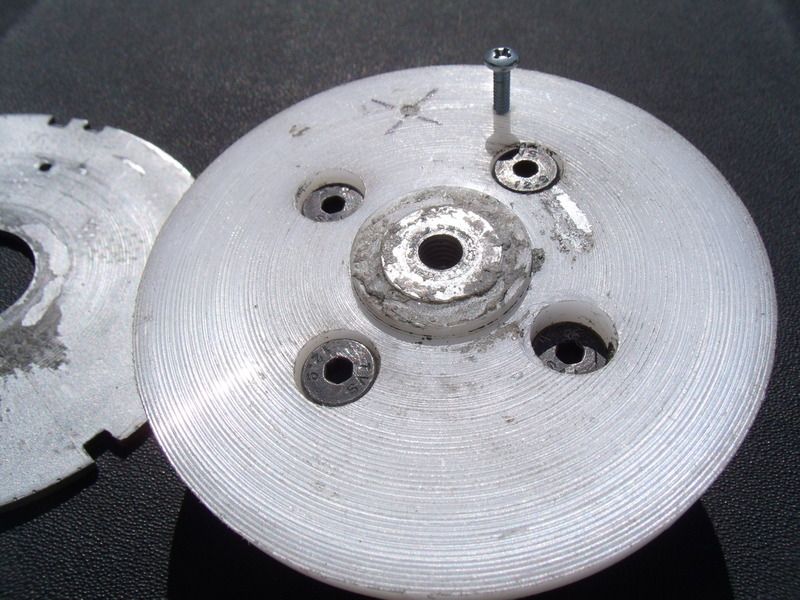 Back a few pages you can see how this crank wheel is assembled. Pictured here is the delrin spacer that holds the steel crank wheel. The gray crud is chewing gum... I have been using gum to sort of keep the wheel locked in place while I experimented with wheel positions. Anyway, I finally settled on the optimum position and its time to pin the wheel to the delrin spacer with a 6-32 screw.
The GM 7X DIS ignition module has a built in ignition curve that will allow the ignition to work if the ECM fails to send a good signal. If the module detects a fault or disagrees with ECM them the default ignition curve is used. Its possible (ask me how I know) that the module will accept some of the ECM commands and ignore other commands. In this case the commands to fire the ignition will bounce back and forth between the module and the ECM. During an event like this the engine will flutter and cause brief loss of power. This is a odd failure mode that was really hard to trouble shoot. The good news is this issue is finally sorted out 
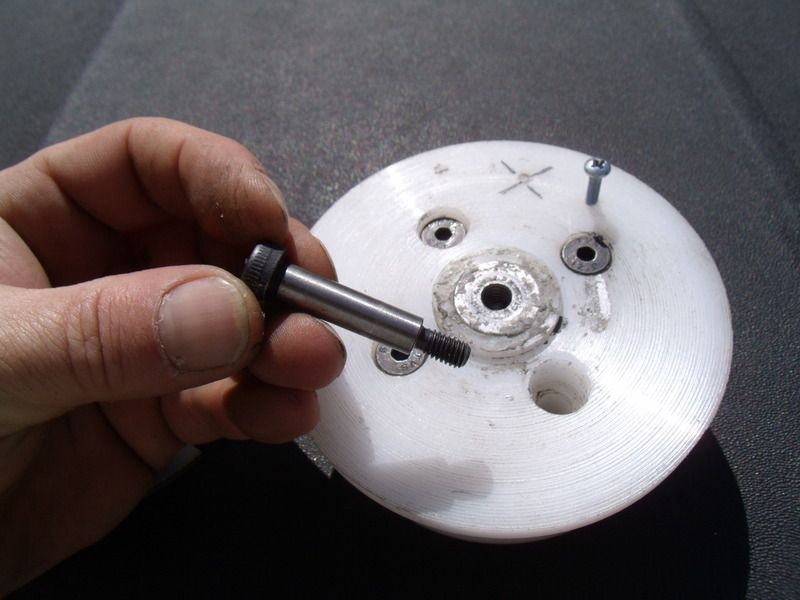 Here is a random shot of one of the four shoulder bolts that hold the Delrin spacer to the crankshaft. Again, you would need to go back a page or two to see how all the parts are assembled.
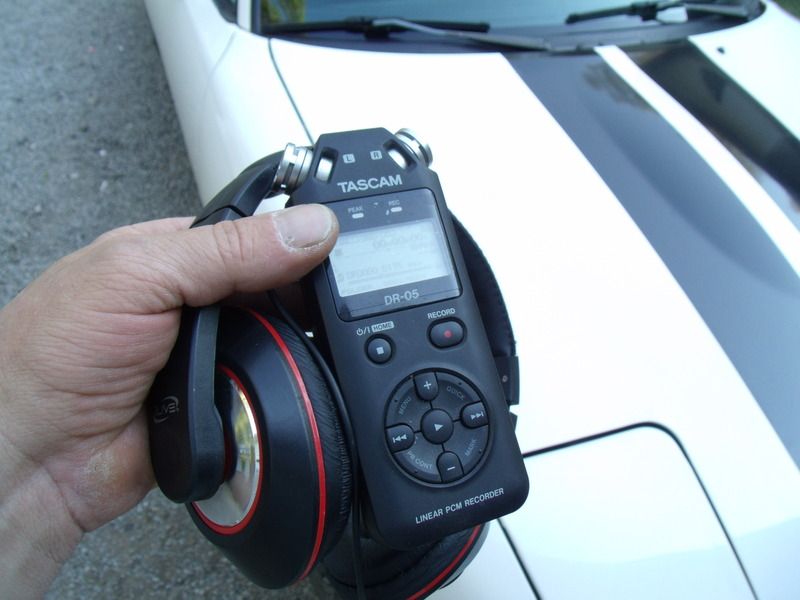 Solo tuning an ignition table is impossible to do on public roads. A chassis dyno is ultimately the right tool.... but that's not how I roll.
Lately I have been using a digital audio recorder that I sync with the datalog files. I start both devices at the same time and when I encounter spark knocks or flat spots I call them out.
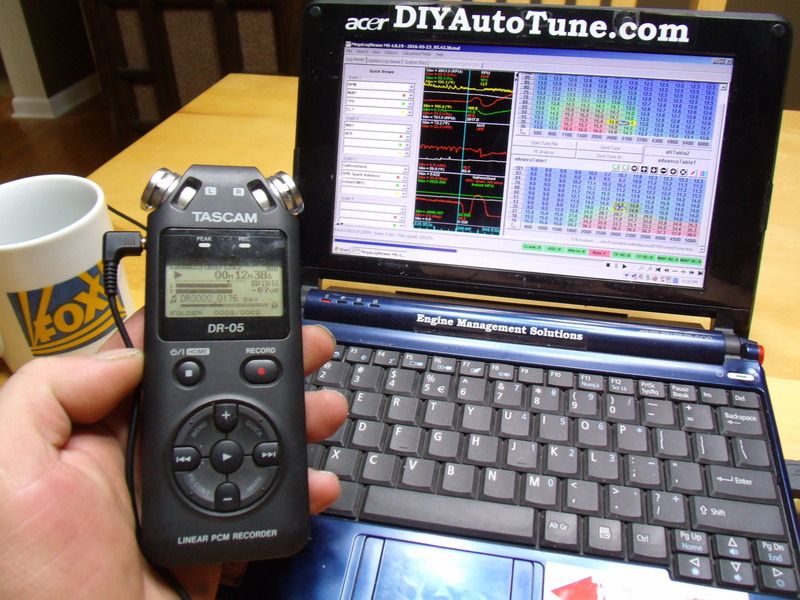 When I review the datalog files and listen to the comments on the digital recorder, I'm able to edit the ignition table with some degree of confidence.
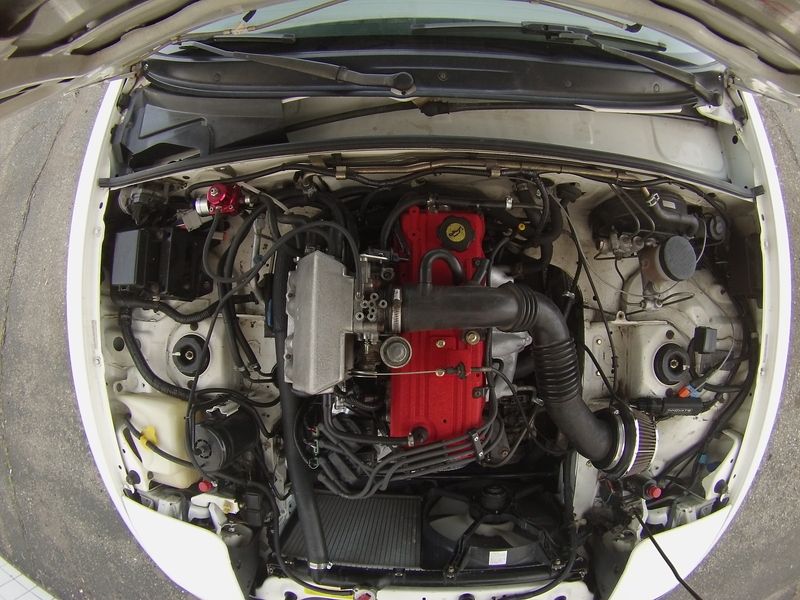 .................Zoom Zoom!
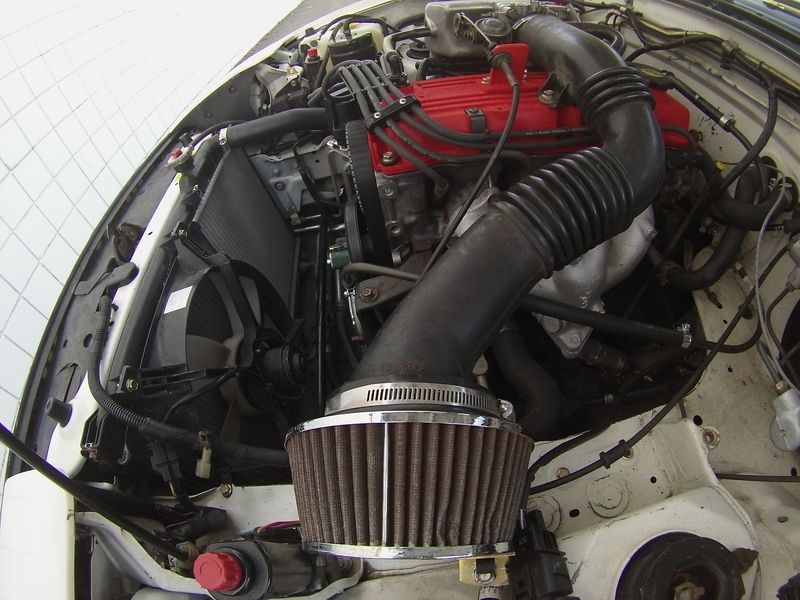
Stay tuned!

RossD
UltimaDork
5/25/16 8:20 a.m.
Cool.
The failure mode with the Ford EDIS is 10°BTDC which would be a good indication that it's failing since it's a static number.
The top of the intake manifold is calling for a faux 'Ferrari' moniker (CNC'd plate?) with Mazda in it instead and with the same red paint in the negative space.
If you have any spare I/O you could just do a momentary switch to note when an 'event' happens.
In reply to RossD:
A spare I/O would work great to tag data in the log files... hmmmm.... I need to check that out.

DaewooOfDeath's comments got me thinking about what this car would actually do if I really tried my best to maximize the fuel economy. At this point I only report the MPG from the daily commute and whatever else the car is used for. Lately the car has been getting a solid 40 MPG, however it is more funner to drive, thus more throttle is applied accordingly.
Anywhoo, for all intensive purposes, the following adventure is a cheat but indicates the potential this car is capable of.
The mini adventure was engineered for the best possible outcome and starts in the podunk town of Jackson Michigan. The Miata was piloted due south on US127 at a reasonable speed . Eventually the Ohio state line was crossed and the earth became flat as a pancake. Rural Northern Ohio on a Saturday afternoon is devoid of any sort of traffic so I slowed down a bit. The car was allowed to cruise between 45 and 55 MPH and piled on the miles. Somehow a detour or two got me pointed North and I eventually crossed back into Michigan. After 165 miles I couldn't stand it any longer and pulled into a gas station to top up the fuel tank. And now the results of that journey....49 MPG. Not too shabby, but realistically I thought the car would do better.
Given that the car was within 1 berkeleying MPG of the ultimate goal I'm still committed to do better. Perhaps in a few weeks I'll try again.
TL:DR? the bottom line is 49 MPG.
DYNO DAY....
While the car did well on the fuel economy run, I wasn't really happy with the overall tune. The ignition table is still unfinished and is getting progressively harder to optimize with the butt dyno. At this stage in the game I had enough of the table worked out to transfer the data to the Megasquirt on the dyno. Let's take a look.....
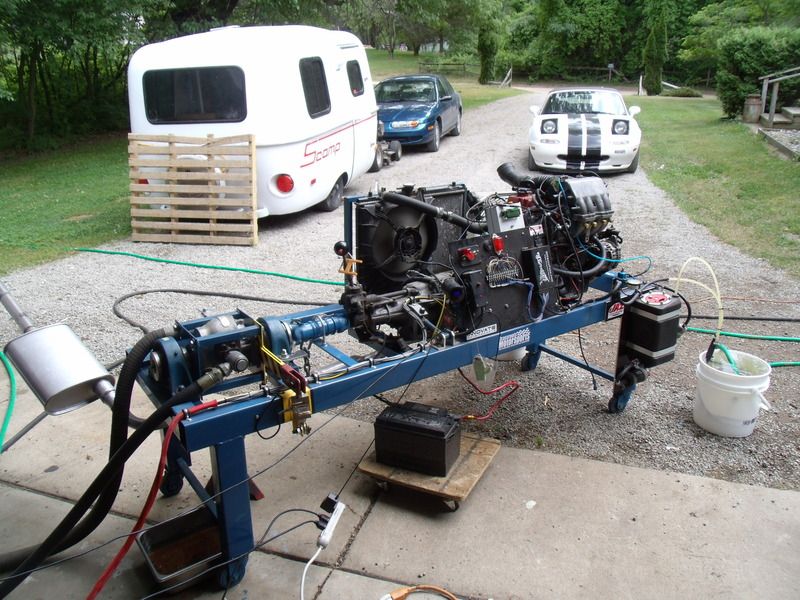 To combat the noise and heat, the dyno is rolled out of the garage and into the driveway. Typical Saturday afternoon and the Doc Brown residence.
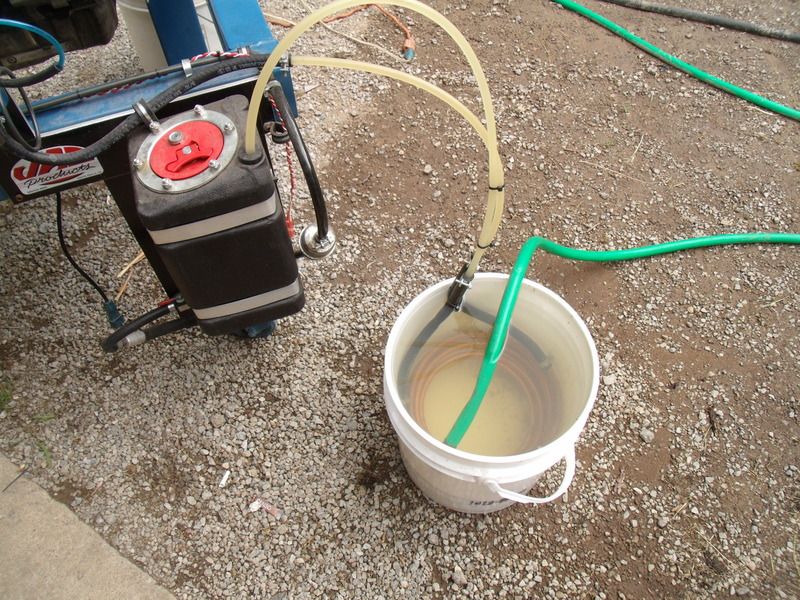 Elevated fuel temps are a problem when the engine rejects more fuel than it can burn. The solution is to chill the fuel before it is returned the the gas tank.
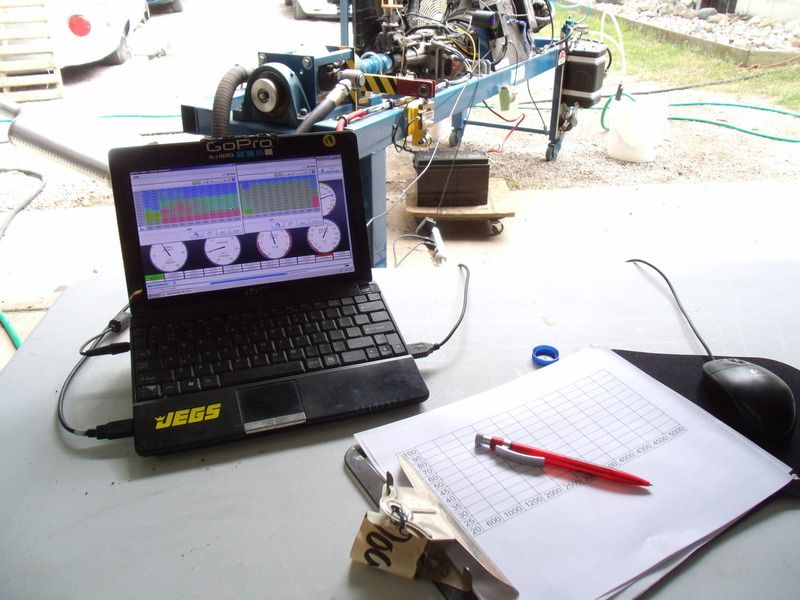 A view from the drivers seat of the dyno....
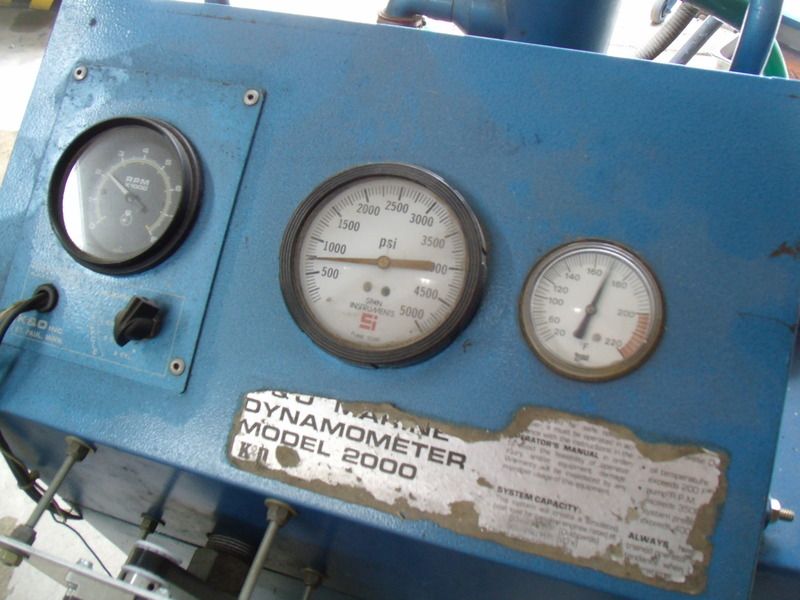 The dyno's fluid temp is slightly elevated in this photo because I forgot to turn on the water for the heat exchanger. Typically the temps will hover around 120F.
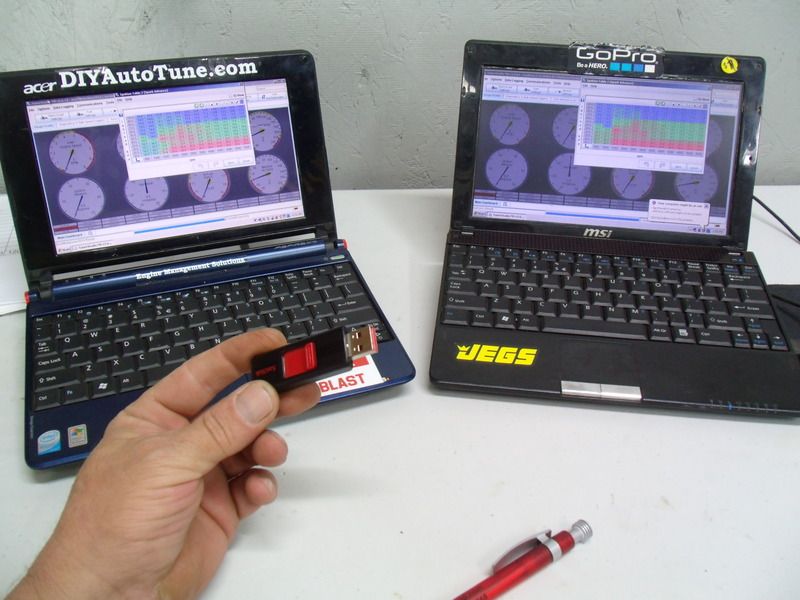 At the end of the day the ignition table was exported from the dyno computer and plugged into the Miata computer. A quick test drive of the Miata indicates a job well done.
Stay tuned!
So you are figuring out that making 5-8 hp really well is difficult, then. 
That's is all it takes to do 45-55mph in that car, I expect.
In reply to alfadriver:
OMFG this is the most difficult project I have ever attempted. There has got to be an easier way to have fun  .
.
I thought the difficulty was part of the fun! 
I can't imagine what you will do if you get this thing to 55mpg. Have to start a new project.
33mpg 1 ton pick up. 
Have you driven this car through Albion from time to time? Swear I've seen you here in town on the main (brick-paved) drag.
Seems like every modern car out there has a little plastic air dam in front of each wheel. I assume this is some sort of aero-gizmo having to do with spinning tires being not so good. Maybe adding those could make an itty-bitty difference...?
In reply to JamesMcD:
Those air dam gizmo's for in front of the tires seem to be popular on modern cars but I can't wrap my head around how to do it on a Miata.
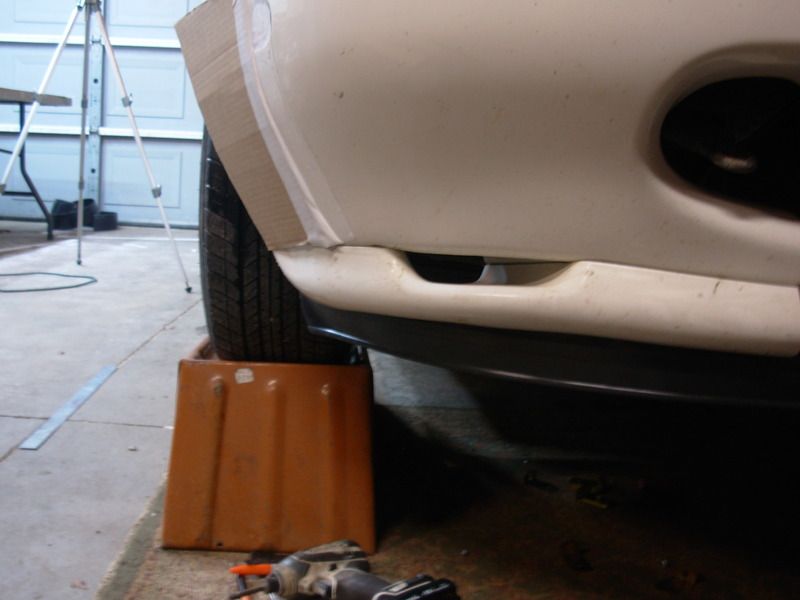 I played around with some cardboard and tape but its going to take some serious tupperware to clean this area up. About the only aero mod that I have been able to fabricate was the grill block off panel.... and the car overheated. Before I try the grill block off panel again I need to finish a mod for the megasquirt to sound an alarm and automatically kick on the cooling fan.
In reply to Acme Lab Rat:
I have been through Albion (paved brick road) a number of times... Usually on weekends. Although I haven't been out that way recently.
In reply to alfadriver:
Hmm.... 33 MPG 1 ton pickup....That don't sound too difficult to do.
You still have a passenger-side mirror. If you drive with the top down all the time you probably don't need it too much. You could even replace it with another mirror which sits to the inside of the a-pillar.
alfadriver wrote:
33mpg 1 ton pick up. 
Use an old 1 ton for lower weight (like early 60s, about 4000lbs), fastback truck cap, 4BT or similar, stick (medium duty?), extreme lowering, with the right rear end gearing I bet that would do it, maybe even without the lowering it into the weeds.
In reply to Doc Brown:
Gas though. And no lean burn. 

I'll give you just highway, so a 45 mph - 55mph cruise. We need some help there. Well, we, as in the entire industry.
BTW, I can't recall this answer- did you change the gearing and rear end?
And I can't recall if I pointed this out before, too- I did some Miata research, and IIRC, with the correct RX7 trans, and a special Miata rear, you could reasonably match 1-3, lower 4th, and much lower 5th. As in about 1000rpm lower at 70.
In reply to alfadriver:
I have a 3.90 open diff ready to swap in and replace the 4.10 Torsen. The transmission has already been modified with the RX-7 5th gear.
I have been threating to do the diff swap for two years now, I guess I really need to just do it.
 Based on a lot of reading, it is recommended the wide band sensor be mounted down stream and not on the exhaust manifold. Since the wide band was acting funny, I figured it was time to get off my lazy butt and move it.
  El'cheapo step drill makes a new hole in the head pipe. This location works out to be 18 inches from the exhaust ports on the head and is in the right clock position.
  Looks good, time to weld it...
  times like this, I wish I had a tig welder. Meh... good enough.
  Manifold capped.
  A tiny V-clamp was sourced to connect the head pipe to the rest of the exhaust system. These V-clamps are awesome!
  After moving the sensor, the air fuel was still wacky. Time to punt. The new'ish EV-6 injectors were pulled and the old EV-1 injectors were put back in service..... Long story short... nope that didn't fix E36 M3. Running out of ideas...
  Although the sensor checks out OK, I went ahead and sourced a new one locally. $54.00 latter and a new sensor is in my grubby hands. I find it interesting that a wide band sensor was available in my little podunk town. Normally E36 M3 like this is special order. Anyway, the new sensor fixed the problem
![]()
 Fresh Smark flugs top off the little engine and the car was happy again.
![]()


 After some experimenting, I discovered that pinching this coolant hose makes the engine run hotter... I don't quite understand what is going on, but it appears I need to do some more experiments.
Stay tuned!


 Arggg!
  Back a few pages you can see how this crank wheel is assembled. Pictured here is the delrin spacer that holds the steel crank wheel. The gray crud is chewing gum... I have been using gum to sort of keep the wheel locked in place while I experimented with wheel positions. Anyway, I finally settled on the optimum position and its time to pin the wheel to the delrin spacer with a 6-32 screw.
  Here is a random shot of one of the four shoulder bolts that hold the Delrin spacer to the crankshaft. Again, you would need to go back a page or two to see how all the parts are assembled.
  Solo tuning an ignition table is impossible to do on public roads. A chassis dyno is ultimately the right tool.... but that's not how I roll.
  When I review the datalog files and listen to the comments on the digital recorder, I'm able to edit the ignition table with some degree of confidence.
  .................Zoom Zoom!
 To combat the noise and heat, the dyno is rolled out of the garage and into the driveway. Typical Saturday afternoon and the Doc Brown residence.
 Elevated fuel temps are a problem when the engine rejects more fuel than it can burn. The solution is to chill the fuel before it is returned the the gas tank.
  A view from the drivers seat of the dyno....
  The dyno's fluid temp is slightly elevated in this photo because I forgot to turn on the water for the heat exchanger. Typically the temps will hover around 120F.
  At the end of the day the ignition table was exported from the dyno computer and plugged into the Miata computer. A quick test drive of the Miata indicates a job well done.
 I played around with some cardboard and tape but its going to take some serious tupperware to clean this area up. About the only aero mod that I have been able to fabricate was the grill block off panel.... and the car overheated. Before I try the grill block off panel again I need to finish a mod for the megasquirt to sound an alarm and automatically kick on the cooling fan.


