1 2 3 4 ... 24
Stefan (Not Bruce)
Stefan (Not Bruce) GRM+ Memberand MegaDork
3/29/16 12:04 p.m.

In reply to wae:

I would as well. Put the MS2 daughter board in place, load the MS2/Extra Firmware and move on.

BTW, if you look at the picture for the MS2 v3.0 kit, you'll see the MS2 Daughterboard in the lower right of the picture.

Seriously, if your mainboard is working well, follow the following instructions:

http://www.megamanual.com/ms2/install.htm

Load your chosen firmware, configure it and get on with tuning.

wae
wae Dork
3/29/16 2:39 p.m.

That's my inclination, as well!

wae
wae Dork
4/2/16 8:38 a.m.

So I effed up pretty hard.

I got the crank sprocket installed by bolting on the crank pulley to press it on to the crankshaft until the clearance between the sprocket and the oil pump was about .020" give or take. The next step was to re-rent the pulley puller (that's fun to say!) and take the pulley back off so I could put the timing belt on and then put the covers back on before re-re-installing the pulley. The rental remover from Autozone works fine except that it comes with two metal rods, the longer of which gets inserted into the bolt hole in the crankshaft for the puller to push against. On the 2.4, the cavity in the crankshaft is too deep, however, so a little spacer is needed.

In a fit of blatant stupidity, I used the same little bolt that I used the last time, only this time I put the bolt into the crankshaft bolt hole and the rod. Pulley came right off, no problem.

I do not know how or why they would have machined it this way, but the bolt hole on the crank starts out narrow with no threads for a half inch or so, then is threaded for maybe three-quarters of an inch or so, and then it opens up into a cavity that is a larger diameter than the rest of the bolt hole. A cavity that just happens to be just about a half a millimeter deeper than that little bolt is long. So my spacer fell in to that cavity and was jammed in place.

That bolt didn't want to come out, so I wound up drilling at it until there was enough clearance for the crank bolt to seat, left the rest of it in there, and broke out the red Loctite. Not the ideal situation, I know, but an ounce or so right on the centerline won't throw things out of balance enough to cause massive problems, will it?

After that fiasco, I went ahead and got the timing belt on and tensioned, and then went about hitting the block and the various brackets and coolant hard lines with a wire brush and some naval jelly to get the rust off. I'm going to hit it with primer and then probably do the block in Hemi Orange and the brackets and water lines in gloss black then throw clear over that and the raw aluminium head.

I've also ordered up an SRT-4 valve cover, since the N/A 2.4 one that I have doesn't seem to match up with the gasket set. That should arrive next week and I'll need to touch up the paint on that. I'm going to replace the rubber water lines as well, so I'll need to source some coolant hose in a couple different diameters. The upper and lower radiator hoses might need to be a little more custom, so I'm going to wait until the engine is in the car with the radiator to try to find hoses to fit.

Other than the stupidity-driven bolt debacle, things are moving along nicely, though. Unless, of course, someone with way more experience than I have is going to tell me that I'm going to have problems and need to figure out a way to fully extract that bolt or just source a new crank.

wae
wae Dork
4/10/16 10:07 p.m.

I haven't updated in a while, but I've been getting stuff done!

All of the timing bits are installed and ready to go:

I scored an actual SRT-4 valve cover from eBay for $35:

While the gasket routing is identical to the regular 2.4, the PCV ports are different and there's more baffling on the underside of the turbo cover:

(SRT-4 valve cover is on the left and a regular 2.4 valve cover is on the right)

I decided to do the coolant hard lines in blue, and that came out okay. They were pretty rusty, so I hit them with a wire brush and then some naval jelly before priming, painting, and clearing them:

Before:

After:

(That picture was taken as I was trying to cure the paint a bit. The temperature dropped pretty significantly a few hours after I put the last coat of clear on and it was really soft. So I used my shop lights for heat, a couple cookie sheets for reflectors, and covered the whole thing with a bit of insulation. Worked out pretty well.

The block and the valve cover got primed and painted, and the block has been cleared. The temperature dipped again before I could get clear on the valve cover.

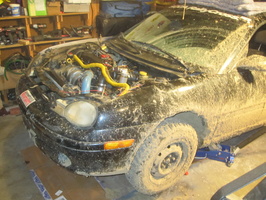
Last night, I had a buddy come over so that we could get the car in the garage to prepare for the operation. It sounded like hell, but it started right up and came off the trailer and up the driveway on three cylinders.

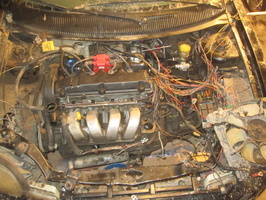
Tonight, I got the fluids drained, pulled the axles out, took out the radiator, and pulled the wiring from the front of the motor:

All that wiring mess is going to get cleaned up. When I re-configure the Megasquirt to accept an MS2 processor (sorry DIYAutoTune -- I think throwing away my existing setup and going to a Microsquirt is a bit of a sales overreach) I'm going to add in the wiring to send the tach output to the cluster, as well as to send power to the ASD relay which should, in turn, provide +12 to the fuel pump and the injectors. That should cut down on the number of wires that need to be flying all over. The MS and all the sensors will also be grounded properly (to the same place!).

wae
wae Dork
4/12/16 6:23 a.m.

Got a bit farther last night, but I can't escape the feeling that while I know exactly where I am and exactly where I want to be, the further I go down the road the less I really know how I'm going to get there! For now, I'm just doing little tasks and watching them create the big picture after the fact.

Before getting too far along, I cleared off some of the clumps of mud and have about a half-a-wheelbarrow full of dirt I need to relocate to the garden somewhere:

And that's just one side! There's another pile like that on the other side of the car.

I threaded the rest of the wiring out and tossed it all over to the side for cleanup later. The exhaust bolts were a real pain to remove since there was no way to get the impact or even a regular socket on to the fasteners that held the downpipe to the O2 housing. One snapped, one was actually missing (oops), one came off without too much trouble, but the last one was pretty brutal to remove. Once I finally had those off, though, I disconnected the power steering lines and pulled the coolant lines from the heater core. With all that removed, I used some straps and a load-leveler to elevate:

It's a real mess in there and I'm going to need to take this opportunity to clean it up a little bit. There's a bunch of wiring that can be cleaned up as well. I also discovered that there is a large tear in the boot on the right side of the steering rack. I'm not entirely sure how big of a deal that is, but it's something I've got to look at. There will never be another time to replace the steering rack if that's what needs to happen here.

Also, my attempt at a bobble strut didn't really last long enough -- the rubber insulator that I used has totally deteriorated so there's been a lot of movement. I need to modify it to remove the rubber part and just go with a solid steel design.

I placed my DIYAutoTune order yesterday as well -- the MS2 daughterboard, their 10' wiring harness, the PWM mod kit for the idle control, and a couple bulkhead vacuum fittings for the boost gauge and map sensor. To compliment that, I need to get a nice grommet for the firewall to run the MS harness through and then that should go a long way in getting the engine compartment tidied up.

Other than that, I think my next steps include getting a few things off the old motor: alternator, O2 sensor, power steering, transmission, oil filter sandwich plate, intake manifold, boost controller, and probably a couple other things I'm not thinking of now. Then I need to start putting all that stuff on the new motor and getting it ready to be physically dropped in to place. I'll also need to dig out the wiring diagrams and get a voltage regulator so that I can pull the stock ECU completely and have MegaSquirt run the whole show.

HiTempguy
HiTempguy PowerDork
4/12/16 4:09 p.m.

This is a bit crazy, but a guy I've known for over a decade had this at our local rally-x on Sunday...

Purple, two door neon, with srt4 swap, and #42 decals. I E36 M3 you not.

wae
wae Dork
4/14/16 6:19 a.m.

I love that! The wing on the back looks better than I would have guessed!

As I was taking off the parts of the 2.0 that I need to transfer over to the 2.4, I did find this:

I am positive that my crankcase has been ventilated.

At this point, I think I have everything off the old block that I need for the new one:

  • Transmission
  • Clutch
  • Intake manifold
  • Alternator
  • Power steering pump
  • Oil filter sammich plate with the oil temp and oil pressure senders
  • Front motor mount

Since the weather was cooperating a bit, I also got the final bit of clearcoat sprayed on the new head and valve cover:

wae
wae Dork
4/22/16 1:20 p.m.

More work than updates lately.

I noticed that one of the boots on the steering rack was torn when I pulled the engine out. I considered getting a new boot for it and that morphed in to going ahead and replacing the inner tie rods since they are still the original ones. What I wound up doing was getting a remanufactured Shadow rack from '89 which bolts right up, comes with new inner tie rods already installed, and reduces the steering motion from 3.25 turns lock-to-lock down to 2.5.

Before putting that in, though, I went ahead and pressure washed the engine compartment so it's a little bit cleaner. They lie to you, though, in the rack installation instructions. There's a whole big warning about needing to make sure the steering wheel is centered and not turning the rack since it's pre-centered. I dicked around trying to get the splines to engage for about 20 minutes before I saw that there's a flat spot on the shaft, making it so it can only be installed one way. That one way is not with the steering wheel centered - not even close. I did verify, though, that when the wheel is centered now, the rack is also centered. Also, some information about the conversion states that you need to take off the Shadow tie rods and put on Neon ones because they're different lengths. I measured the existing steering rack with inner tie rode and the new one with the Shadow rods and they're both 47 inches.

I have the valve cover installed on the engine and I got the exhaust manifold / turbocharger bolted up last night. I need to get a few things to hook up all the oil and water lines -- primarily I need some of the thread sealant for the oil lines and a bunch of new water hose. I also kind of mocked up the PT intake manifold and it doesn't seeem to push too far forward, but it definitely will not clear the hood. For now, I am going to put the motor in the car without any intake manifold so I can see just how bad it will be to put the PT manifold on.

Slowly but surely, it's coming along!

Knurled
Knurled GRM+ Memberand MegaDork
4/22/16 1:42 p.m.
wae wrote: They lie to you, though, in the rack installation instructions. There's a whole big warning about needing to make sure the steering wheel is centered and not turning the rack since it's pre-centered.

If you still had airbags, and you install the rack with the steering one turn off of "centered", you break the clockspring the first time you go to full lock.

So you need to make sure the clockspring and the rack are centered. Easiest way to do that is to center the steering before you disassemble everything, then run the seatbelt through the steering wheel to lock it in place. Don't trust the column lock.

wae
wae Dork
5/14/16 3:06 p.m.

Between work and family stuff, I've been getting my butt kicked lately and just haven't gotten much done.

I did source a bunch of Gates bulk hose from Rock Auto to put the water lines back together and those are all hooked up with new hose clamps and such. The biggest problem with that is that the water pump outlet to hardline hose is about 4-5 inches long (if that) and requires what is apparently an odd-duck size of 7/8" ID. None of the local auto parts chains seem to have the ability to service that, so I went to Rock Auto for a length of Gates 24014 hose. Priced by the foot, sold in multiples of 3', so if anyone needs a little coolant hose, let me know I can hook you up! Now that I think about it, I should probably have tried Napa or KOI, but I haven't had the time or energy to run around town.

At any rate, I went ahead and mounted up the alternator, which required a little bit of modification to the bracket -- apparently the PT bracket for the turbo motor is different from the non-turbo, so I had to put a little bend in it to make it fit.

I got the power steering adapter painted and bolted up, but the reservoir to pump hose is a little too short and I need to find a way to offset the mounting bracket for the reservoir so that it doesn't rub against the valve cover. The 2.0 PS belt is a little bit too big, so I'll need to measure that out and find a replacement.

The next problem I ran in to is that the mounting plate that is on the car isn't the one that I need -- I've got to go find a Stratus 2.4 bracket that I can bolt my adapter plate to and then the PS pump will have room to mount.

Intake manifold choice is a little more complicated than I expected it to be. The PT manifold is going to require some clearancing on the hood but if I use the 2.0 intake manifold, one of the coolant hard lines is in the way, so I'd have to use the hard lines from the 2.0 and then fab up coolant lines to the turbo and the oil cooler. I'm inclined to take an angle grinder to the hood and put some sort of cowl on it, but we shall see.

Finding a grommet for the megasquirt wiring through the firewall is proving more difficult than it should be, but maybe a Napa or KOI stop will prove fruitful.

Overall, I think fatigue and frustration are starting to set in with this project. There isn't enough room in the garage for the motorcycle, the car, the engine stand, and the engine hoist, so I'm tripping over myself, every time I start to make a little bit of progress on one part of the project, I run up against a brick wall of some sort, and quite frankly by the time I get home from work and the kids get to bed, all I want to do is collapse.

wae
wae Dork
5/16/16 1:21 p.m.

Apparently in order to make progress, I need to piss and moan.

Last night, I got the transmission mated to the engine. In order for that to fit, I had to pull the flexplate off of the 2.0 and put it on the 2.4 crank. With the 2.0 flexplate, I was able to bolt up the clutch (which is no easier with the motor out than with it in!) and then slide the transmission on.

Tonight, I want to get all the braces and bolts in between the trans and the engine along with the starter. Ideally, I'd like to give it a test-fit tonight in the engine bay just to see if there's anything I'm going to need to trim or whatnot in order for it to drop in. One potential problem that I've seen is that the water hard lines are in the way of the shifter cable brackets. It might fit, but it'll be tight. (heh)

Things to do yet:

  • Grommet for the megasquirt wiring harness / drill the hole in the firewall
  • Stratus engine mount bracket
  • Finish putting megasquirt together with outputs for the fuel pump, fan, tach, and IAC
  • Get the voltage regulator
  • Weld up a new solid bobble strut
  • Measure for PS belt and find something that fits
  • Get a longer hydraulic hose for the PS reservoir
  • Build a spacer to mount the reservoir to the head

More than that for sure, but that's what I'm focusing on for now.

Knurled
Knurled GRM+ Memberand MegaDork
5/16/16 4:58 p.m.

I found the dimension from the 2.4 I did a few months back! It was 1.019" for posterity's sake.

wae
wae Dork
8/11/16 4:26 p.m.

Hello?

Are we still here?

Oh, good.

So... yeah... May.

I've been jammed up with other projects (SHARKGUN!) and such for the last couple months, but I have done a few things here and there. As it sits right now:

Motor is assembled and installed (loosely) in the car. To accomplish that, I was gifted a stratus motor mount (thanks Tim!) and I "flipped" an extra trans mount that I had in the garage and filled it with WindoWeld. There is no way on the face of this planet that the front motor mount bracket is going to fit with the structural collar in the way and I'm not really interested in loosening the engine-to-transmission connection. That sort of seems important. To get around that, I've found advice to build a "torque strut" for the upper and lower of the right side of the engine and to put a solid bobble strut on the transmission.

My motor mount arrangement really provides no facility for an upper torque strut at this time, so I'm going to pretend that doesn't exist for the time being. After a couple very frustrating hours on eBay, Amazon, Jegs, Summit, and several other smaller sites, I finally found the magic combination of rod end bushings, weld-on threaded rod end adapters, and DOM steel tubing that should work. I love buying a $5.50 length of tubing and paying $10 to have it shipped about 75 miles.

Anyway.

I also found out that the wreck that resulted in me getting the car in the first place was worse than I ever realized. The core support is still pushed back about an inch or so on the right side. That was never a problem before, but now I'm trying to put the power steering pump pulley exactly there. My tentative plan is to clearance the back of the headlight bucket with a sawzall or grinder to make room for the pulley and belt.

The old Megasquirt wiring is removed and I plan to have the new wiring harness installed tonight. I'm using the grommet that is already in place for the factory wiring harness, so the fit is difficult, but I couldn't find any other place along the firewall where there isn't either heater core on the inside or engine on the outside.

Look ma! No Crane!

wae
wae Dork
8/16/16 6:57 a.m.

Last night I went ahead and got the intake manifold squared away. The PT one wasn’t going to clear the hood, so I drilled new holes for the original 2.0 DOHC manifold and went to line it up. The coolant hardlines were completely in the way, so I cut them back to where they come around on the side of the head. The plan right now is to trim them up a little more and run hoses around to clear the manifold.

Before I did anything with the manifold, though, I power washed it to clean it up a little, so it looks a little nicer now.

The PT fuel rail wasn’t going to work because the mounting tabs were in the wrong place. I was going to weld up some tab extensions and just drill new holes, but the fuel rail wasn’t ferrous, so I’m thinking it’s aluminium. The DOHC rail had been sort of hacked together to accommodate the longer injectors, but it wasn’t really right, so I went ahead and cleaned up and re-welded the tabs so the fuel rail sits tight on the manifold.

Now that it’s all bolted up, I had to make some decisions around water filler neck. I seem to recall talk about the PT neck, but that one didn’t fit right from a bolt-hole perspective, so I went with the DOHC neck and it looks like it’ll work. One of the bolts will be a little tough to start, but it fits.

I need the gaskets for the throttle body and for the water neck, as well as some longer coolant hose for the smaller of the two hard lines.

The wiring harness is pulled through the firewall and I need to go ahead and start splicing on the various connectors. Some research on the MegaSquirt tells me that the spark output should remain the same under MS2-Extra, but I need to add a 12V jumper to the daughterboard. I’m still really unsure of what to do about the tacho output — there’s plenty of talk about a circuit schematic to add, but they don’t go into any detail about where to add it. I’m going to get things wired up without the tach for now and will come back to that and the FIDLE control later.

Also, the voltage regulator is mounted and ready to go.

And there’s plenty of room for the power steering pump:

Things that I know about that need to be done at this point:

  1. PS and ALT belts
  2. Wire up voltage regulator
  3. Gaskets for water neck and throttle body
  4. Build torque strut
  5. Add bushings to bobble strut*
  6. Connect throttle cable
  7. Connect clutch cable
  8. Connect water hoses to hardline
  9. Connect heater core water hoses
  10. Connect exhaust
  11. Connect shifter cables
  12. PS reservoir mounting
  13. PS reservoir hose
  14. Wire engine
  15. Install radiator
  16. Install cooling fans

I’m sure there’s more, but right now that’s kind of the big picture.

*On the bobble strut: I’m afraid it might just be too solid, so I’m thinking that I may have an extra Prothane sway bar bracket bushing laying about. I was going to put a set of those bushings on the trans bracket to put a little bit of give in to the engine mounting.

Knurled
Knurled GRM+ Memberand MegaDork
8/16/16 12:36 p.m.

Wow, that voltage regulator brings back memories...

wae
wae Dork
8/16/16 11:05 p.m.

Tonight I learned that 12mm is bigger than 7/16.

I realize that it is kind of obvious that 12mm is physically larger than 7/16". In fact, it's about 1/32" of an inch bigger. Basically, we're talking about 15/32" versus 14/32". It doesn't seem like much.

I got the rest of the parts for the engine torque strut today, so I went ahead and welded everything together:

It worked out pretty well, although I did need to cut a couple inches off the tube I bought. When I measured the length that I thought I needed, the engine was rocked way back on the side mounts. Anyway, that part went fine. The problem I ran in to is that the bolt hole that I need to connect the strut to is metric. 12mm specifically. I think you know how this is going to end.

The good news, though, is that while an M12 bolt will not fit through the rod end bearing, a 7/16" threaded rod will slide through an M12 thread! So, my plan is to acquire a couple 7/16-14 nuts to lock a threaded rod in place through the hold in the mounting bracket on the front of the engine. That will give me a stud, basically, to run the rod end bearing through. On the other side, I bent up a bracket and put the 7/16" holes in the legs. I still need to drill the hole for the attachment to the control arm, but to attach the heim joint, I'm going to get a 7/16" bolt and nut plus a brass spacer. I'll cut the spacer so that there's a little bit of space on either side of the joint and it rests roughly in the middle of the bracket.

I worked on a few other things so that in the end, I left the engine bay looking like this:

Tim came over and gave me some help tonight. Specifically, he was able to work out how I need to modify the coolant hard lines to accommodate the intake manifold and the heater core connections. Basically, I'm going to chop up the hard lines some more to separate the return and the source lines. That way I can angle things a little better.

In addition to that, we got the shifter and clutch cables hooked up -- part of the hardline re-routing is to keep it out of the shift cable bracket! The thermostat is installed along with the fill pipe. We also got the power steering reservoir bolted up to the head using some old nuts as spacers. Amazingly, the return line for the P/S system actually fit, so I don't think I need to get a new hose for that, so that's good!

I also picked through the wiring harnesses that I have from the 1gn and from the PT and went ahead and plugged in the various connectors to their sensors. Additionally, I started running the new vacuum lines. Little things, to be sure, but now the wiring portion of the project can get underway and I can work on how I route everything. Overall, a night of good progress!

wae
wae Dork
8/18/16 6:46 a.m.

Minor progress last night, but a couple things off my list. The throttle body is on, the exhaust is bolted up, both new engine mounts have some paint on them, and the solid bobble strut is re-installed with prothane bushings. That leaves my list like this:

  1. PS and ALT belts
  2. Wire up voltage regulator
  3. Build torque strut
  4. Connect water hoses to hardline
  5. Connect heater core water hoses
  6. Wire engine
  7. Install radiator
  8. Install cooling fans
  9. Install MS2/Extra firmware
  10. Re-install MegaSquirt

I'm sure that list will wind up growing before I'm all finished, but that's what's on my radar at this point.

Kylini
Kylini HalfDork
8/18/16 8:17 a.m.

Love the progress and can't believe I missed this. Last Gen 1 Neon I remember was my friend's in undergrad which had a serious overheating problem. As in, we drove it a quarter-mile at a time then stopped for 20 minutes to get it back from the repair shop he couldn't afford. Yeah... it was fun pretending my Dodge Intrepid was a service vehicle though, complete with flashy yellow light! That car got turned into $300 from a junker.

Needless to say, yours is much better.

wae
wae Dork
8/21/16 10:11 p.m.

You say that, but your friend's could go a quarter mile further than mine can right now, so... =)

My wife had to go out of town this weekend but before she left, she arranged to have one of my daughter's friends spend the night. So, that pretty much shot Friday and early Saturday. Then my Father-in-Law dropped in from out of town, which was pretty cool, but it meant I didn't get much work done this weekend.

I chopped up the water hardlines a bit and I think I've got them how I need them. Now I need more hose clamps and several feet of 5/8" ID heater hose to finish up the cooling system.

The engine mounts are done and installed:

Naturally, this couldn't possibly be a simple thing to do. There wasn't enough space to get the nut in place on the backside of the engine bracket, so I had to grind the edges down until it was jammed between the bracket, the bedplate, and the oil pan. With the motor secured, I did a test-fit of the hood and there's room to spare! So that part is more or less complete.

Next up, I started on the wiring. One thing I noticed out of the gate is that the wires from the DIYAutoTune harness are for a 3.0 MS2 board, not for a 2.2 board. Or at least, not for how the instructions told me to put my 2.2 board together. It looks like I don't have a dedicated "sensor ground" wire on my PCB, but I think that's okay -- all of the ground wires should be on the same ground plane, so no big. I do need to move some wires around, though, because the PCB is set up for pins 7-11 and 19 to be ground with the harness set up for pins 15-19 with pin 7 being sensor ground. Also, the ignition outputs need to be pins 25 and 27 for X11 and X12 outputs. Shouldn't be a big deal to move around. I've started to connect the wires up in the engine bay, but first I went ahead and ran all the wires to their actual location so that the finished job will be nice and clean. (The clamps are to hold the wires in their spot)

Something else that I am almost certain to forget is that I put the wideband O2 sensor in the bung, but it still needs to be tightened.

Also, I remembered tonight that I put a new steering rack in, so I'm going to have to worry about getting it aligned somewhat when I put it all back together.

But let's not get ahead of ourselves...

wae
wae Dork
8/24/16 4:04 p.m.

The wiring has been a real PITA. Not difficult, just very tedious. At this point, I have the engine wired, though, and gave it a minor electrical test. The battery is reconnected, and power seems to flow to the electrical systems:

That is MegaSquirt2/Extra code getting loaded. Exciting times, Goose.

One weird problem that I need to troubleshoot: The ASD and fuel pump relays both need to be fired up from the MS fuel pump relay output. In order to do that, I’ve added a third relay so that the MS will power the relay which will, in turn, power both the ASD and fuel. The diagram I found indicated the need for a diode to prevent the fuel pump and ASD relays from feeding in to each other, but it looked like the diagram showed the diodes installed backwards, so I installed them the way I thought they should be. Now, as soon as I plug in the MS controller – even with the ignition off – the fuel pump turns on. So, MS is powered down, but we’re pumping fuel. Apparently I got too smart for myself.

MS is responding to throttle input and sees the O2 sensor and the CLT sensor, but I haven’t calibrated any of the other sensors or anything yet. For now, I’m going to leave the IAC disconnected like it was before and I’ll worry about that later. Likewise on the tach output. I completely don’t understand the schematics that I’ve found from the Megamanual, so I’ll get back to that later.

wae
wae Dork
8/24/16 10:05 p.m.

Yeah, swapping the diodes around was not the right move, so I put them back. That works better.

It also worked better when I remembered that the ECU fires the ASD and fuel pump relays by grounding them.

It looks like Megasquirt is working at this point, which is awesome. The fuel pump control works and I get all four injectors clicking on command.

Next, I need to wire up the ignition box and the air temp sensor and then get the sensors calibrated.

wae
wae Dork
8/26/16 7:26 p.m.

No chance that I'm going to make the two-day OVR/WOR event this weekend, so yet another that I'll sit out. I'm a bit bummed by that, but it's my own damned fault so I'm going to use the time to sally forth and try to get the car started before I go to work on Monday morning. I lost two nights' of work this week to some things I needed to do for church and for the kids' school, but I've gotten time in when I could.

Megasquirt is nearly ready to get a base tune laid on it. I'm going to use the GM air temp sender and the stock DOHC coolant temp sender and they are reporting back rational numbers to TunerStudio. One note on that: I went nuts (short trip) trying to find the calibration menu in the latest version of TS. Turns out you have to click on the menu item to unlock the calibration options and THEN do the calibration. I suppose there's a good reason for that, but I didn't find it very intuitive. Anyway, that's done and next I need to do something about my wideband. I have some variant of the AEM UEGO wideband and it's all over the board. With the sensor unplugged, the gauge reads 14.8 and MS interprets the voltage as 14.6. With the gauge plugged in, it reads 15.8 when MS shows 15.0 and doesn't seem to be very reliable. Obviously, that's kind of a big deal, so I'm going to need to play around with that and figure it out.

The other thing I need to do with MS is clip the spark wires back by the DB37 and connect them to the ignition box and then connect the ignition box output to the wires that run to the coil. But, I used all 40 of the weatherproof butt connectors that I bought, so time for a trip to the store.

Once those two things are figured out, an SRT4 base tune is in order and then MS should be ready to rock.

I've got to wire up the alternator yet and then put back a bunch of wires for the light bar, headlight, horn, and stuff like that.

The hot side pipe is connected to the turbo and bolted to the bottom of the structural collar. It doesn't reach to where the intercooler is on the Neon, though, so I've cut off the silicone hose from the end of the PT hot side pipe and replaced it with one of the angled elbows from one of the PT cold side pipes I have laying about. I'm going to put a section of aluminium pipe between them and that should complete that side, but the big bracket that is part of the lower torque strut mounting is in the way so I need to chop a section off of that to make room. The old hot side pipe that I built for the car way back when appears to fit, so I'll re-use that. I'm a little concerned that the elbows might not hold with the additional pressure, but we'll burn that bridge when we come to it.

For the cooling system, I have all the hoses cut and fitted but I need to add hose clamps and some metal strapping to the lower hose to keep it in place. It appears that the turbo intake pipe will still fit in there, but that remains to be seen. I'll also need to see about how I mount that and if the bracket that I made for the 2.0 will work -- it should, since the head is pretty similar and that's what it mounts to.

That's enough for now. Back to the garage to start knocking items off this to-do list.

ssswitch
ssswitch Dork
8/26/16 8:01 p.m.

Good progress, man! It sounds like things are going smoothly even with one event missed.

EvanB
EvanB GRM+ Memberand UltimaDork
8/26/16 8:26 p.m.

Need a car to drive this weekend? You're welcome to try the Miata but you may not fit.

wae
wae Dork
8/27/16 8:10 a.m.

I appreciate it, but I'm going to spend the time working on the car to try to get it fired this weekend. This sounds weird, I know, but I spent a lot of time earlier in the year sitting on the couch whining that I wasn't motivated enough to go work on the car. I didn't do the work when I should have, I've gotta suffer the consequences.

I blame my upbringing.

Last night, however, I did manage to learn another life lesson: Don't use the angle grinder without the little safety guard. I still have all 10 fingers, but it was closer than I'm really comfortable with.

1 2 3 4 ... 24

You'll need to log in to post.

Our Preferred Partners
oIHMs9v33IbssBl7NKoS3M5kPFjfcfrPENGJsppGSfLtEvpU1mrkiCWmdQNXK3fa