1 2
docwyte
docwyte UltraDork
1/28/19 3:30 p.m.

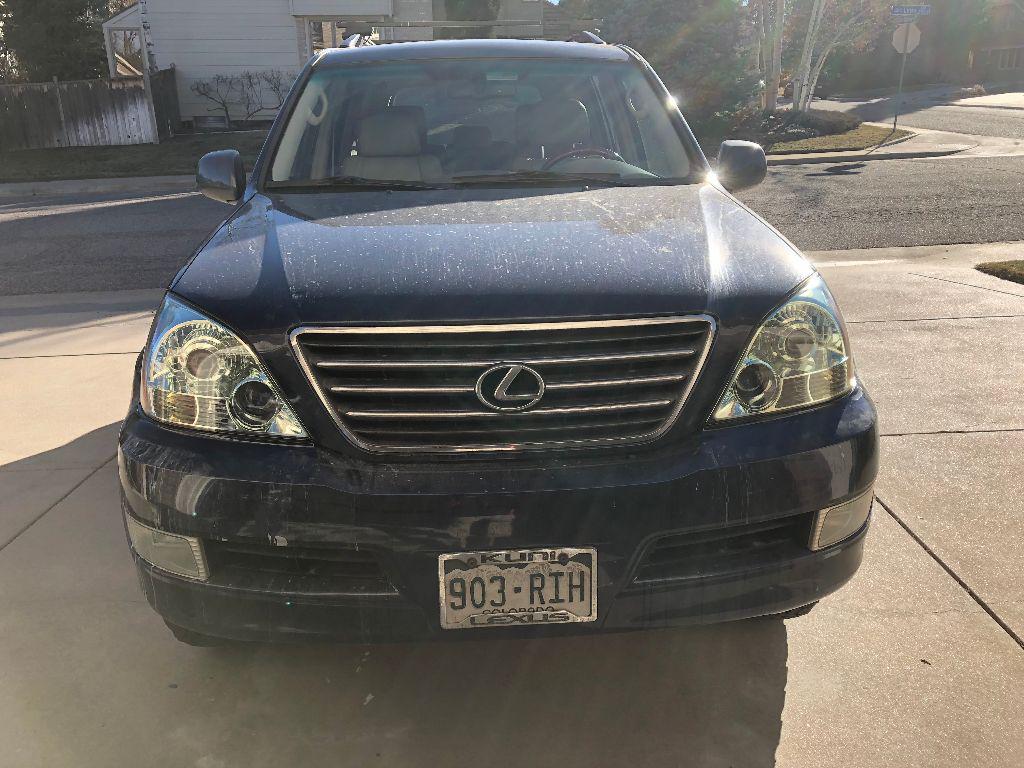
So I've actually owned this SUV since 2012.  I originally bought it for my wife with 39k miles on it, Lexus CPO'd.  At around 75k miles, right before the warranty expired, Lexus did the timing belt/water pump under the CPO warranty.  It got severely hail damaged in one of our typical hail storms here and got fixed by the body shop.  New roof, hood, PDR, paint, etc, etc.  As such I kinda don't care so much about it.  It's been super reliable tho, only normal maintenance with 120k miles on it now.  Only weird thing was a water leak from the drivers front roof rack foot.

I bought myself a 2015 Cayenne Diesel a year ago, after offering to buy my wife a new car and take on the GX.  She initially refused but after seeing and riding in the Cayenne for a few months that became her car and I inherited the GX.  This thing is a beast and it handles like one, hence the Blue Whale.  It goes ok with the V8 but isn't all that happy on a twisty road, especially compared to the Cayenne.  It has had the positive effect of slowing me down tho, doubt I'll ever get a ticket in it.

First thing was to make sure it fit underneath the lift.  That's my old M3 track car, now replaced with my 996 Turbo.  Luckily it fit with room to spare, even with my Thule cross bars on.

My wife doesn't take the greatest care of her cars and I don't get in her car nearly enough to make sure all is well.  So when I took over the GX I immediately discovered the TPMS on, a bunch of nails in tires and the alignment out.

I wanted to make it look a little less like a mall crawler, so I installed a set of BFG KO2 AT tires.  They look beefy and work fairly well in the snow.  Definitely not Blizzak's but good enough.  I drove it like this for about 10 months.  I kinda abuse this truck, I keep the inside nice and clean but don't really care to wash it much.  Every so often I hit it with my pressure washer.

Next up was to try and update the truck a little.  One of the features I really hate about it is the rear door.  It's a swing open barn door arrangement with fixed glass.  It really sucks!  I wish Toyota had used the tail gate from the Cruiser or the hatchback with electric up/down glass from the 4Runner instead.  Oh well.  I spent $25 and installed a gas strut on it, so at least it doesn't try and kill me by slamming into me anymore.

I also tinted the front windows, polished the headlights and installed LED bulbs.  Now I can actually see at night!
Next up is doing something with the suspension.  It has the electronically adjustable shocks/struts and height adjustable rear air bags.  All that stuff has 120k miles on it and the shocks/struts are getting a bit worse for wear.  The air ride is still working, so I'm going to leave it alone for now.

About a year ago, toyota blew out all their TRD Pro suspension kits for 1/2 price, $550+ shipping.  I thought about buying one then and throwing it in my basement but of course I didn't.  Luckily I was cruising craigslist this past Friday and found a TRD Pro kit off a 4Runner locally.  Only had 15k miles on it before the guy pulled it off for some Icons.  Best bit was I scored it for $200!

These should fit with very minor modifications.  I've got to shave down the lower strut eyelet just a tad and I may have to enlarge the upper rear shock bracket hole on the truck.  Looking forward to getting them on, should be a huge improvement in ride/handling, plus they'll level out the ride height.  Should raise the front about an inch or so...

Plan is to keep this as my daily for another 2 years, then give it to my daughter as her first ride when she turns 16.   After the suspension is getting an Apple car play double din stereo installed with new front speakers.  This car is a base model, no Nav, no KDSS.

mr2s2000elise
mr2s2000elise Reader
1/28/19 5:03 p.m.

Looks great 


surprised that cpo warranty covered t belt maintenance 

ebonyandivory
ebonyandivory PowerDork
1/28/19 5:26 p.m.

Always good to be able to give your kid a Lexus suv for her first vehicle. It’s sure a safe choice.

pinchvalve
pinchvalve GRM+ Memberand MegaDork
1/28/19 5:44 p.m.

Love it, great plan and a great first ride.  My daughter loved her Cherokee because it was so tough. 

docwyte
docwyte UltraDork
1/28/19 6:07 p.m.

In reply to mr2s2000elise :

The water pump was weeping.  That’s why they covered it and the timing belt

docwyte
docwyte UltraDork
1/28/19 6:16 p.m.

Truck didn’t come with a tow hitch and I also wanted to put my trailer brake controller in.

A quick visit to eTrailers got me a Curt hitch that’s rated to 6000lbs and a plug n play  harness for the trailer brake controller.

The truck from the factory already had a 7 pin trailer plug and the hitch just bolted right in.  Now I can tow as well as use my trailer mounted bike rack.  Because of the stupid rear barn door I had to get a swing away for the bike rack, otherwise you can’t get into the back of the truck with the rack on.

Hardest part about the trailer brake controller was finding a place to put it


docwyte
docwyte UltraDork
1/28/19 8:36 p.m.

In reply to ebonyandivory :

For sure.  I fear for what she runs into with it! 

docwyte
docwyte UltraDork
1/28/19 8:37 p.m.

In reply to pinchvalve :

It's super reliable, despite its age and mileage (it'll have close to 150k when I give it to her) I know it won't strand her on the side of the road

docwyte
docwyte UltraDork
2/3/19 11:55 a.m.

Read up on the suspension install, it should be really straightforward.  I need to shave down the front lower eyelets a little and probably enlarge the upper rear shock hole bracket a bit.

Needed some tools for the job, a 21mm wrench and a step bit large enough to go to 1".  Quick trip to Harbor Freight and I'm good to go.

Hopefully find some time the weekend of February 16-17 to get this done.

EDMSolutions
EDMSolutions New Reader
2/3/19 1:20 p.m.

Those self-tappers look dangerous to any unthinking/forgetful fingers that might try to open the fuel door or hood.

docwyte
docwyte UltraDork
2/3/19 1:24 p.m.

In reply to EDMSolutions :

They're a lot further away from your fingers than they look.  I'll probably nut/bolt it tho, just to make it a cleaner install.

On the suspension I checked the M8x1.25 bolts holding on the remote reservoir bracket, a few were stripped out and I was missing the two that actually hold the bracket to the frame rail.  A quick trip to the hardware store got me what I needed, along with 2 plastic washers to place in between the bracket and the frame rail. 

docwyte
docwyte UltraDork
2/24/19 7:40 p.m.

So my wife and daughter were out of town for a dance competition and my son was off with a friend.  Time to jump on installing the TRD Pro suspension in the Blue Whale.  Handling has definitely degraded and in last weeks cold snap it felt like the shocks were frozen. 

Truck up in the air, actually the first time I used the bridge jacks to lift the truck.  They worked great, just had to stack my mandrels to get them high enough to reach the jack points.

Wheels off, which I promptly rotated as that's overdue.  Ok, front shock assembly.  These were a major PITA!  Mostly because the truck has electronically adjustable dampening and the module is bolted onto the top of the front shock assembly. 

See the wiring plug on the top?  Yeah, that thing is the control module.  It's held in place with two 4mm bolts, one on the front, the other on the back.  They're packed with dirt/road grime and strip easily.  I also discovered that the inner CV boot on my passenger side axle is torn, hence all the dirt/grease you see.  I'll need to replace the axle next.

Here are the 4mm bolts...

I managed to get this off the drivers side without issue.  Once you unclip the harness and unscrew the one bolt you can see, you can then rotate the entire assembly to expose the bolt on the other side and unbolt it.  The bracket comes off with a 17mm nut and you're left with this.

I cut the plug off the harness, wrapped the end in electrical tape and then plugged it back into the body side harness.  That way no dirt/grime will get into the the plug and if anyone ever wants to go back to stock, they can.

Once I had that total bitch of a module out of the way, it was 3 14mm nuts on the top, a 19mm bolt on the bottom, 2 19mm bolts holding the spindle on, 1 17mm bolt for the swaybar endlink, a cotter pin/19mm nut on the tie rod and 2 14mm bolts for the swaybar bracket.  Then the whole assembly dropped out.

Now you have to grind some material off the bottom eyelet of the TRD Pro shocks, they're 2mm wider than the stock stuff and they won't fit into the lower shock bracket.  I used a flapper disc on my grinder to do that.

New TRD Pro hotness installed.  Everyone knows that red is better!

Ok, all bolts back on, torqued, wheels on, etc.  On to the rear!

On the back, it should go quicker as there aren't any modules on the tops of the rear shocks, thank the lord!  However, it's not just a plug n play.

First off, do yourself a favor and use a sawzall and cut the upper nut right off.  You're not gonna reuse this crap and it's near impossible to unbolt that top nut. 

Once you do that, undo the bottom 17mm bolt and pull the shock out slightly.  Unclip the electronic ride control harness, clip off the end of the plug, yada yada.

Ok, now you need to grab your drill with a stepper bit on it and enlarge the upper shock hole to 1".  Take a M8x1.25 tap and clean out the threads on the frame where you're going to mount the remote reservoir.

Go ahead and push the shock up into place, making sure you have the collar seated all the way up into your enlarged hole.  Put the upper bushing on, thread on the nut, tighten down.  Use a bottle jack and lift up the hub so you can put the lower shock eyelet on, run down the 17mm bolt. 

Now we get to deal with the remote reservoir.  In the above pic you can see the threaded hole in the frame I'm going to use, it's the top left hole of the three right behind the swaybar link.  I routed the hose behind the shock so it wouldn't get hit by the tire.

Wheels on, torqued down.  Test drive taken.  Truck feels SO much better!  I measured the ride height before I started and it basically got lifted 1" all the way around, which mades sense as this suspension lifts a 4Runner 1".  These shocks are longer than stock and my rear shocks were totally dead, no rebound at all. 

Thankfully the truck still fits underneath my lift.  Not gonna lie, this job was a royal pain in the balls.  Mostly because nothing just bolted right in and those modules on the front took a ton of time to get off.  I actually stripped one of the bolts and ended up using the sawzall to cut through the bracket on that side to get it off. 

With any luck this stuff will last a long time.  I'll get an alignment done this week, although the only thing adjustable is toe and I didn't mess with the tie rod length at all, so it should be fine.  Next up is dealing with that torn front inner CV boot.

docwyte
docwyte UltraDork
2/25/19 8:07 p.m.

So I thought I'd farm out the CV/axle job because I was feeling lazy and how expensive could it be?  $200 for a rebuilt axle and 1 hour of labor, so maybe $350?  Haha!!  I don't know why I keep getting surprised at the cost of jobs now, I guess it's because every shop, including the Indy's, uses book time now. 

So I called an Indy and got quoted $750, dealer wanted $840.  Holy schnikes!  The Indy wanted to charge me $500+ in labor alone to swap out an axle!  Are you kidding me?

Asked around on the GX boards, everyone recommended CVJ to get the axle from, they only rebuild stock Toyota axles, using stock parts.  $185 for an axle and it turns out they're in Denver, all of 30 minutes from me.  So I ordered one and I'm going to pick it up at lunch on Wednesday.

Ordered the 35mm socket I need for the axle nut and I'll pick up a set of prybars and a better, higher torque setting torque wrench. 

It'll take me all of 1.5 hours to do, I'll get some new tools out of it and I'll still save enough to buy the bigger tool box I want from Harbor Freight.

mr2s2000elise
mr2s2000elise HalfDork
2/26/19 12:50 a.m.

Denver mechanics must be smoking a lot of weed 


my LC200 - much more of a “whale” than your skinny gx - axle replacement labor was $340

thatsnowinnebago
thatsnowinnebago GRM+ Memberand SuperDork
2/26/19 1:58 a.m.

Have you thought about getting new bumpstops too? Wheelers Offroad sells their superbumps that might work for you. They're nice progressive polycelluar foam pieces that smooth out the big hits. I run them on the front of my 99 4runner and have been pleased with them. They'll work in the rear too, you just need a threaded hole. 

Superbumps

docwyte
docwyte UltraDork
2/26/19 8:46 a.m.

In reply to mr2s2000elise :

Right, so with charging slightly over retail for the part, that makes it $550.  Not $750.  They charge 2.5 hours of labor for a job that takes them no more than 1 hour and then make a bunch of money on the part too.  $750 I'm not paying.

that snowinnebago, the stock bump stops seem fine.  This thing is basically a mall crawler, so as close to stock is the way I want to keep it.

amerson
amerson New Reader
2/27/19 12:32 a.m.

Looks great. It is a nice DD with plenty of power.

docwyte
docwyte UltraDork
3/1/19 2:37 p.m.

I was at it early this morning replacing the axle.  Pretty straightforward job, even though I'd never done it before.  The worst part was getting the axle out of the spindle and the diff and then reseating the rebuilt axle into the diff.

On the lift, in the air, wheel off.  Take off the dust cover, then the cotter pin and retaining nut, then use a 35mm socket to remove the axle nut.  Now take off the cotter pin on the tie rod and use a 19mm to take off the castle nut.  I bang the spindle with a BFH to pop the tie rod out.  Now use a 17mm to take off the swaybar end link and pop it out of the spindle.

Now use a 19mm and take out the 2 bolts on the bottom of the spindle and it'll rotate freely.  I used a BFH to bang the axle out of the spindle, then pulled it out.  I then used a 2' prybar to pop the axle out of the diff.  Make sure you have a drain pan down, as fluid will come out.

Now seat the new axle into the diff, with the channel in the c-clip pointing down.  Slide it in carefully so you don't nick the seal and make sure you have the splines lined up.  Now using the axle itself as a slide hammer, slam it into place. 

Pull back the spindle, line up the axle in there and seat it.  Assembly is the reverse as they say.  Remeber to use blue loctite on the lower spindle bolts. 

Not really any pics of the work as I was working pretty hard to get it done fast.  I'm getting a little residual leakage of diff oil off my skid plate that I'm hoping is just oil I didn't clean up from when I pulled the bad axle out.  If not, that means I nicked the diff seal when I installed the new axle and I've got to take it all apart and replace the seal.

I've cleaned up the skid plate again really well and will keep an eye on it.

Yup, this axle is definitely bad...

docwyte
docwyte UltraDork
3/9/19 7:20 p.m.

So I think I nicked the inner diff seal when I either popped the old axle out or seated the new one.  It seems to be tattooing my driveway.  Also, right on time, my radiator is leaking.  Argh!  This is my winter daily driver/ski machine.  I can't have it down while I wait to have time to fix it and gather parts.

Off to the shop it goes Monday am.

docwyte
docwyte UltraDork
3/15/19 9:12 a.m.

Got it back from the shop Tuesday, just in time for our huge storm Wednesday.  Truck did fine, shop replaced the diff seal and the radiator.  Next time I do an axle, I'm just going to replace that seal period. 

Next up is tool storage.  I bought some more tools to do the axle job and I was pretty much maxed out on tool box space to begin with.  I thought about replacing my tool box with a bigger one but some time in the garage with a tape measure showed me that I don't have space for a larger tool box.  Drat! 

I stewed on that for a bit and thought maybe I'm thinking about this all wrong.  Maybe I don't replace my tool box, I replace my workbench.  Which is a two piece deal, workbench is one piece and then a cabinet with two drawers and cabinets slides underneath it.  It doesn't hold very much stuff, so if I get one of those large, rolling work bench/tool chests I can have much more storage and the same foot print.

A little searching online found me this from Home Depot.  It's the same width as my current workbench but has loads more storage, plus a power strip and USB plugs.  I just got my REI dividend, which I converted to cash and it'll pay for it.  Score!  Ordered it yesterday, should be here in a week.

Dirtydog
Dirtydog GRM+ Memberand Dork
3/15/19 9:36 a.m.

Good score.  A 2 for 1 shot.  Having the power strip is an added bonus.  Perhaps a small rolling cart would be nice.  Having tools in one place, next to your project, is always a good thing.

docwyte
docwyte UltraDork
3/15/19 10:27 a.m.

In reply to Dirtydog :

For sure.  The good thing about my garage is that it's very compact.  So it's only a few steps from my lift to the work bench.  I also tend to use the lift decks as a place to hold my tools for the job.  Convenient!

Bubbal
Bubbal GRM+ Memberand New Reader
3/15/19 11:22 a.m.

I had a 2000 LX-470, also called "the Beast".  We bought new in SoCal, saved $8K from prices in NorCal where we lived.  Drove it for 16 years and sold it for 10% of purchase price with 230K miles on it.  Very reliable, wish I had improved the suspension.  The only unusual repair was the ignition key cylinder - it wore out after soo many starts.  I liked the rear hatch on the LX - agree with you about the barndoor on the GX.

J1000
J1000 New Reader
3/15/19 11:54 a.m.

Super cool GX. I love the look of those things. Also you have an '08 with the good engine and transmission. I have an '07 LX with the same trailer brake controller. Found out Wednesday that it pulsates the trailer brake when the truck's ABS is activated. Sweet truck, these things are Colorado Cadillacs :)

docwyte
docwyte UltraDork
3/17/19 5:25 p.m.

Took a couple of minutes today to replace the self tapping screws holding my trailer brake controller in place with nut/bolts.  Much less chance of finger injuries now and it makes for a neater looking installation.  Result!


Oh and the drivers seat outside thigh bolster split open.  Obviously all the years my 105lb wife spent driving it wore the seat out, lol!  Trying to figure out an economical way to repair this, the truck has done a good job of draining my wallet this past year.

1 2

You'll need to log in to post.

Our Preferred Partners
TXXq8KummmPcKBRwGeeEhS4nBW96JV2LngcSzj3KugGYgMxO0wh0Nr7CBj48urmJ