1 2 3 ... 11
Rad_Capz
Rad_Capz HalfDork
10/14/13 9:39 a.m.

I started this project before we had a project/build section here. So I'm going to copy/past it over here from a thread on another forum till I get up to date and then update as I move along

[URL=http://s240.photobucket.com/user/NOTATA/media/pt_winnerswhats_hot9image.jpg.html][/URL]

As some of you know, I won the grand prize in the Performance Therapy Online Photo Contest a while back with a photo my bud John Hendrick took at the Sebring road race track. Some of the prizes awarded included a Set of Yokohama tires, a set of Rushforth wheels, and a set of Baer brakes which are going on my 70 Firebird.

I'm going to try to provide a lot of information in this thread that may help others learn about these products and installation. DISCLAIMER : I am not an engineer/expert in suspensions, Tires, Wheels, or Brakes but will try to offer information based on my previous experiences (including mistakes lol) and what I learn along the way installing these products.

My old Yokohamas were worn out so that worked out perfect. I'd been holding off for a few years on bigger brakes because that required bigger wheels AND tires! The combined expense was out of my budget so I just kept running the stock style single piston front/drum rear brake setup with 17" wheels and some sticky Yokohama AO32 tires. I had a lot of problems keeping brakes on the car at road courses and kept making improvements with braided lines etc. until I got to the point of running a dedicated set of track brakes using race pads and custom made race shoes with one set of rotors and drums and a completely different set of pads, rotors, shoes, and drums for the street. I've been switching everything and replacing the fluid before and after every track event. The rotors got so hot on track I would crystalize them and have to get new ones before the next track event.

So after checking all of my possible options for wheel and tire sizing and talking to Jay at Rushforth about available wheel sizes, I decided on 18" X 10" wheels all around and the newer version of the Yokohama DOT R tires I had before. They are the AO48 in 285 and 295 18's. The 285's up front are going to be a little tighter fit than the 275s I had and will reduce the turning radius a little but I think on track they'll be great in the corners. 295's on the rear will be no problem since I had 315's before and they just rubbed a tiny bit, only on track at full tilt when I hit a corner curb too hard and the rear moved the leaf spring setup enough to touch (they were really stuffed in there close). So the 295's will give me a little extra room which eliminates the immediate need for some type of panhard bar or other device I'd been considering to limit rear movement.

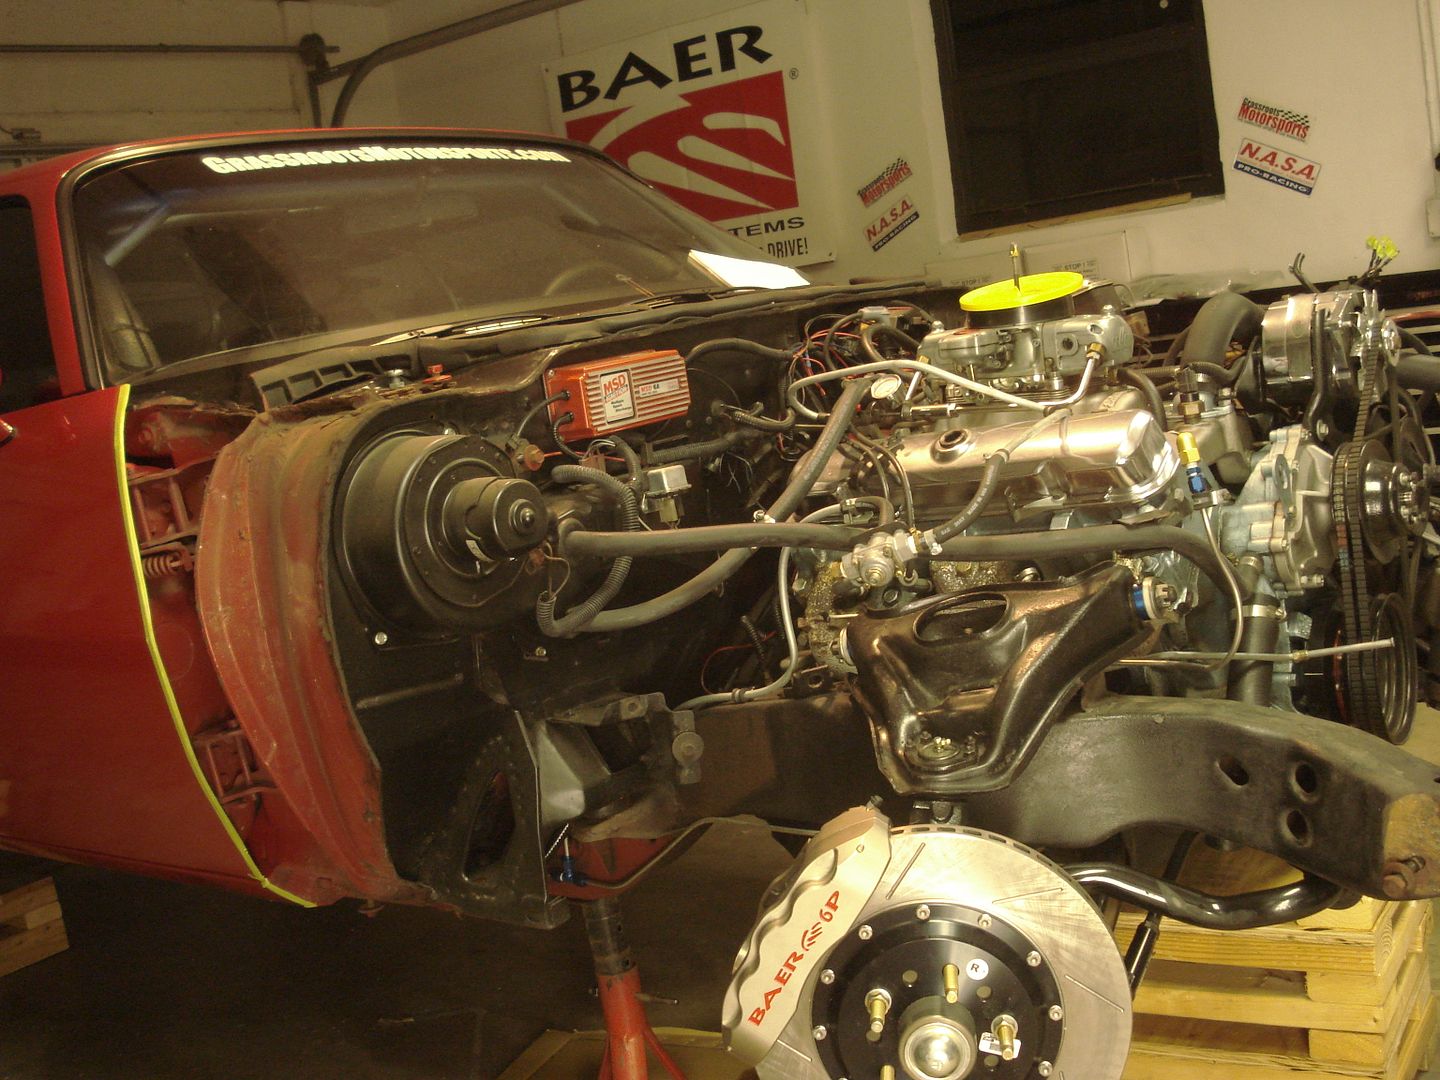
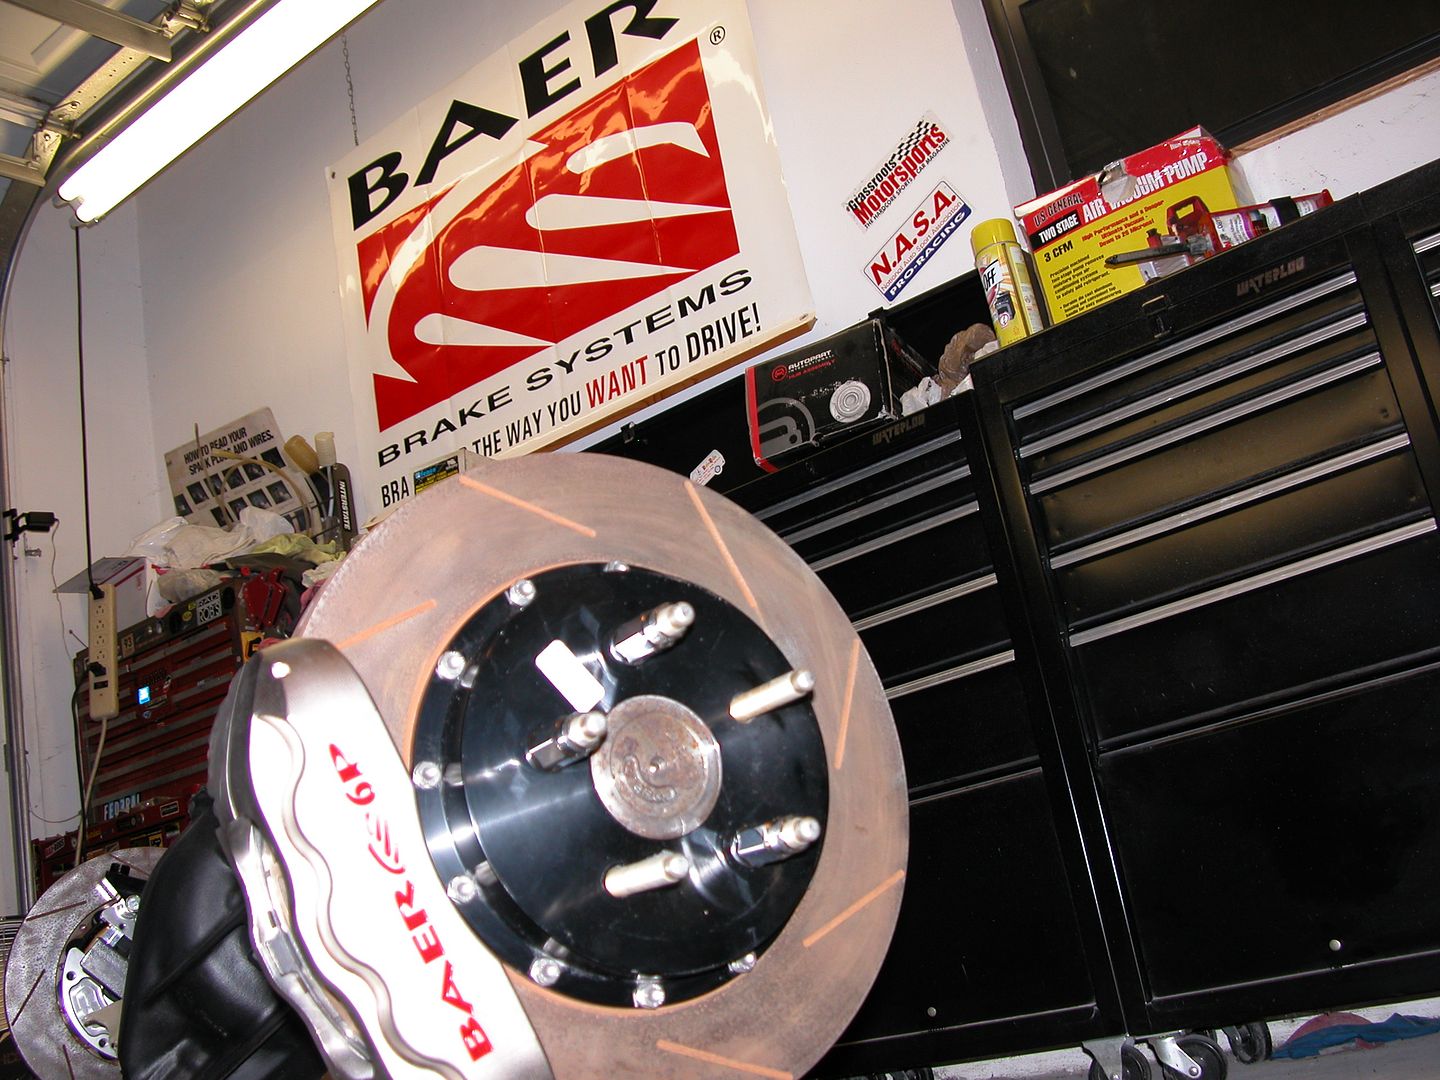
Before Todd at Baer passed away he really hooked me up with some killer brakes! I talked to him about what I did with my car and explained that although the car's pretty and photographic, I'm more about function and that I'd rather have brakes that worked well on track than something pretty. I'm no brake engineer so I left it up to him and he went way out of his way, and beyond the call, to hook me up with a set of 14" slotted rotors (all around) with their 6P 6 piston calipers, parking brakes, and an adjustable proportioning valve for the rears. To top it off they sent them in their "Nickle" finish!

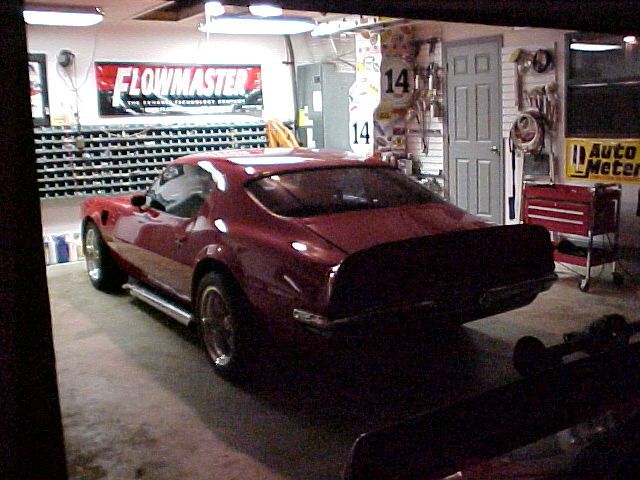
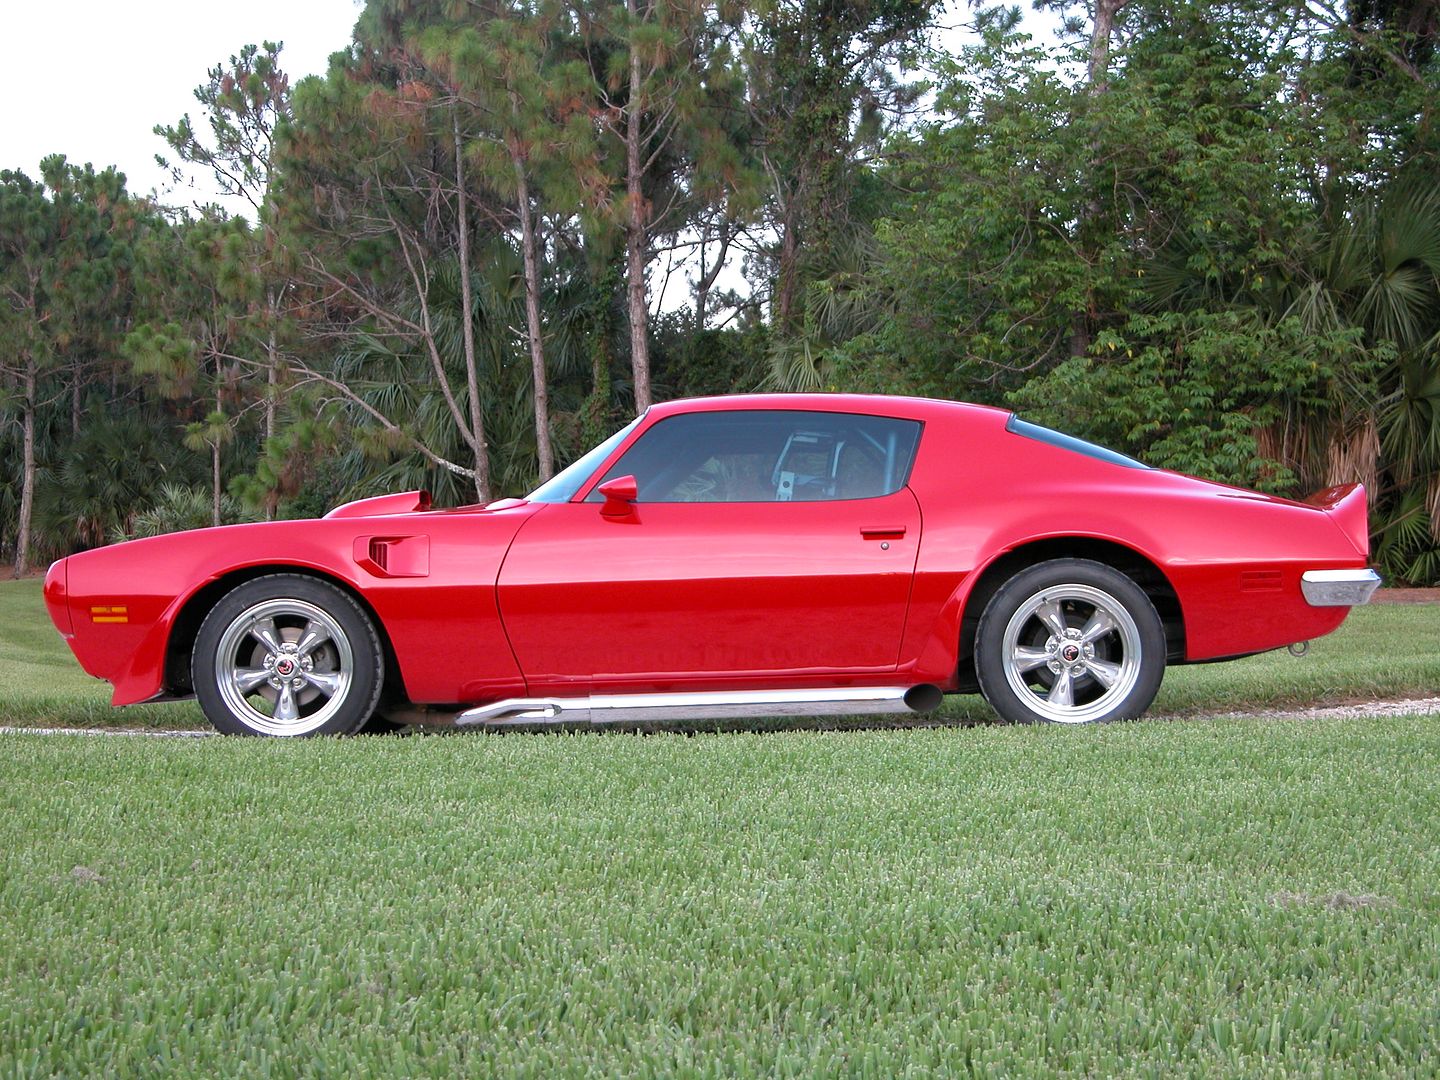
I've been daily driving The 14 Car on the street and no track days in a while so there's no numbers etc. on it now, but here's a "before" pic. I can't order the wheels until I get the brakes installed so I can measure for the backspacing required. I'll keep updating as I progress with the install.

http://www.baer.com/products/calipers/index.php http://www.rushforthwheels.com/ http://www.yokohamatire.com/tires/advan_a048.aspx
Rad_Capz
Rad_Capz HalfDork
10/14/13 9:48 a.m.

Tires are the limiting factor to any suspension upgrades that increase the handling capabilities of the car since the contact patch, compound, tread pattern, and casing design combine to provide the connection of the vehicle to the pavement. For a car like mine that gets used on road tracks we use a wide, soft compound tire, that has big tread blocks. It is a type of tire designed for track days on full size road courses that is still barely streetable and carries a DOT # so it's legal. These are road track tires which require a certain amount of heat in them to function at their best so the first lap or two on track brings the tires up to temperature. Tires designed for auto-X are different and do not require the warm up that road track tires do. Our first couple laps is like a drag car warming up slicks to get them sticky.

A wide tire gives a bigger footprint and with the larger contact patch comes increased traction. At 285 mm front and 295mm rear these tires are almost a foot wide, about double what the stock factory tires were! Double the width, double the grip = double the FUN!!

These Yokohamas have a treadwear rating of 60 which is very low and indicates a soft compound so you wouldn't expect to get a lot of street miles out of them. I don't care about longevity. Chances are, the tires will start to dry and loose their grip in a 3-4 years before I wear them out anyway. At least thats what happened with my last set and 6 years is max tire life. Yokohama makes these AO48 tires in 2 different types. One for lightweight cars and one for heavier cars like mine. The difference in construction helps keep the tires in the optimum heat range for the rubber compound to provide the most grip. If I ran the tires designed for the lightweight cars on mine, the tires would overheat, and become "greasy" by the middle of a track session. Tire life would be greatly reduced.

The tread design on these tires is designed to channel water in rain if necessary (road course track days do not stop for rain) and keep the tire DOT legal. The large blocks provide a very stable connection to the pavement. The taller and narrower the tread blocks are, the more the blocks can move (squirm) and on road tracks cars with tires like that are limited by the tires.

The rounded casing design of these tires provides a good contact patch and smooth transition from full braking to cornering loads and again when rolling back into the throttle through the turn with a predictable feel. Tires like these don't squeal around corners so the driver has to pay more attention to how the car "feels" through the steering wheel and seat of the pants.

http://www.yokohamatire.com/tires/advan_a048.aspx

Rad_Capz
Rad_Capz HalfDork
10/14/13 9:48 a.m.

Before I won the contest I'd been trying to just have as much fun as I could while retaining an original type single piston front disc/rear drum brake system. Of course I keep replacing the calipers, wheel cylinders, master cylinder etc. and I installed braided flex lines to replace the stock rubber ones. I tried a number of different pads and shoes over the years and the most recent and best setup was having Porterfield race pads on the front with custom made Raybestos race shoes in the rear. I kept dedicated street pads, shoes, drums, and rotors and swapped everything and bled the brakes before and after every track day. A lot of work, but the race setup worked so much better on track than stock stuff it was worth it. The biggest drawback was that I would get the rotors so hot on track because of the race pads that I'd crystalize them and have to junk them after a track weekend. Now I'm going big time!

As mentioned in my first post, I talked to Todd at Baer for a while one afternoon. After discussing what I do with the car and my personal opinions on things like aesthetics. He came up with the brake package you see below. There's a few reasons for the way I got certain things that I think might be interesting to others considering big brake upgrades. I told Todd I didn't care what color the calipers were so they sent me Nickle plated!

Although the car's pretty and photographic, I am more concerned with the function, performance, and simplicity of things for The 14 Car than I am about the "look". If a couple sponges rubbing on a balsa wood disc would stop the car faster I'd be fine with that, no matter how silly it looked. So given that attitude, some things that the more show oriented guys get in a brake package I have no yearning desire for. Zinc wash rotor coating is a good example. My brakes are going to be used to their limit and so the wheels, spindles, calipers etc. get covered with brake dust at every track event. I clean everything often but I don't need the "show" look of the zinc. Drilled rotors are another type of option that I don't really need. There's a lot of opinions about drilling rotors that I'm not going to go into here, but for me, I'm good with slotted or solid rotors.

The big rotors are a lot of rotating mass and they will require more power to get them up to speed out of every turn. (read, slow my car down) That mass is also what helps dissipate all the heat generated while slowing the car repeatedly on track. Now, while you might think that the car accelerating slower out of corners will make the lap times higher, the ability to stay at full speed on the other end of the straight longer before braking more than makes up for the slower corner exit acceleration. As an example if I was going 140 MPH at the end of a straight I'd cover a lot of ground in a short period of time. If I can start braking a hundred feet later than I did with the old brakes the loss of time getting up to speed is more than made up for by the time saved traveling at full speed for an extra hundred feet!

The rotors are a 2 piece design and the calipers are BAER 6P asphalt track 6 piston design with BOTH brake pads moving! (inside joke). The fronts come on a dedicated spindle for the 2nd gen F bodies and the rears are designed to work on the Ford style Moser tapered bearing housing ends I have on my 10 bolt GM rear. These calipers use a modern Corvette design pad so replacements are readily available in different compounds.

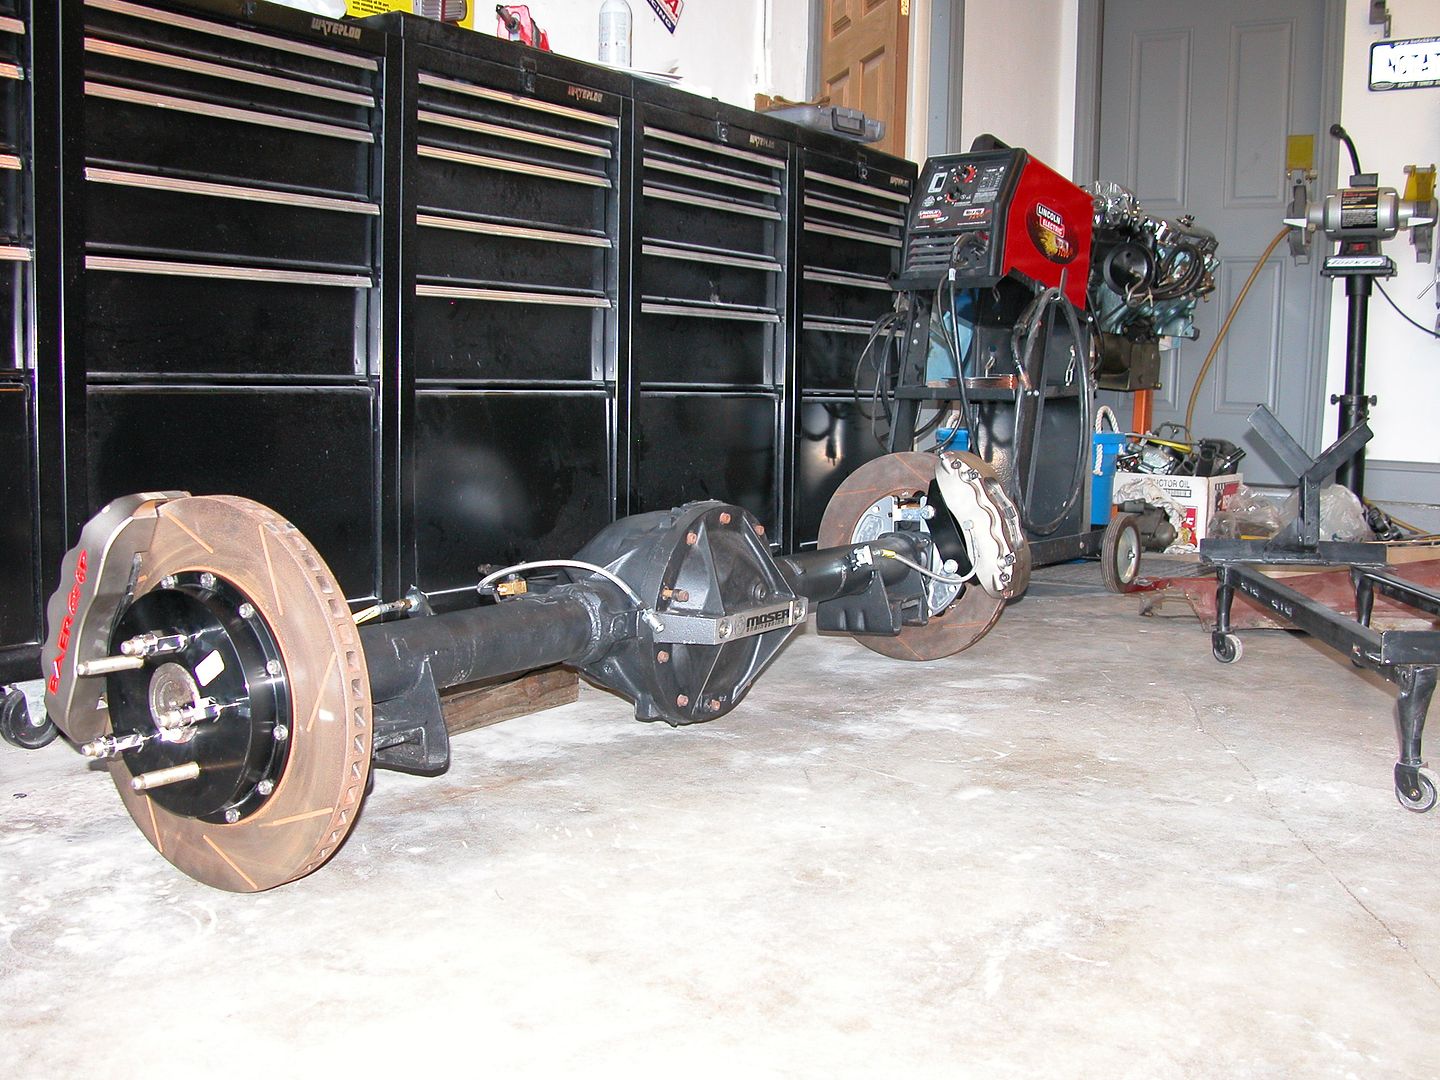
The rear brakes are also 14" rotors with the 6P calipers and include the park brake that fits into the center section of the 2 piece rotors. There will also be an adjustable proportioning valve I'm hoping to mount within reach while driving to fine tune the amount of work the rear brakes do.

Rad_Capz
Rad_Capz HalfDork
10/14/13 9:50 a.m.

I decided a while back that since I'll have the car out of commission for a while I'm going to expand on the project of brakes, wheels, and tires. I've been saying I was going to do several other things to the car and so I'm going to take the opportunity to do everything at once. On top of the brakes, wheels tires I'll attempt the following. We'll see how it goes, and hope I don't slide down the slippery slope too far!

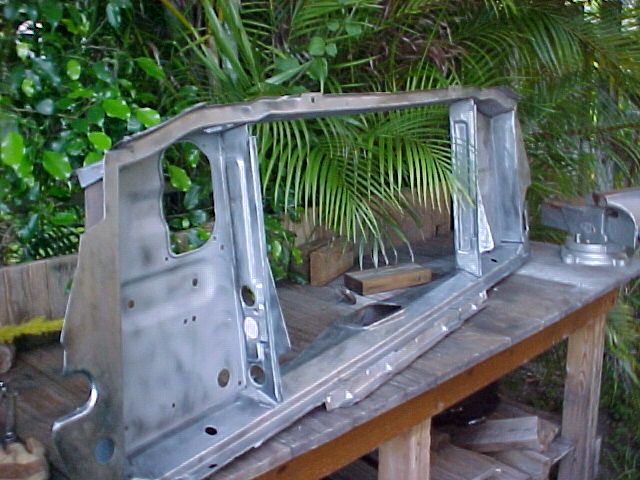
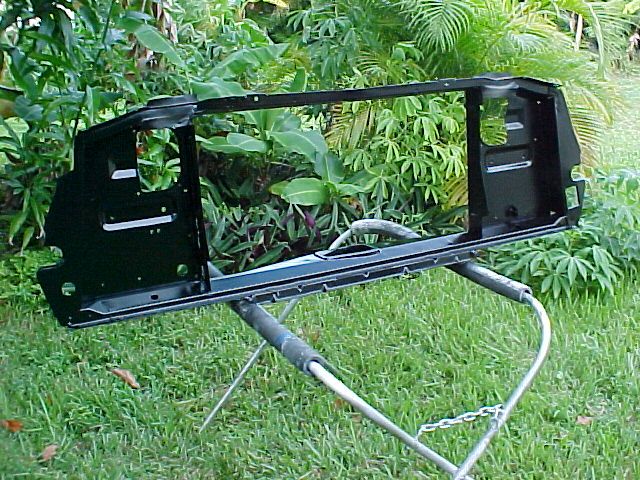
  1. Replace core support. Mine was rusted out when I bought the car 20 years ago. None were available repro or used, so I fabricated a new bottom section so the radiator wouldn't fall on the ground (literally). I got a good used one from Arizona Rust Free about 6-7 years ago but never put it in. So the plan is to strip, paint, and install it.

  2. Replace hood. My hoods not a real TA hood, just a stock hood with a hole cut in it. A guy in an Alfa Romeo lost an engine at Palm Beach International just as I was about to pull out to pass him. Some chemical from his engine damaged the paint on my hood and shaker scoop. So now's the time to paint and install the new hood. I bought a nice TA hood maybe 10-12 years ago but never installed it because I'd need to paint it. I'll have the paint out for.......

  3. Repaint front spoiler. I hit a chunk of 2 X 4 that flipped up on a highway south of New Orleans while on vacation that took a chunk of paint out of the spoiler. Then I started going fast enough on track so the air pressure was folding the center of the spoiler straight down which the paint didn't like so it started peeling. If you've seen pics of my car with stickers on the front spoiler it was to hide the peeling paint ! LOL

  4. Spoiler extension and splitter. Aerodynamic benefit and the supports will keep the stock spoiler from flexing so much at speed. Another thing I've been saying I'll get to. Since I'll have everything apart and be painting, now's the time. I've been working on a design, will try to make it a reality.

  5. Custom front valance. Already have a spare valance to work with that's better than the one on my car. Gotta design in mind, will try to make it a reality.

  6. Rear diffuser. Again I have a design in mind and will see how it works out.

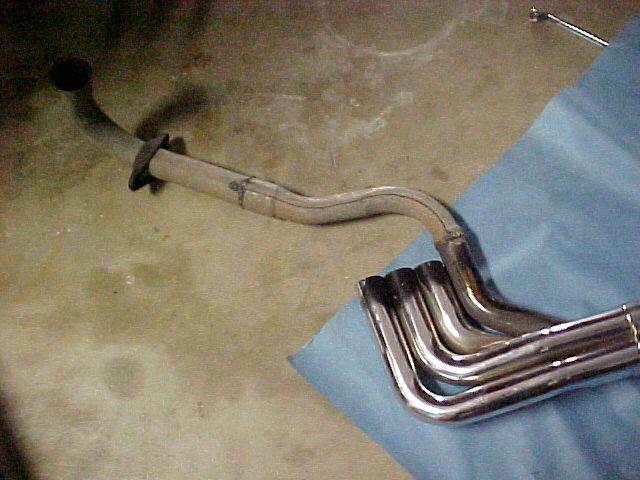
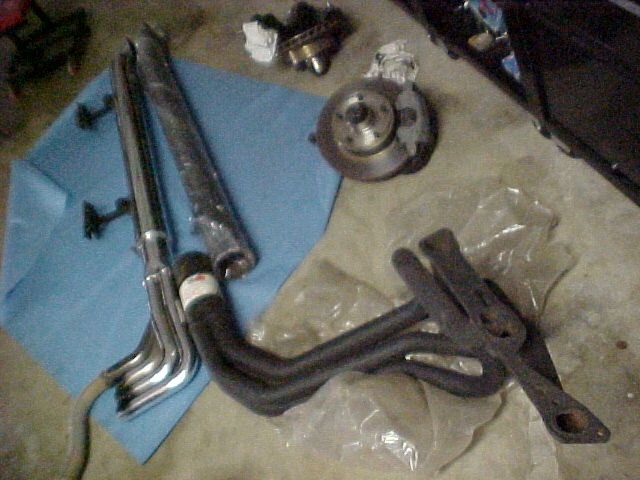
  7. Install NOS Hooker side pipes. I bought a set of side pipes a couple years ago to replace the ones on my car. The ones on my car are limiting performance because they are not headers to side pipes, but regular exhaust manifolds with custom bent exhaust tubing to the side pipes which have a fake "header" section on the front of them. They look cool (to me) but limit the engines performance to reach my speed goals. Drawback is the new pipes are black and so the "look" of the car will need to change. I'm considering a couple options.

  8. Install foilers. Foilers are wheel well flares like the ones TAs come with but they fit behind each wheel. I bought a set about 10 years ago but never painted them or installed. Since I'll already have the paint out..... However there may be a glitch in the installation because the new side exit headers that came with the sidepipes may interfere with the front ones, we'll see.

  9. Install trunk filler panel and trunk lid. Again, parts I bought long ago and never installed. My current deck lid is a stock non TA one I drilled holes in to install a spoiler and I have a better filler panel to use now.

  10. Put the car on a diet! I added 200 lbs. of roll cage and adding a spoiler extension, splitter, and diffuser will add more. I would like to figure out some ways of getting that back out of the car. It weighed about 3500 lbs before the safety equipment install and I'd like to get back near that weight if possible. So while I've got the car torn apart I'm going to look for some places to do some automotive liposuction.

So I started the project today by getting out the core support and stripping it. Gave it a good scraping to remove undercoating, wire brushed the big stuff off, wire wheeled it to get most of the heavy remaining deposits, and then sandblasted it with an Eastwood outdoor style blaster and wire wheeled it some more. I'll sand it before more work is done to it. I'm going to add some metal to stiffen it up where it attaches to the sub frame.

[URL=http://s240.photobucket.com/user/NOTATA/media/The%2014%20Car%20Performance%20Therapy/MVC-006F.jpg.html][/URL]

Rad_Capz
Rad_Capz HalfDork
10/14/13 9:55 a.m.

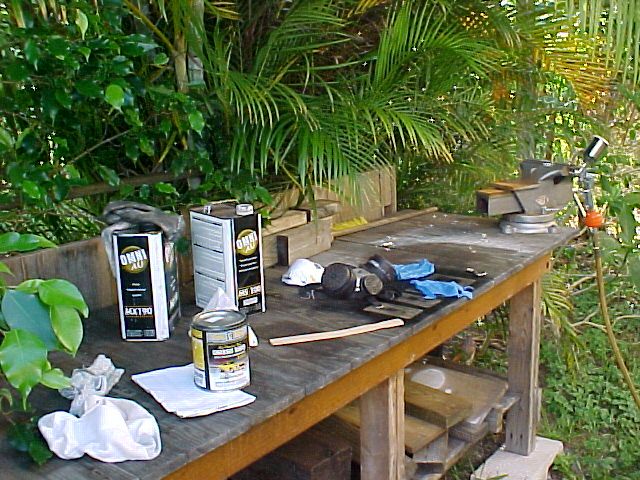
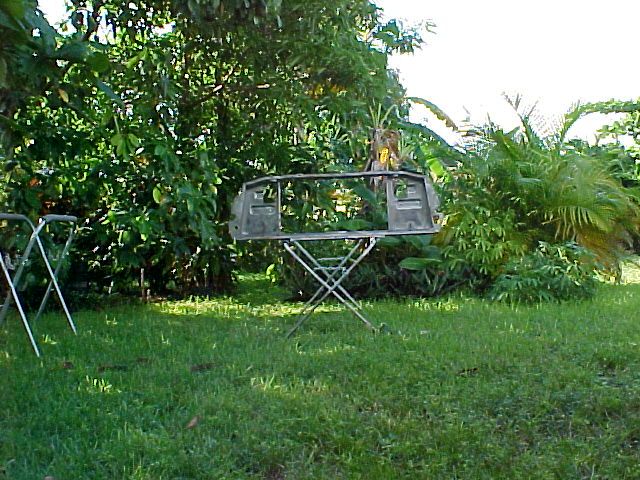
Today was finally paint day for the core support after waiting through a week of wind. I used some Chassis Saver which is a single stage rust encapsulating type of paint by Magnet Paint.

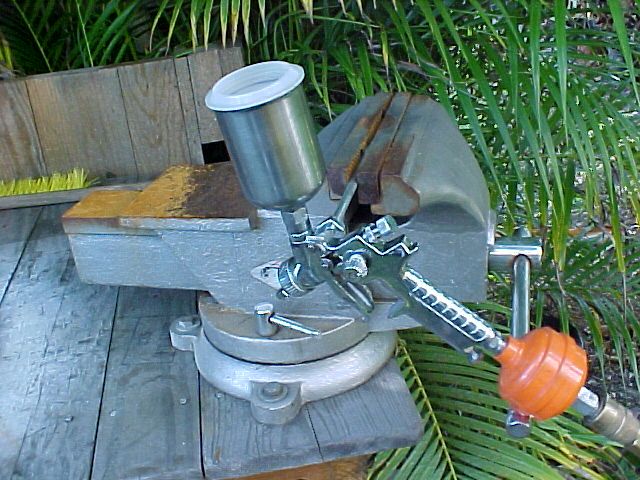
Here's my high tech mixing station! I use a HVLP jamb gun for jobs like this. The biggest hassle is making a way to hang the gun so the cup stays upright. READ DIRECTIONS (and follow them) for any type of paint.

Here's my spacious booth complete with a tropical theme. Banana, Plantain, Papaya, Mango, Avacado, Yuca (Cassava), Areca Palm, and Almond background.

Rad_Capz
Rad_Capz HalfDork
10/14/13 9:57 a.m.

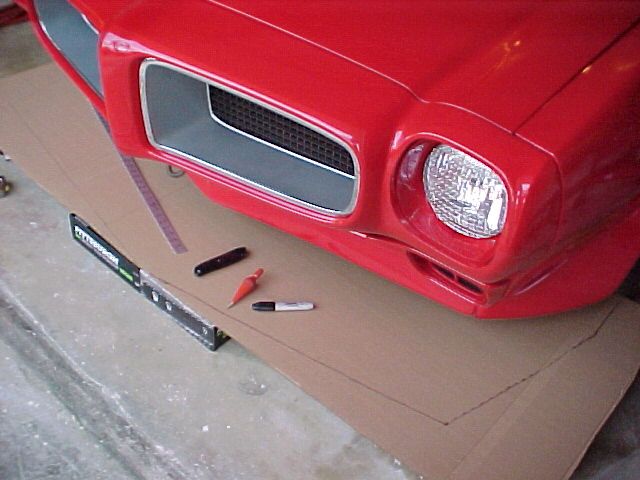
Before tearing the car apart I wanted to make some patterns for the spoiler extension and splitter I'm going to fabricate. Once the car is up off the ground it will be difficult to check ground clearance etc.

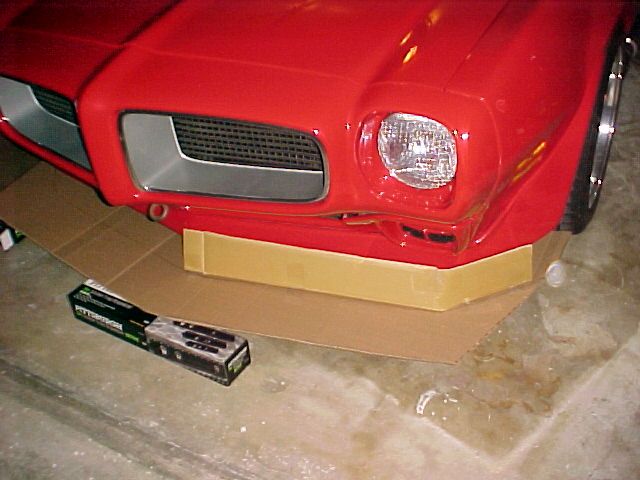
I placed a piece of cardboard about 3" off the ground under the front end and used a plumb bob to create an outline roughly the same as the nose of the car. From what I've read, the ideal splitter lines up with the front of the car. So I figured I'd use that as a starting point and shorten if I feel like it later.

With the height and outline done I made a piece approximately the size I'll need for the spoiler extension.

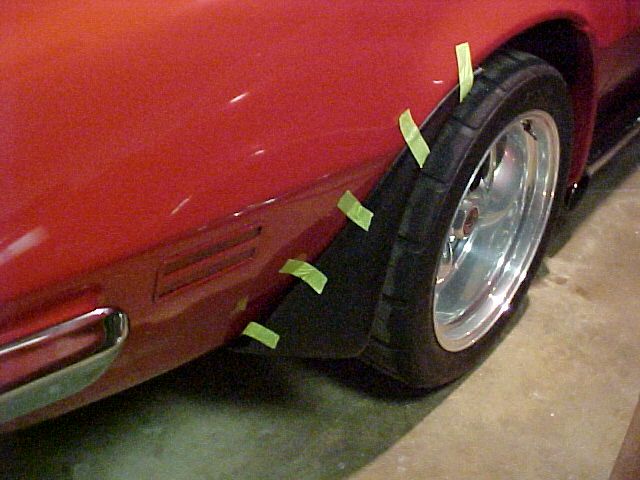
Test fitted the foilers for the back of the rear wheel openings. It's going to take some time to fit them nicely. Not sure if I'll be able to use the ones behind the front wheels because the side exit headers may be too close. We'll see.

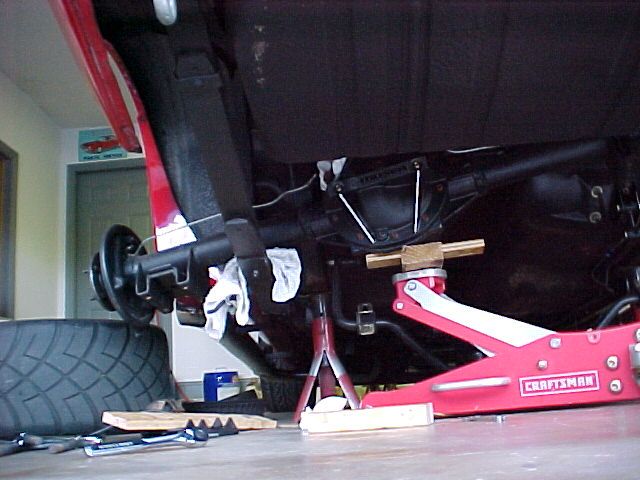
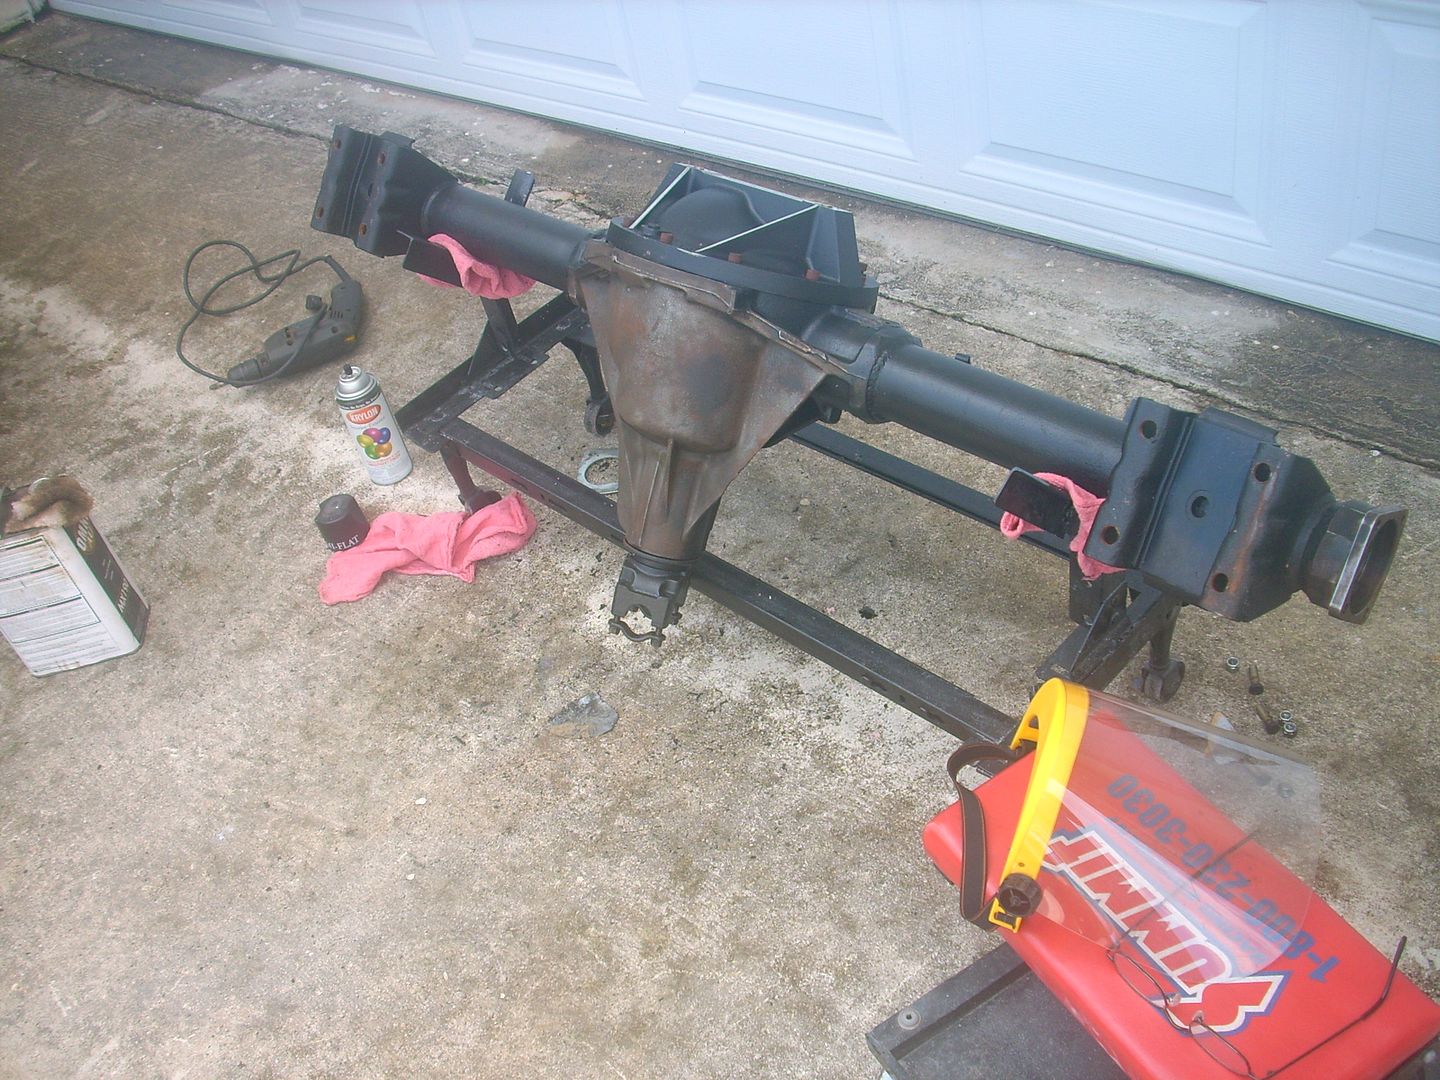
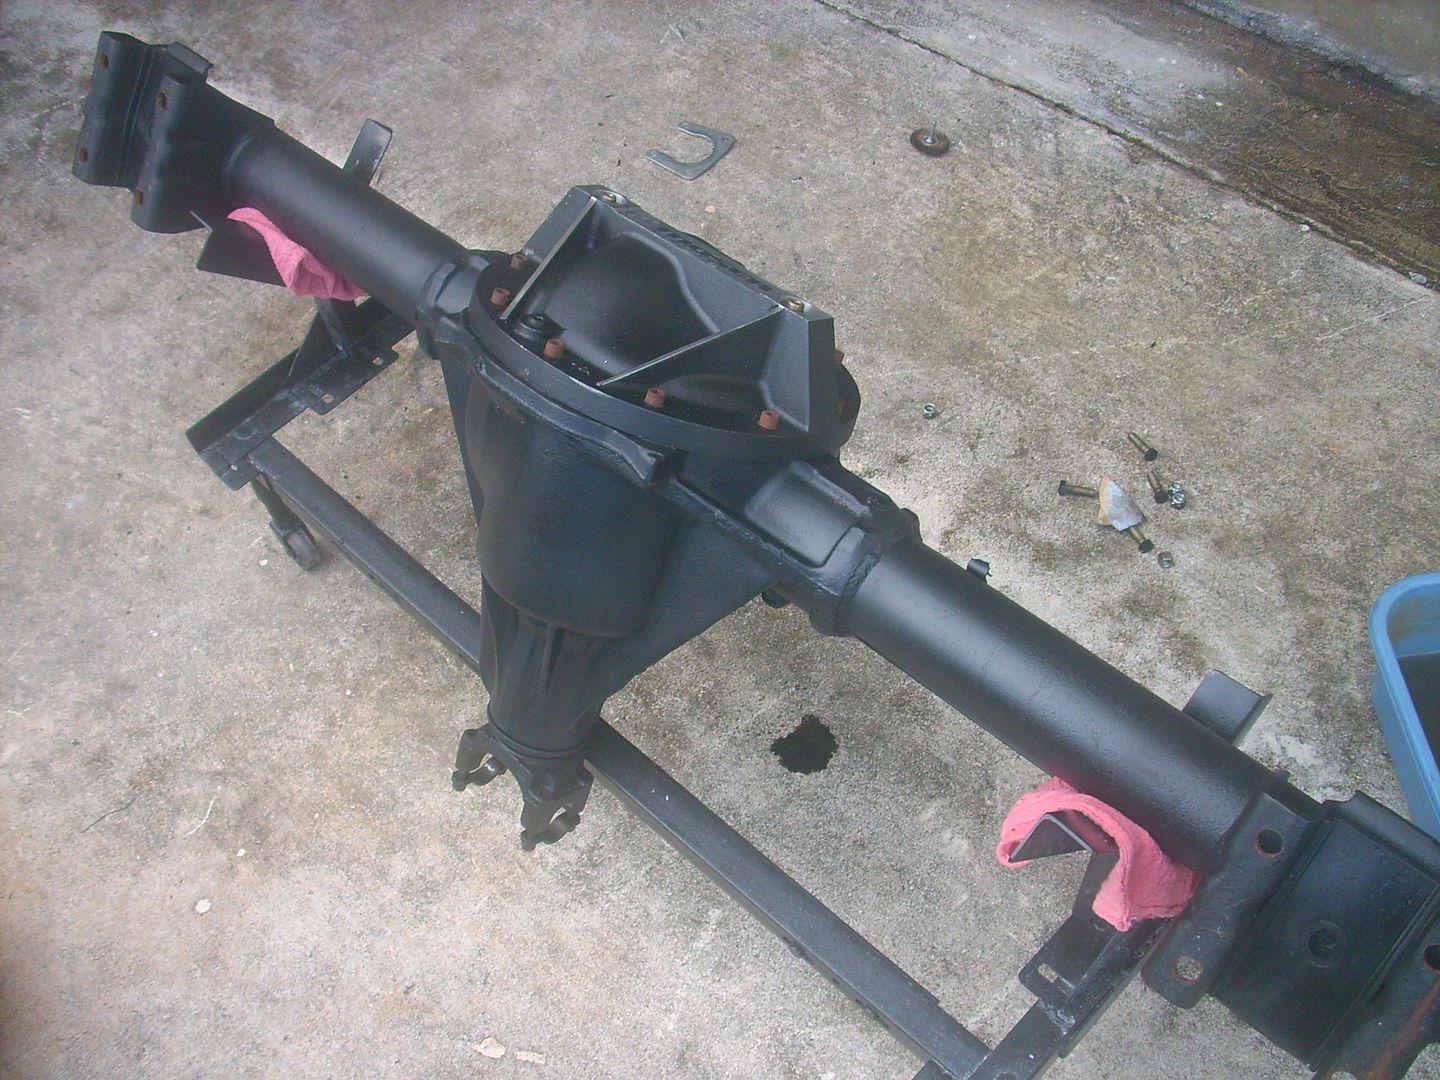
So after shuffling cars around to make the garage available without being crowded I've started taking things apart. I swapped out the 2.41 rear I normally use for street, road courses and Land speed racing for the 3.73 rear I use for drags. Then stuck the Mickey Thompson ET Streets on there so if I need to roll the car around while I'm working on the rear to install the Baers I'll be able to. I need to upgrade the rear axles to 1/2" wheel studs to match the front so the axles have to come out anyway so I can line everything up nice and straight in a drill press. I figured I might as well just pull the whole rear to make it easier to work on.

1st thing, get the car in the garage ALONE!

I work alone so swapping rears is a little tricky. First thing was battery disconnect and suck the fluid out of the master cylinder since all the brakes are coming out. Then remove the swaybar brackets, brakes, and disconnect the brake line flex hose and park brake cables. Then remove one shock and lower plate and swing the other lower shock plate out of the way. I carefully jack the rear while balancing it and shift it to the side without the shock, tip it down then shift it back the other direction by rolling the jack. This way I don't need to remove the springs.

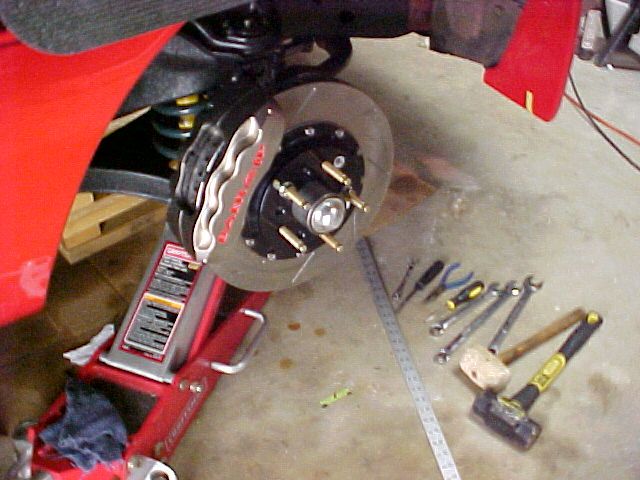
After swapping rears and removing front wheels so I can work on swapping the spindles.

Rad_Capz
Rad_Capz HalfDork
10/14/13 9:59 a.m.

I was stuffing a lot of tire in stock wheelwells up front with the 275's on 9.5" rims and now I'm going to try 285's on a 10", so backspacing is important. I could touch the swaybar with the tires at full lock and it rubbed the powdercoating off. I'm concerned about backspacing when ordering the new wheels so I haven't ordered them because I was afraid if the new brake combo moved the wheel flange out I'd be in big trouble. So I figured better to install the new brakes and spindles and measure before ordering. I will loose some more turning radius and plan on installing limiters on the lower control arms. The types of driving I do with this car don't require extremely sharp turns.

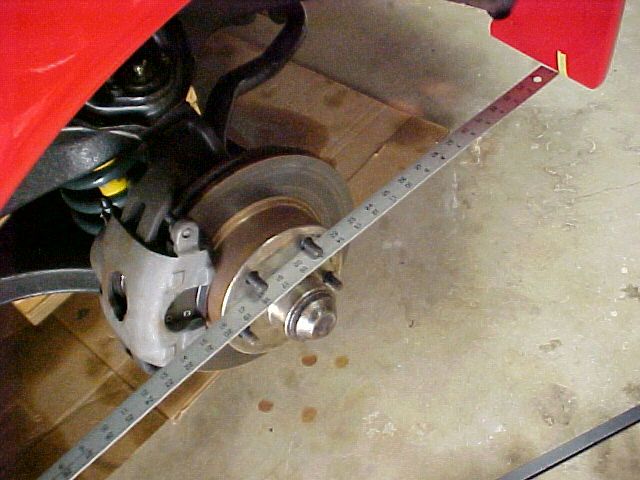
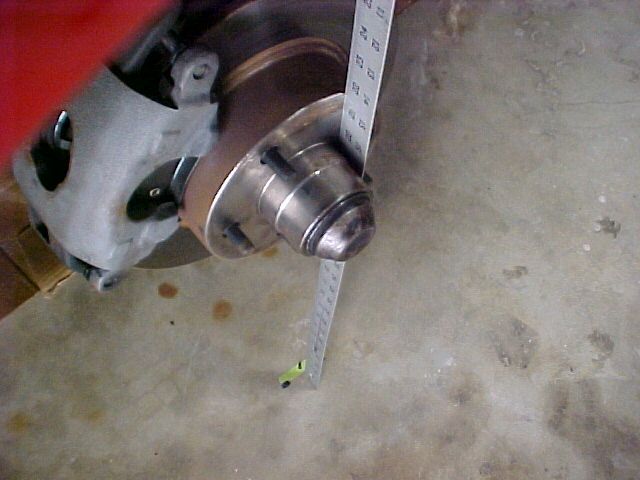
With the original spindle and rotor still in place I used a straight edge to put some tape markers on the car and floor so I could line up the new combo and see if there was a difference.

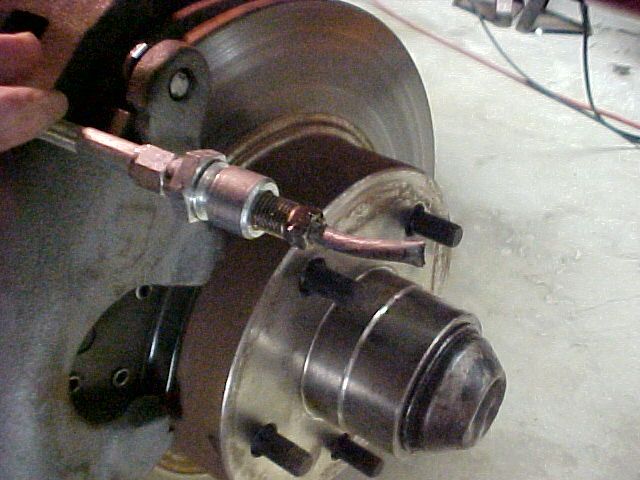
The first step involved in swapping out the spindle assemblies is removing the brake lines at the frame mounts where the flex tubes end. Since I replaced the flex lines with braided about a bit over a year ago I figured everything should come apart easy, right? WRONG! LOL The passenger side gave me a hassle so I did what anyone irritated would do, yup, I got a big pair of linesmans pliers and cut the hardline. AHAHAHA. I make new brake lines all the time so no big deal. Just would have been nice not to have to make that one from the line lock solenoid over to the passengers side since it was fairly new.

So after making quick work of the stubborn brake line I moved on to removing the spindles with everything attached. The Baers come all set up on a new spindle so all thats necessary to swap the setups is loosening, separating, and then unbolting the tie rod end and upper/lower ball joints. After putting the new assembly in place I checked my tape marks and was pleasantly surprised to find no change in the wheel flange position so I can easily calculate backspacing for the new Rushforth wheels based on the old wheels.

Because I'm concerned about weight I weighed the stock vs. Baer spindle assemblies fully loaded. I got out the bathroom scale and picked up one of each and weighed myself and a piece to be sure I was in the accurate range of a bath scale. I was shocked to find that the new ones were actually LIGHTER than the smaller stock rotor size ones! In disbelief I then piled both old ones on the scale then both new ones. Sure enough! The Baer assemblies with giant rotors are about 1-1 1/2 lbs LESS than stock for each assembly! While the rotating mass is heavier because of the much bigger rotor the overall unsprung weight is lower so in theory there would be some slight handling improvement and a beneficial loss of front end weight helping the front/rear weight bias.

Rad_Capz
Rad_Capz HalfDork
10/14/13 10:00 a.m.

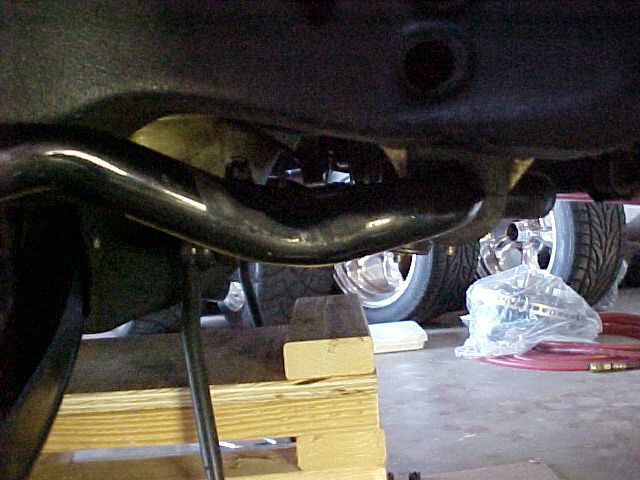
As I mentioned in my last post the 275 17's would hit the Hotchkis sway bar at full lock. The new 285 18 Yokohama tire is 10mm wider and will be on a 1/2" wider rim. The "extra" tire has to go to the inside because I was already at the limit on the outside and moving the tire out at all would result in the tire rubbing the fender lip under max compression.

Having the tire hit the swaybar could potentially be very dangerous. As an example, if I was on track and trying to control a situation where some or all of the wheels were at their limit of adhesion and a front tire contacted the swaybar it might cause that wheel to skid. That would be BAD! Lets say the rear end got loose in a corner and I was trying to correct by steering into the slide. The inner front tire (with less weight on it and therefore less grip) would contact the swaybar possibly locking up that wheel, then I'd probably be 4 wheels off before I even knew what happened!

So here's the rub.

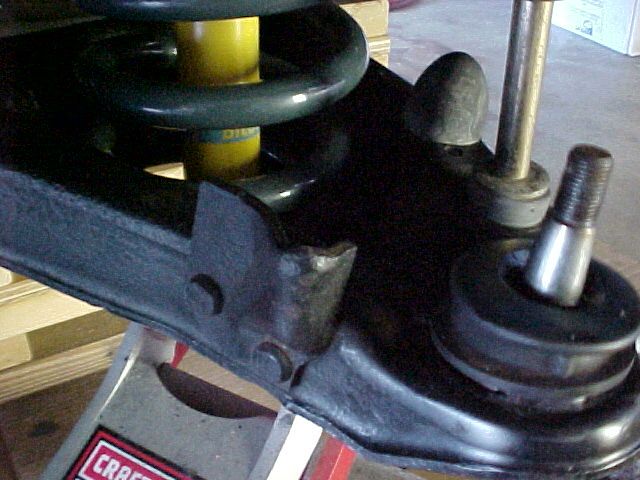
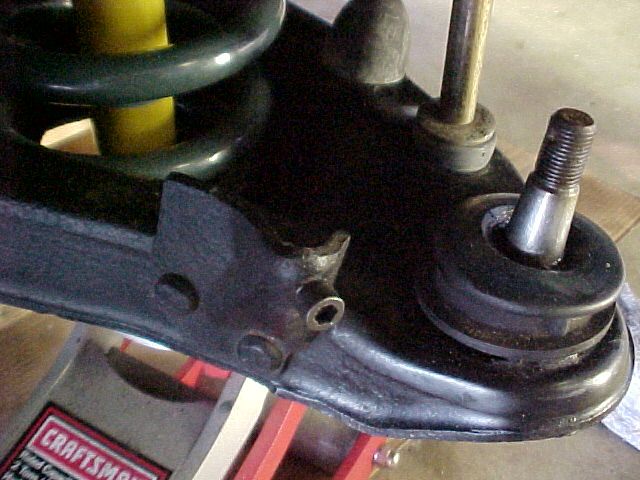
Below is the stock limiter that the spindle bumps into at the end of it's turning radius. The one on the left side limits left turns (right wheel hitting swaybar) and vice versa for the right.

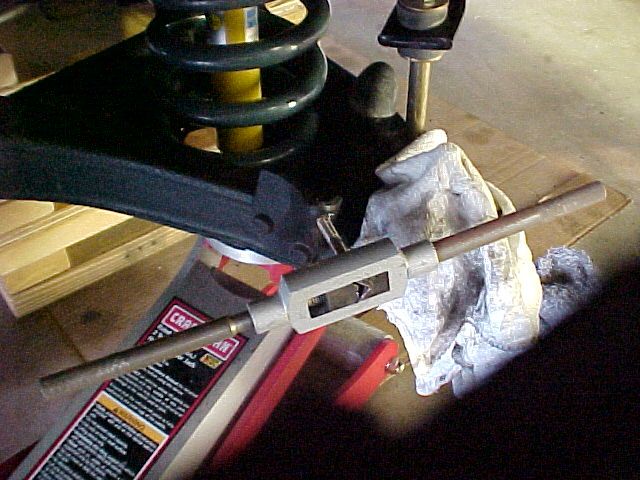
I decided to drill and tap the stock limiter for a 5/16" bolt or threaded rod and use that as a variable adjuster so I can retain as much turning radius as possible. Once the new Rushforth/Yokohama combination is in place I'll adjust the turning radius limiters and lock the adjusters (probably spot weld) so they can't move or loosen up and fall out. "Why 5/16" bolts?" you might ask. Well, 1/4" might bend, and 3/8" would be hard to drill and tap due to the geometry of the stock limiters, also this is a pre metric car so no metric stuff if possible.

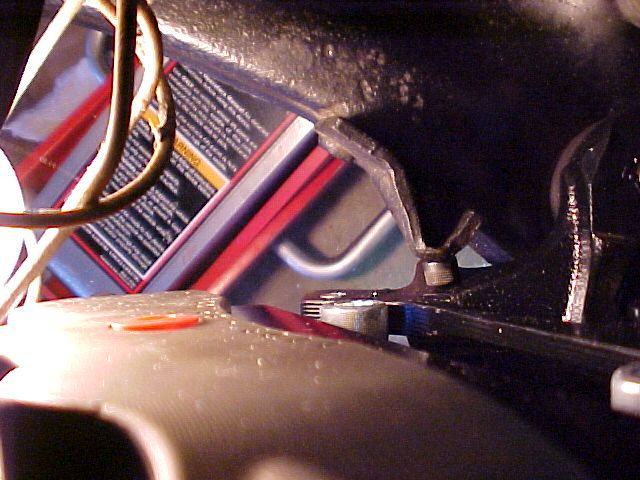
Pics below show an Allen head bolt in screwed into the limiter but I haven't decided what will be used for sure yet. The final pic is looking down from the top so you can see how the spindle travel is limited.

Rad_Capz
Rad_Capz HalfDork
10/14/13 10:01 a.m.

Black pipes will make the car look like it's higher off the ground so I probably won't leave them black. It's an optical illusion. Those who were around in the 70's may remember the flat black rocker panel trend, I did it to my 68 Camaro and it instantly looked like it was higher off the ground. As you can see in the pic in my first post my car is not really very low at all as it is compared with the current drop & tuck trend in the PT community. I've even been told I have too much "gap" above the tire. I care more about performance and it seems fine as is on track and at the same time the sidepipes make it appear lower than it actually is because the bottom of them is lower than the rockers. The effect is noticable more in person than in pics.

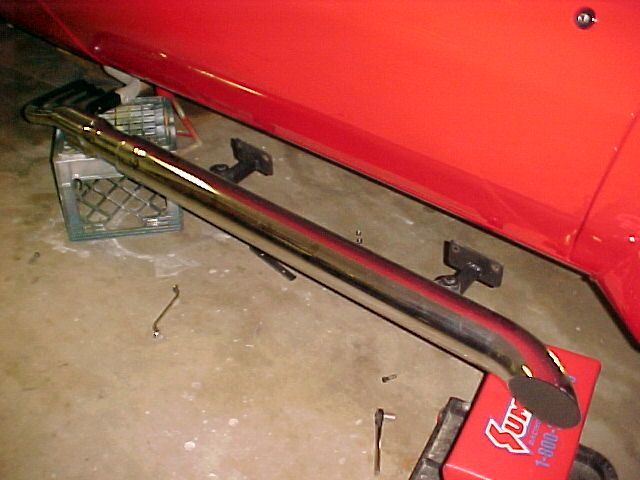
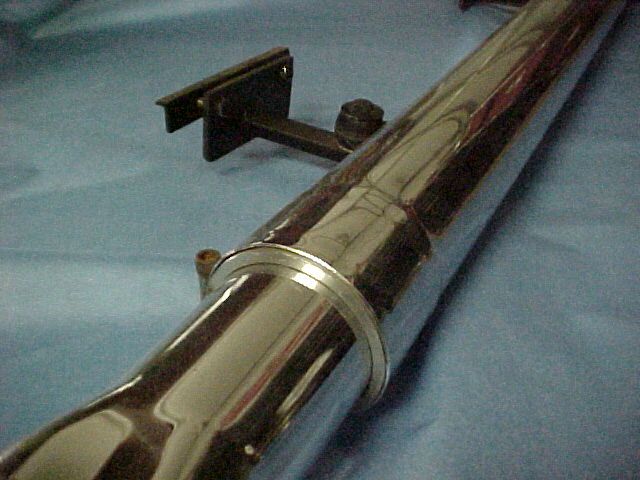
Because I care more about performance I'm giving up the chrome pipes even though I really like the look of them. As you can see below the front section is just a faux header with only one of the tubes flowing exhaust. When I originally installed them I had the stock 350 2V engine with a single stock exhaust system. So upgrading to actual "dual" exhaust was a big step up ! AHAHAHA Even using stock exhaust manifolds! Since then I installed a bigger engine which is limited by the exhaust and the small (575 CFM) carb I've been using with the chrome setup. Car runs great and drivability is good. Throttle response is great but I'm leaving a lot of available power unused because the engine is kind of corked up.

The chrome pipes are great for an around town cruise night car and I've run high 13's at the strip and up to 140 MPH on road courses and at land speed races so for what I was doing before they were fine. Now that I've got all the safety equipment in place to run up near 200 MPH I'll be building for more power eventually and the new full headers will be necessary. You just can't easily push enough air through stock Pontiac D port exhaust manifolds to make 600-700 HP.

So anyway, here's my old setup. The front and rear sidepipe sections were NOS pieces when I installed them but were from 2 different sets. They were different diameters. I had aluminum spacer collars made close to size by a bud in a machine shop then hand sanded them to an interference fit. I had a local exhaust shop bend up the sections that run from the faux header sections to the stock exhaust manifolds. I fabricated some T shaped mounting brackets that get bolted to the pinch weld at the bottom of the rockers. I used sway bar end link bushings to mount the pipes to the brackets so the engine movement and flex of the car over uneven roads etc. wouldn't crack the pipes.

Rad_Capz
Rad_Capz HalfDork
10/14/13 10:02 a.m.

To replace the core support on this car everything from the firewall forward has to come off except one fender. On most old cars that's not too bad of a job but the early 2nd gen birds with a front spoiler have a lot of pieces and LOTS of bolts! So a couple hours here and there over the past couple days when I had time and it's all off. Since I will be pulling the engine/trans and running lots of new brake lines etc I figured there was no good reason to leave one fender in place so I just took everything off.

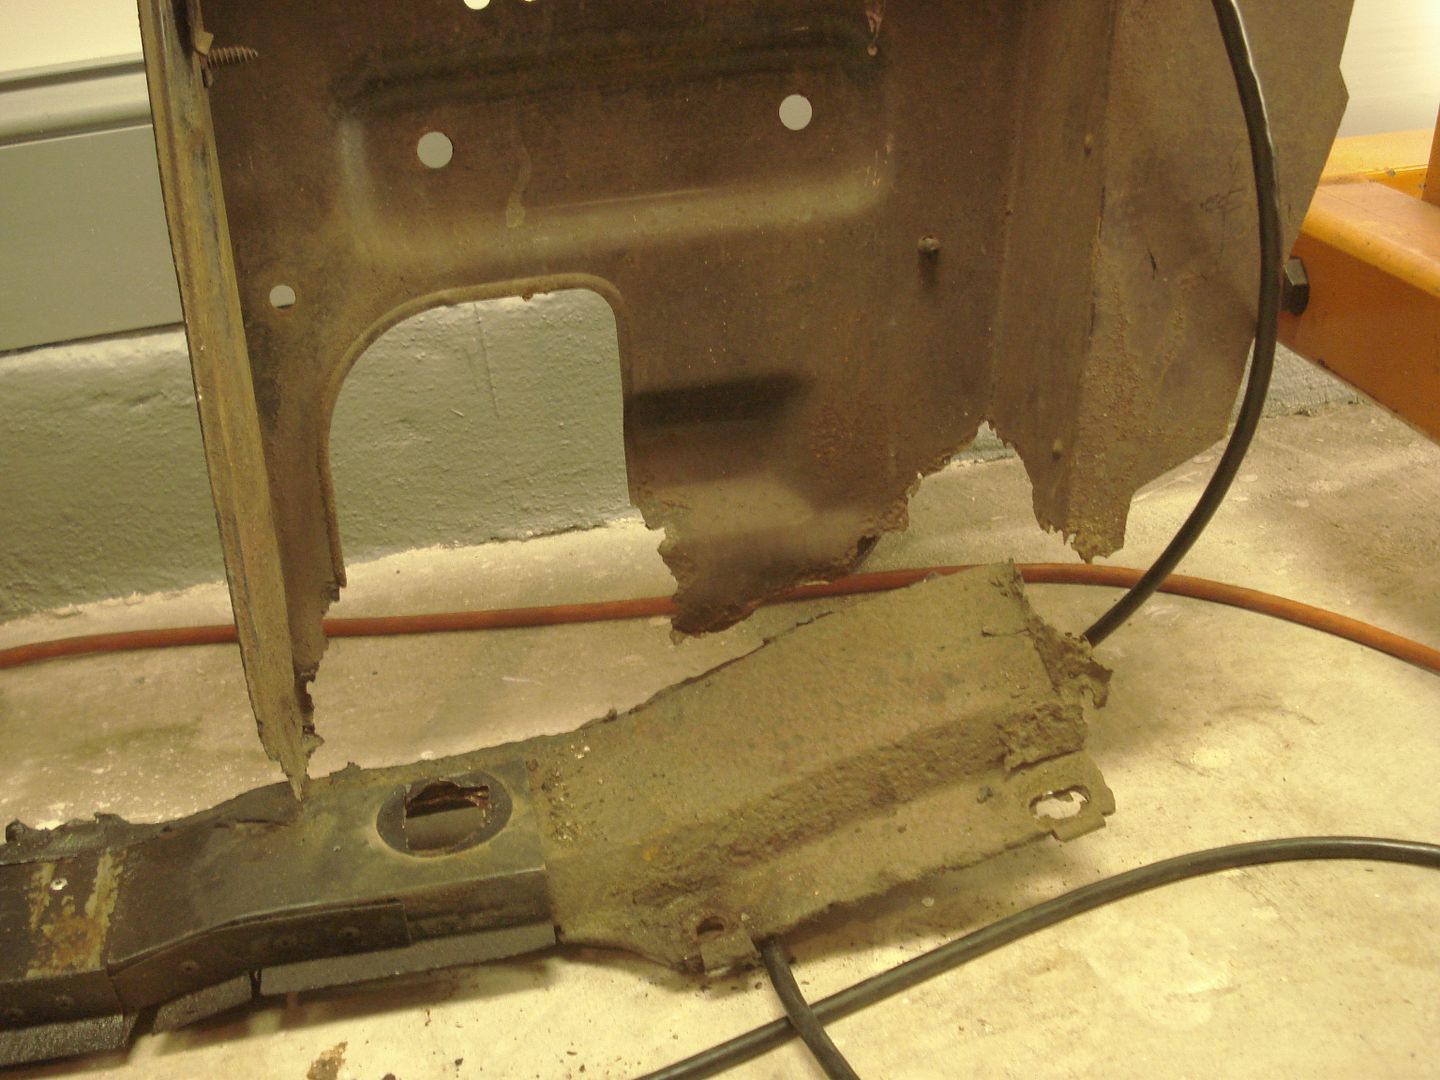
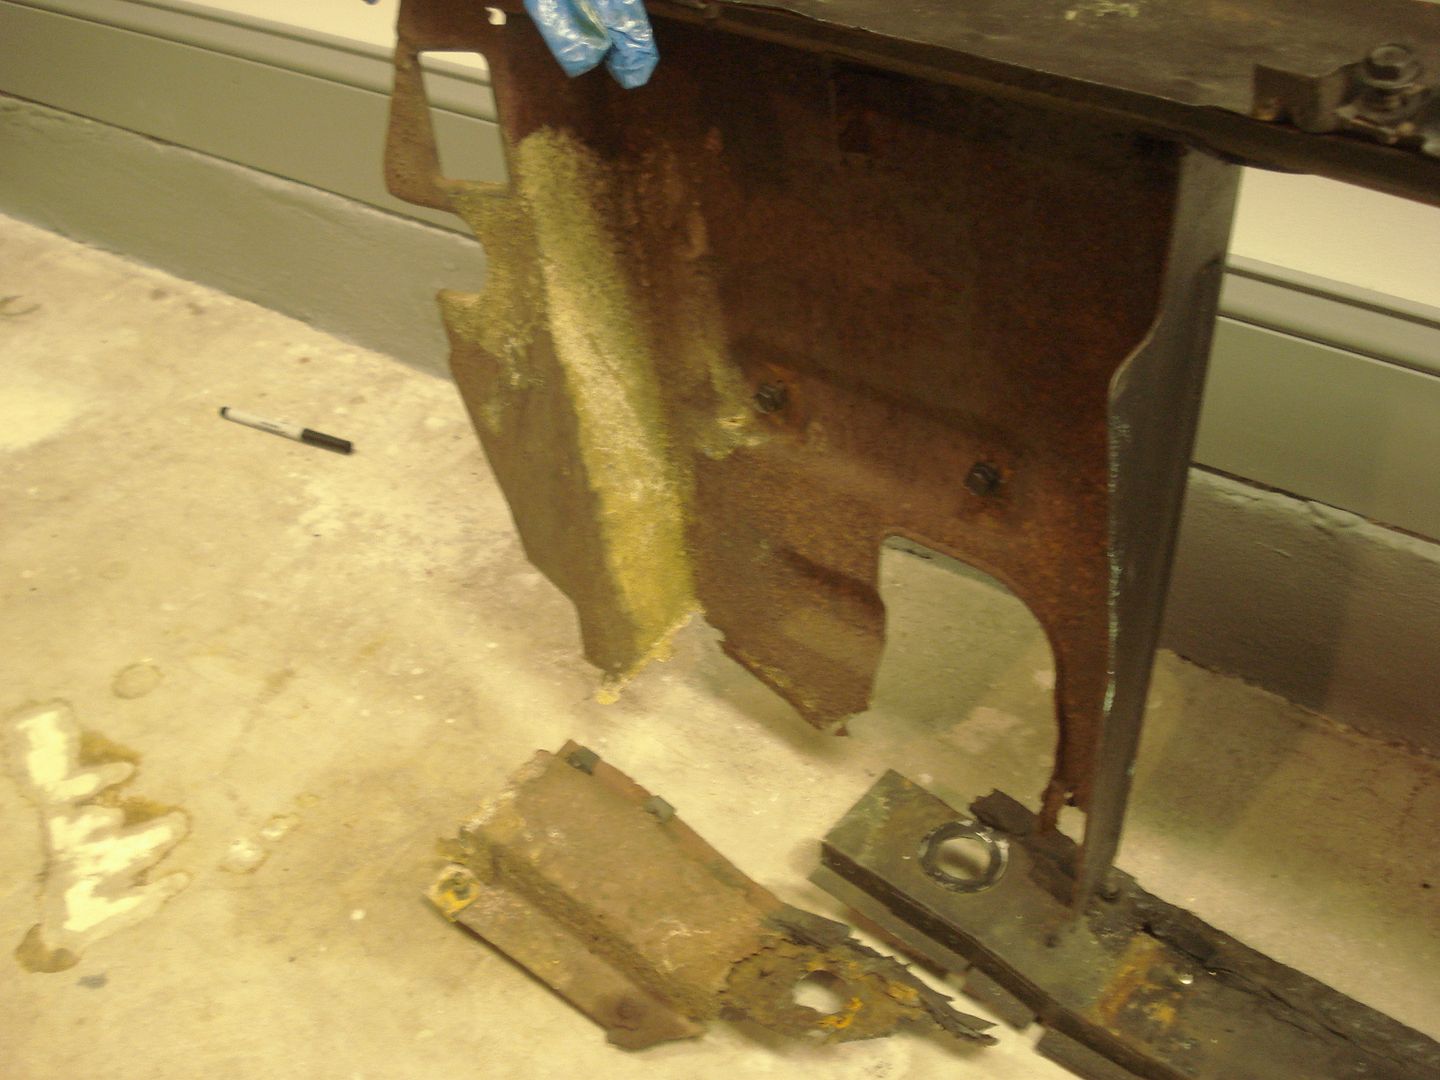
In previous posts you saw the new (to me) core support. These early 2nd gen Firebirds were notorious for rusted out core supports. The wide openings under the bumper with no grills allowed leaves, papers etc. to fly in and hit the radiator then drop when the car stopped only to slowly rot there because there was no place for the debris to get out. It just sat wet from rain and washing on the lower part that holds up the radiator. The core support was the worst part on my car when I bought it, and remained the worst until today, while pretty much everything else on the car was reconditioned/replaced.

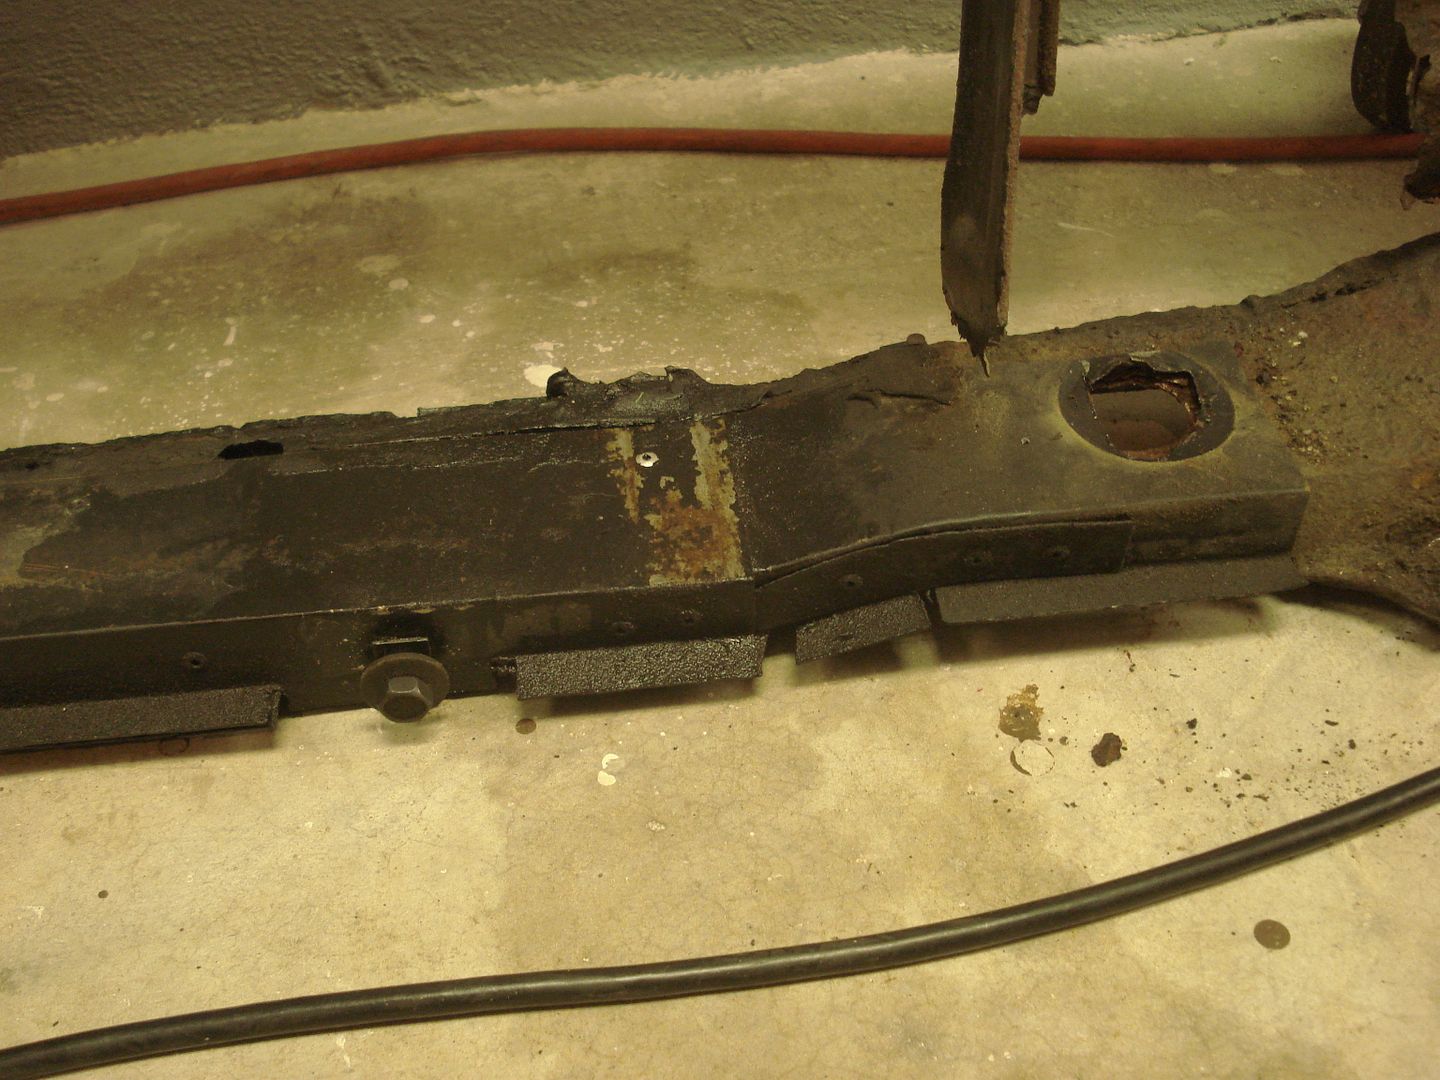
Many, many years ago I made a sheet metal section from frame rail to frame rail to support the radiator and eventually found a pretty good core support to replace the original with. BUT, I knew how big a job it was to replace and procrastinated, year, after year, after year. AHAHAHA So here's the pics of the rusty one. Due to rust the only thing connecting the top and bottom is the latch support bracket which will be refurbished and moved onto the new core support.

Rad_Capz
Rad_Capz HalfDork
10/14/13 10:03 a.m.

When I started this thread I debated whether or not to get involved with "The rest of the story" or just stick to the brakes, wheels, and tires install. Most of us don't own "perfect" cars, and we each know what our car needs or what we want to do to make it better. For many of us the upgrades or repairs get ignored or pushed off "till I have time" or "when I have the money", and I'm no different. I figured posting about the repairs and other upgrades would be beneficial to some and perhaps interesting, entertaining or informative to others. I won the contest because I had a cool picture of me out driving my car at Sebring. I never would have had that opportunity if I waited till my car was perfect and by not waiting my car will be closer to my idea of perfect sooner with the Baers, Rushforths, and Yokohamas.

As for the core support and front end. It was very strong and didn't move around much at all. I pushed hard on it to be sure my car was solid whenever using jackstands and never noticed any flex. I doubt it moved more than a stock bird. The way all of the pieces bolt together creates a strong structure of folded sheetmetal with several horizontal supports and the center vertical latch bracket along with my tow hook bracket which ties the frame rail mounted bumper supports together. I've worked on other 2nd gen F bodies (drag cars) with most of the core support cut out to reduce weight and noticed there was little affect on the integrity. If you think about it the whole subframe is just hanging on 6 rubber bushings from the factory. So out front, there was no solid, rigid body support to the subframe, the front end sheetmetal was bolted to the firewall. I've always wondered if there would be a change to the front/rear weight bias if the front sheetmetal was attached only to the subframe instead of hanging like a ledge from the firewall trying to lift the rear of the car due to the weight forward of the front wheels.

Rad_Capz
Rad_Capz HalfDork
10/14/13 10:04 a.m.

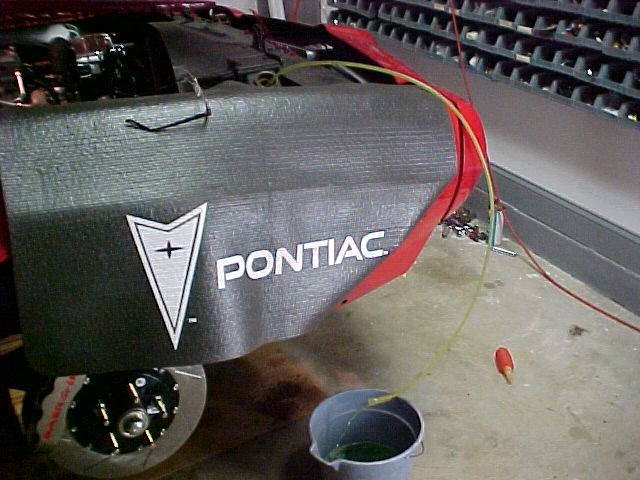
I pull engines fairly often and I don't like a big mess. The first thing I do is go to the local appliance store and get a large box from a refridgerator to cut up and lay under the car. If one piece gets all soaked with a fluid I've still got 3 more to make another mess! Siphoning certain fluids is another thing I do to keep things clean and neat. Most (but not all) radiator petcocks are not in a place that's both easy to reach and they don't usually pour the fluid in an open enough area to easily collect the fluid without it running all over suspension/steering components or the frame or core support creating multiple waterfalls under the car. So I siphon the radiator. Then I remove one end of the lower hose to drain the rest of the fluid into a bucket without the geyser that happens if the system is full. Then there's usually only a small amount of fluid that spills out when I pull the engine from whats left in the block. On this car I did this before removing the sheetmetal knowing I'd need the fluid out eventually.

Next is the Automatic transmission. Lots of stock trannys require dropping the pan to drain the fluid and it can make a big mess real fast if things go wrong. So I siphon the trans fluid out of the dipstick filler tube opening after removing the filler tube. Then the trans can be removed without dropping the pan and just refilled after reinstalling if there's no need to get into the trans.

With the fluids taken care of (no need to drain oil in this case) I support the trans with a jack and hook up the engine hoist with the chains just snug so the engine and trans can't fall and then remove the bolts holding the engine and trans together, the bolts holding the flexplate to the torque convertor, and the trans crossmember bolts. A slight tweak with a prybar between engine and trans housing slides the trans back far enough to remove the engine. Then remove the engine mount bolts and out she comes!

Rad_Capz
Rad_Capz HalfDork
10/14/13 10:05 a.m.

With the engine out I moved the trans forward to clear the crossmember, removed the torque convertor, and dropped the trans down and moved it out of the way. I've got a T-400 that will be replacing the T-350 and I'm giving the 350 to a bud who needs one for a late 2nd gen TA with a mild Pontiac 400 he's building for his wife. He's a hardcore Ford guy and it's killing him to build the TA she wants AHAHAHA. Wait till the wife feels the tires chirp when it hit's second with the shift kit and the stock stall convertor!

So engine and trans out with no big muss or fuss other than a couple little drips of trans fluid on the cardboard from removing the torque convertor.

Once the trans was down and safely out of the way it was time to get the engine on a stand. For you guys reading to get tips, here's a few. Remember, engines are heavy. Keep yourself out of positions where if something goes wrong you could be be pinched against a solid object (including floor). Pick up all tools etc. and get them out of the way before putting the engine on a stand. Clean work area is a safer work area! 1. Don't forget to remove flexplate before putting an engine on a stand. 2. When choosing a stand for a big heavy engine with accessories like this one DO NOT use a stand with only one wheel in the front, they're more "tippy" and you'd be amazed how quick an engine can flip and crash (I've seen it happen). Use a stand with double front wheels for any big heavy engines. 3. Check the bolts you're going to use to bolt the engine to the stand (no, the bellhousing bolts will not work) to be sure the shank of the bolts will not protrude and bottom out on the block. Also be sure the bolt won't bottom out in the block before it's tight. Space the bolts with washers if necessary. 4. Bolt the stand adapter to the block while the engine is hanging with the bolts loose. Then center the part that slides into the engine stand. Tighten up all the bolts. DO NOT overtighten, nothing trying to pull the engine off the stand. 5. Pick up the stand itself, and slide it on the adapter. Insert the pin that keeps the engine from being able to rotate on the stand. 6. Gently lower with attached stand.

So with the engine and trans out and safe it was time to pick and move the car so I can get another one back in the garage also while I work on all the parts. I decided to try and combine two great ideas. Wheel cribs and wheel castors. It actually worked very well and is suprisingly stable.

Rad_Capz
Rad_Capz HalfDork
10/14/13 10:07 a.m.

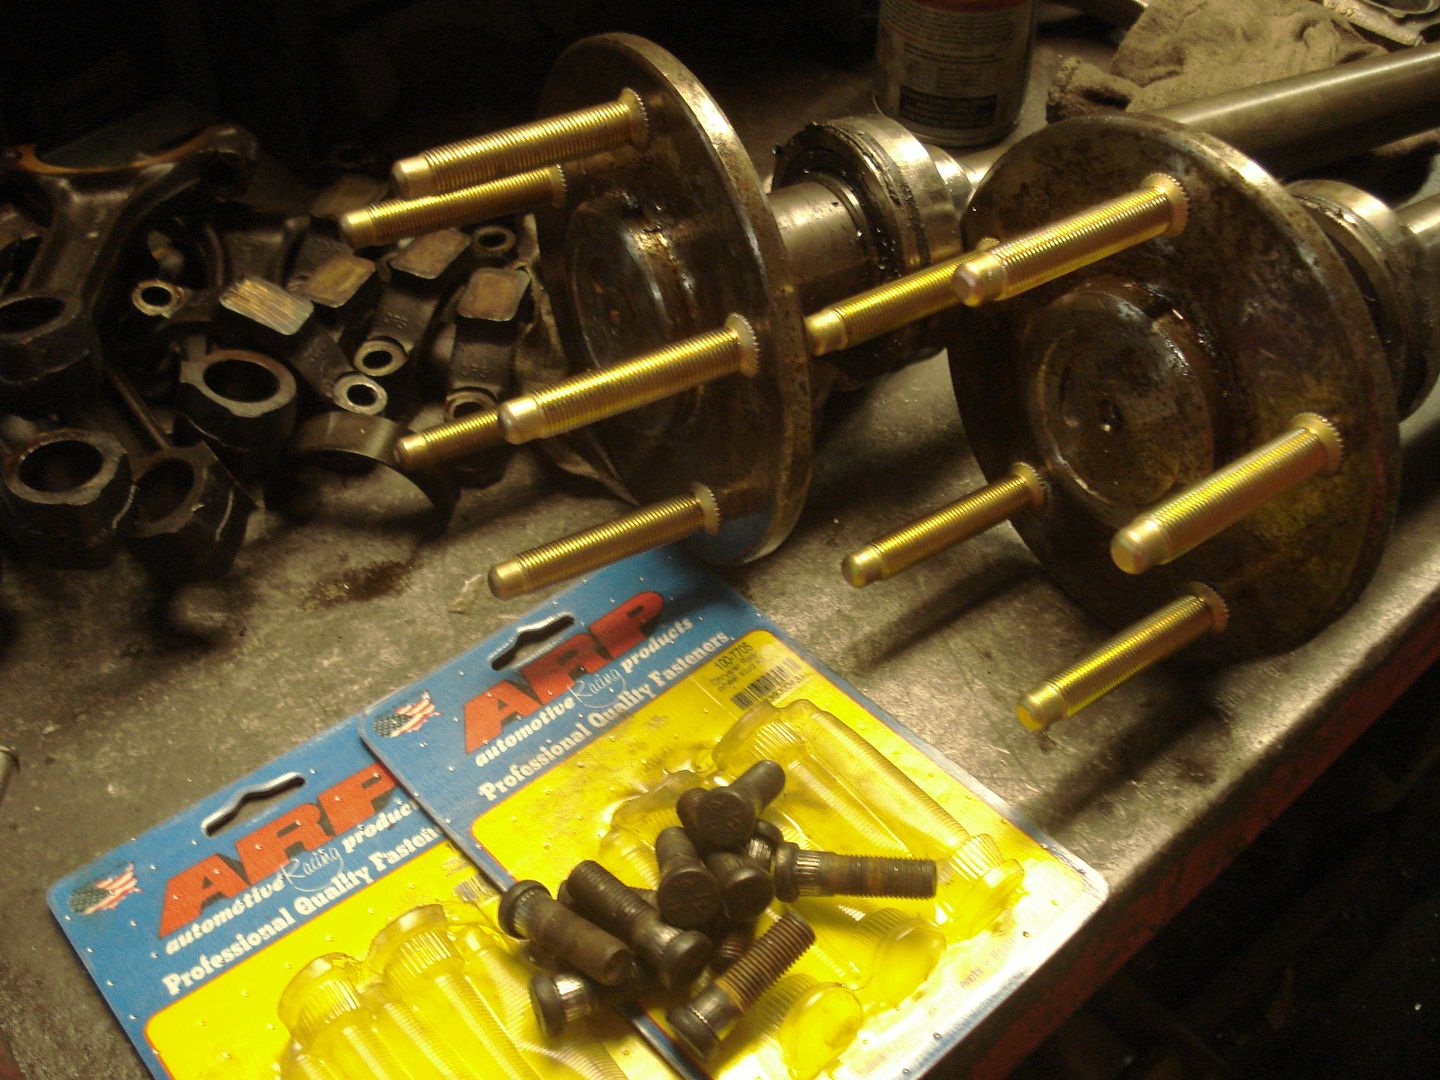
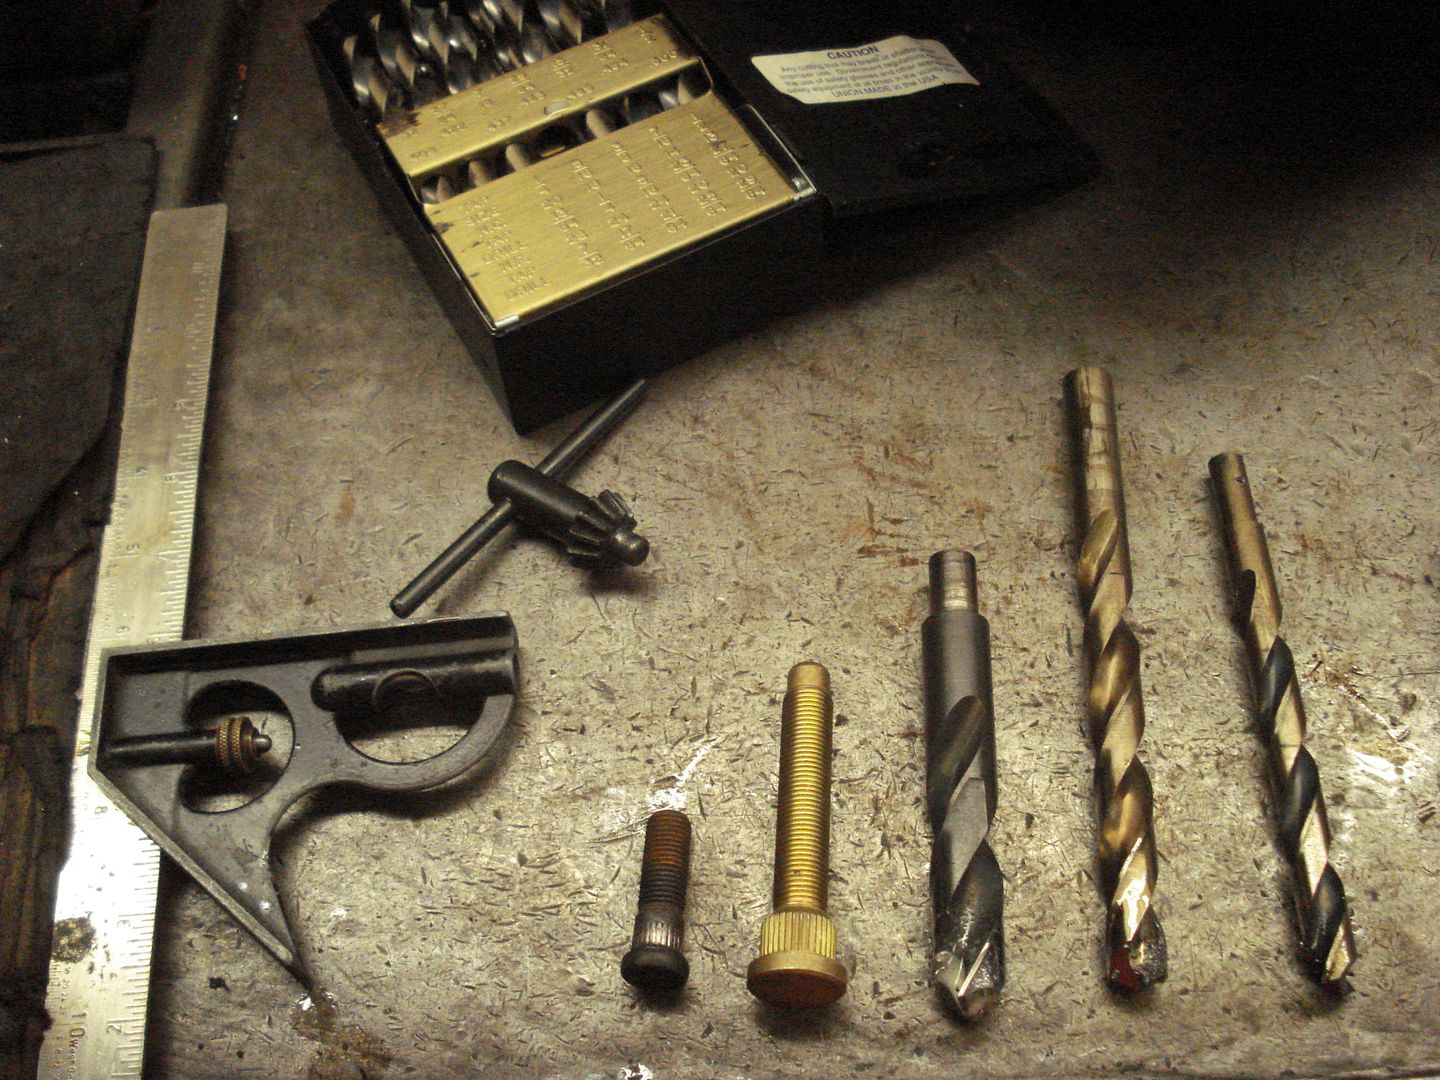
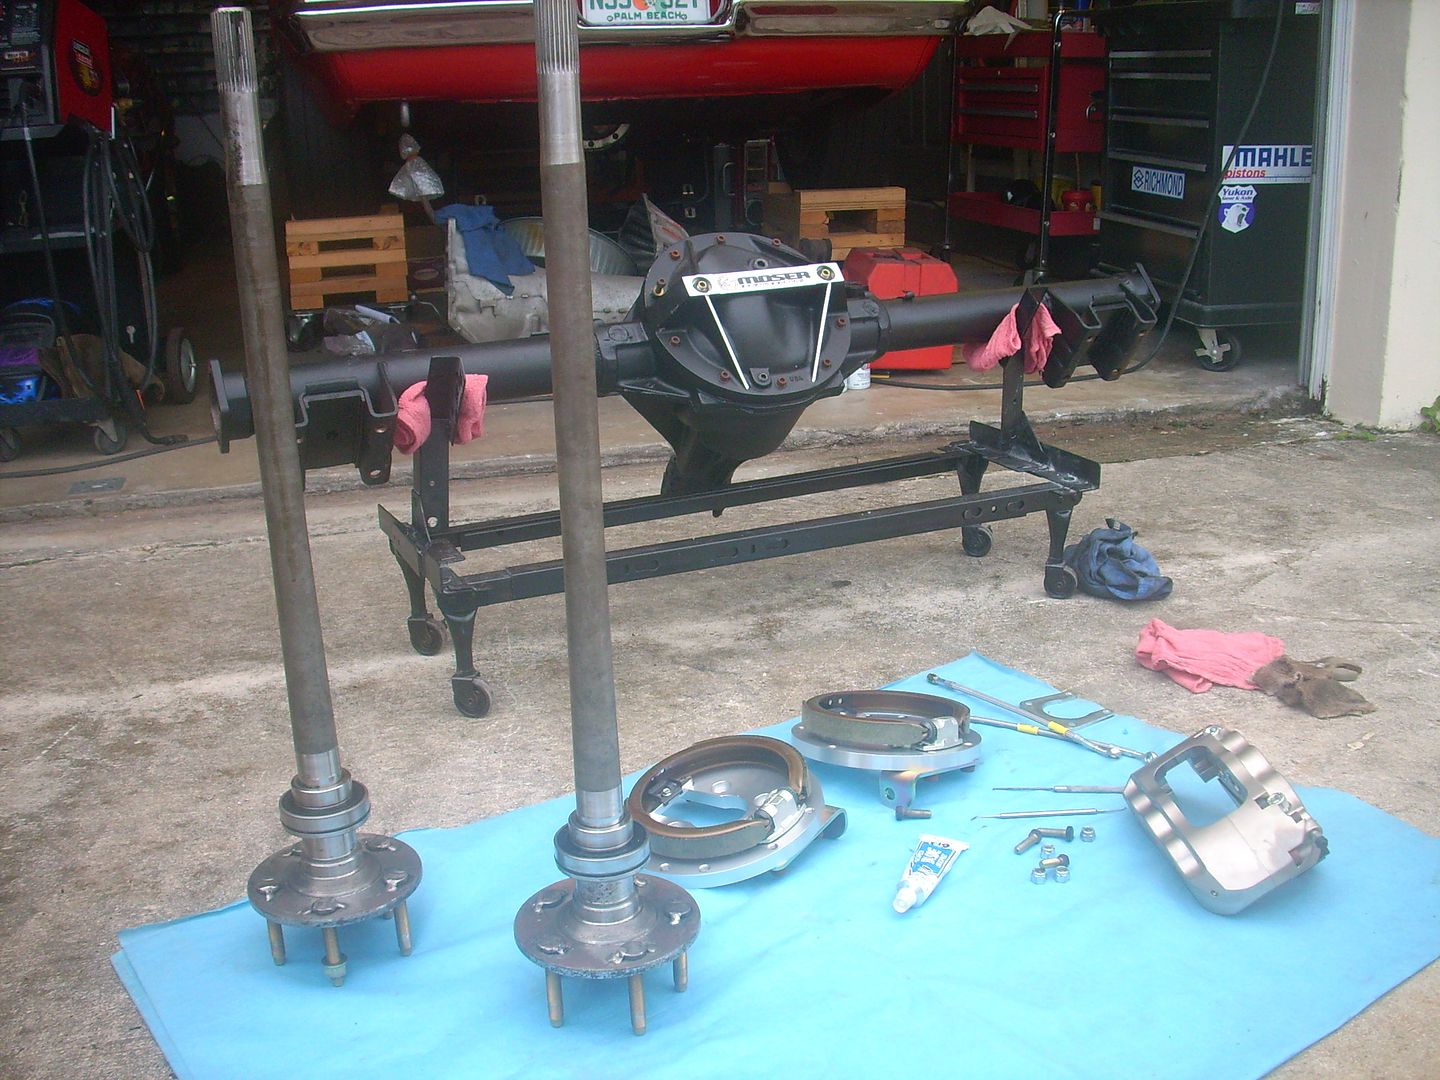
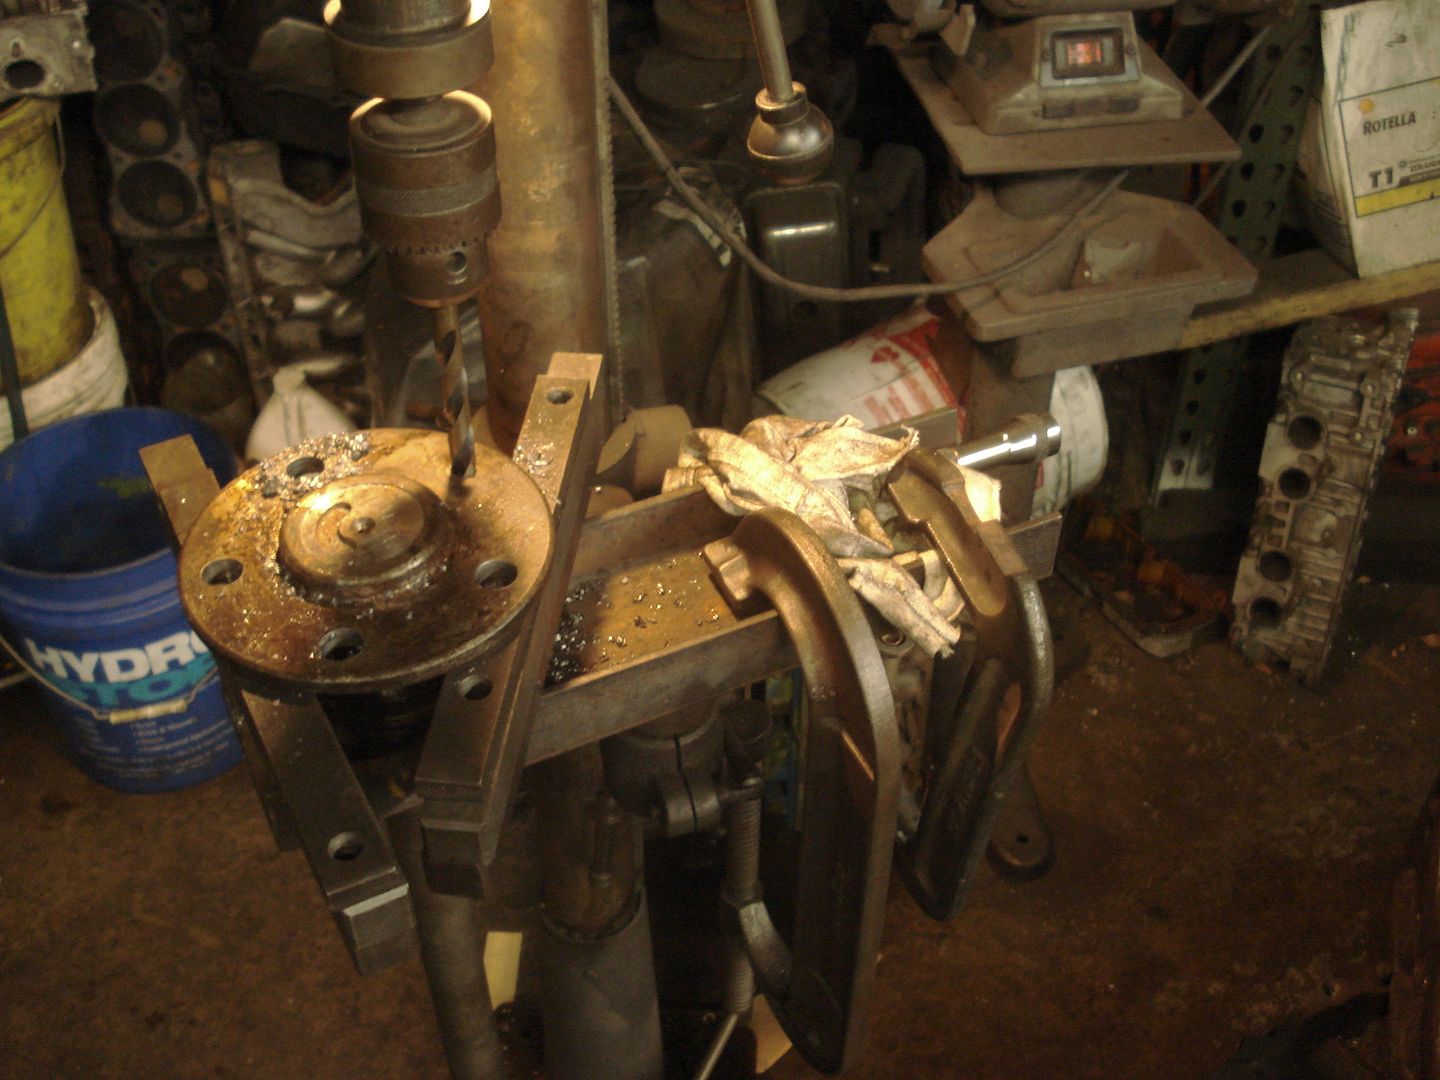
I went over to the machine shop to drill out my rear axles for 1/2" wheel studs. The race classes I plan on running in require 1/2" studs so that's what I asked Baer to send my set ready for. The fronts were already installed in the new assemblies. I called Baer tach support to be sure I got the same style ones for my Moser axles. Don't want the hassles others have gone through with different thread size or appearance of front vs. rear studs.The gentleman on the tech line that day conferred with a bud at ARP and they decided which studs I needed which I then ordered. The steps below are the old school way of doing this and modern machines can do this much more quickly but if you've got access to a big drill press like I do and want to do it yourself, here's how.

At the machine shop there's a big ole freestanding drill press that's rarely used. Many years ago the shop owner made an adapter to allow drilling out axle flanges which he told me about when I asked about drilling mine. Neither looked like they've been used in 10 years and I've been there 3 and haven't seen anyone use them. Anyway since I knew they were available I figured I'd use them.

First step drag out the press and shim it at the bottom so the drill bit would be straight up and down. I used a small square and a level on the drill bit at 2 sides 90 degrees apart. Shimmed the press at the floor with wood shingles till the drill bit was square with the world.

Next I set the table adapter that would support the axle flange so it too would be flat and square with the world. The table adapter has a couple holes in it that allow offsetting the axle shaft so the hole that needs to be drilled can be lined up with the drill bit.

First step is taking out the "little" 7/16" studs. Support axle flange on a vice and plink them out with a big hammer.

Next set up the axle on the press adapter and install a bit the size of the original holes (7/16" in my case) in the chuck. Then double check the axle flange and bit to be sure they are square to each other. Because I'm reusing the axle bearings I had to use apacers to support the axle flange because the bearings wouldn't fit through the axle hole in the table adapter. For each hole the 7/16" bit gets lowered and lined up through a hole to be drilled and then the flange is clamped in place. To be sure the hole is lined up perfectly with the bit after clamping, release the bit, then lower it again and make sure it slides cleanly through the hole.

With an intermediate sized bit the hole is opened up. Go gentle at the touch off and check the cut to be sure the bit is centered. Use cutting oil to lube the bit. After the intermediate hole is finished repeate the process using the final bit which should be sized for a 10 thousandths interference fit.

Once all the holes are drilled use a flat file on the flange to clean off the burrs from drilling. Then Install the new studs by supporting the axle flange on a vice and using the big hammer to plink them in. If you did everything right the studs should all be parallel. Check out the size difference in the studs! I put a spot of weld on two sides of each stud with a stick welder to keep them from ever moving. .

[URL=http://s240.photobucket.com/user/NOTATA/media/The%2014%20Car%20Performance%20Therapy/004-2.jpg.html][/URL]

Rad_Capz
Rad_Capz HalfDork
10/14/13 10:08 a.m.

I decided that figuring out the backspacing I think will work for the new wheels and ordering them would give me incentive. So I ordered 18 X 10's with 6" backspacing up front and 5.5 backspacing in the rear. The 285/295 tires are Yokohama AO 48's which are a DOT legal race compound tire designed for track day use. I expected a wait time of 8-10 weeks which is not unusual for custom wheels and figured I'd use the time to start working on the car. Imagine my surprise when I got a tracking # within a week! I better get moving!

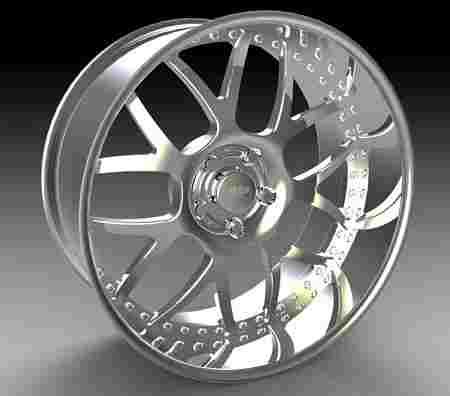
For those who've never bought custom aftermarket wheels like these Rushforth Night Trains there are other options besides the backspacing. You can get different finishes/colors, regular or hidden valve stems, exposed or hidden hardware etc. My wheels are the model shown below but will appear a bit different. Will post pics of mine when I get them.

[URL=http://s240.photobucket.com/user/NOTATA/media/The%2014%20Car%20Performance%20Therapy/NightTrain1s_medium.jpg.html][/URL]

Rad_Capz
Rad_Capz HalfDork
10/14/13 10:12 a.m.

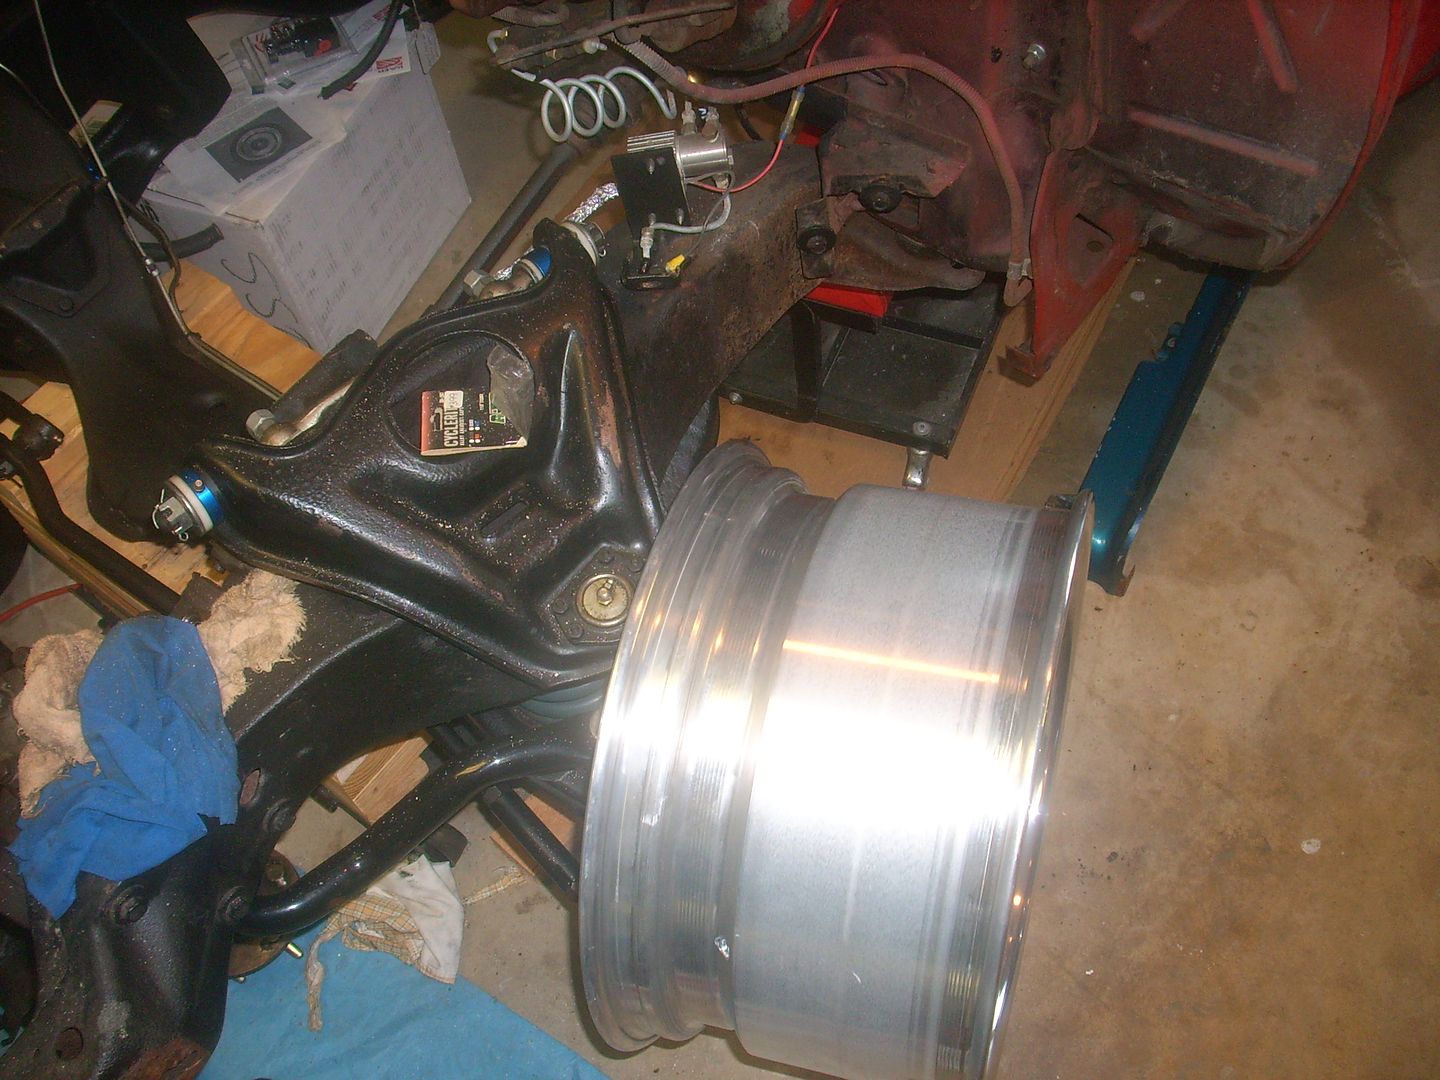
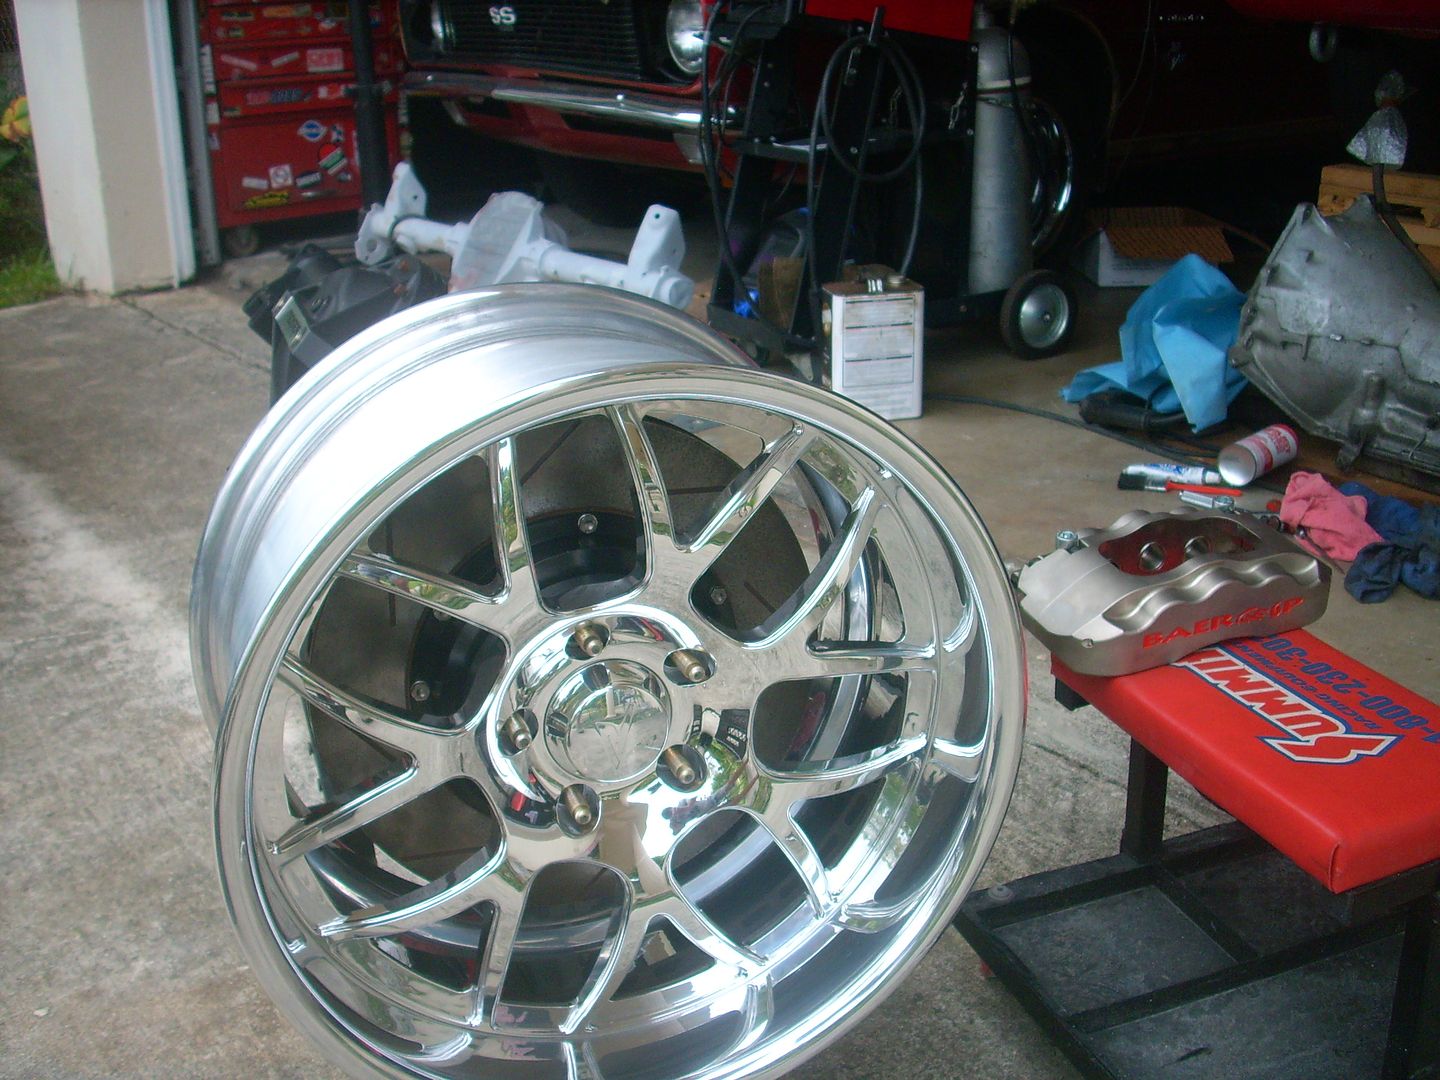
I test fitted one of the Rushforth Night Trains on the front to check clearance of the 18 X 10's and so far it looks like they'll work out nicely.

Haven't gotten the tires mounted yet but been working a bit on the rear disc install. First thing was to spruce up the paint from jacking the car on the rear. Since this car gets tracked and I might wreck it one day I just make the underside look nice but no powder coating or more expensive appearance things. So I "fixed" the paint by giving the affected areas the Krylon touch with the same semi flat black I've been using on the car the last 20 years.

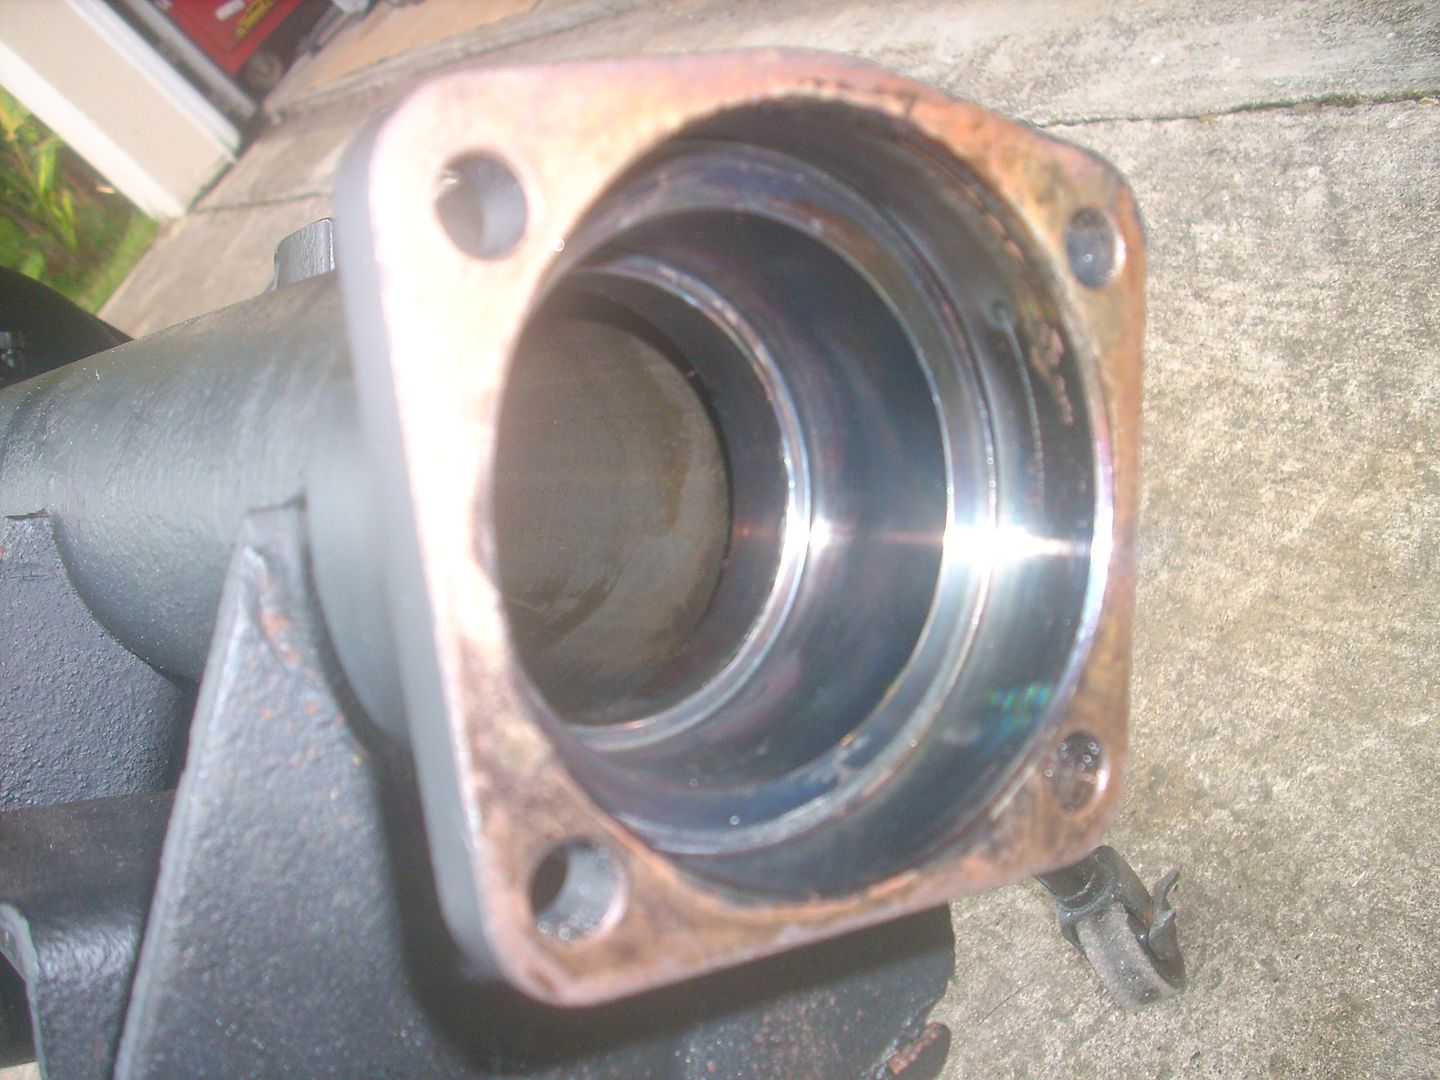
It's going to be very tricky getting the parking brakes installed with Moser tapered axles and big Ford axle housing ends on a GM 10 bolt. I'm contemplating removing the axle bearings and trying to slide the complete backing plate/park brake assembly on as a unit then reinstall the bearing and then install the whole shabang at once. Anyone who's ever tried this combo please let me know if you've got a tip to make the install easier.

Rad_Capz
Rad_Capz HalfDork
10/14/13 10:13 a.m.

I'm replacing several pieces on my car with "better" ones than I could find (or afford) when I first painted the car 20 years ago. I collected these pieces over 20 years and am finally painting them since the cars apart anyway.

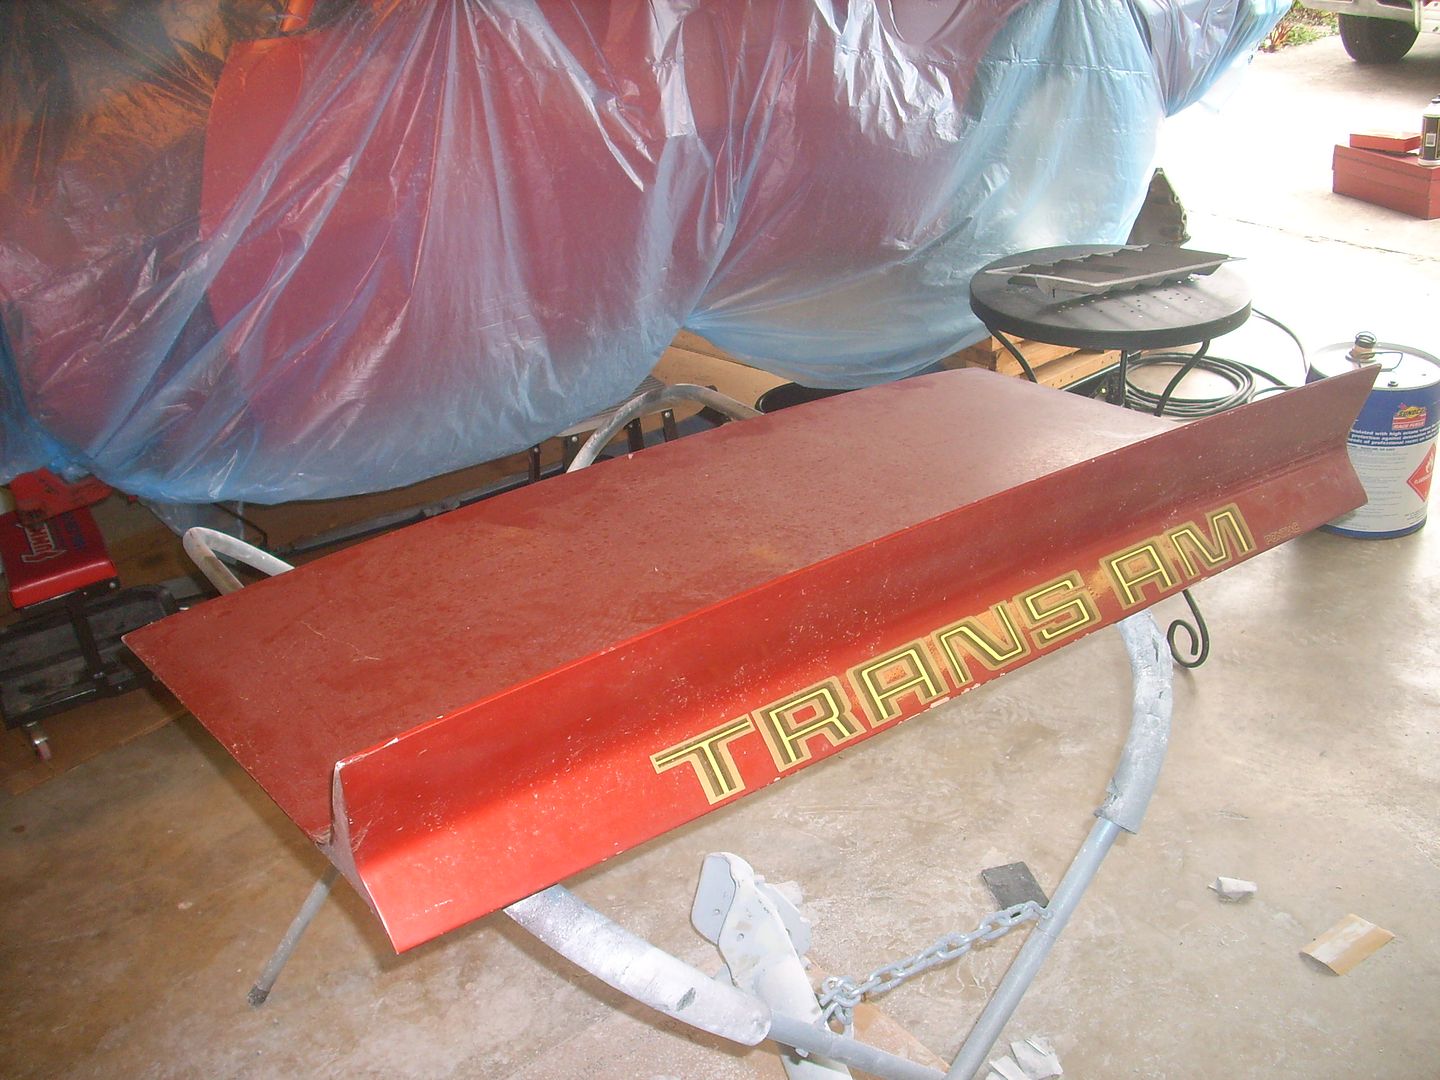
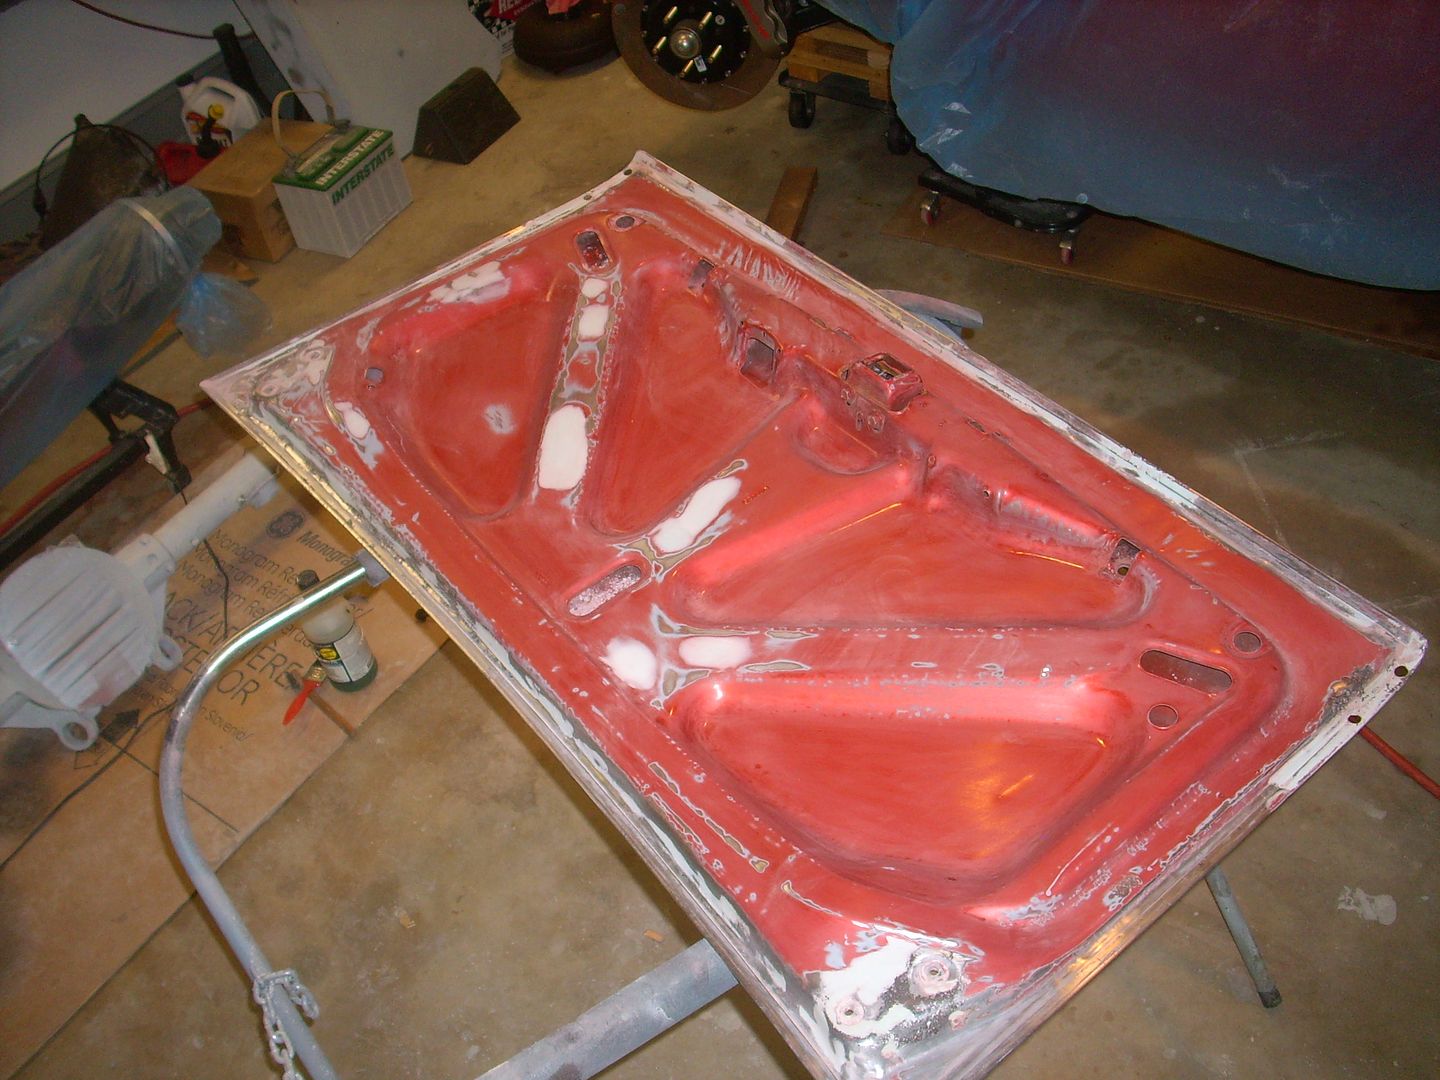
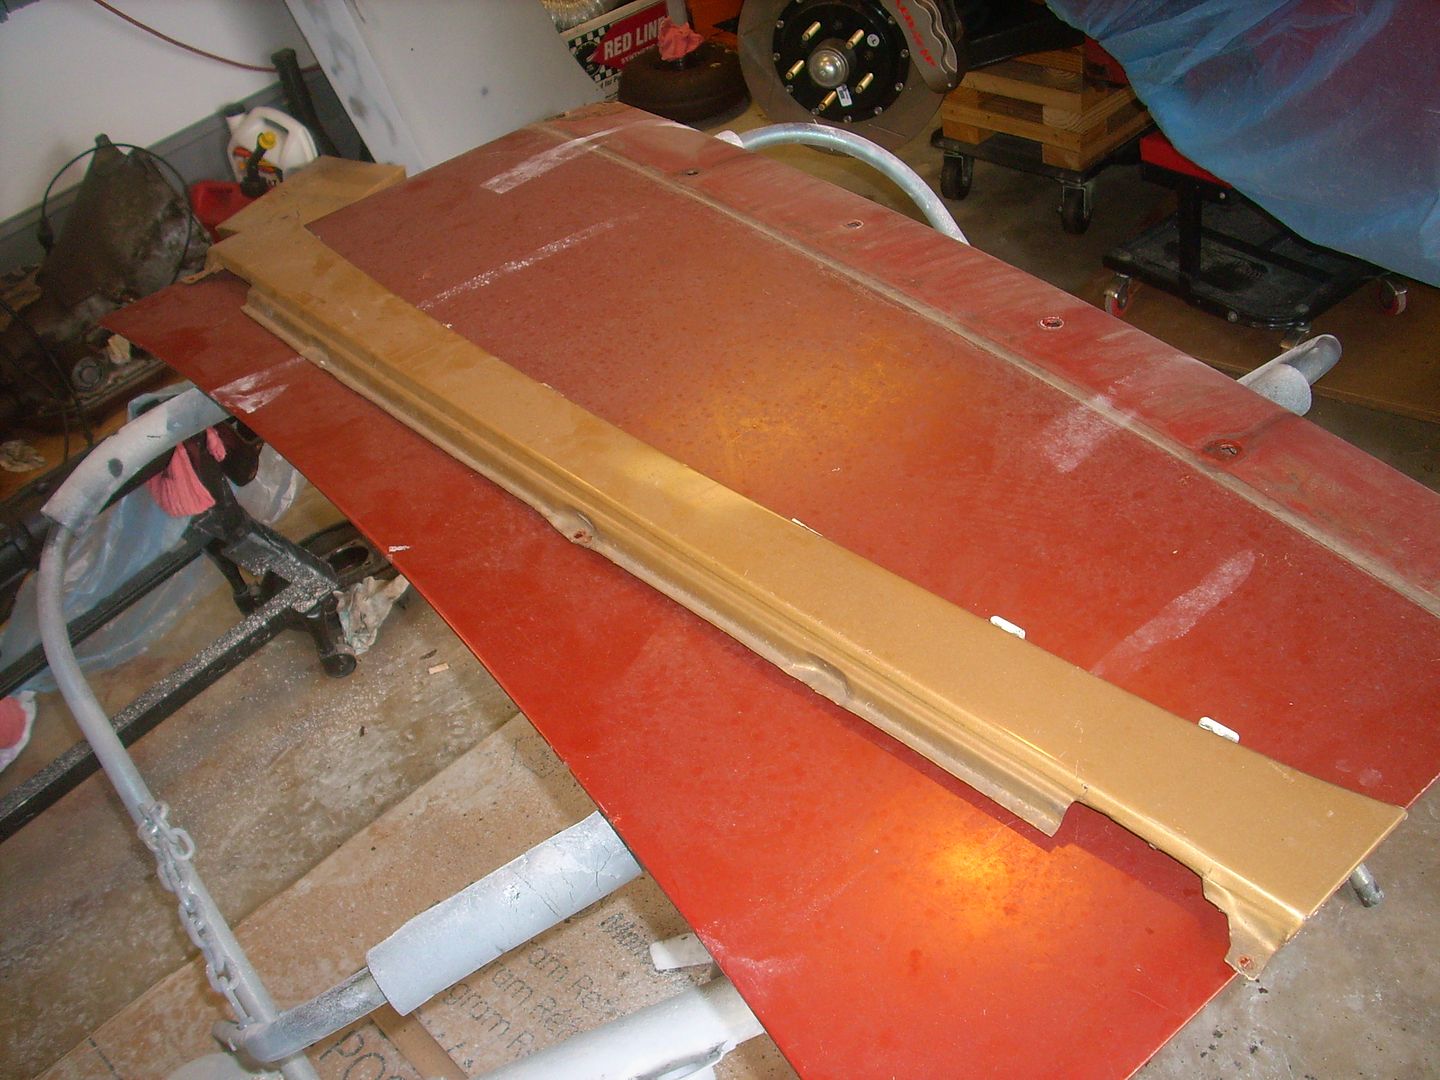
1st up is a deck lid. The one on my car now was the original esprit lid without spoiler which isn't as straight as I'd like. I had drilled holes and mounted pieces from 3 different spoilers on the car at the time. I parted a 76? TA back in the 90's and saved the deck lid and spoiler for use now. Spoiler will be modified. I didn't completely strip the inside of the trunk because it's a lot of work few will ever see and not being in the sun the paint isn't cracked. I did strip the edge and smoothed a dew dents.

The trunk filler on my car wasn't as good as the one on the parted car so it came along for the ride and got stripped as well.

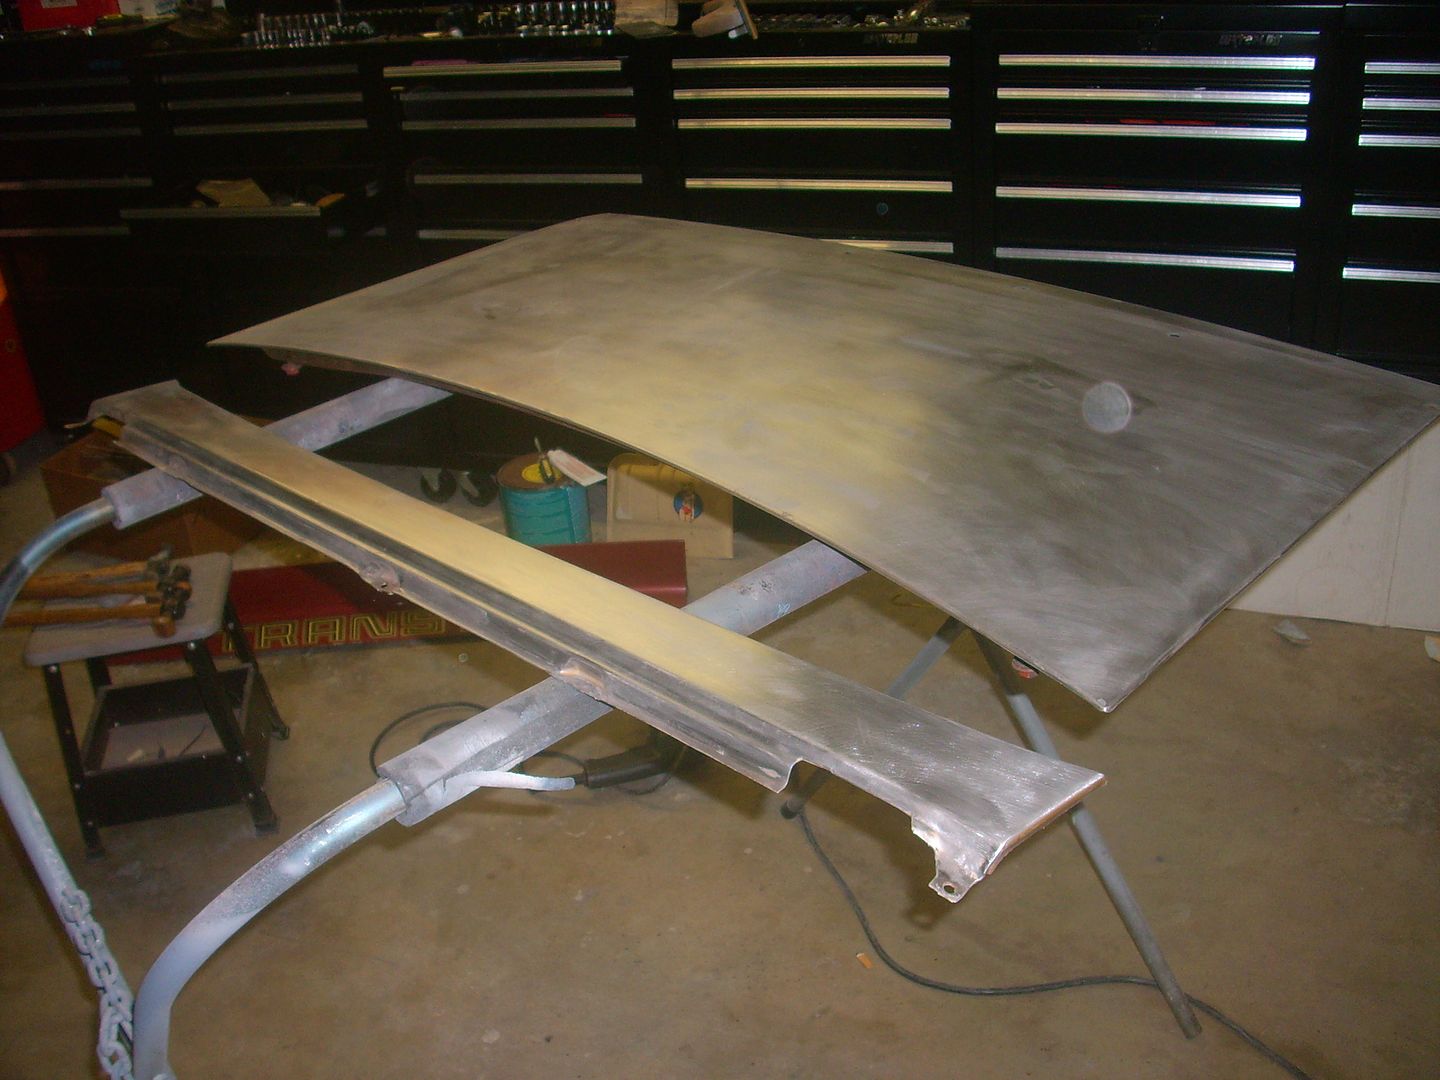
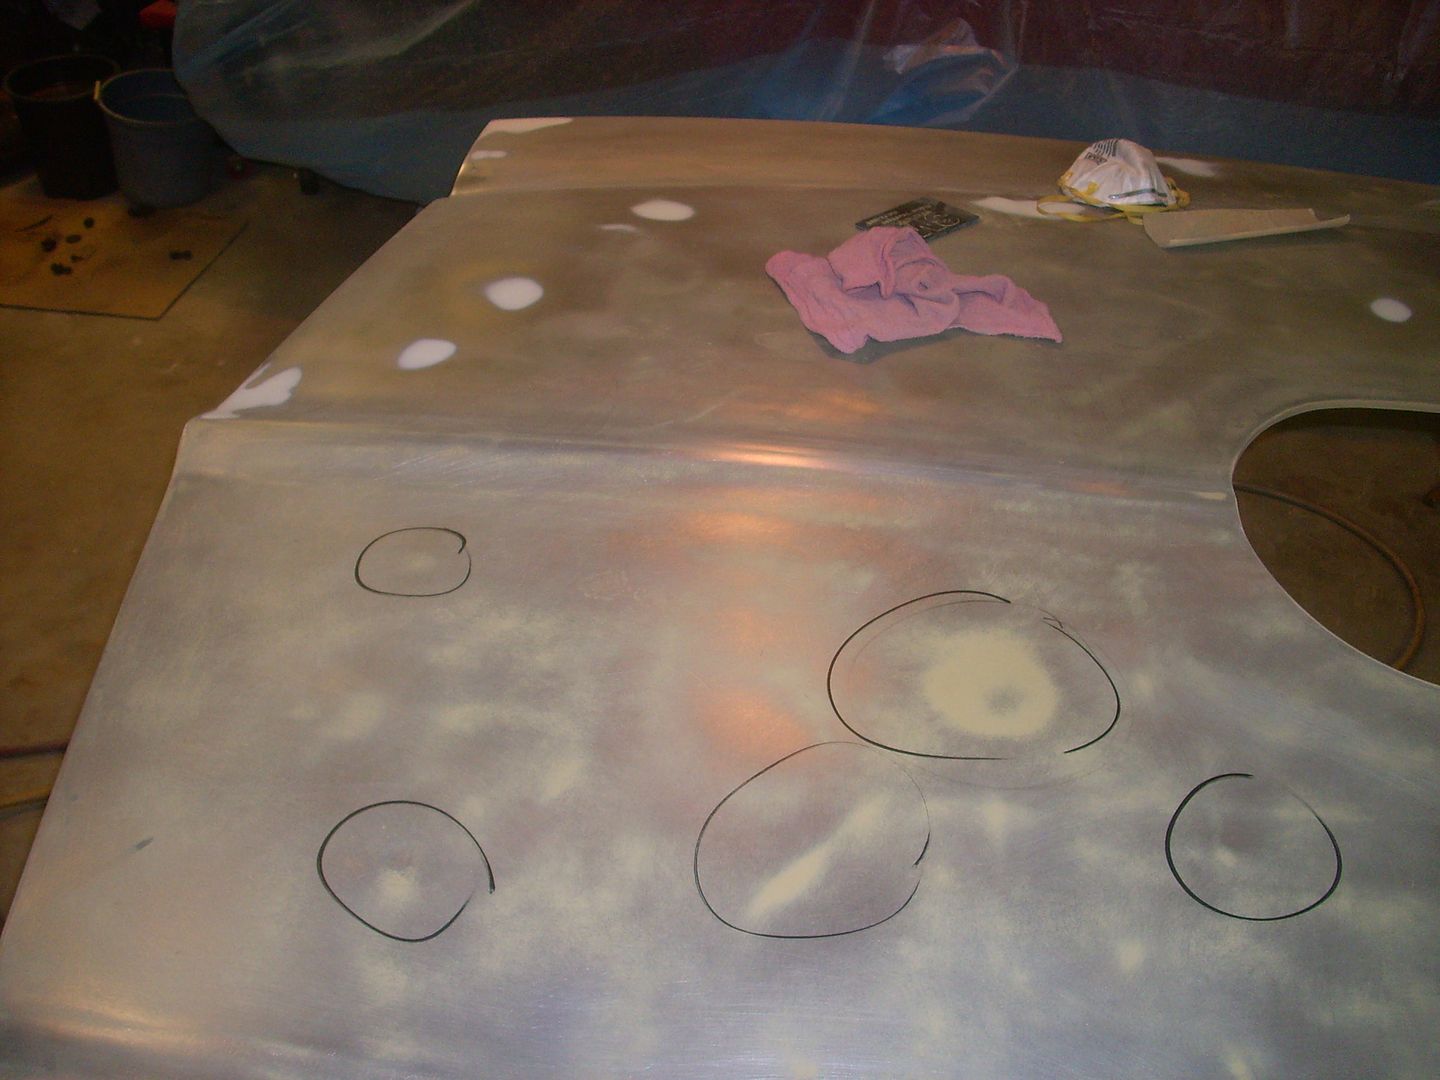
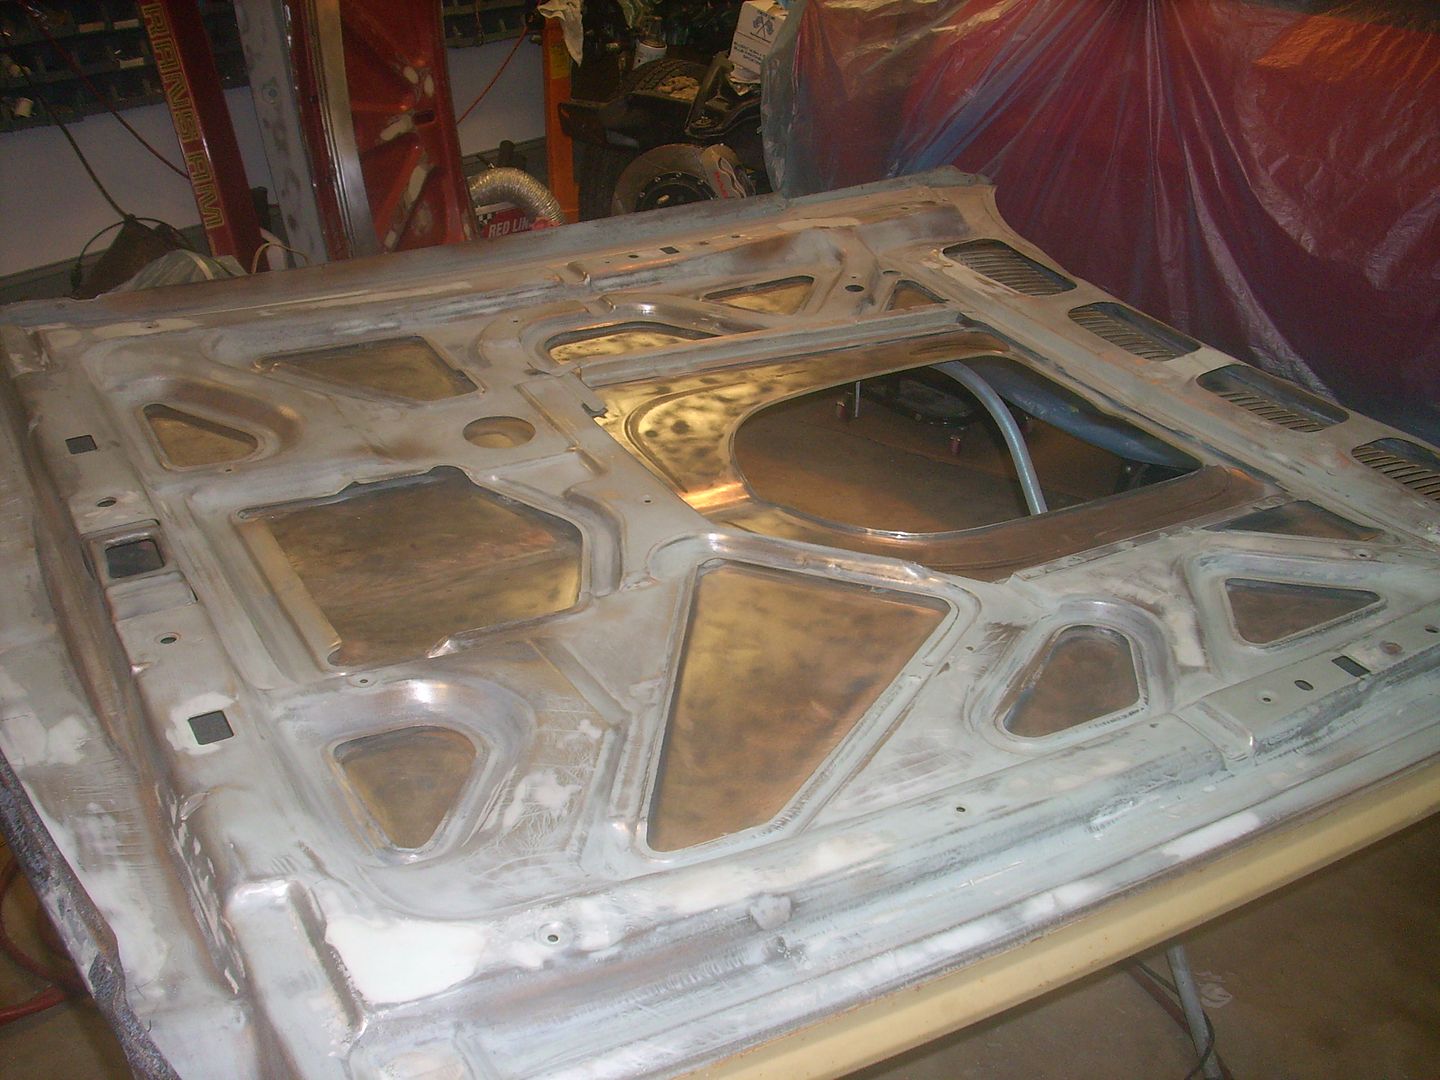
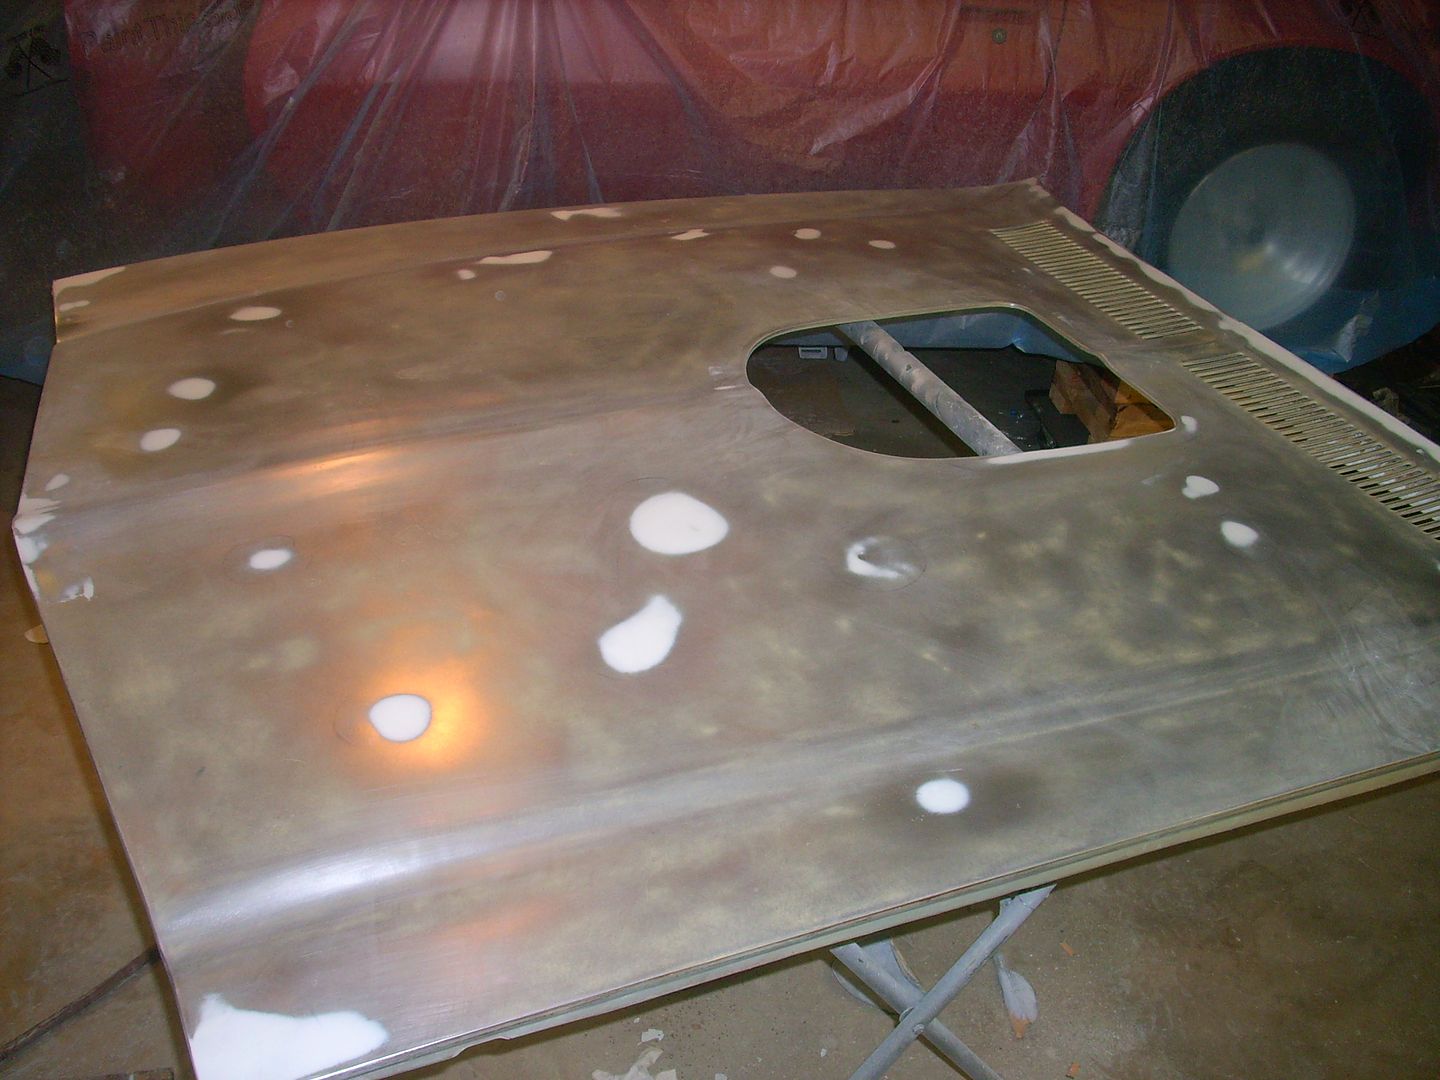
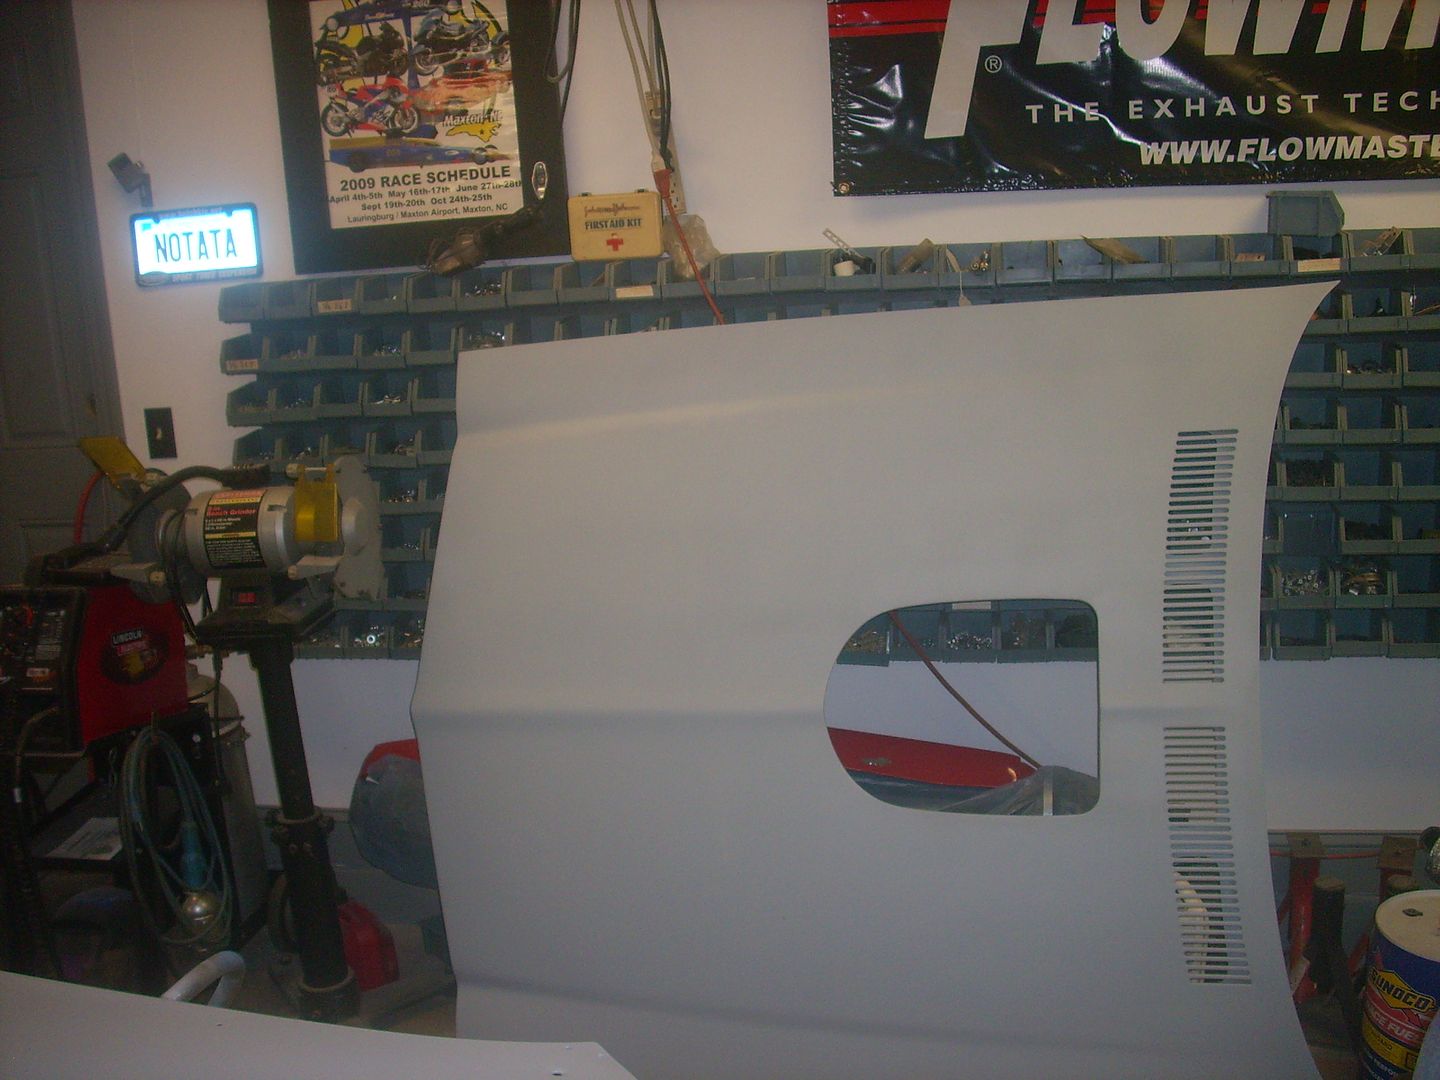
The hood on my car was originally a stock flat hood someone did a nice job of cutting a shaker hole in before I ever had it. I bought a stock TA hood long ago and have kept it waiting for paint. Because my job involves a lot of underhood restoration projects and customers will want a peek at my own car I'm kinda forced to do a nicer job than I would normally do to a car that might get stuffed into a tire wall at a track. So I stripped and smoothed the complete inside and outside of the hood. I've got over 20 hours in it so far!

The hood was media blasted and primed before I bought it a long time ago so I wanted to start with bare metal. While using a DA to strip it I mark all the high and low spots so I don't miss any then sand out the paint before hammer/dolly work and thin filler.

Rad_Capz
Rad_Capz HalfDork
10/14/13 10:14 a.m.

I had to see what one of the new wheels looked like on the rear when I was working on the brake install! Just to check fit ya know! Ahahahaha

Rad_Capz
Rad_Capz HalfDork
10/14/13 10:15 a.m.

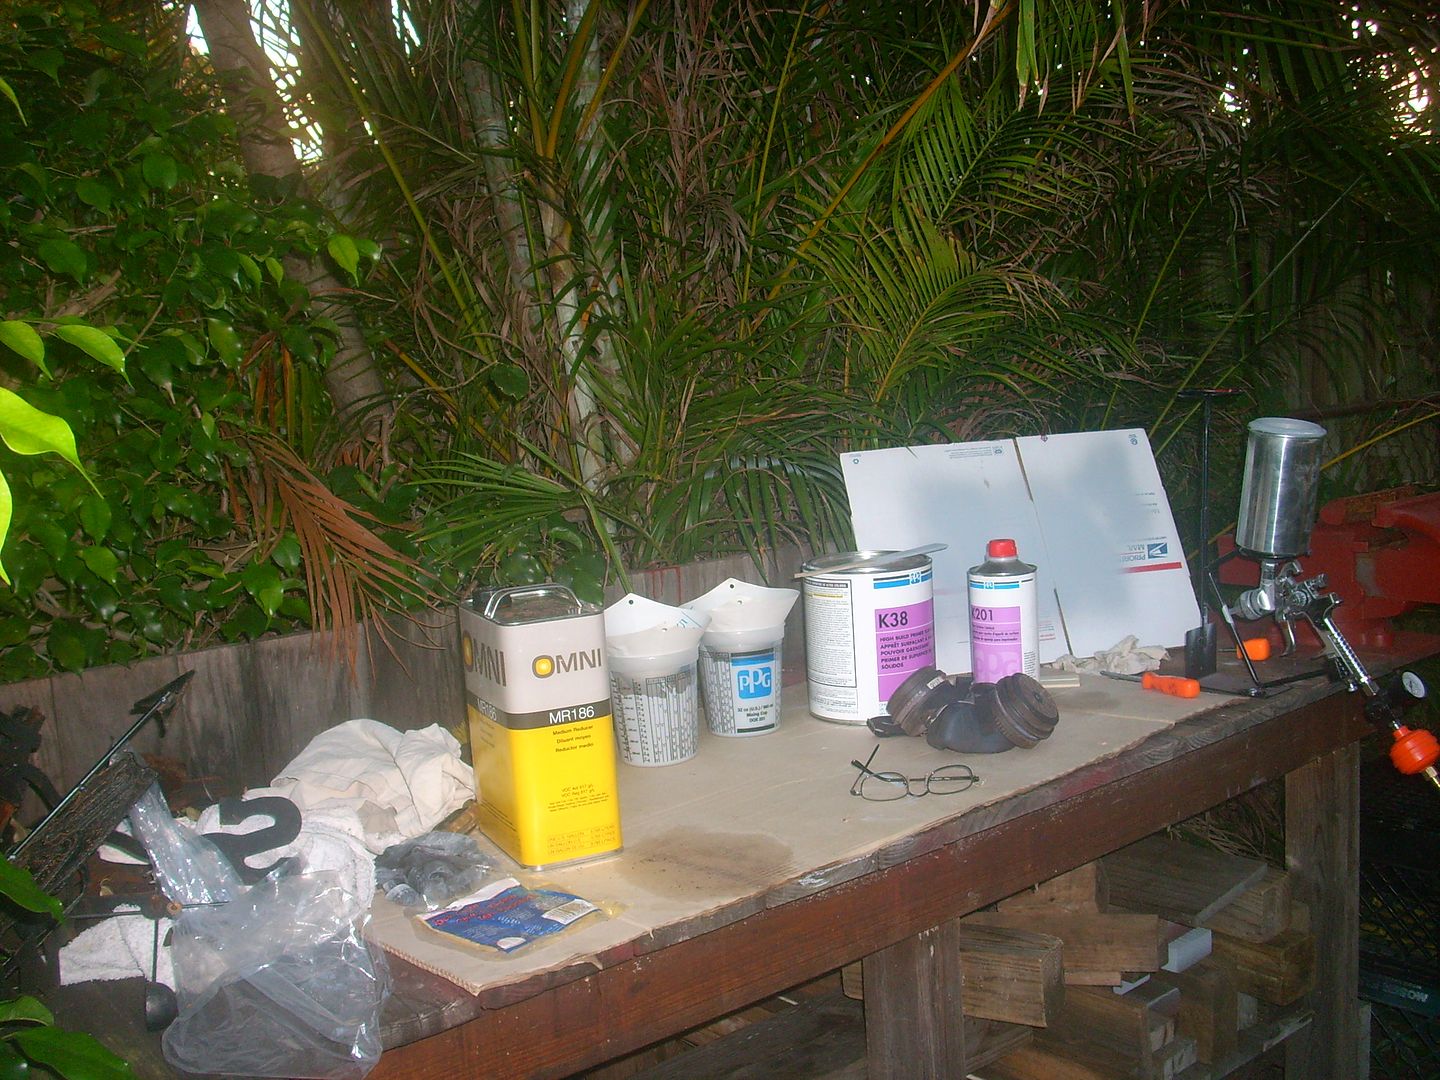
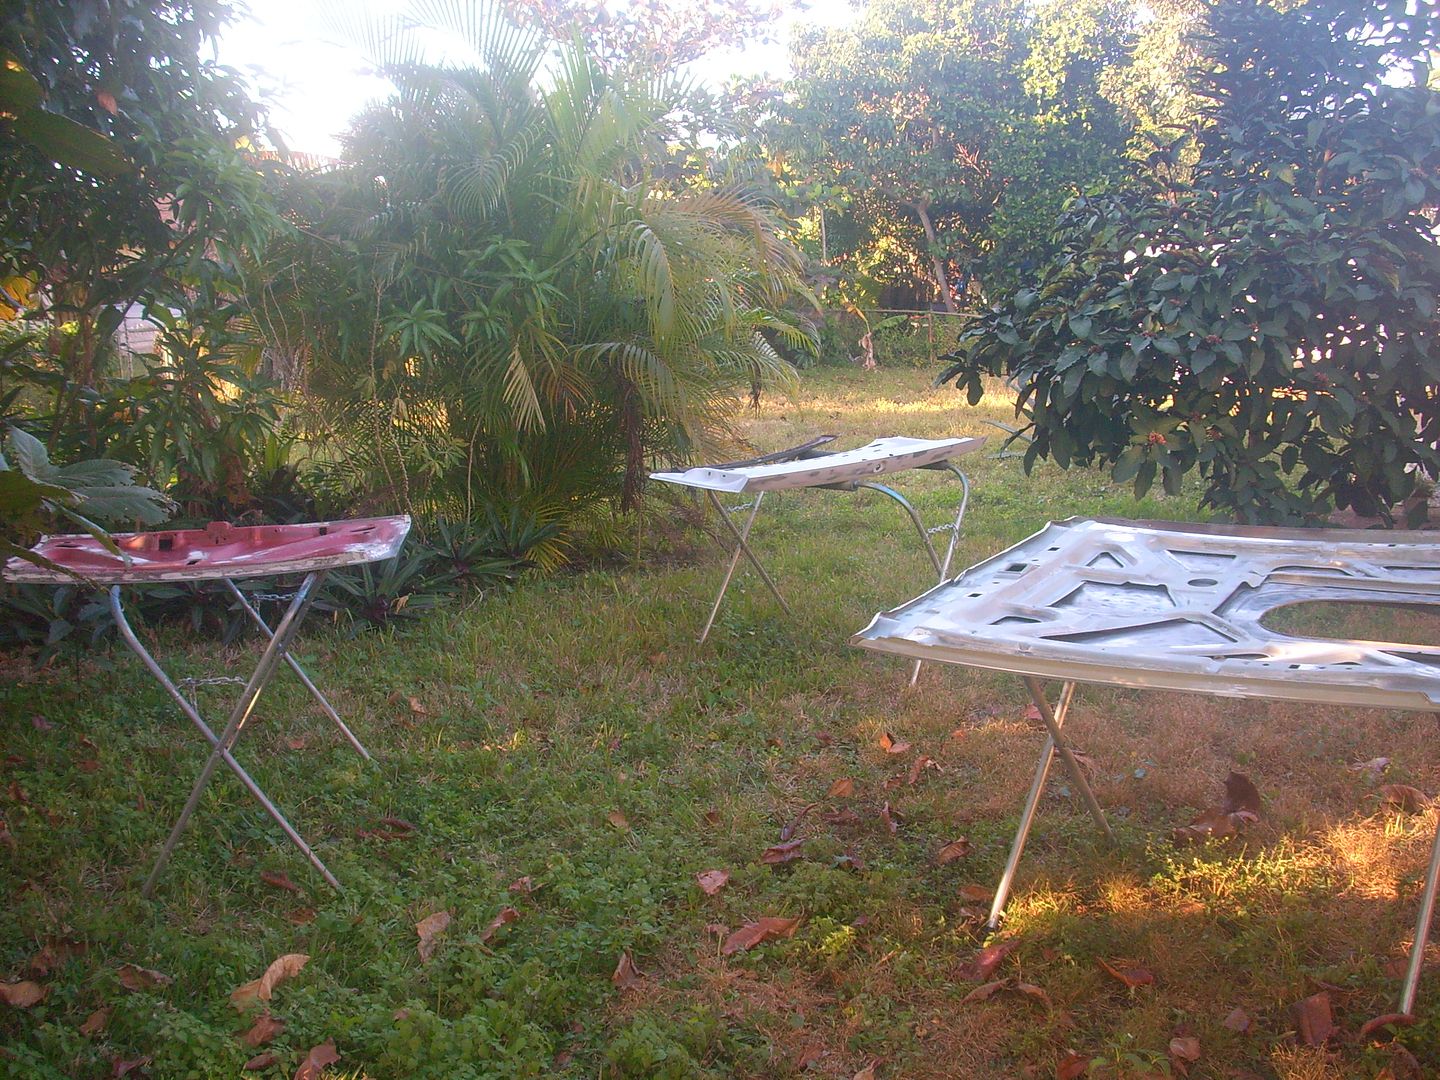
Living close to the Atlantic we get an ocean breeze most days. Since it was calm today I took the opportunity to spray some primer on pieces that were ready for some paint.

My high tech mixing station.

My fabulous tropical spray booth. Yes, I need to mow the lawn (weeds) but it's bodywork season!

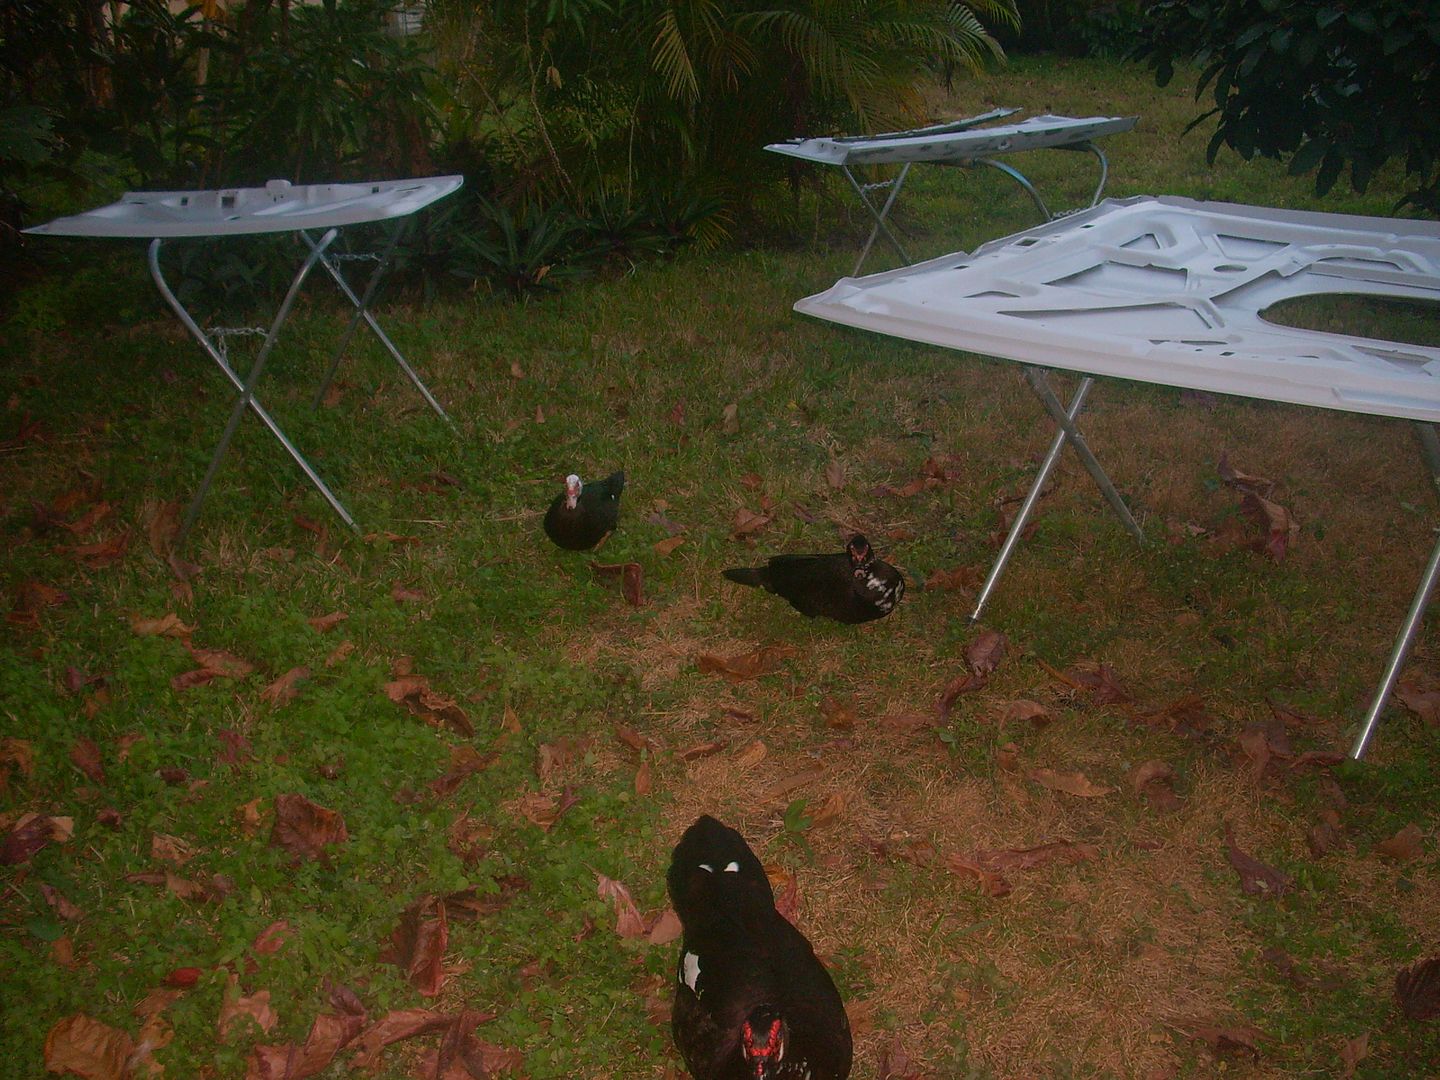
Some neighborhood quacks stopped by to offer assistance (beg for food). While some guys have a shop dog or cat the ducks have decided it's fun to stop by my house get a bread snack and check out whatever I'm working on. They'll stand in front of the garage if the doors open but not come in, however if I'm outside they get underfoot and sometimes get banished like they did today ahahaha.

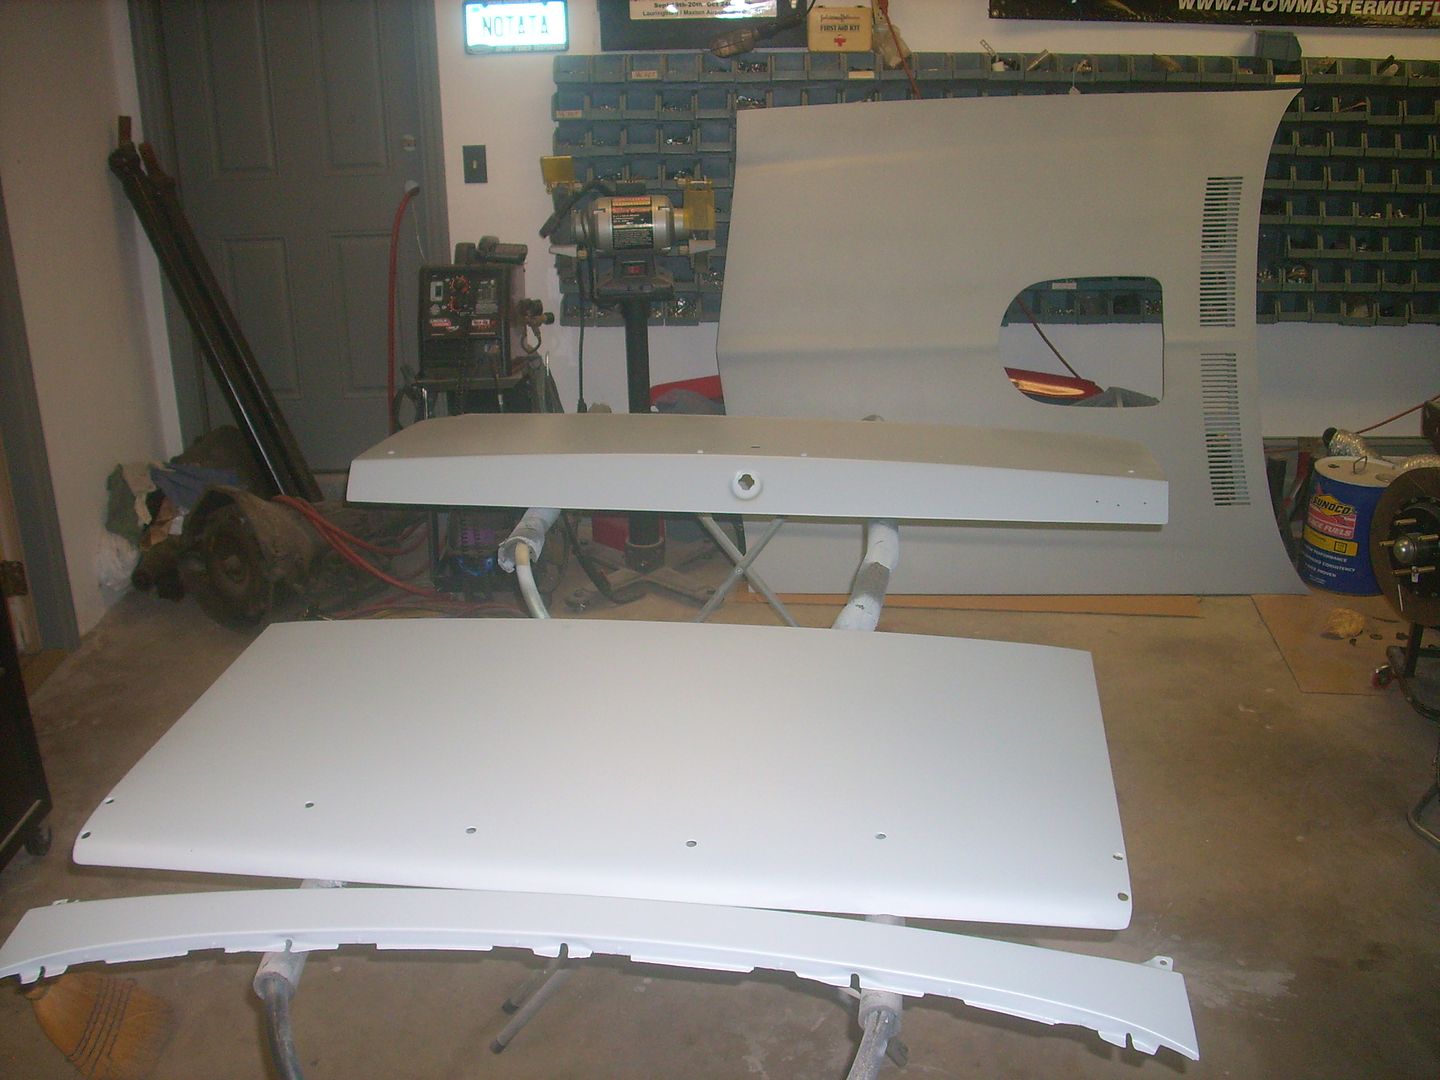
All primed inside and out with high build sandable primer. Ya ya I know "Whats that Fox body notch trunklid doing in the mix?" It snuck in and will be painted white.

Rad_Capz
Rad_Capz HalfDork
10/14/13 10:16 a.m.

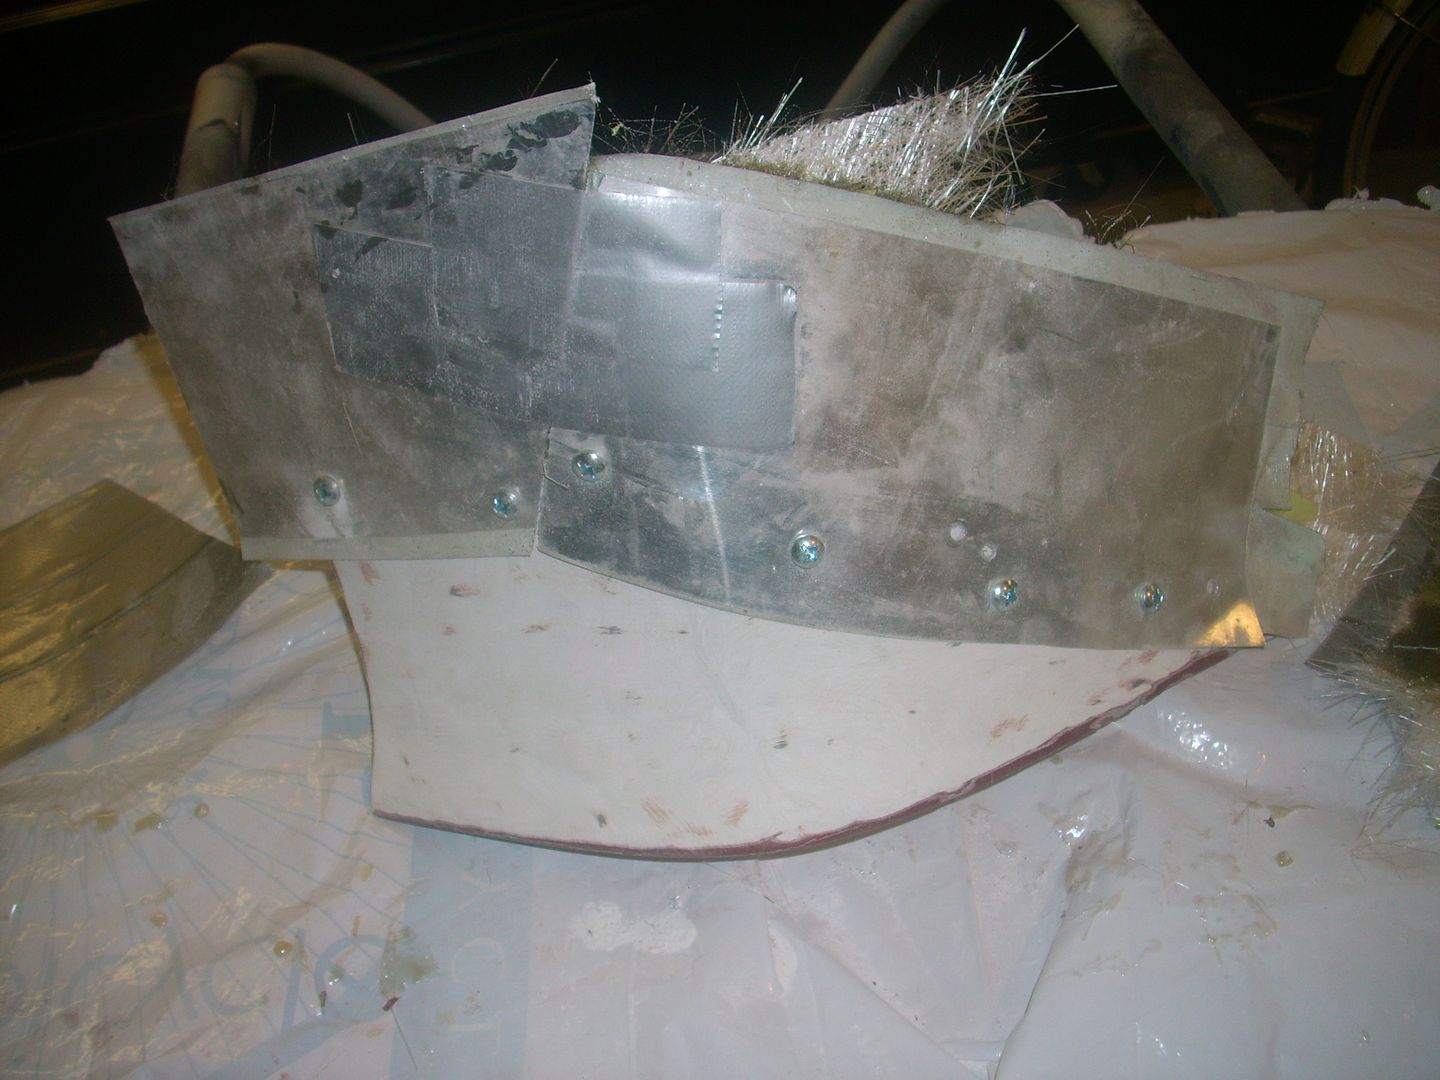
I decided to modify a rear spoiler with the hope of increasing downforce. I will be making a front spoiler extension & splitter so hopefully this will balance it out a bit. I'm adding fiberglass to a stock rear 3 piece spoiler to make it about 1" - 1 1/4" taller.

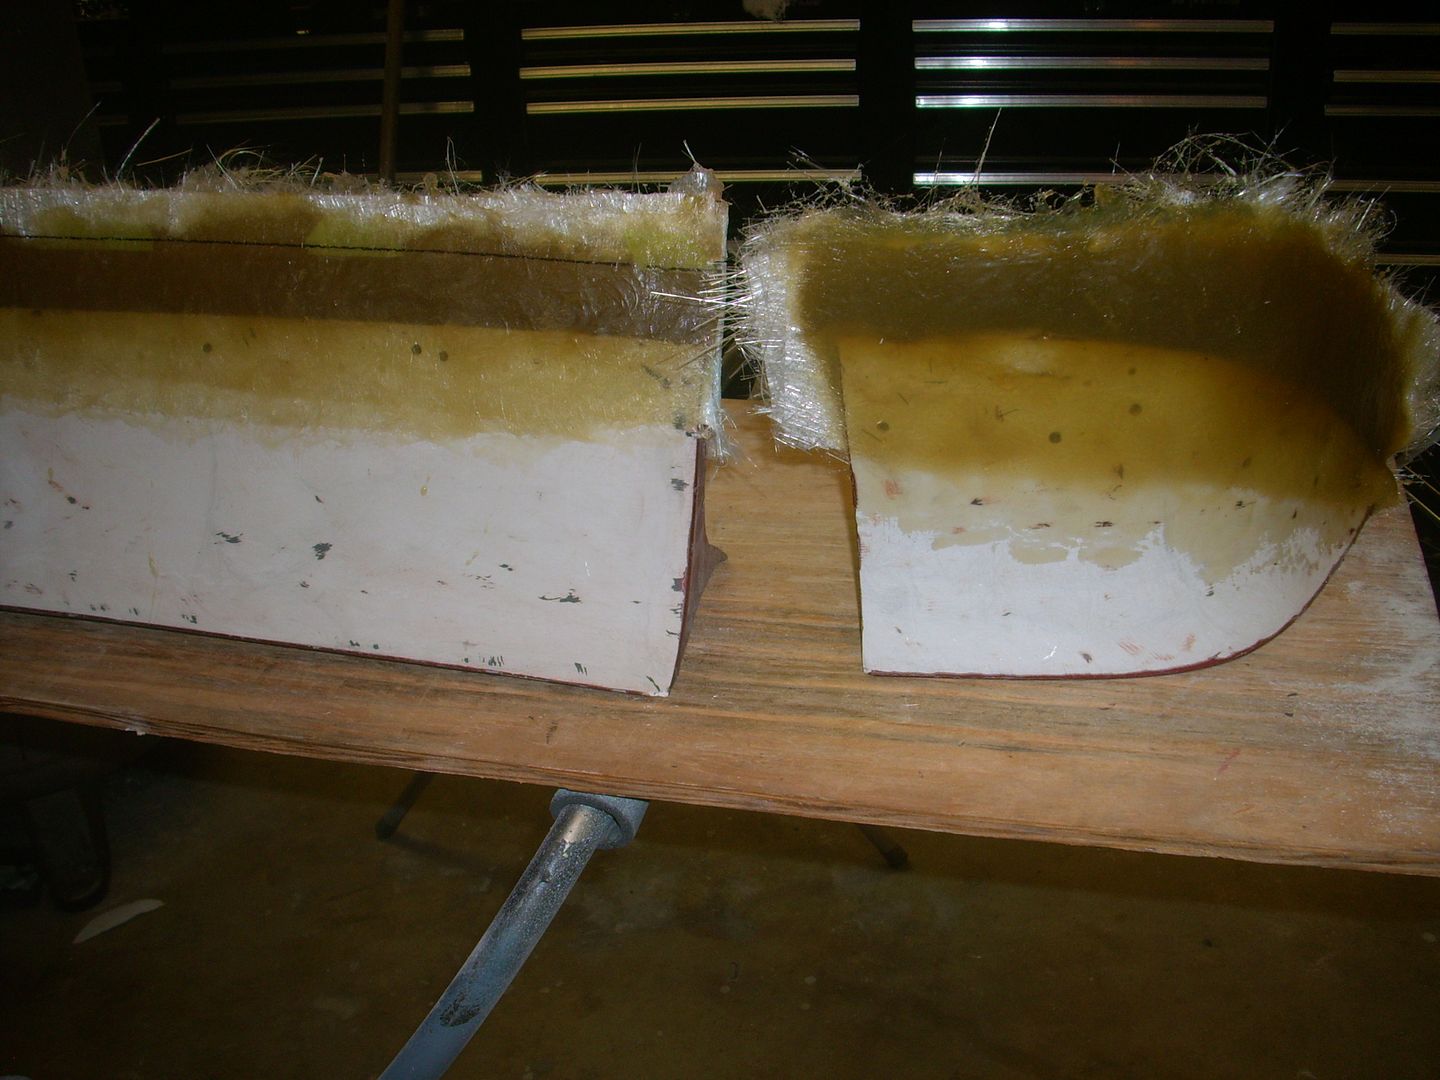
So far I've got about 80 bucks in materials and it looks like it'll work. I used some roofing flashing to make a sort of mold on one side of the spoiler to support the fiberglass & resin.

After building up one side with several layers of fiberglass I removed the flashing and added several layers to the other side.

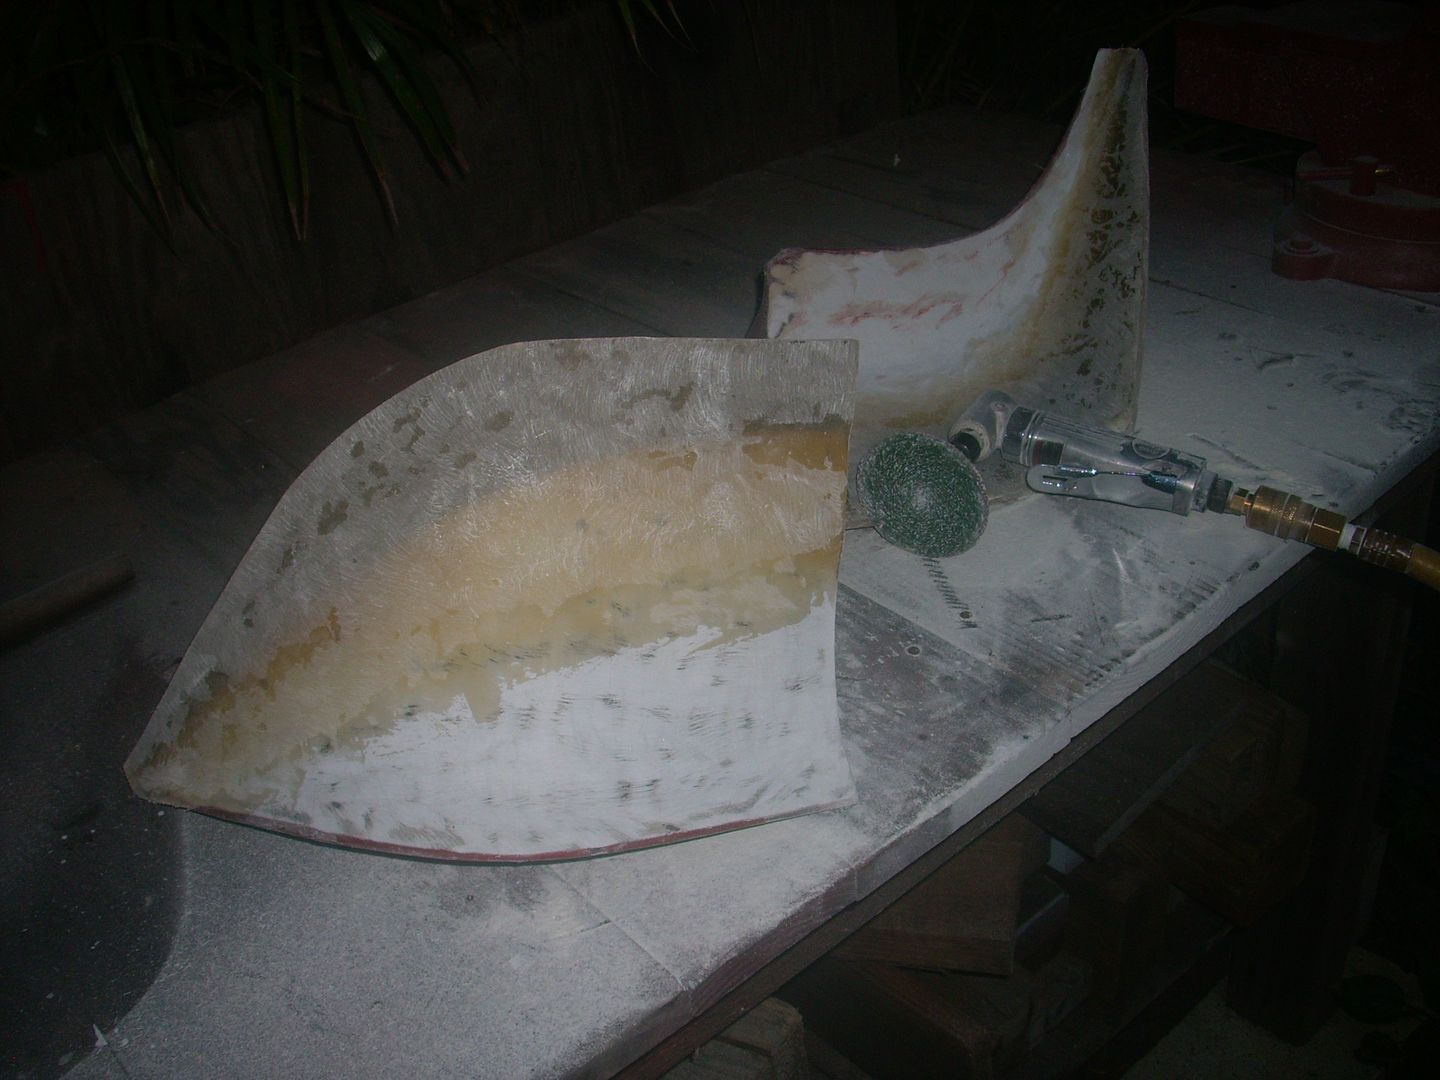
Then sanded with an air tool with rough twist lock 3" pads to create the curves and zip off the excess.

After another coat of fiberglass resin and another rough sanding *I'll smooth out the surface with a skim coat of bondo and prep for paint.

Rad_Capz
Rad_Capz HalfDork
10/14/13 10:18 a.m.

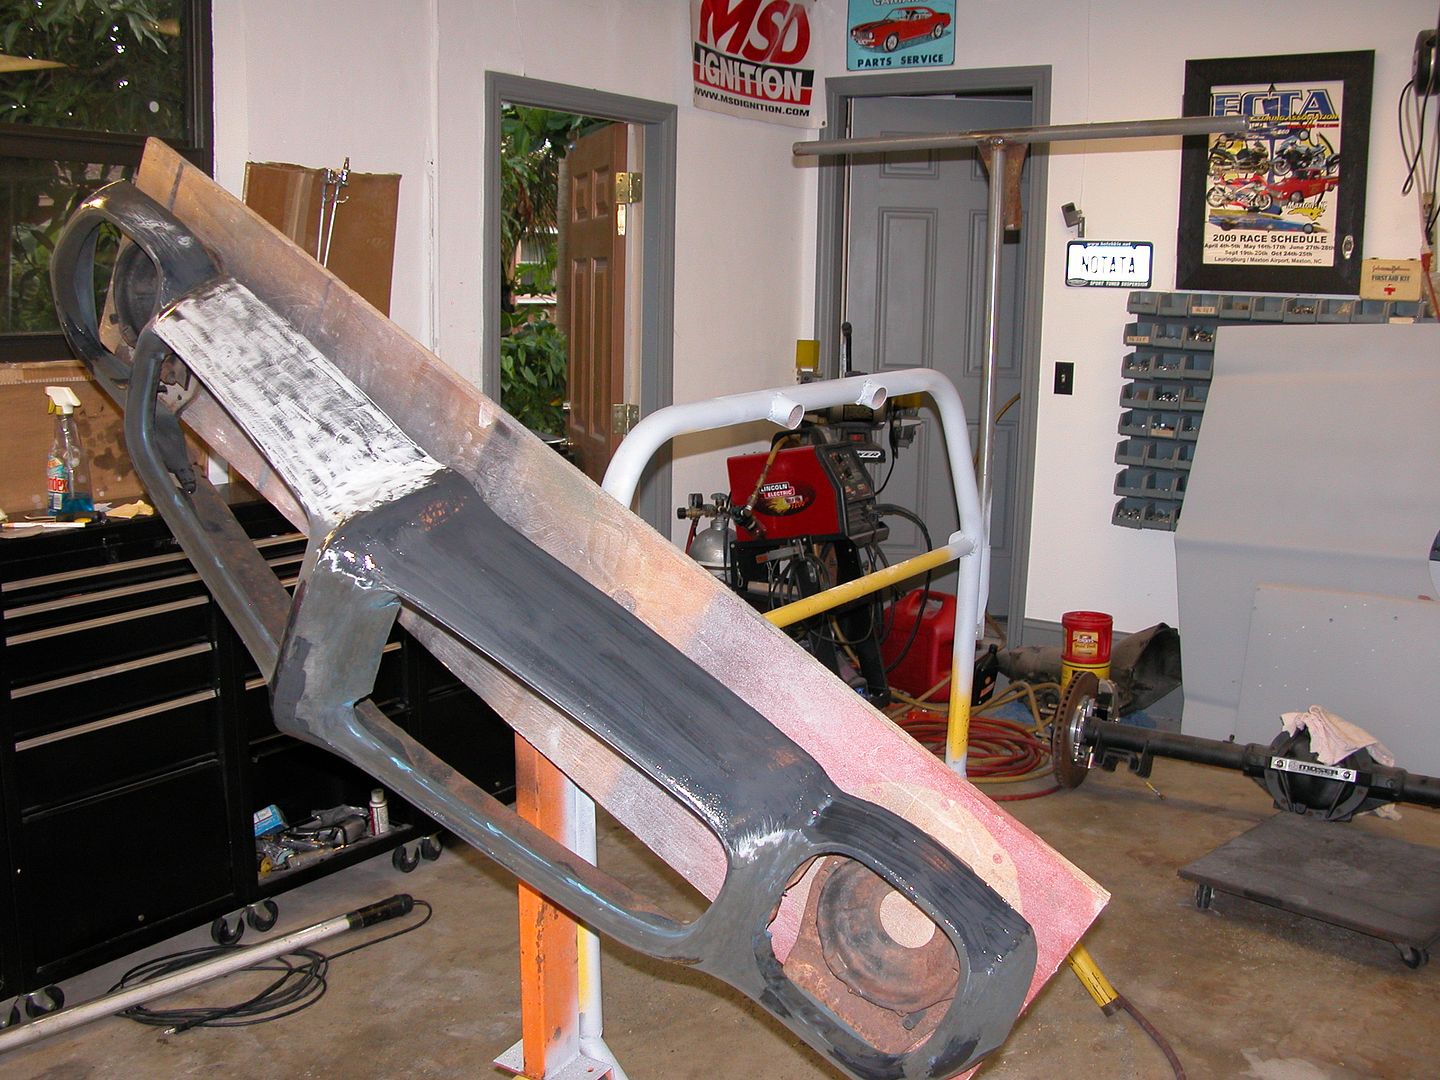
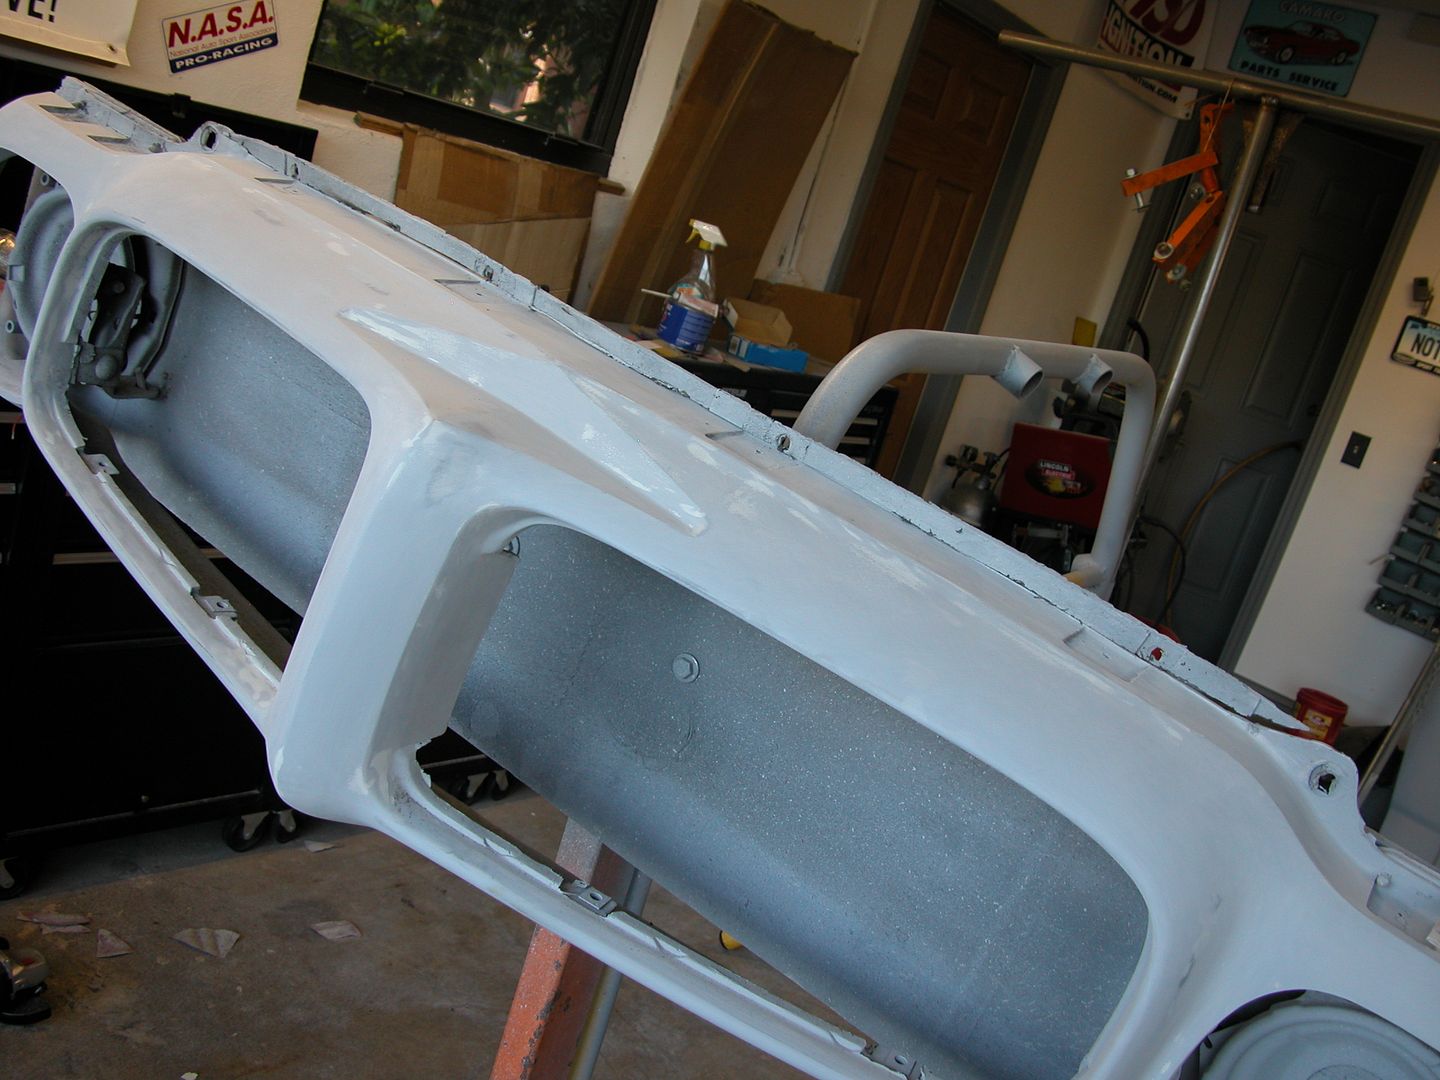
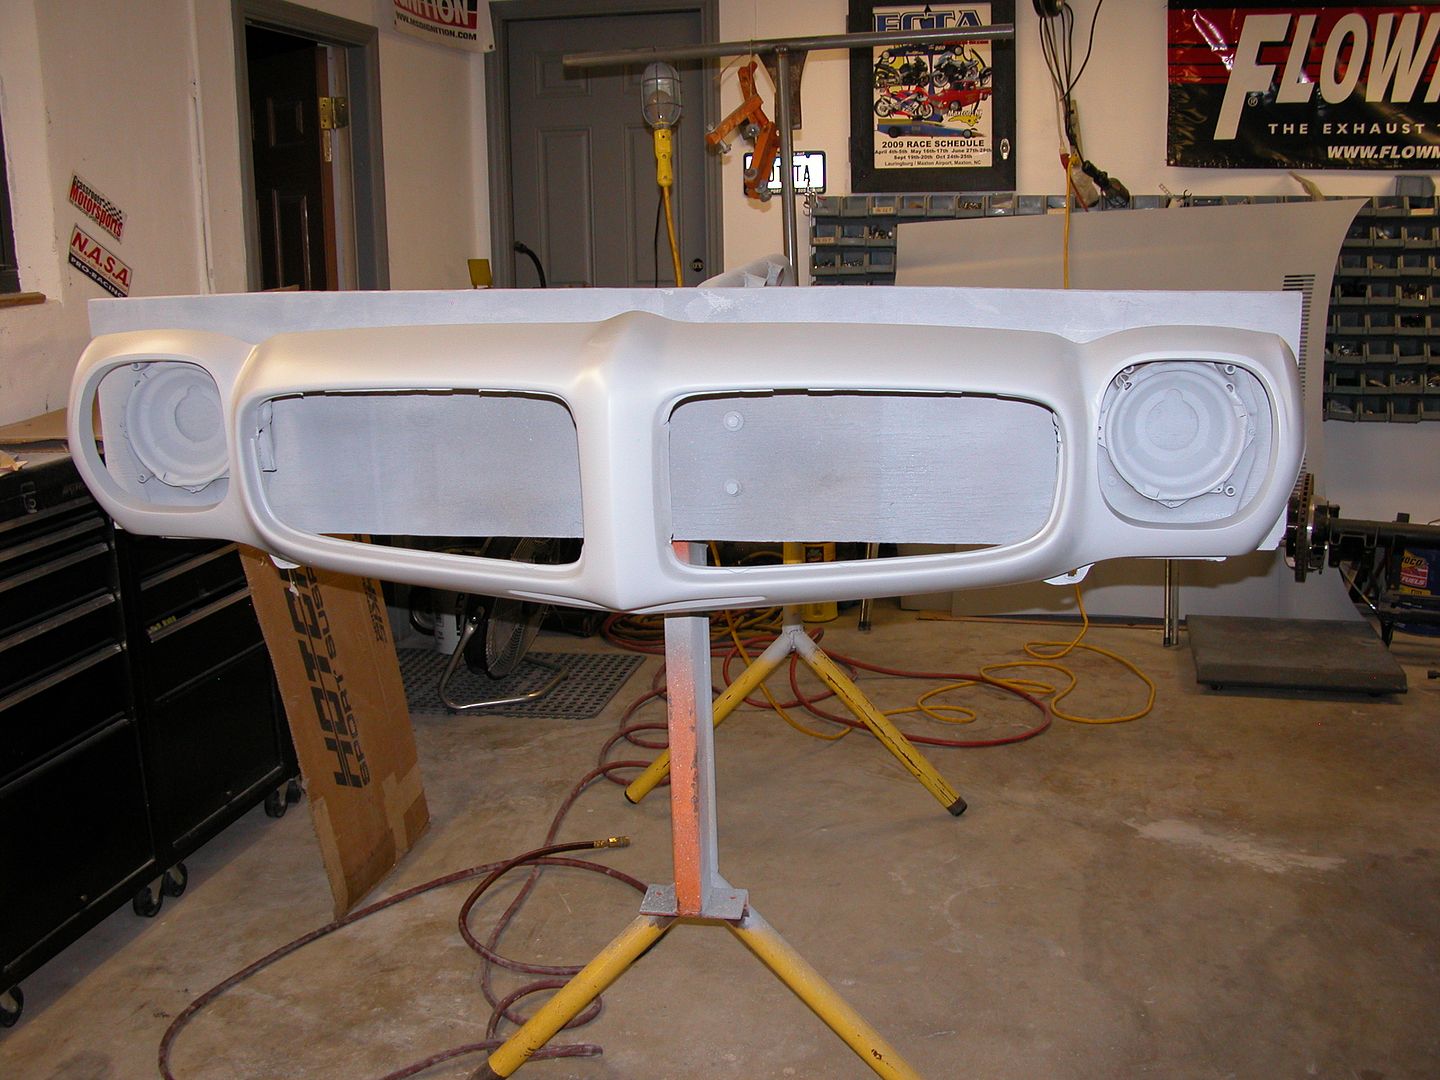
The rear spoiler is roughed in and will get finish work done later while mounted to the car. I started working on the front bumper I'll be using. I want a bumper without the jack hole slots for a cleaner look.

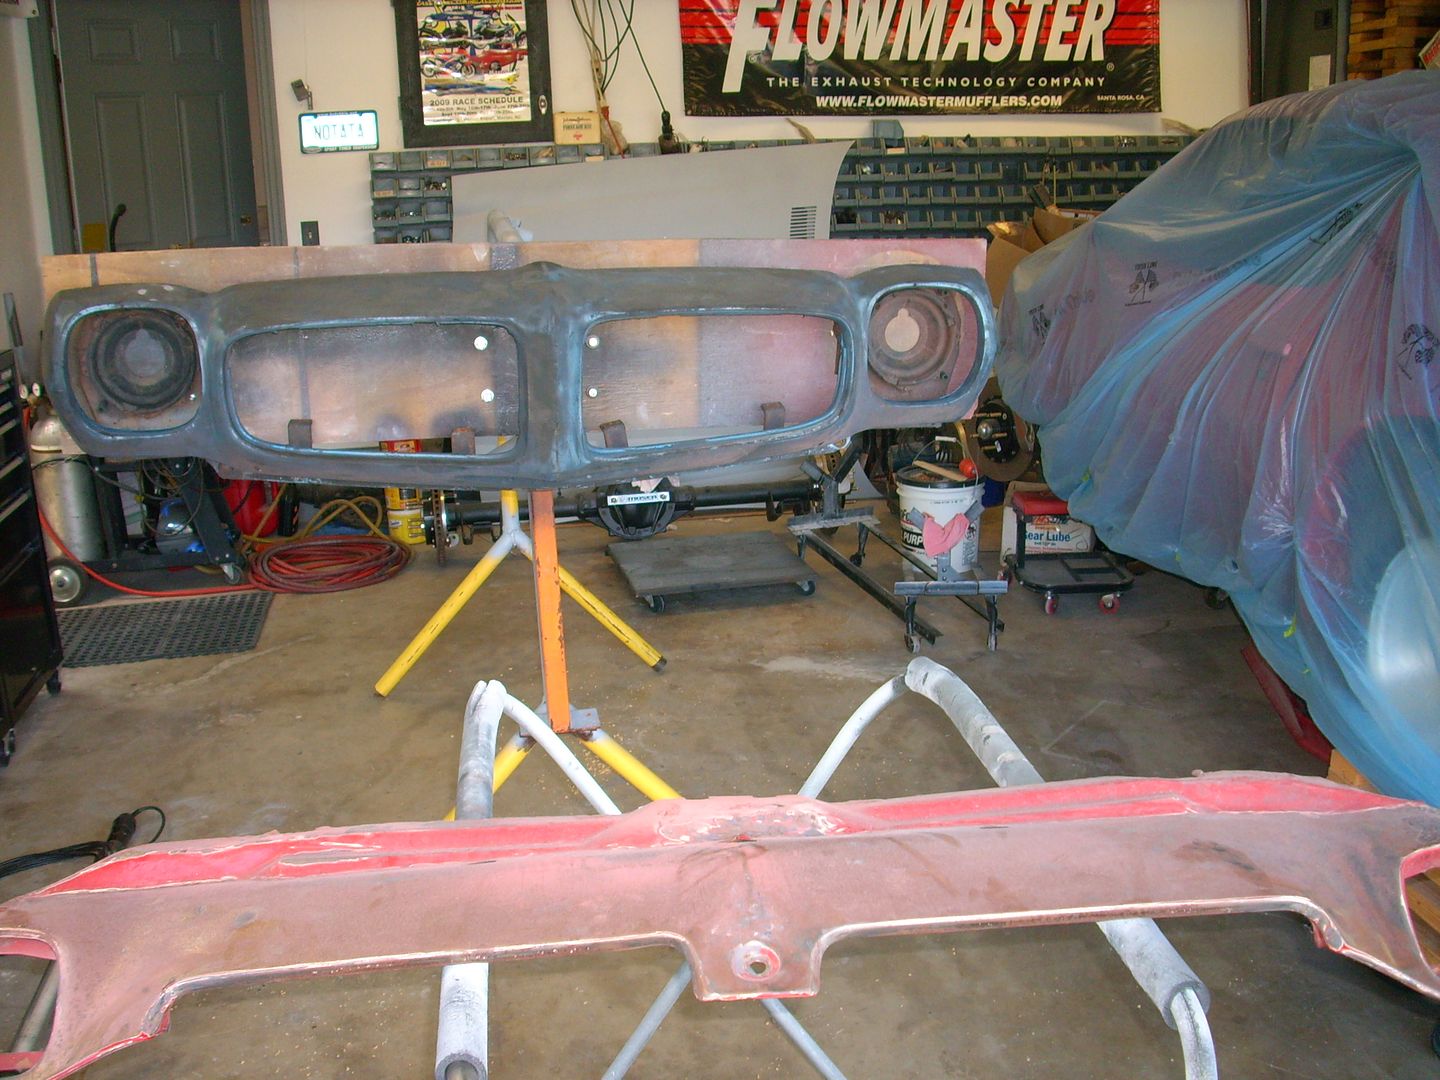
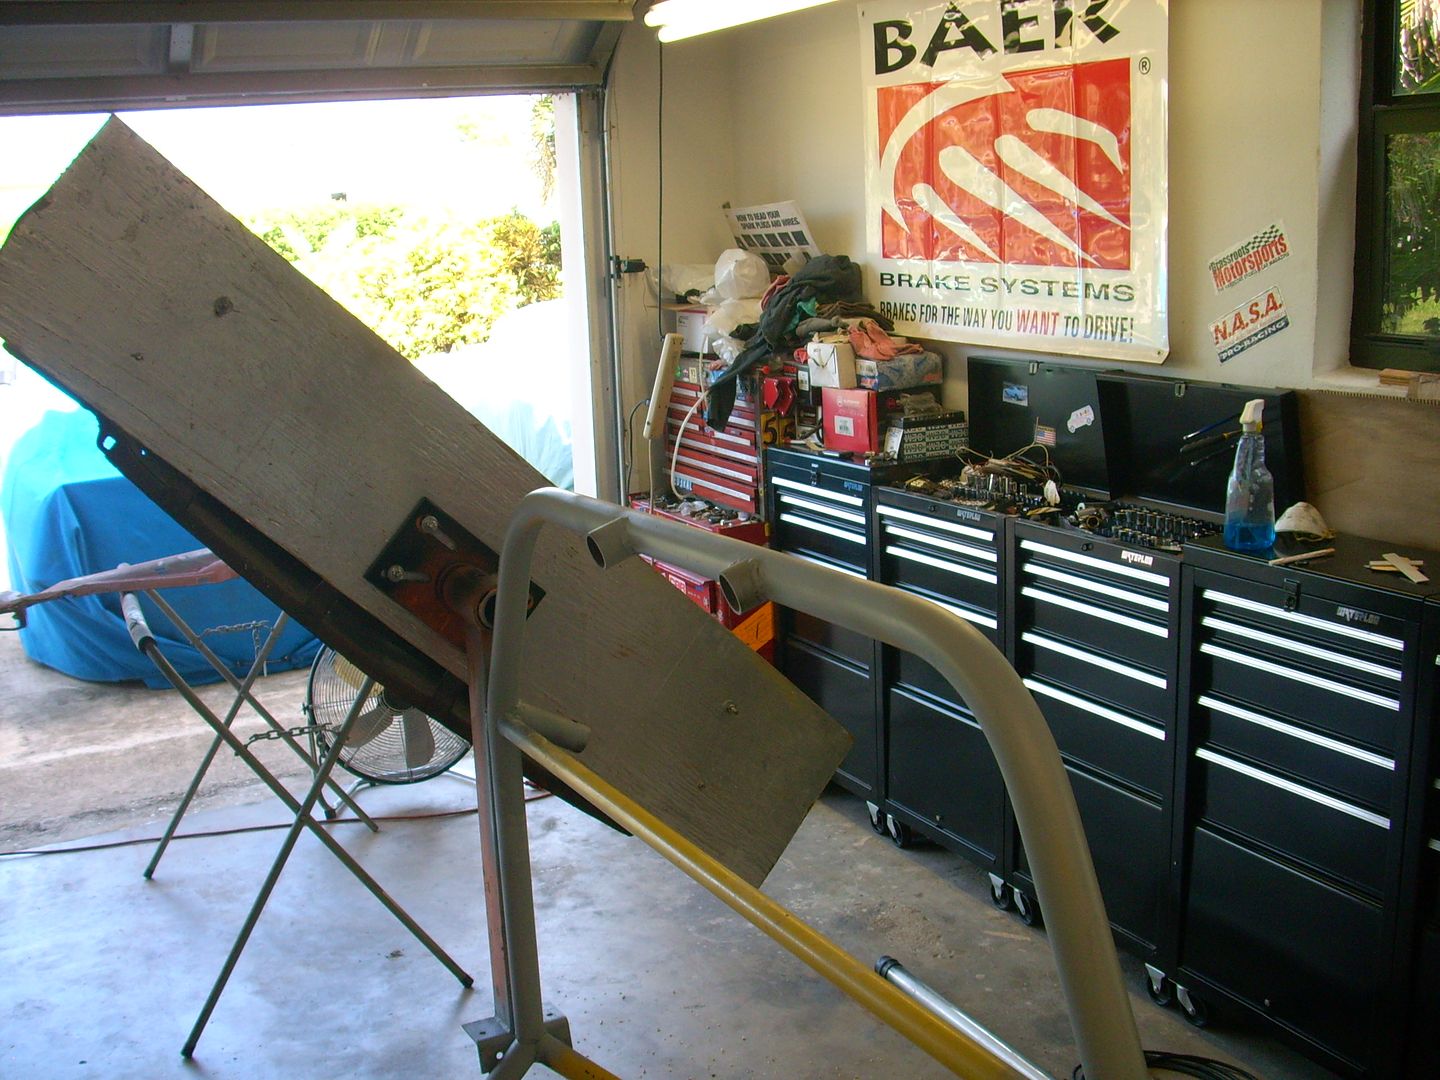
Starting with a core I bought many years ago I soda blasted it to get off most of the old primer & paint that someone put on it. Then mounted it to my "whatdayacallit" body/paint contraption while bolted to a board to make it easy to work on. This way I can spin the bumper to work on top/bottom and the part doesn't keep flexing like they do when trying to work on regular bodywork stands.

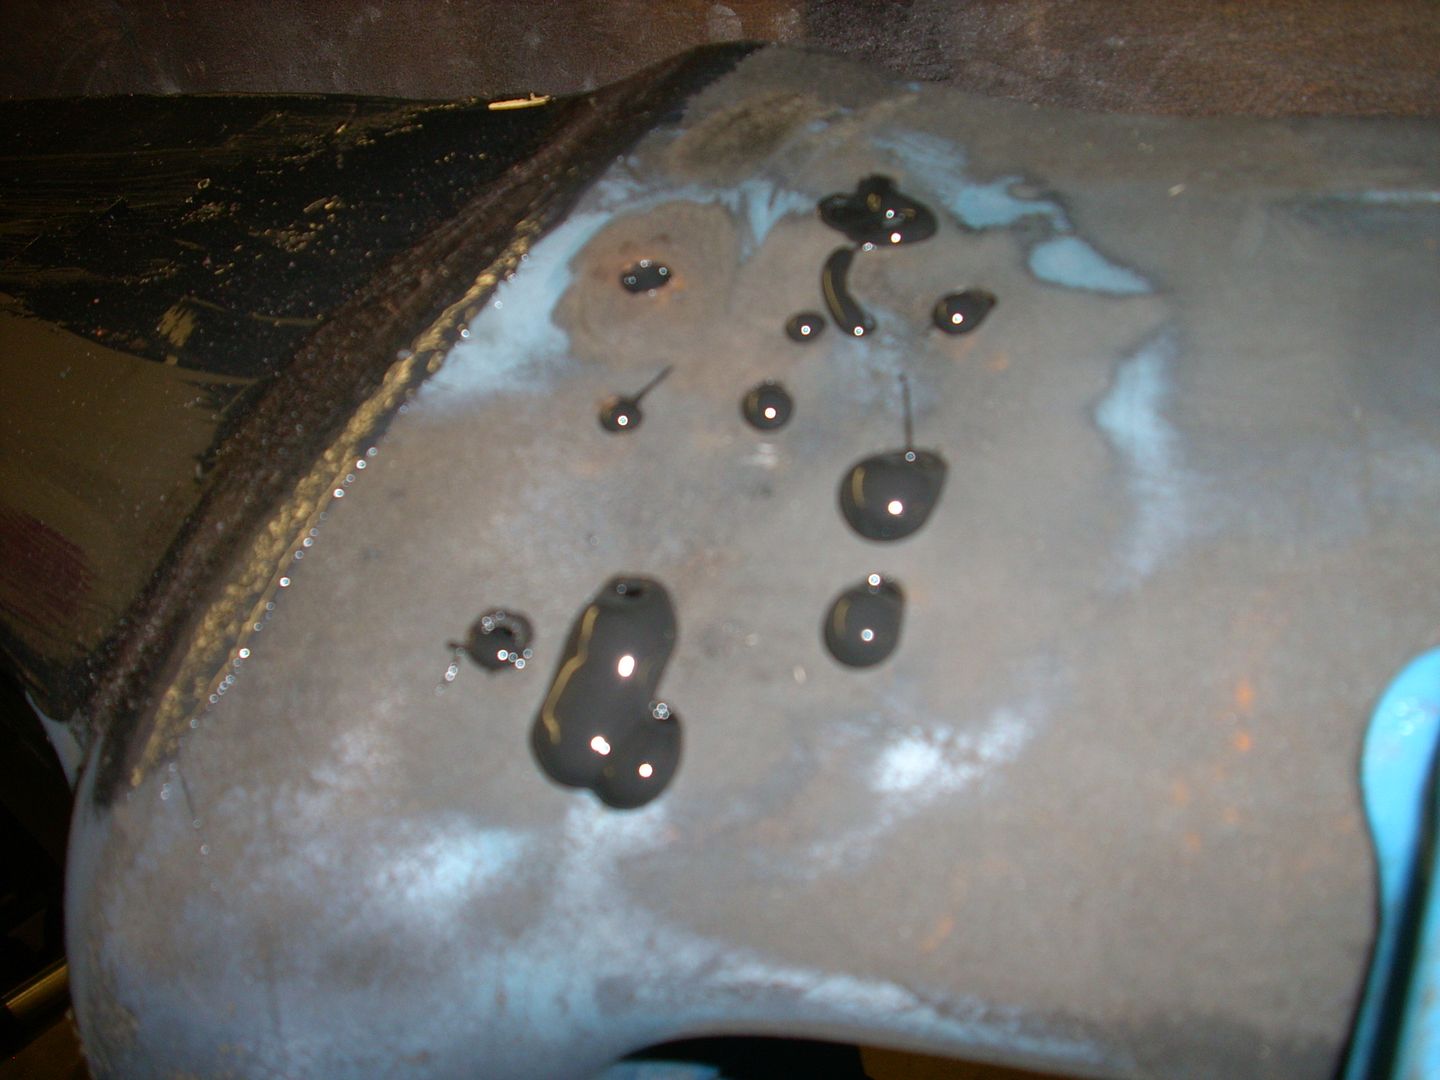
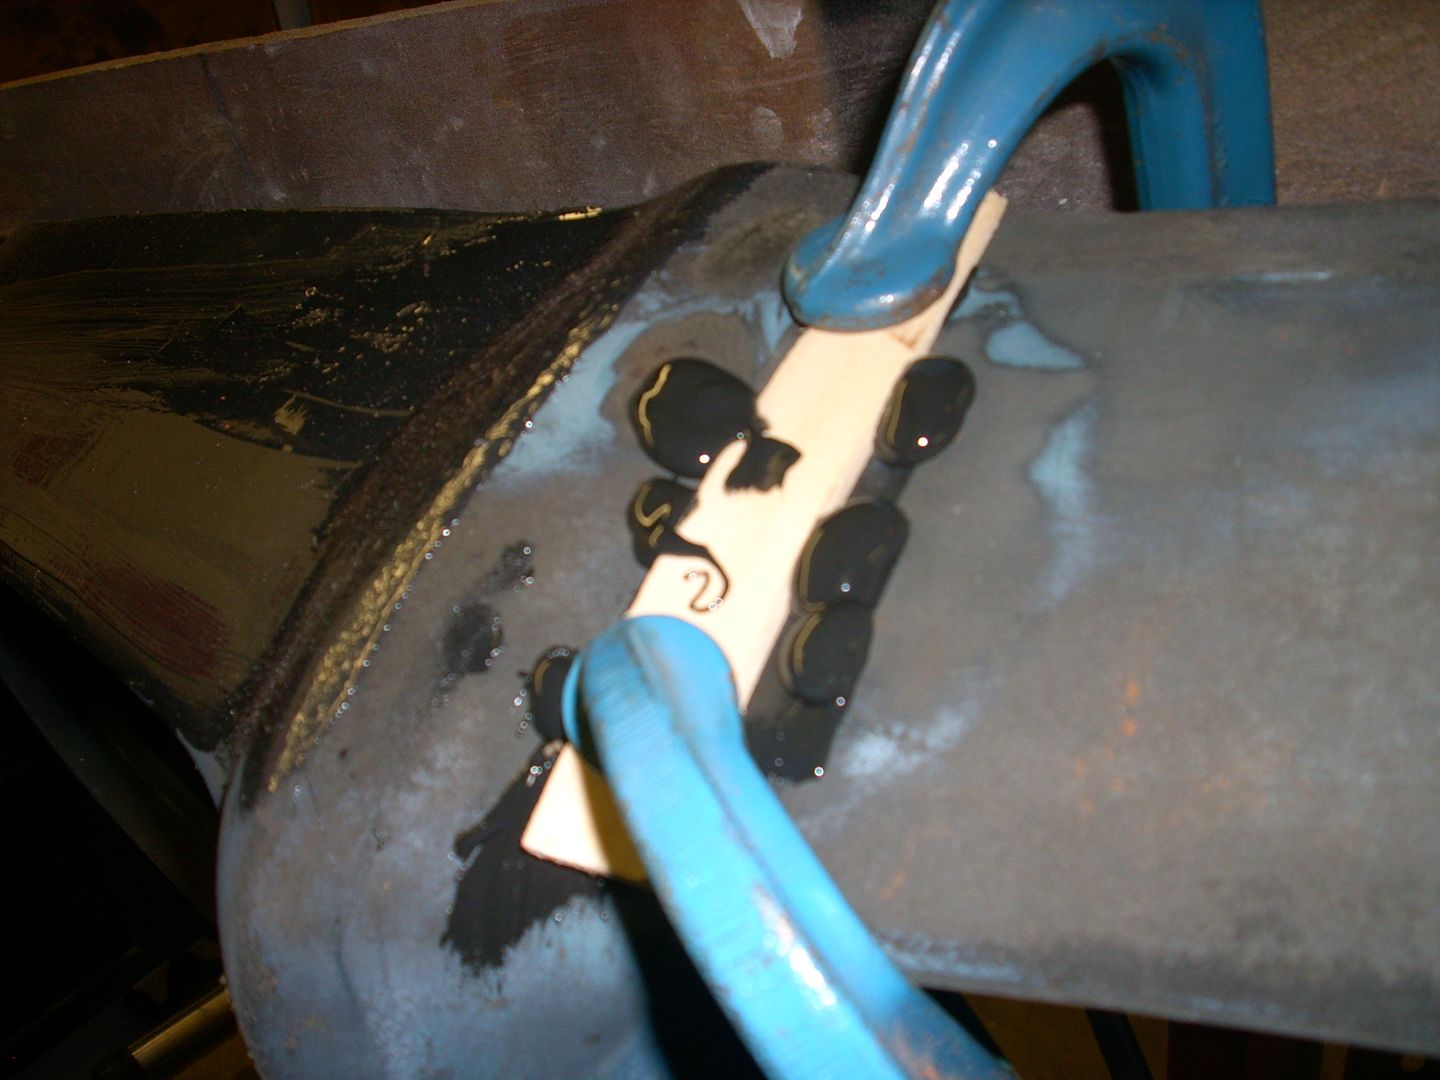
There was a section that had lifted from the metal core which happens to many of the 70-73 bumpers. So I drilled holes in the affected area, scraped inside to loosen rust/dirt etc. and then blew out the junk with an air hose. Then pumped panel bond into the void through the holes and clamped overnight.

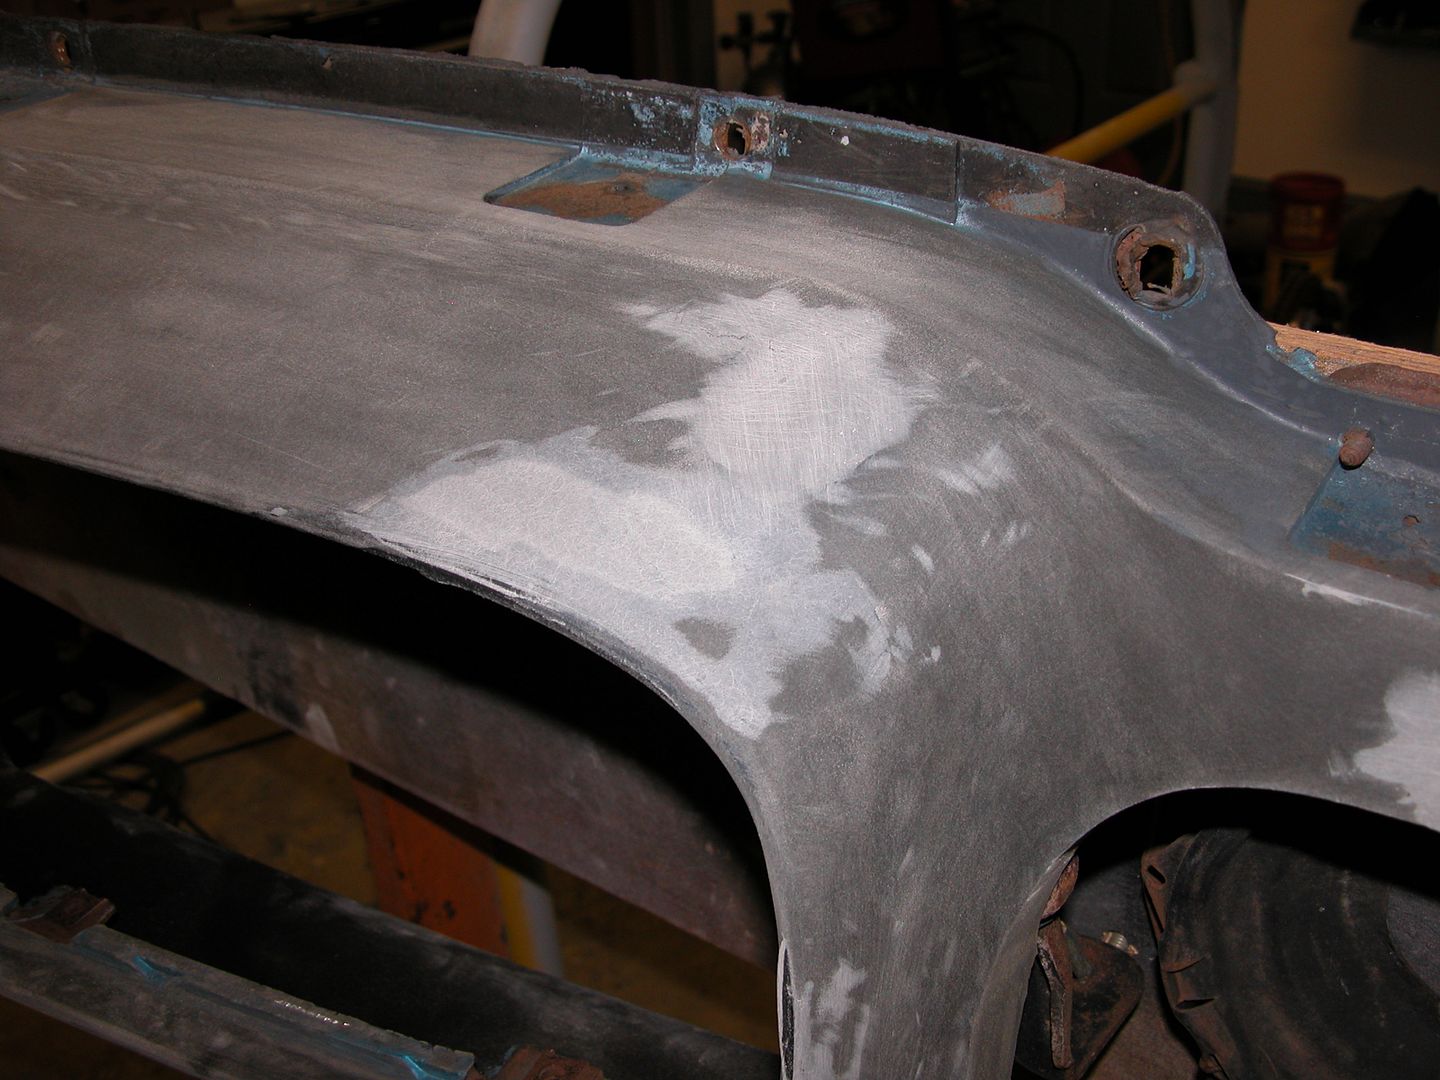
After the panel bond was dry I ground off the paint sticks and excess panel bond and used 3M flexible parts repair material to fill the voids and other bumps cuts etc. on the bumper.

[URL=http://s240.photobucket.com/user/NOTATA/media/The%2014%20Car%20Performance%20Therapy/002_zps0838a368.jpg.html][/URL]

[URL=http://s240.photobucket.com/user/NOTATA/media/The%2014%20Car%20Performance%20Therapy/004_zps11e70764.jpg.html][/URL]
[URL=http://s240.photobucket.com/user/NOTATA/media/The%2014%20Car%20Performance%20Therapy/006_zps6574a6e0.jpg.html][/URL]

[URL=http://s240.photobucket.com/user/NOTATA/media/The%2014%20Car%20Performance%20Therapy/007_zps8a5a1b8c.jpg.html][/URL]

[URL=http://s240.photobucket.com/user/NOTATA/media/The%2014%20Car%20Performance%20Therapy/006_zps14ef0d44.jpg.html][/URL]

Rad_Capz
Rad_Capz HalfDork
10/14/13 10:19 a.m.

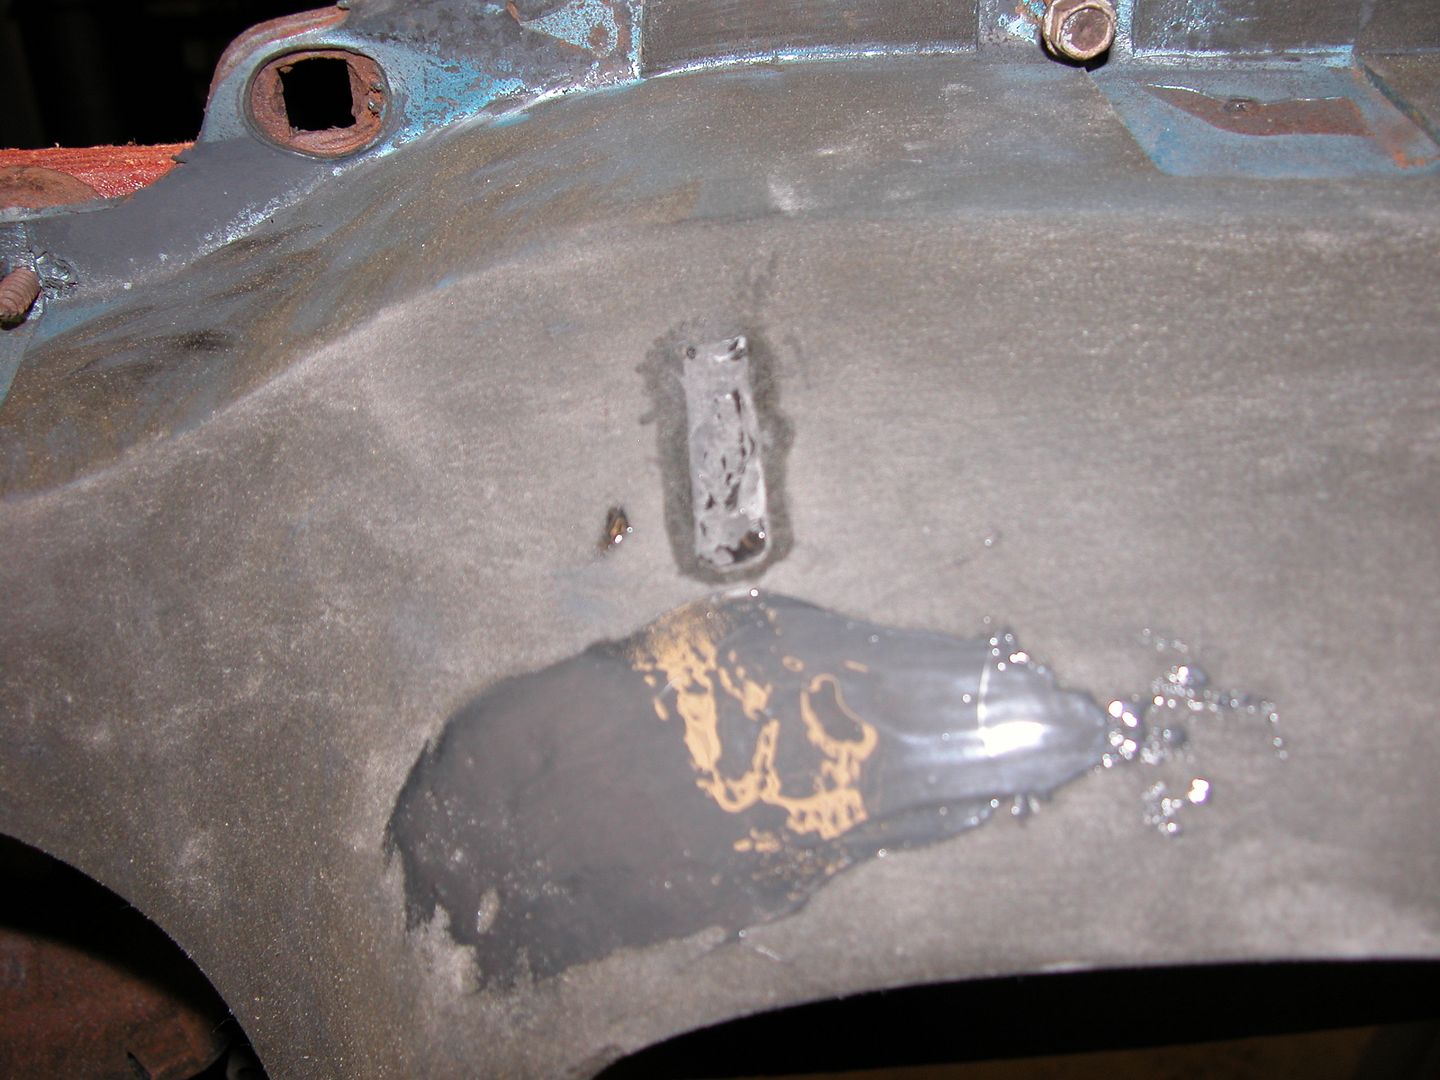
Jack hole slot removal. Prep slots by roughing up and chamfering the rubber around the slots with dremel tool. Panel bonded a thin piece of aluminum to inside of bumper, let dry. Filled slots 1/2 way with panel bond , let dry. rough up panel bond and use #M flexible part repair material, let dry. Sand & fill with 3M till smooth.

[URL=http://s240.photobucket.com/user/NOTATA/media/The%2014%20Car%20Performance%20Therapy/005_zpsb43d4531.jpg.html][/URL]

[URL=http://s240.photobucket.com/user/NOTATA/media/The%2014%20Car%20Performance%20Therapy/003_zps7ce23a63.jpg.html][/URL]

[URL=http://s240.photobucket.com/user/NOTATA/media/The%2014%20Car%20Performance%20Therapy/004_zpsd7403a9c.jpg.html][/URL]

Rad_Capz
Rad_Capz HalfDork
10/14/13 10:19 a.m.

Another thing that annoys me about the early 2nd gen front bumpers is the strip across the bottom where the grill supports attach. It's ugly and is seen from the front so I painted that section of my other bumper flat black in an attempt to make it disappear in the shadow. For this bumper I've cut it off and will make new lower supports for the grills.

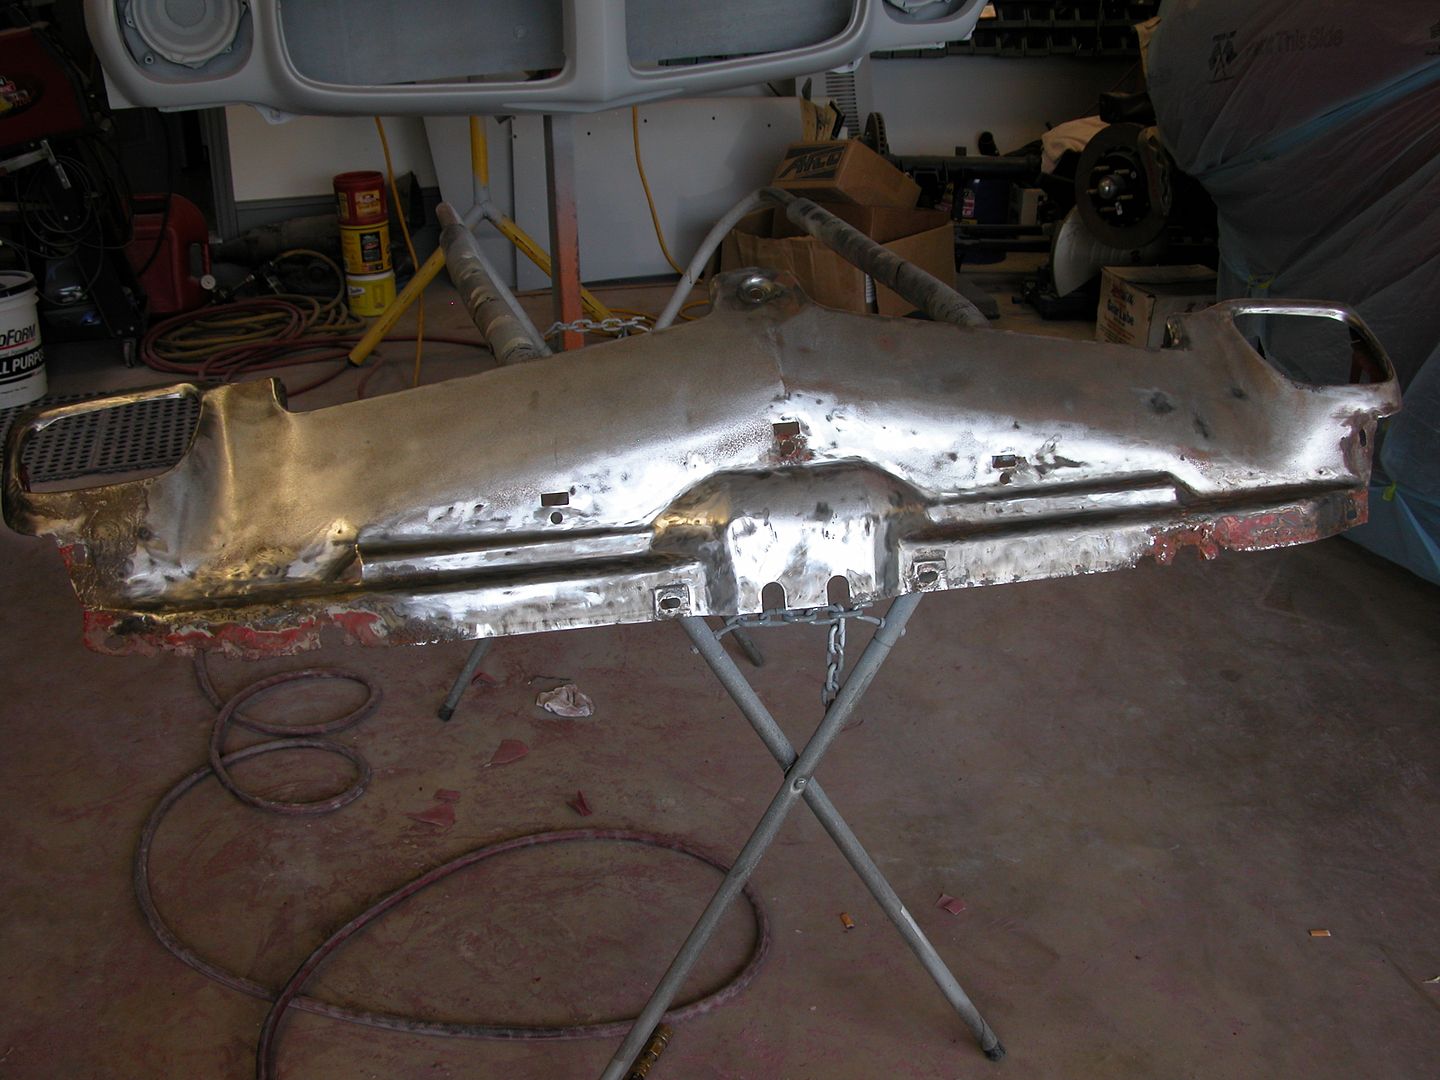
I've got 2 front splash pans and am currently working on the one that was on the car before stripping, doing some metal work, and prepping for paint as it was stock. The other one will be modified later to see if an idea I have will work.

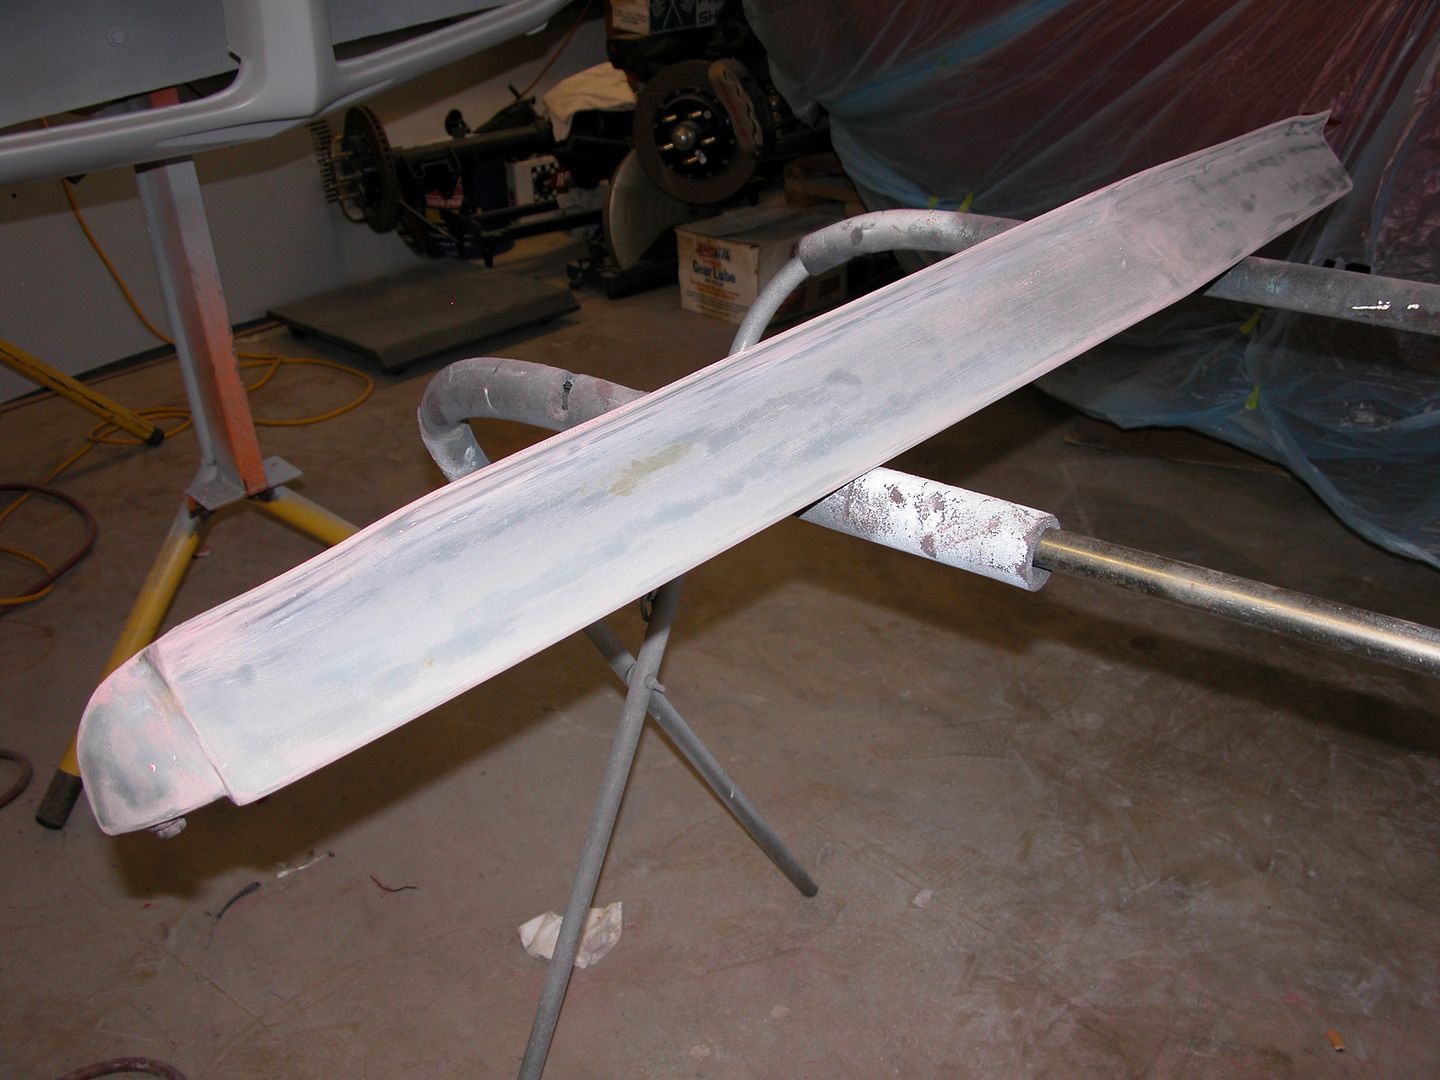
I Also stripped the center section of the front spoiler for paint prep. Over the past 20 years it had gotten a few bumps & bruises and seen a lot of flexing at high speed events from air pressure. The angle of the spoiler would be straight down over about 125 MPH and the repeated flexing caused paint cracking/peeling problems. I will be adding reinforcements to prevent the flexing in the future..

[URL=http://s240.photobucket.com/user/NOTATA/media/The%2014%20Car%20Performance%20Therapy/012_zpsc606e175.jpg.html][/URL]

[URL=http://s240.photobucket.com/user/NOTATA/media/The%2014%20Car%20Performance%20Therapy/004_zpsd4ec4e80.jpg.html][/URL]

[URL=http://s240.photobucket.com/user/NOTATA/media/The%2014%20Car%20Performance%20Therapy/017_zpsd9e7df22.jpg.html][/URL]

[URL=http://s240.photobucket.com/user/NOTATA/media/The%2014%20Car%20Performance%20Therapy/002_zps9a3b0729.jpg.html][/URL]

[URL=http://s240.photobucket.com/user/NOTATA/media/The%2014%20Car%20Performance%20Therapy/003_zps58c5216a.jpg.html][/URL]

Rad_Capz
Rad_Capz HalfDork
10/14/13 10:20 a.m.

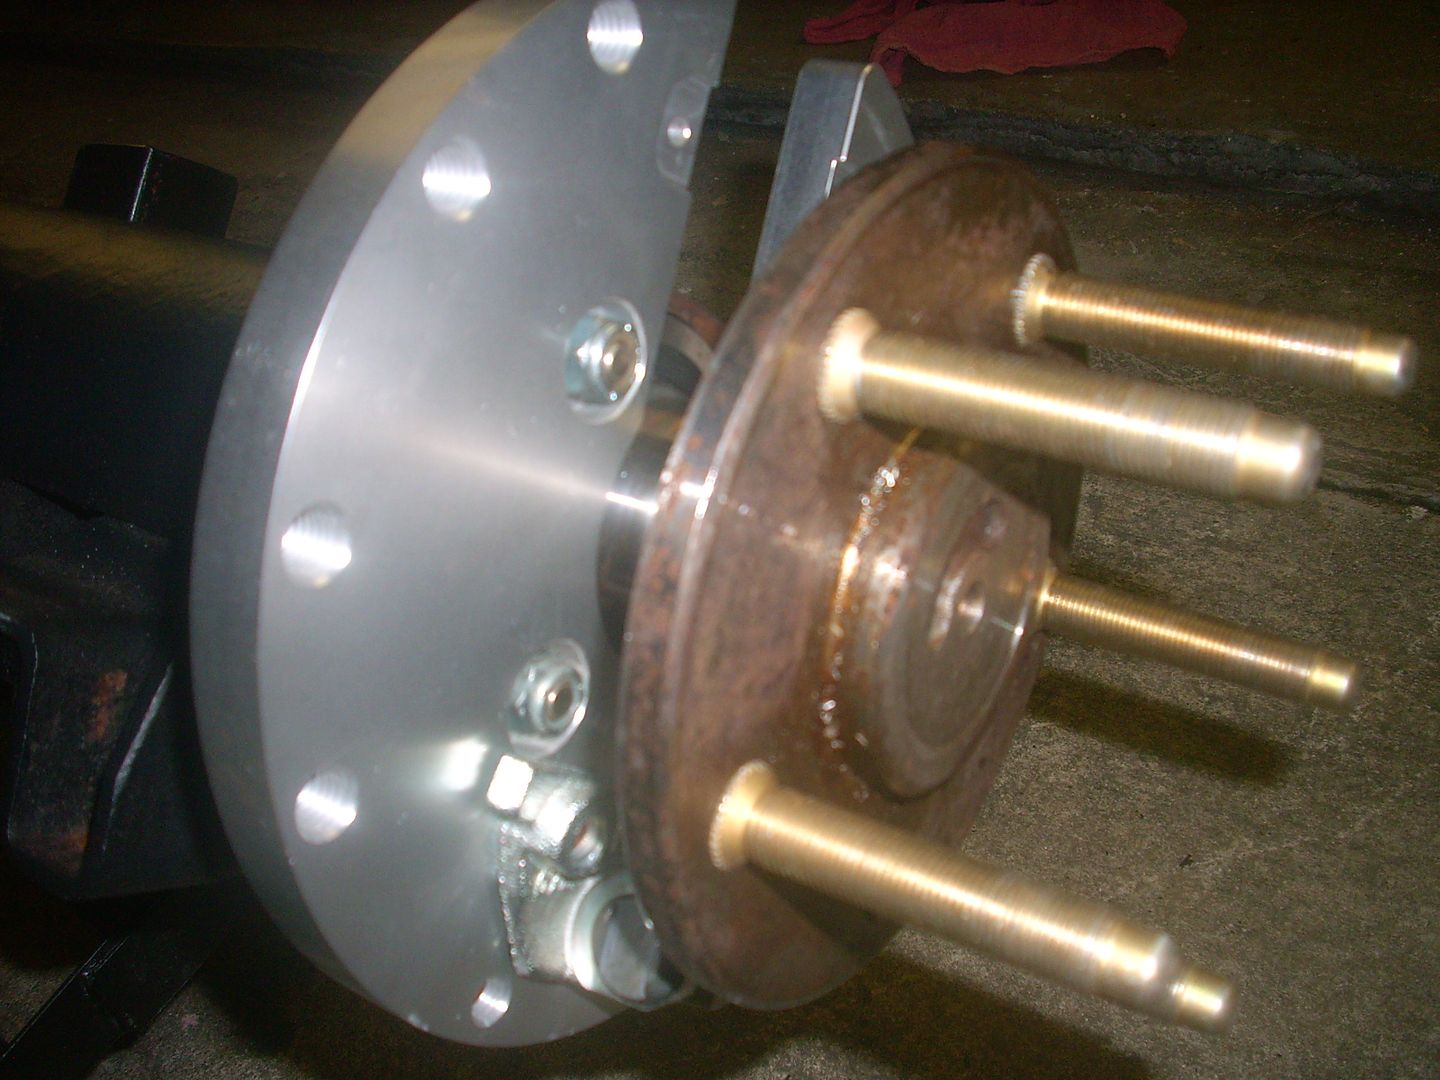
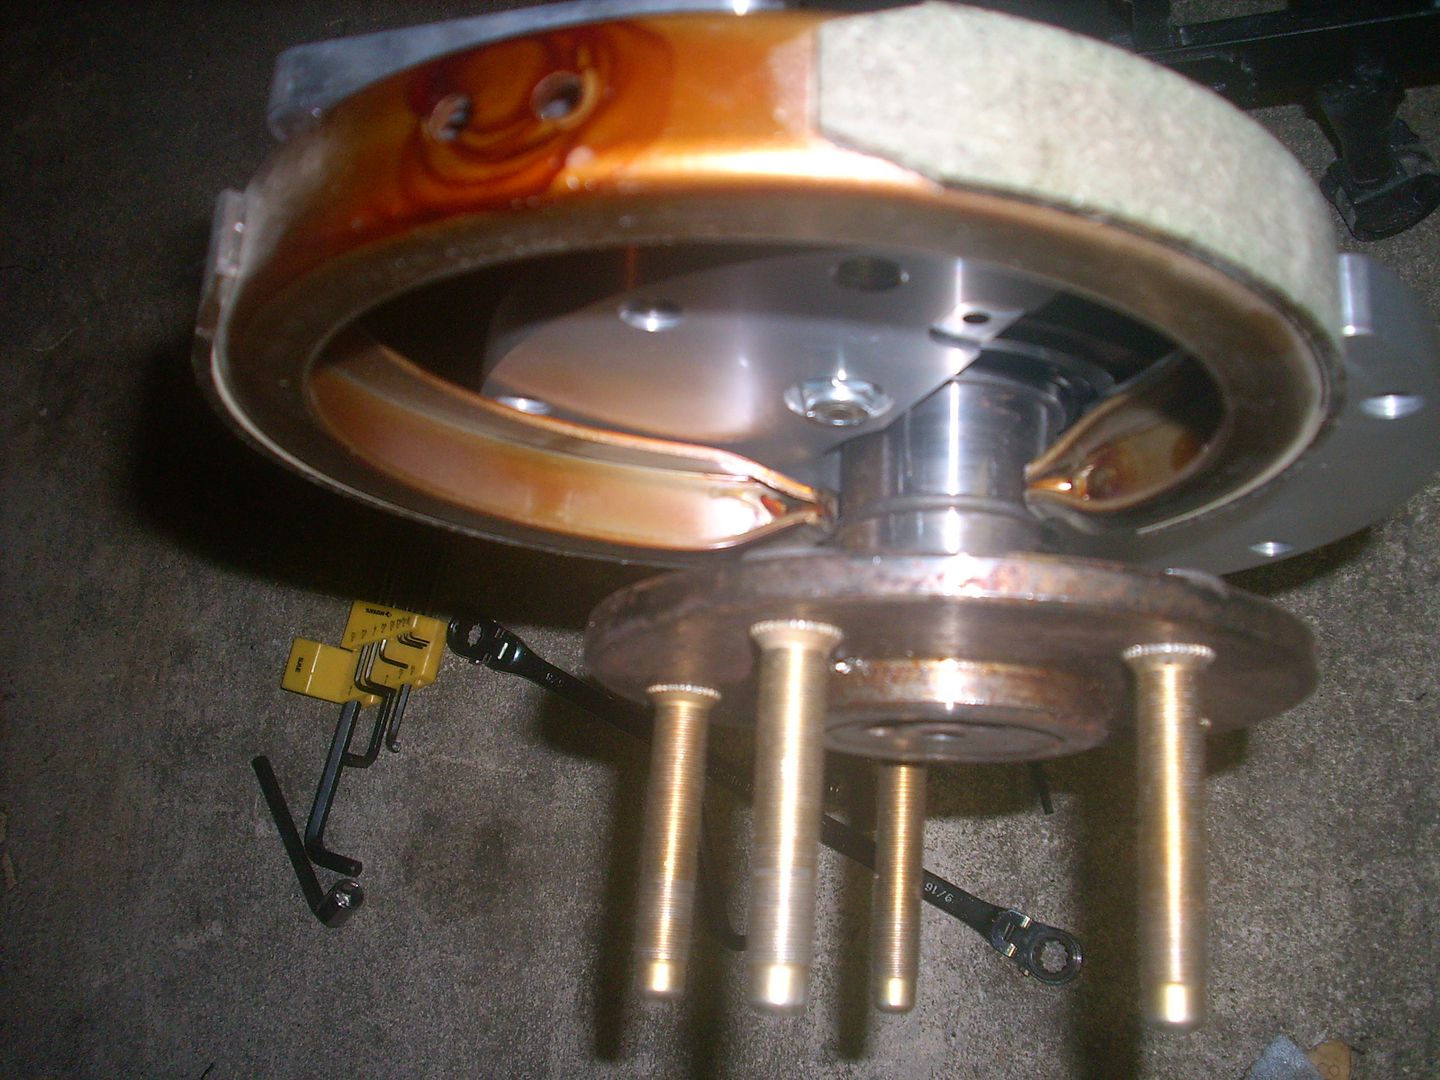
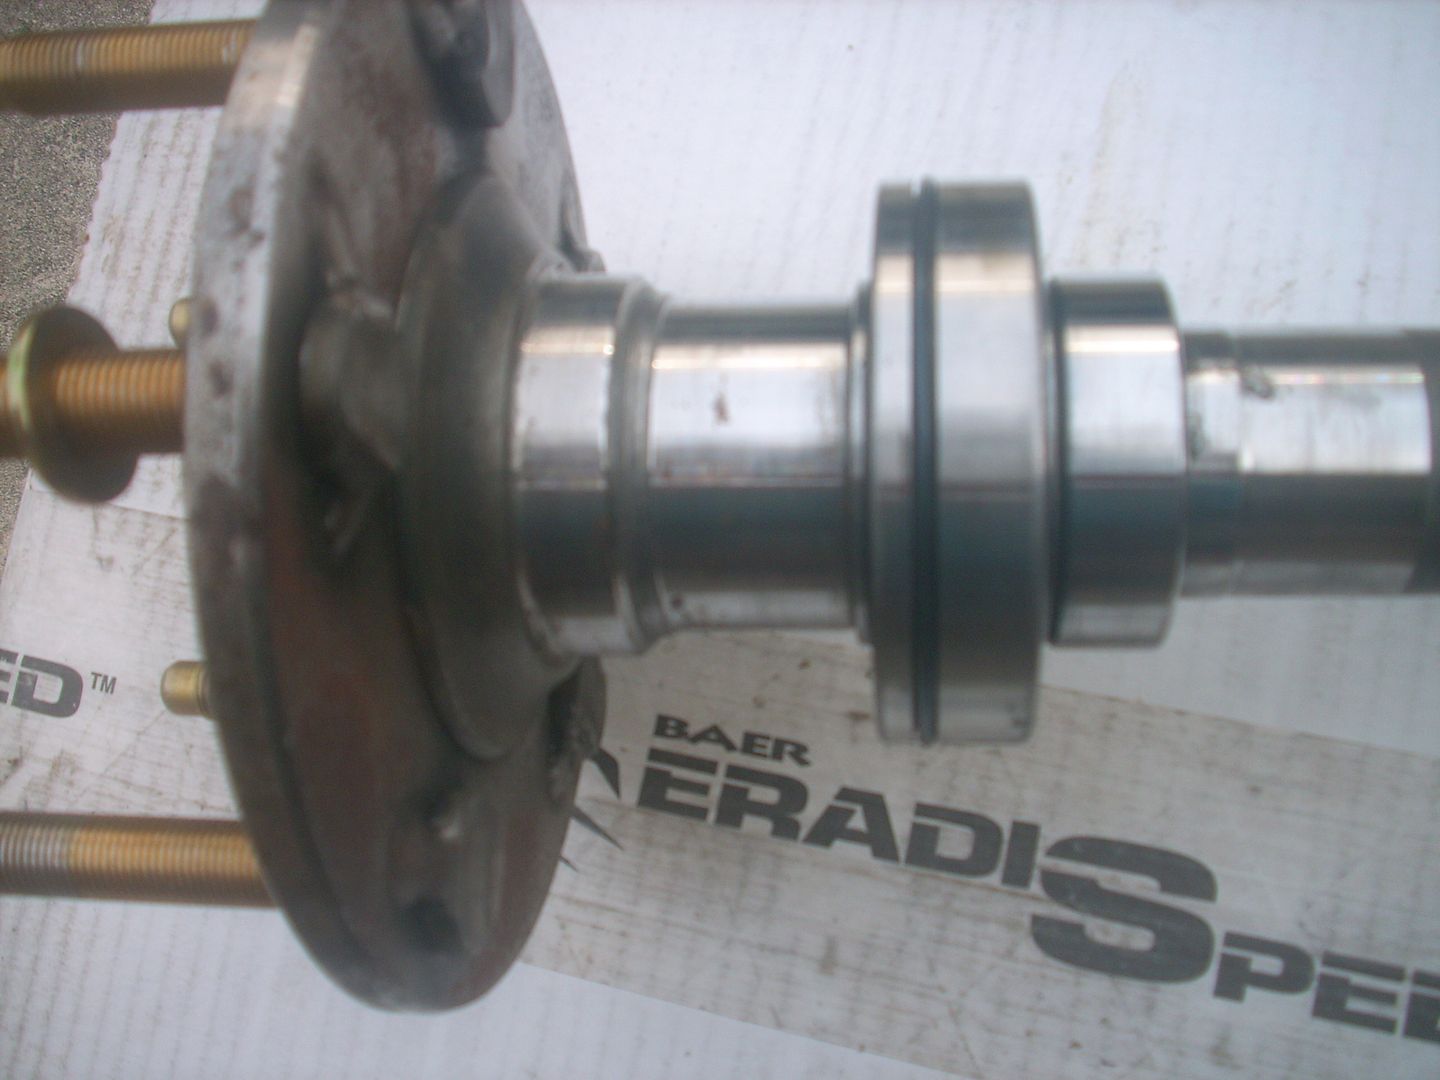
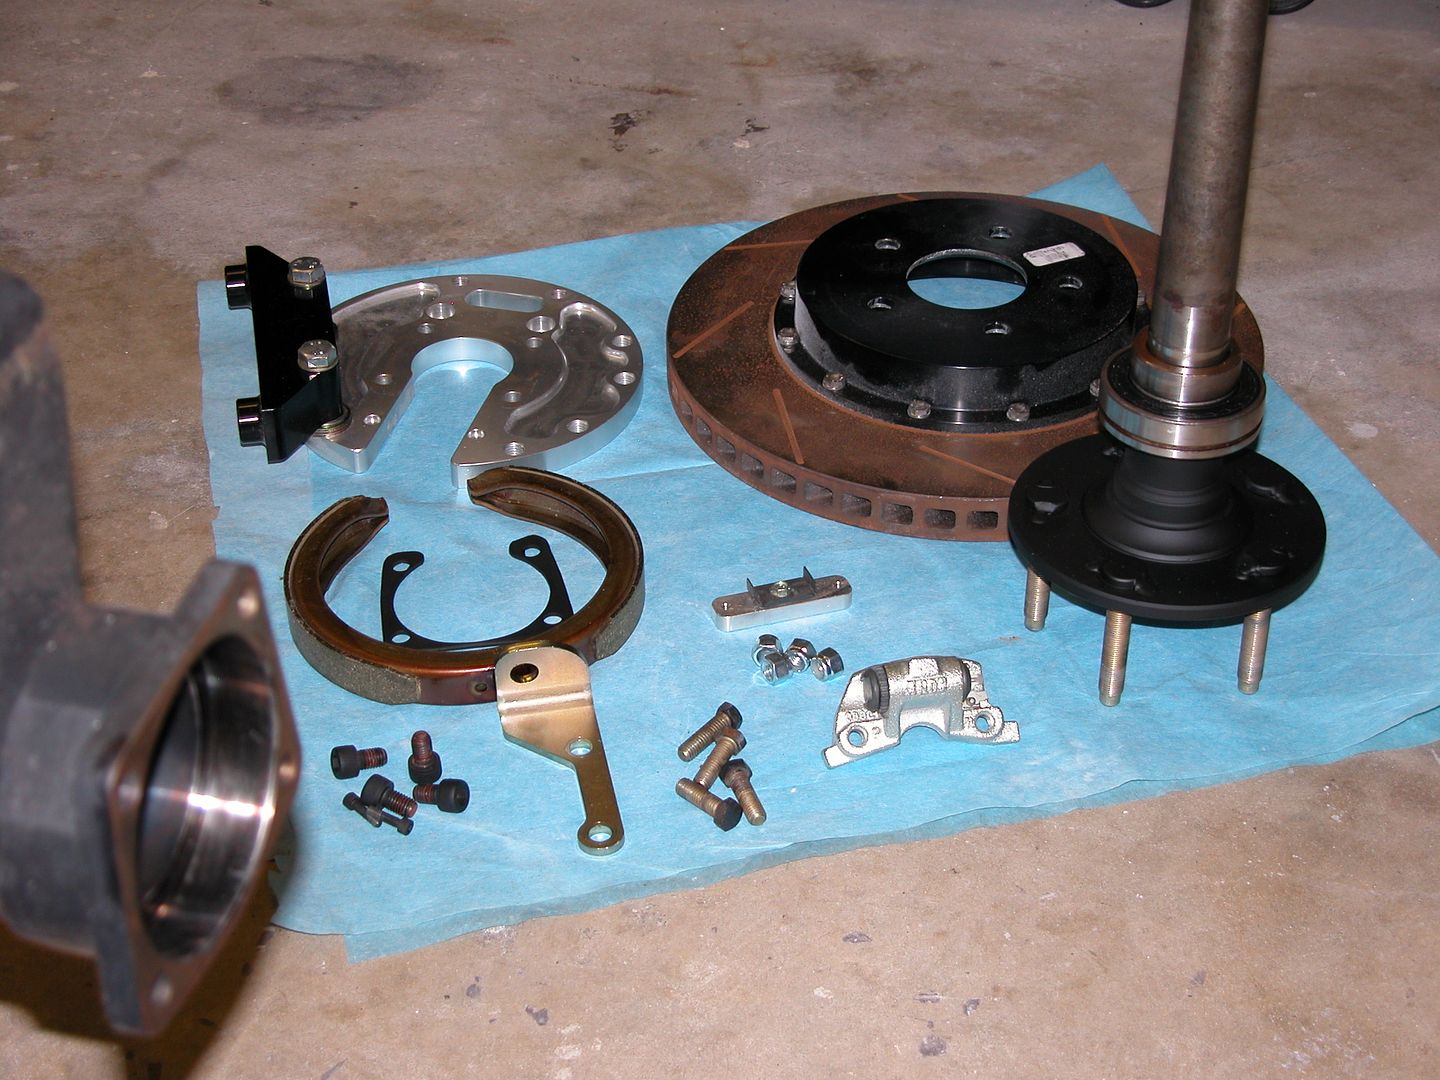
I'd installed 1/2" wheel studs in the rear axles a while back so while working on body panels I also got everything together to install the Baer discs on the rear. I had Moser tapered axles with Moser Ford style housing ends for drum brake application welded to a 8.5" GM housing so switching to disc brakes with an internal drum parking brake in the rotor hats is an unusual swap.

It turned out to be a bit of a puzzle to figure out how to actually assemble and required some minor fabrication to make it all work. Rather than explain I'll just post pics since it's unlikely very many people will be in the same situation since most people do the disc upgrade at the time they install axles etc. and wouldn't be in my situation since they'd get housing ends welded on for disc brake applications.

[URL=http://s240.photobucket.com/user/NOTATA/media/The%2014%20Car%20Performance%20Therapy/018_zps7554f435.jpg.html][/URL]

[URL=http://s240.photobucket.com/user/NOTATA/media/The%2014%20Car%20Performance%20Therapy/030_zps01efbb1e.jpg.html][/URL]

[URL=http://s240.photobucket.com/user/NOTATA/media/The%2014%20Car%20Performance%20Therapy/005_zps65b147e5.jpg.html][/URL]

Rad_Capz
Rad_Capz HalfDork
10/14/13 10:21 a.m.

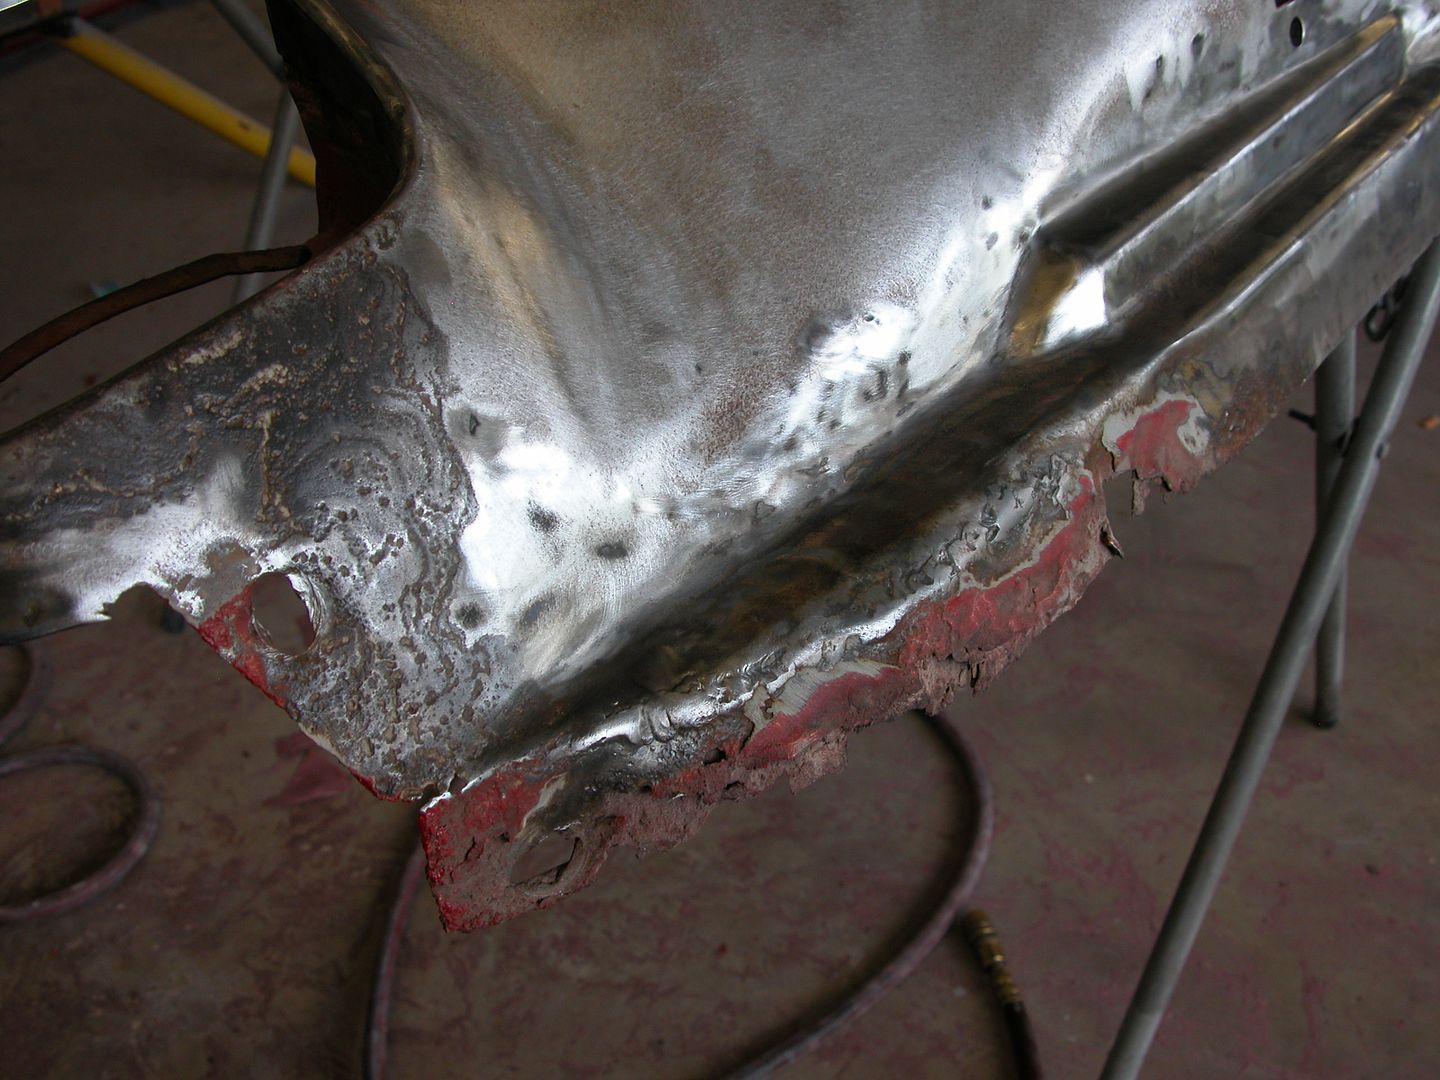
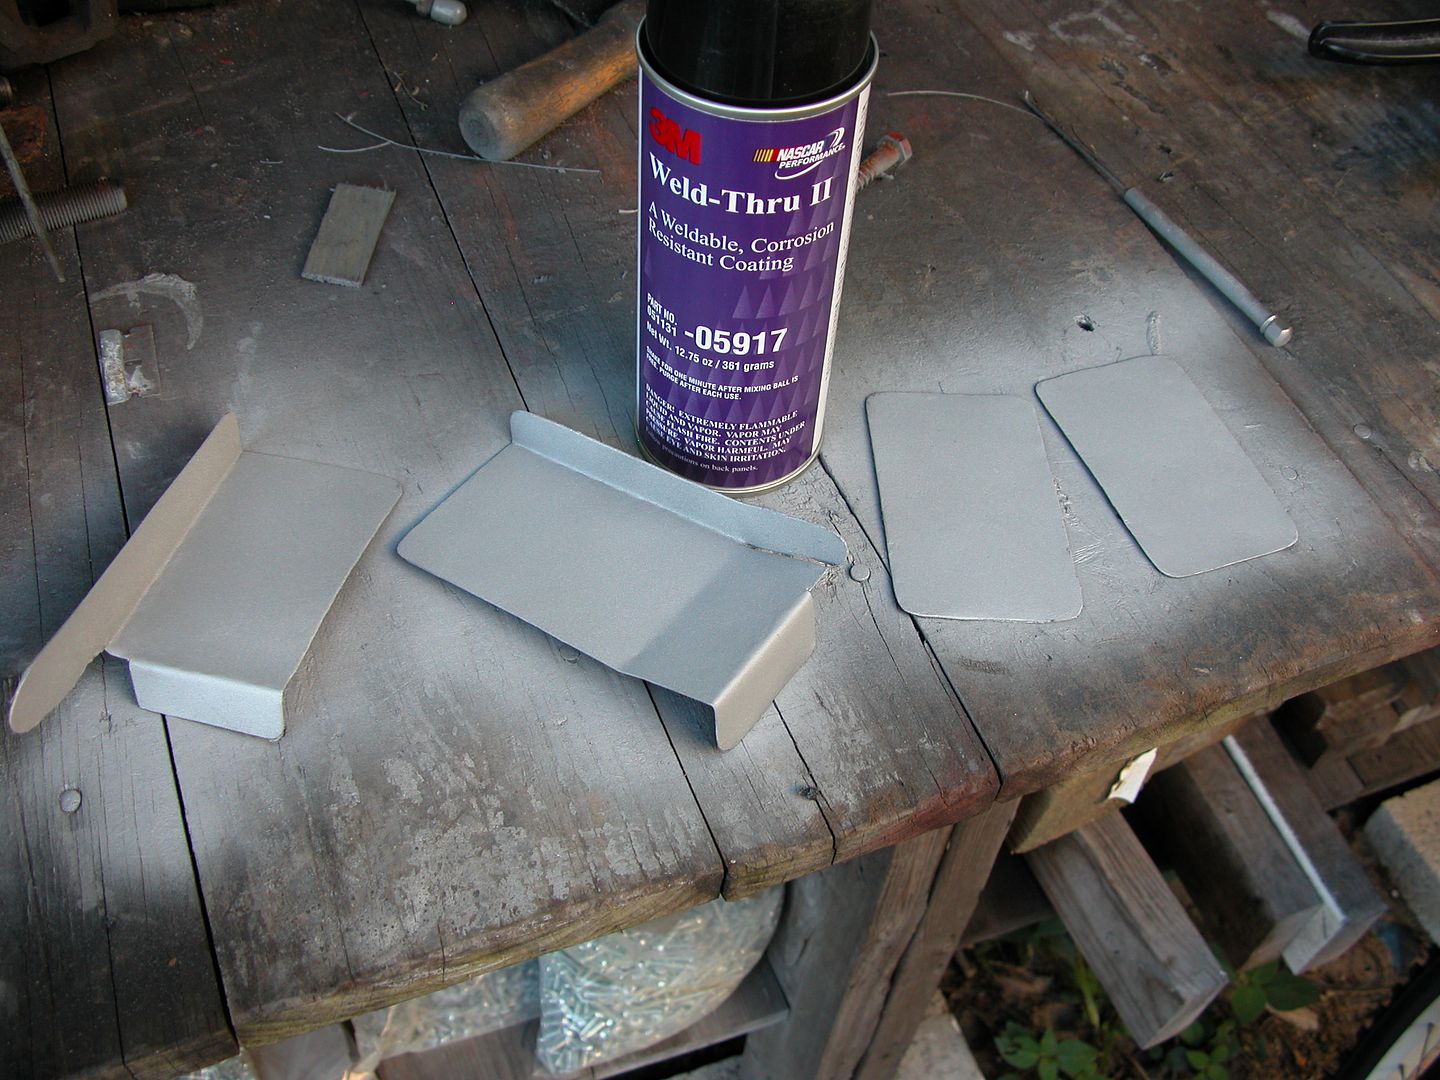
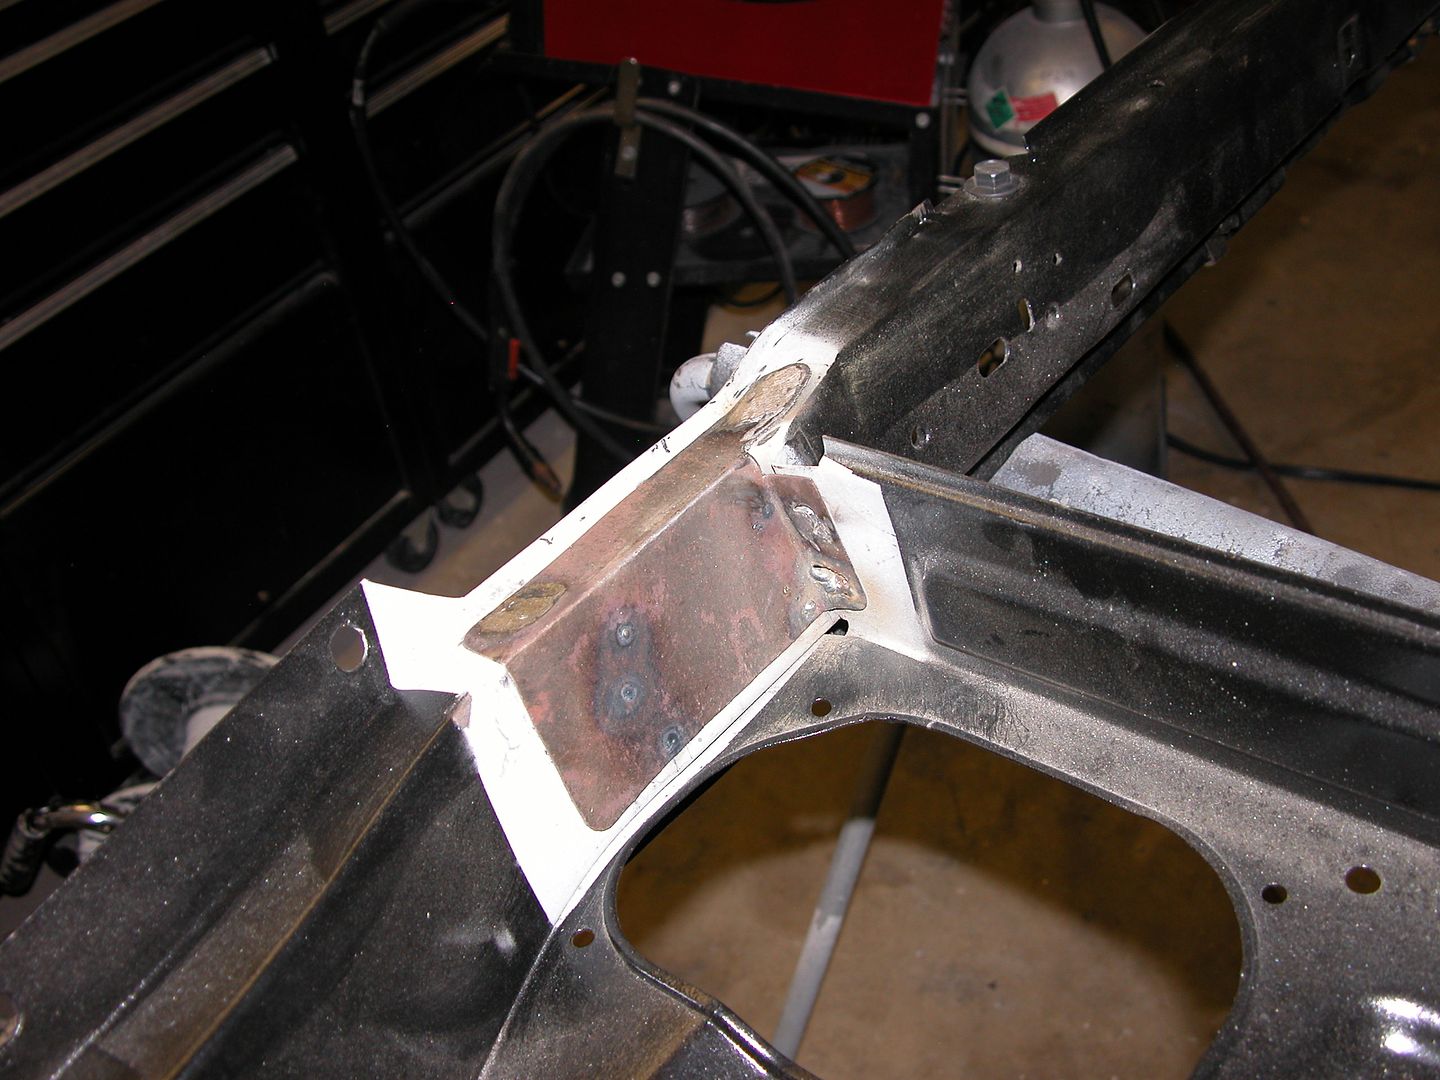
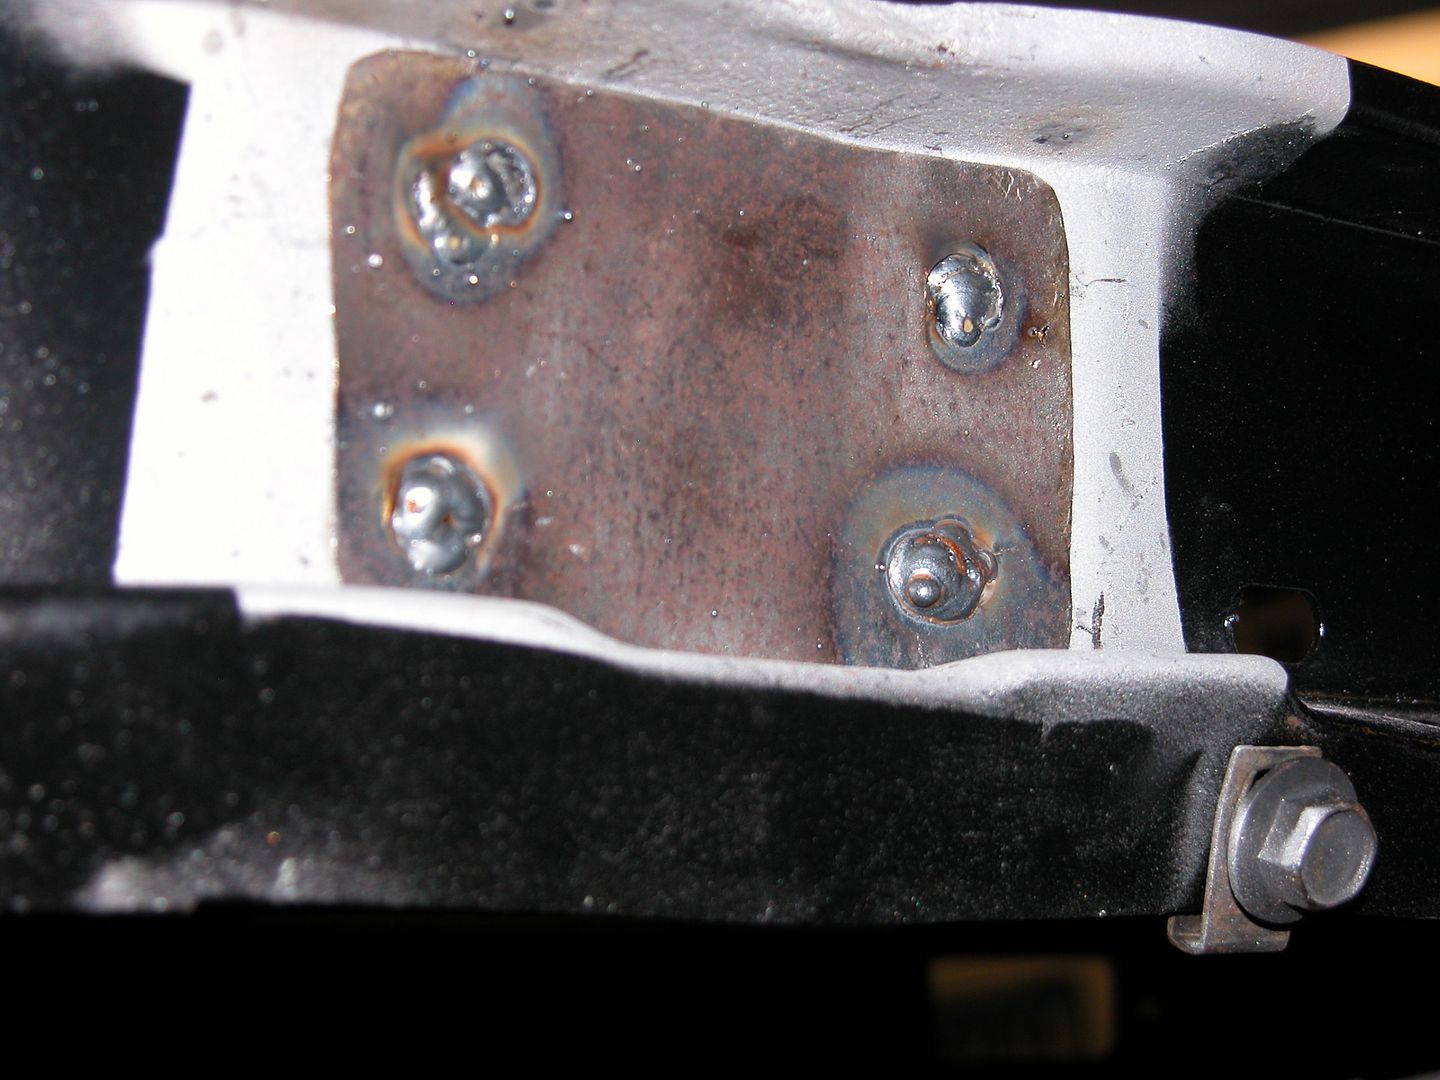
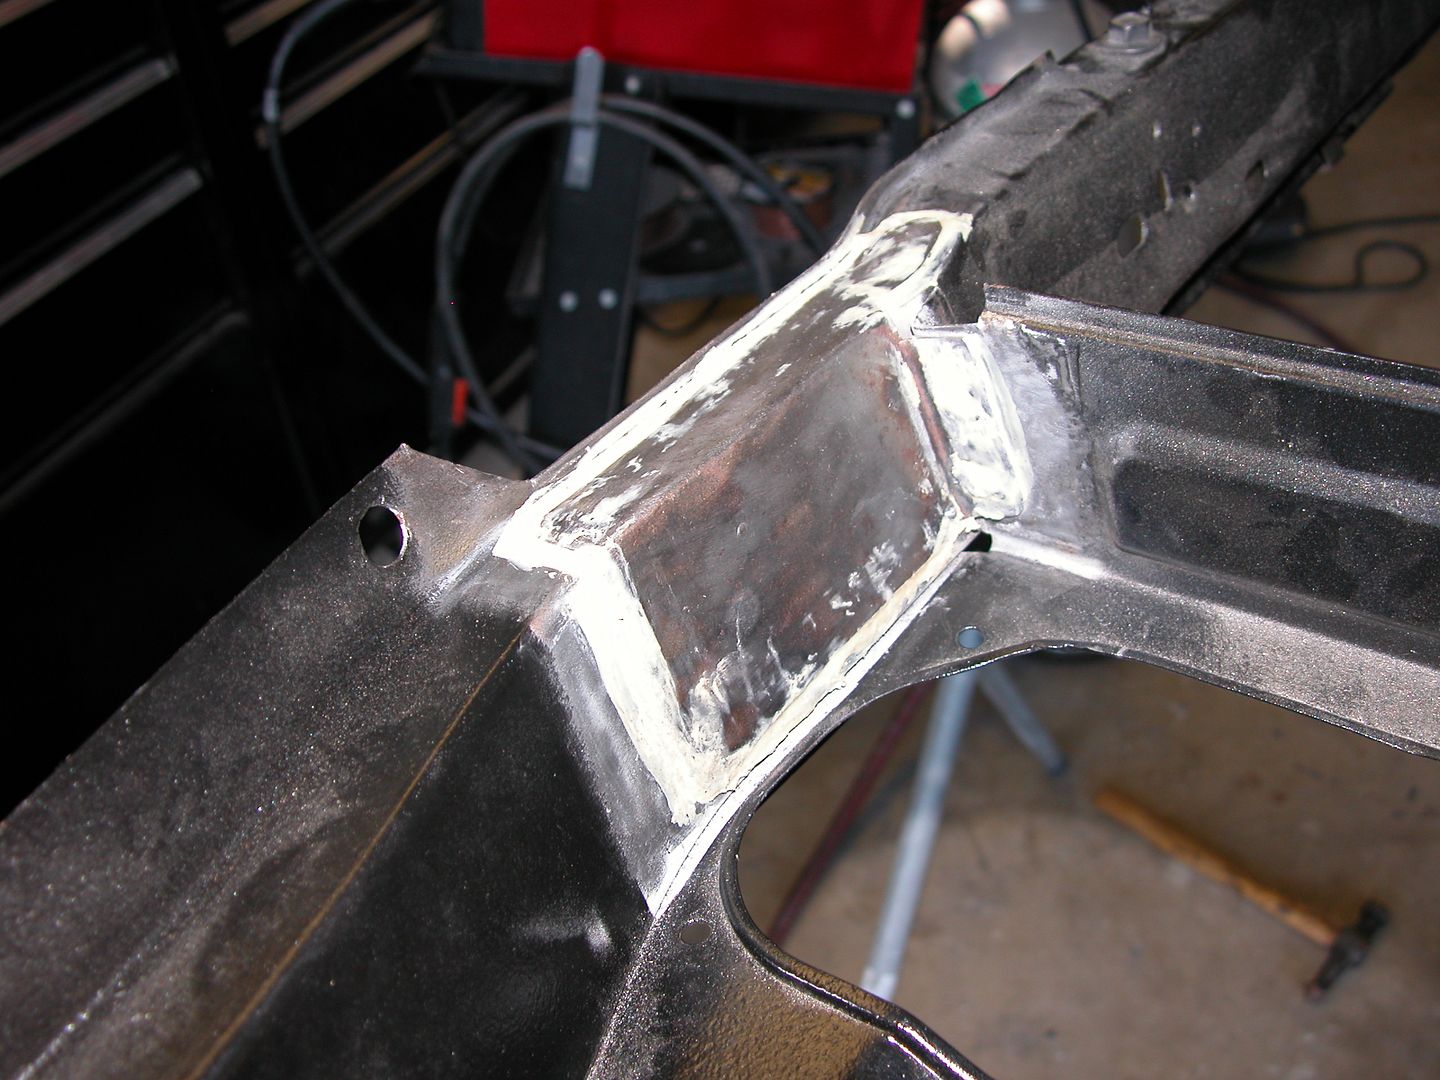
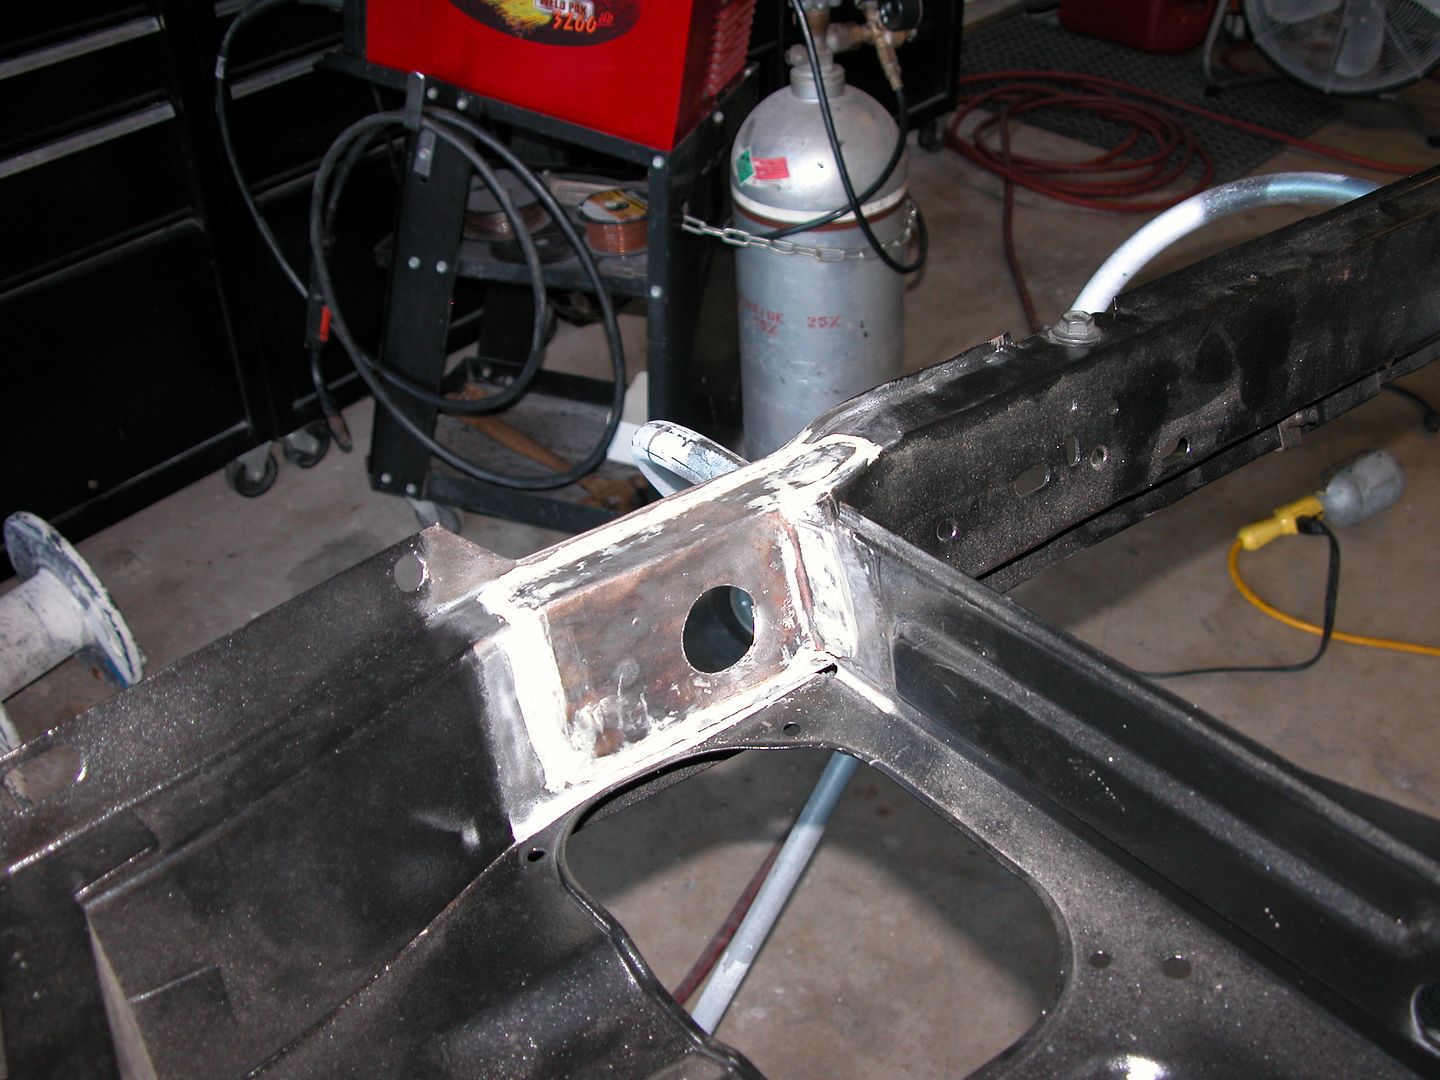
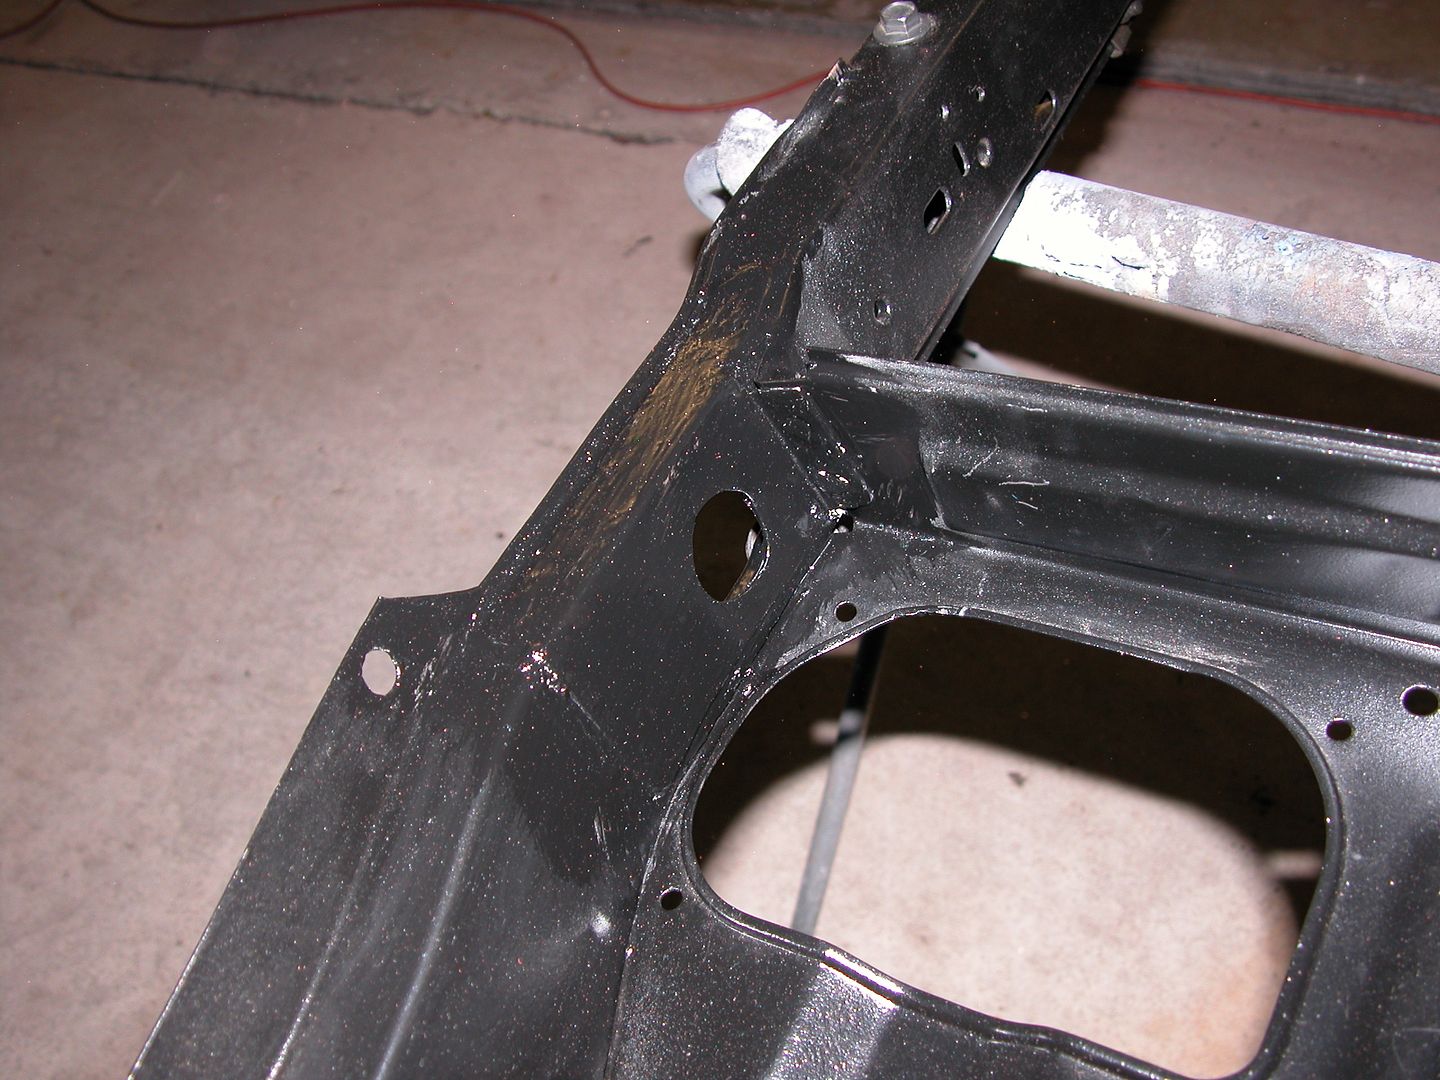
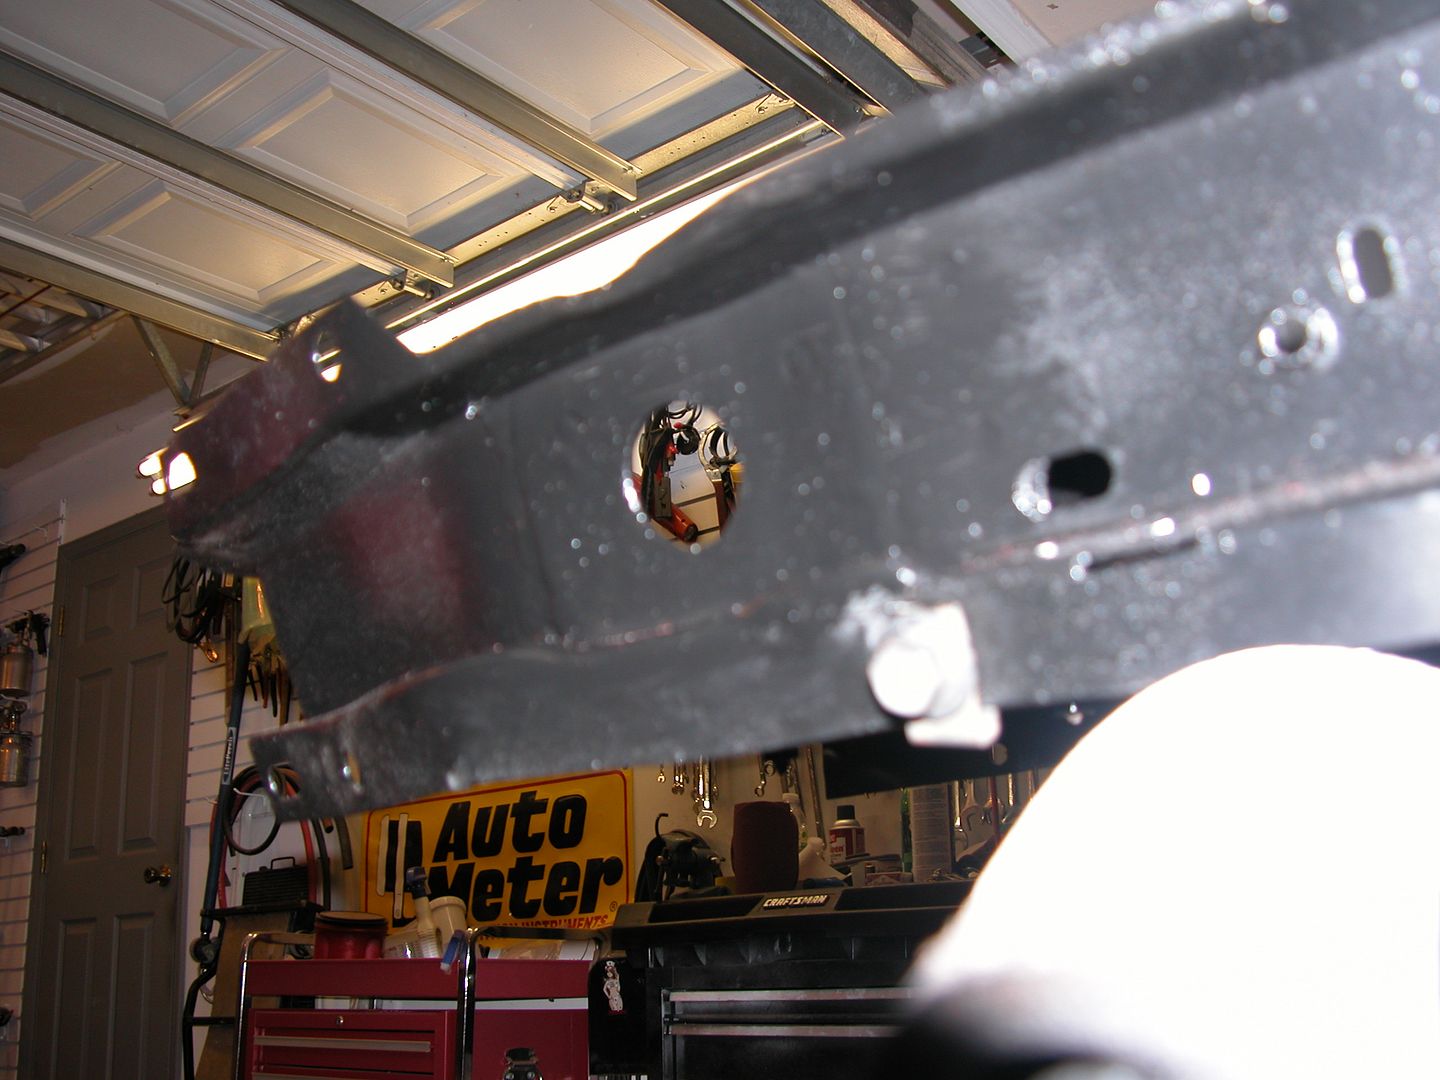
Back in the beginning of this thread I mentioned i was going to reinforce the core support where the body mounts attach. They typically get rusty & soft on the early 2nd gen bird core supports. The one I'm using is one of the best I've seen but it had started rusting there like they all do. I decided to make a sheet metal patch panel for above & below the original sheetmetal and plug weld them in to make the piece stronger than the original.

[URL=http://s240.photobucket.com/user/NOTATA/media/The%2014%20Car%20Performance%20Therapy/009_zps7adc7e0b.jpg.html][/URL]

[URL=http://s240.photobucket.com/user/NOTATA/media/The%2014%20Car%20Performance%20Therapy/012_zps507db74a.jpg.html][/URL]

[URL=http://s240.photobucket.com/user/NOTATA/media/The%2014%20Car%20Performance%20Therapy/011_zpsc58cb16e.jpg.html][/URL]

[URL=http://s240.photobucket.com/user/NOTATA/media/The%2014%20Car%20Performance%20Therapy/004_zps98496a76.jpg.html][/URL]

[URL=http://s240.photobucket.com/user/NOTATA/media/The%2014%20Car%20Performance%20Therapy/006_zps772685d0.jpg.html][/URL]

[URL=http://s240.photobucket.com/user/NOTATA/media/The%2014%20Car%20Performance%20Therapy/003_zpse2863372.jpg.html][/URL]

[URL=http://s240.photobucket.com/user/NOTATA/media/The%2014%20Car%20Performance%20Therapy/002_zpsc3f78119.jpg.html][/URL]

1 2 3 ... 11

You'll need to log in to post.

Our Preferred Partners
TeDhr2GyHSz7N7y1ltlUWx4YcChXmVVGWdCACHHn47zrRF3l5BgUZHqrVjpsLfPd