If I can't get the black ones to look/fit the way I want I may use RARE manifolds or regular headers and then electronic exhaust cutouts and the old chrome setup. This way I can open them up for LSR's, track days, etc. and run through the sidepipes on the street. I mostly drive it like a 90 Y/O lady on the street anyway. We'll see what happens as I move forward.
In reply to Rad_Capz:
That's what I am doing on my Mustang. It already has a Magnaflow system on it with the tail pipes tucked up under the rear valence. I'm going to add electronic cutouts and side exit pipes ala Shelby. That's a winter project that will get done along with the new engine.
But I have to say, I love side pipes on certain cars. And your car is one of the few (outside of Corvettes and Cobras) that they look really good on. I hope you can figure out a way to retain the chrome side pipes in some form. You might be able to use regular headers and they have the side exhausts fabbed up from there in stainless. Just a thought.
Edit - I wrote that before reading the last couple posts on the last page, so take my comments about fabbing up the side pipes for what it's worth.

bravenrace wrote:
In reply to Rad_Capz:
That's what I am doing on my Mustang. It already has a Magnaflow system on it with the tail pipes tucked up under the rear valence. I'm going to add electronic cutouts and side exit pipes ala Shelby. That's a winter project that will get done along with the new engine.
But I have to say, I love side pipes on certain cars. And your car is one of the few (outside of Corvettes and Cobras) that they look really good on. I hope you can figure out a way to retain the chrome side pipes in some form. You might be able to use regular headers and they have the side exhausts fabbed up from there in stainless. Just a thought.
Edit - I wrote that before reading the last couple posts on the last page, so take my comments about fabbing up the side pipes for what it's worth.
I had a system like yours on my 66 Mustang years ago and really didn't like the pipes sticking out under the valance. When I put it back on the street I've gotta figure something out. No sidepipes on that though because it's a coupe and wouldn't look good IMO. I don't like the drone of turn downs either so thats out too.
What will your new engine be?

Rad_Capz wrote:
bravenrace wrote:
In reply to Rad_Capz:
That's what I am doing on my Mustang. It already has a Magnaflow system on it with the tail pipes tucked up under the rear valence. I'm going to add electronic cutouts and side exit pipes ala Shelby. That's a winter project that will get done along with the new engine.
But I have to say, I love side pipes on certain cars. And your car is one of the few (outside of Corvettes and Cobras) that they look really good on. I hope you can figure out a way to retain the chrome side pipes in some form. You might be able to use regular headers and they have the side exhausts fabbed up from there in stainless. Just a thought.
Edit - I wrote that before reading the last couple posts on the last page, so take my comments about fabbing up the side pipes for what it's worth.
I had a system like yours on my 66 Mustang years ago and really didn't like the pipes sticking out under the valance. When I put it back on the street I've gotta figure something out. No sidepipes on that though because it's a coupe and wouldn't look good IMO. I don't like the drone of turn downs either so thats out too.
What will your new engine be?
Just to clarify, my pipes aren't visible from behind the car, so adding the side pipes wouldn't make it look like it had two exhaust systems. I do have turn downs in the rear, but no droning at all. I agree that side pipes don't look good on that vintage mustang, coupe or fastback, IMO.
The engine is a 5.0 based 347. Should make 400-430hp.

bravenrace wrote:
Just to clarify, my pipes aren't visible from behind the car, so adding the side pipes wouldn't make it look like it had two exhaust systems. I do have turn downs in the rear, but no droning at all. I agree that side pipes don't look good on that vintage mustang, coupe or fastback, IMO.
The engine is a 5.0 based 347. Should make 400-430hp.
I've seen a couple 64-66 Fastbacks with sidepipes that looked good to me but no coupes. I built a 302 set up for nitrous for mine. Your car outta scoot pretty good with the 347.
My update
Door bottoms of most American cars built when this one was didn't hold up well. I can't tell you how many cars I've seen with fully rusted out bottoms and they're a pain to replace the metal in because of the curves & folds. Luckily, although mine had some rust they were repairable without having to replace metal. The passenger side door is usually worse than the drivers and mine's no exception so I'm using that to show how to do a door that's got some rust but is still structurally sound without welding all new metal in.
In this case there's no visible rust in the interior of the door, if there was, new metal would have been installed. When I painted the car 20+ years ago the outside rust was there and I cleaned it with wire brushes/wheels, etc. and put rust converter on it before paint. Granted the car has rarely gotten wet since the first time but the rust had not popped through the paint or progressed. This time it's getting a better repair because I have a blaster.
Sandblast edge of door & get the rusty parts really good. Blow out all send & debris and then coat all the rusty areas with panel bond, let sit 24 hours. Because this isn't a place where the panel bond would get hot from exhaust or rapidly change temperature by heat from the sun it makes a great filler to seal the pits and stop new rust from forming after blasting. Inside will be sealed later.
[URL=http://s240.photobucket.com/user/NOTATA/media/The%2014%20Car%20Performance%20Therapy/011_zps9310f123.jpg.html]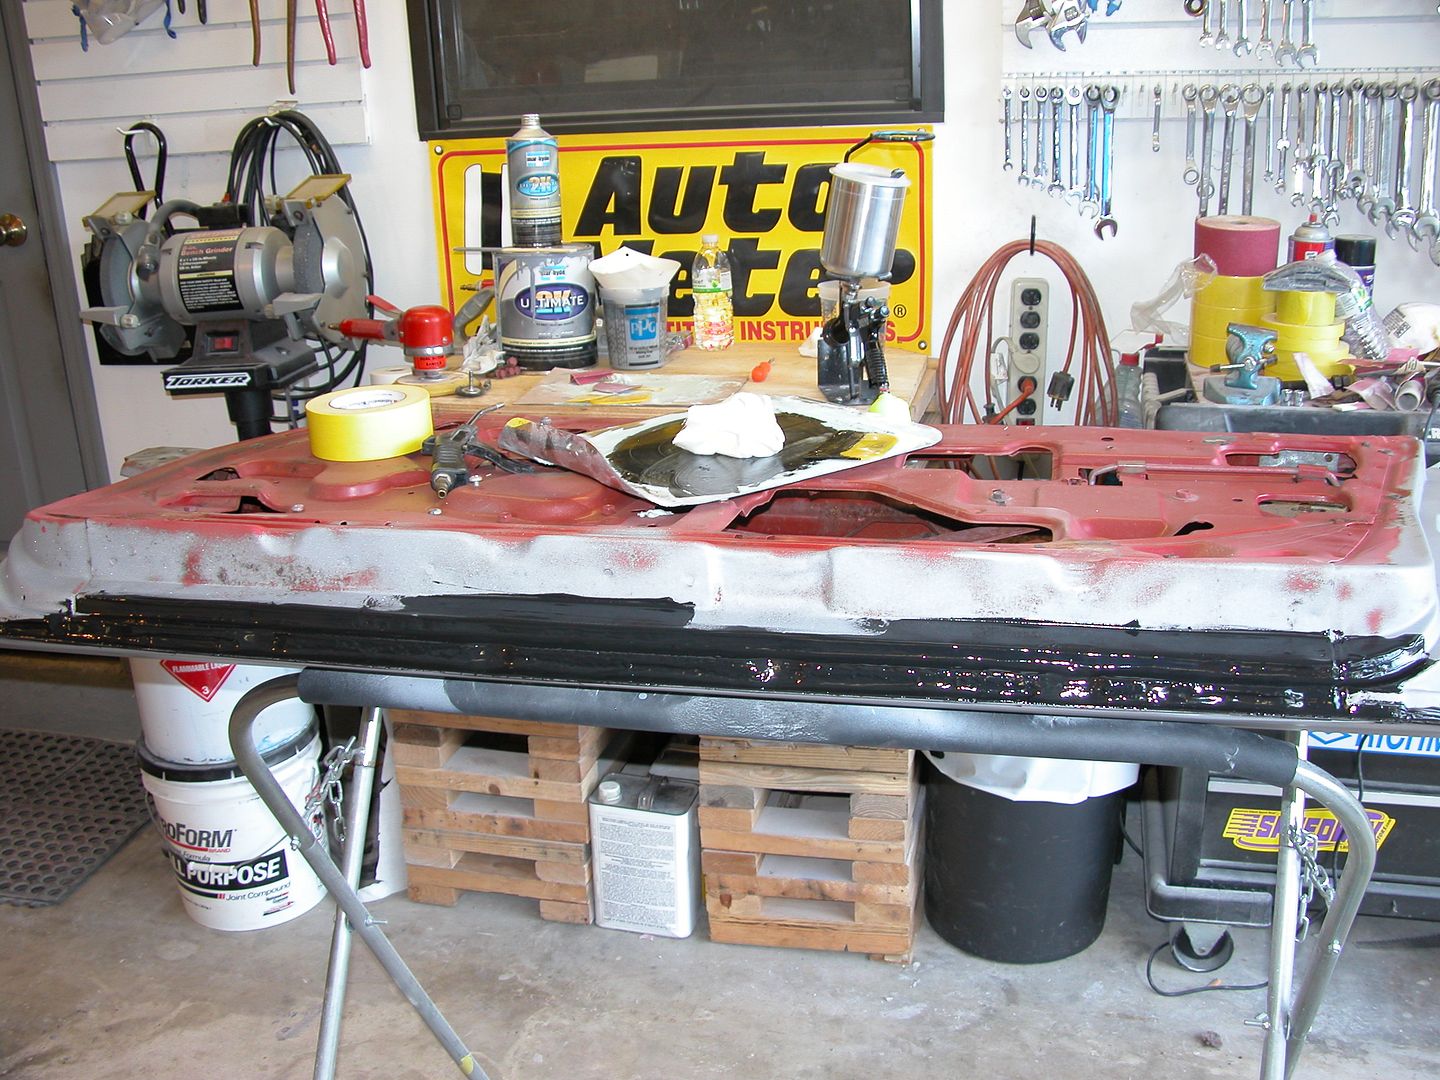 [/URL]
Sand down panel bond till it's just filling the rust pits and open up the drain slots, and gasket holes. Then skim coat with regular filler, sand, and prep for primer.
[URL=http://s240.photobucket.com/user/NOTATA/media/The%2014%20Car%20Performance%20Therapy/014_zps2d964c22.jpg.html]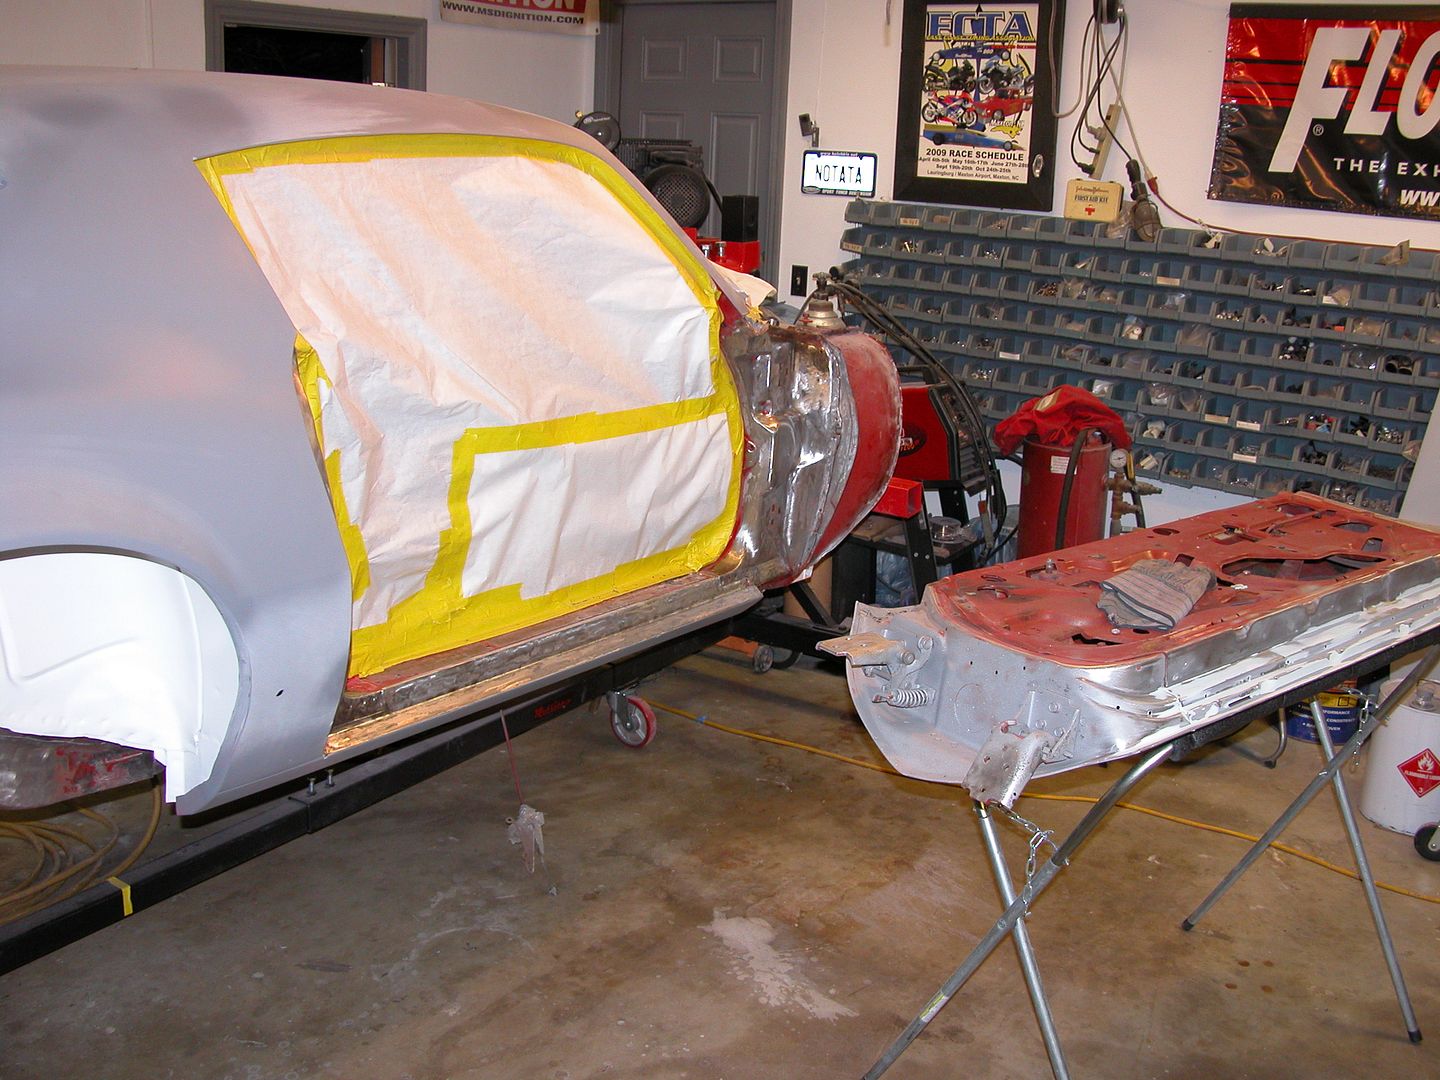 [/URL]
[URL=http://s240.photobucket.com/user/NOTATA/media/The%2014%20Car%20Performance%20Therapy/002_zpsb8af8f19.jpg.html]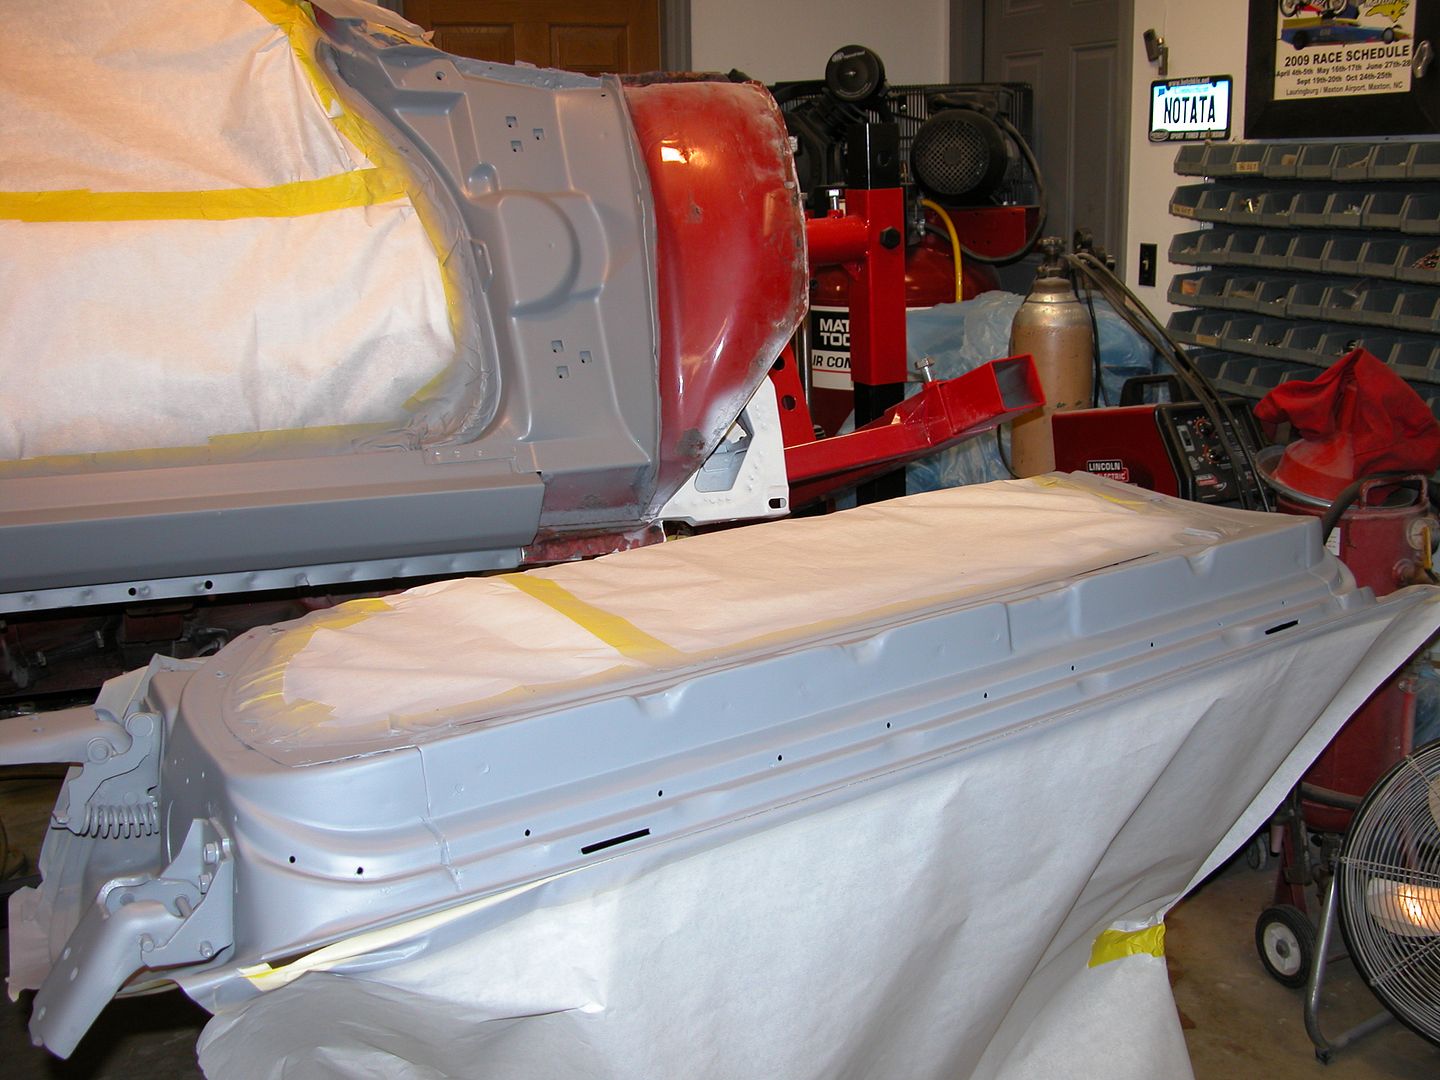 [/URL]
I've been cleaning the underside to clean shiny metal a section at a time and shooting it with epoxy primer. With a little luck I'll finish cleaning the middle floor section and have it in primer over the weekend.
[URL=http://s240.photobucket.com/user/NOTATA/media/The%2014%20Car%20Performance%20Therapy/005_zpsdba2adb7.jpg.html]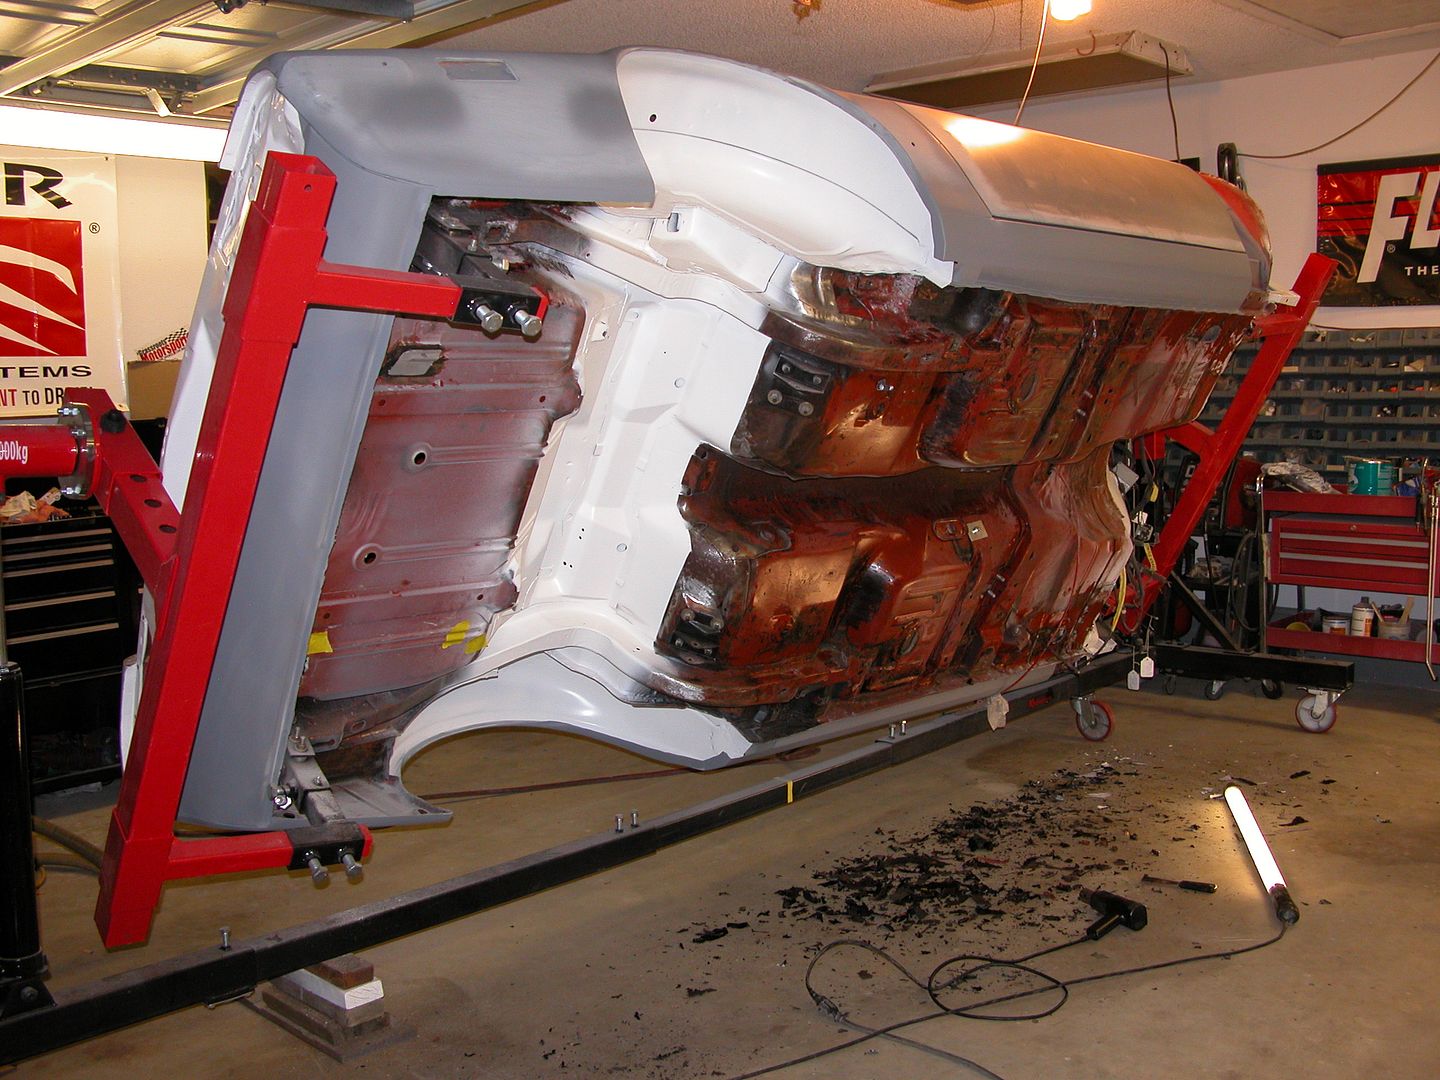 [/URL]
[URL=http://s240.photobucket.com/user/NOTATA/media/The%2014%20Car%20Performance%20Therapy/007_zpsf41d62c8.jpg.html]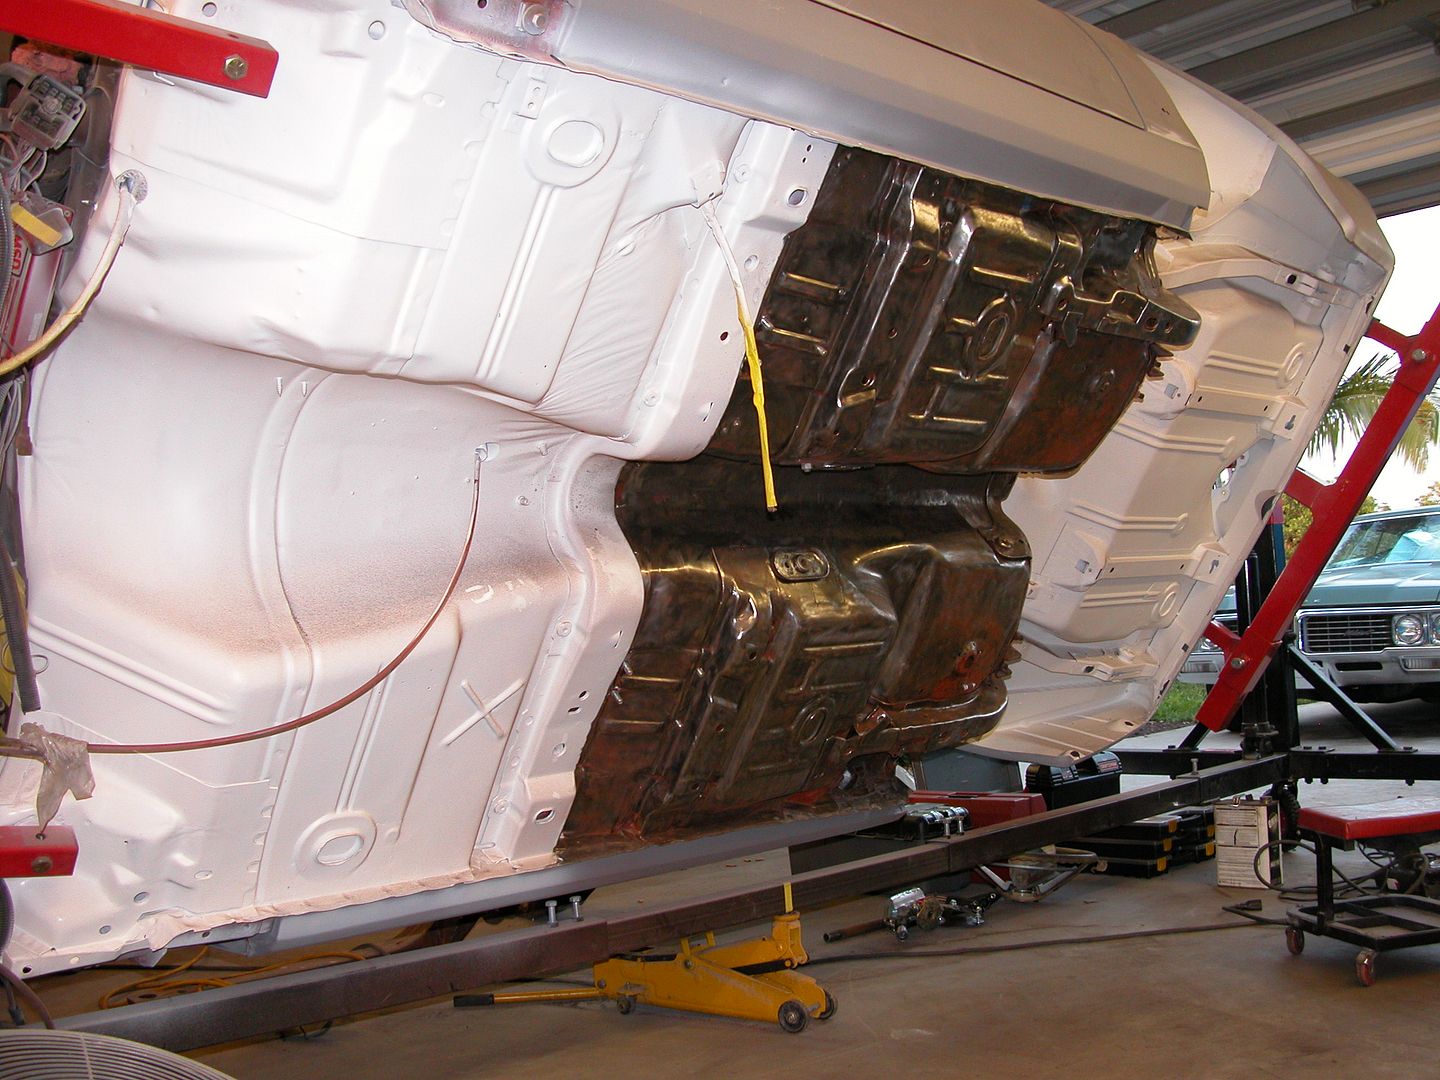 [/URL]
Making progress, need to remove interior to finish the last sections. Found a little rust on the passengers rear seat pan I'll take care of and need access to the bolt heads for the sway bar supports that attach to the floor pan.
[URL=http://s240.photobucket.com/user/NOTATA/media/The%2014%20Car%20Performance%20Therapy/001_zpsa5e82711.jpg.html]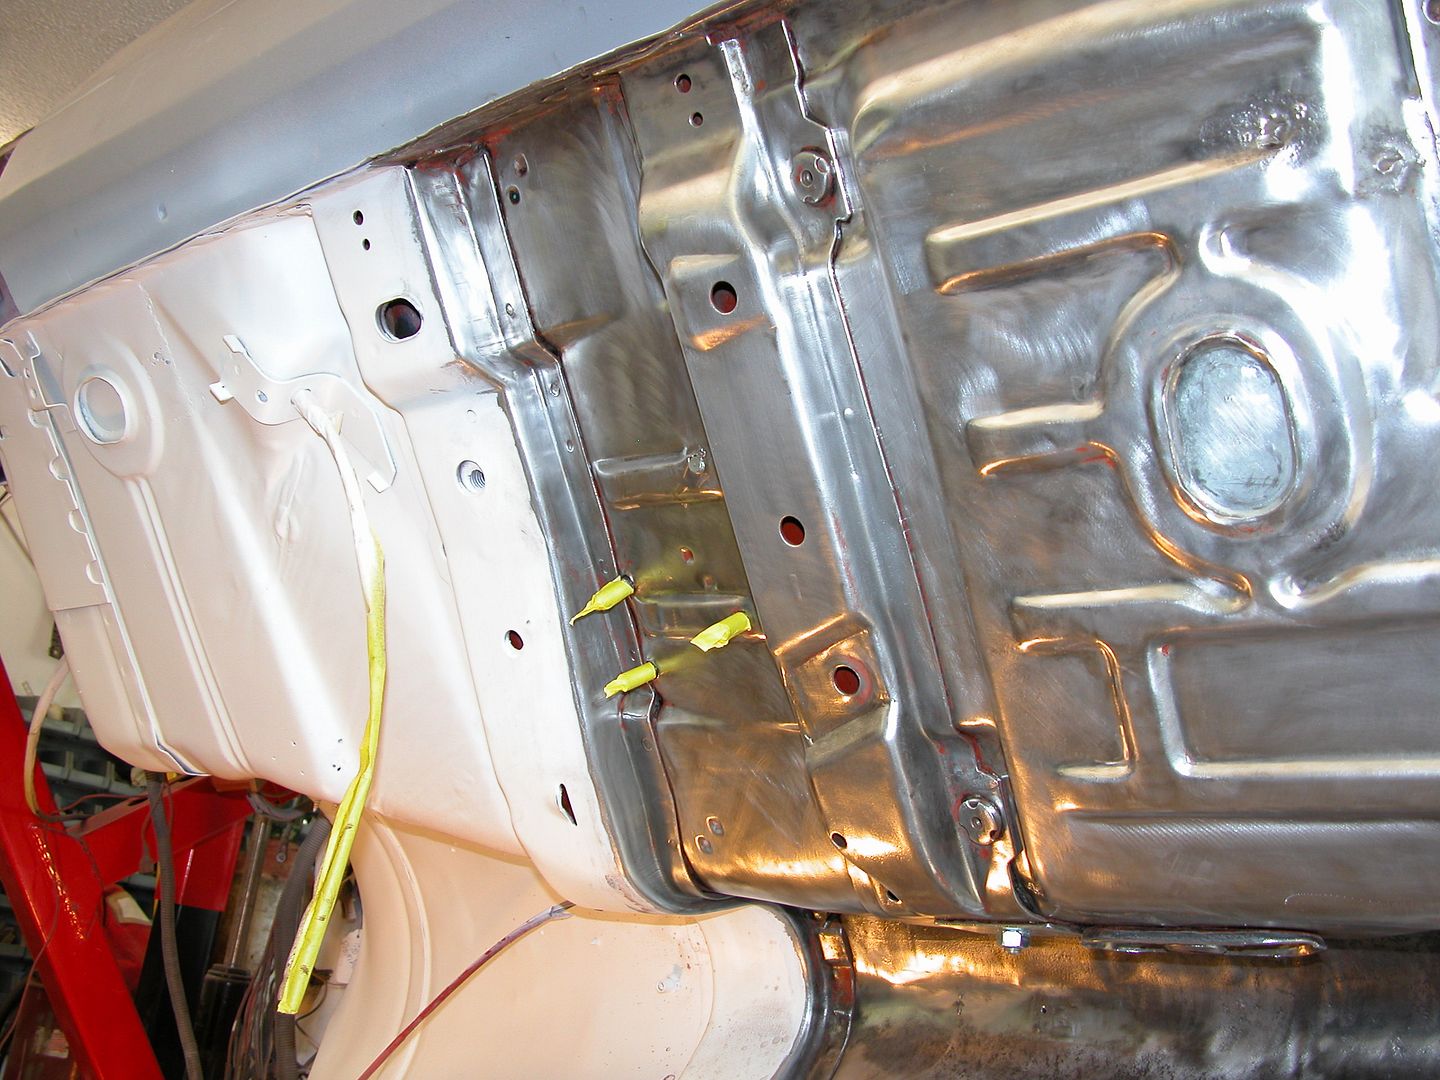 [/URL]
[URL=http://s240.photobucket.com/user/NOTATA/media/The%2014%20Car%20Performance%20Therapy/005_zps03cb2c47.jpg.html]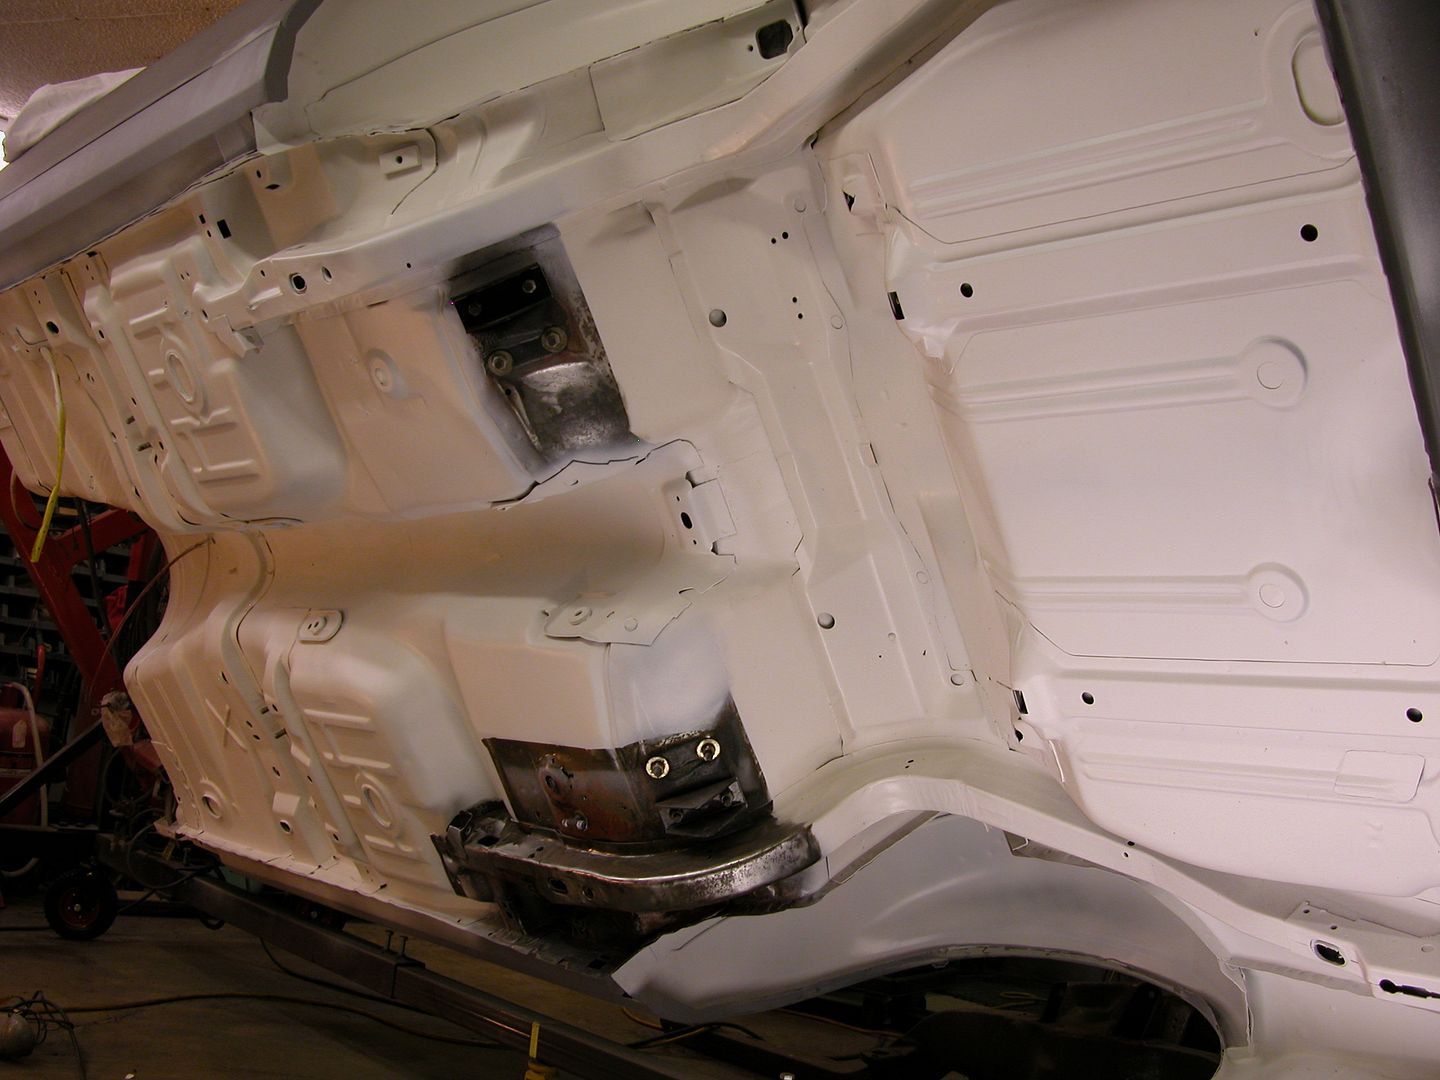 [/URL]
What are you using to strip it to shiny metal? I assume some kind of fine wire wheel, but if you've got a better trick I'm all ears.

I'm stripping this one mechanically (for certain reasons). Here's my process. Be sure to use heavy leather gloves, face shield, hearing protection and particle mask. Leave the guards on the right angle electric grinders or you risk serious injury.
-
With heat gun and putty knife remove as much undercoating and loose paint as possible paying particular attention to the undercoating. Undercoating will melt & smear with wire wheels making it take longer to get an area clean.
-
Use a 4 1/2" electric angle grinder with twisted carbon wire wheels to remove as much paint & leftover undercoating. Do not try to clean perfect.
-
Use 4" electric angle grinder with stainless wire wheels. Go over all areas that were done with the bigger grinder wheels to remove anything left over by the 4/2" in open areas and then start start stripping nooks and crannies the 4 1/2" wouldn't fit it.
-
Use 3" wire wheels on an electric drill. Clean & strip deeper into corners nooks & crannies.
-
Use 2" wire wheels on electric drill.
-
Use 1 1/2" wire wheels on electric drill.
-
Use 1 1/2" wire wheels on air grinder to get in areas an electric drill is too big for.
-
Use 1/2" wire brush on air grinder to get into the smallest nooks & crannies.
-
Wipe the areas that were cleaned with the wire wheels using lacquer thinner on rags.
-
Go back over areas with small wire wheels in air grinder to get little places where paint is left in spot welds etc. Then wipe clean with thinner.
-
Use red scotch Brite pads over all sections where paint was removed till metal is clean.
-
Wipe all areas with wax & grease remover.
-
Primer!
That's a cumbersome process, but the results don't lie. Thanks for the recipe.

Finished up the floor pan and moved on to the cowl and firewall area. Had a small rust spot on the drivers side of the cowl so I made a patch piece for it. Since it's not visible once the fender is on it just has to be functional. Once the sides were in primer I moved on to stripping the firewall and cowl after removing all the wiring, windshield wiper system, steering column and pretty much everything under the dash. Will be smoothing the firewall a bit.
I'm eliminating the heat/AC under dash parts to save some weight. I'd removed the under hood part of the AC system and switched to heater functions only when I lived in New England but being in FL now there's no need for heat either so out it all goes!
I'm sooo tempted to leave the bottom in white, ya know, because race car!
[URL=http://s240.photobucket.com/user/NOTATA/media/The%2014%20Car%20Performance%20Therapy/004_zpsb0b83b2d.jpg.html]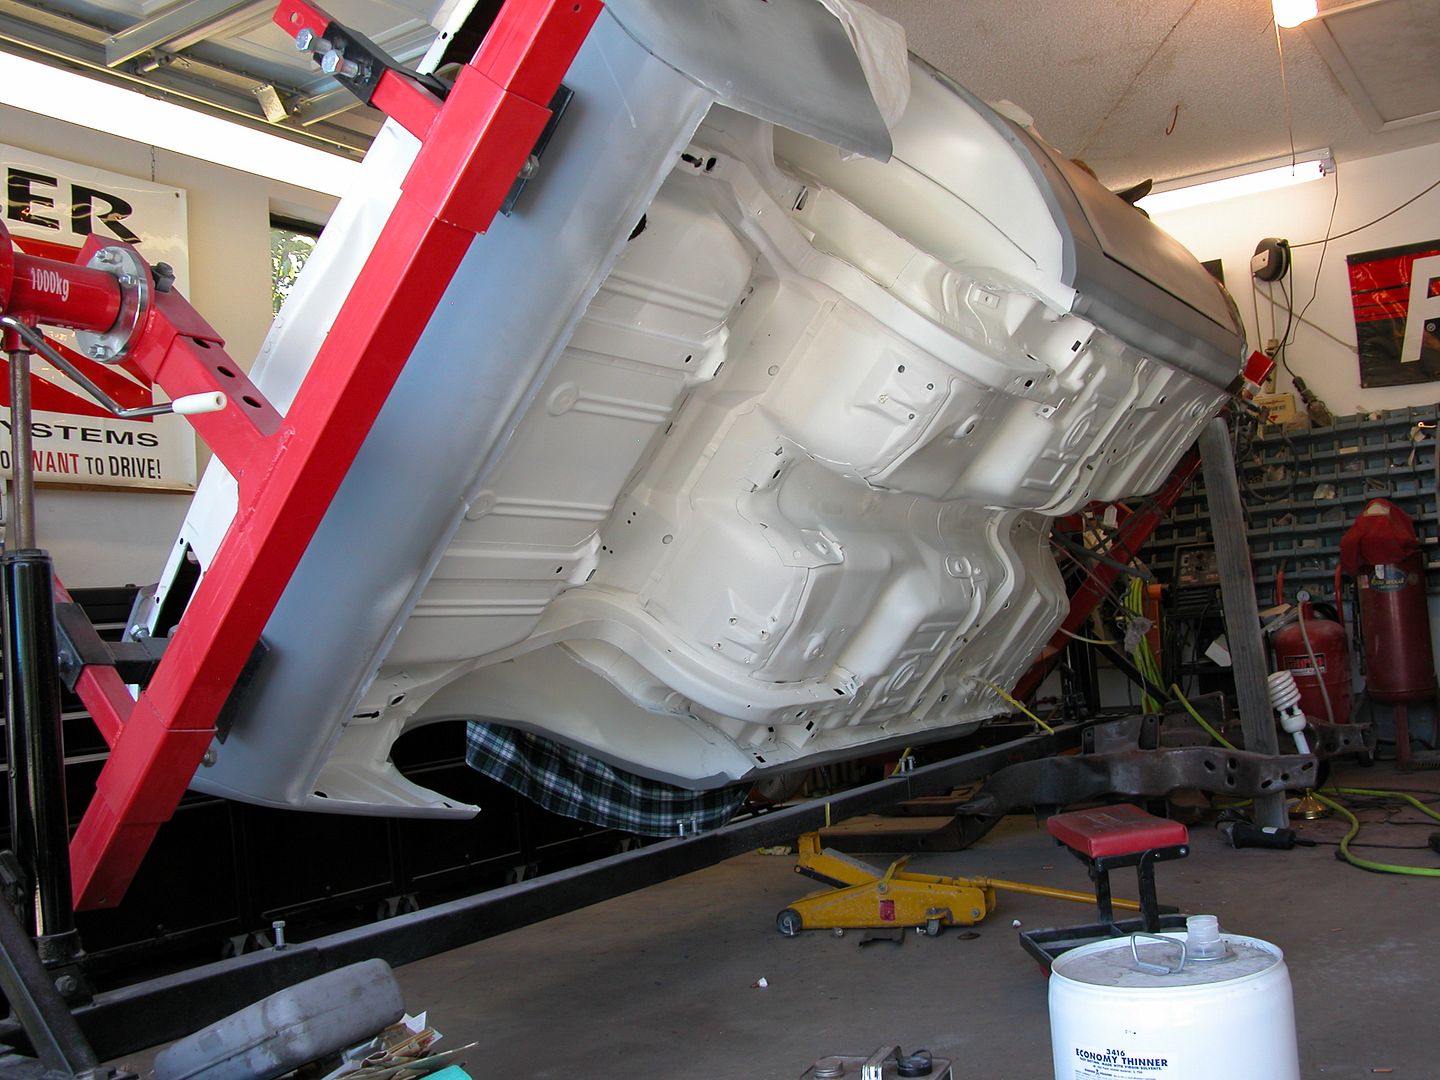 [/URL]
[URL=http://s240.photobucket.com/user/NOTATA/media/The%2014%20Car%20Performance%20Therapy/005_zpse2d5e3ed.jpg.html]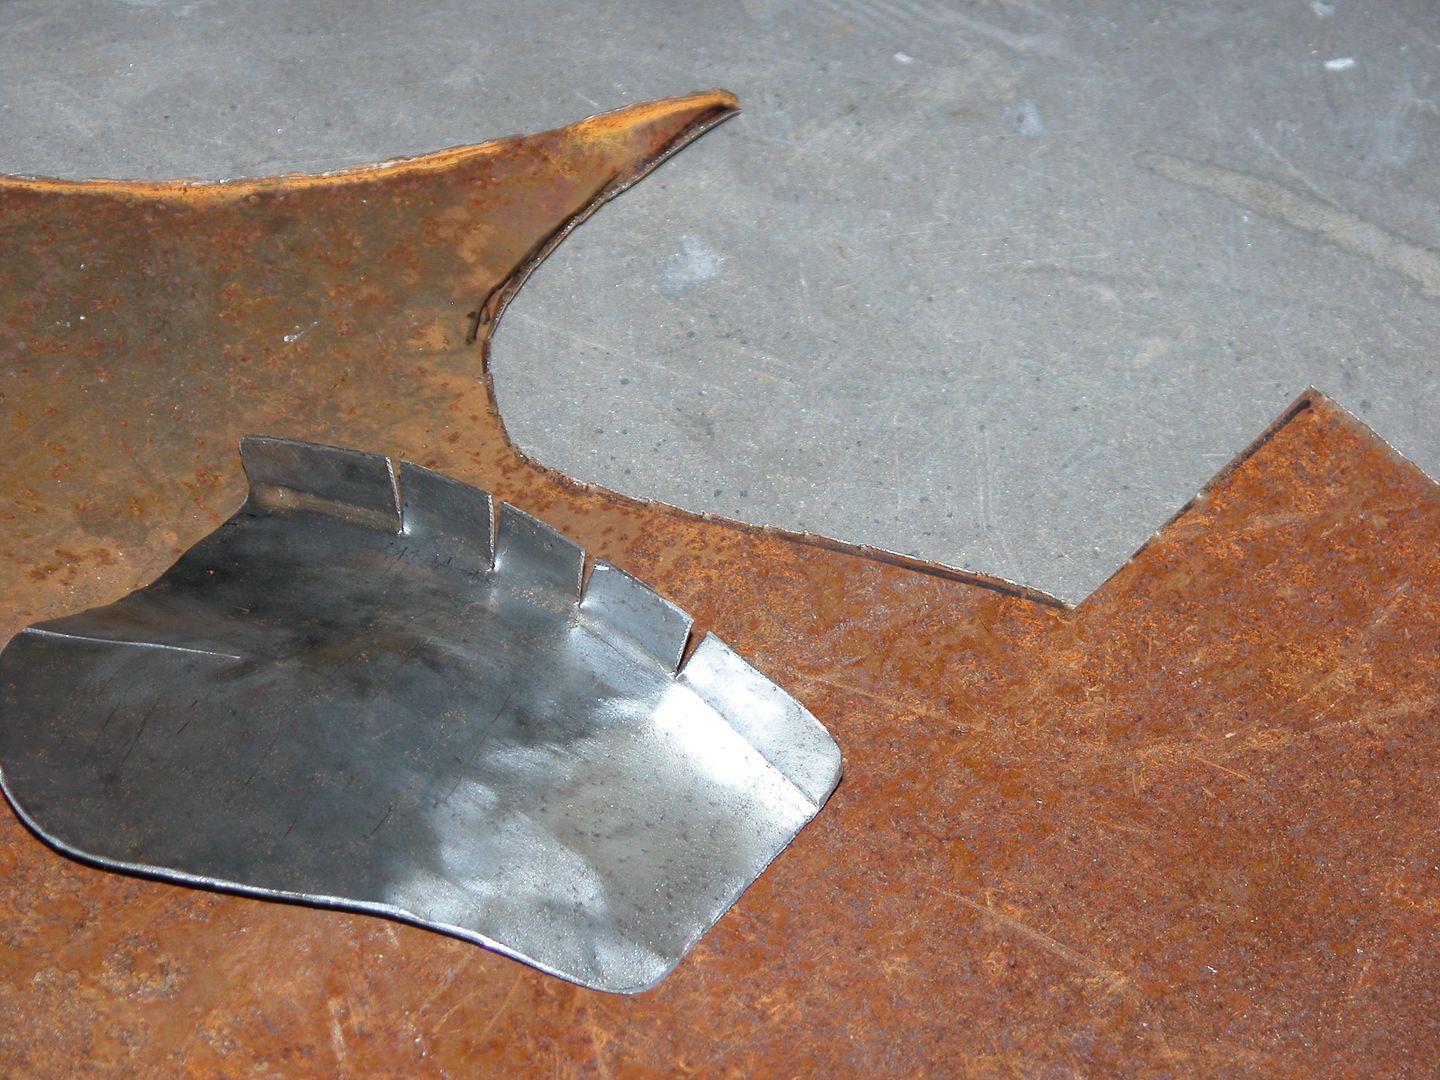 [/URL]
[URL=http://s240.photobucket.com/user/NOTATA/media/The%2014%20Car%20Performance%20Therapy/007_zpsfeaa6d33.jpg.html]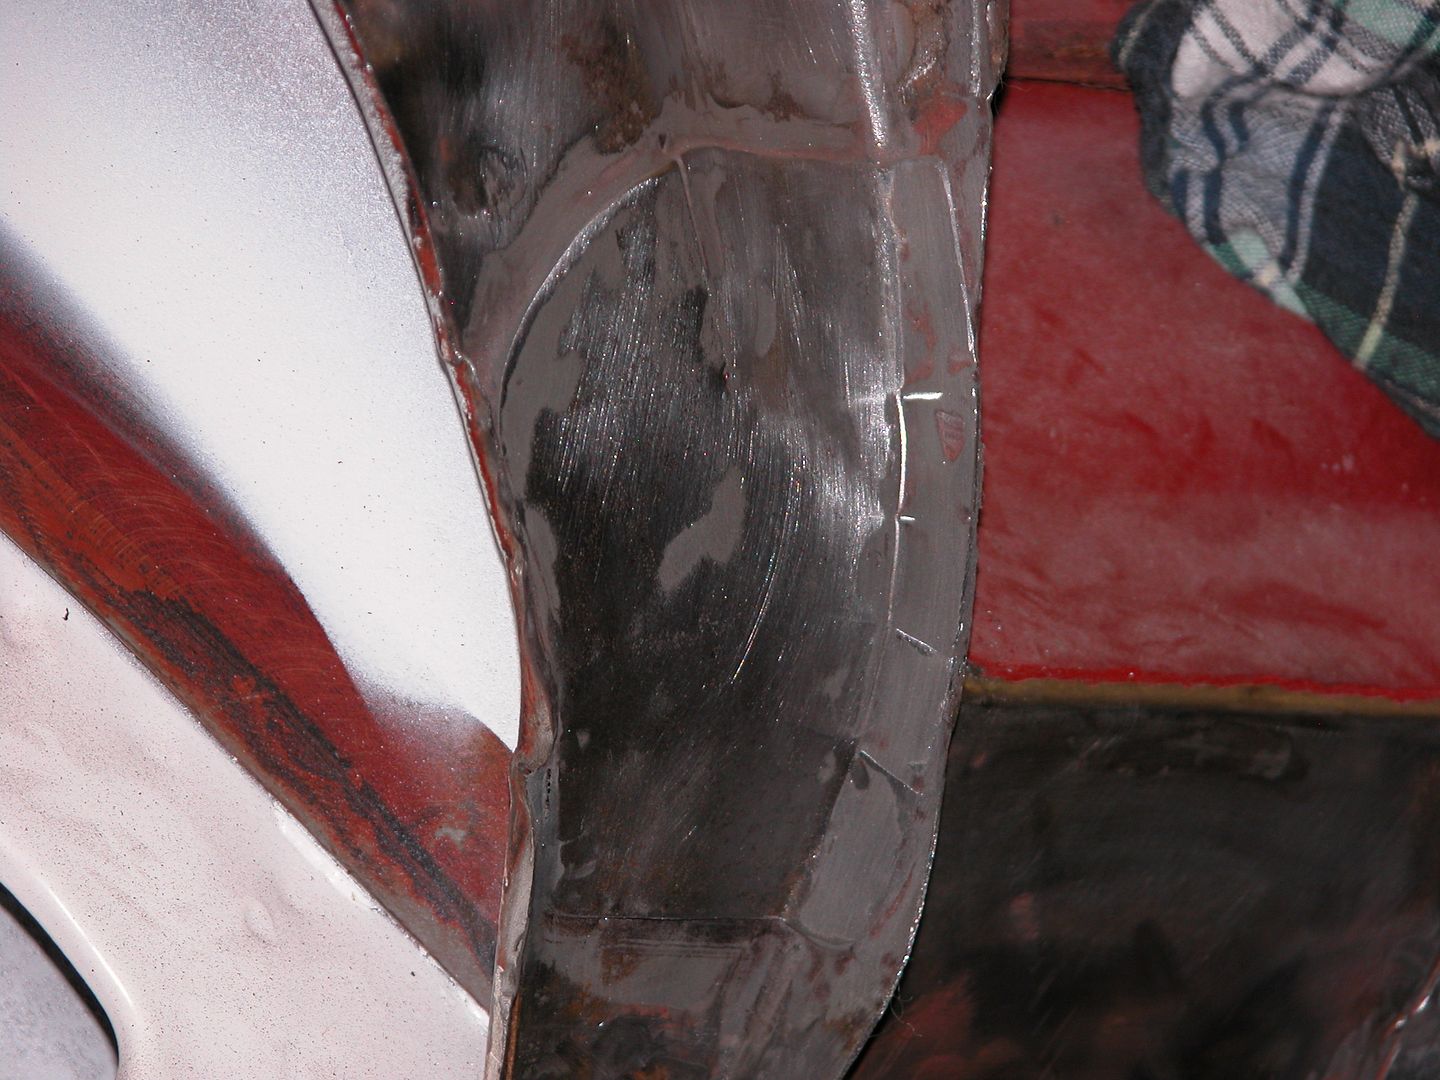 [/URL]
[URL=http://s240.photobucket.com/user/NOTATA/media/The%2014%20Car%20Performance%20Therapy/002_zpsf59da55b.jpg.html]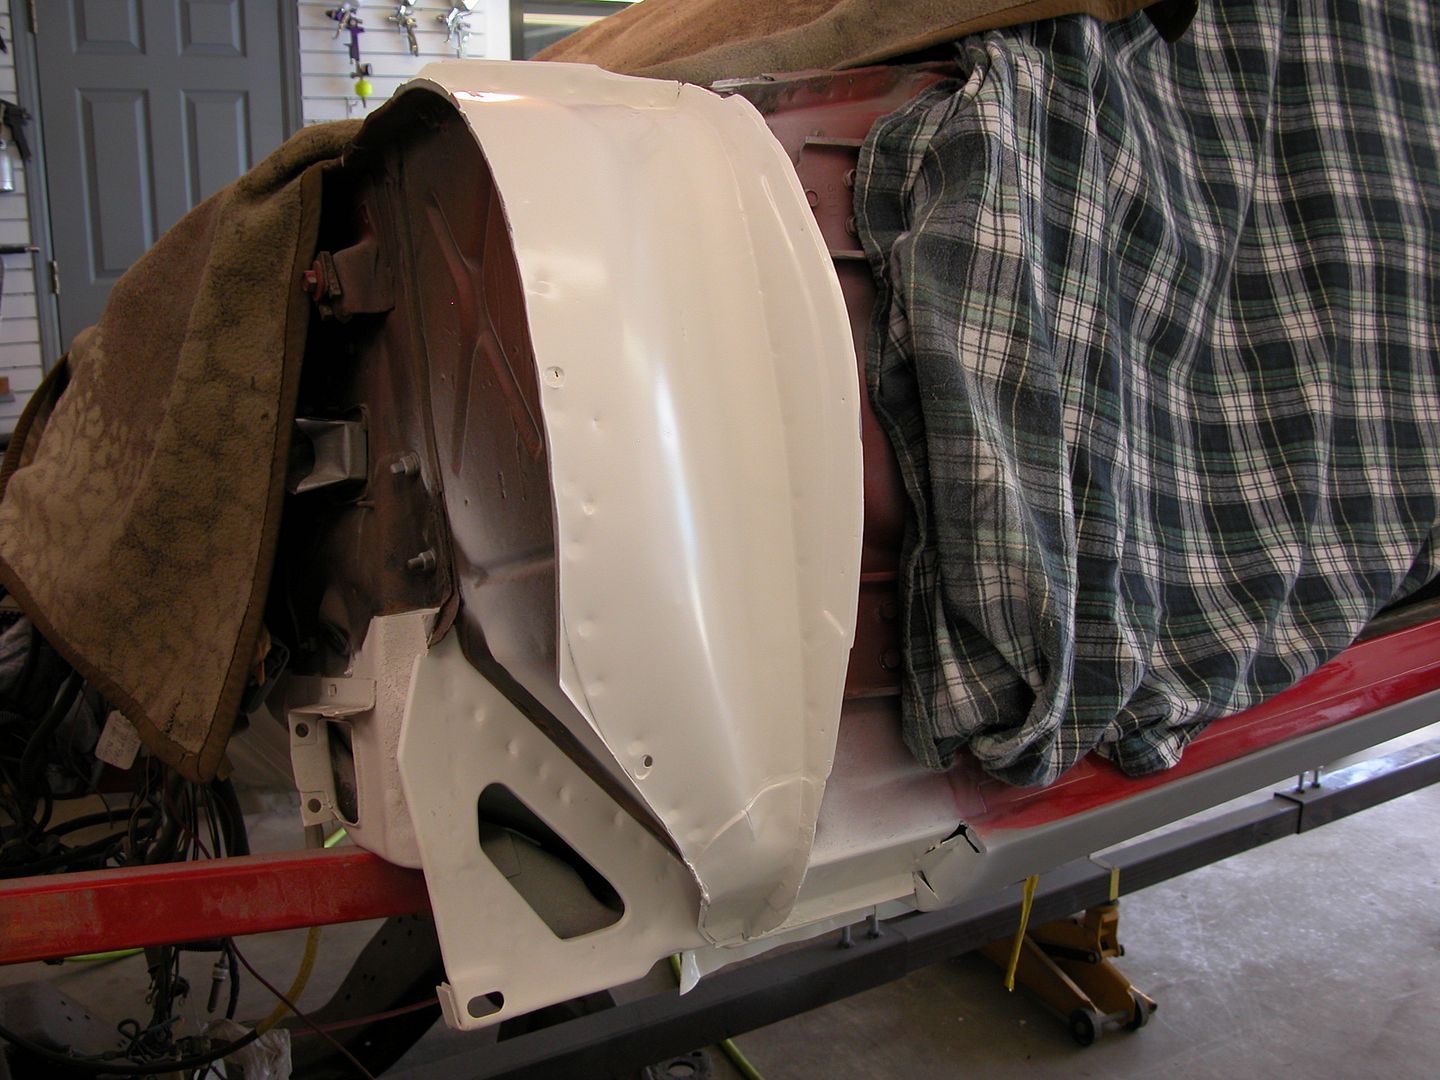 [/URL]
[URL=http://s240.photobucket.com/user/NOTATA/media/The%2014%20Car%20Performance%20Therapy/009_zps22cd5194.jpg.html]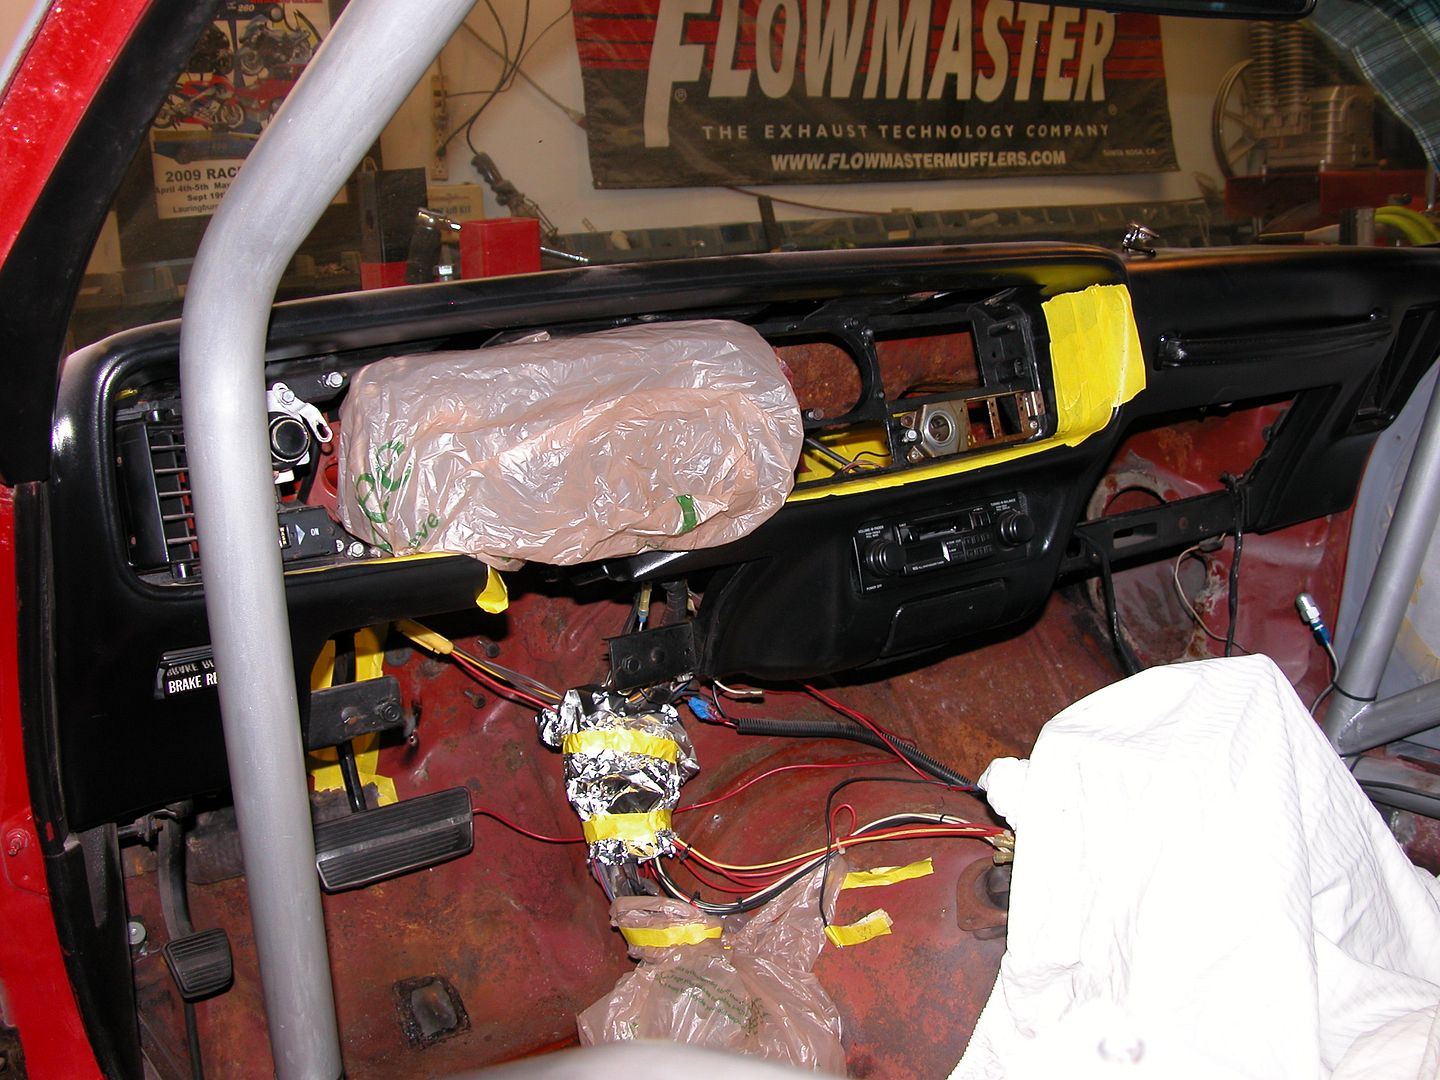 [/URL]
[URL=http://s240.photobucket.com/user/NOTATA/media/The%2014%20Car%20Performance%20Therapy/007_zpsb7768996.jpg.html]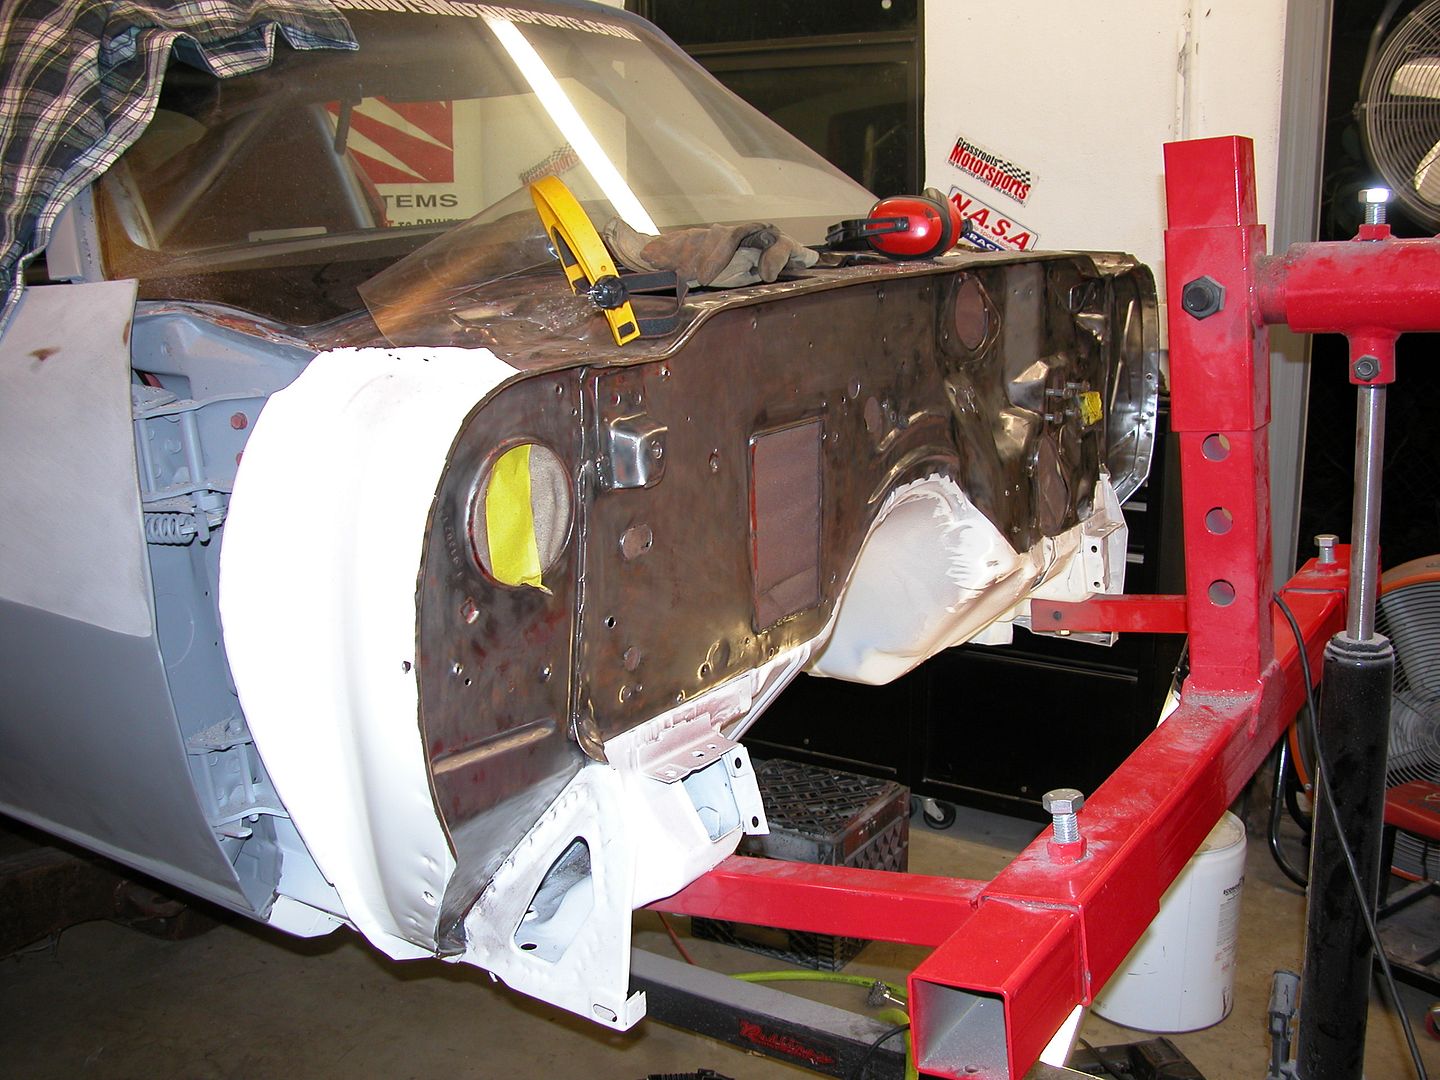 [/URL]

2nd gen F bodies are known for poor cowl drainage. They suffer more if the car sits out in the weather for extended periods without moving like mine did. Puddles form on the top of the cowl by the ends and GM made a nice place for a little pond to form inside the cowl right above the brake pedal. About 10 years ago I fixed the inside pond part and on the top I had cleaned what I could get to (with the fenders still on the car)and used rust converter followed by some bondo to fill pits and semi gloss black paint. Since the car doesn't get wet it's been fine but this time I can do a better repair since the fenders are off.
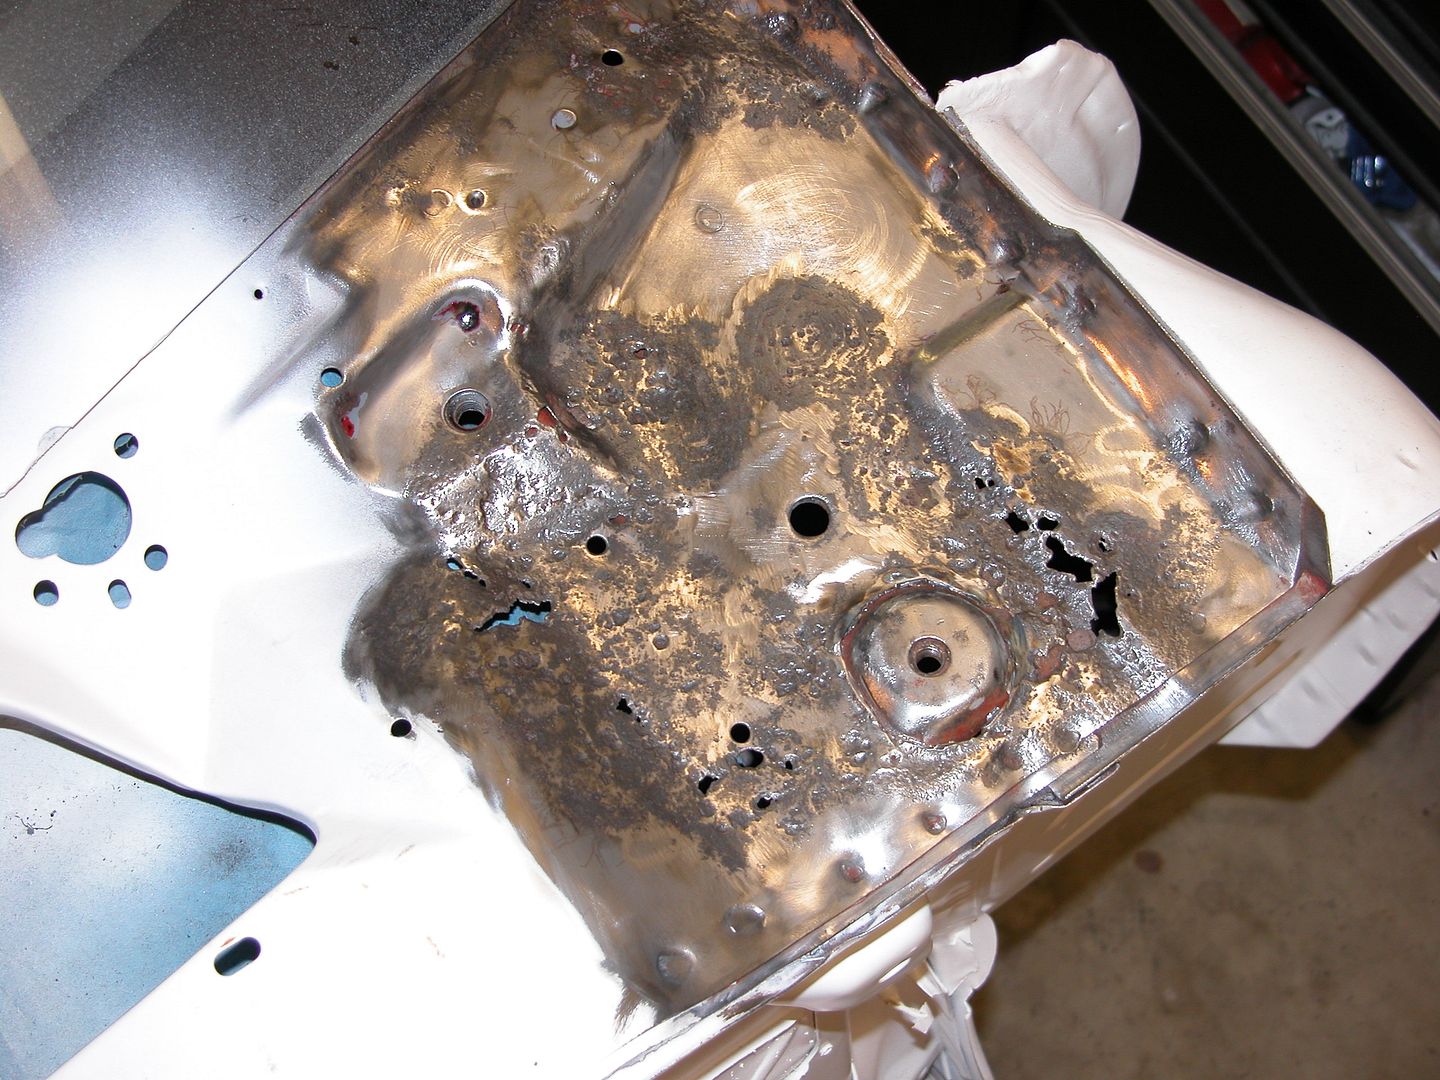
Although both ends on top of the cowl had pitting and some rust through the drivers side was worse due to the cowl tag holding water under it so I'm showing the repair on that side but I did make a similar panel for the pass side. Since they rust from the top down due to the puddling we're seeing the worst of it. Replacing the entire top of the cowl can be done however in this case I didn't feel it was justified. The center of the top of the cowl is in great condition and this is more of a track car that is street driven so strength and fire protection are my goals on the cowl/firewall area. I could cut and weld new metal in the ends but I felt this would be stronger and easier.
The top of the cowl had already been wire wheeled and the center section primed to prevent rust. The raised area around the fender mount was thin so I cut it out around the fender mount then wire wheeled the area to clean metal.
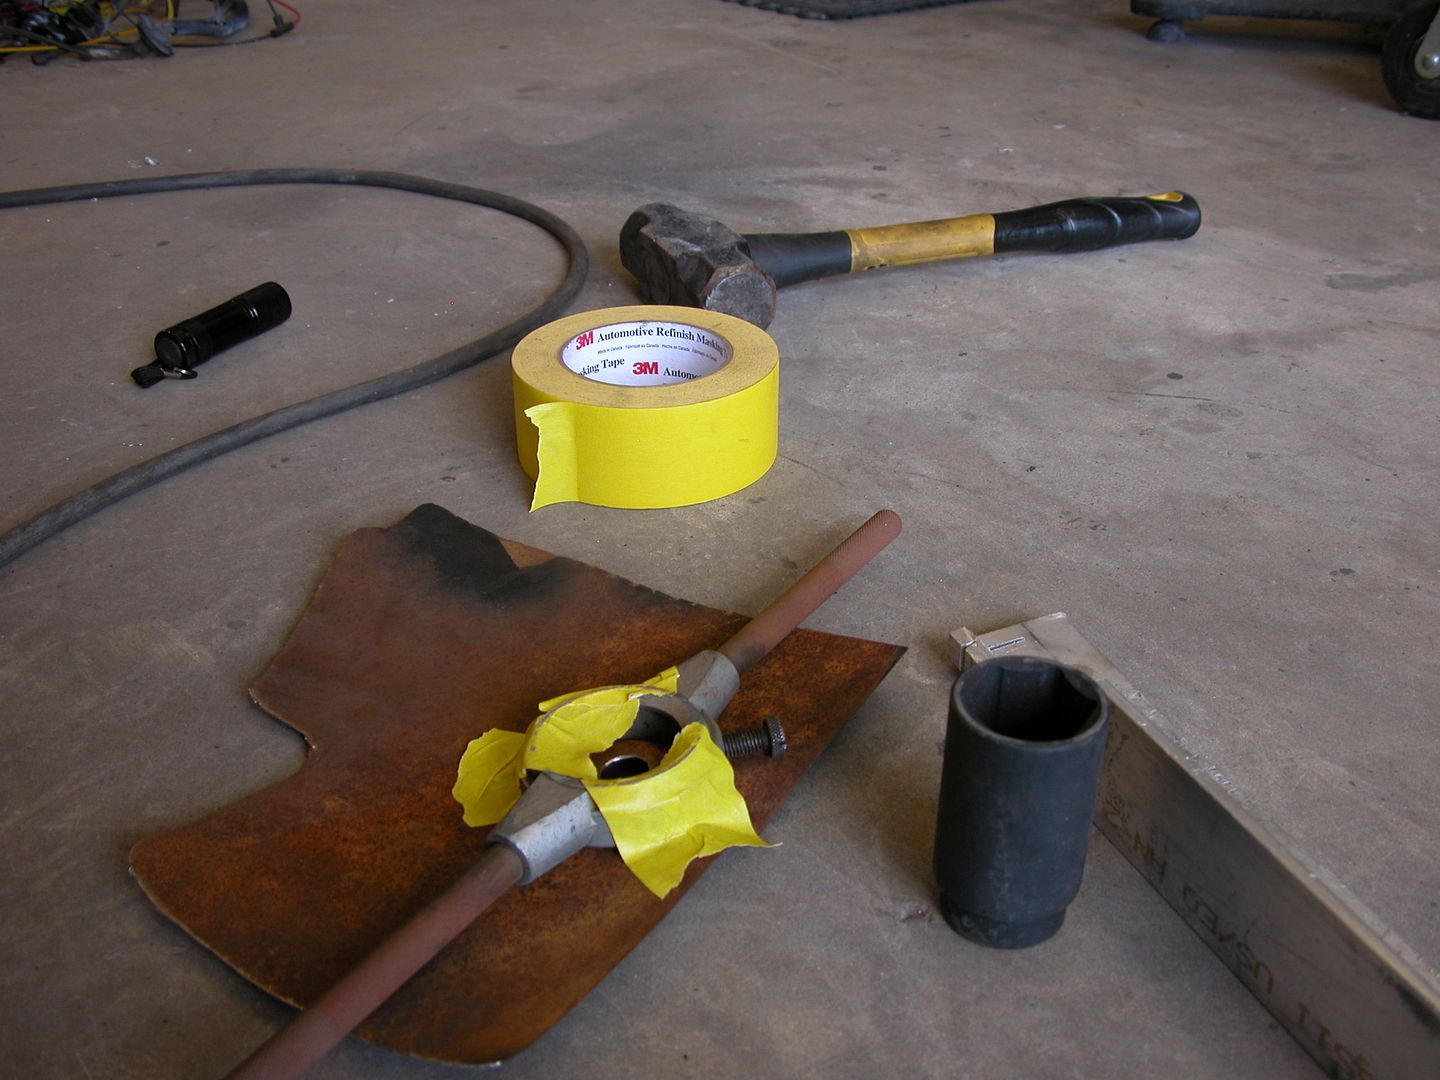
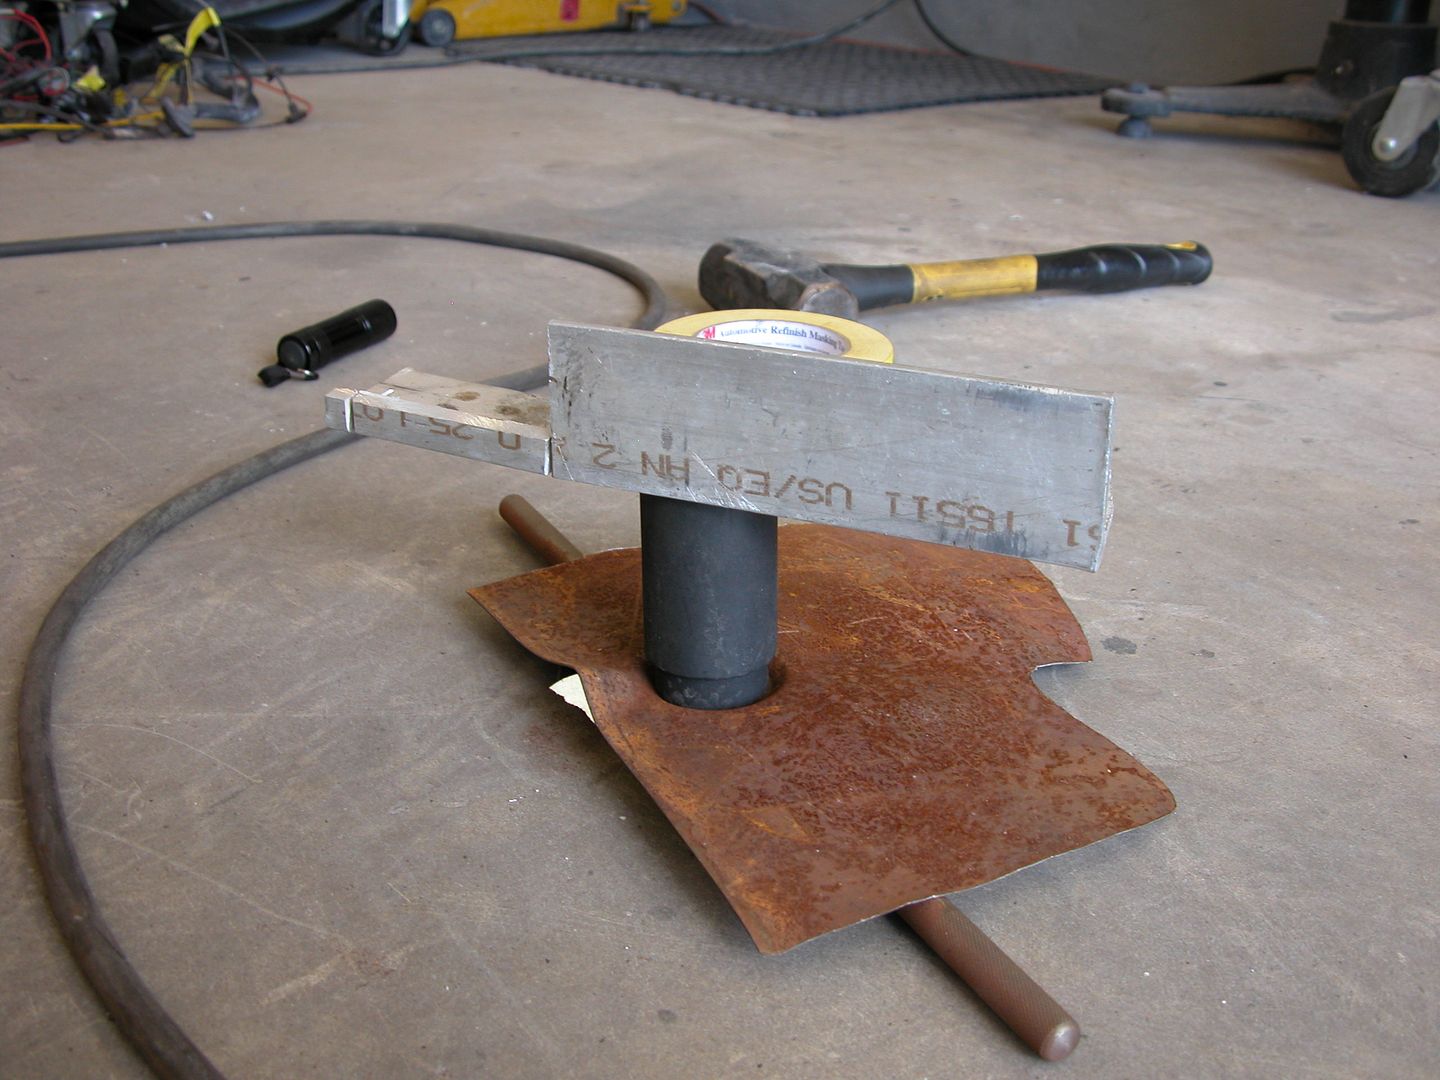
Made a pattern out of paper, transferred to sheet metal and started bending, hammer/dolly, etc. into shape. Made the raised area for the fender mount with a big impact socket and a die handle with a BFH. It's humid here in So FL so everything rusts as you can tell by the sheet metal. Not to worry though it gets cleaned up well on both sides before final install.
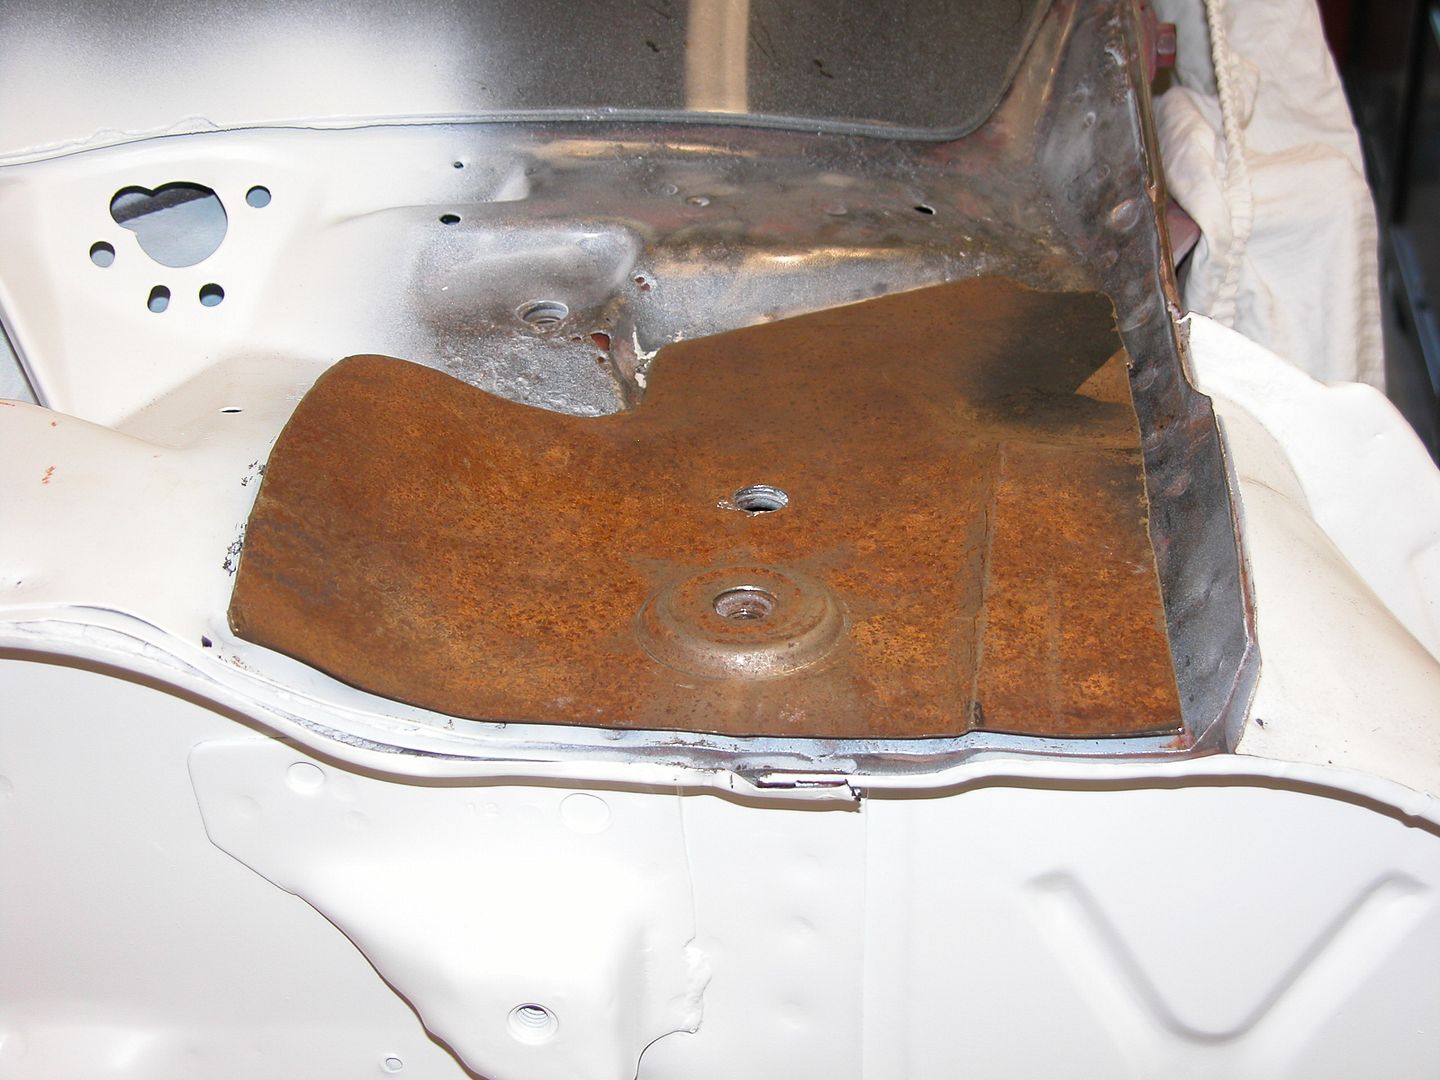
Once the panel is shaped the edges are finished and it gets cleaned. Then it gets marked where the soft areas are in the original panel and screwed into place staying out of the soft areas. Then the screws are removed.
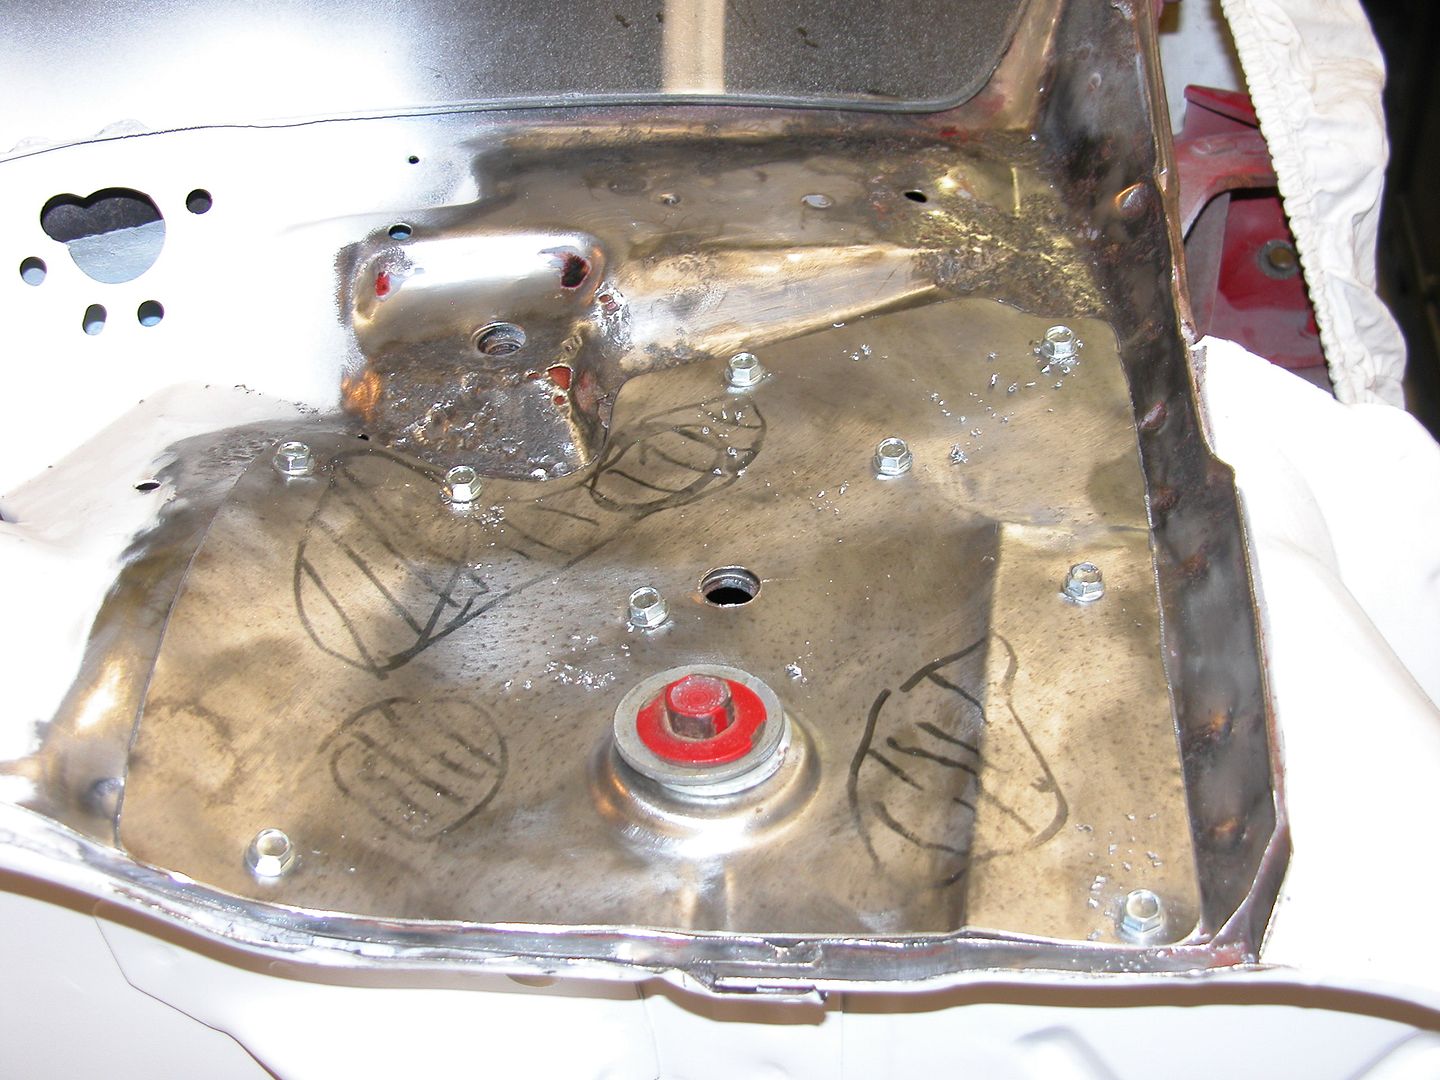
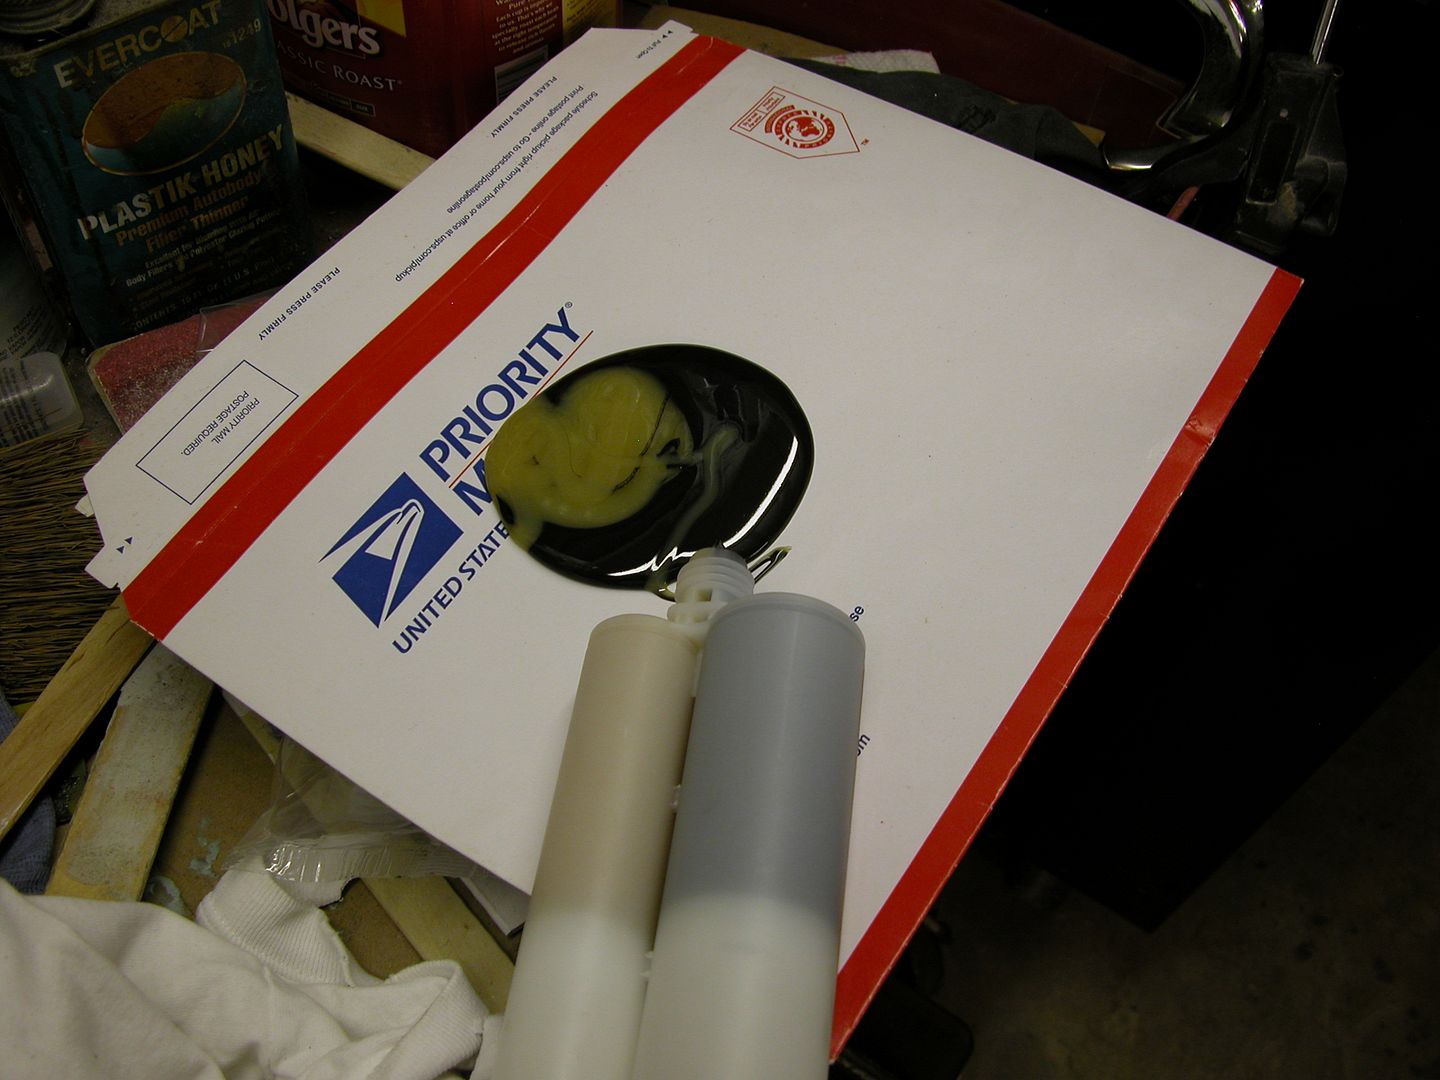
Next a thin layer of panel bond is spread on the area where the panel will go. Bonding the panel onto the existing panel is much stronger than replacing the original metal with a single layer regardless of whether it was bonded or welded in place. The panel bond over such a wide area is stronger than mig or spot welding without the warping problems. For those who avoid panel bond because they don't want to buy the expensive double barrel caulk gun you can push the 2 parts out evenly (without a mixing tip on) with a piece of pipe if you remove the back of the label so you can evenly move the plungers so you have equal parts. Then mix like bondo and spread where you need it with a plastic bondo spreader.
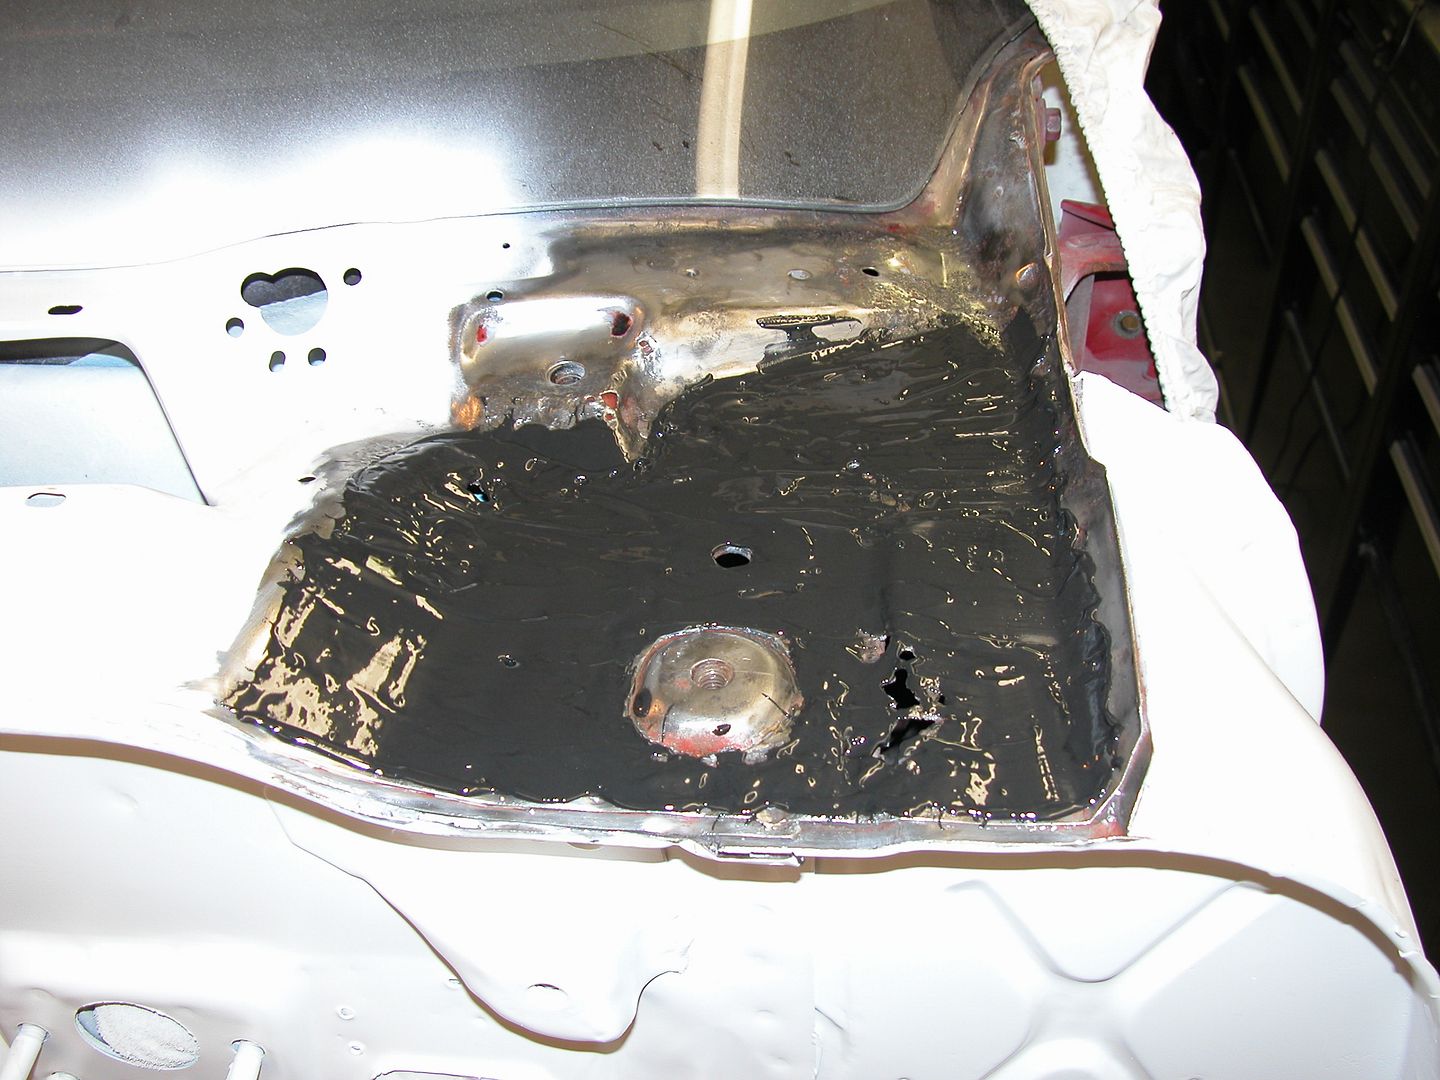
Once the panel is in place install the fender mount bolt with wide washer on it and screw the panel on, then do a finger smear around the edges with the panel bond that squishes out which will seal it so no water can get under. Make sure the drain hole is open and that the panel bond will keep water from getting between the panels there also. Because the fender mount is high there's no need to have that bolt hole sheet metal sealed (and you do not want a washer bonded there!)unless you're gonna throw the car outside for 10-20 years.
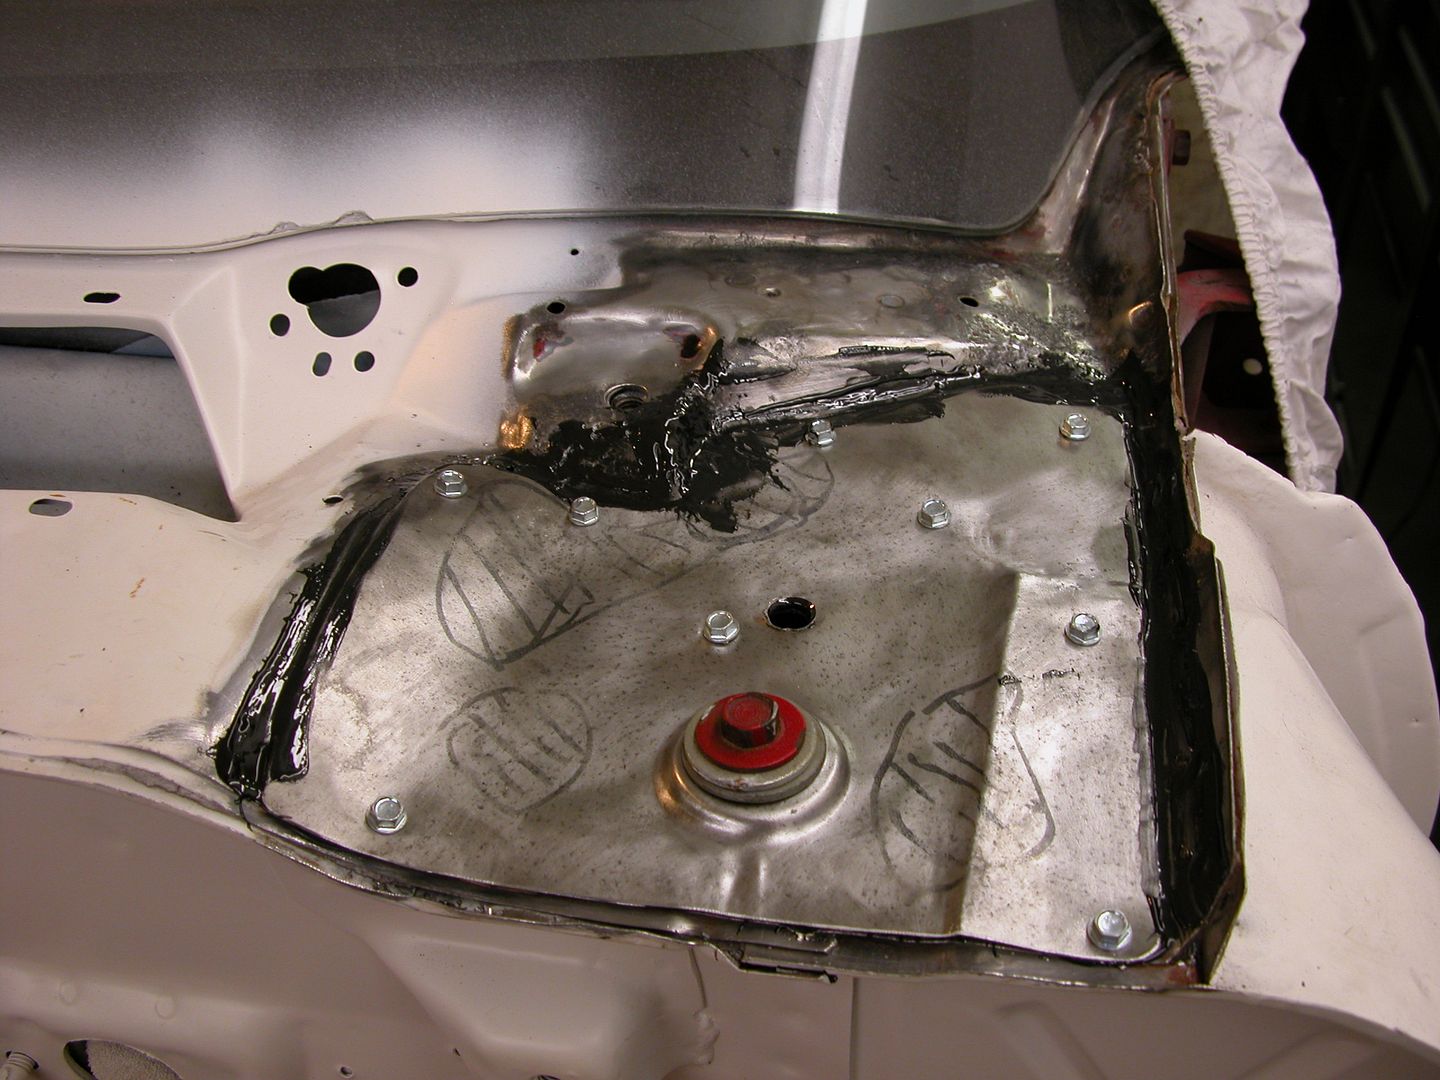
Once the panel bond has set remove screws and fill the little screw holes with panel bond. A piece of tape underneath will keep it from dropping through till it sets. After the panel bond is fully cured (24 hours) sand the panel bond and apply a little plastic filler then sand. With the repaired area done prep the whole area surrounding the repair and prime. Before priming I used a large drift and a BFH to make some spot weld looking dimples along the cowl lip so it'd resemble the original part in the center.
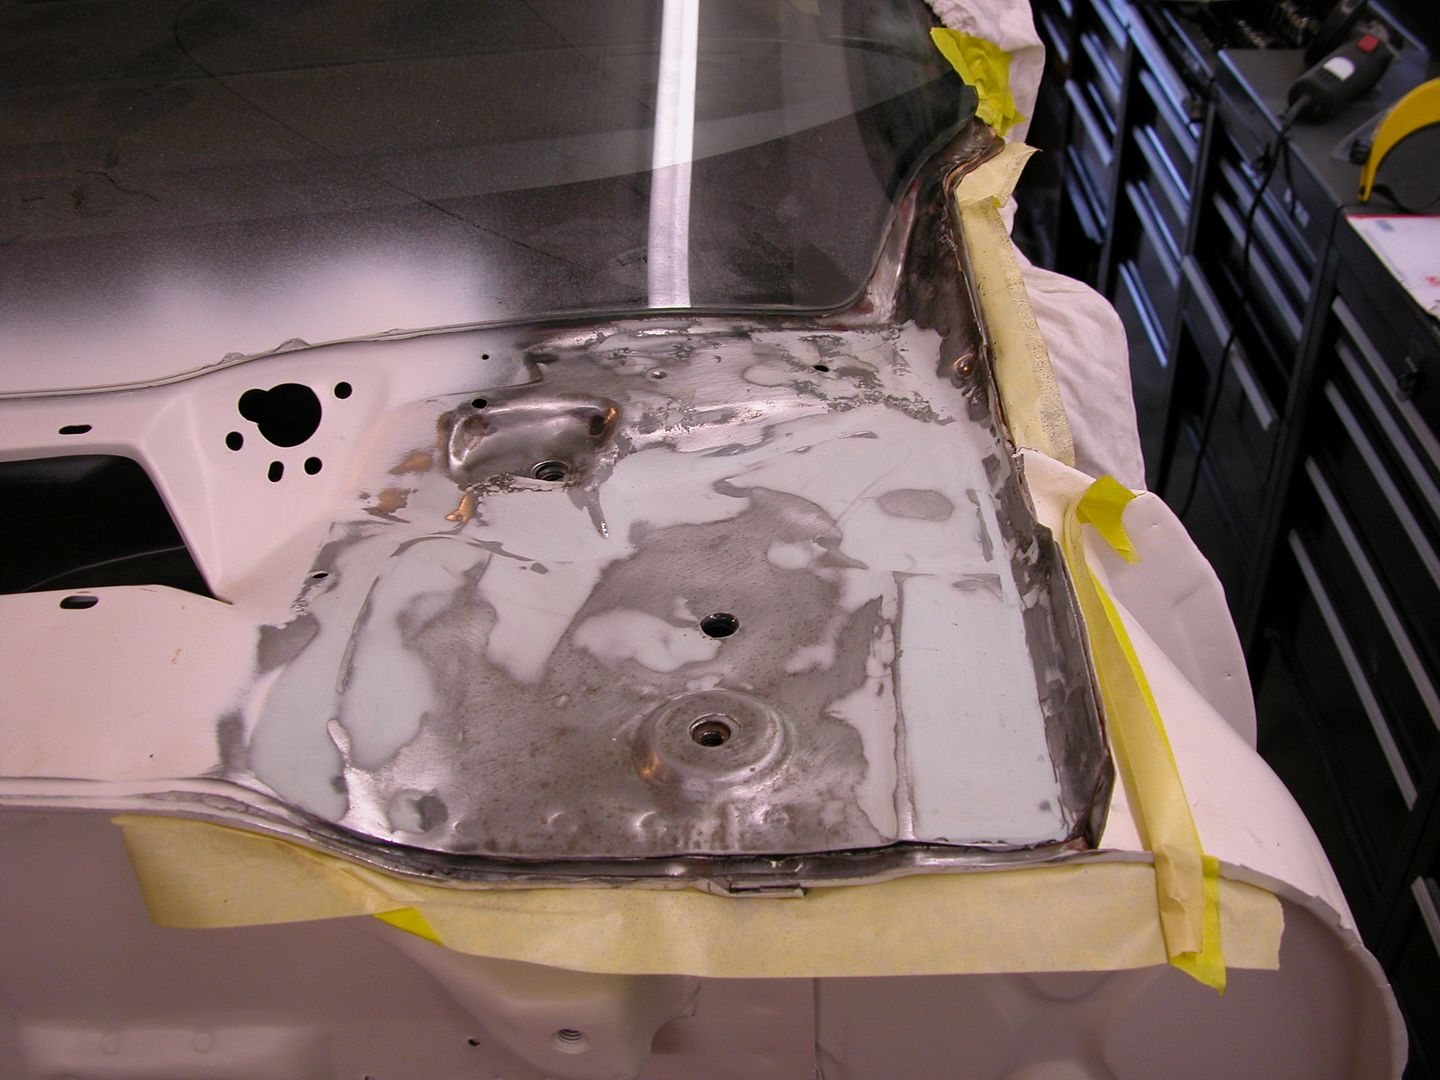
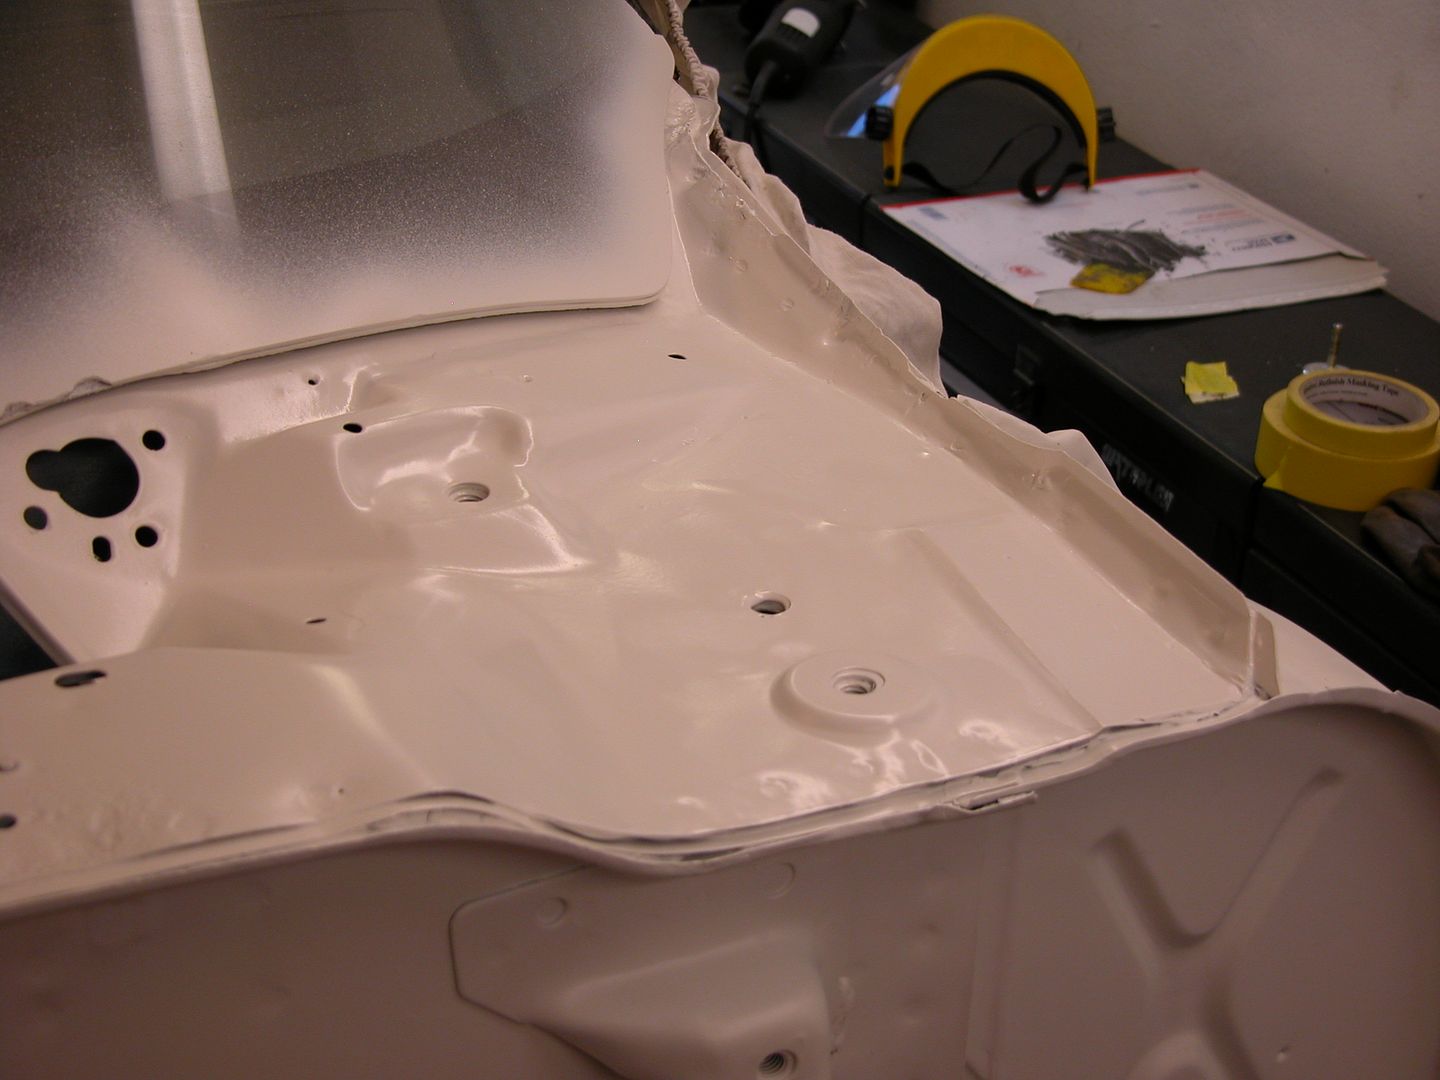
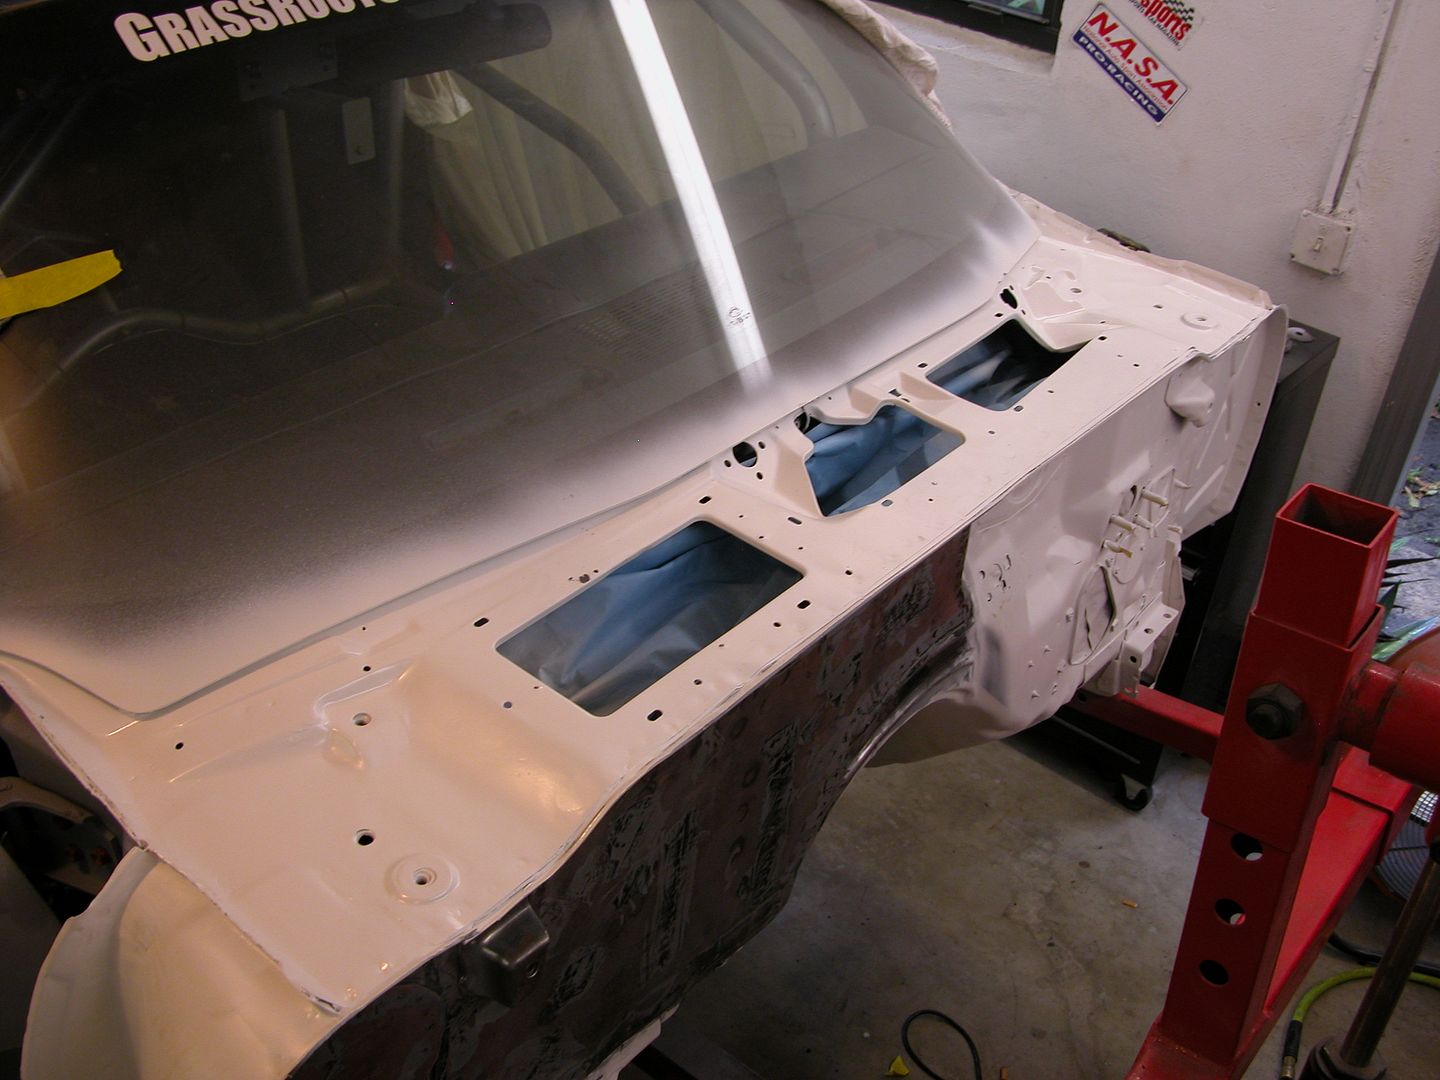
With no heat/AC anymore I want to close up the firewall openings to slow a fire should one ever occur in the engine compartment. So I made up a couple panels for the large openings, spot welded them in place, sealed edges with panel bond, and smoothed the larger area. Also made a small panel to cover some extra holes I'd made previously for wiring, gauge senders etc. .
[URL=http://s240.photobucket.com/user/NOTATA/media/The%2014%20Car%20Performance%20Therapy/002_zpsf36e899a.jpg.html]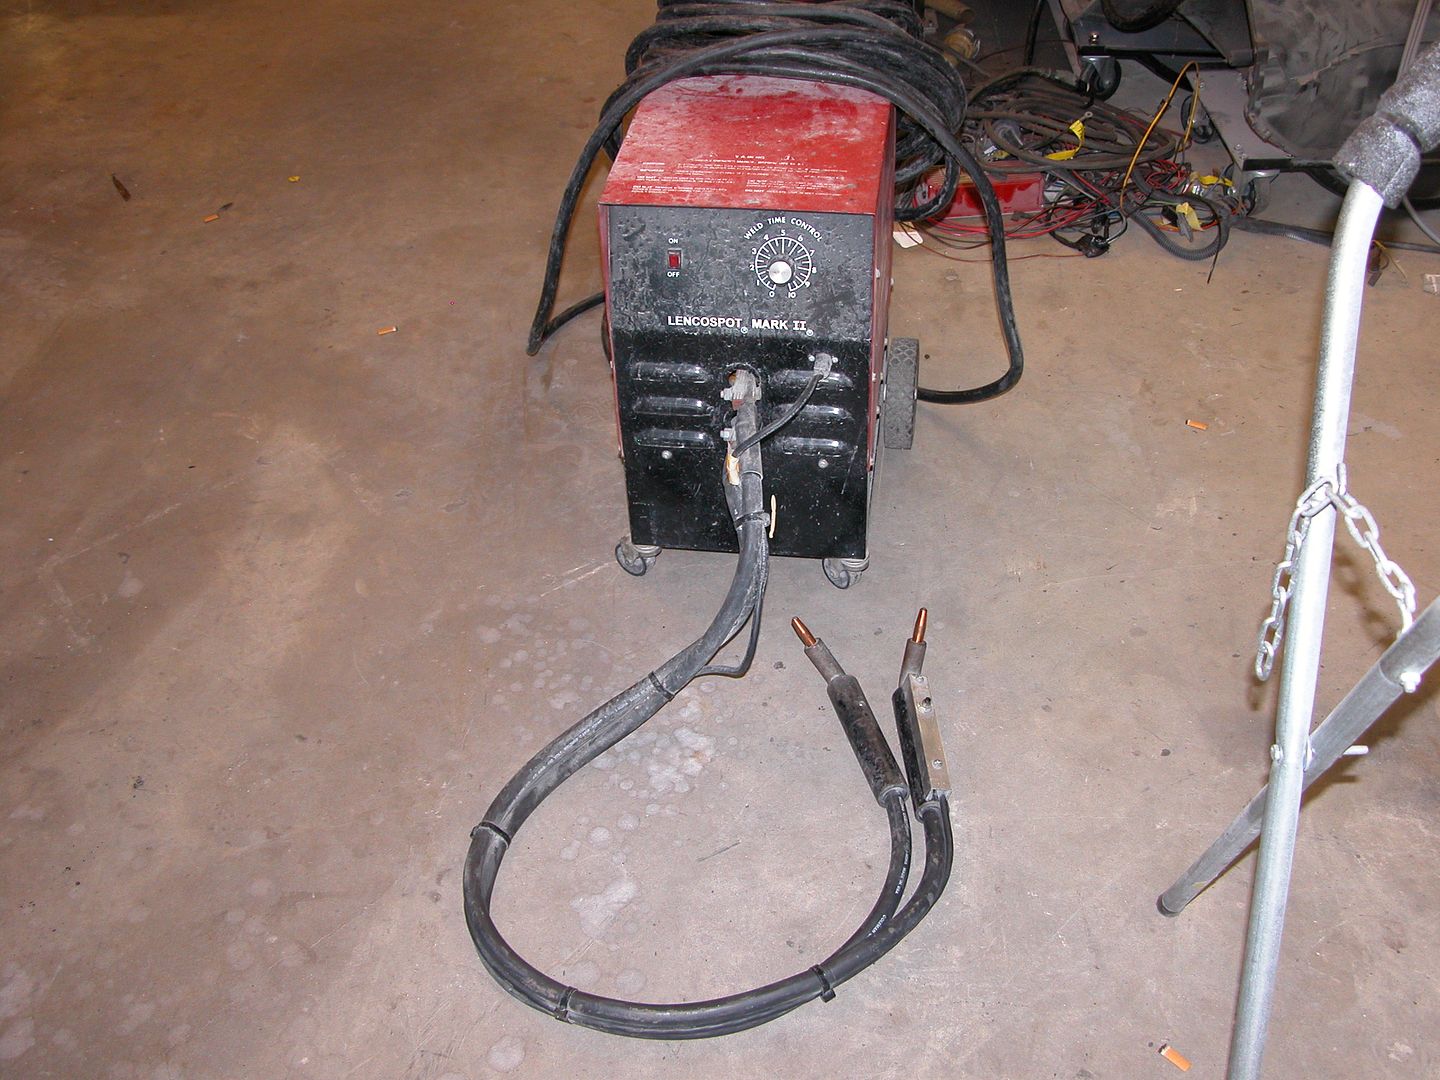 [/URL]
[URL=http://s240.photobucket.com/user/NOTATA/media/The%2014%20Car%20Performance%20Therapy/001_zps290453d9.jpg.html]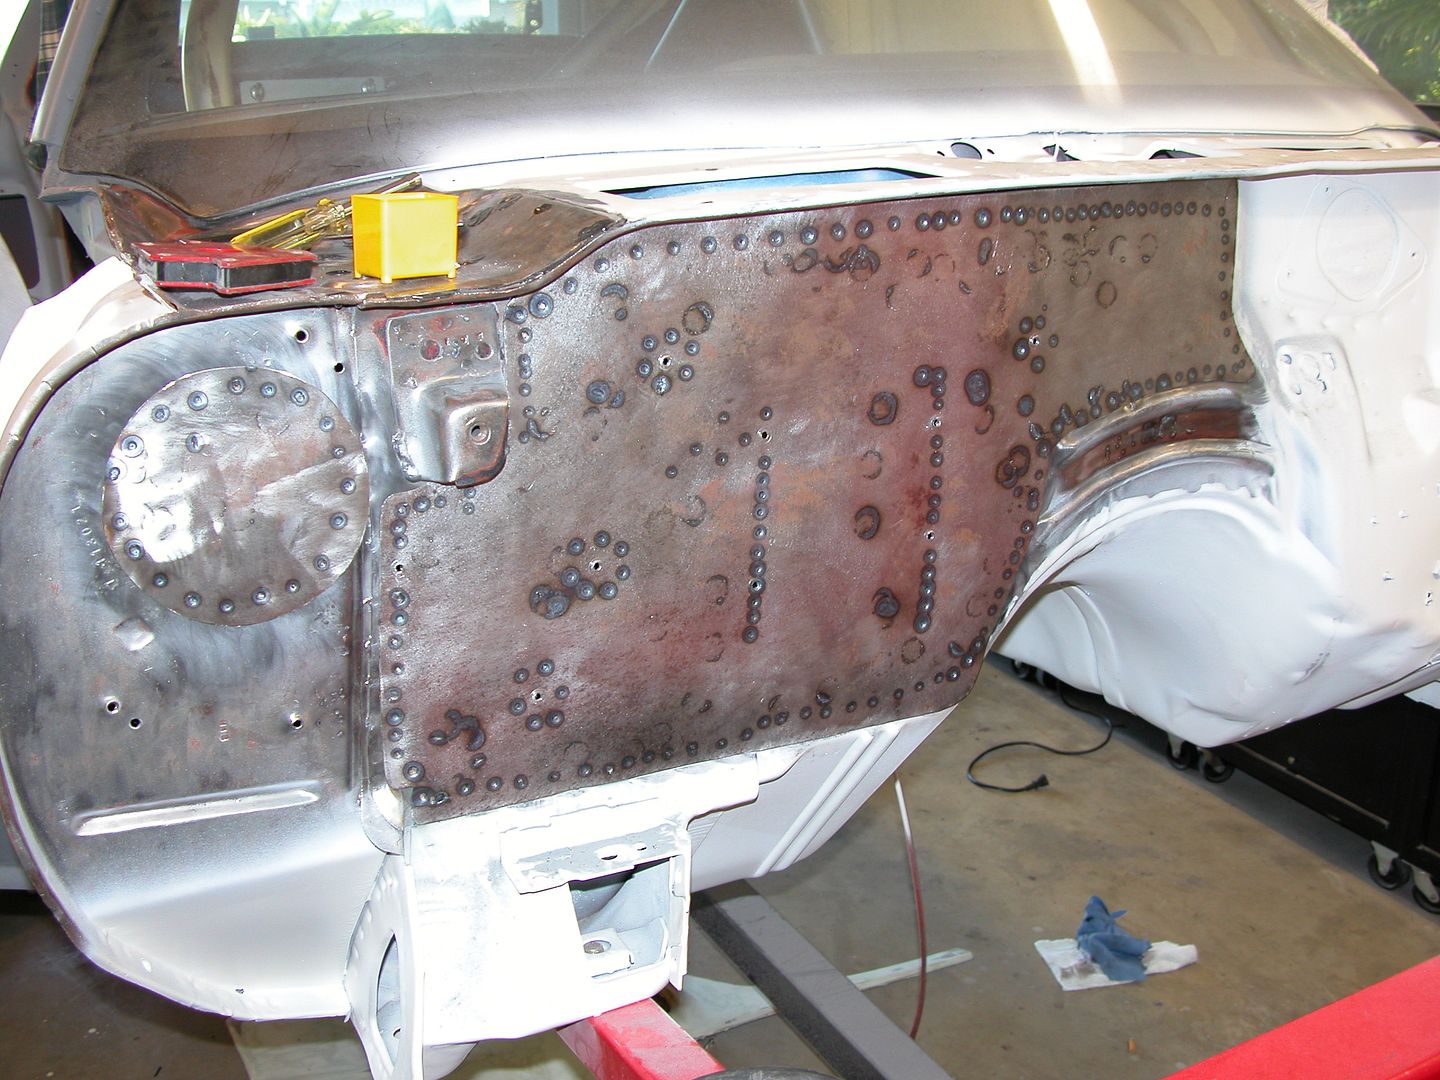 [/URL]
[URL=http://s240.photobucket.com/user/NOTATA/media/The%2014%20Car%20Performance%20Therapy/004_zps376ccb68.jpg.html]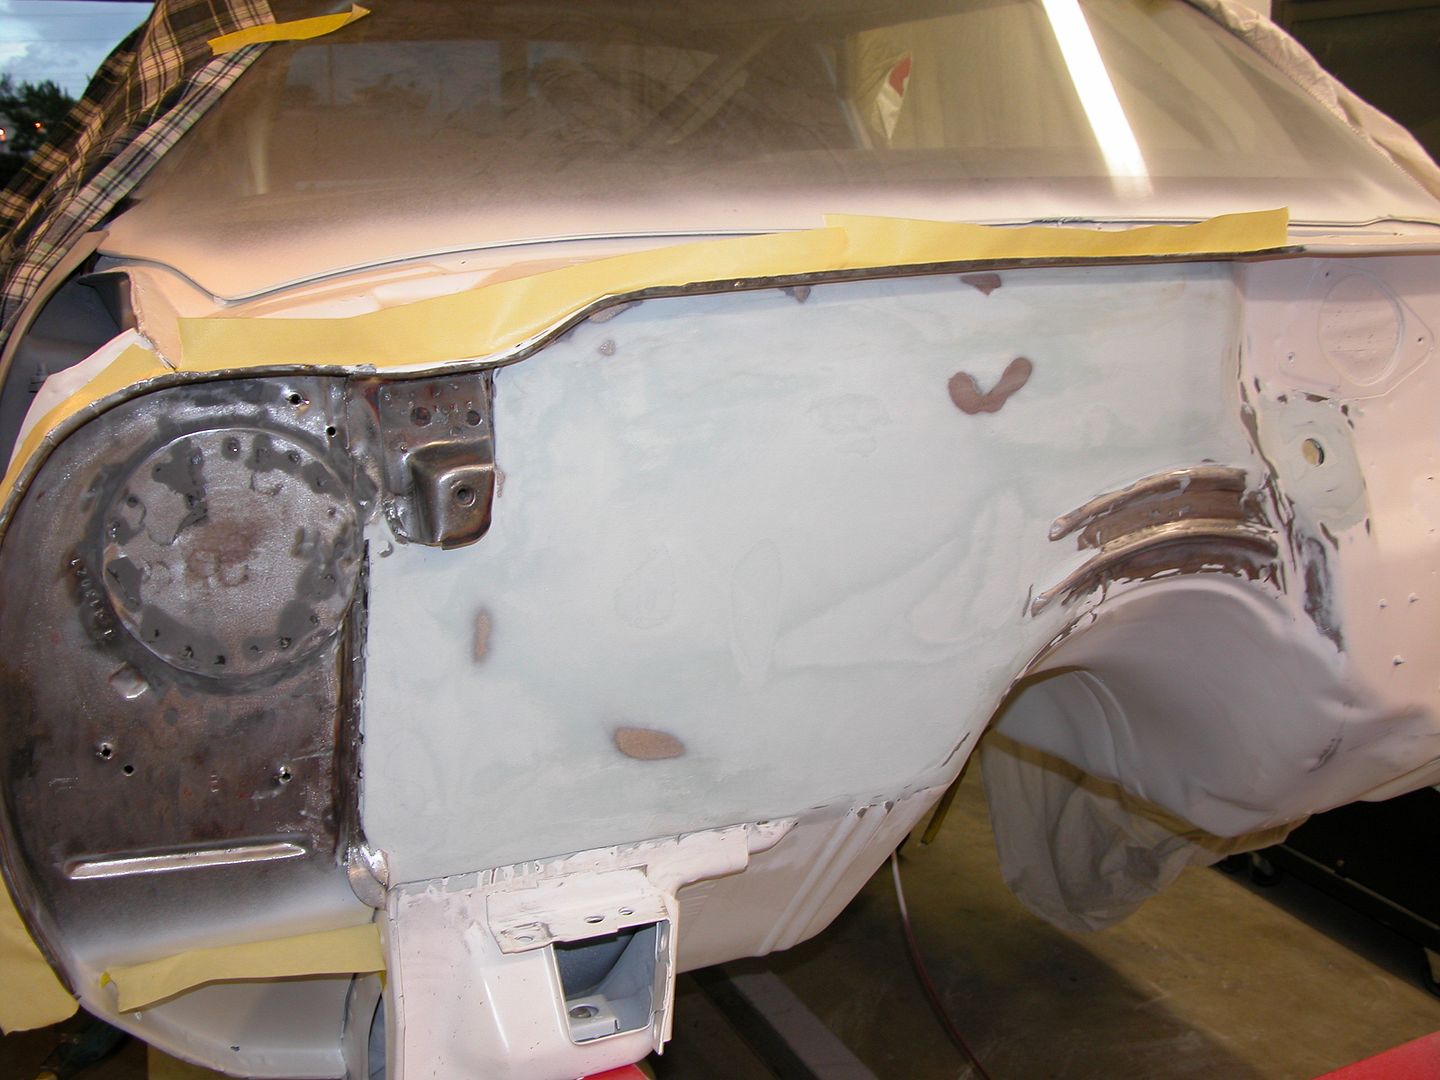 [/URL]
[URL=http://s240.photobucket.com/user/NOTATA/media/The%2014%20Car%20Performance%20Therapy/005_zps3b6a6af5.jpg.html]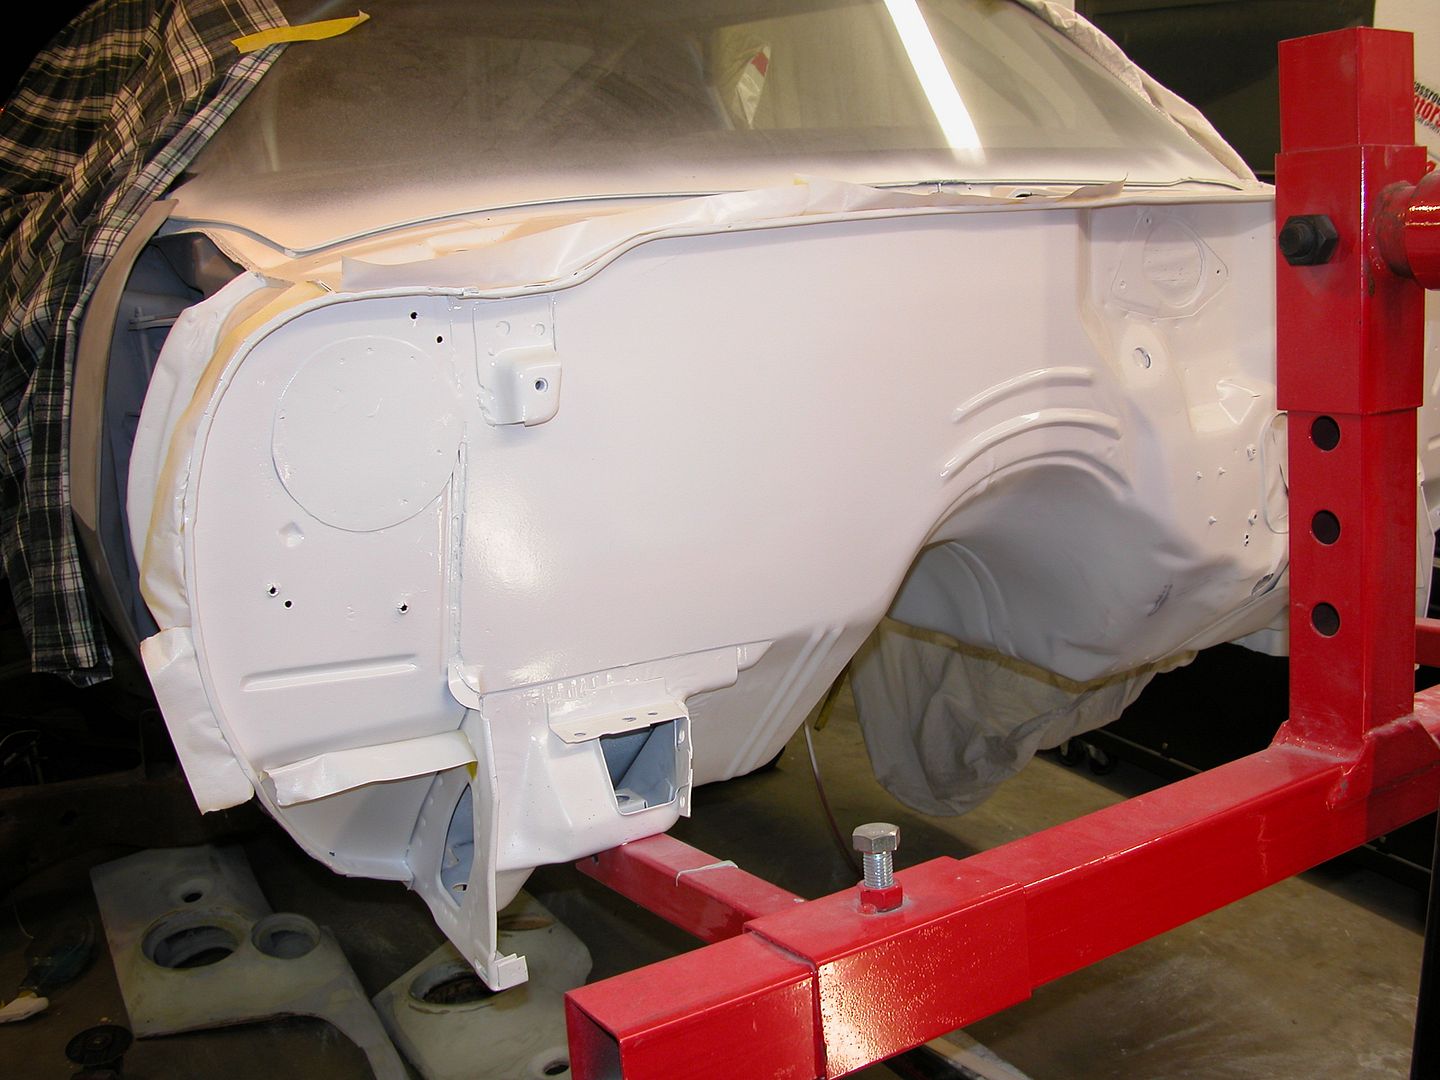 [/URL]
I really like the fact that you are doing pretty much all the things I need to do to my Trans Am and taking pictures of the process. I was wondering how I was going to fix my cowl rust! Thanks!
SilverFleet wrote:
I really like the fact that you are doing pretty much all the things I need to do to my Trans Am and taking pictures of the process. I was wondering how I was going to fix my cowl rust! Thanks!
Glad this thread gave ya some ideas you might use. Next up for rust repair is probably the rear window channel. Depends when I can get Phil (the glass guy) over to remove the rear window.
Rad_Capz wrote:
SilverFleet wrote:
I really like the fact that you are doing pretty much all the things I need to do to my Trans Am and taking pictures of the process. I was wondering how I was going to fix my cowl rust! Thanks!
Glad this thread gave ya some ideas you might use. Next up for rust repair is probably the rear window channel. Depends when I can get Phil (the glass guy) over to remove the rear window.
Sounds good. Guess what? I need to do the same thing to my car!  Yours will be different than mine because I have the wrap-around rear window, but I'm sure the repair process is similar.
Ya repair can probably be done similar. I'd seen the tell tale rust signs on your car in your build thread pics, that's why I mentioned it.
But for now, COLOR! Prepped the underside and firewall areas with 320 grit paper and red Scotch Brite pads then shot it with PPG Delstar single stage acrylic enamel.
[URL=http://s240.photobucket.com/user/NOTATA/media/The%2014%20Car%20Performance%20Therapy/003_zpsecb0173d.jpg.html]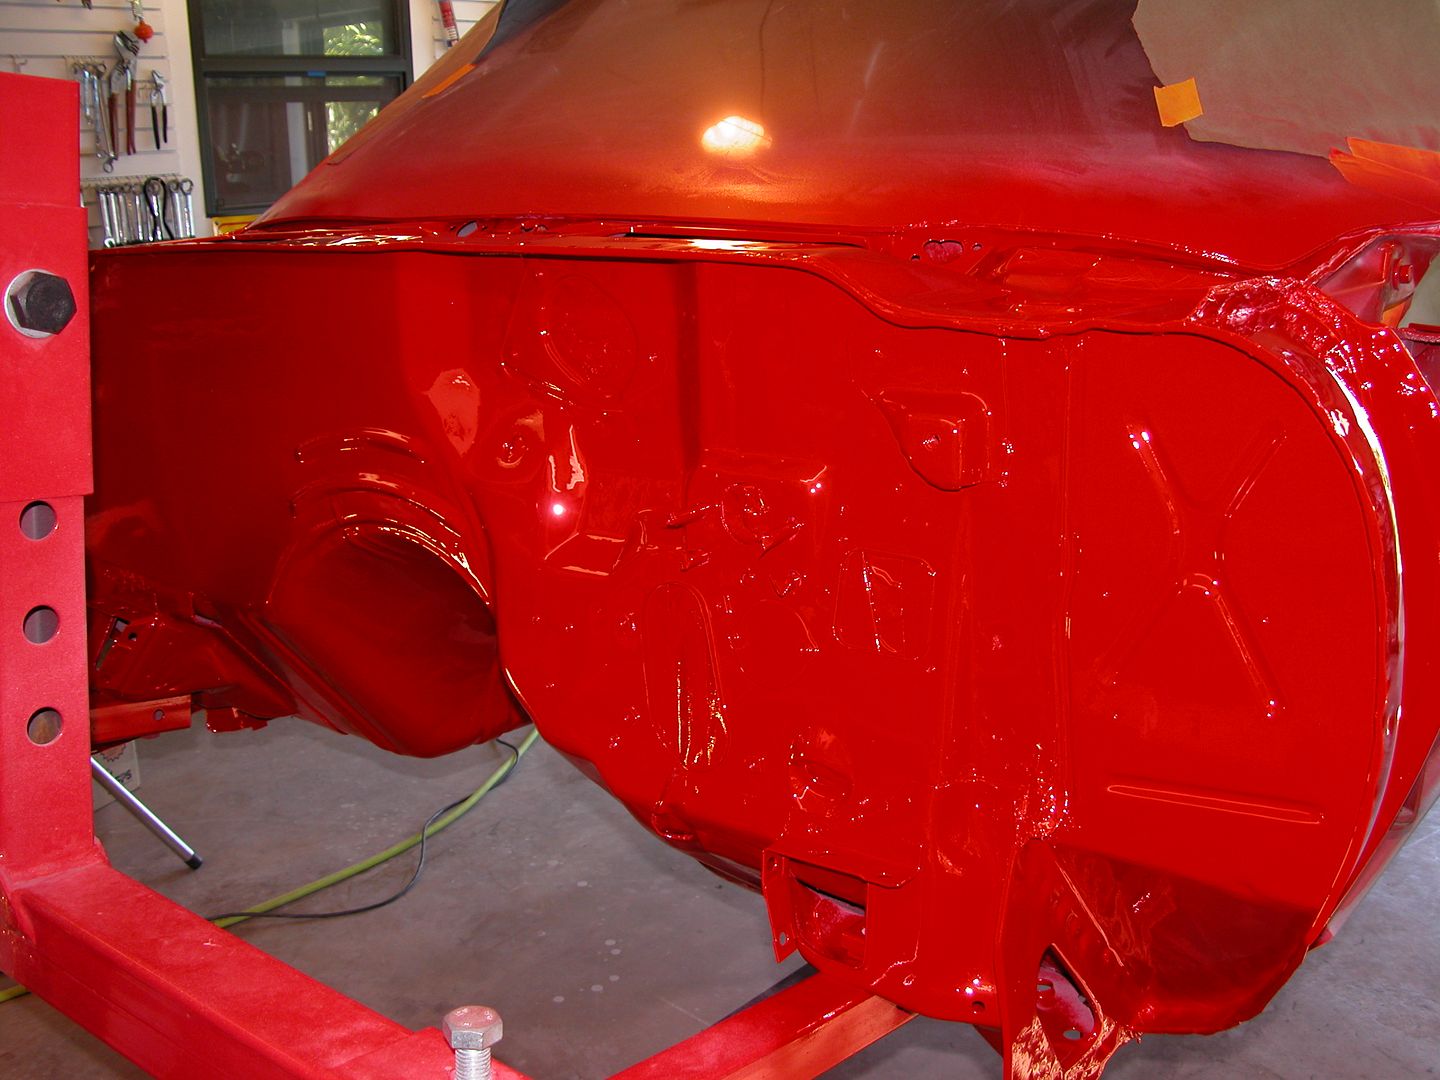 [/URL]
[URL=http://s240.photobucket.com/user/NOTATA/media/The%2014%20Car%20Performance%20Therapy/004_zpse8280b2b.jpg.html]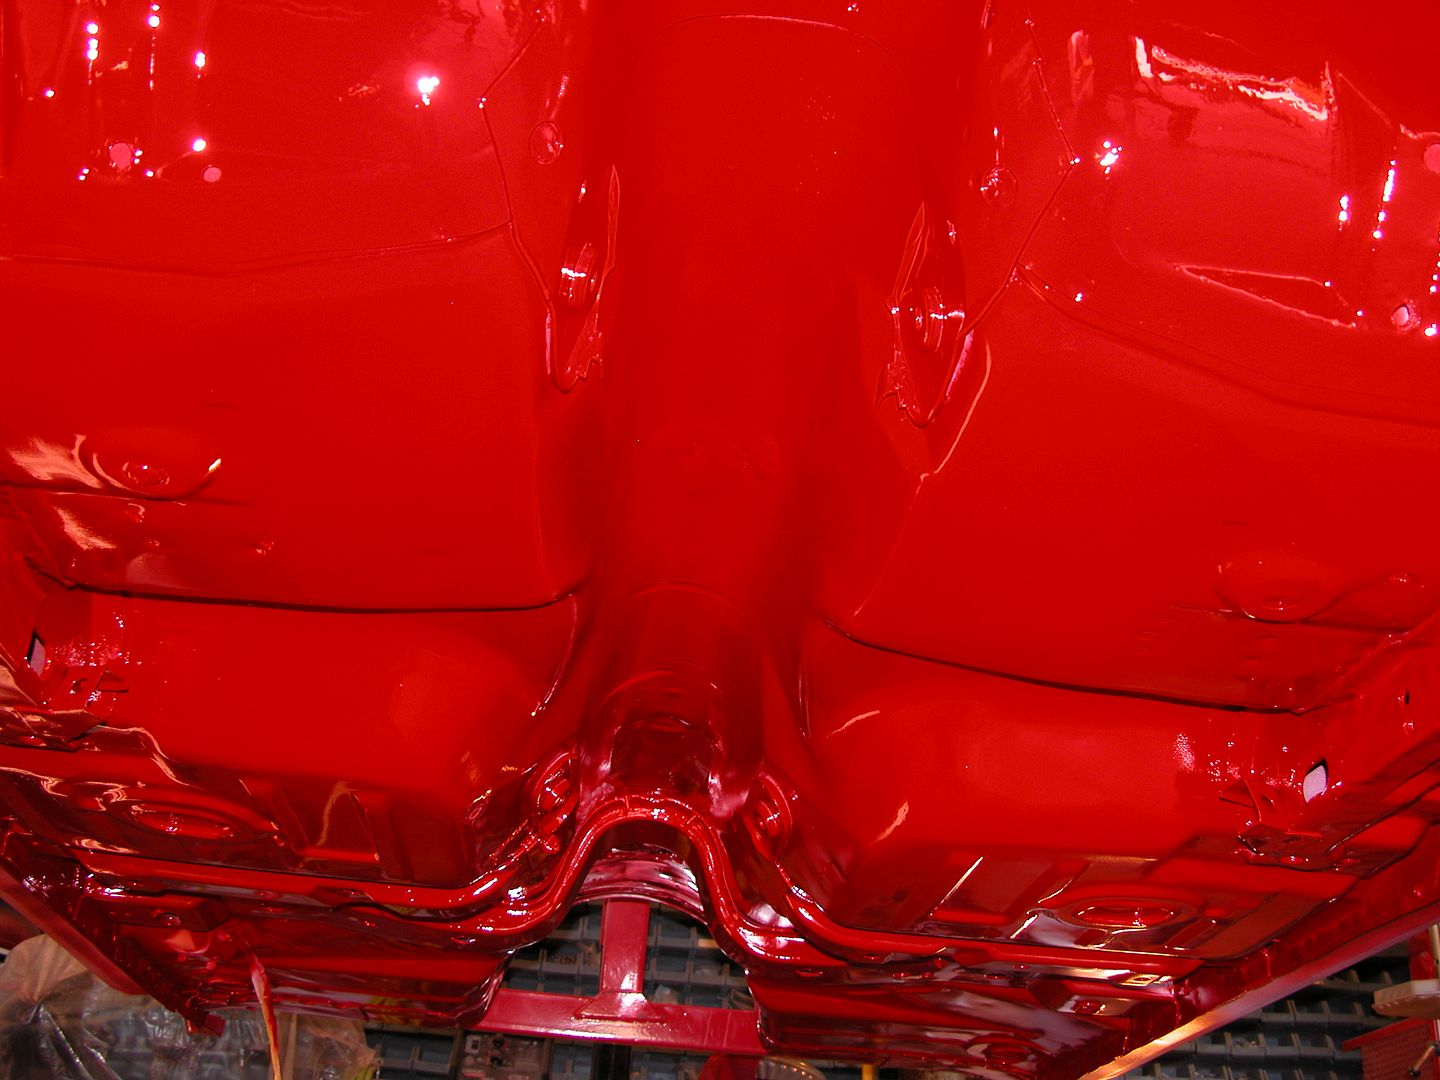 [/URL]
[URL=http://s240.photobucket.com/user/NOTATA/media/The%2014%20Car%20Performance%20Therapy/008_zps7d1703ce.jpg.html]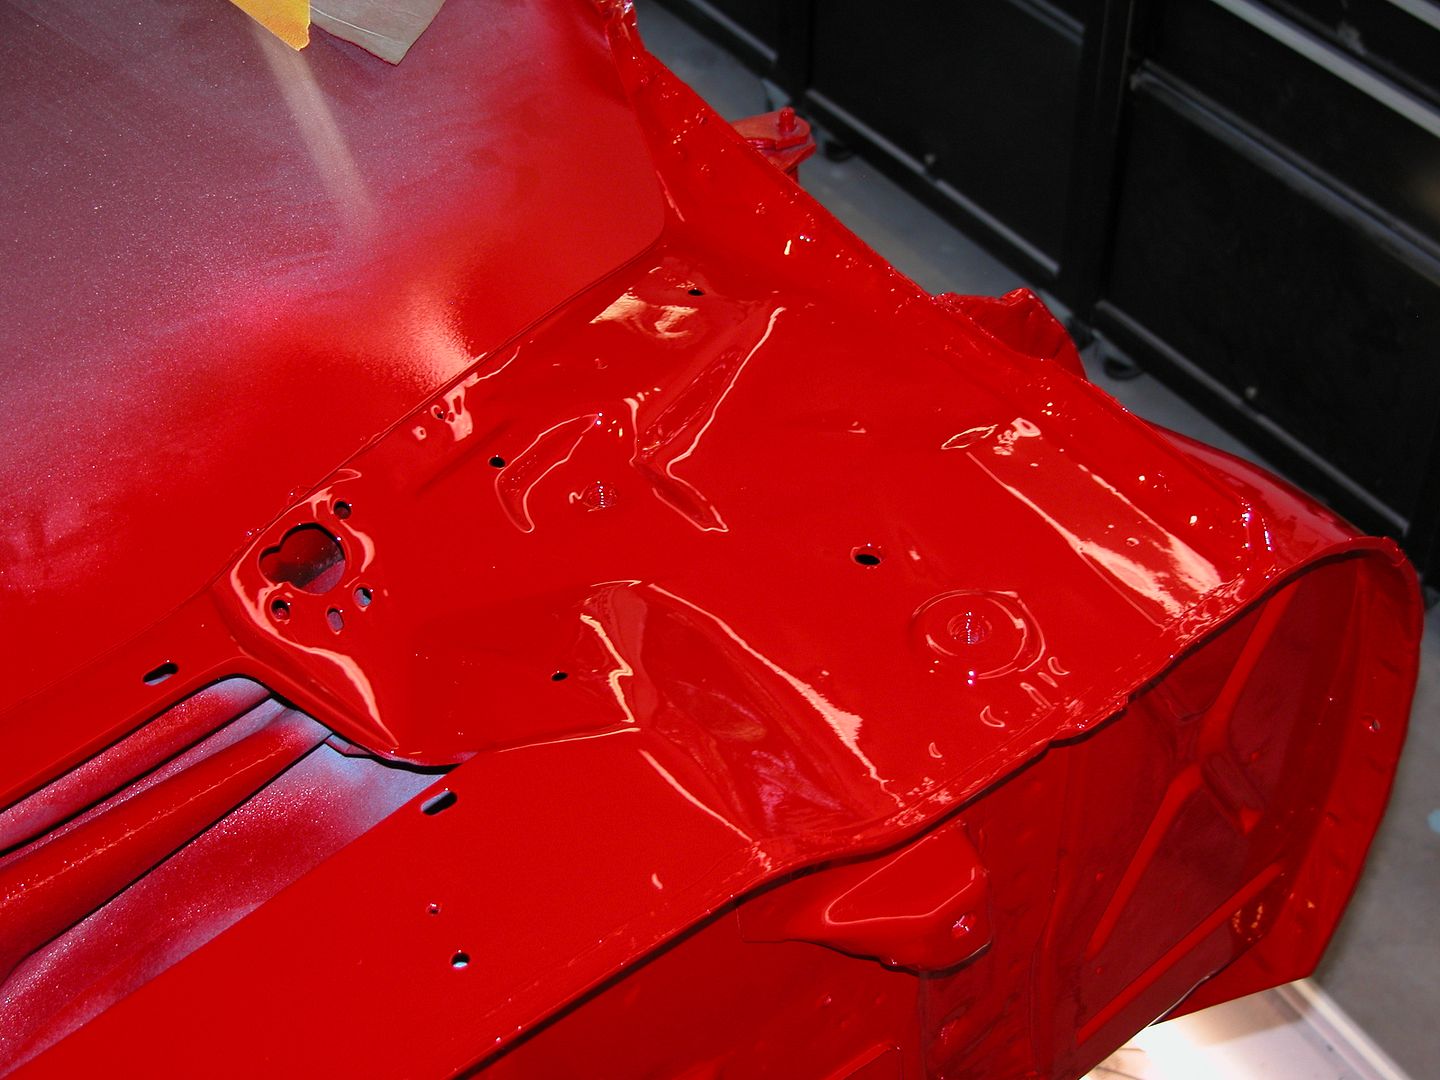 [/URL]
Hell yeah! Looking most excellent!
Thank you for taking the time to post your progress...

cdowd
HalfDork
7/6/14 3:38 p.m.
I always look forward to your updates. It looks amazing!
Thanks! Even though it's on the rotisserie it's actually easier to paint it with the car level from underneath. Otherwise there's nooks and crannies that can't be painted because if the cars sideways you can't get the gun low enough. Anyway, I turned it up on it's side today to get a good look. I'm happy with it!
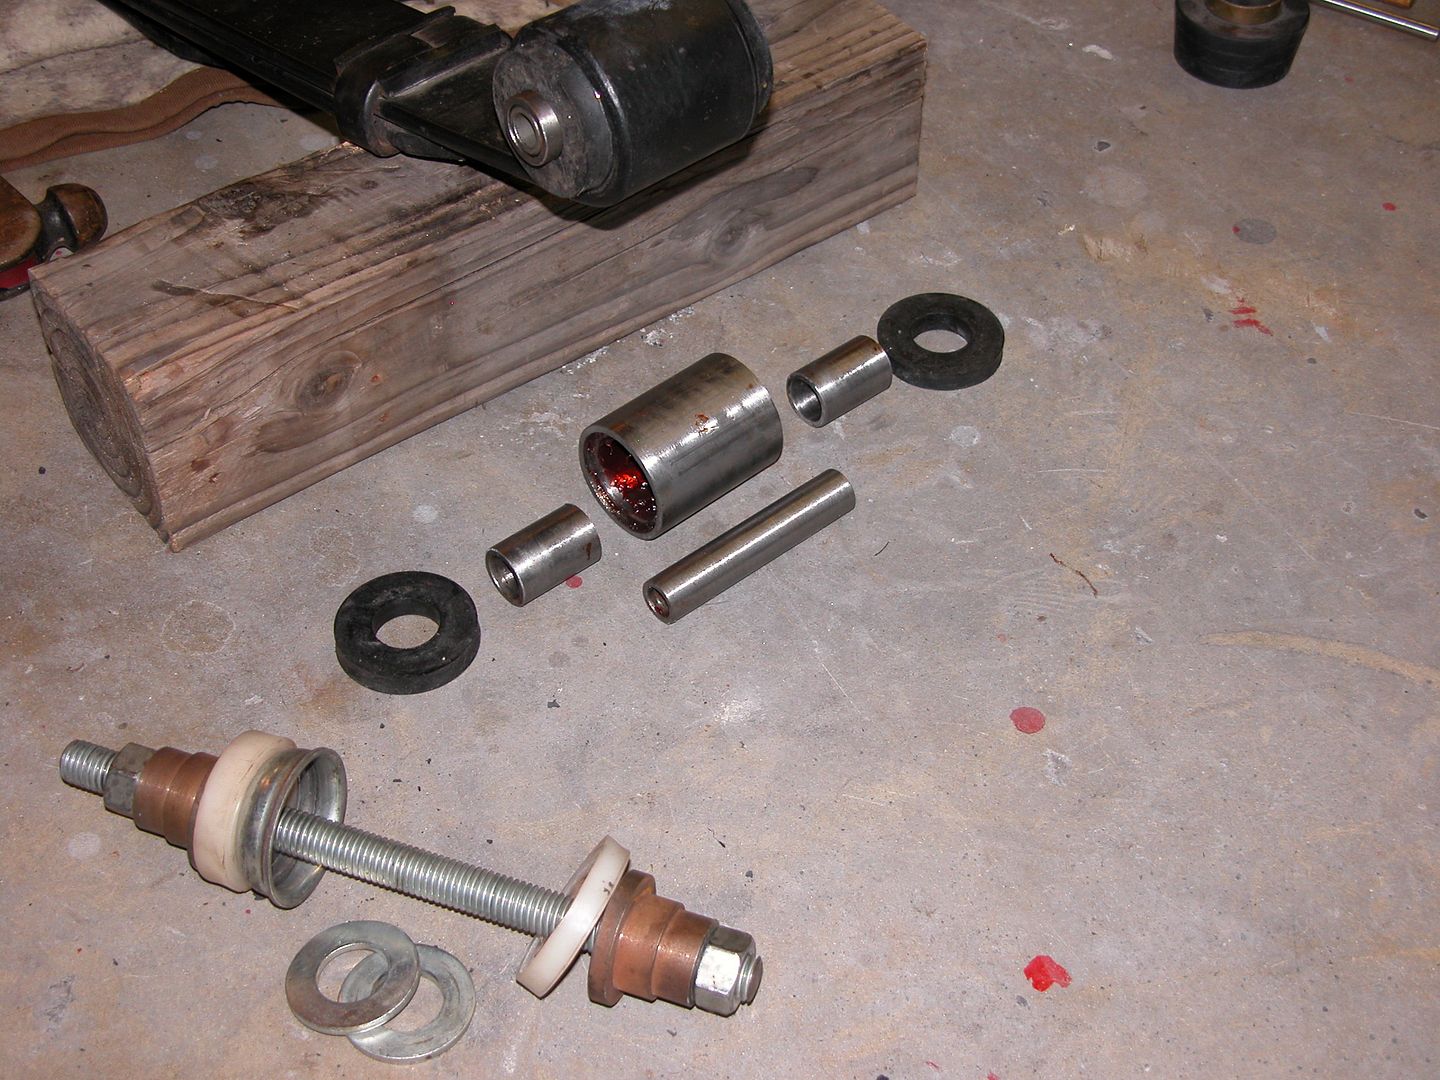
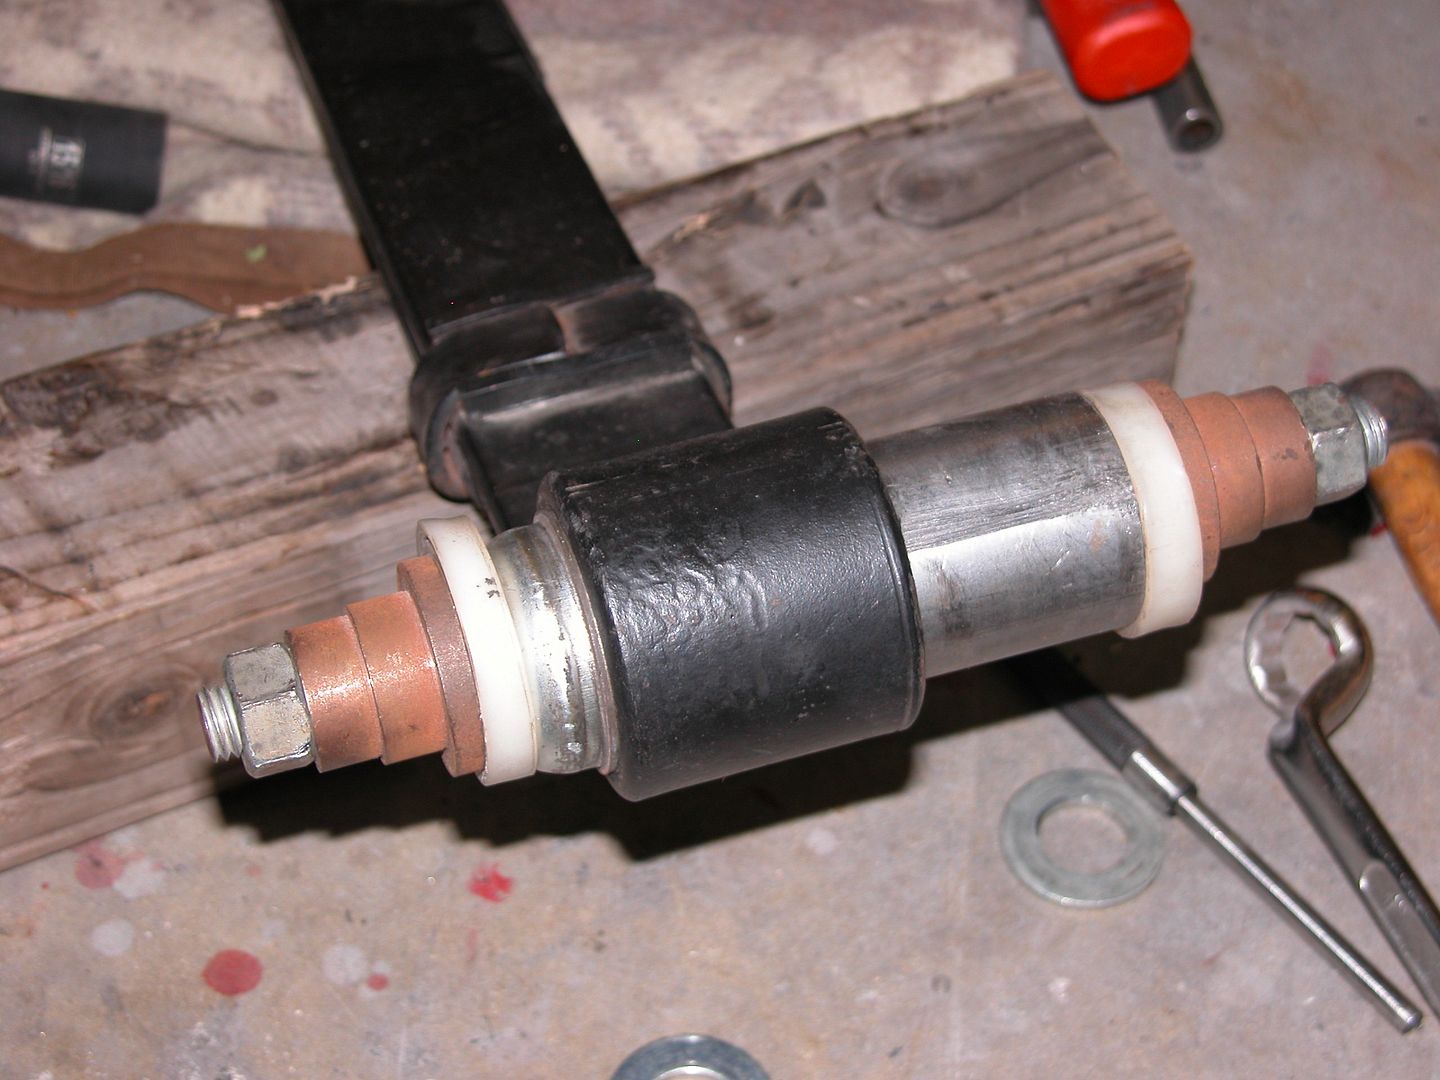
Started working on the rear springs today doing the Adams mod and installing spherical front spring eye bushings.
[URL=http://s240.photobucket.com/user/NOTATA/media/The%2014%20Car%20Performance%20Therapy/007_zpsb54f3816.jpg.html]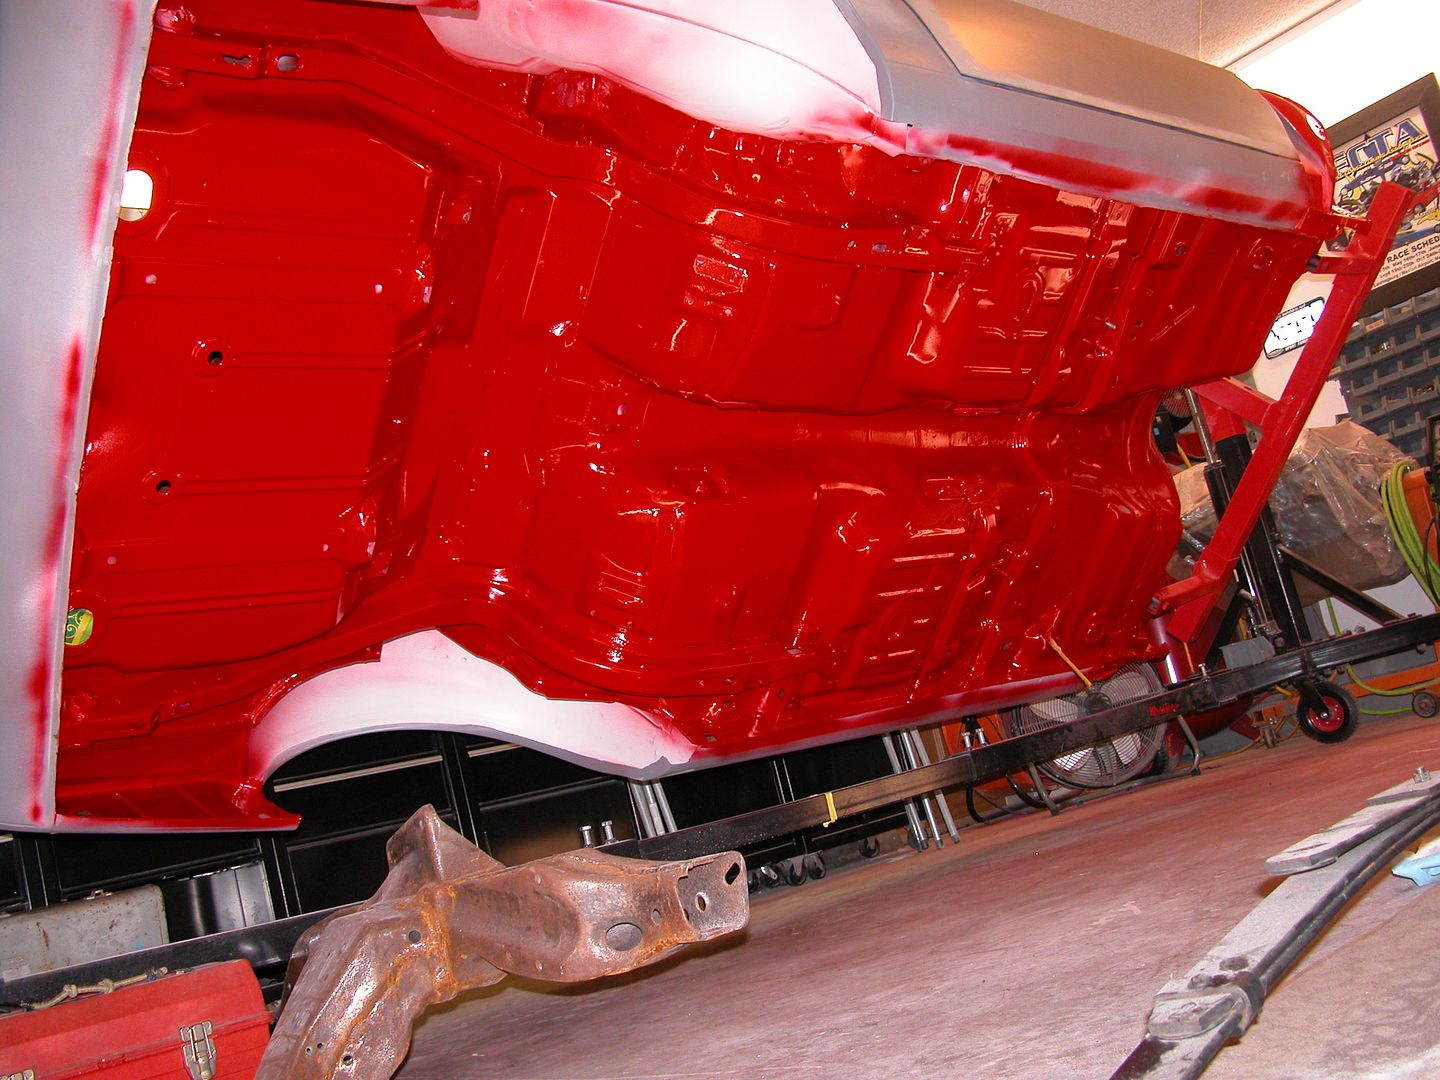 [/URL]

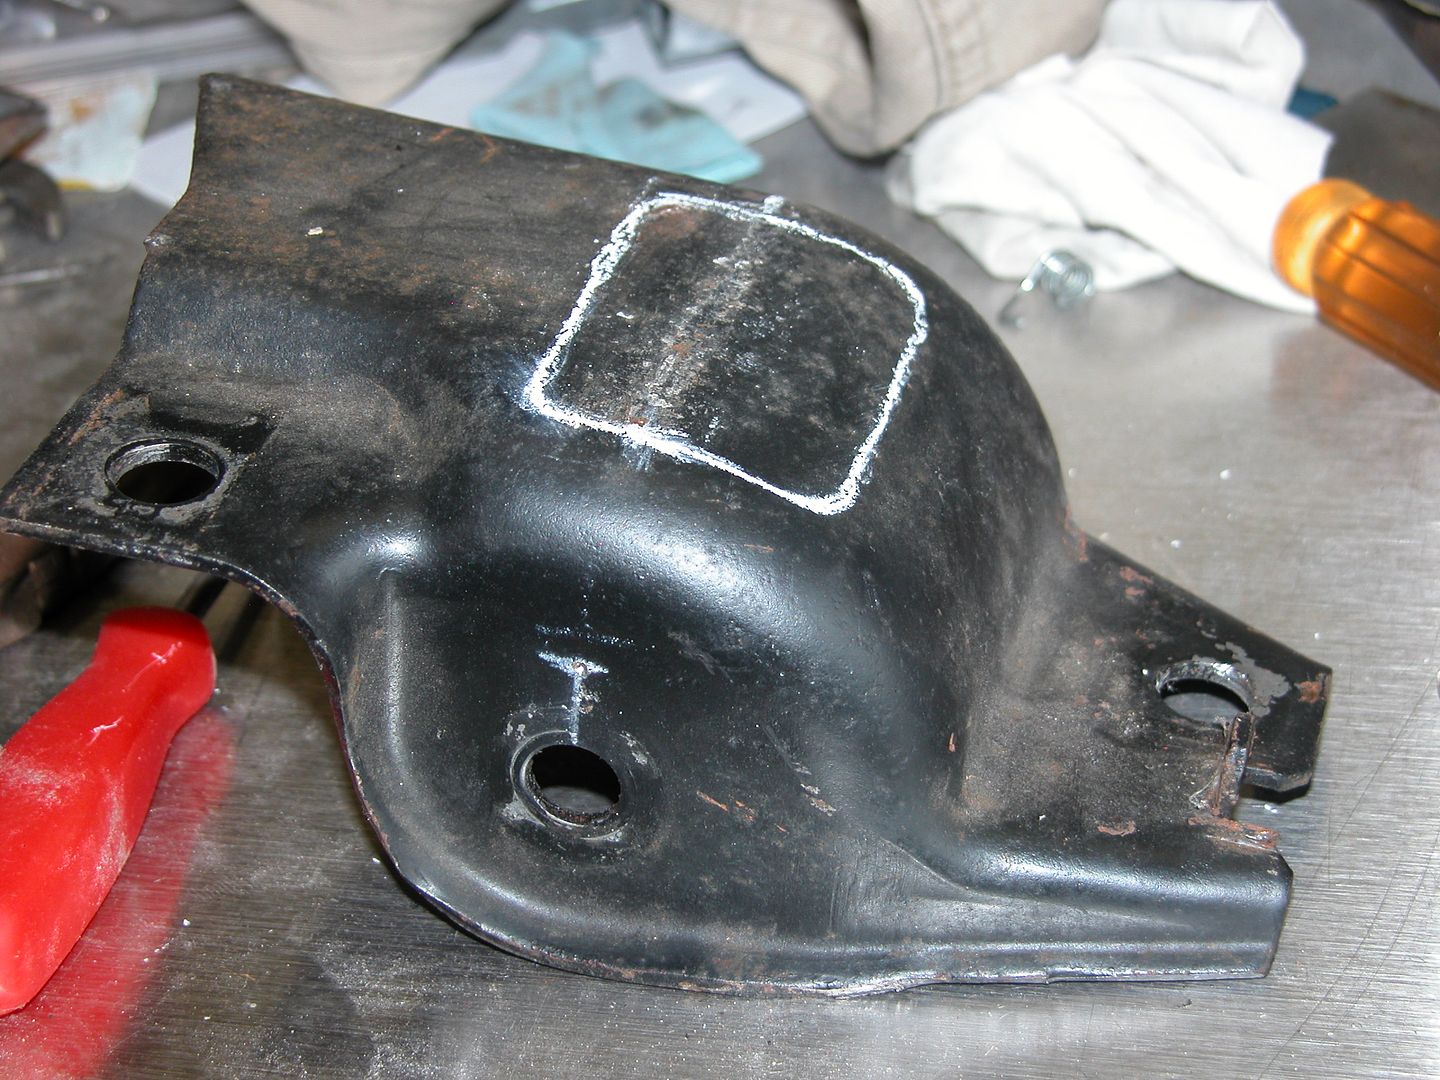
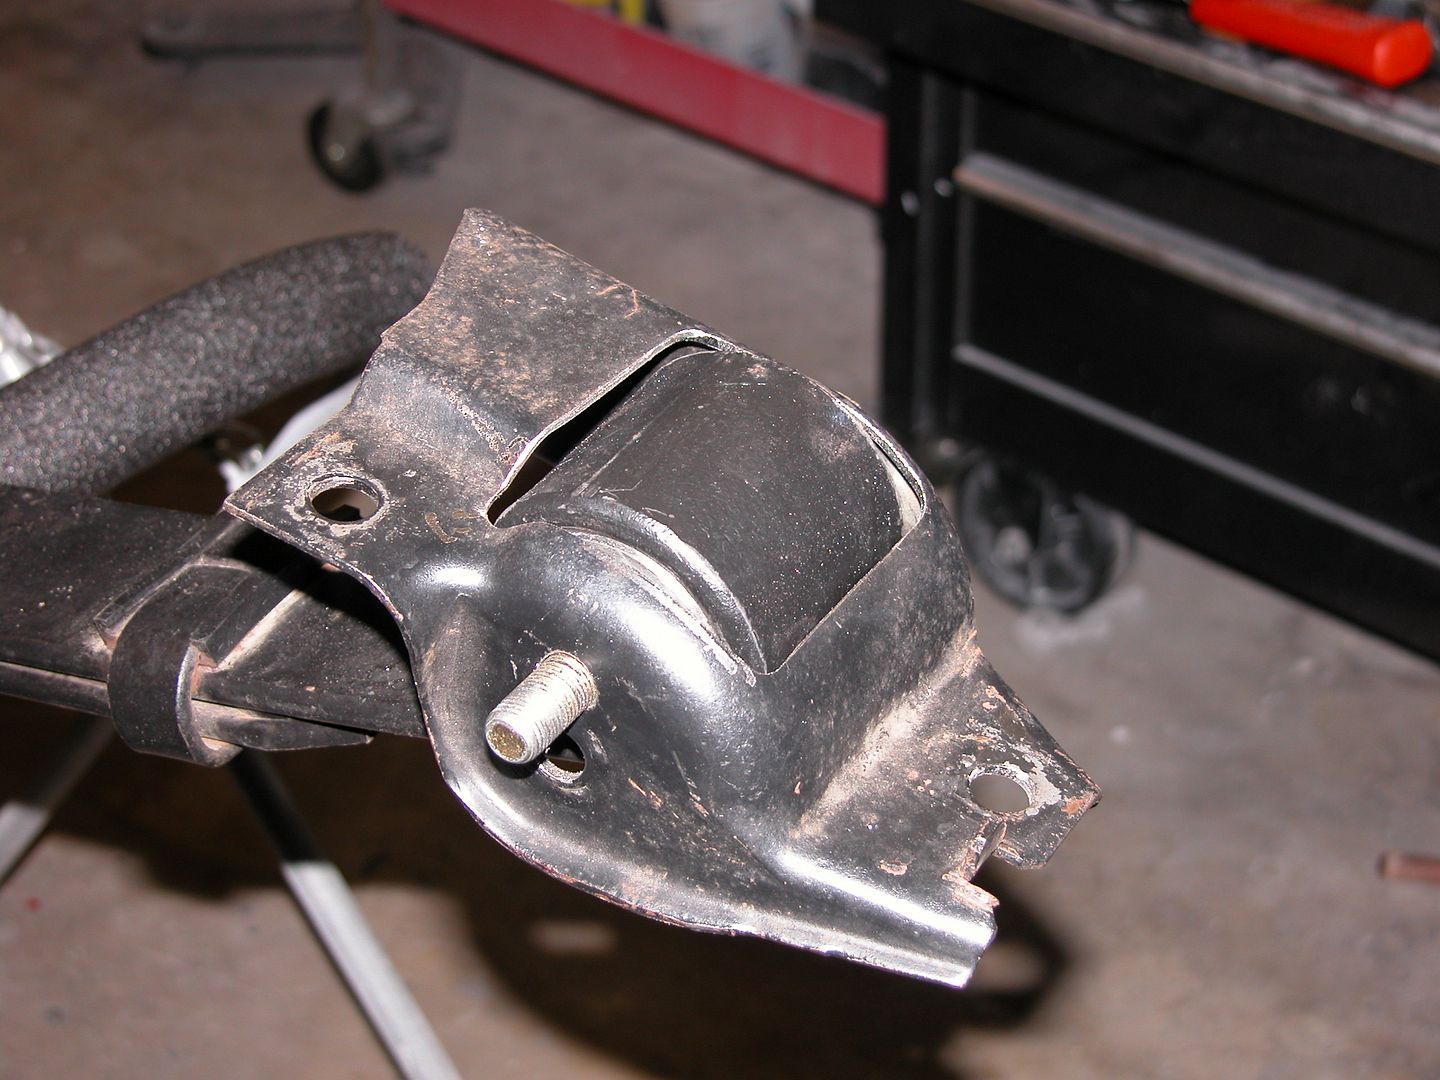
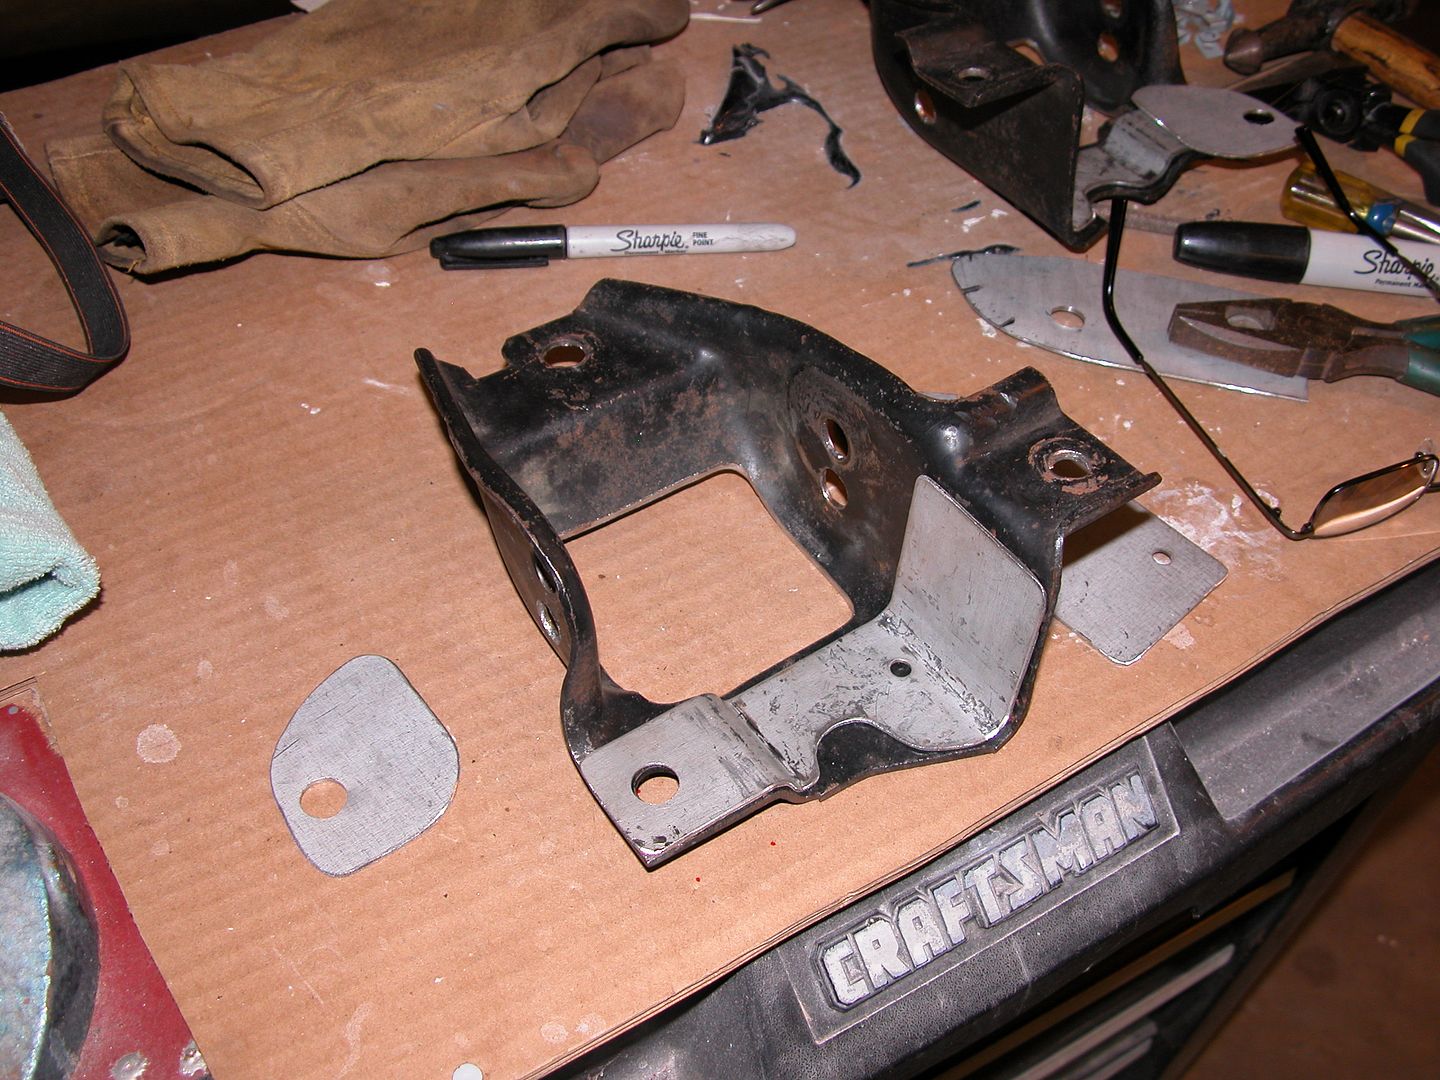
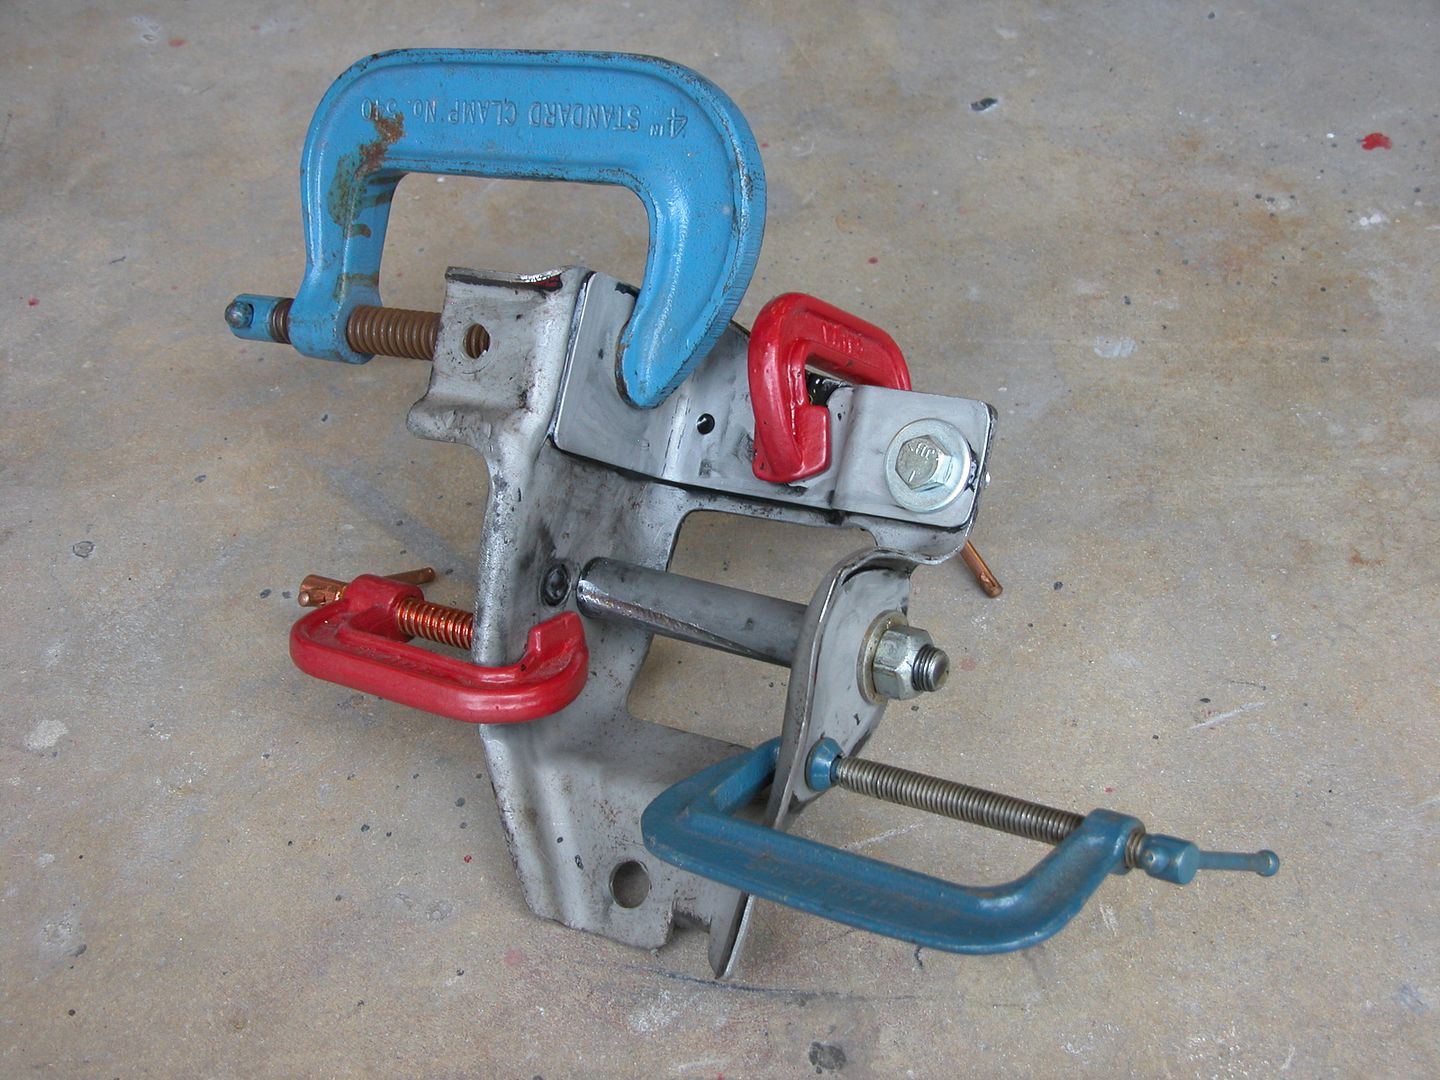
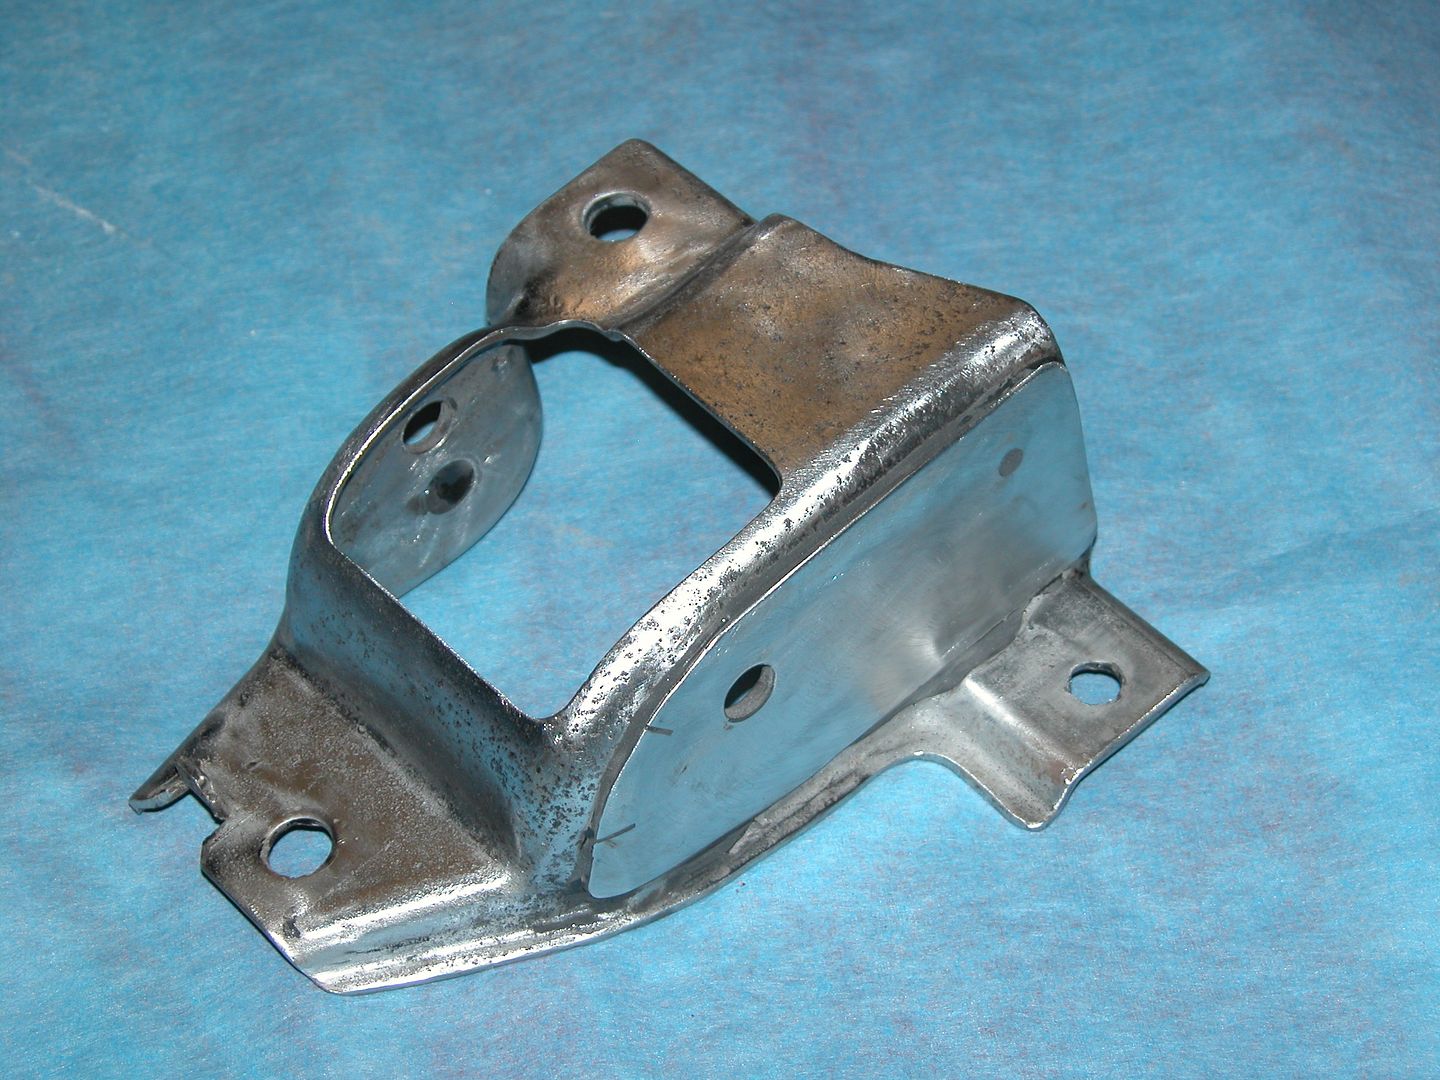
While I was waiting for the paint to fully cure so I could mask it off to keep the daily dust from other projects off it I did the Adams Mod by modifying the front rear spring mounting pockets and installed spherical spring eye bushings.
A while back I had the opportunity to chat with Harry Quackenboss. While the name may not be familiar to many, he was one of the young engineers who worked with Herb Adams building the SCCA 64 Tempest Grey Ghost car and continued as Adams SCCA chassis engineer through the Firebird days then as chassis engineer on the Adams NASCAR team when they fielded a Pontiac Grand Am at Daytona. Harry then became Chief engineer at Delorean when John left GM and started the Delorean Motor Company. Anyway, I've digressed. I told Harry about my car sent pics and explained my plans for it. Including, (as some of you may have guessed) the Adams Mod (raising the front mounting hole for the of F body leaf springs) which he was involved in coming up with back in the day during the SCCA Trans Am series. I wanted to know if this was still considered a good idea and would it work well with a spherical front leaf spring which I'd considered. His answer was yes both work and they will work well together for my use of the car. So I thought what better recommendation could I possibly get? So that was my project this past week.
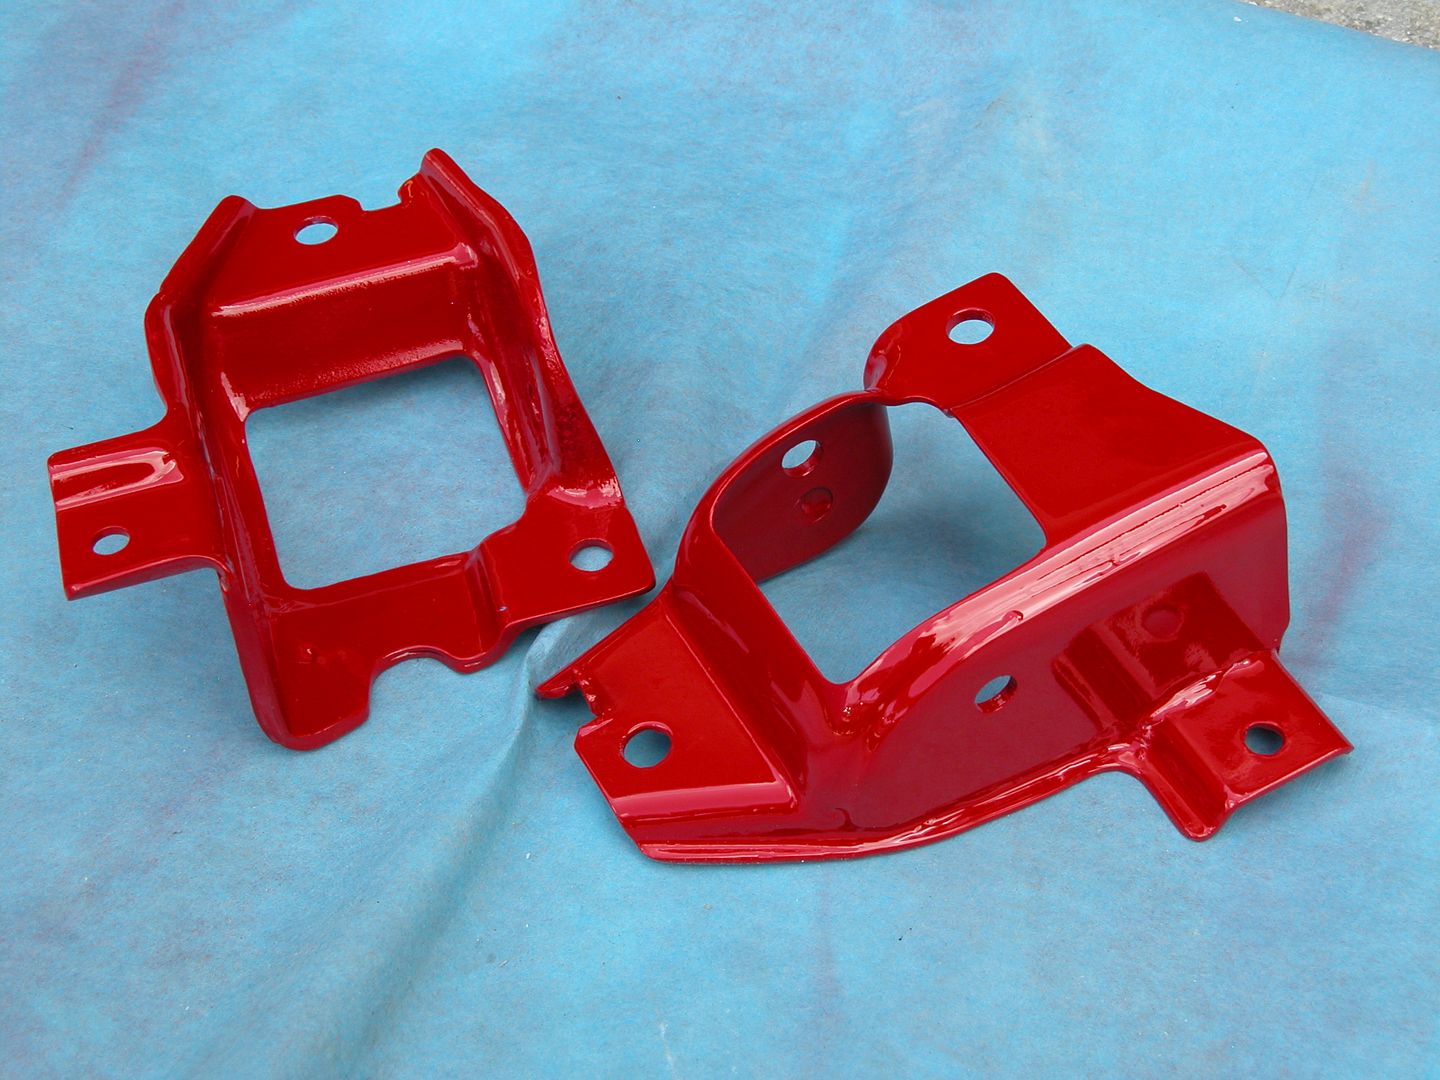
The Adams mod required windowing the spring pocket and the spherical bushing requires a little bigger window because the spring eye can pivot. I decided to reinforce the spring pocket by doubling/tripling up the sheet metal on the sides and across the rear by making some pieces I panel bonded to the pocket. I'll epoxy prime the pockets and paint red before installing in the car.
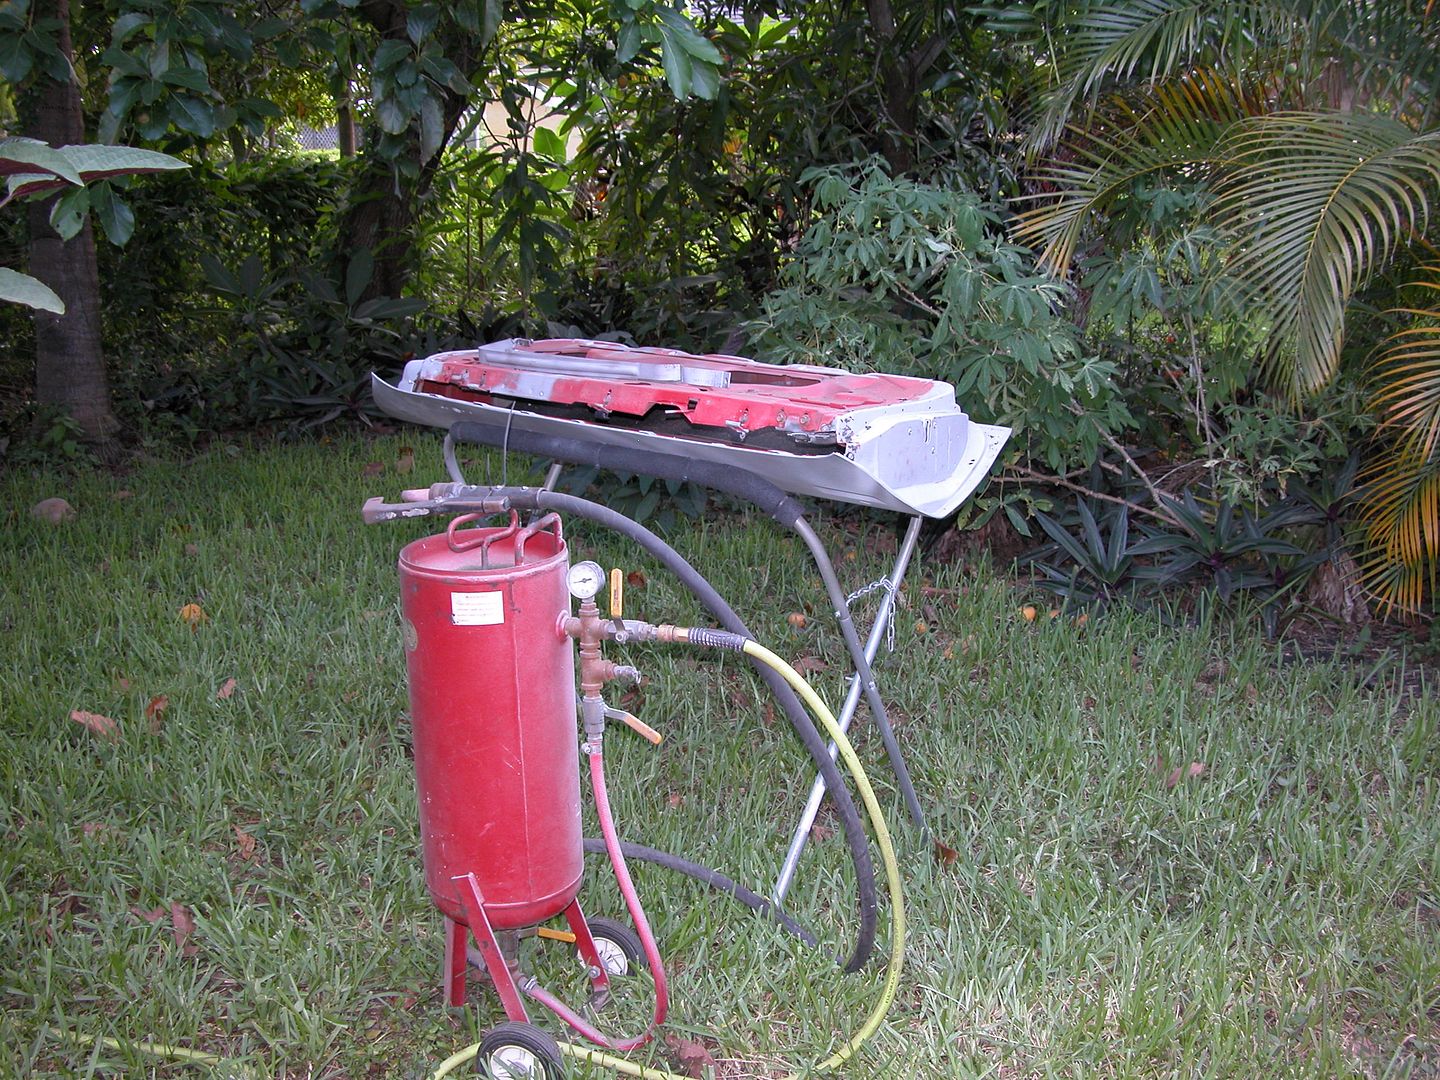
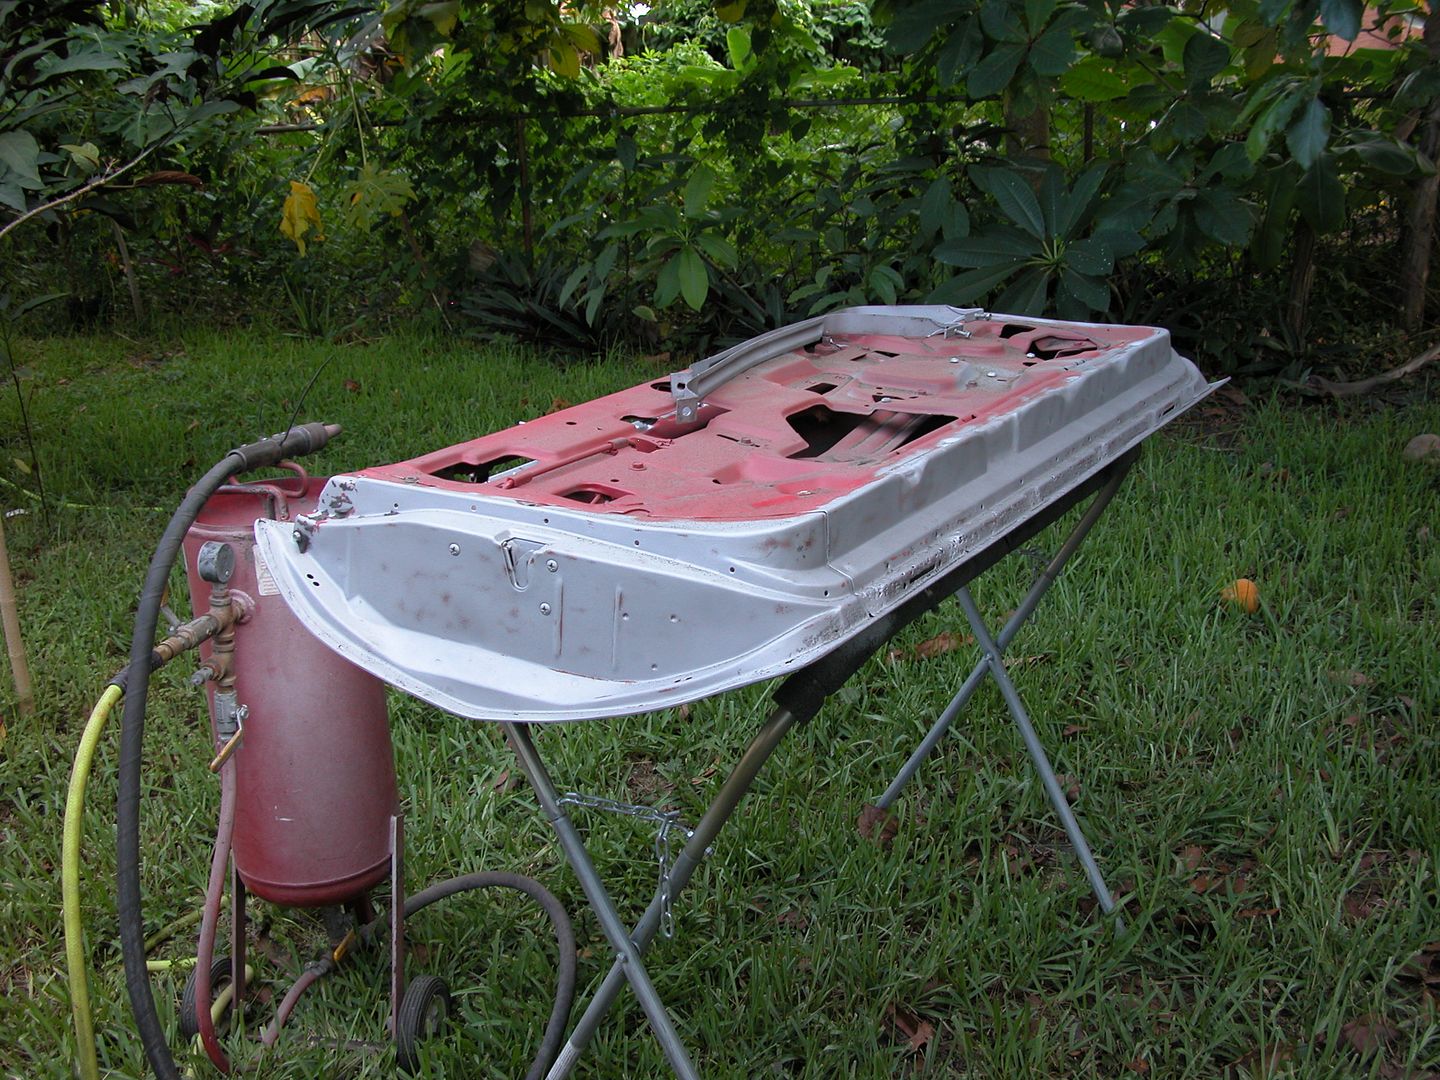
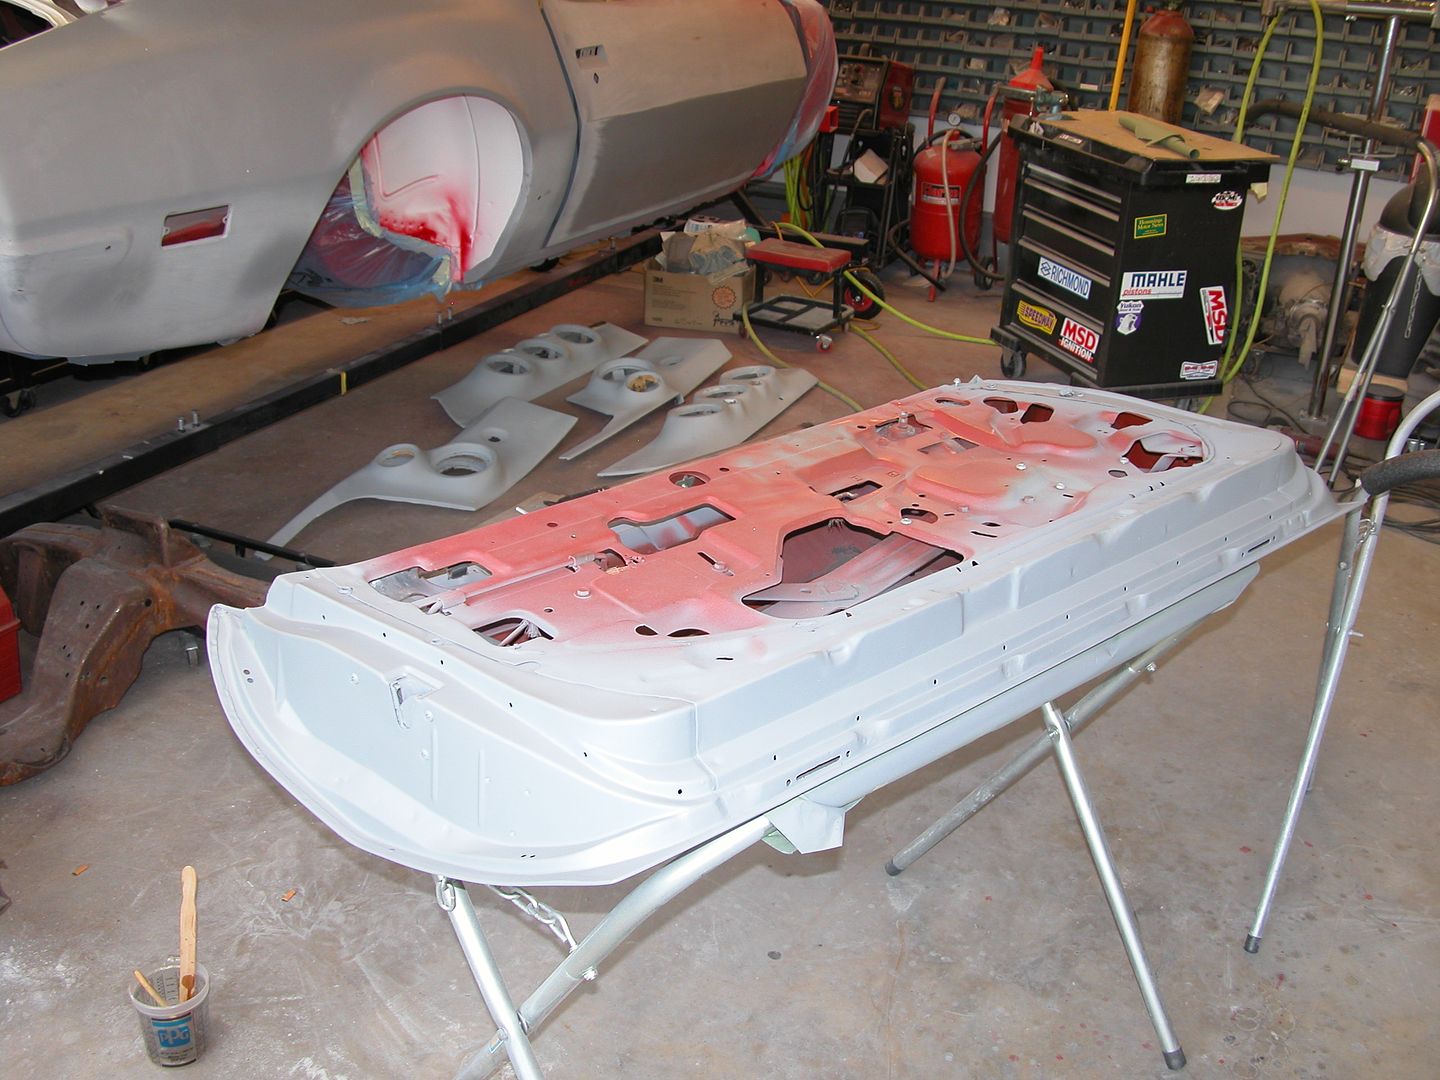
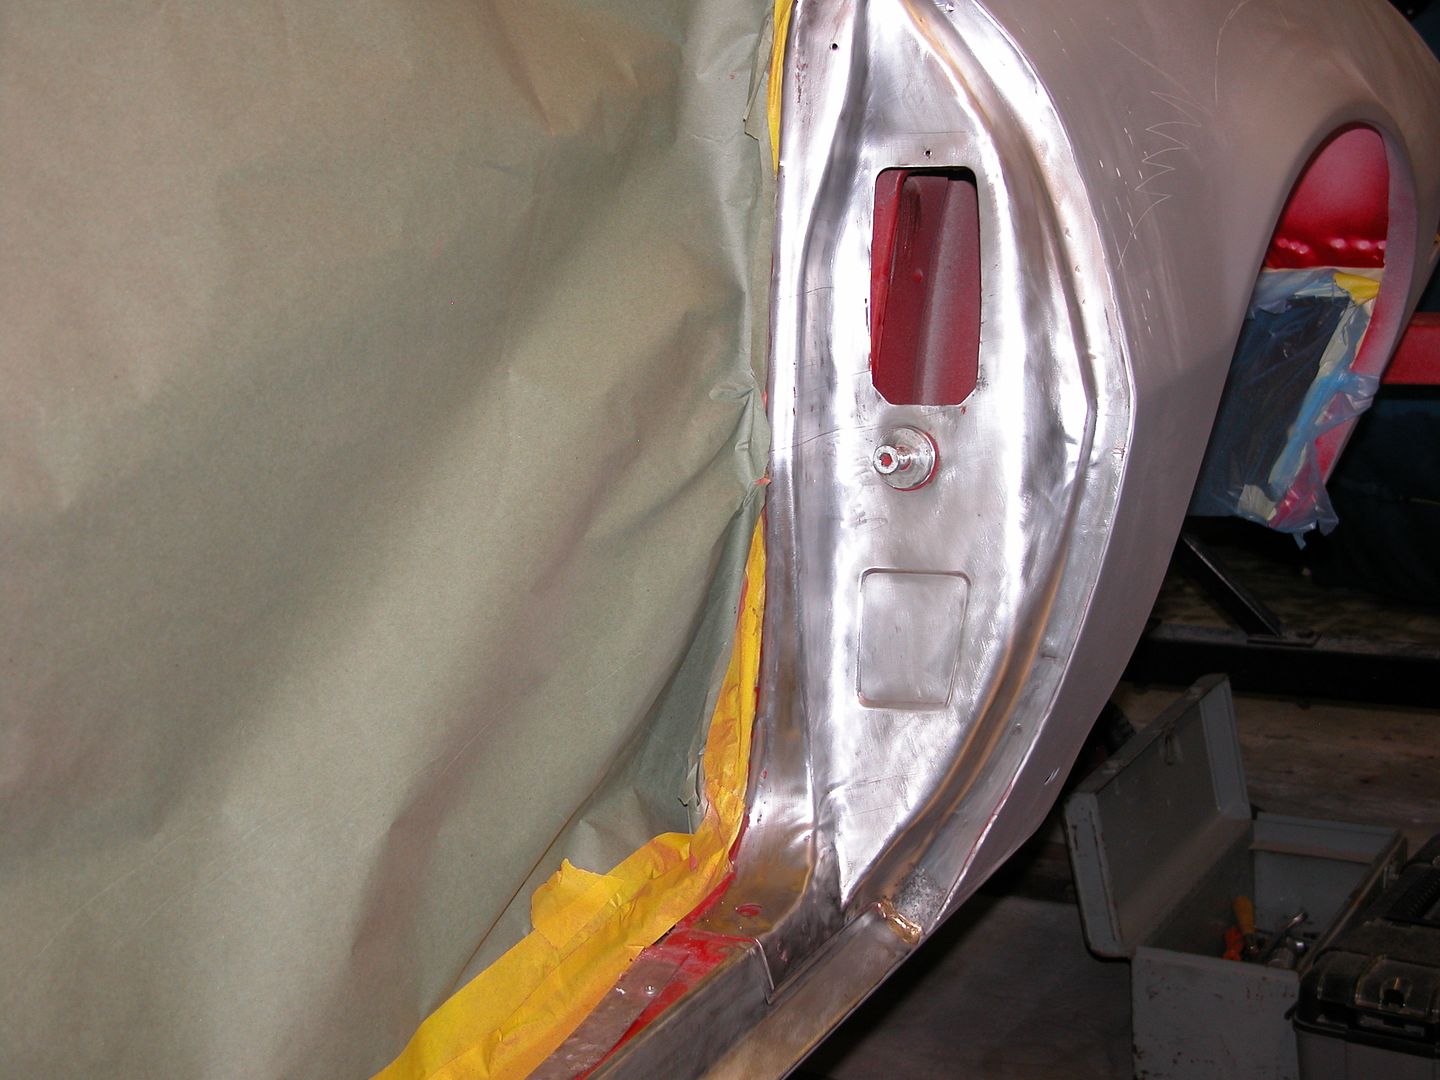
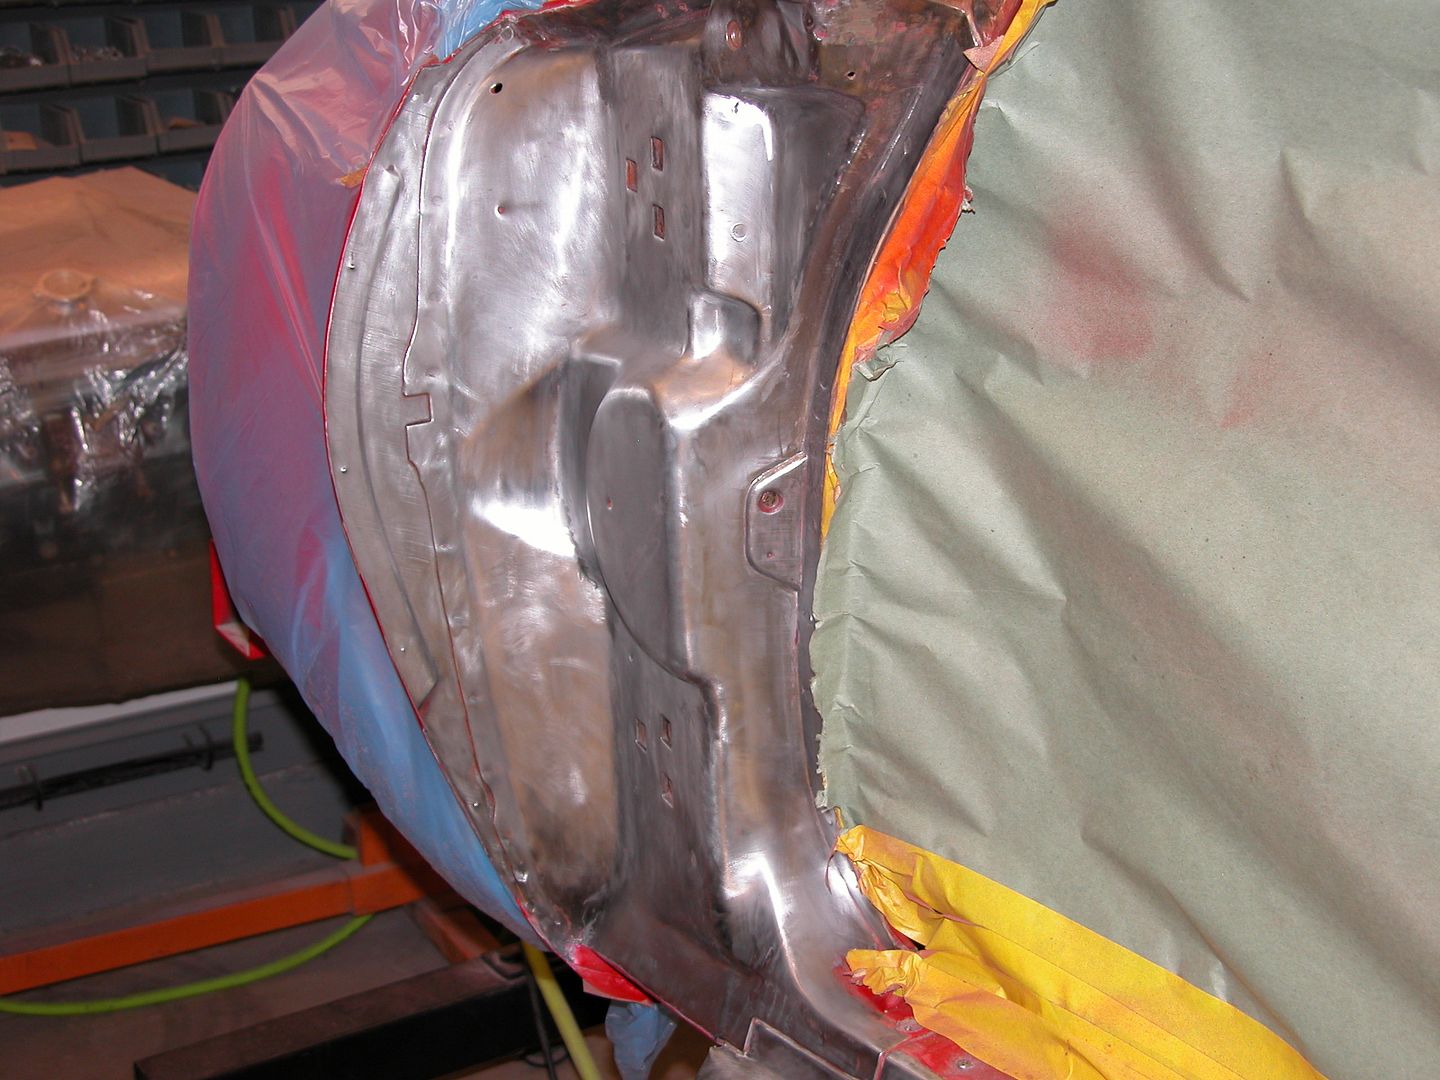
I took the drivers door off a couple weeks ago and it's been raining so frequently here during our south FL rainy season that I haven't had time to set up my makeshift outdoor sandblast booth which usually allows me to reclaim about 1/2 the blast media. I really wanted to get the drivers door edges done and in primer so I just blasted it with some previously reclaimed media and accepted the loss to keep things moving along. Outside of door was sanded to bare metal previously like the rest of the body exterior. I don't use the blaster on large sheetmetal that might warp. Then I did some rust pit repair on the bottom of the door, stripped the door jambs, got both in primer & rehung the door just to get it out of my way.
I'm finally getting to the fun part since I'm almost done with stripping/rust repair and I've been painting things so they're ready for reassembly.
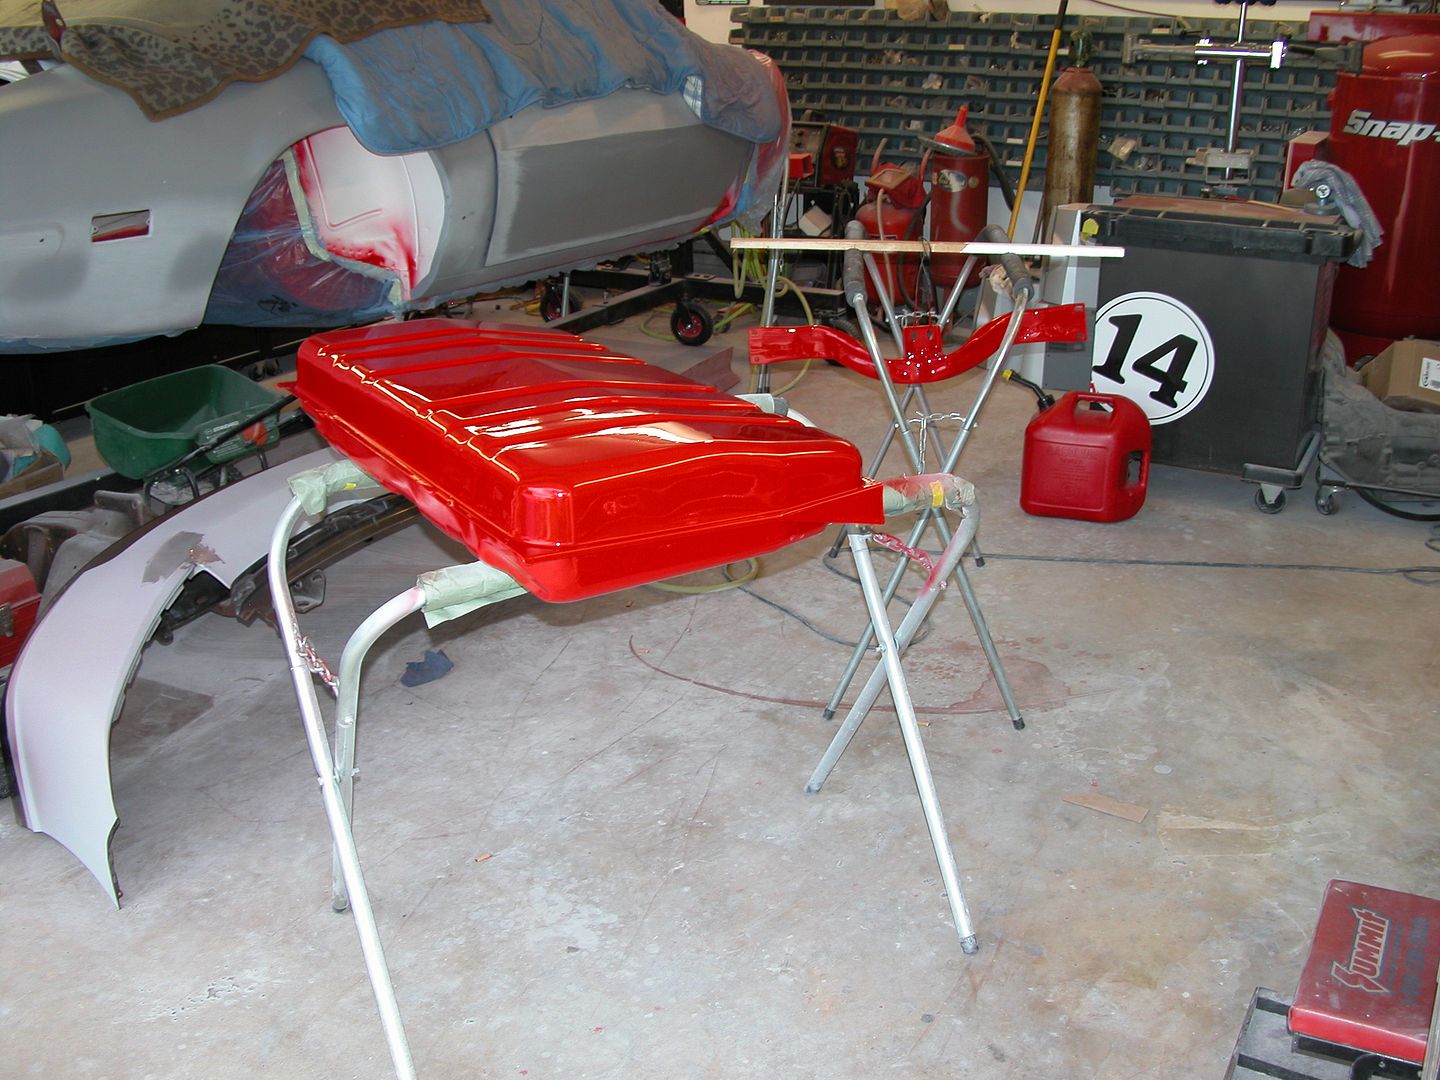
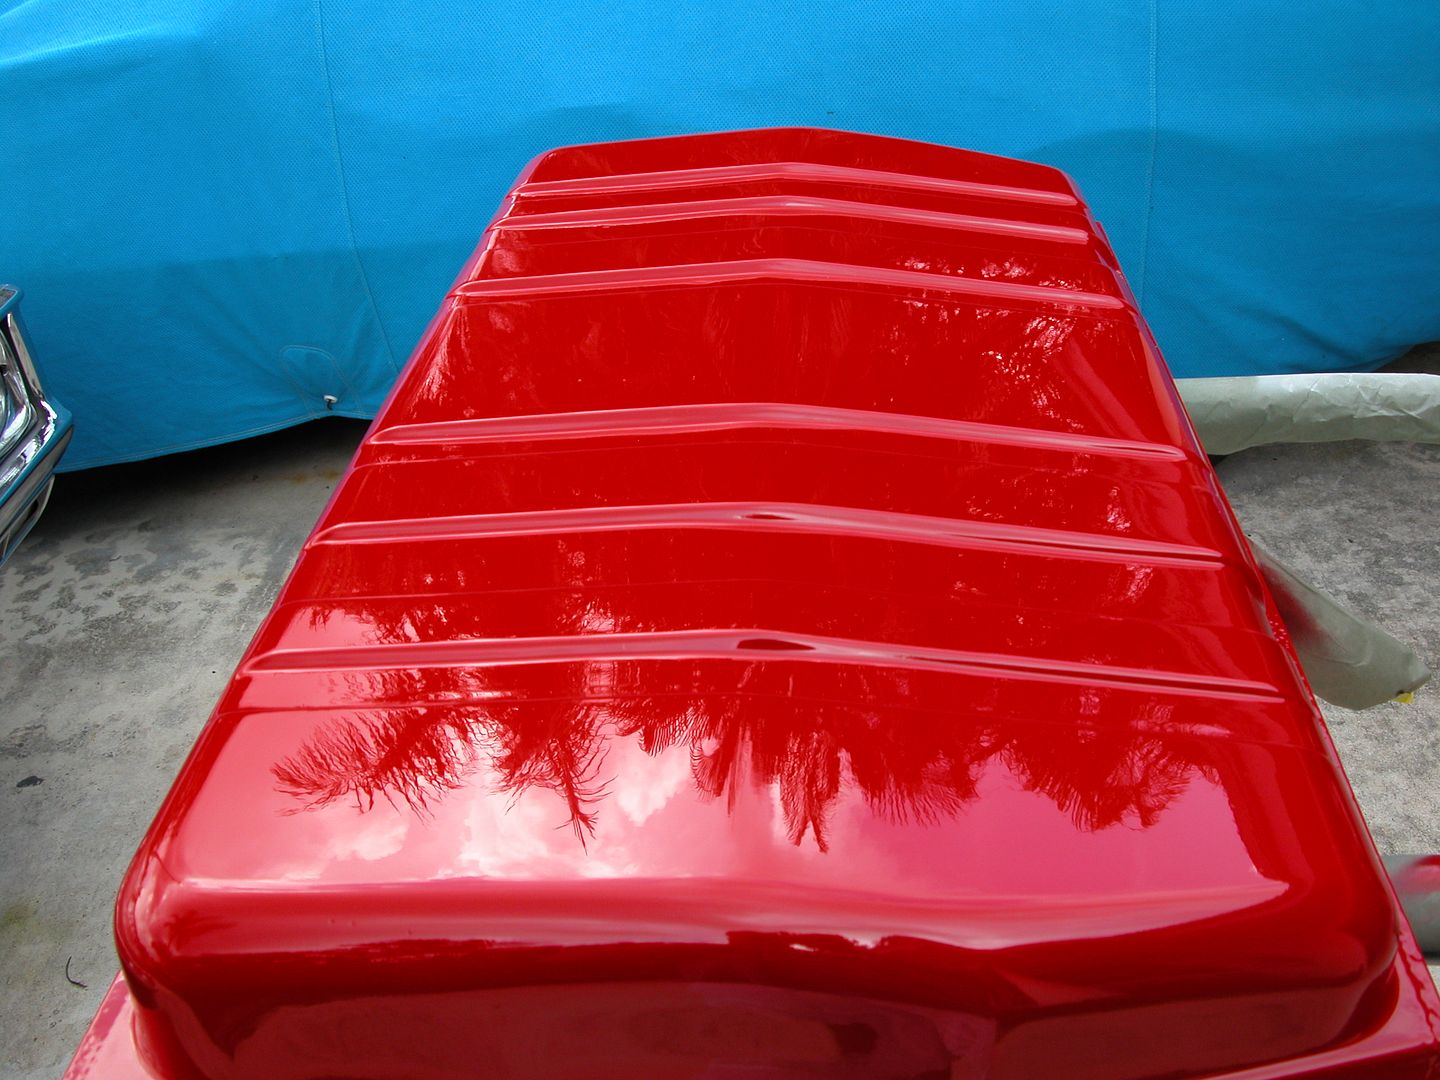
A while back I straightened & smoothed the fuel tank and once in epoxy primer I tucked it away. Normally I'm not a body color fuel tank kind of guy but I have a plan of using the fuel tank as the roof of the diffuser and if my plan works out hopefully it'll look pretty cool, if not I'll paint it black or tank tone. So I gave it a coat of high build primer, sanded smooth and shot it.
Since I've gotten carried away with the underside I figured I might as well make the rear spring pockets I modified look pretty too!


 [/URL]
 [/URL]
 [/URL]
 [/URL]
 [/URL]
 [/URL]
 [/URL]
 [/URL]
 [/URL]
 [/URL]
 [/URL]
 [/URL]
 [/URL]


 [/URL]
 [/URL]
 [/URL]
 [/URL]

 [/URL]
 [/URL]
 [/URL]

 [/URL]


