The original Burrito Fiat thread is updating again? Santa did get my letter!
On a more serious note:
I'm just an hour or so north of ya, if you need a hand working on the car or disposing of beer give me a holler ![]()
So, since we are down to two cars here at Casa de Burrito, I've found myself with a bit more time to waste on the 850. Something about not having a fleet of 5 cars to maintain really frees up your schedule. This has also freed up some much needed capital for the remaining projects and garage related accessories.
It's weird coming back to a project after an extended hiatus. One of the things that has always kept me up at night is the shift linkage, so I figured I should start there.
Since the Porsche 901 Transaxle I'm using is essentially a ACVW trans with one more gear crammed inside it, I ended up rolling the dice on a "universal" dune buggy style shift box and a type 1 shift lever assembly. Both arrived, courtesy of eBay, for around $80. The shift box is a decent piece and well worth the $60 cost of entry. The shift lever and it's associated gubbins aren't the highest quality reproductions, but they'll work for now.
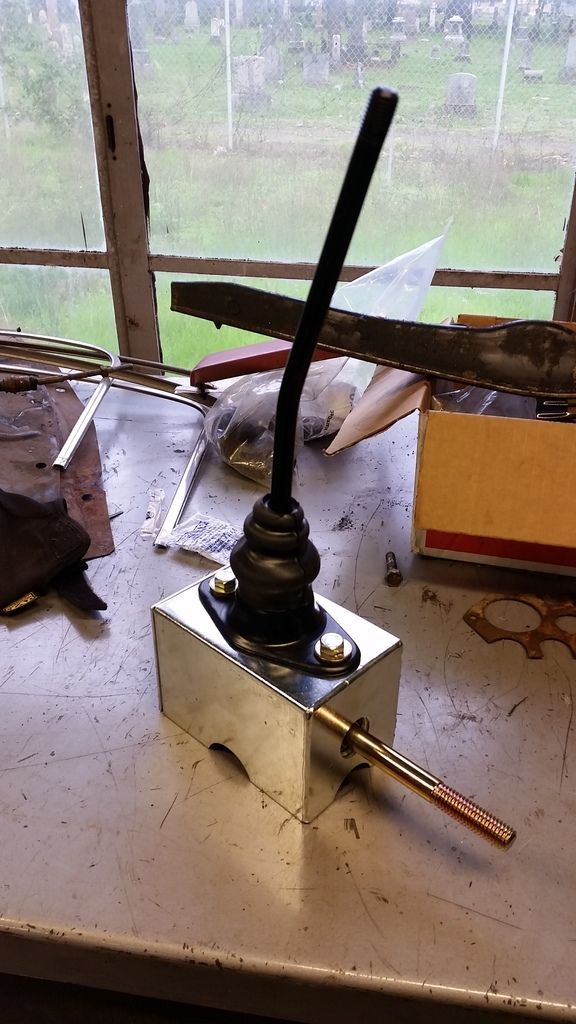
But, just cramming this into the car in a random location doesn't make much sense to me. Since I'm building this car for me, and only me, that means getting the ergonomics reasonably close to ideal, and that means mounting the drivers seat and steering wheel and seeing where things feel comfortable.
So, out of the basement came one of the NB Miata seats.
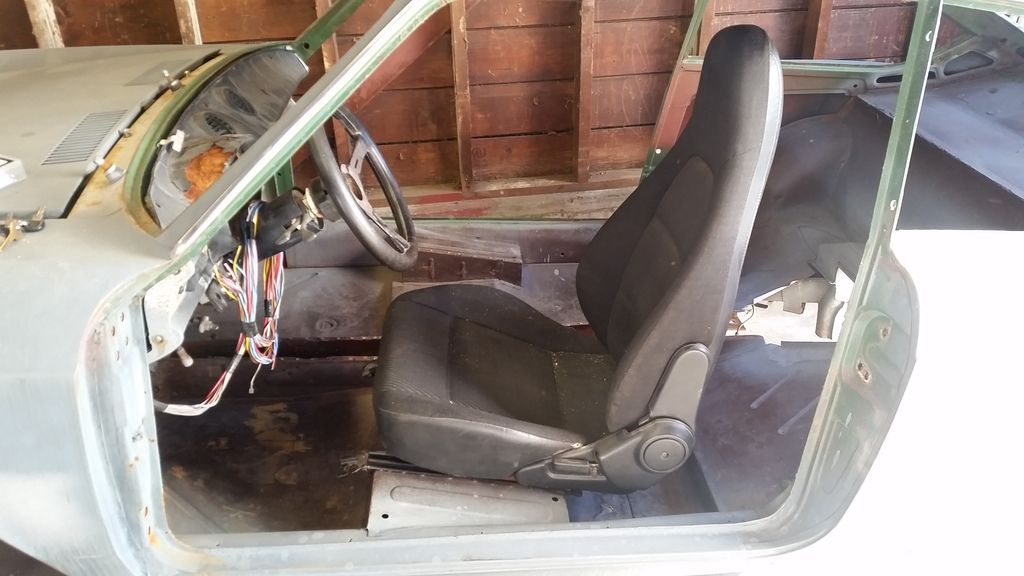
Thanks to the factory Fiat seat rail boxes, my head and the roof wanted to occupy a lot of the same space.
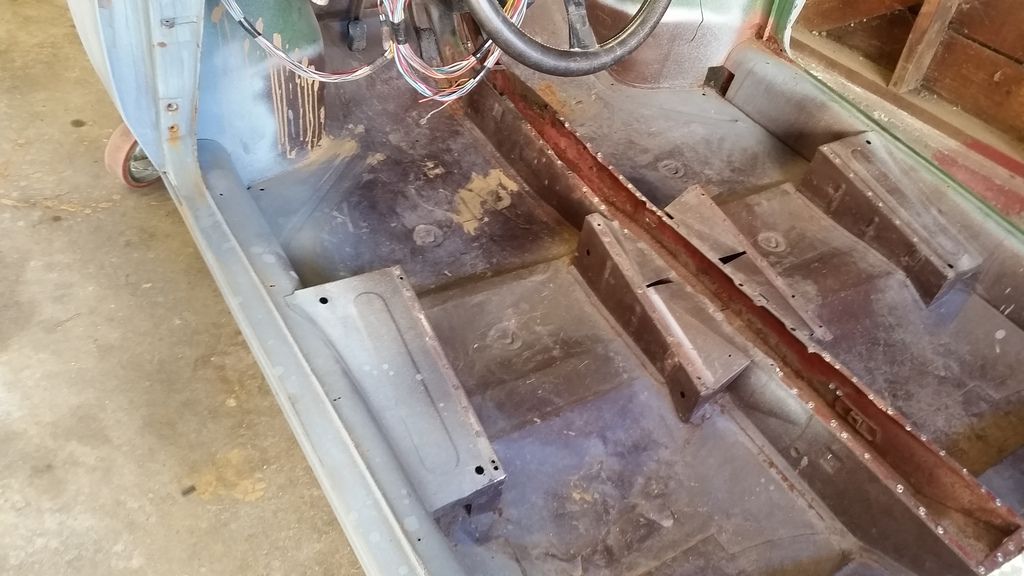
So, off we go to obtain some much needed vertical clearance for the Brain of Burrito. Queue the spotweld drilling montage.
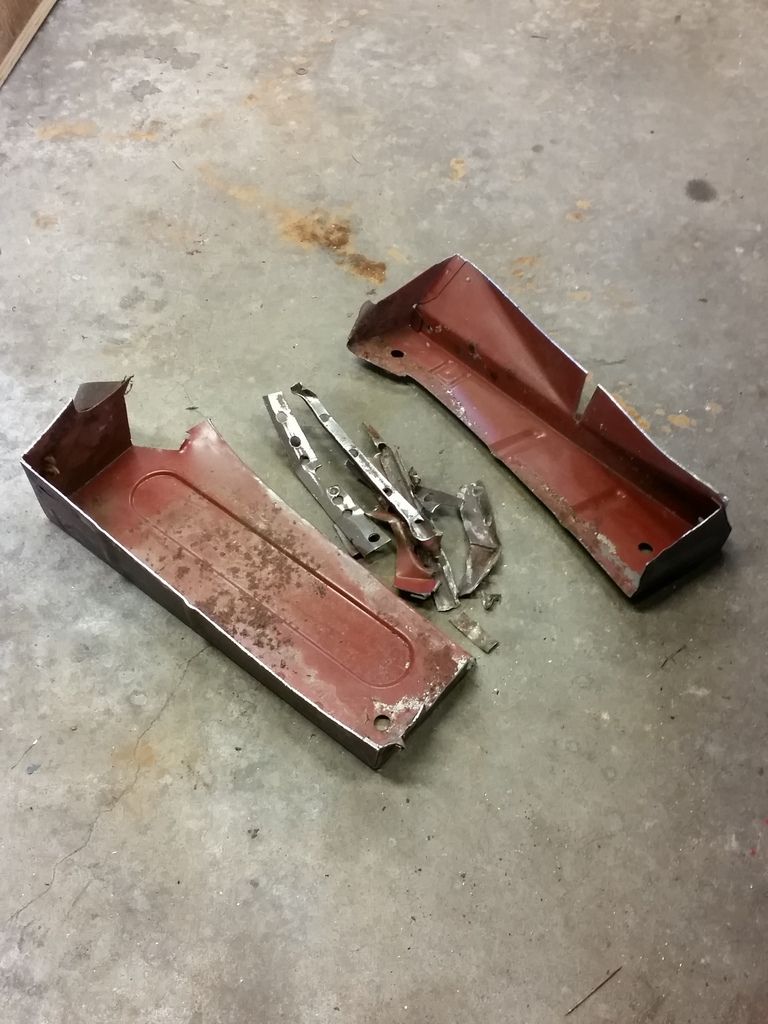
At some point some shiny happy person of a rodent set up shop under the the outer box and left an impressive looking home. Unfortunately, it also rotted out that section of the floor pretty good, too.
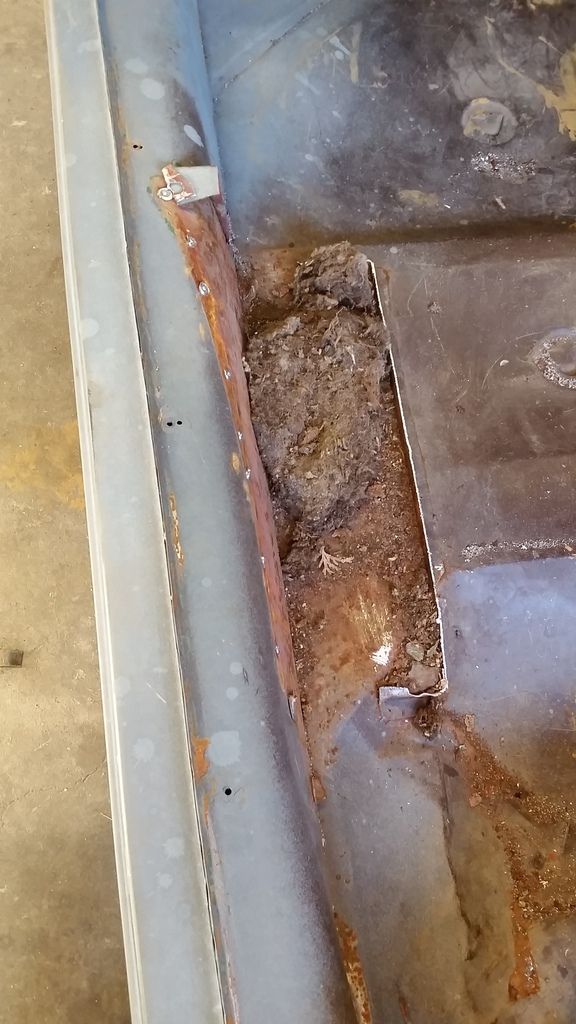
The floor is pretty rough shape in places and I'm not shying away from the idea of replacing the majority of it in one fell swoop.
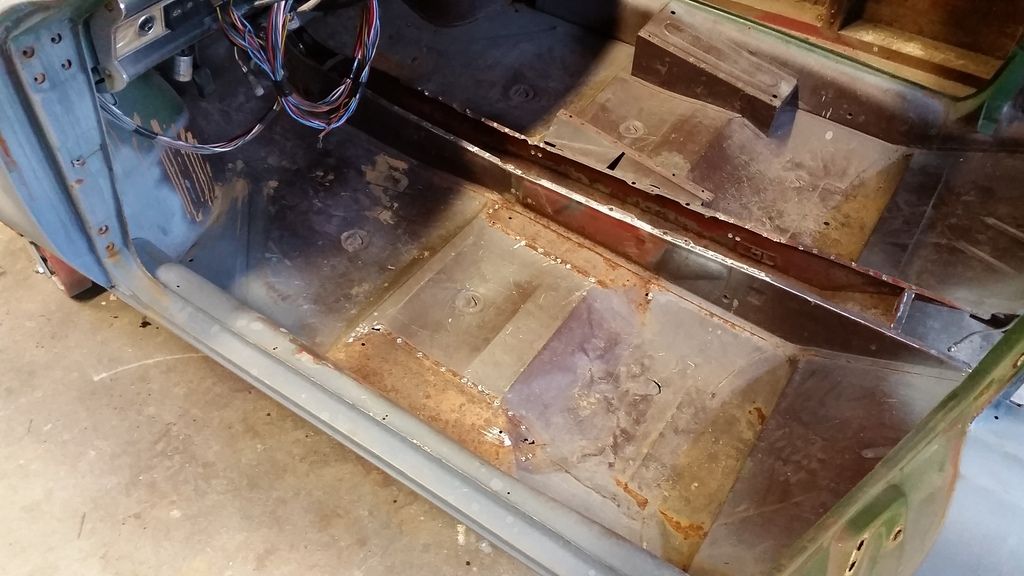
But anyways. With all that sheet metal out of the way, I was able to get the seat low enough to get me and my helmet under the roof comfortably.
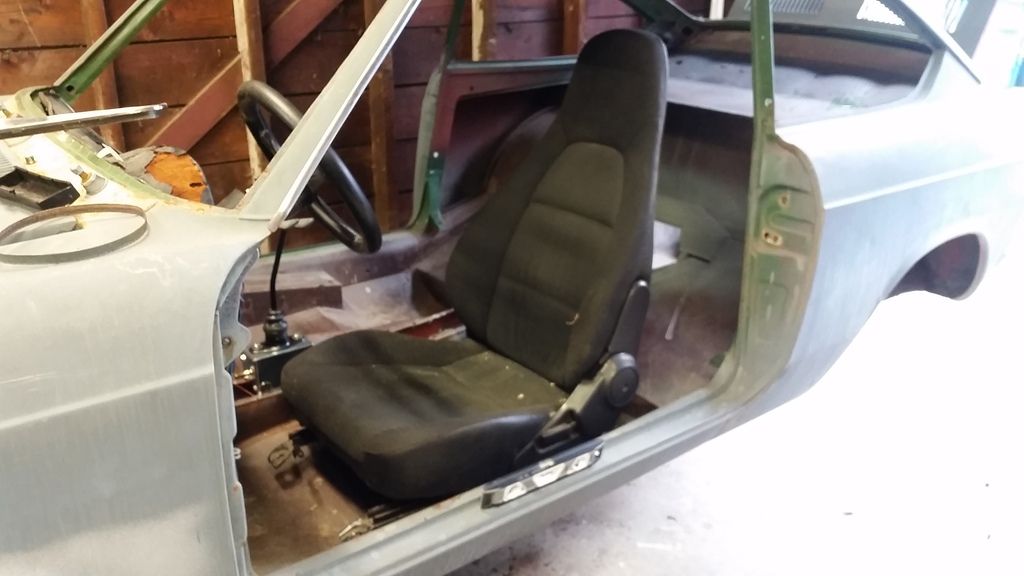
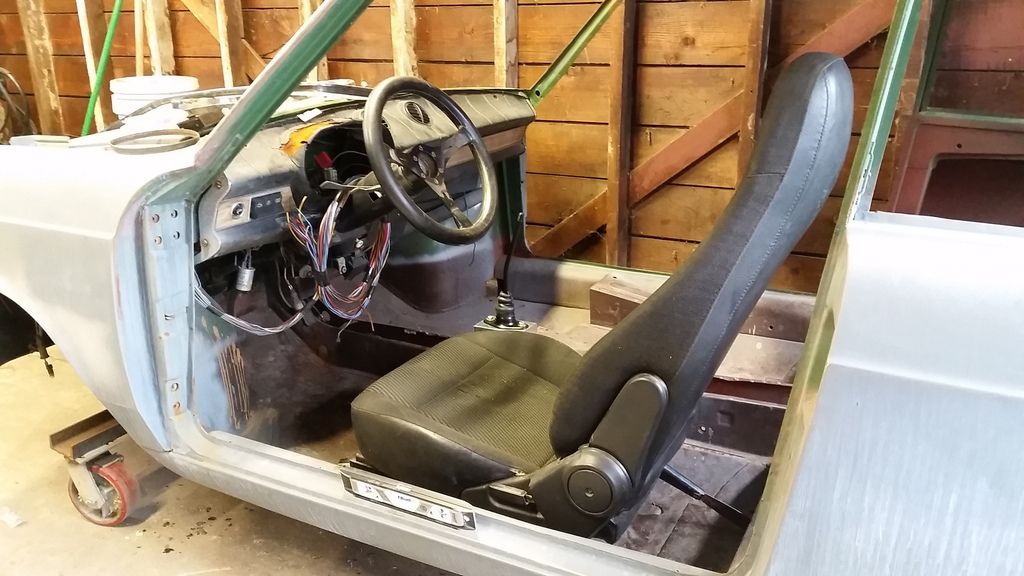
I'll be moving the seat around as I design and mock up the seat brackets. So far we are headed in a positive direction, though.
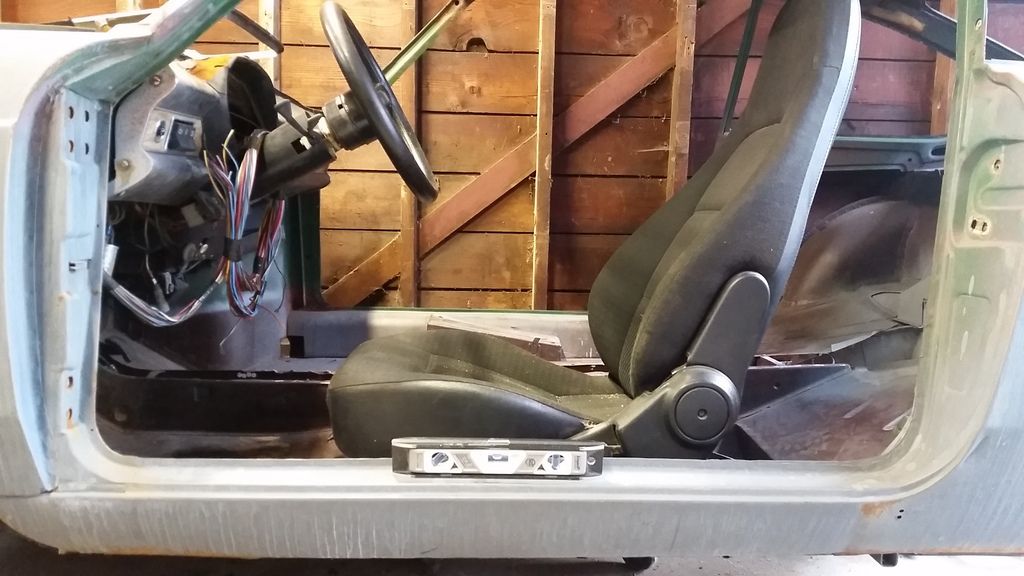
So, the loose plan of action is to figure out final seat position, fabricate mounts, locate and mount shifter assembly, then reinstall the transmission and finalize the back half of the shift linkage. Oh, and watch project binky again from the start.
Woohoo! Progress! Also most pleased to read the phrase "me and my helmet", indicating plans for the sort of vigorous use associated with Snell-approved headwear!
Excellent! I thought I read in another thread that all Burrito-mobiles other than the Yugo/fiat had been sold. In my mind, there was a long, protracted "NOooooo", then I realized it was really none of my business, and I kind of hate people who go on the internet and say "NOooooo" when people make real world choices that have no bearing on the the person making the proclamation, yet still, deep in the cockles of my soul there was a sincere, selfish disappointment that I felt it best to just shut the heck up about...
What I'm saying is I really like this car, and am glad to be able to follow along.
In reply to Ransom:
I'm not claiming that it will ever be a competitive Autocrosser, but it would be pretty silly to not keep the need for headspace in mind at this point. It would be stuck in a mod class at this point, so there's really not much hope for it, even regionally. I have thought long and hard about putting a more modern Fiat motor in it to keep it XP or Street Mod legal, but I am going to forge ahead with the Suzuki lump for now. At one point I was heavily considering getting Seat 850 badges for the car and sticking a VW 16v in the car with a Seat intake manifold, but all the Eugene AX guys didn't think that would fly beyond a regional club.
Six Degrees of Separation for Street Modification?
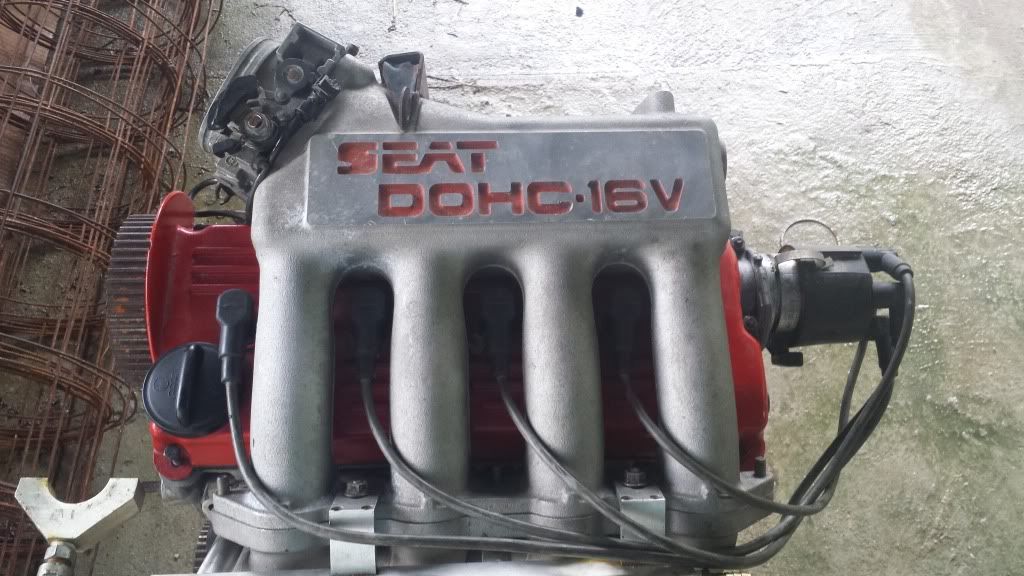

I mean, it could work, right? Kennedy Engineering sells an adapter for that...
Hey, maybe we can get EESCC's OSP classes popular enough to run informally within mod around the region, the way the CB160s are run in their own class within 250 Vintage... I feel like some of what's going on suggests an interest in autocrossing cars whose limiting factor is what you're willing to put up with in a street-driven car... But I digress. Just stoked to see progress!
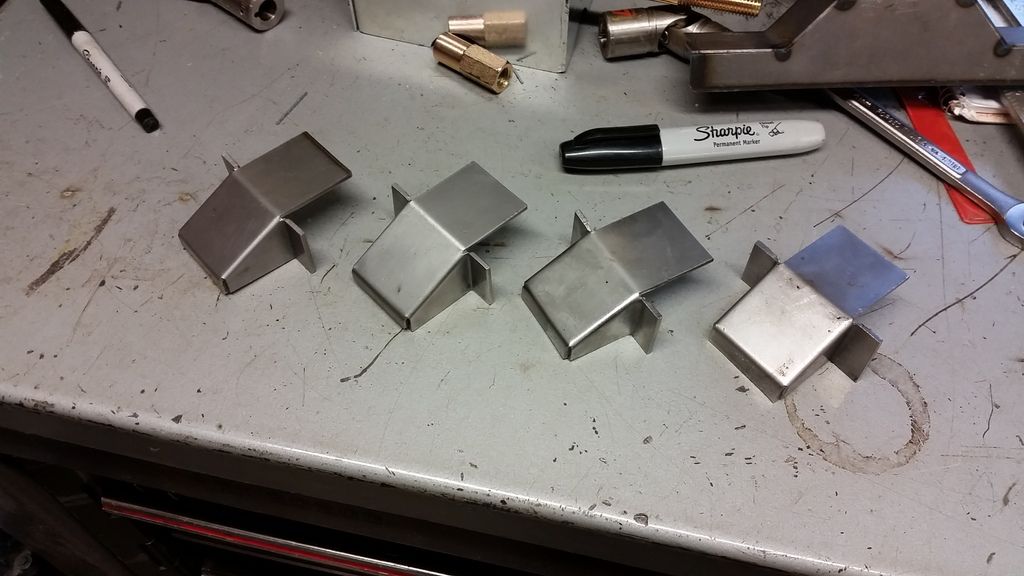
Ok, so moving forward with the seat mounts. The front of the miata sliders have a little 25 degree kick down between the locating pin and the bolt hole. I would like very much to keep this feature.
So, paper template:
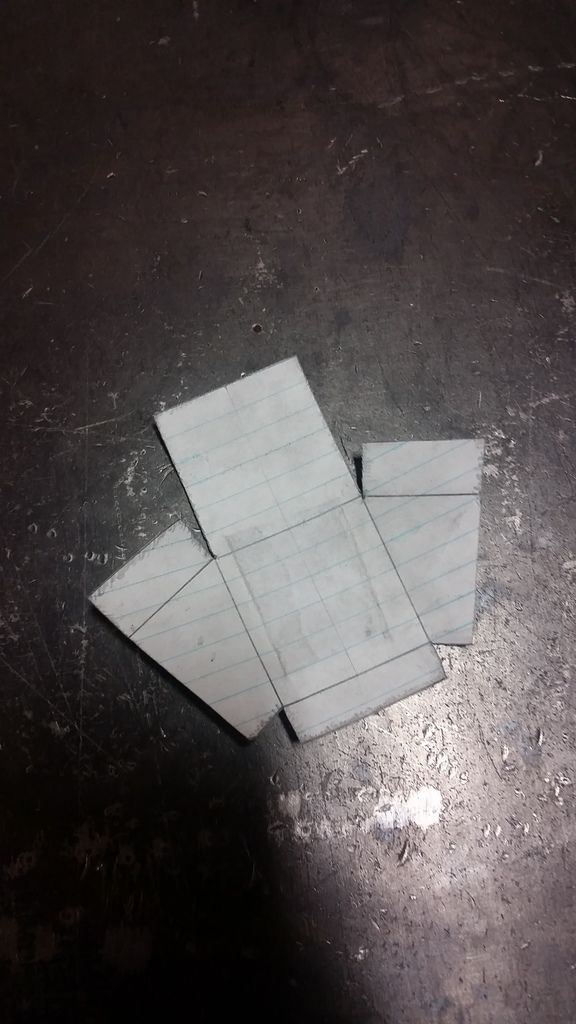
Transfered to some 12ga sheet:
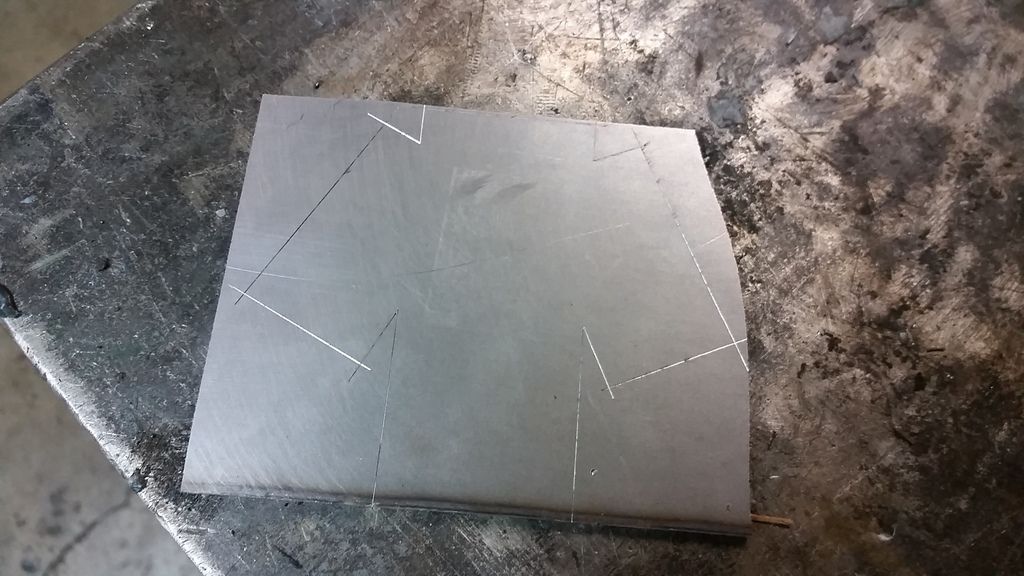
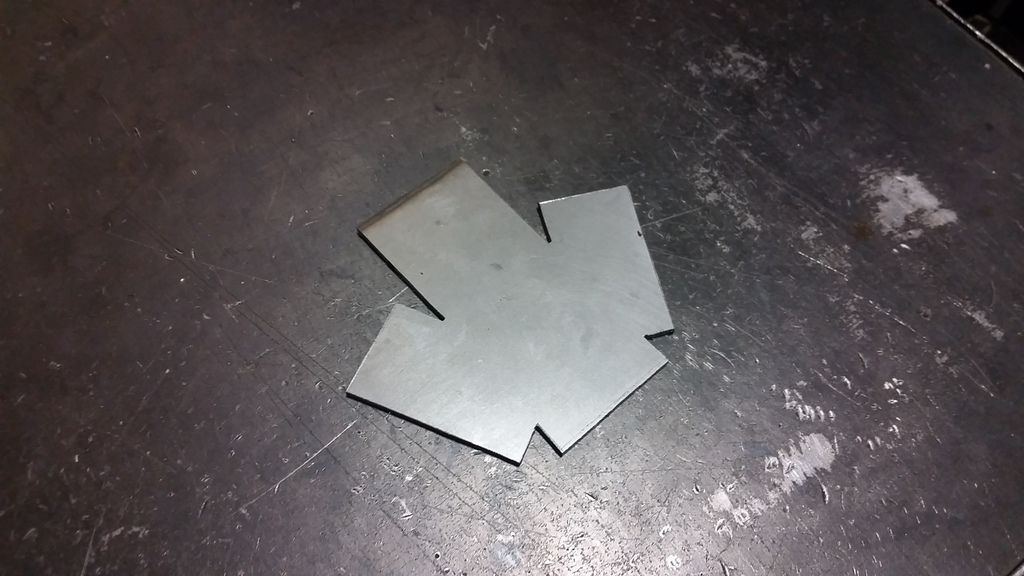
Cut out and cleaned up:
And all bent up times four:
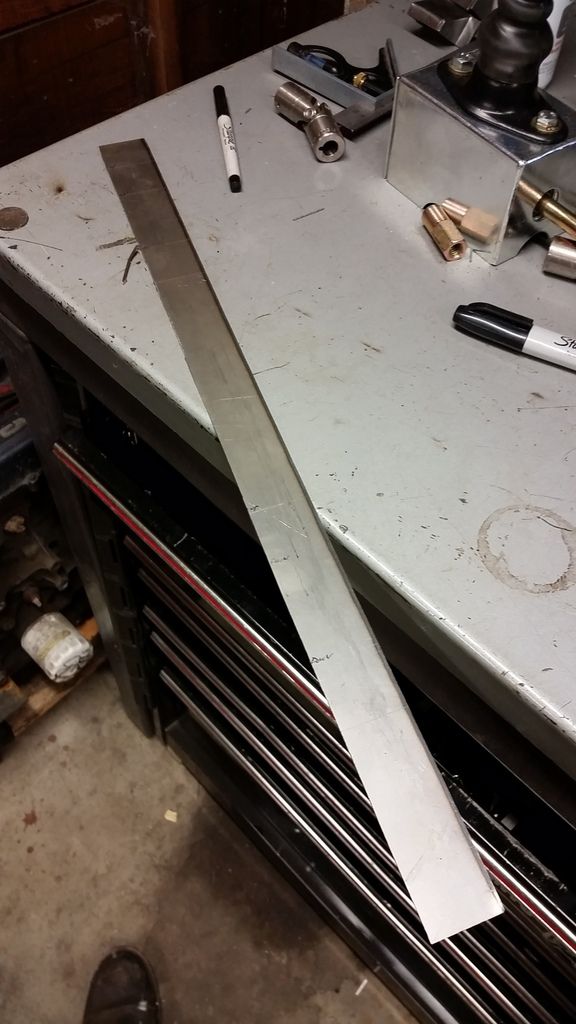
Next piece of the puzzle is a crossmember to tie those parts into. This time some 16ga.
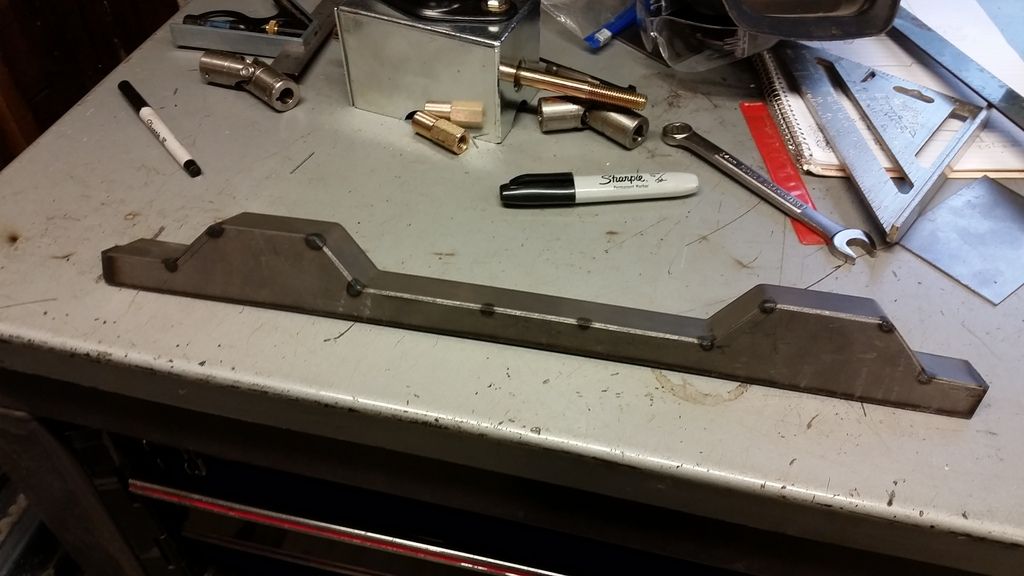
Bent up and tacked.
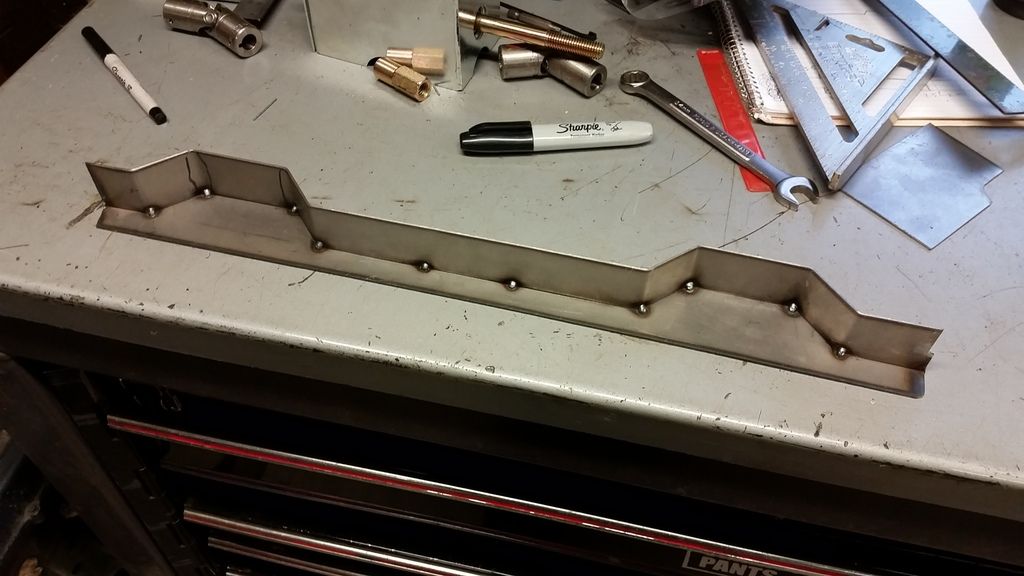
Ran out of steel at this point, too. Bummer.
So, the little angle pieces will hang off the front of the part thusly.
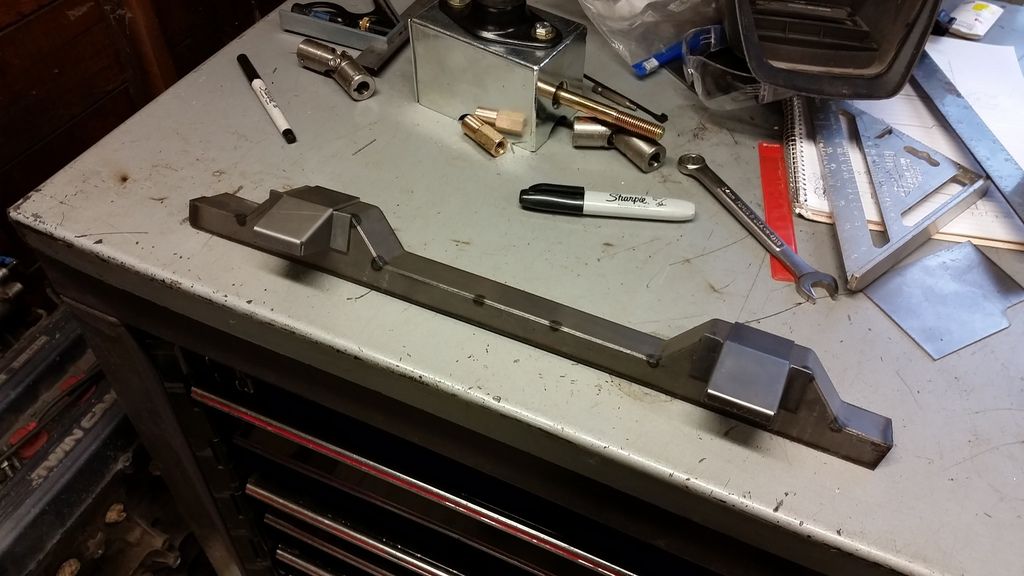
And it should fit in the car somewhere around here.
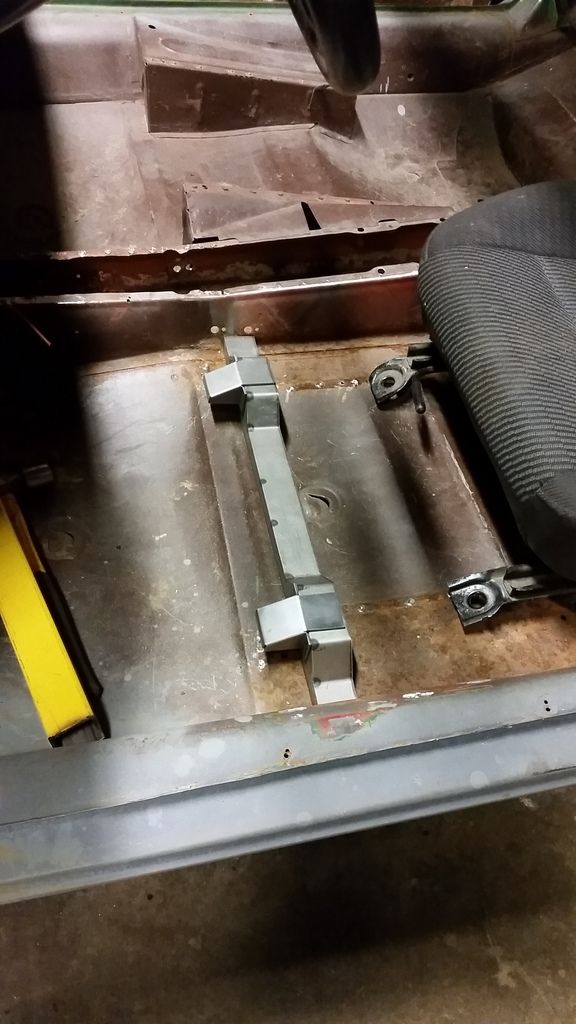
The job this week will be to finish up this crossmember and get started on the rear one, tack them into the car, and get the seat bolted in. Then I can locate the shift box.
Cheers!
Very nice; love the thought process and execution on the cross member and seat mount brackets. I can tell that you are watching the Binky project.![]()
Burrito wrote:
This one pic amply shows the difference between your ability, my dreams and my sad sad abilities. My hats off to you sir.
Adrian_Thompson wrote:Burrito wrote:This one pic amply shows the difference between your ability, my dreams and my sad sad abilities. My hats off to you sir.
I really believe that if you can make it out of poster board, you can make it out of sheet metal. It just takes a little more time to cut out the shapes. All the bends were done in the bench vise, didn't even bother getting out the brake.
Really, you just got to give it a go. It's all easier than it looks.
Burrito wrote:Adrian_Thompson wrote:I really believe that if you can make it out of poster board, you can make it out of sheet metal. It just takes a little more time to cut out the shapes. All the bends were done in the bench vise, didn't even bother getting out the brake. Really, you just got to give it a go. It's all easier than it looks.Burrito wrote:This one pic amply shows the difference between your ability, my dreams and my sad sad abilities. My hats off to you sir.
I agree with Burrito...if you want to learn to do this E36 M3, you gotta do this E36 M3, cause there ain't no can't when you have to.
And just so y'all know, I think I am going to steal the sheet-metal fabrication trick and re-do the tranny cross-member on the Molvo.
you can use a punch w/ a paper pattern then drill pilot holes at corners, then connect them w/ judicious use of a dremel/grinder/band/hack saw. Takes patience, but you can do nice work that way.
I am currently using a portable bandsaw held sorta-kinda vertically to do most of the cutting on the thicker stuff that tin snips won't cut. The majority of this steel is from the scrap bin at work (take a penny, leave a penny), so I tend to trim the chunks into something resembling square with the plasma cutter before I bring them home.
I really thought the portaband was going to be the answer to all my problems, but the model I got won't let you pass long pieces past the column.
I think this is the model I got used off CL.

See how the mast or column or whatever (where the big DeWalt logo is) is very thick and inline with the blade?
That's no good for this kind of work. I didn't even realize it was going to be an issue until I started cutting with it. Now I'm looking for something more like this:

Much more offset for cutting long, thin pieces.
I'm interested in staying with a portaband because of it's compact size and it's ability to multitask. Oh, also they're made to cut metal, unlike the majority of floor model vertical bandsaws that run nearly 2000 sfpm, these little guys run 100-250 sfpm, which is perfect for cutting steel.
So, anyone want a good deal on a used DeWalt portaband with variable speed and a built in light? ![]()
Oh, I'm also channeling my inner Mazdeuce and am using a Craftsman jig saw from 1972 to do some of the trimming on 16ga where the bandsaw can't get into. It goes through the sheet surprisingly fast.
I have never had much luck with any of the different shears or nibblers. I'm trying to move away from pneumatic tools, too, since my little compressor has a hard time keeping up with pretty much any tool (plus it's loud and has a tendency to trip the breaker).
In reply to Burrito:
I inherited a very nice Craftsmen jigsaw from my grandfather but it doesn't make pieces as nice as yours. I will assume it's broken.
Found enough 16ga in the skip to finish off the the front crossmember.
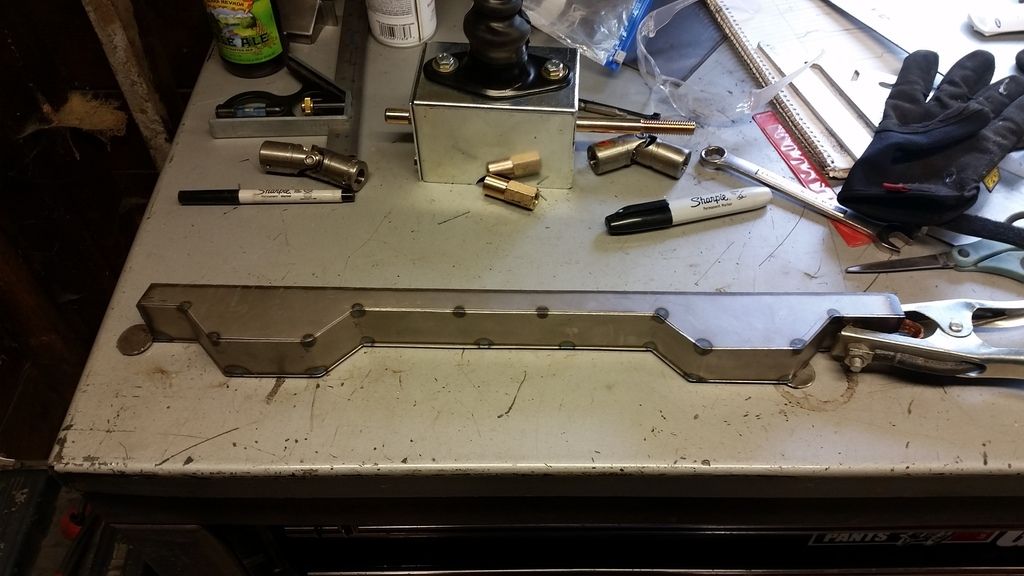
Fully welded.
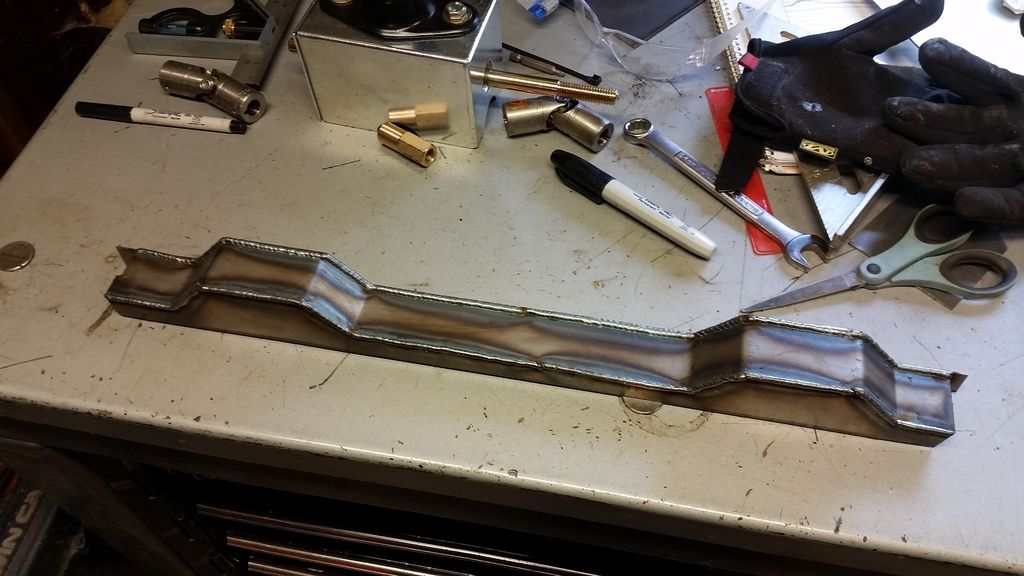
I try to take the welds down about this far with a stone. Where you can just catch the edge of the weld with your finger nail, then switch to either a roloc or a flap wheel.
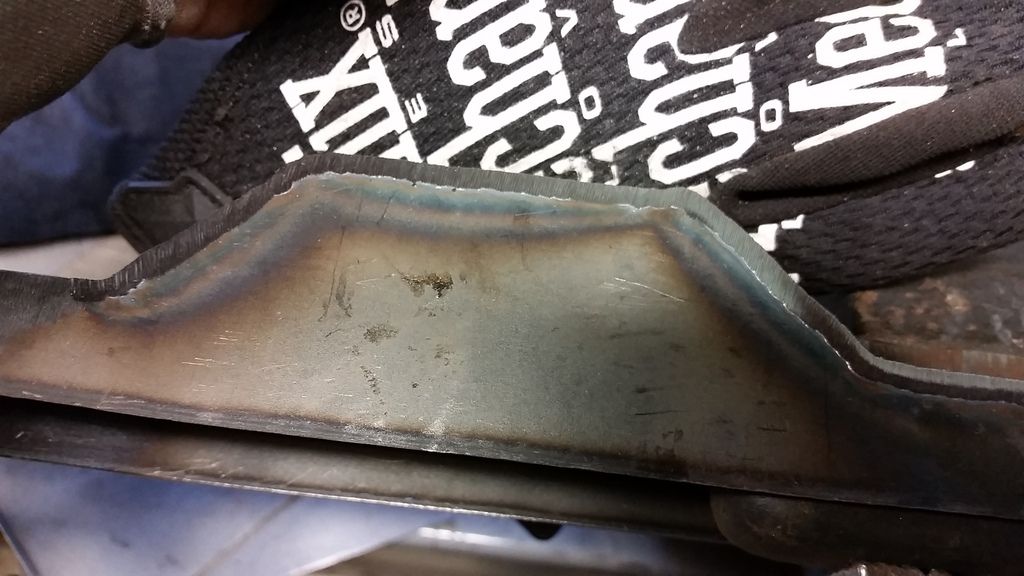
And all ground off smooth.
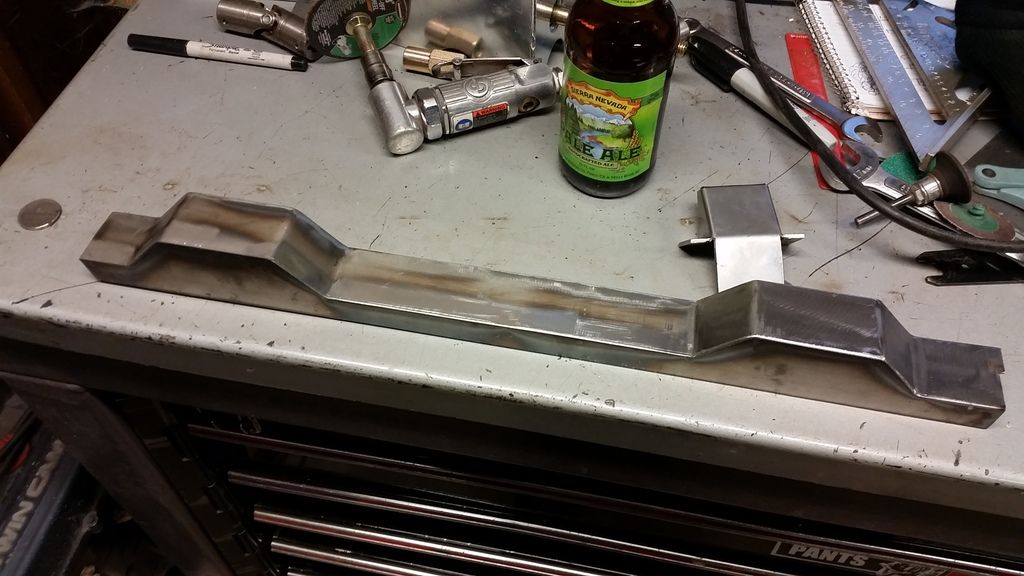
So, that's pretty much that part finished. I'll need to come up with a way to mount it before I weld it in for good, but it's done enough to get tacked in for the time being.
And now for something completely different. I'm far too cheap to buy a good bead roller and it seems like all the ones in my price range are all the same cheap POS. Since I'm looking at replacing the majority of the floors at this point, I really need some way of adding some sort of bead-like feature tof prevent oil-canning.
This is what some creative scrap-bin engineering and $13 gets you.
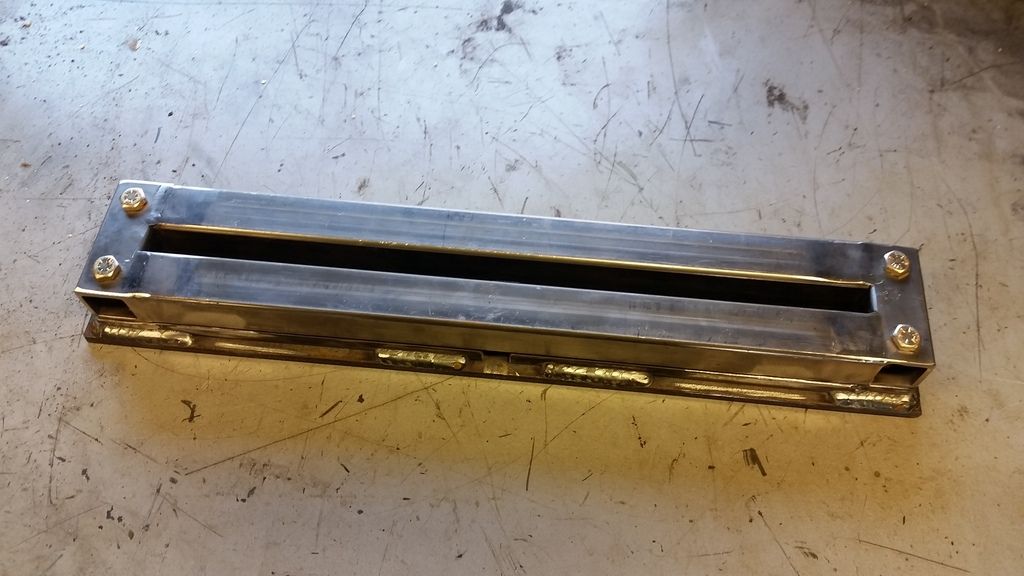
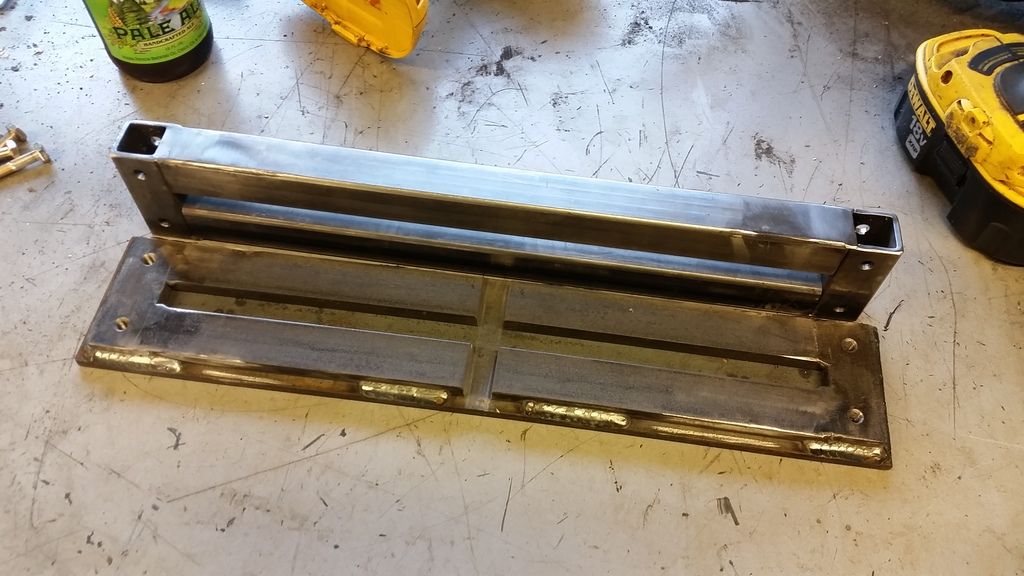
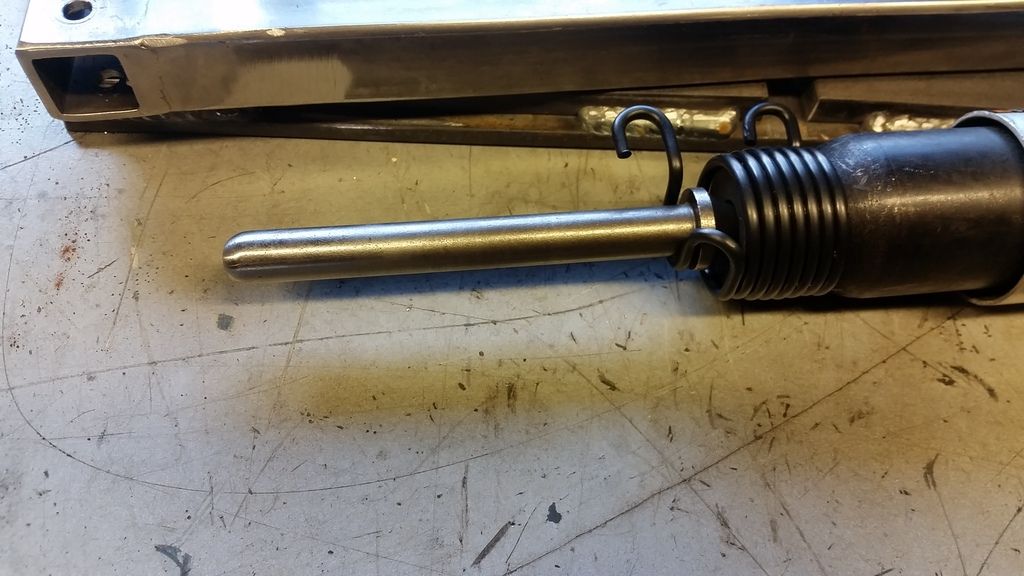
It needs some fine tuning, but it will put a .5" wide bead .25" deep into a chunk of 16ga. I had hoped I could make an X bead, hence the cutout in the middle of the bottom piece, but it doesn't look like that will work with the current tooling.
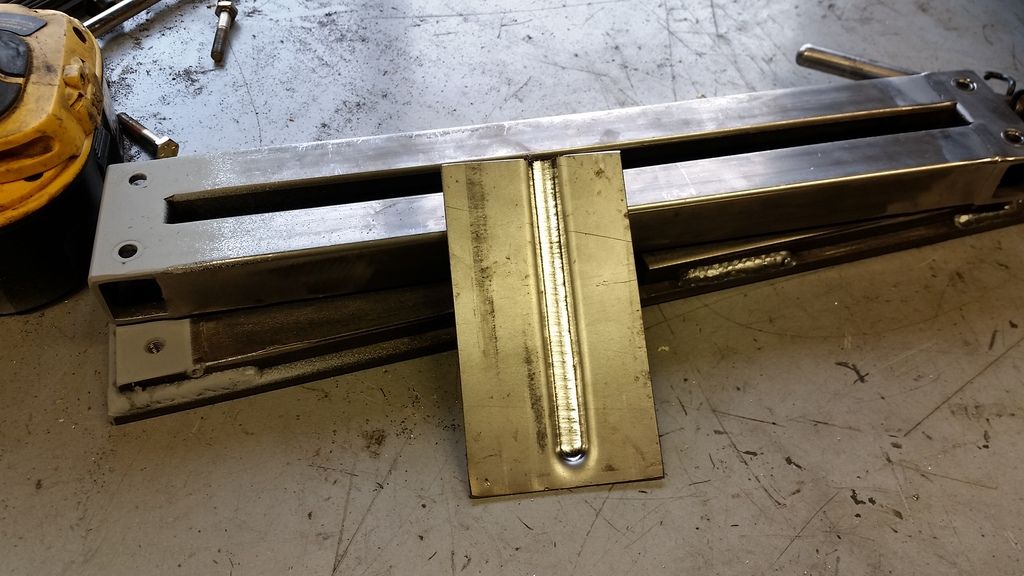
And, yeah, I had to stop halfway through to paint one end of it so I could line the holes back up.
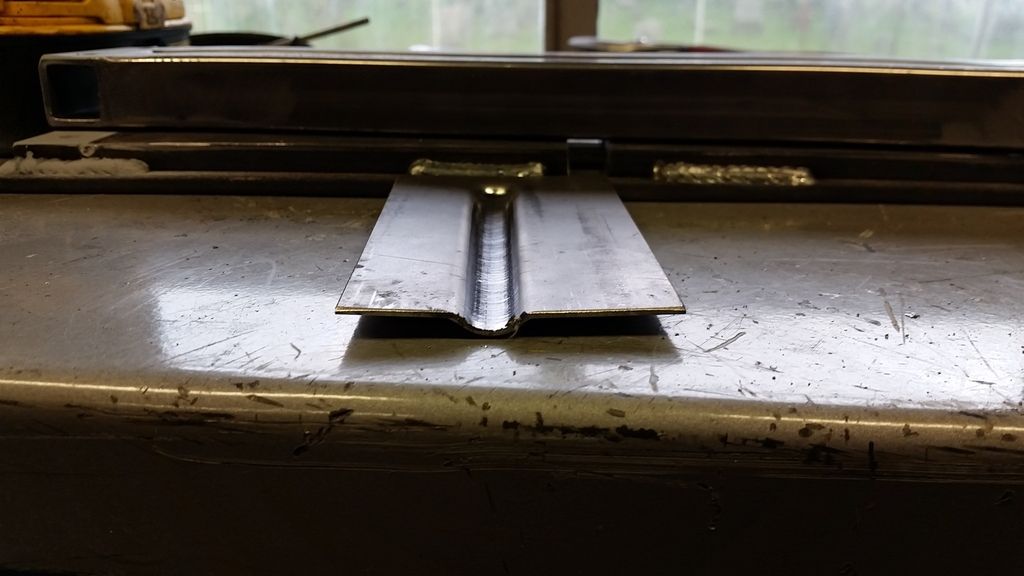
I think it will come in quite handy as is, but I'm thinking about moving up to a .625" driver to match the factory beads. Silly, really, considering the direction the car is heading.
In reply to Jumper K. Balls:
Oh, so that's the technical term for it. I saw someone do something similar on RetroRides years ago, but I didn't know what it was actually called.
Down the rabbit hole I go!
You'll need to log in to post.