1 ... 6 7 8 9 10 ... 13
Burrito Enthusiast
Burrito Enthusiast HalfDork
1/18/15 5:32 p.m.

So, the car and all the crap I pulled off is gone.

Here's the price break down:

Initial purchase: $800

-$40, side skirts -$220, transmission -$360, everything else, including the body

So, my total investment in the G13B comes out to $180. The gentleman that is taking the transmission also wants every sensor off the engine, so there is a little meat left on the bone still. I won't need the sensors because MegaSquirt (i.e. I'll be adapting GM sensors).

Here's something we can all enjoy!

Burrito Enthusiast
Burrito Enthusiast HalfDork
1/20/15 12:40 a.m.

Spent a bit of time in the dungeon tonight puttering around with the new engine. I pulled the exhaust manifold and extracted two (previously) broken studs before pulling the timing covers.

After much cleaning, I found the timing marks and confirmed that everything lined up as intended.

Everything is coming up Milhouse.

Just for E36 M3s and giggles, I pushed the engine and trans together for the first time. Why not?

Right now with a gap of about 3/4" between the two, it is roughly 27" from the center of the output flanges to the outside of the crank pulley. That should put the engine a full 6-7" forward of the rear-most point of the car. I am hoping to push the flange centerline forward of the wheel centerline by an inch or two or three. But I won't know about the final position and length for quite some time.

As far as joining the engine and transmission is concerned: I see the logical first step as getting a clutch that has the same diameter and thickness as the Swift unit, but has the correct spline count and diameter as the 914. Luckily, a 190mm MK1 VW clutch is both of those things. Step 2 will be finding a pilot bearing with the ID of the 914 trans and the OD of the Swift flywheel. This has proven to be slightly more difficult, as the Porsche pilot is 12.5mm, which makes for very slim pickings. More thought is necessary here. I will be trolling the SKF and Timken catalogs tomorrow in hopes of something that we can make work, but I feel some machining will be required here.

The bearing that I require, should you want to look for it yourself, is 12.5x30x9mm (id, od, depth).

Prepare yourselves for the rambling portion of this build thread.

Burrito Enthusiast
Burrito Enthusiast HalfDork
1/20/15 12:57 a.m.

And now I'm doubting the measurement of the Porsche pilot. I distinctly remember not zeroing out my calipers...

Jumper K. Balls
Jumper K. Balls UltraDork
1/20/15 1:23 a.m.

 photo 20150113_144458_zpslbd0dpsm.jpg

Don't get caught up overthinking this part. A needle bearing in a spacer is all you need to make it right. Or just a brass bushing.

Keep at it. And keep your eyes peeled for another cheap 914 box. I need to decide on which direction my new motor will turn.

RossD
RossD PowerDork
1/20/15 7:29 a.m.

I'm not up on current clutch prices but a custom one from Taylor Race Engineering might be one solution: http://www.taylor-race.com/items.cfm?category=Clutches&subcategory1=Custom%20Driven%20Discs

Burrito Enthusiast
Burrito Enthusiast HalfDork
1/20/15 10:42 a.m.

In reply to Jumper K. Balls:

I knew that there would be simple enough solution! Also, what a perfect excuse to head to Eugene for the weekend.

Edit:...or I could just order McMaster P# 8486A78, cut it to length, press a stock porsche pilot bearing in it and call it a day.

Jerry From LA
Jerry From LA Dork
1/20/15 11:20 a.m.
Jumper K. Balls wrote:  photo 20150113_144458_zpslbd0dpsm.jpg Don't get caught up overthinking this part. A needle bearing in a spacer is all you need to make it right. Or just a brass bushing. Keep at it. And keep your eyes peeled for another cheap 914 box. I need to decide on which direction my new motor will turn.

A good machinist can increase the i.d.and turn down the o.d of any bronze oilite pilot bushing so find one that's close and go for it.

Dusterbd13
Dusterbd13 SuperDork
1/20/15 11:43 a.m.

McMaster carr. Simple, easy, reliable.

wheelsmithy
wheelsmithy GRM+ Memberand Reader
1/20/15 4:19 p.m.

Question: are you going to flip the ring and pinion in the 914 transaxle to make it work?

Burrito Enthusiast
Burrito Enthusiast HalfDork
1/20/15 4:49 p.m.

Answer: Yes. I will probably drop it off at German Transaxle out in Bend, OR, and have them set it up for the reverse rotation and give it a clean bill of health. That's going to hit the budget pretty hard, so I'm putting it off as long as I can/I need to make sure I can make this whole arrangement work.

I wanted the real deal 911 901, but they seem to trade for more than I have "invested" into the rest of the project. I put down a whopping $140 for the 914 unit.

190mm Rabbit clutch disk and 914 pilot bearing will be here tomorrow, $50 for the pair. The friendly Fastenal guy is going to check on the bushing (to adapt the 22mm OD of the 914 pilot bearing to the 30mm ID of the Swift flywheel) for me; he believes he will have it in stock, for under a tenner. Plus their parts house is a little over a mile from my shop.

Ethnic Food-Wrap Aficionado
Ethnic Food-Wrap Aficionado HalfDork
1/20/15 10:36 p.m.

Fiat 850 guys are always complaining that there's no easy solution to better transmission/ bigger engine/ more power/ etc. So, in case you want to build your own rear or mid-engine Suzuki G-series/ Porsche 914/911 abomination, here's some measurements you might find interesting.

Swift GTi Transmission:

65mm, from bellhousing mounting surface to throw-out bearing face, relaxed.

51mm, from bellhousing mounting surface to throw-out bearing face, full out.

Pilot bearing measures 10x30x9mm (ID,OD,Depth).

Input shaft is flush with bellhousing mounting surface.

Sadly I did not measure the length of the pilot or the length of the splines. I will see if I can figure this out with some creative measuring on the flywheel and pressure plate.

There is a 17mm hole in the rear crank snout that is approximately 17mm deep.

Porsche 914-901 Transmission:

62.25mm, from bellhousing mounting surface to throw-out bearing, relaxed.

48.25mm, from bellhousing mounting surface to throw-out bearing, full out.

Input shaft is proud of bellhousing mounting surface by 5mm.

What does this mean? It means we are looking pretty damn good. The difference of roughly 3mm in throw-out bearing depth is going to help us. It looks as though it would be very easy to modify the 914 transmission to give a little more movement on throw-out bearing. Whether or not this will be necessary remains to be seen.

Here's a little more good news. None of the bolts conflict with the opposing flanges. My current plan is to make a 1/4" (or 6.3mm...) plate adapter between the Swift engine and the Porsche transmission. I will gladly attach a .dxf of the adapter when I know that this is actually a feasible idea. Once I have the engine and trans bolted together with a working clutch package I will begin looking at the Starter.

If there is any other measurements pertaining directly to this that you want to know, I will gladly update this post.

Scargod
Scargod GRM+ Member
1/21/15 4:10 a.m.

In reply to Burrito Enthusiast: Enjoyed seeing the spyder. My bro bought this new and a years or so later we started racing it. This pic from 1971. I did much/most of the work to it. Made that mirror stand and did siamesed velocity stack for the carb. Ours would do 120 on a good day. Gave the Bugeyes fits, bit it lacked power and durability to win very often. Around 1980 it was sold and went back onto the streets of Dallas.

Ethnic Food-Wrap Aficionado
Ethnic Food-Wrap Aficionado HalfDork
1/23/15 8:51 p.m.

I've hit my first real snag on mating the engine and trans. I will go into the details after I get a little time in on a lathe and can solve the issue. That said, it's back to working on the shell.

There's a false firewall that separates the engine and transmission on these cars. since I plan to shove the drivetrain as far forward as possible, it needs to come out.

I started with the fuel filler pocket, this is no longer needed as the car will run on hopes and dreams (or not at all, which is more likely). This is coming out first because I keep hitting my head on it...

After a little love from the body saw.

Then I ground out all the plug welds and smoothed out the panel a bit.

Now onto the false firewall. This is just a big sail panel; absolutely no strength in it.

Only managed to get the first 10 or so spot welds ground out before it was time to start my Friday night. Hope everyone has a great weekend!

Ethnic Food-Wrap Aficionado
Ethnic Food-Wrap Aficionado HalfDork
1/30/15 12:37 a.m.

Prepare yourself for a scatter brained post.

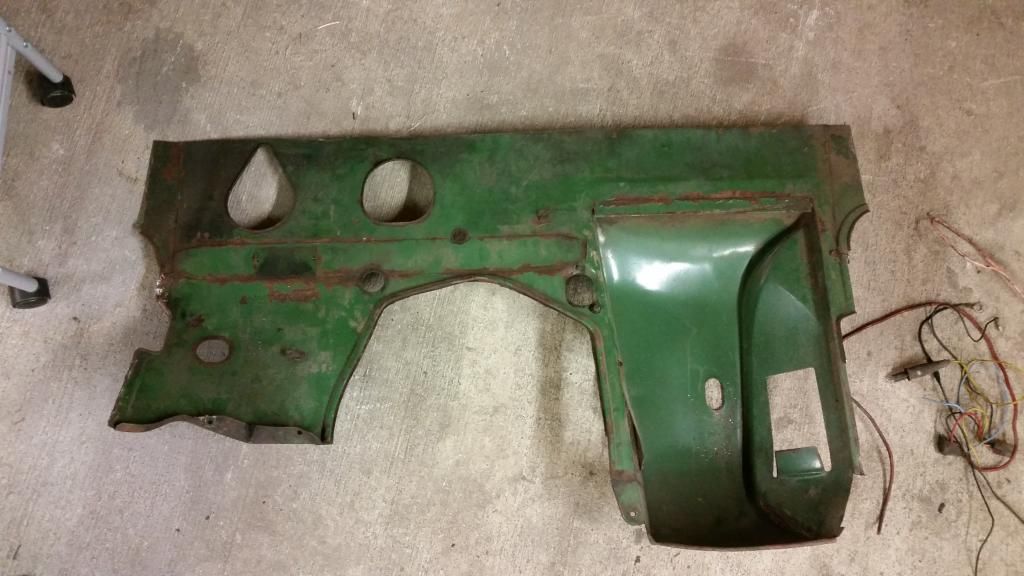
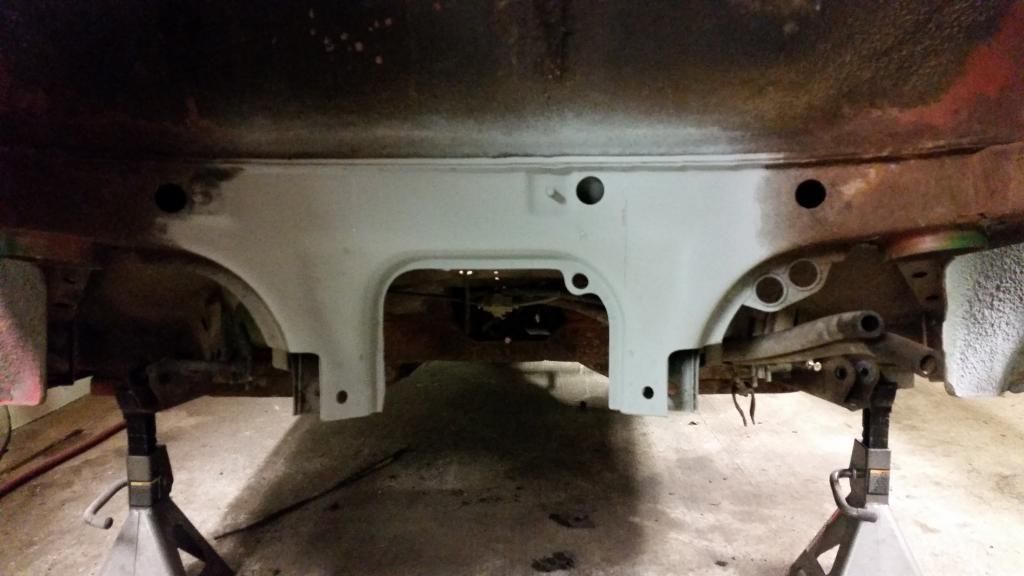
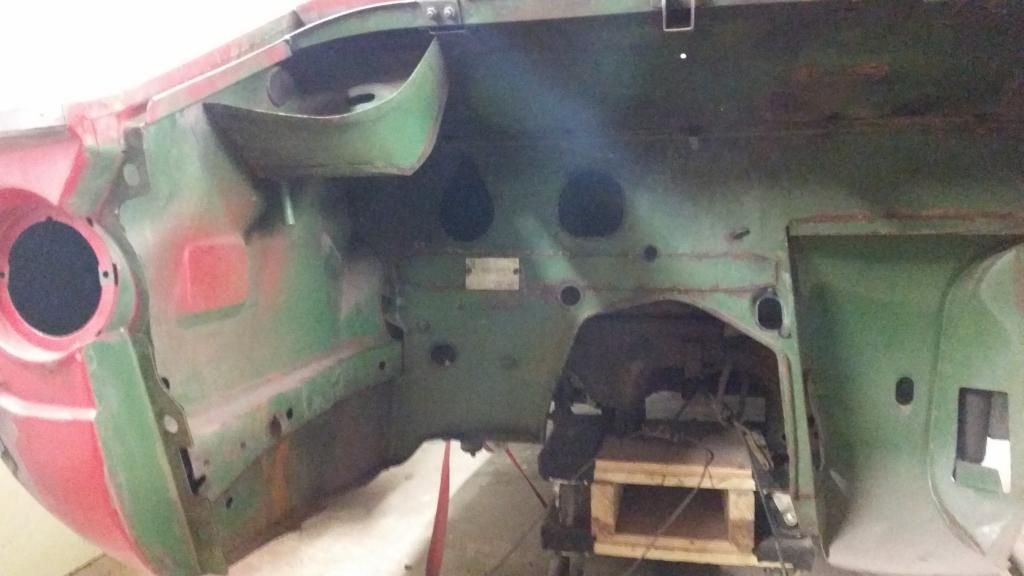
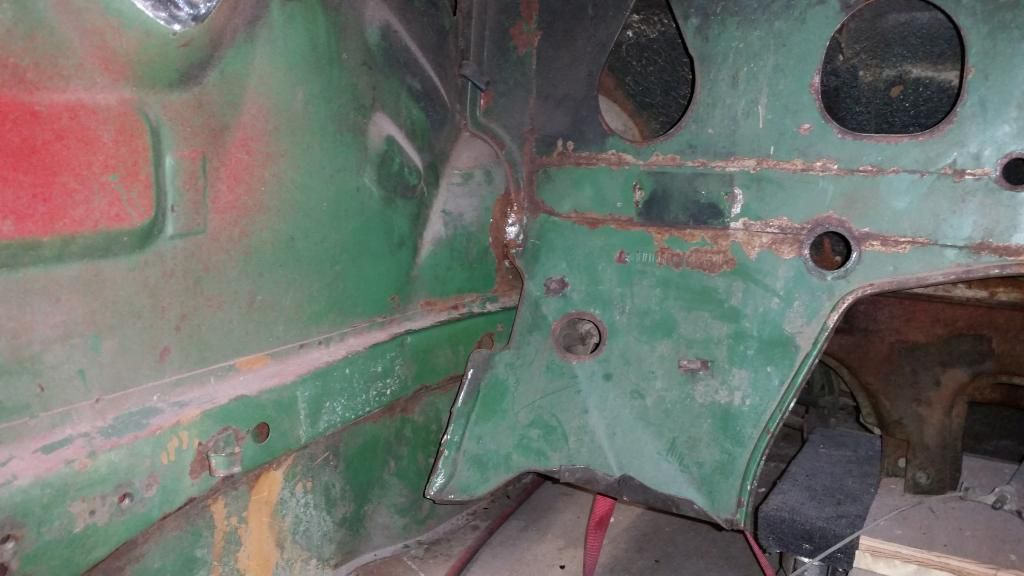
This week I've been focusing on the engine bay and transmission tunnel. I've managed to get the false firewall removed and have started cleaning up the now much larger bay.

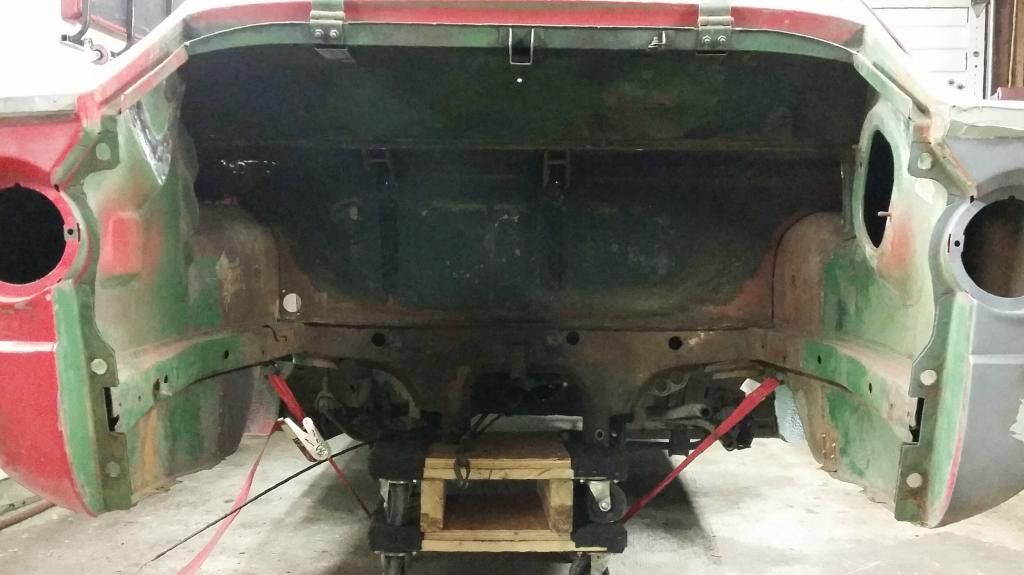
Lots of undercoat and surface rust to be dealt with.

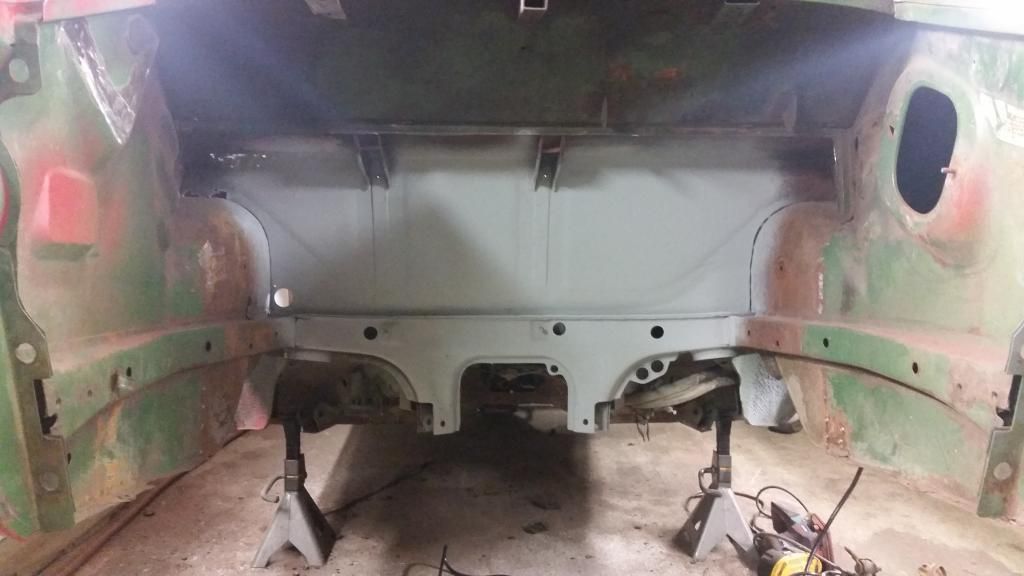
Everything in primer here has been taken back to bare metal.

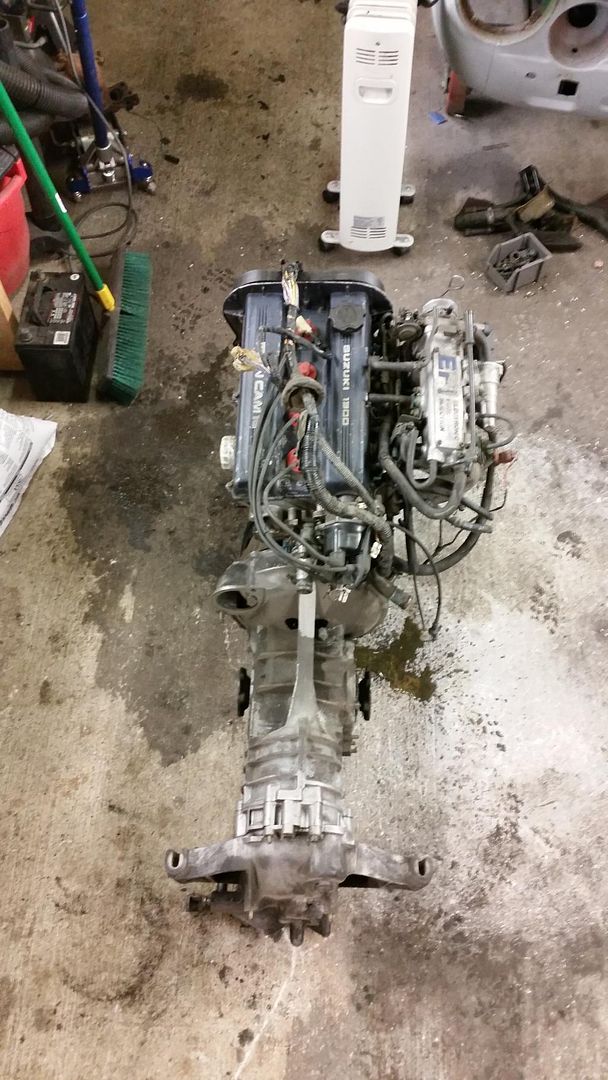
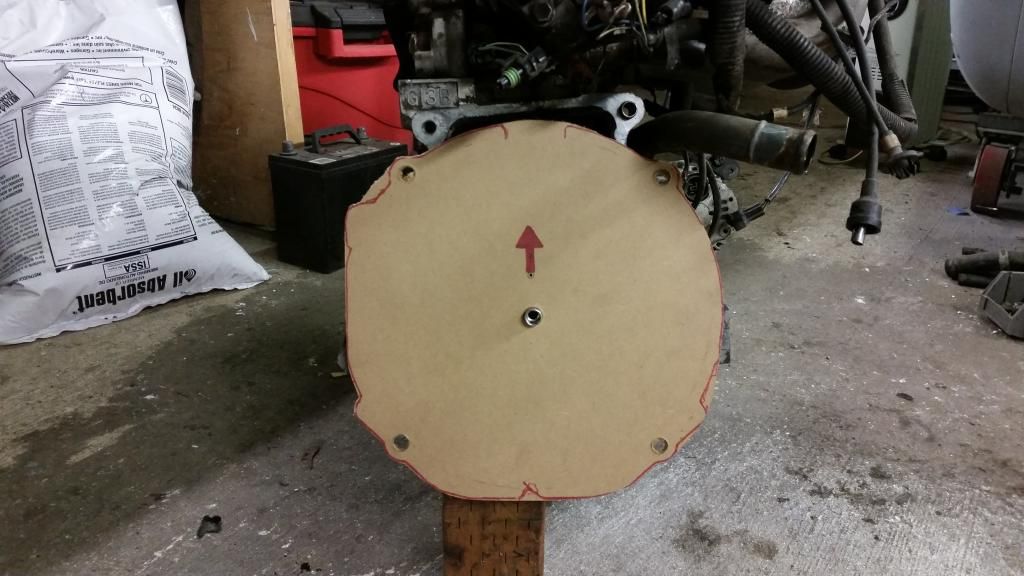
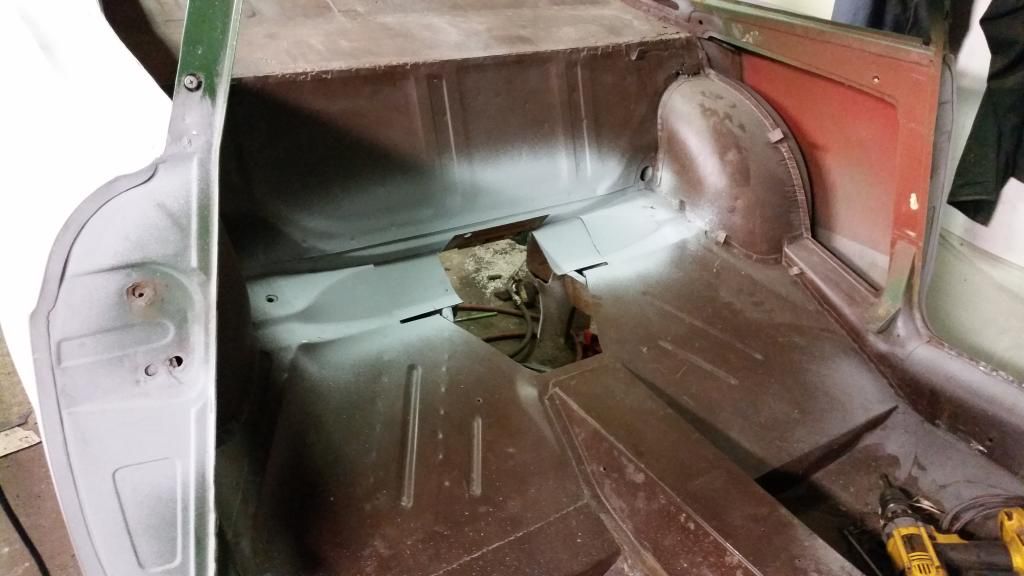
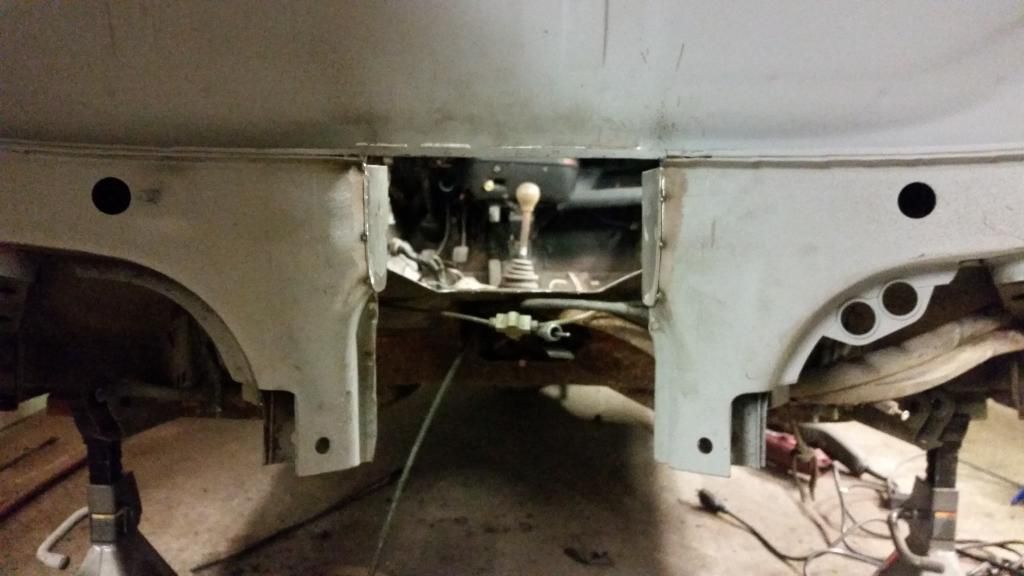
At some point during the week I leveled the car out and offered up the transmission for the first time. The results weren't fantastic.

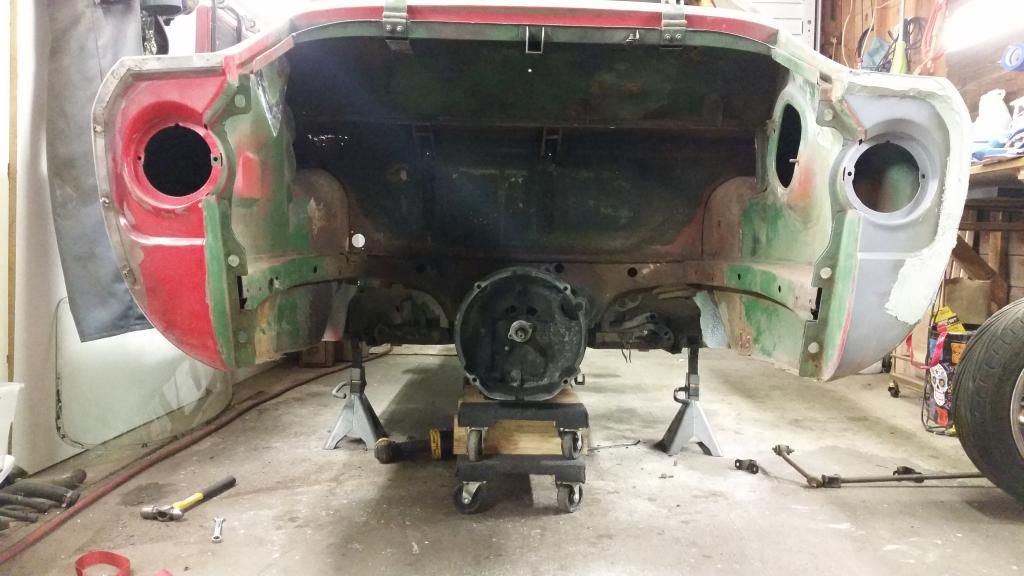
That's as high as it goes. That's with both the body and the transmission level. At this point the oilpan would be about an inch above the ground at my preferred ride height. I would really like to have 5 or so inches of air separating the two from any sort of intimate contact.

So, that means I need to buy myself a good 4 inches of vertical space for the transaxle to dwell in. There's no good way that I can see to do this, and I have been drinking beer and staring at the problem for 2 afternoons now.

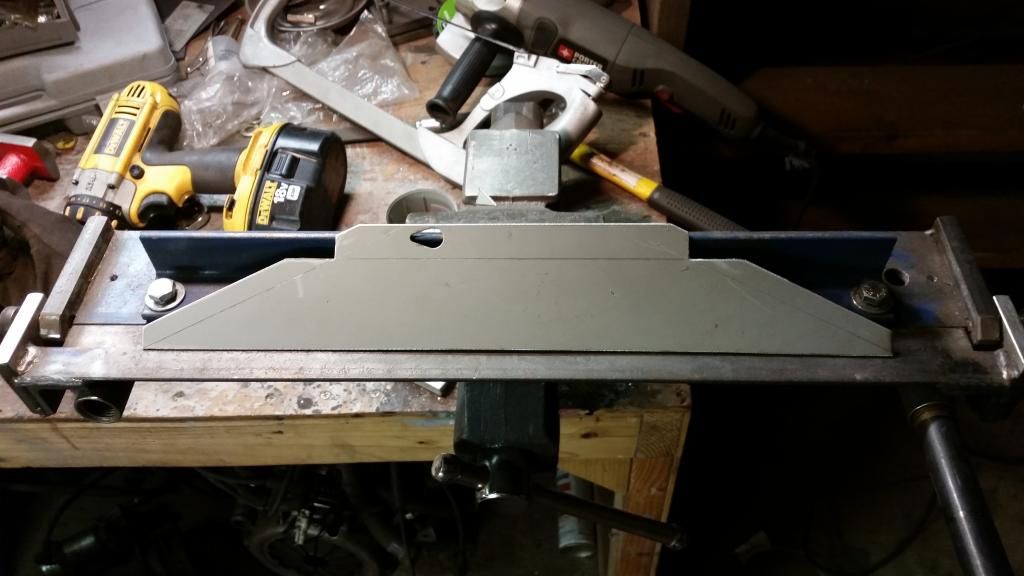
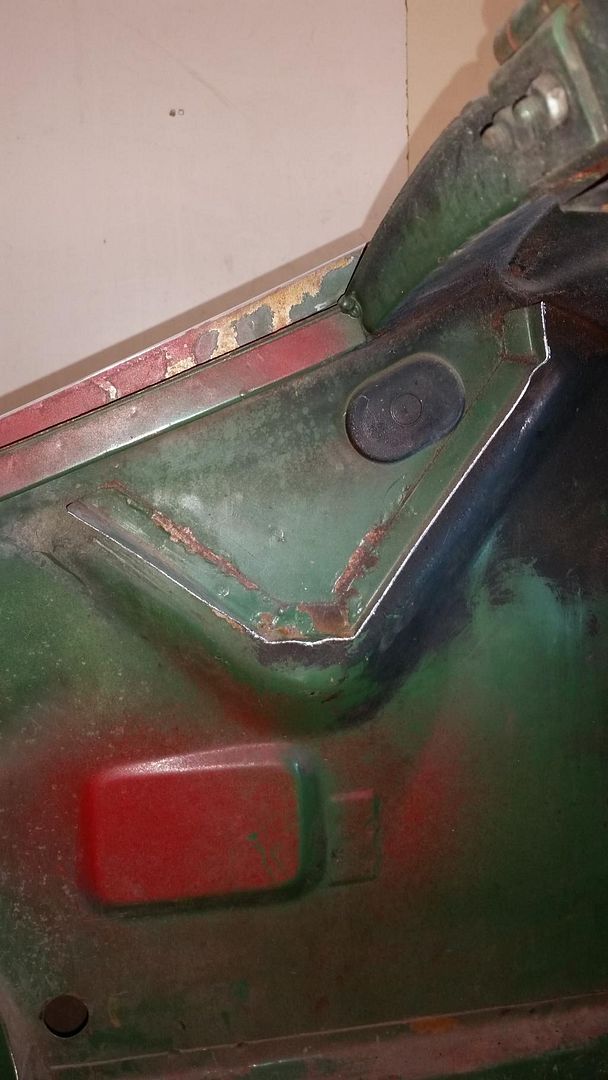
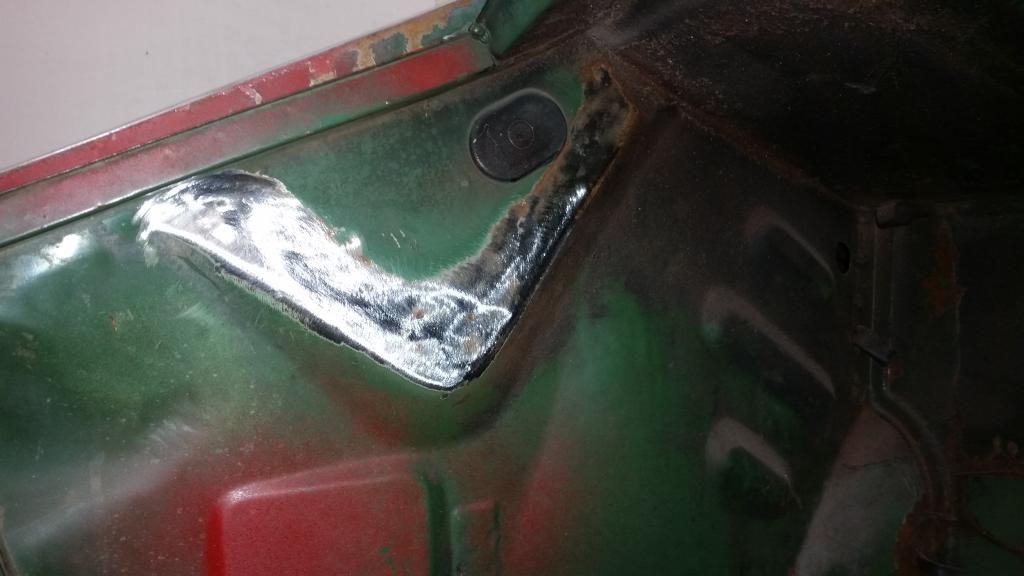
I can cut the pinch weld off of the trans pocket here and weld the seam up flush:

That would buy me .5".

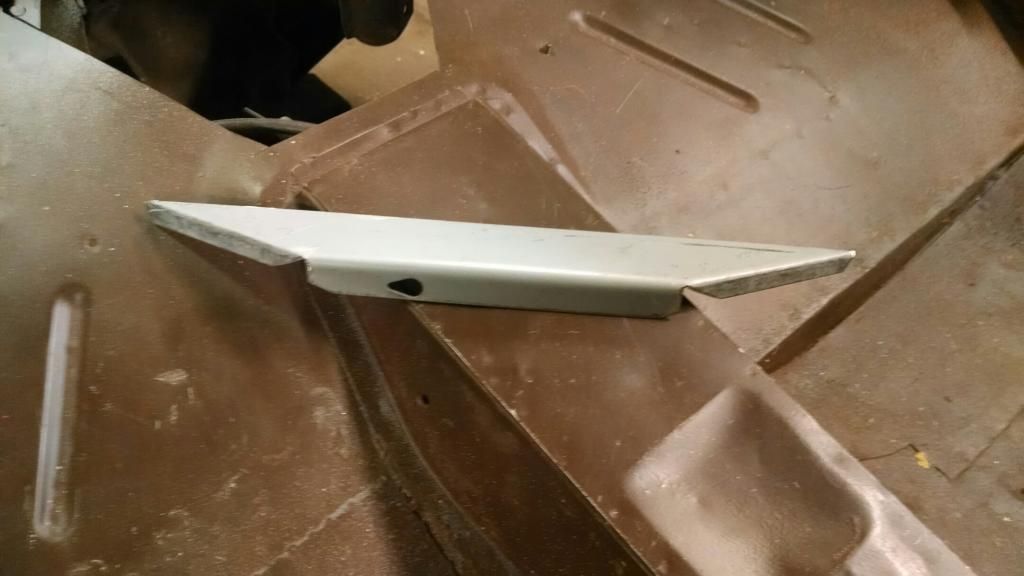
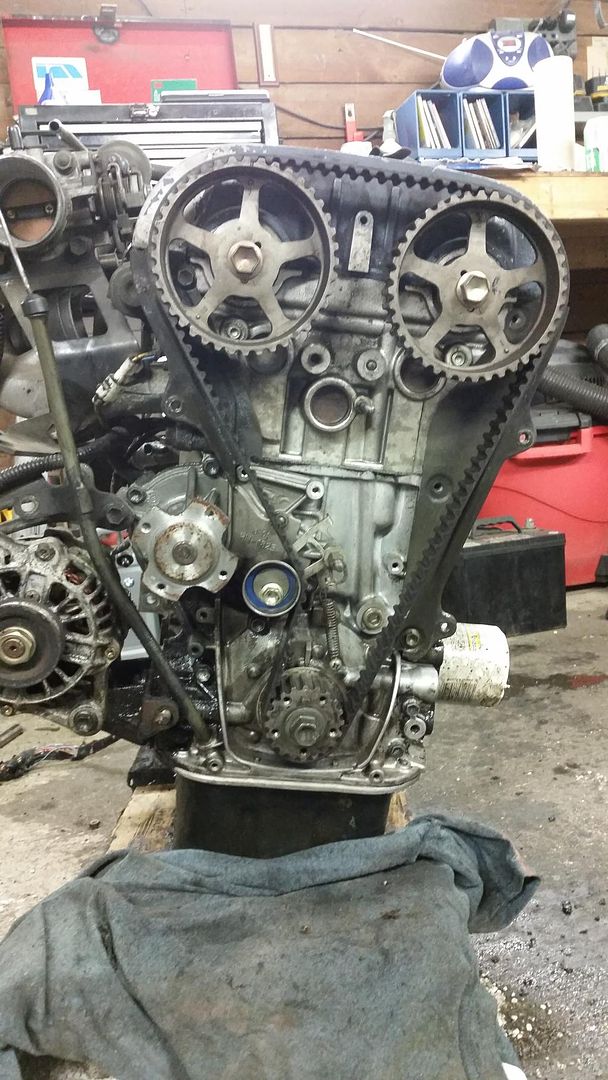
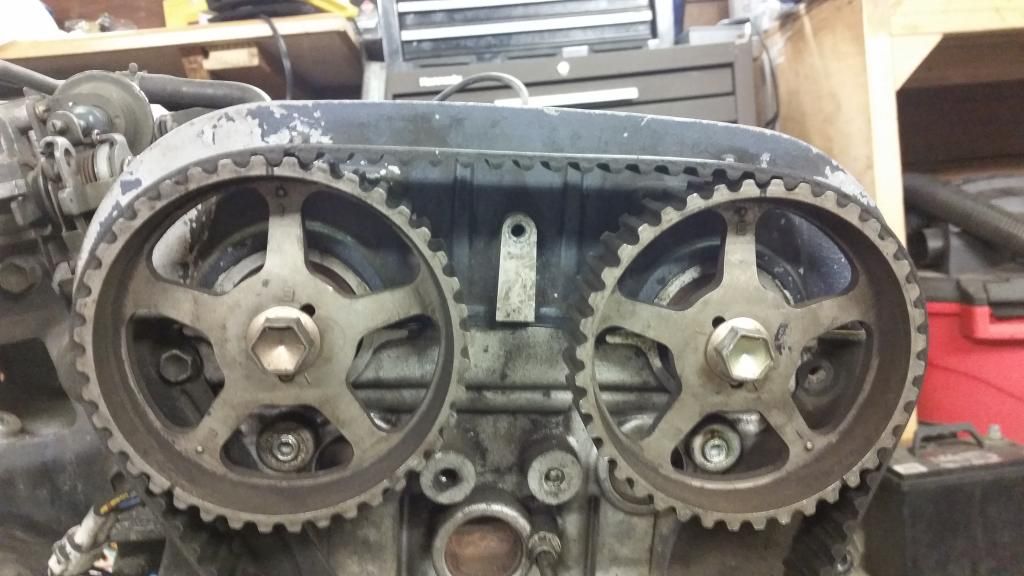
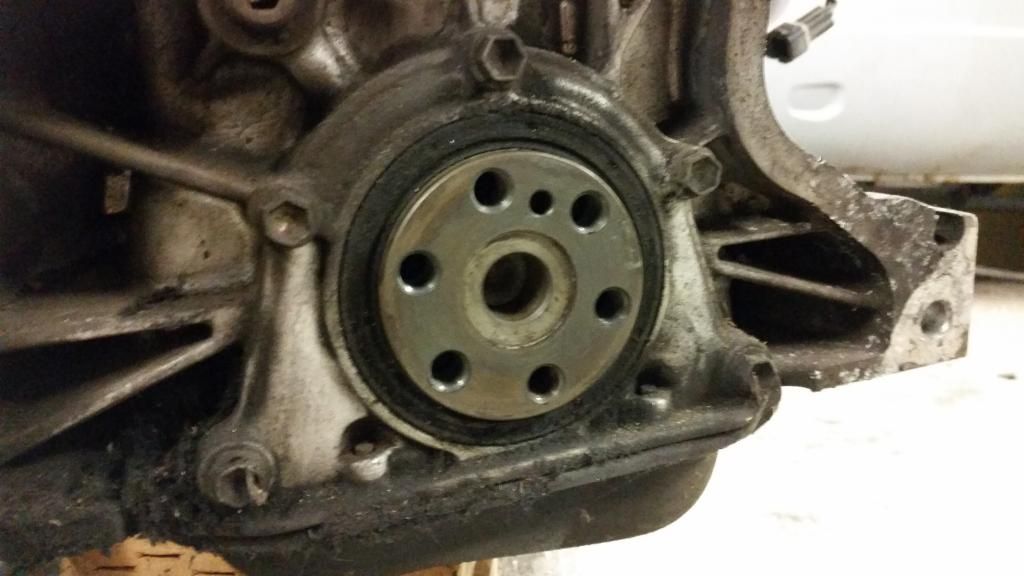
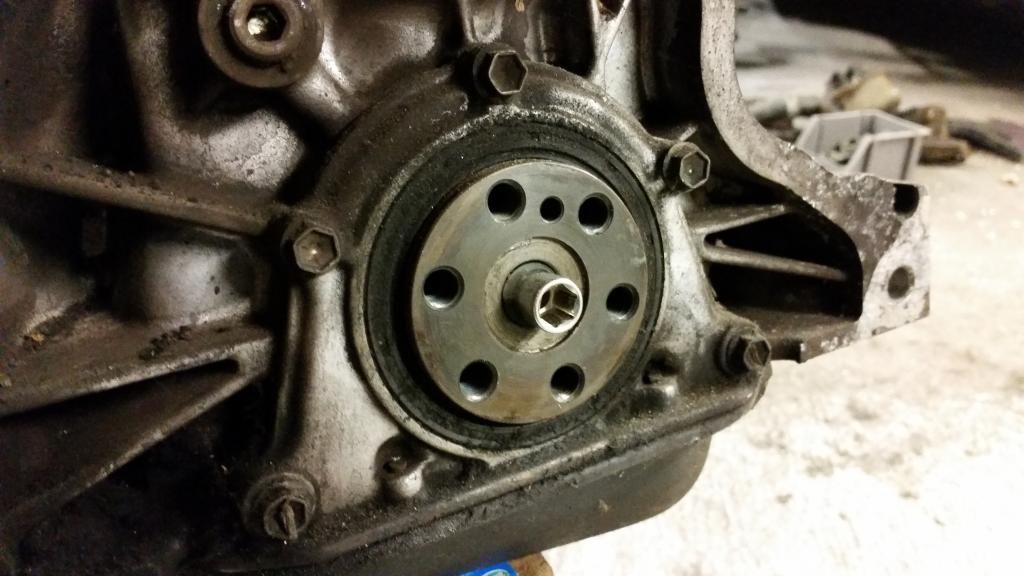
I can cut over 1.5" of webbing off of the top of the transaxle before running into the internals, but I really don't want to do this. This could work in conjunction with the previous idea, buying me 2".

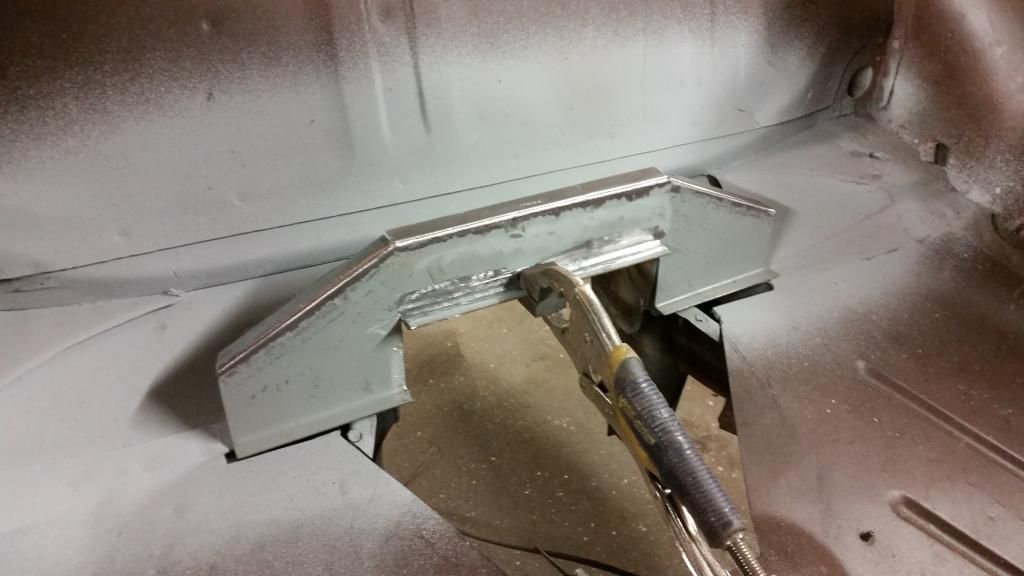
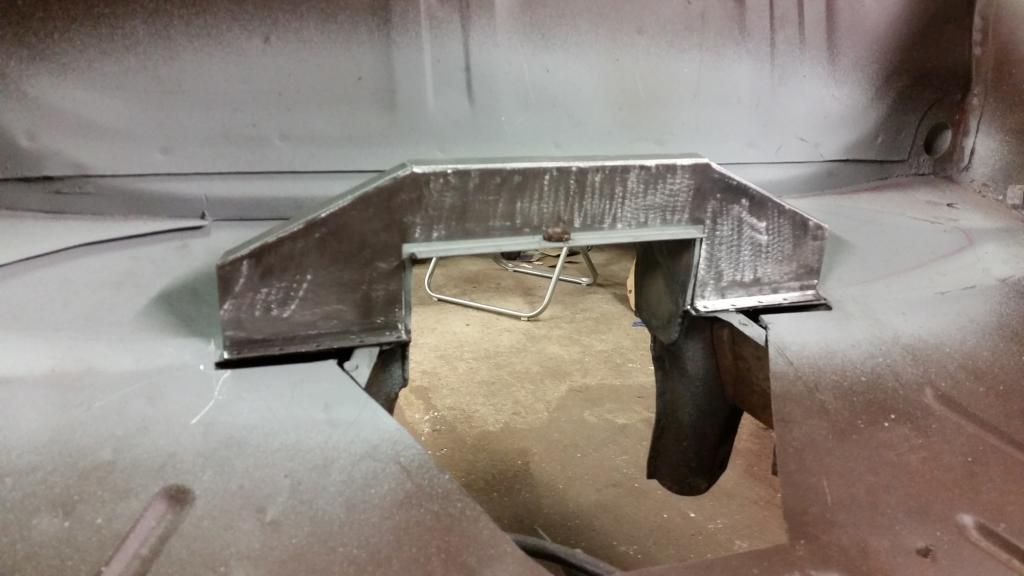
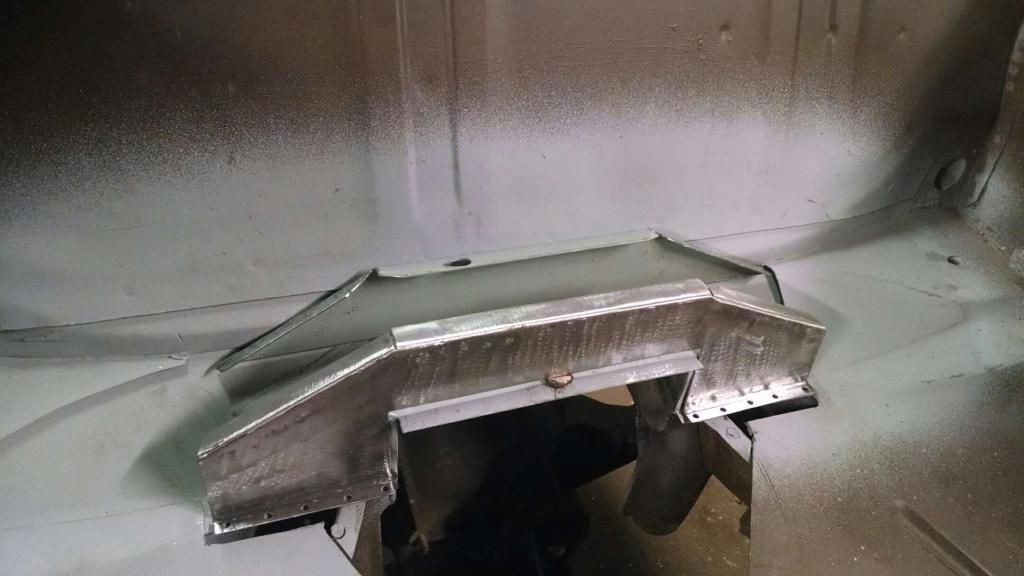
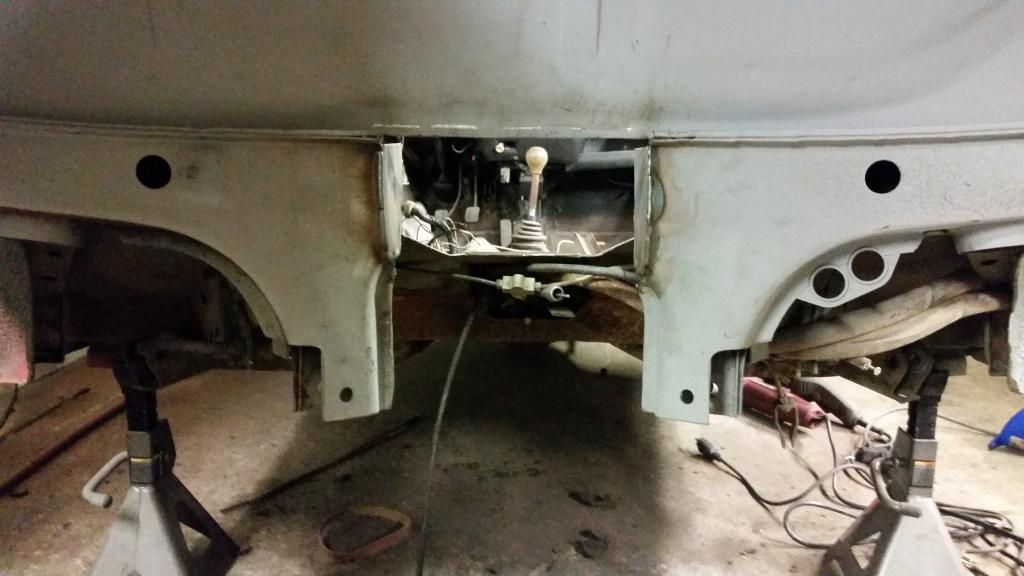
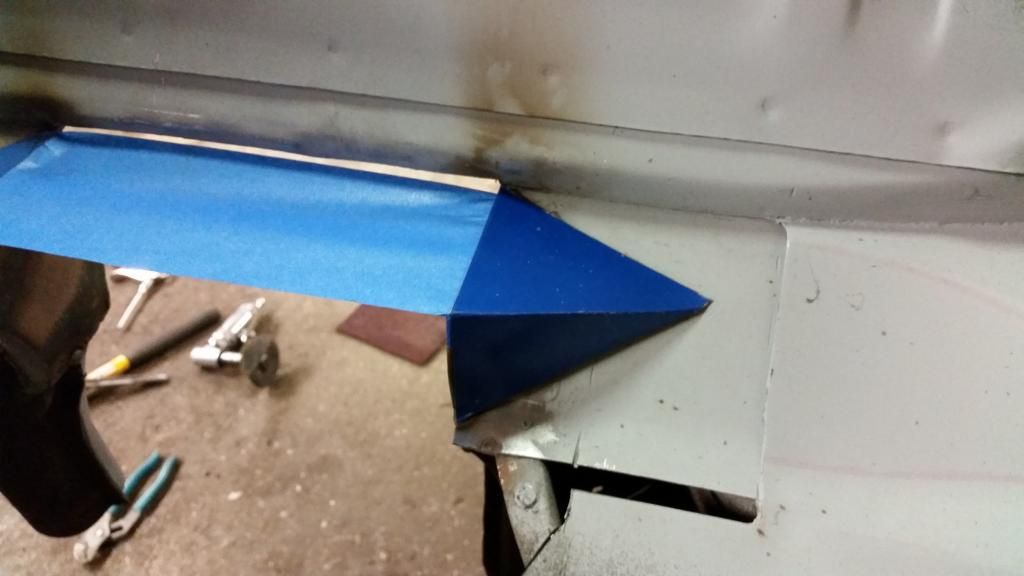
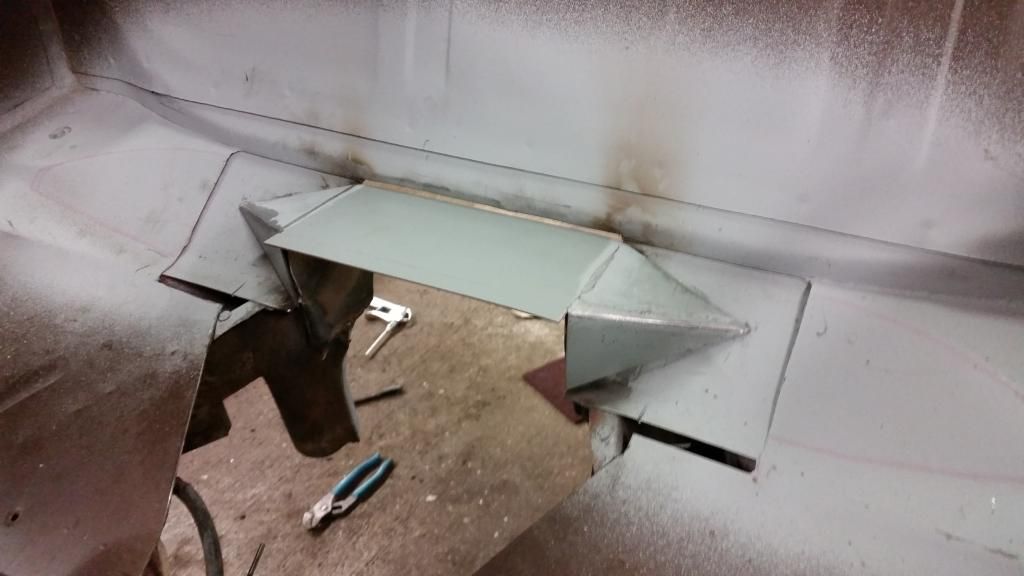
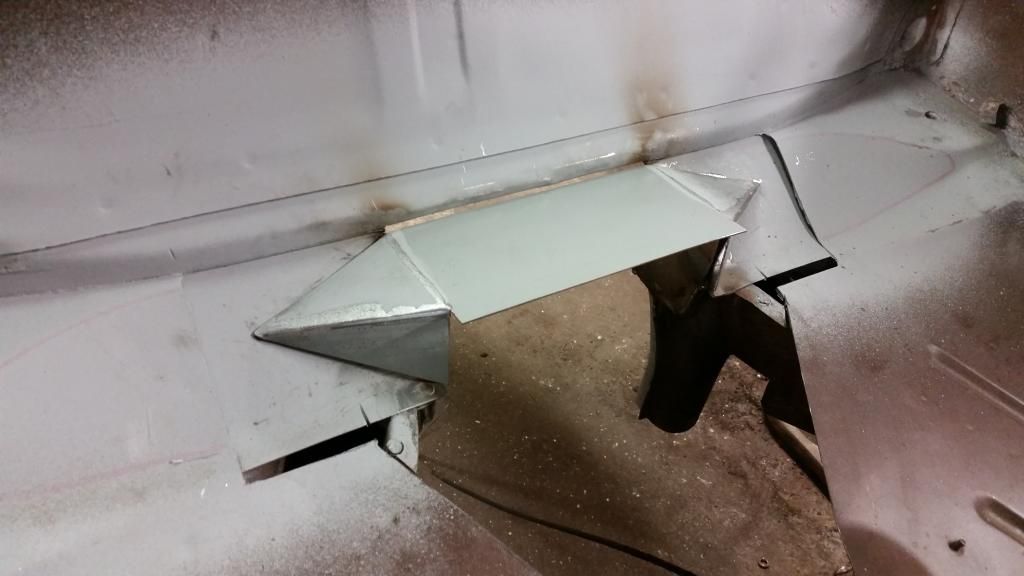
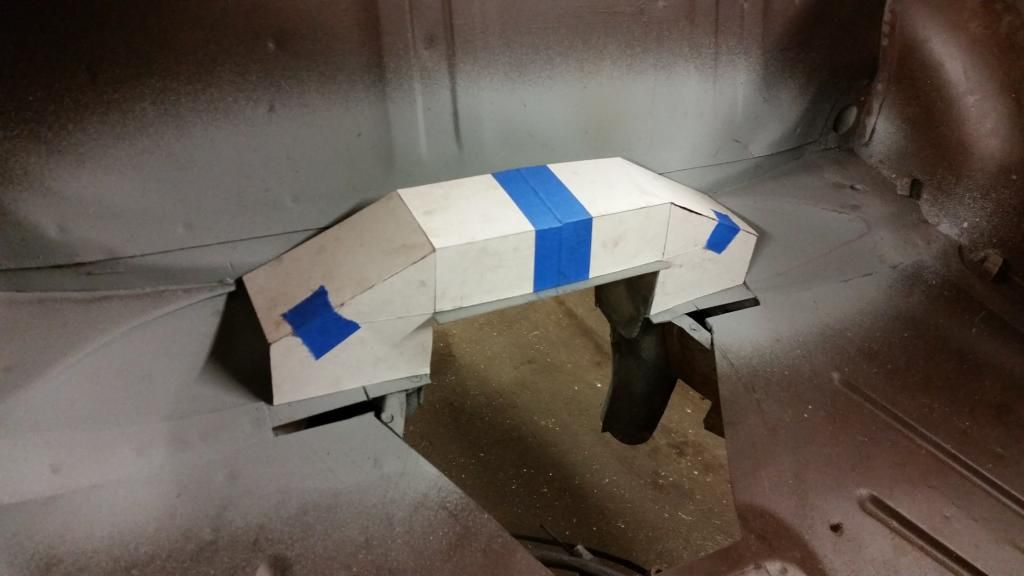
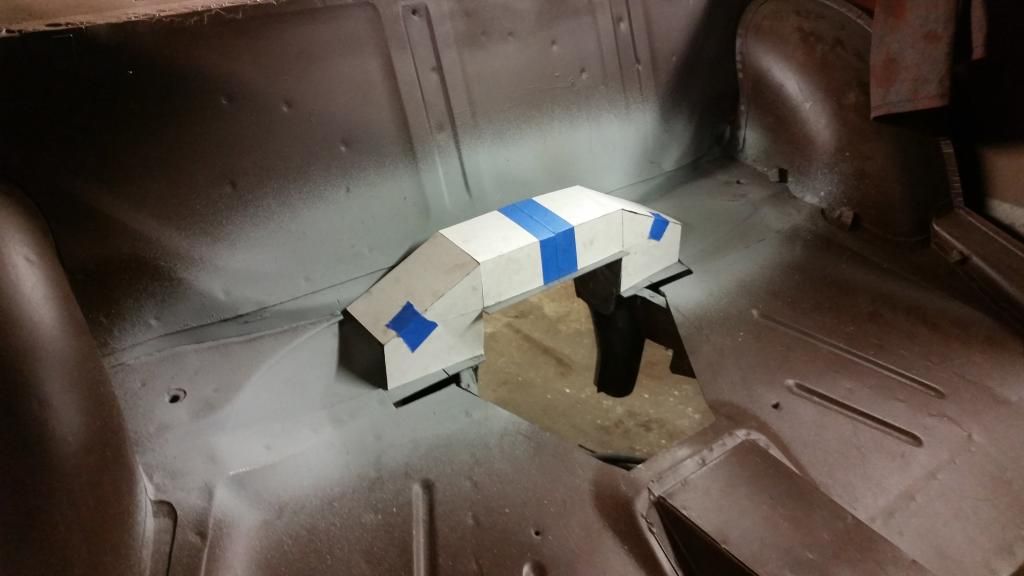
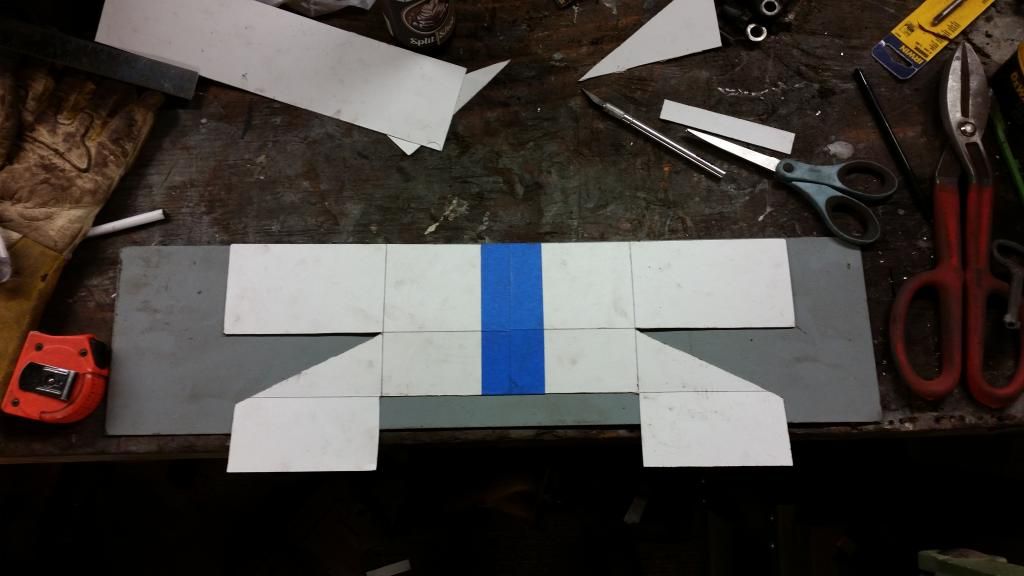
I can cut the center of the transaxle pocket out, move it up 4 inches, fabricate a new section of "frame" to mount above what I cut out (this will be in the cabin), and a fabricate a stress bar to pass between the two suspension mounting points (this will go under the trans). This is what I'm planning on doing, because I am both an idiot and a man who doesn't value his free time or understand arbitrarily set deadlines.

If this still isn't enough, I will say berkeley it and run the engine and transmission at an angle.

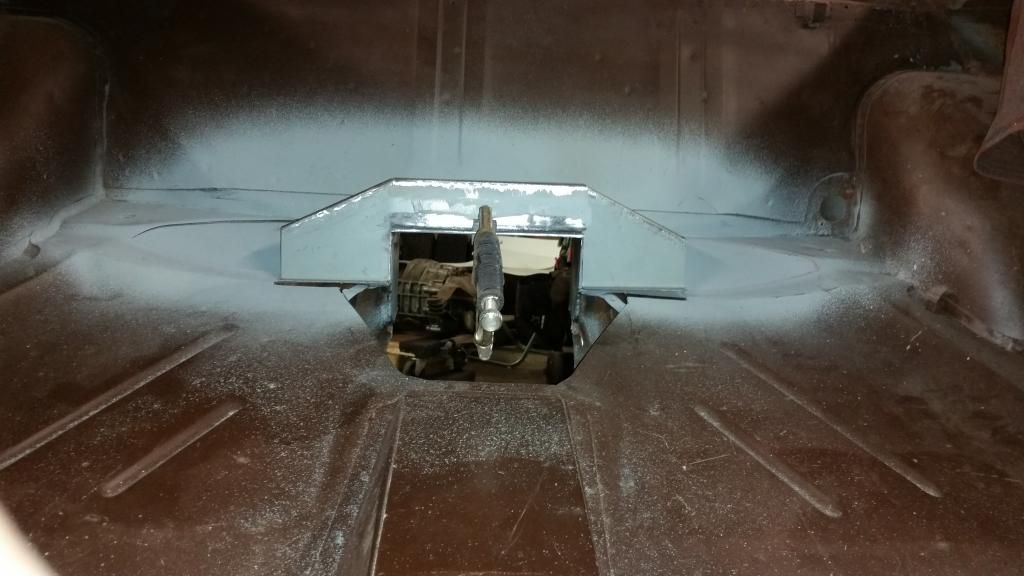
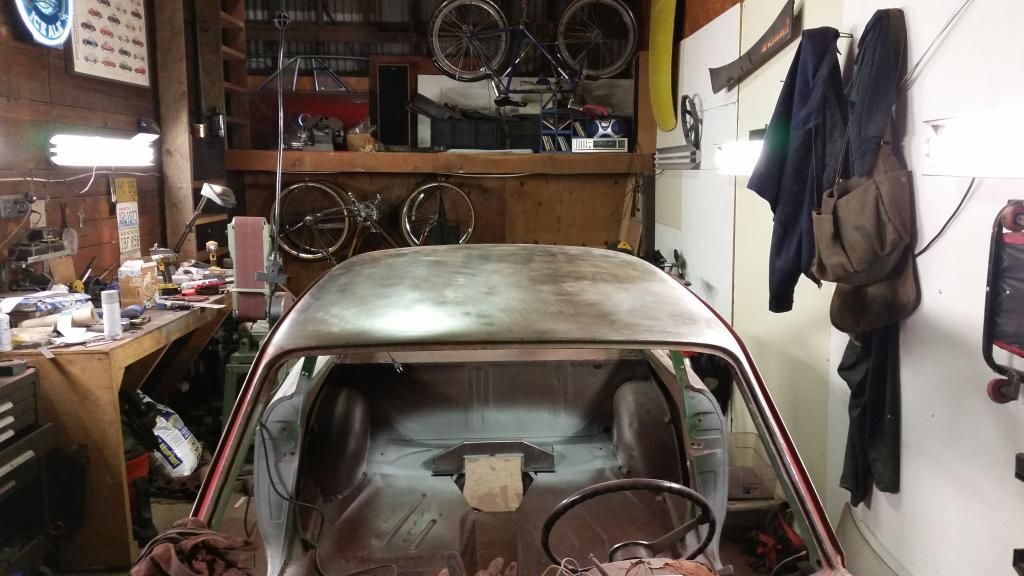
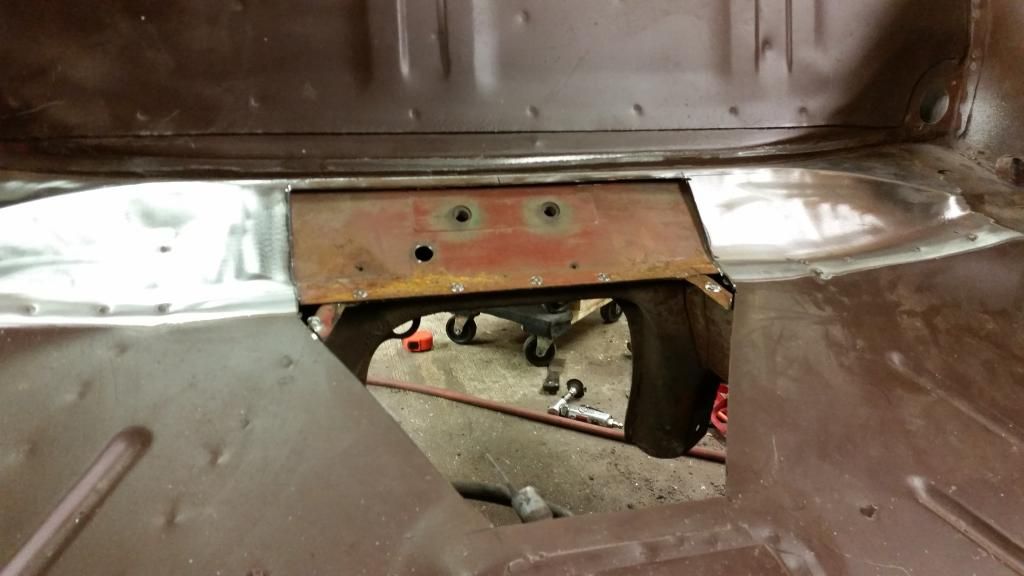
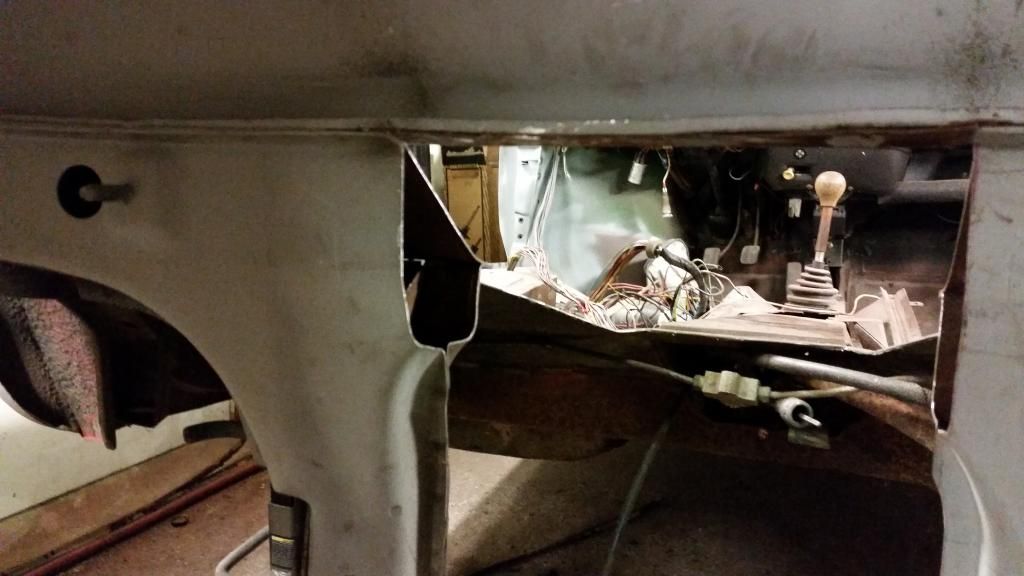
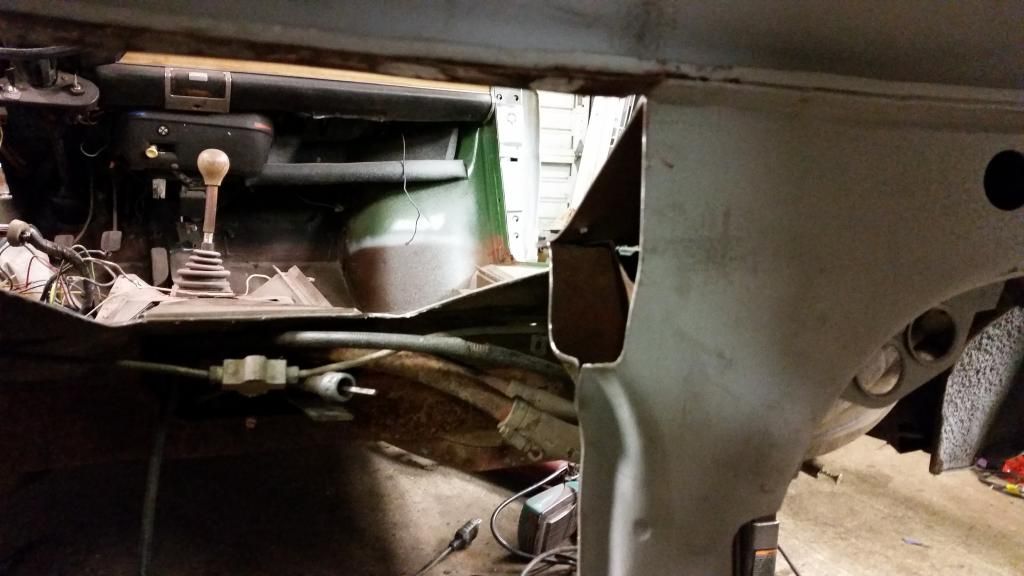
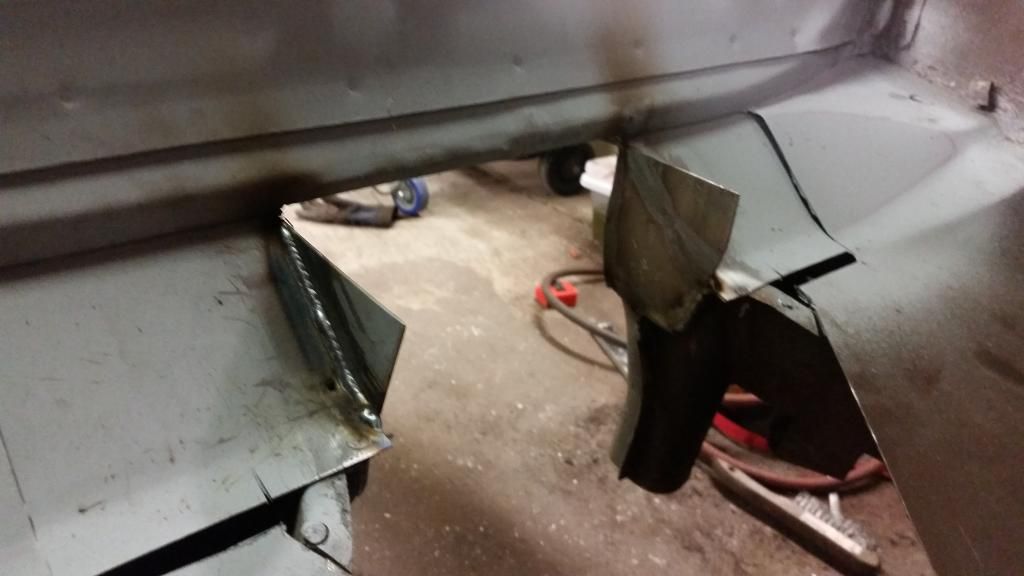
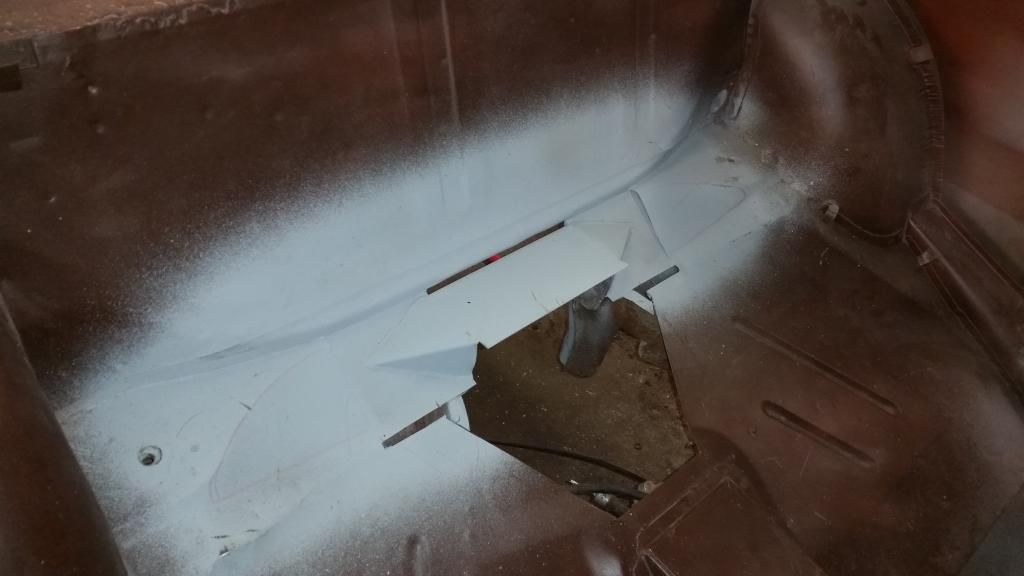
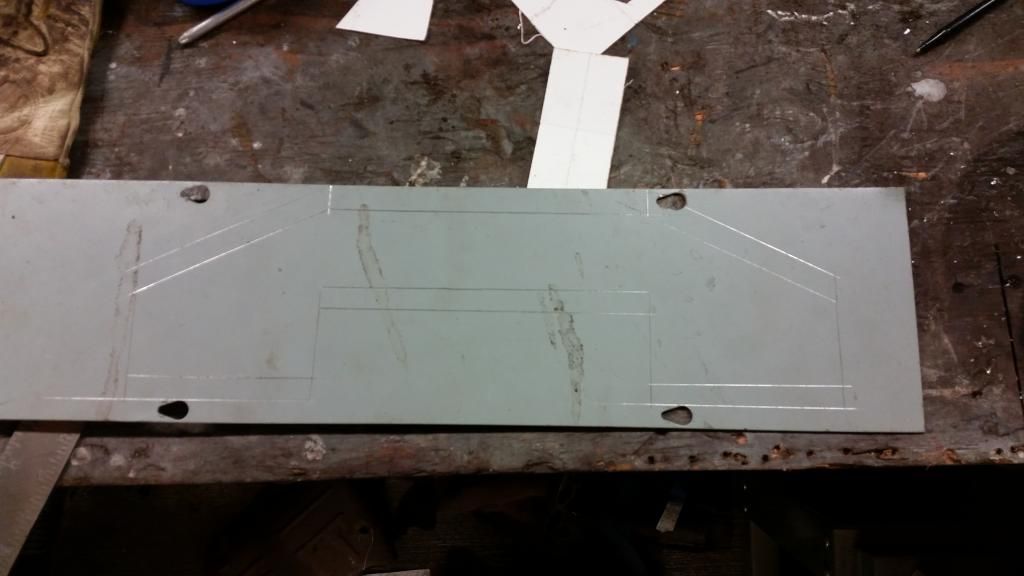
I was having trouble telling where and how the rear frame section met up with the floor, so I cut a big porthole today...

I will see about drawing up some quick diagrams to better convey my thoughts.

Thoughts, concerns, criticisms?

NOHOME
NOHOME UltraDork
1/30/15 5:28 a.m.

Gut-check time. Where you either took the first step down the path of genius, or you just destroyed a classic! And there is no going back.

Boy do I know that feeling.

RossD
RossD PowerDork
1/30/15 7:25 a.m.

Keep up the good work! I love it!

Ethnic Food-Wrap Aficionado
Ethnic Food-Wrap Aficionado HalfDork
1/30/15 10:02 p.m.

Made the hole bigger tonight.

next step is making sure the trans fits and is high enough, then building a new structure. Those suspension pickup points are still very sturdy, but I will be tying the two sides back together and building a lower stress bar.

ssswitch
ssswitch Reader
1/30/15 11:30 p.m.

This thing is coming along great. I can't stop going back and looking at the before and after shots of the lock plate.

Sweet hole.

Ethnic Food-Wrap Aficionado
Ethnic Food-Wrap Aficionado HalfDork
1/31/15 2:36 p.m.

In reply to ssswitch:

That hinge plate is the nicest thing I have ever beaten out of a sheet of metal. That repair, Project Binky on repeat, and beer are my guiding light for this stage of the build.

ssswitch
ssswitch Reader
1/31/15 2:52 p.m.

Honestly, you should get a professional photographer to take a picture of that latch plate and hang it over your marital bed.

Ethnic Food-Wrap Aficionado
Ethnic Food-Wrap Aficionado HalfDork
1/31/15 9:15 p.m.

Got a few hours in on the car this afternoon.

I got the two cuts I made yesterday all cleaned off, squared up, and prepped for welding.

Then knocked out a quick template for some end caps. The two sides were quite different from each other. Here's one of those.

Then hacked some 16ga plate into the appropriate shape. There's no way I could cut this stuff with my tin snips, so it was all hack saw and belt sander for these two.

I got those tacked in place after a coat of zinc and checked some measurements.

And blasted them in. I started the passenger side one first, and decided after about an inch that the welds were a hair cold. The left side came out much nicer.

In case anyone is wondering, welding upside down still berkeleying Sucks!

I have moved past the "OMG what the hell have I just done?!" portion of this task and have entered the "This isn't nearly as frightening as it was yesterday" portion. I think I might be able to steal a hour or two tomorrow to start patching things back together.

Layer one should look something like this.

Ethnic Food-Wrap Aficionado
Ethnic Food-Wrap Aficionado HalfDork
2/1/15 5:52 p.m.

Started making the first of the new panels today. I'll be making these out of 18ga, because that's what I have, and it was free.

Here's the general idea of what I am making, but out of steel instead of paper and masking tape...

Which looks like this.

After some tweaking in the vise, it fits pretty well.

Hopefully tomorrow I can get this finished, zinc'd, and welded in.

Ethnic Food-Wrap Aficionado
Ethnic Food-Wrap Aficionado HalfDork
2/9/15 11:19 p.m.

Last week was not a good one for progress. Fought a cold the first half of the week, then took care of SWMBO after she caught my cold.

On Wednesday I got the panel from last week all burned in. I can't say it went well, but it is on their now.

Tonight I started making the next layer with some CADboard.

The bad part is my free metal is too small, so I'll be making this in 3 pieces.

Here's the "front" piece all layed out. This piece is the most complicated of the 3, so I did it first in case I needed more than one try at it. 
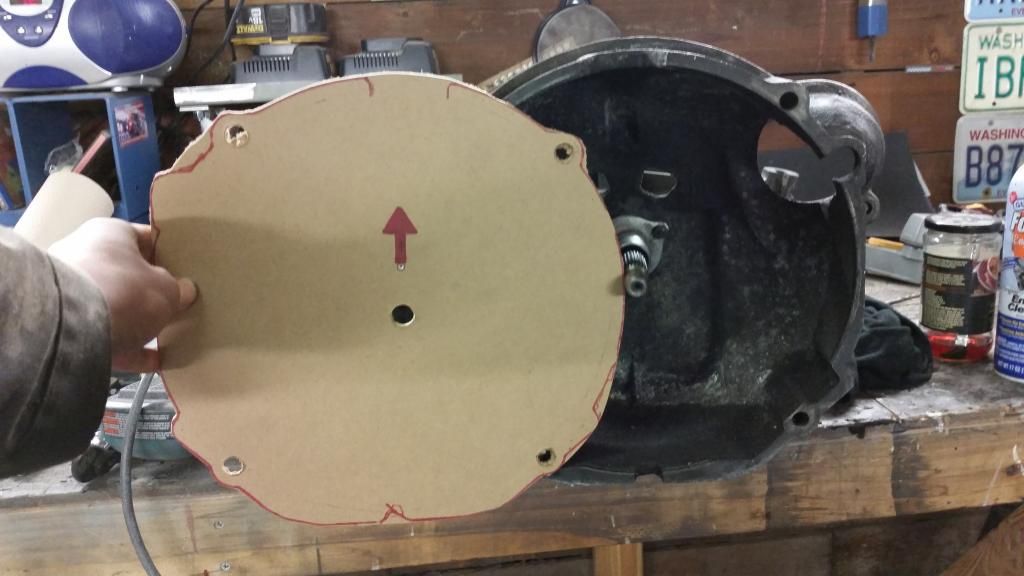
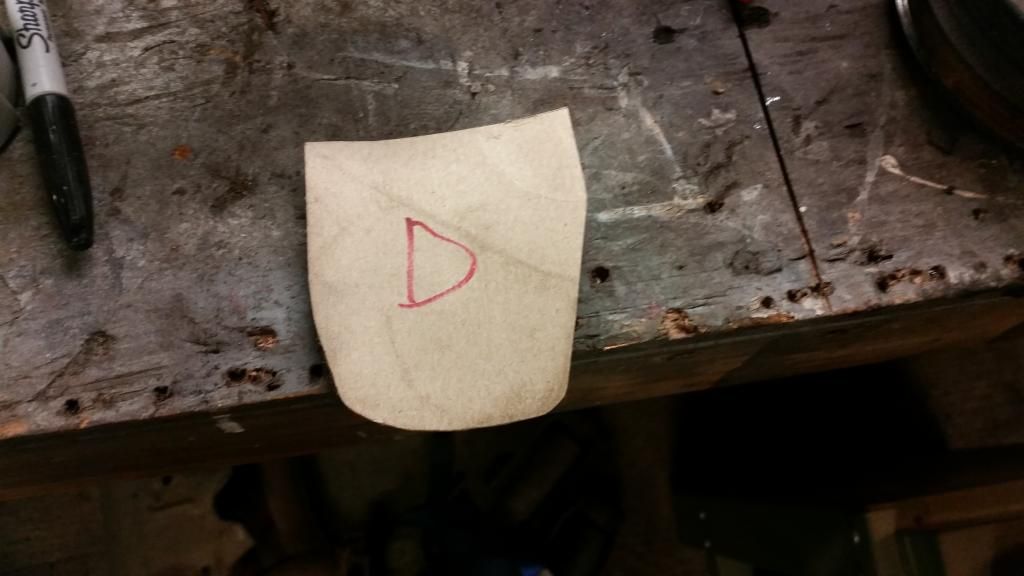
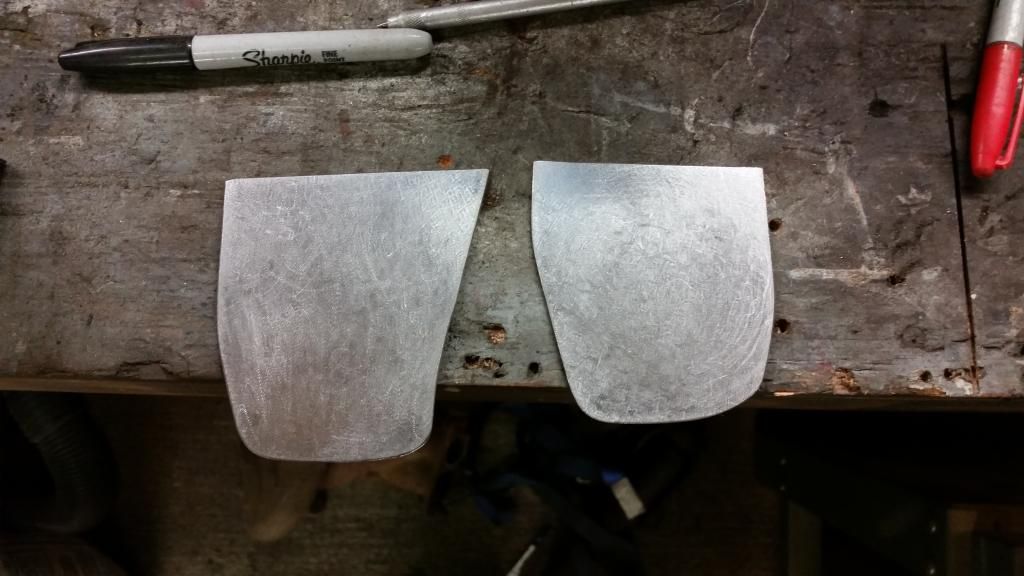
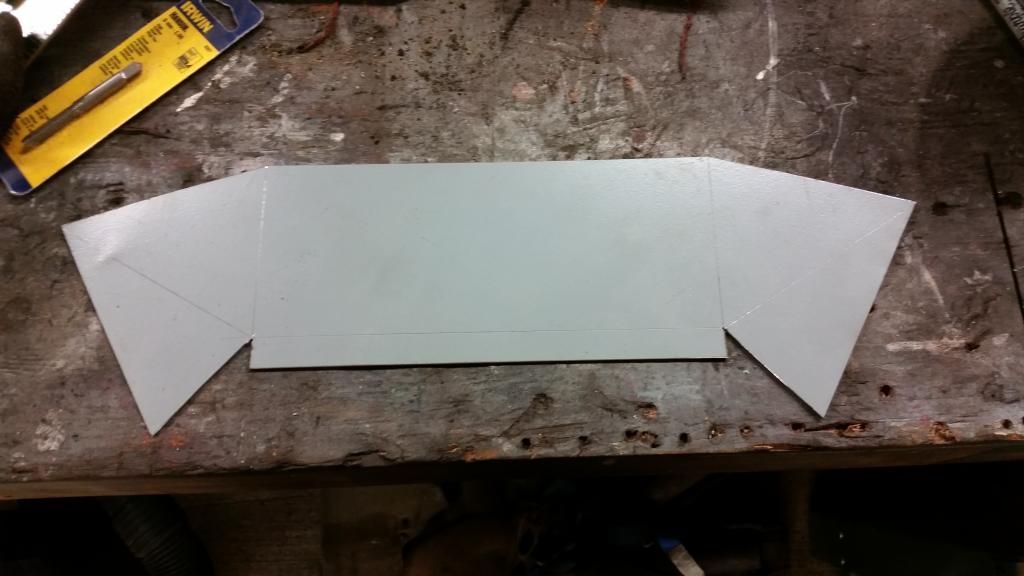
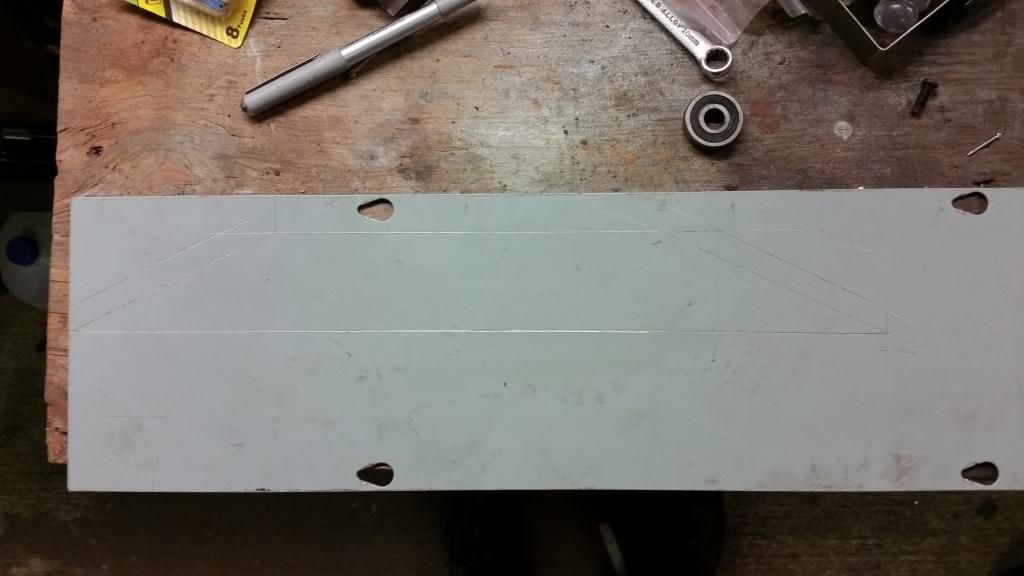
Yes the steel is from an electrical gutter cover.

After a bit of folding in the old vise we have our almost finished panel.

I need to redo the bend on the lower right, it ended up a fair bit crooked. It's likely I will have to trim off the lower center bend to get this part to fit perfectly.

Ransom
Ransom GRM+ Memberand PowerDork
2/9/15 11:46 p.m.

To once again quote Gir; I love this show... Excellent work, sir!

Ethnic Food-Wrap Aficionado
Ethnic Food-Wrap Aficionado HalfDork
2/12/15 1:08 a.m.

We had a fairly productive night at the shop. I got most of the fitment issues taken care of on the piece I made earlier this week. I also stripped it and poked some holes for plug welding.

Then I started laying out the next piece of the puzzle from the same 18ga gutter steel.

Which I cut out with a variety of primative tools.

After a quick trip through the brake for the longer bend and the vise and hammer for the two shorter ones we have a decent looking part.

These will go on something like this with a plate spanning the distance between the two flanges.

The last two pieces will be the end caps. I kinda need to get everything mocked up before I know what these are going to look like.

And a rather large milestone for David was reached tonight.

No more paint left on the roof! I owe that guy a quality pint, for sure!

1 ... 6 7 8 9 10 ... 13

You'll need to log in to post.

Our Preferred Partners
zp5TcpXlq0AS2FdBxgUJp6HqMOZealYwMubQyi0sjwB5vM348GU1b6XbmwmBUNgZ