1 ... 7 8 9 10 11 ... 13
Ethnic Food-Wrap Aficionado
Ethnic Food-Wrap Aficionado HalfDork
2/12/15 10:29 p.m.

Another productive night at the shop. It seemed like I got a lot done for the 2 hours I was down there.

I got things squared up and took some measurements.

Then made up some quick angles to plug weld through along the flat center section.

The first one was located simply enough.

The second angle was located off of the first.

Everything is looking pretty great here.

Did the final welding on the back piece before I lost access to it.

Then got to plug welding on the forward piece.

I'm really pretty well pleased with this. It's nice to have the two sides connected again, even if there's still some work to do.

The lid is going to be a simple affair.

Just needs some holes for plug weldin'. Gotta do the end caps first, though.

Looks good from where I'm sitting!

See you folks next week!

Ethnic Food-Wrap Aficionado
Ethnic Food-Wrap Aficionado HalfDork
3/3/15 12:11 a.m.

Been staying busy despite the lack of recent updates.

The reinforcements to the rear suspension points are as good as done. Well, apart from a lower stress bar.

I've also been pluggin away on the adapter plate. DaveBob and I made a nice template of both the Swift and Porsche mounting faces, then combined the two.

Paying extra attention to hole location, I cut a loose copy of the template out of some scrap bin 1/4 plate. There's still a lot of finish work to be done on it, but I'm holding off until I know that everything is copasetic before pouring hours of my time into making it pretty.

Which, spoiler alert, attaches the engine to the transmission. I guess that's why they call it an adapter plate.

That's a huge milestone in my book. Furthermore, the spline engagement is very good.

Keen observers may also note that the transmission has changed. I picked up a 912 trans off fellow GRMer, Nashco last weekend. Since its from a rear engined car, the rotation is correct for my application. Also, since it doesn't have a pair of big mounting horns hanging off the nose, it fits in the hole I cut in the car much better.

Hosanna.

The trans needs to move up about 3/4" from where it's at in these pictures. There's about an inch available, so it's no big deal. Hopefully I can move it up enough to get the shift rod to fire squarely into the trans tunnel.

Right now there's something of a cospatial event...

It even looks as though the Fiat shift linkage will play nice with the new transmission. Obviously there's some modifications to be made, but I think it should be a fairly straightforward mini-project.

This week's project is going to be making a jig to hold the engine and trans level and square so I can start fabricating the engine and transmission mounts.

bgkast
bgkast GRM+ Memberand UltraDork
3/3/15 11:10 a.m.

Nice!! How did you match the centers of the transmission and engine "patterns" when combining the two into the adapter plate?

Ethnic Food-Wrap Aficionado
Ethnic Food-Wrap Aficionado HalfDork
3/3/15 12:54 p.m.

The Porsche pattern was pretty simple to make, as the input shaft is proud of the bellhousing by a few mm. So we just started with a 15 mm hole in the CADboard to slip over the input shaft before moving to the perimeter.

The Swift one was a little more difficult and required a two piece template, multiple straightedges, some beer, and a few sockets, all leading up to some shrugs and a "good enough".

As far as combining the two, I marked them both with what I perceived as level and plumb, then just taped the two together and traced around them. Very arts and crafts, not machine shop fab work.

I think I might have to move the Porsche pattern down 1mm on the plate. I won't know until I get the pilot bearing all squared away and have a positive way to locate the true center. I'm working on a .dxf of the adapter, so the next one will be cut with a CNC plas. Still working on the starter placement, too.

ssswitch
ssswitch Reader
3/3/15 7:36 p.m.

Looking cool! The 912 transmission sure seems to fit a lot better. How far back does the bellhousing go into the engine bay? Is there enough room for the starter?

Ethnic Food-Wrap Aficionado
Ethnic Food-Wrap Aficionado HalfDork
3/3/15 8:12 p.m.

I'll be using the Swift starter since it's gear is a match for the ring gear and is a known worker. As an added bonus, it installs from the engine side of the plate so there should be no issues on space. I want to say it goes on the intake side of the engine, so I won't even have a problem roasting it with a hot turbo. And, should it fail, the Swift starter is a good $125 cheaper than a Porsche unit.

It should go in this area here:

And here's a (hotlinked) shot of the stock Swift trans to give you an idea of the geometry:

At this point I'm really kickin' myself for not making a template of the swift transmission before selling it. If somebody has a transmission laying around and wants to make and scan a rubbing of the transmission, it would be a massive help.

RossD
RossD PowerDork
3/4/15 7:39 a.m.

Get a hold of the guy who bought it.

Ethnic Food-Wrap Aficionado
Ethnic Food-Wrap Aficionado HalfDork
3/5/15 12:54 a.m.

Another big night at the shop. The engine and trans got jigged up, leveled, and stuffed under the car for the first time. Next step is engine and transmission mounts!

I am very happy with how far forward we've managed to push the drivetrain. This should be close to its final resting place, but the mounts will be slotted for some for and aft movement.

Again, very happy with the way this is coming along. Engine and transmission mount parts should be here tomorrow.

wheelsmithy
wheelsmithy GRM+ Memberand HalfDork
3/5/15 5:15 a.m.

You, Sir, are a magnificent bastidge. I, too, got rid of my transaxles for Metros/Swifts, but I do have a Tracker transmission or two that SHOULD work for starter placement. I'd be glad to try a rubbing if you like.

Beagle
Beagle New Reader
3/5/15 5:26 a.m.

"...That's a huge milestone in my book. "

roger that. I missed the detour sign where you decided to put a Japanese engine with a German transmission into an Italian car, but I'm loving it.

Adrian_Thompson
Adrian_Thompson UltimaDork
3/5/15 8:49 a.m.

Outstanding work.

Do you still need more ground clearance under the sump? If so it looks pretty deep, could you section it and remove an inch from its dept. Then if you need more capacity add some wings, or extend it forward a bit?

tuna55
tuna55 UltimaDork
3/5/15 8:54 a.m.

Loving this. Nothing else to report.

Ethnic Food-Wrap Aficionado
Ethnic Food-Wrap Aficionado HalfDork
3/5/15 11:24 a.m.
Adrian_Thompson wrote: Outstanding work. Do you still need more ground clearance under the sump? If so it looks pretty deep, could you section it and remove an inch from its dept. Then if you need more capacity add some wings, or extend it forward a bit?

I think we are going to be pretty good on sump clearance now. I'll be giving it a little love with some .125" plate for some protection, but I'm hoping to not have to shorten it or reduce its capacity in any way. I will be pulling the sump and seeing if we can make some baffling to help keep the oil pump pickup submerged in the dino juice at some point, but that's a ways off.

If I do have to shorten it, I really dig your wings idea.

Ethnic Food-Wrap Aficionado
Ethnic Food-Wrap Aficionado HalfDork
3/30/15 10:41 p.m.

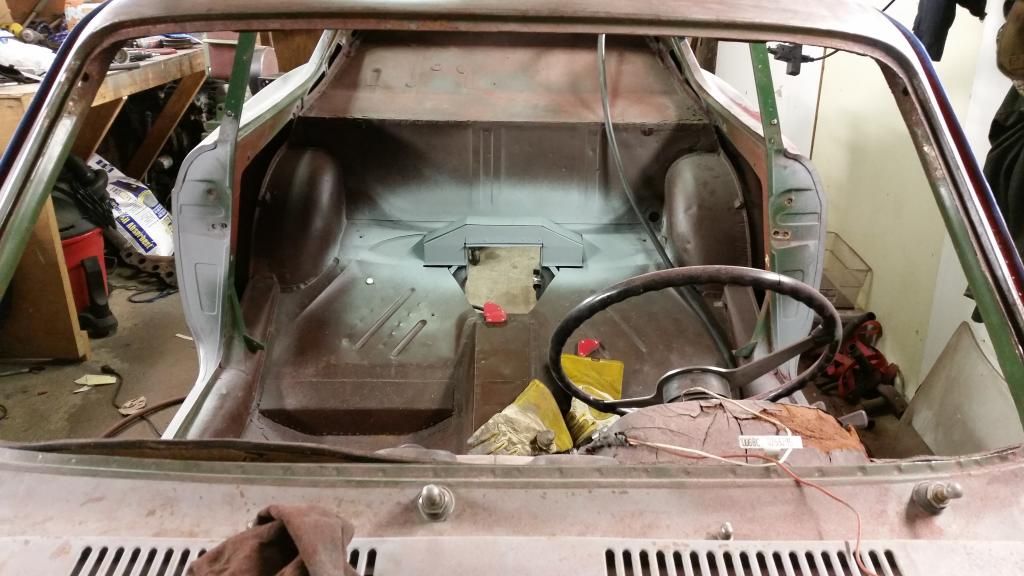
Wow. I can't believe it's been almost a month since I posted an update. I've been setting little arbitrary goals along the way and this month's goal was to have the engine and transmission mounted and leveled and get the car back to being a roller. I've only just made that deadline, too.

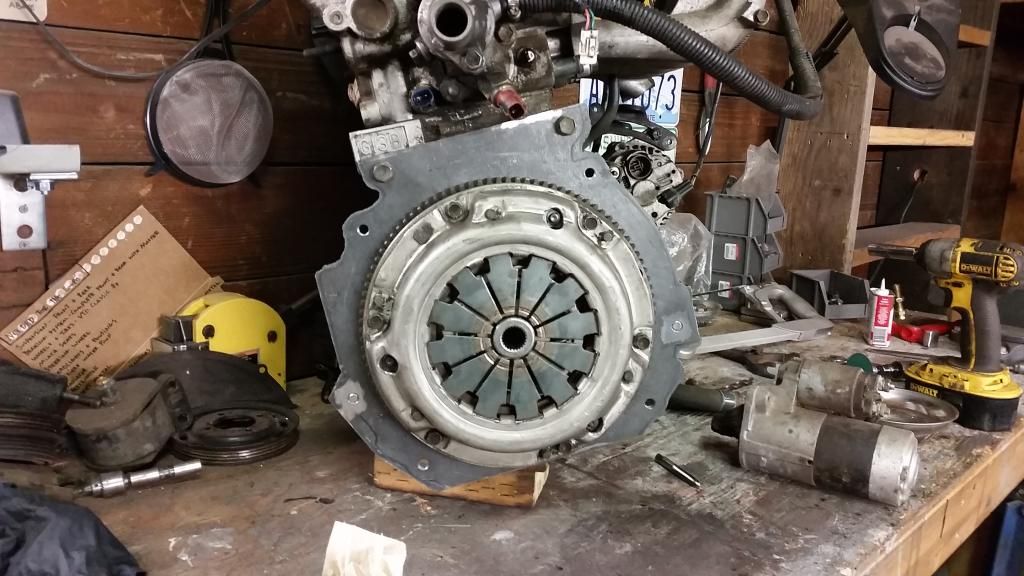
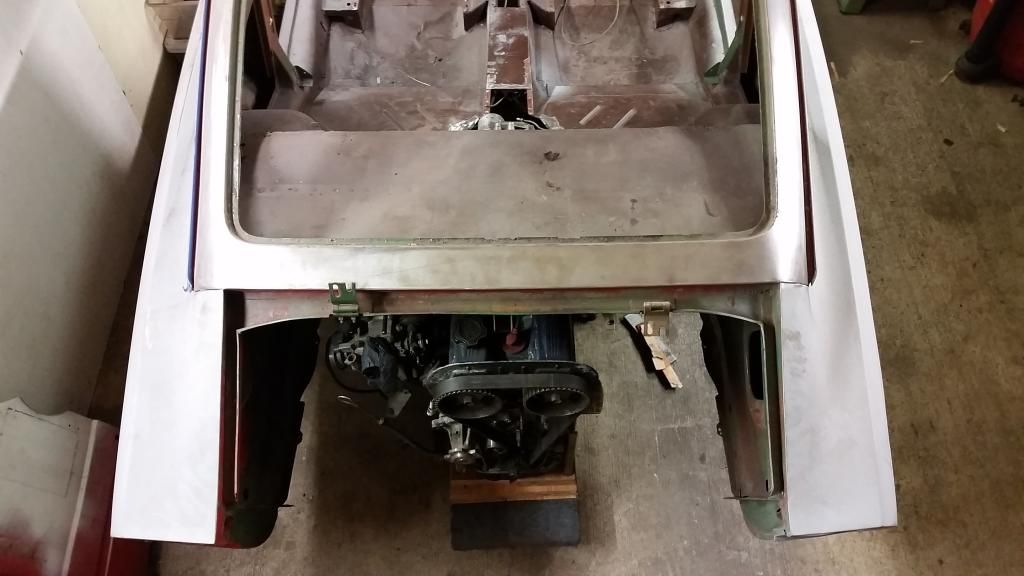
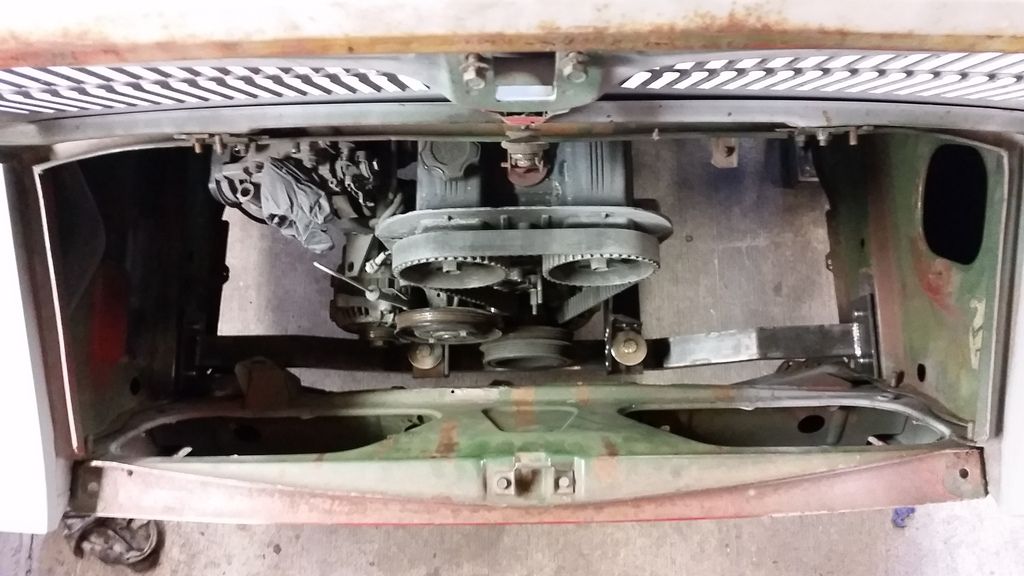
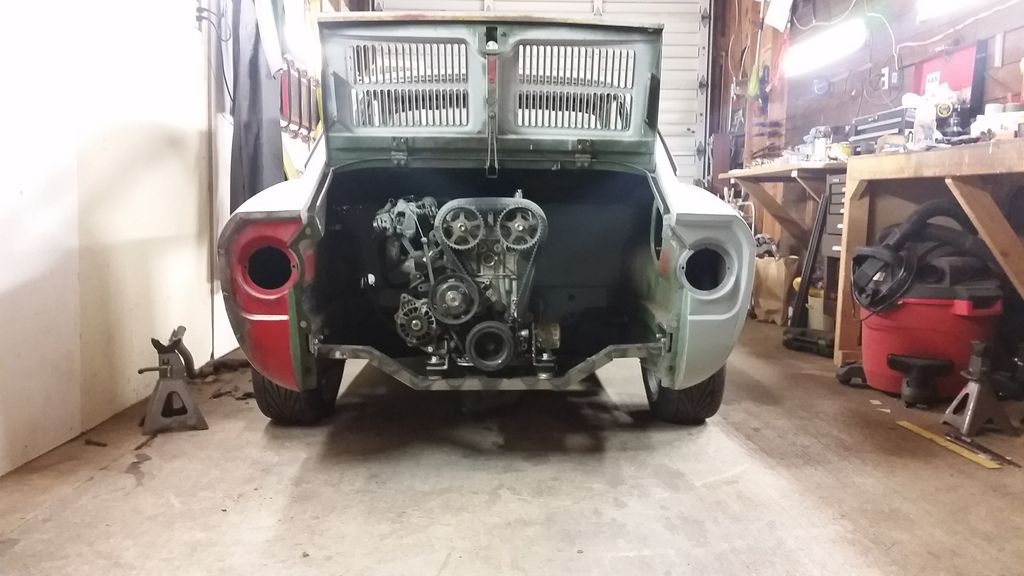
I started off by removing all of the existing motor mounts from the rear valance as they were fouling the waterpump on the new, much larger engine.

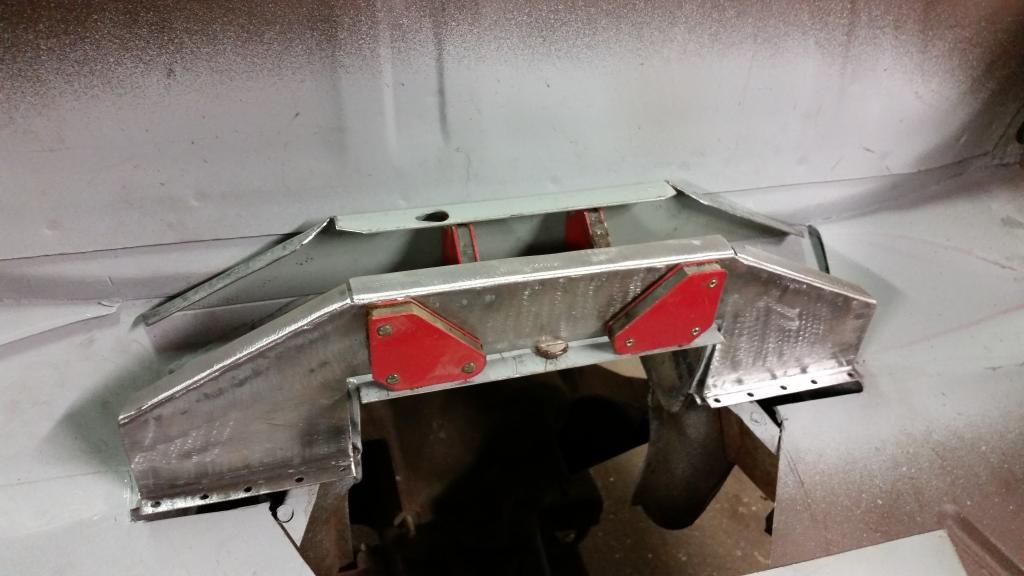
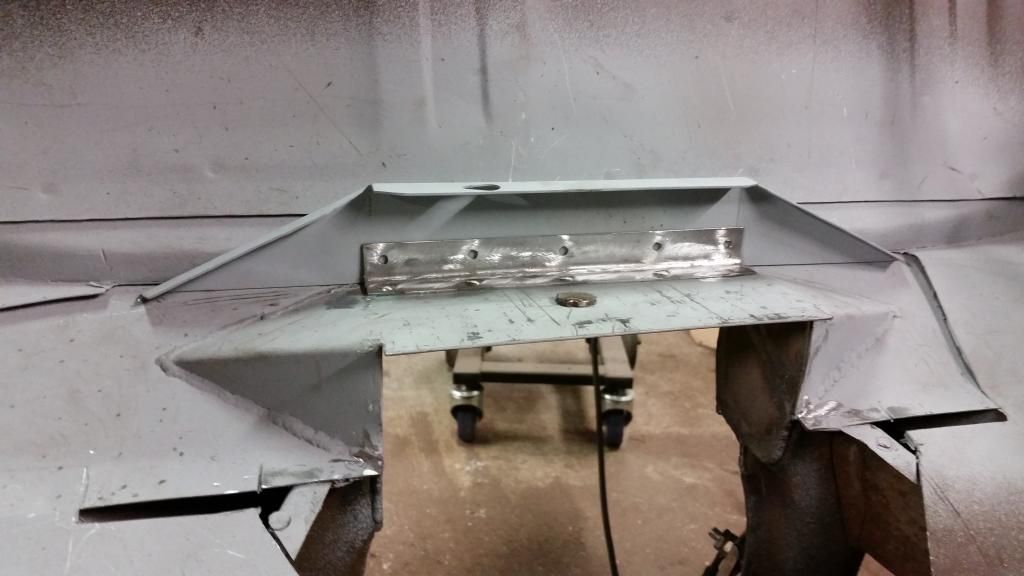
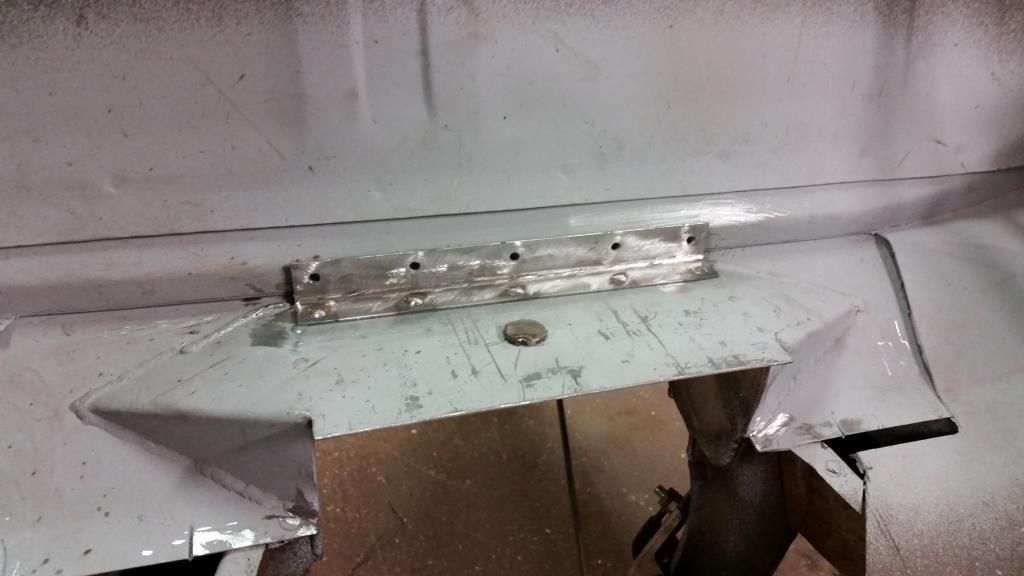
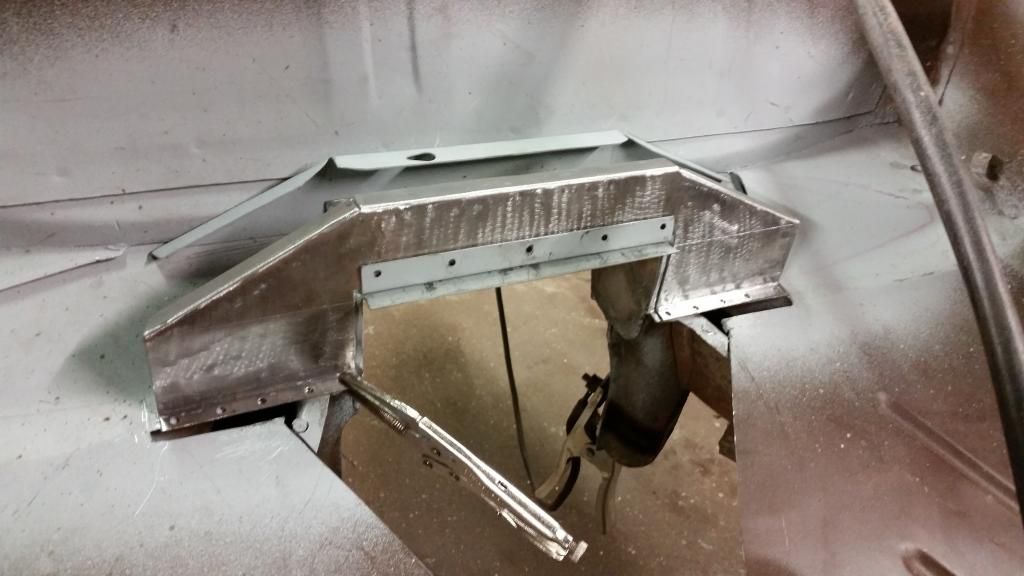
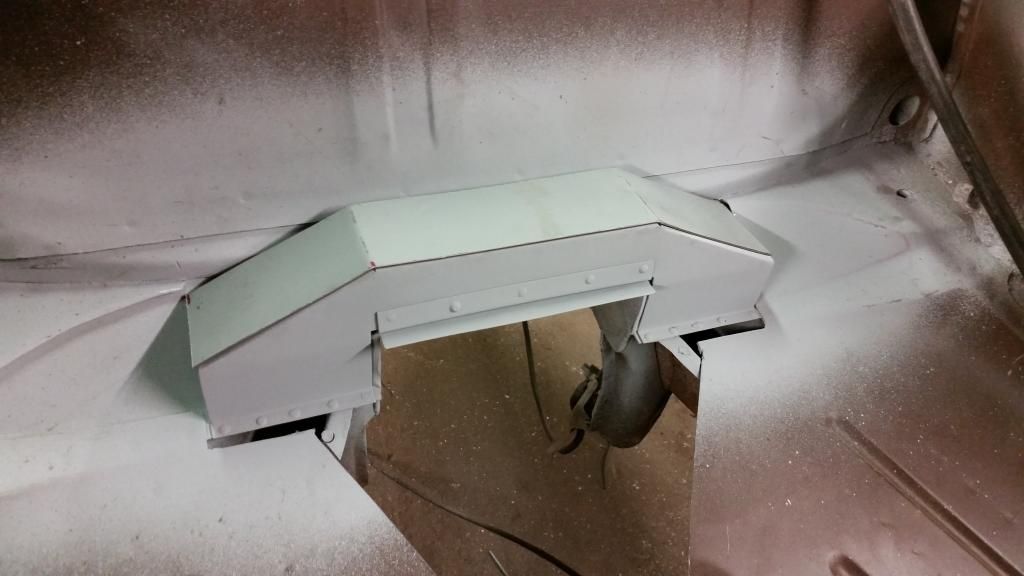
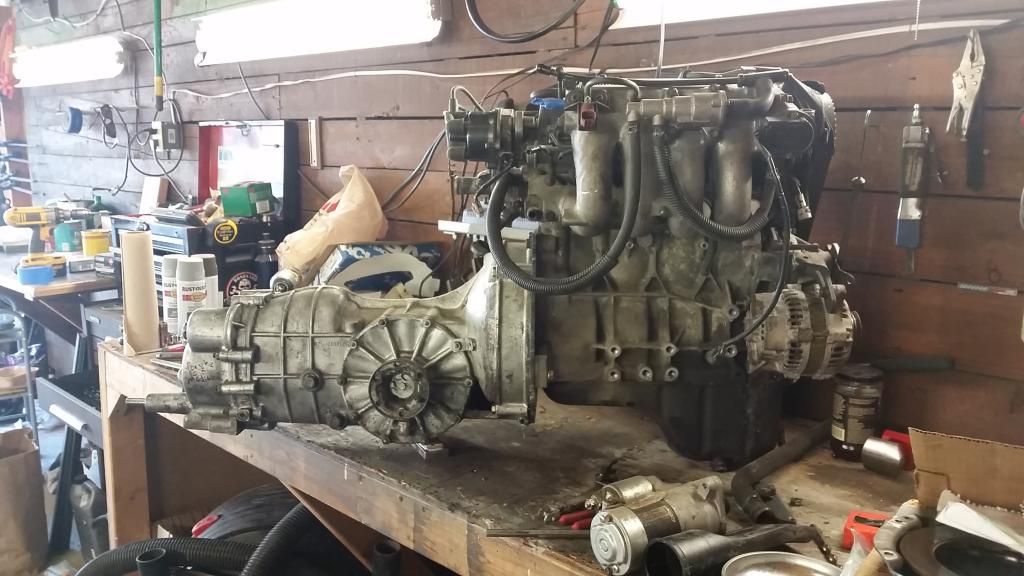
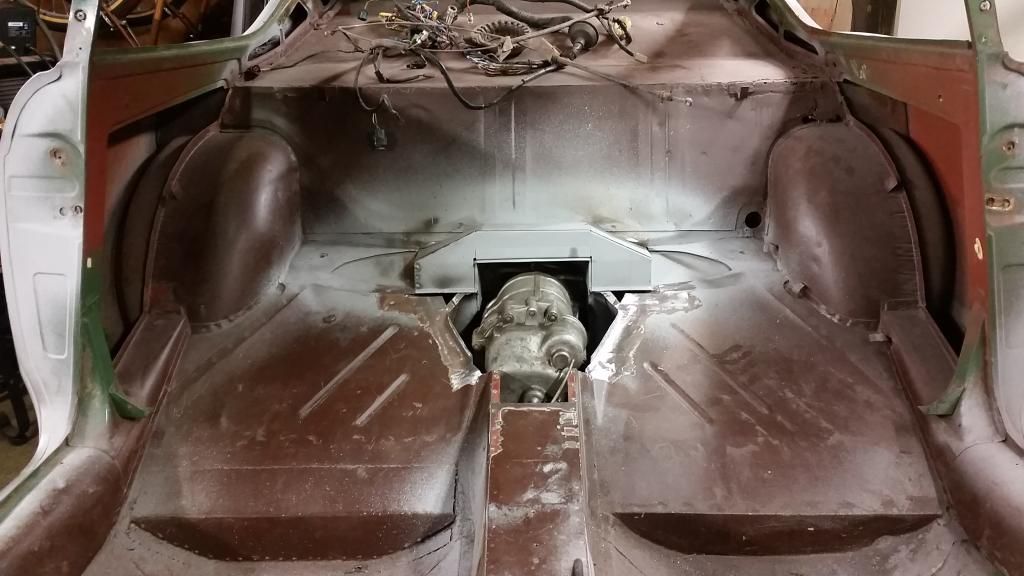
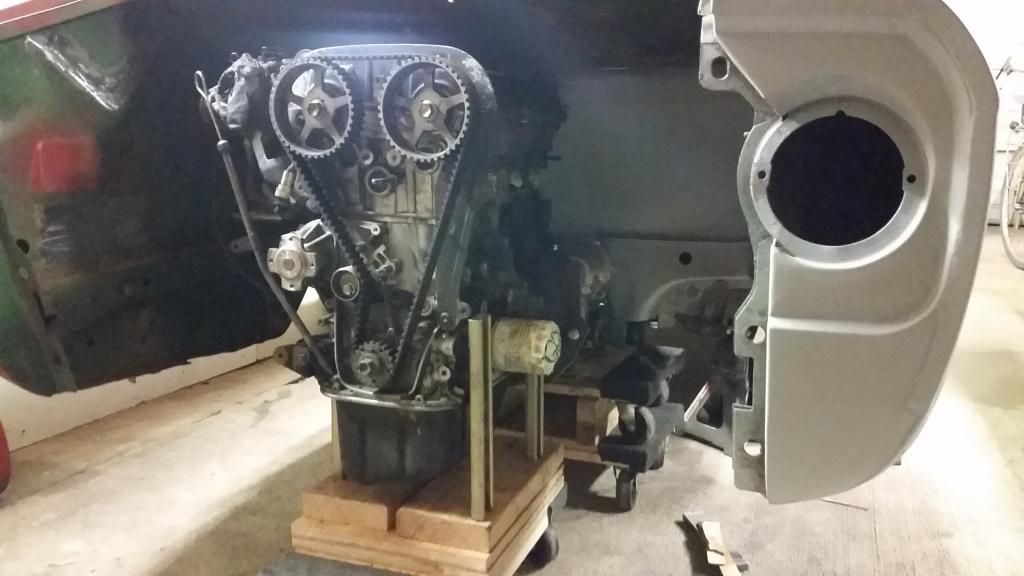
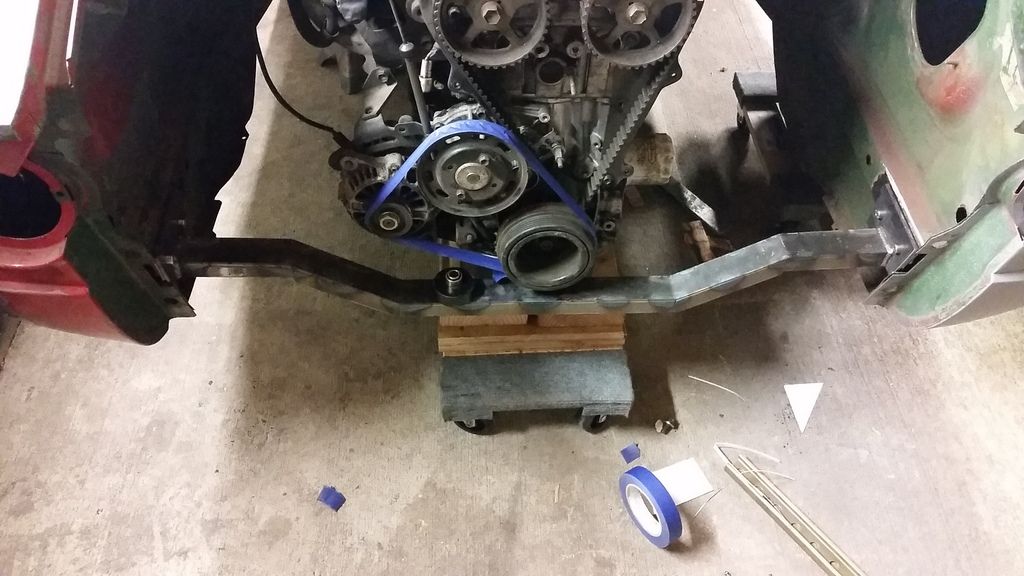
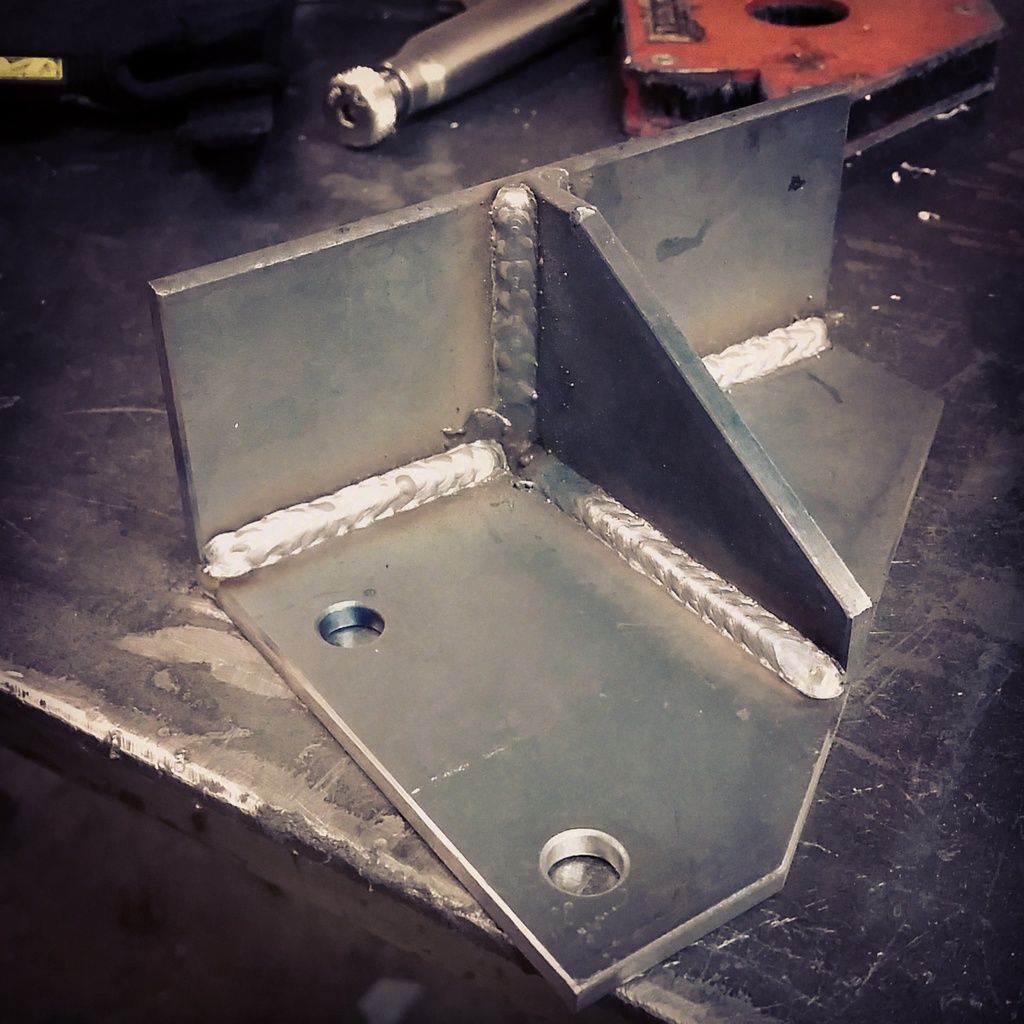
I then set about making a new crossmember that would stretch across the bay, underneath the crank pulley, and attach to the stock bumper mounting location.

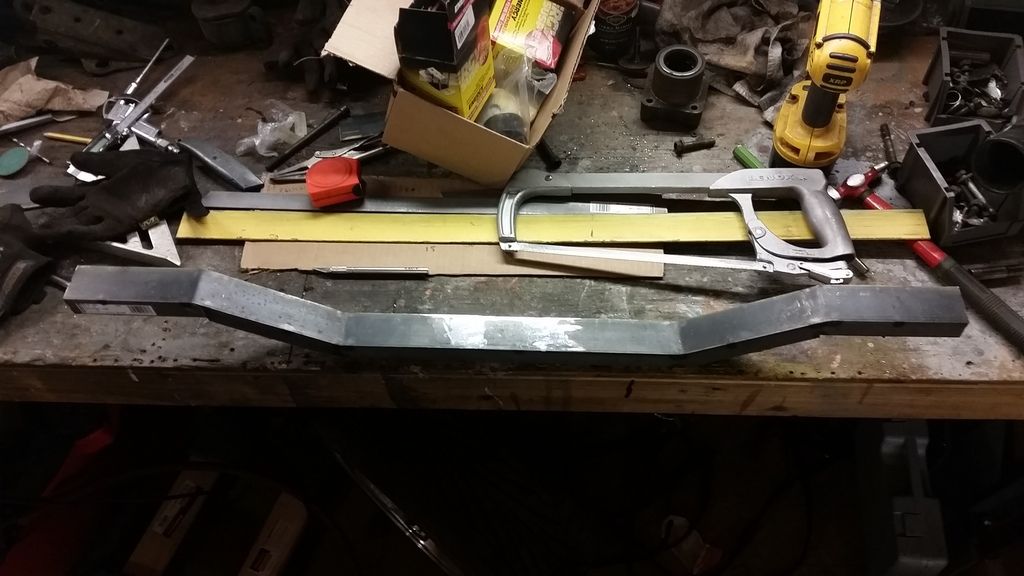
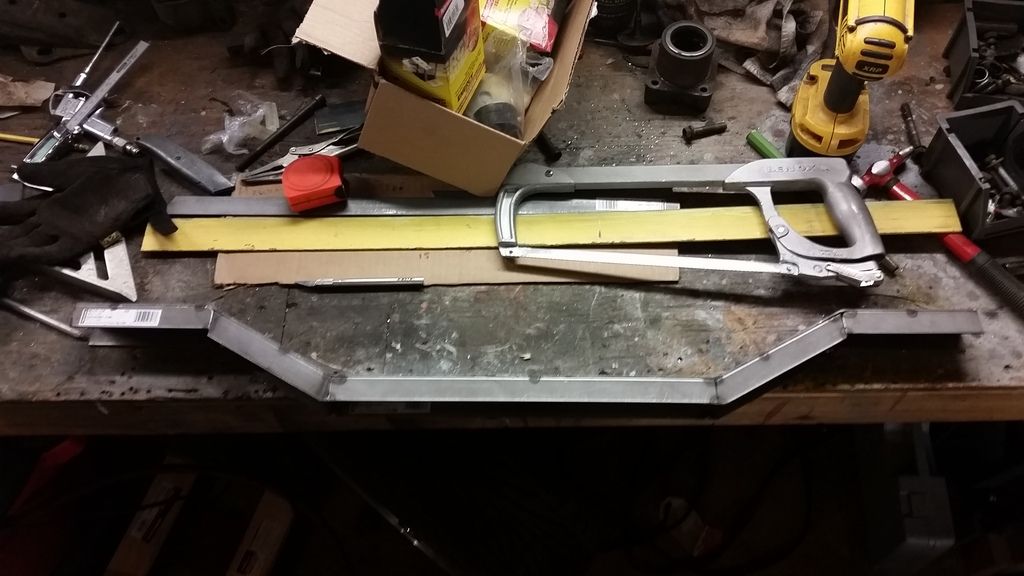
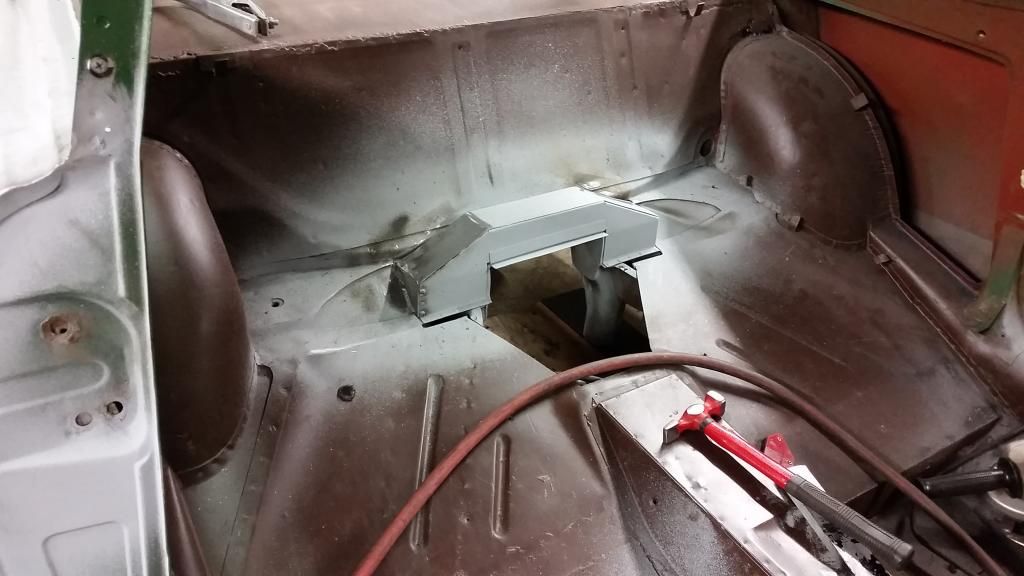
Here it is in all it's glory. The top piece is 1.75"x.125 and the sides are 1"x.125. The end caps are .1875, because there was a decent chunk in the scrap bin.

There's still some finish welding to do on it, but for all intents and purposes it's "finished".

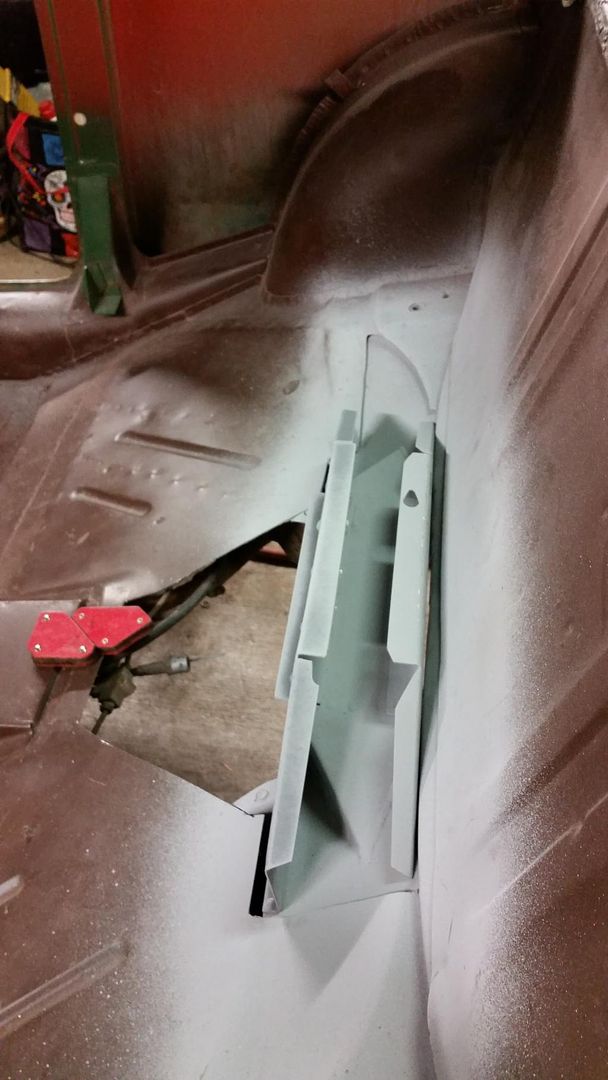
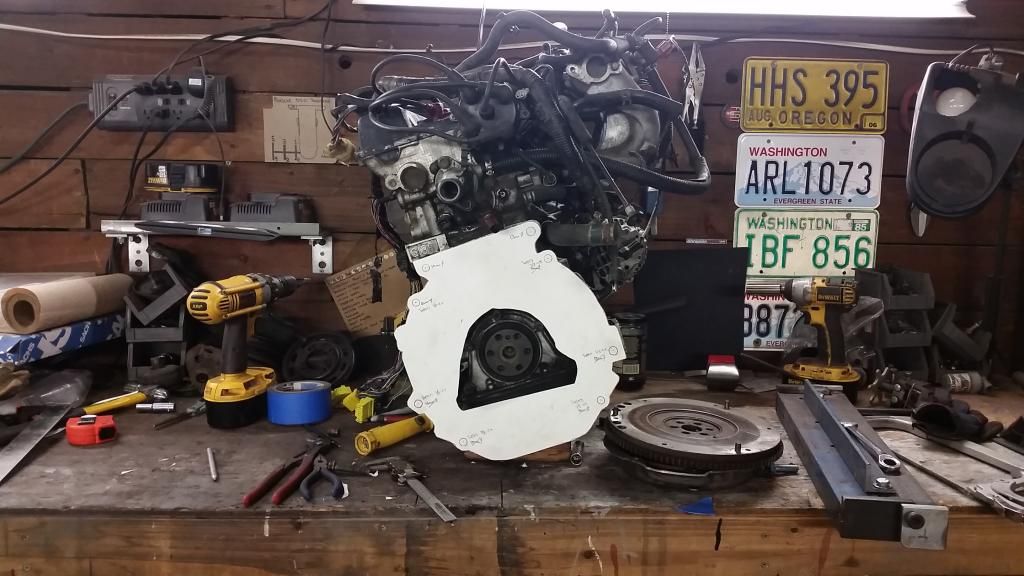
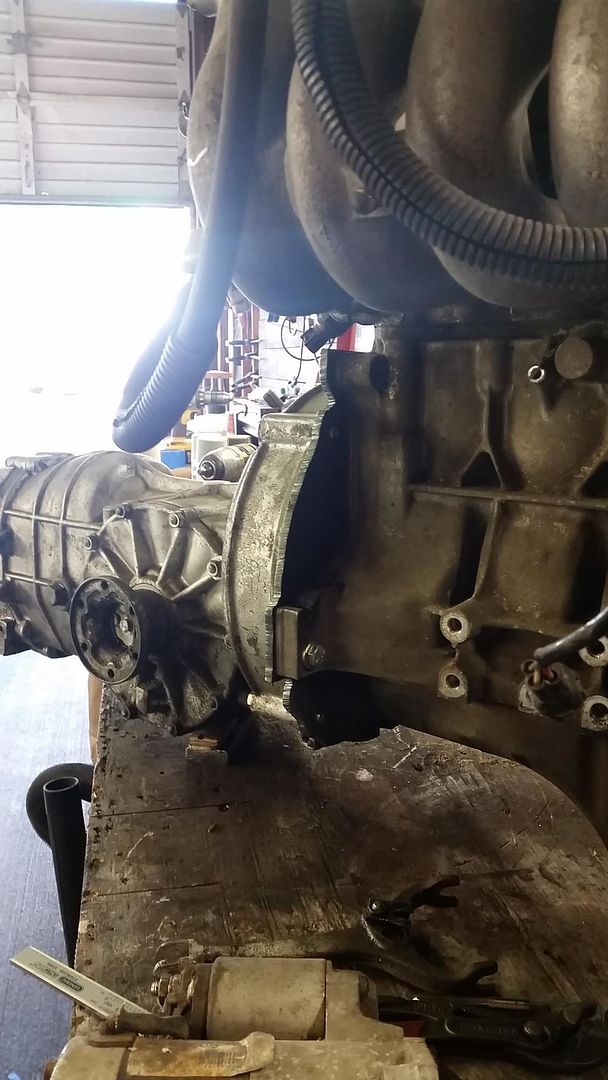
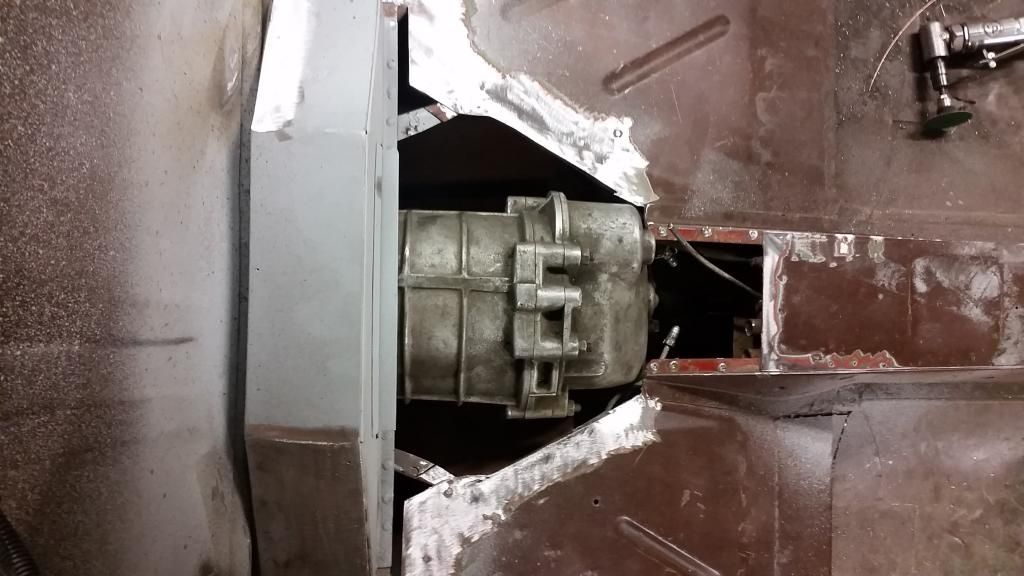
Step two was motor mount #1...

Apparently there's no pictures of motor mount #2. I assure you it exists. Imagine motor mount #1, but slimmer so it clears the serpentine belt... also MM#1 got a slew of speed holes. Because racecar.

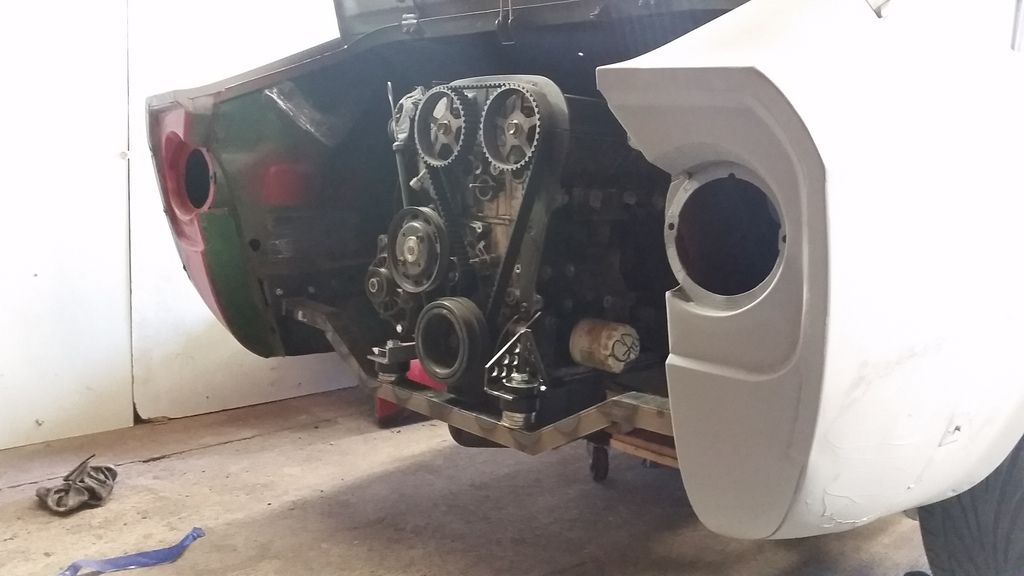
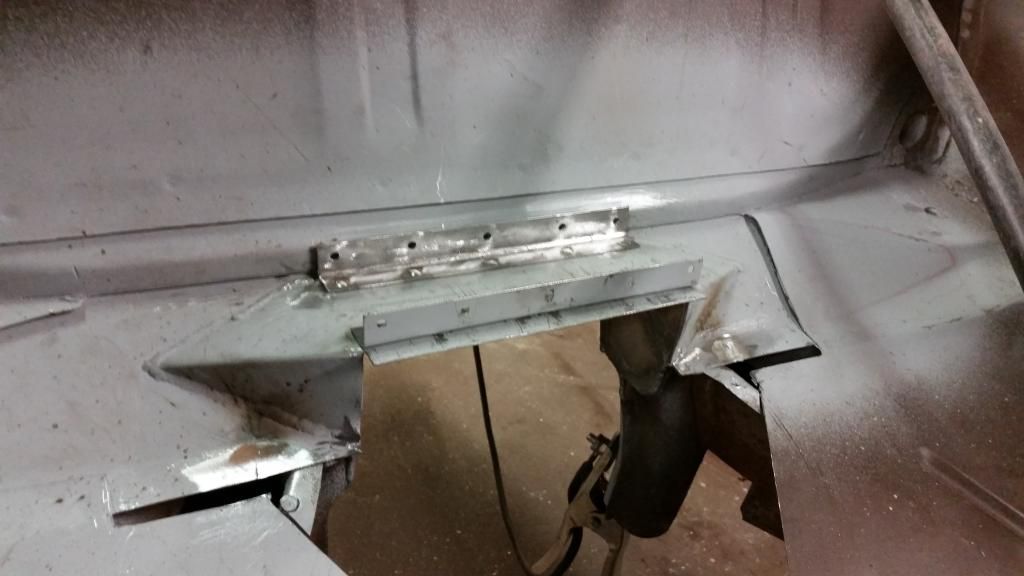
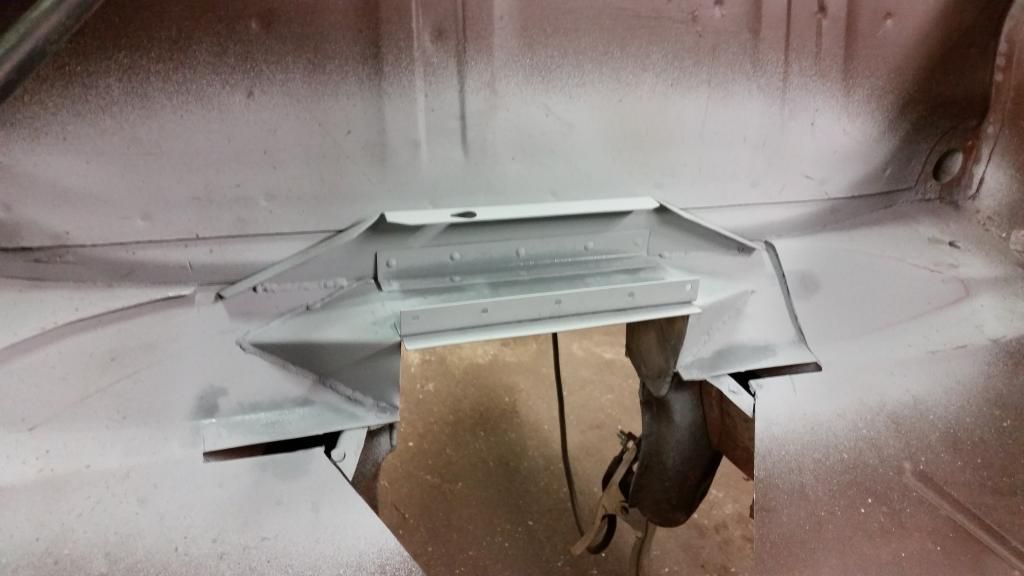
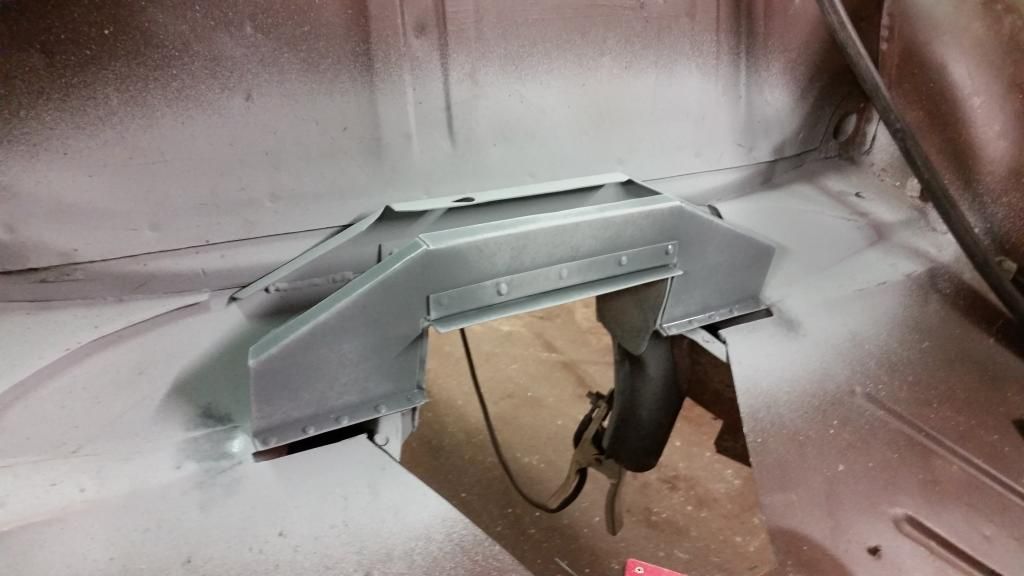
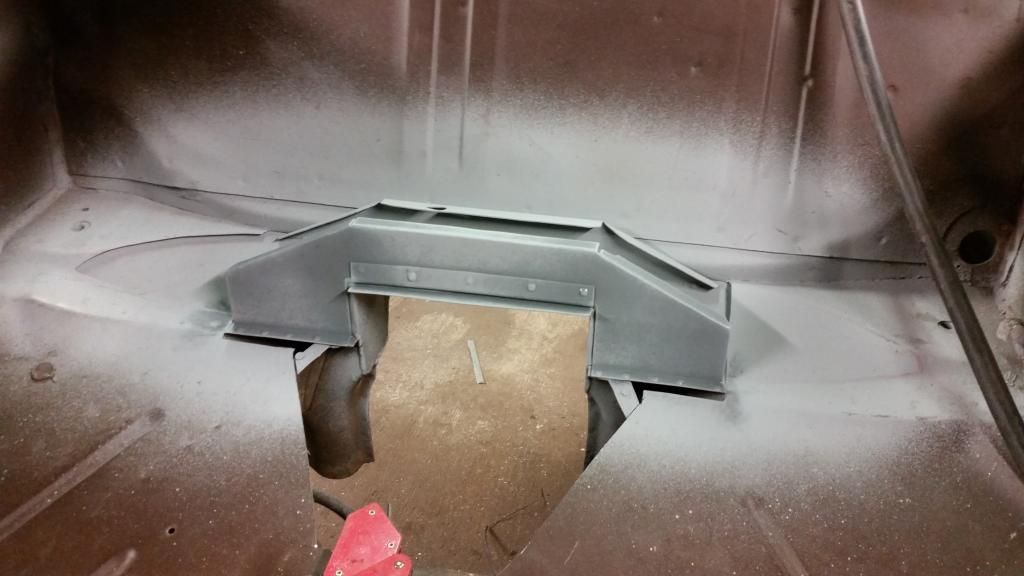
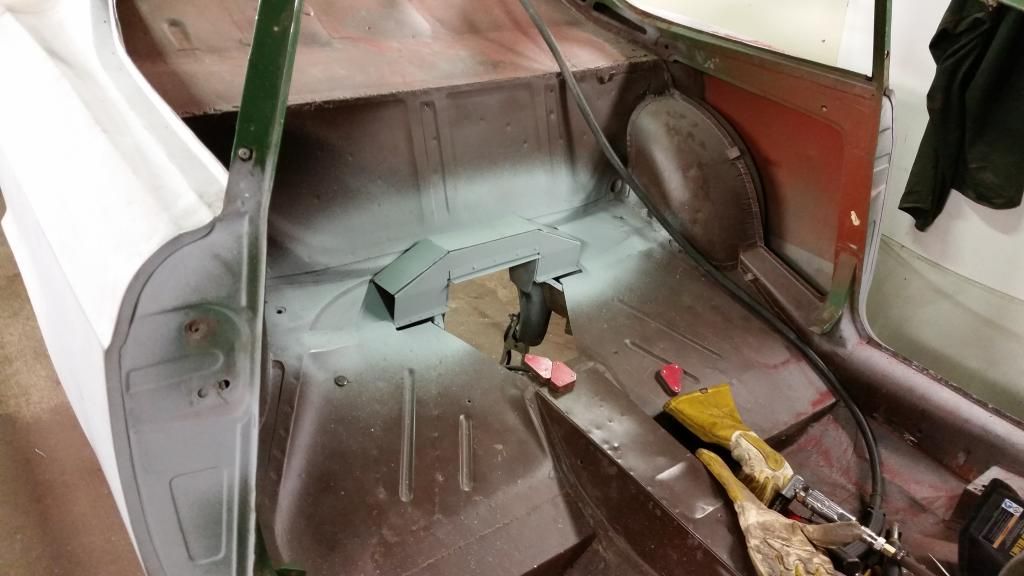
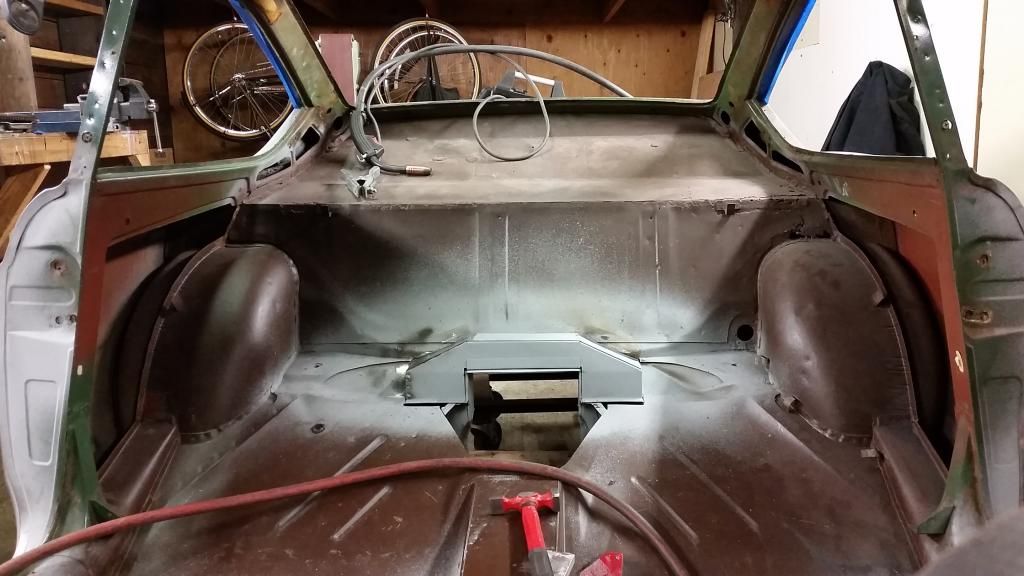
The rear valance still clears nicely and will get tied into the new crossmember to aid in, uhhh, torsional rigidity.

The urethane isolators themselves are a universal Energy Suspension part. I went with the harder of the two available kits, but left enough space to use the slightly taller and softer ones if these are absolutely dreadful.

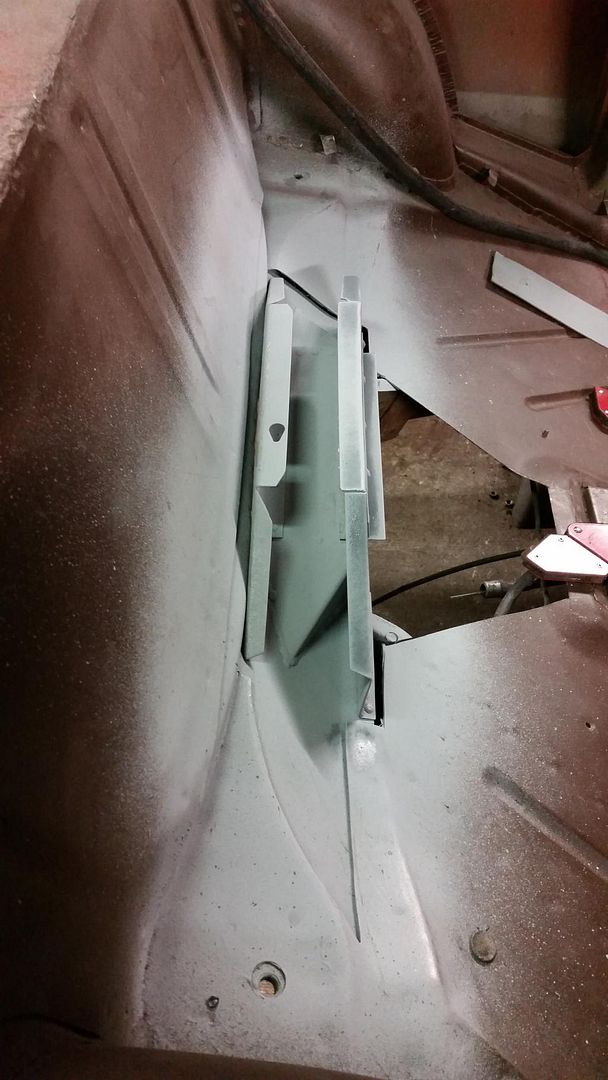
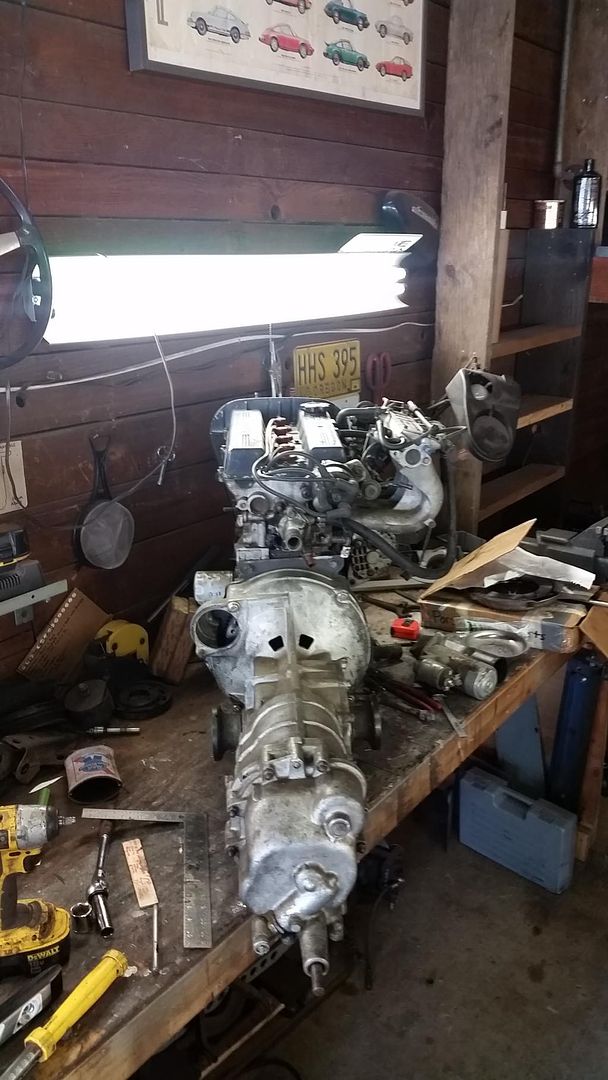
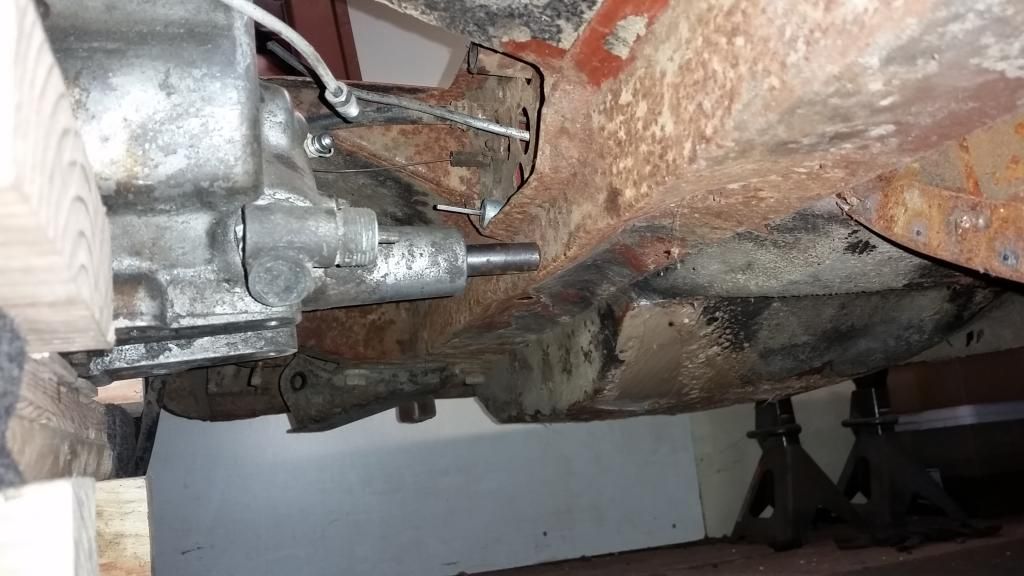
The transmission mounts were a similar affair and use the same urethane isolators.

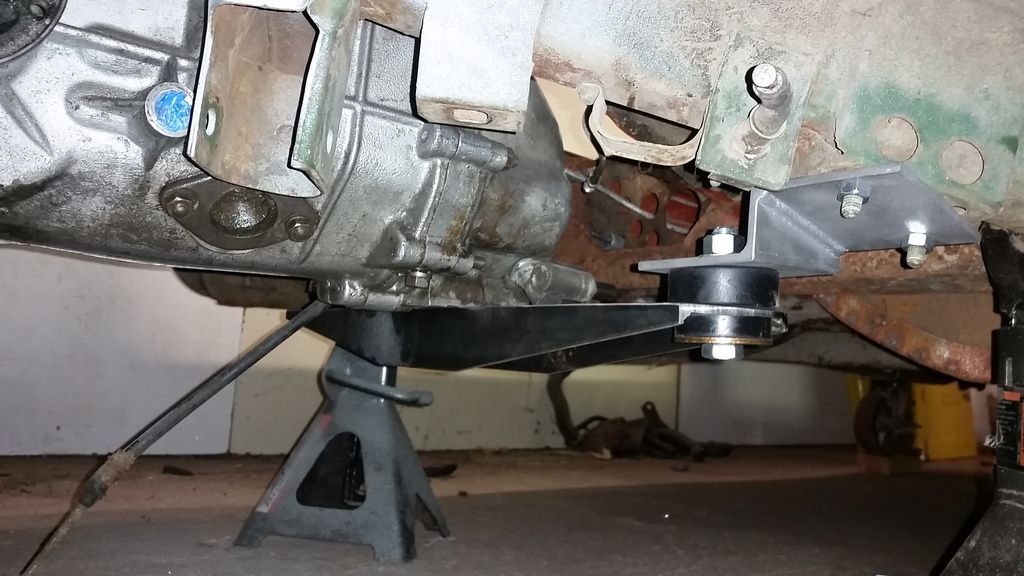
Again, I failed to get proper pictures of them before mounting them. I was pretty dang excited at the time. All of the motor and transmission mounts are slotted and will give me about an inch of for and aft movement, we are in the furthest back position currently.

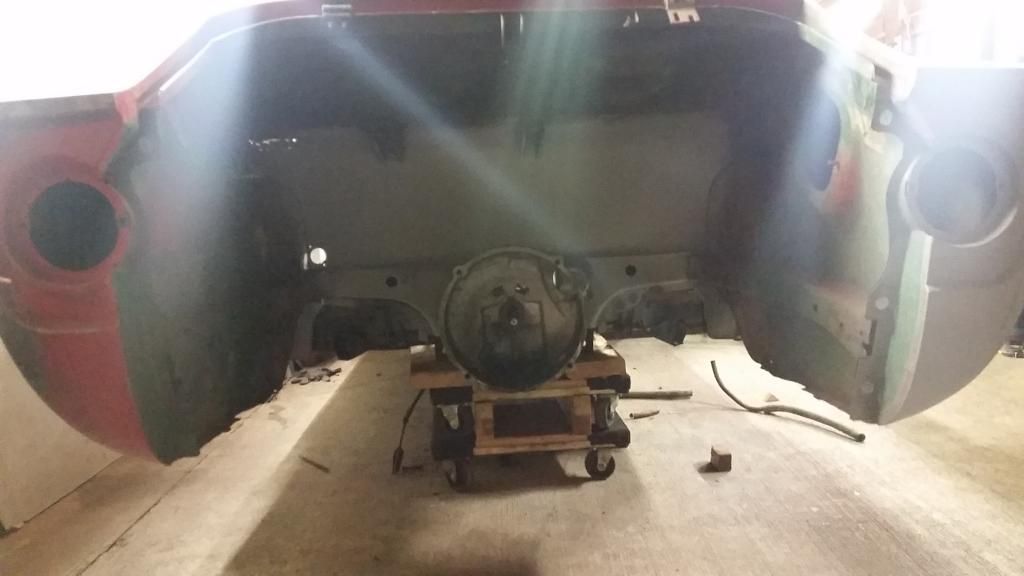
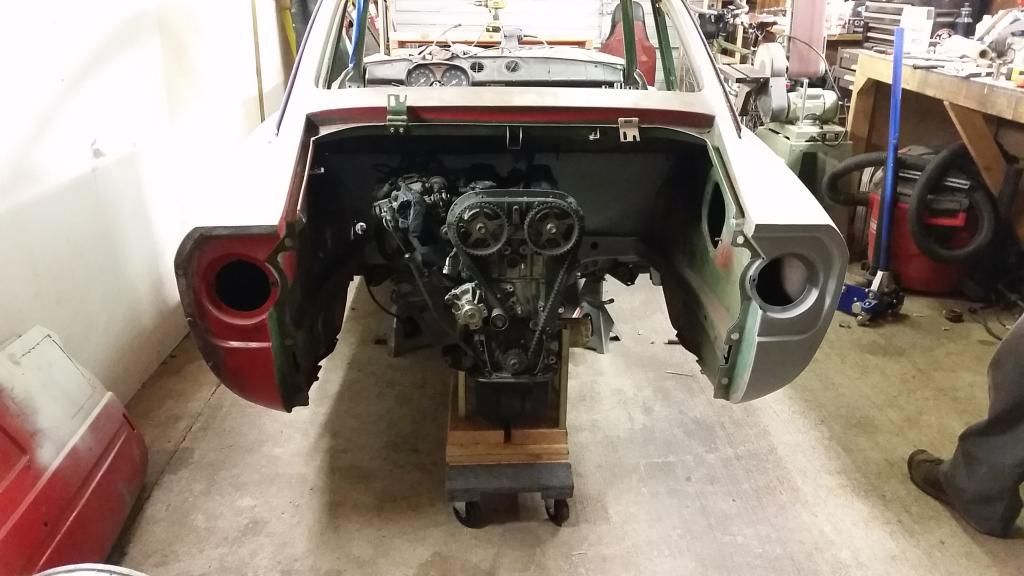
Then, for the first time in the better part of 4 years, I tossed enough suspension under it to mount up the VTO wheels from the Scirocco/Spider and set her down.

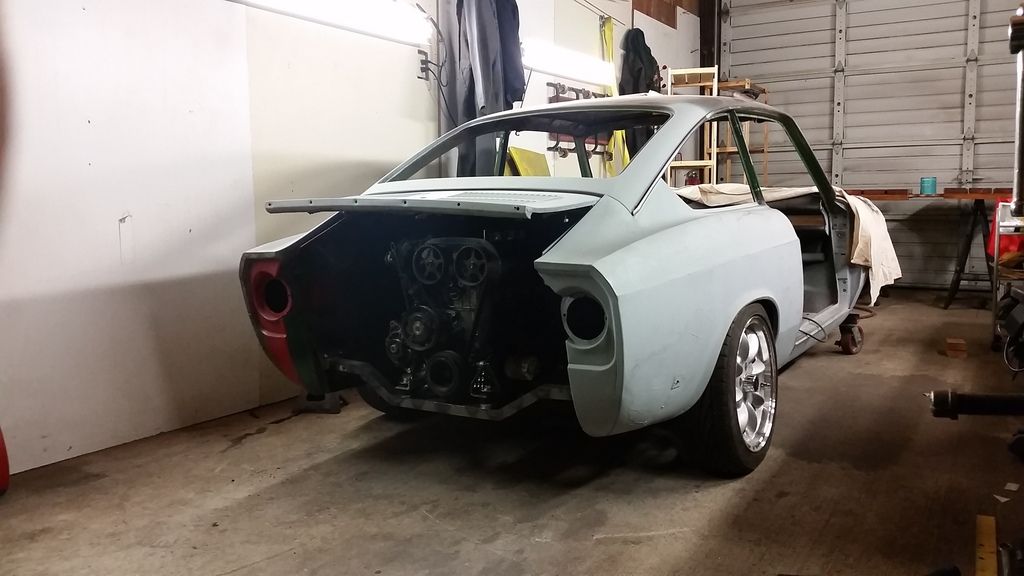
Needless to say, I am a bit excited. There are things that need reinforcing and there are things that need finish welding and grinding, but the engine and transmission are bolted together, supported by their mounts alone, and I'm two furniture dollies richer.

As an added bonus/surprise, this will be the last update from South Unit #2. I'm moving down a few bays to Middle Unit #6, which has niceties such as real lighting, a loft that isn't ready to topple, and, best of all, it's own berkeleying breaker panel.

Graefin10
Graefin10 SuperDork
3/30/15 11:18 p.m.

I'm getting excited about this one too. Nice looking welds on the motor mount. I really like 850 Coupes and have never seen a swap like this done on one before.

Kenny_McCormic
Kenny_McCormic PowerDork
3/30/15 11:19 p.m.

Will the engine cover close all the way, or will it be propped open Abarth style?

Also, I've got a gut feeling that crossmember should be boxed in, or is it thicker than it looks? Good spot to add a rear jacking point too.

Edit: oh, read it again, 1/8", carry on.

ssswitch
ssswitch Reader
3/30/15 11:20 p.m.

That's a sweet motor mount, good fabrication work there. Really interested to see how you're going to finish off the rear of the car.

Ethnic Food-Wrap Aficionado
Ethnic Food-Wrap Aficionado HalfDork
3/31/15 12:02 a.m.

In reply to Graefin10:

I've never seen a swap like this performed on one either. Hopefully I will be revered as a trailblazer in the world of rear engined Fiats. For a while now I've been saying "It's like an OT1300, without all the provenance and debilitating debt".

In reply to Kenny_McCormic: The decklid clears with roughly a nautical mile of clearance, but I'll be running it propped up Abarth style because awesomeness. The crossmember supported the engine and 170lbs of Burritos jumping up and down on it, but I'm still kinda weary of it. I'm going to tie it in with the rear valance mounting points and somewhere near the center just to be sure. It would be a very costly mistake if it were to fail entirely. The one I'm really worried about is the outer trans mounts, though.

In reply to ssswitch: I'll be shaving the inner lights (well, reshaving. A much younger me did some really regrettable work). I have a very nice set of series 1 Coupe/ Sedan tail lights that I'll be using in the outer position. That's going to require some cutting and fiddling with sheet metal, so it should be coming up fairly shortly.

bgkast
bgkast GRM+ Memberand UltraDork
3/31/15 12:22 a.m.

Wow, nice progress and fantastic looking welds!

SkinnyG
SkinnyG Dork
3/31/15 12:54 a.m.
Ethnic Food-Wrap Aficionado wrote: I'm still kinda weary of it.

I'm not tired of it at all! Keep it coming! Your build inspires me!

Kenny_McCormic
Kenny_McCormic PowerDork
3/31/15 4:04 a.m.
Ethnic Food-Wrap Aficionado wrote: The one I'm really worried about is the outer trans mounts, though.

Looking at those and thinking hard for a while, yeah, I don't like them either. With the mount bolts offset from the chassis tie ins you're gonna get some weird bending loads through those brackets and into the chassis. Lot of force on the transaxle (straight up) under hard acceleration.

Looks like you have enough clearance to make a wider crossmember that puts the mounts directly under the chassis mount points with room for spacer brackets/blocks to provide a mounting stud. That should solve the problem.

NOHOME
NOHOME UltraDork
3/31/15 6:09 a.m.

Going to join the chorus on not feeling the love for this mount. I blame part of it on the fact that you raised the bar pretty high with all the other fab work.

Maybe if you triangulated the two sides? I would really need to know more about what the two chassis side bolts are going up into.

And congrats on the roller! I live for the day when my project becomes a single car and I can push it around on wheels.

ssswitch
ssswitch Reader
3/31/15 8:31 a.m.

There's a little bit of a gusset on both 90° edges there. Triangulating it more just seems like it would make it hard to get at that nut, though I'm no FEA solver.

Adding a lip on the underside to help locate that bushing might make it easier to reinstall the transmission in the future though. Agreed that the crossmember could make a great jacking point but I'm gonna hazard a guess that there's one not too far from there in the final product anyway.

NOHOME
NOHOME UltraDork
3/31/15 8:56 a.m.

I would get rid of the Z shaped mount, lengthen the crossmember to go directly under where the Z bracket is now mounted with the two bolts and use a piece of box tube to mount directly under the frame.

Adrian_Thompson
Adrian_Thompson UltimaDork
3/31/15 9:50 a.m.

You are doing awesome work like this and I can't even get my 1988 Saab running. I think I'll go and curl up in a hole and rock myself to sleep while crying in a fetal position.

This is awesome, I'd love to do this too an Imp, then I remember I can't even get the Saab running again.

1 ... 7 8 9 10 11 ... 13

You'll need to log in to post.

Our Preferred Partners
7jJZ6vTVVha3waoIJSSm8gDg7VVGK8pGJTtKaPf1gmN79zB4qLdU0TH0hEHCeEux