1 2
wheelsmithy
wheelsmithy GRM+ Memberand UltraDork
3/27/20 8:13 a.m.

In reply to volvoclearinghouse :

I've been doing that for years, Just since the move, I've had far less scrap around. Endless variety is helpful for all these complicated shapes. I finally decided to bite the bullet and make this. Next up, a slip roll. I don't have the materials, and am staying home like a responsible citizen at the moment. I'll just buy a shrinker/stretcher and cheap bead roller one of these days.

Keep up the good work on the Volvo, and be well.

engiekev
engiekev Reader
3/31/20 11:38 a.m.

For a compact brake like this, do you have to bolt it to the floor, or is it heavy enough to now shuffle around on you?

Sounds like a perfect addition to a metal top workbench!  Maybe something modular that can be easily removed.

wheelsmithy
wheelsmithy GRM+ Memberand UltraDork
3/31/20 12:57 p.m.

I welded the 1/4'X? piece I cut off the folding beam between the two feet at the front, so you can stand on them, and kind of do a dead lift type thing if the material is being resistant.

That's it, bottom left.


wheelsmithy
wheelsmithy GRM+ Memberand UltraDork
3/31/20 1:24 p.m.

This piece was what prompted me to build the brake.

It is a filler piece for the nose of my X1/9 Challenge car. Here it is installed on the car, it is also part of the radiator ductwork.

Note, the angled 1/2" kick ups at the front were made the old fashioned way: clamping them between two pieces of angle iron, and beating them with a hammer.

TVR Scott
TVR Scott GRM+ Memberand Dork
3/31/20 1:43 p.m.

In reply to wheelsmithy :

Very cool!

Thinkkker
Thinkkker UltraDork
4/3/20 2:46 p.m.

I really did not need to look back at this. 

Currently I am working on:

Building a new rollbar for DM car.

Building engine with drysump for DM car.

Setting up new drysump for DM car with full oil system.

Relocating batter and setting up seat for DM car.

Building storage rack for storage boxes.


I may need to amend that last one to store boxes under a break *which I have been thinking about as I need to create some bend pieces for the DM car and drysump oil lines on the car*.  Ok, finish rollbar, then onto the finish of box storage modded to do a break.....

Raze (Forum Supporter)
Raze (Forum Supporter) UltraDork
4/4/20 6:47 a.m.

Awesome build!  Thank you for sharing.

I also find it ironic I had to get a sheet metal brake when I was working on my First 124 spider years ago, nothing like what you've built but having one must be a Fiat thing wink

kb58
kb58 SuperDork
4/4/20 11:36 a.m.
BrianC72gt said:

...My problem is space.  With a large 1 car garage, I haven't got any to spare.   Everything in my small space has wheels on it, the table saw, 20 ton press, wire shelving, and the scissor lift came with wheels.  Does anyone have thoughts on a workbench mounted removable brake?...

Consider having just the bottom angle piece permanently mounted to the front edge of the workbench, and the bending part (with its handles) hanging down from it, as the pictures show. It stays out of the way when using the bench as a bench, and only comes into play when needing to bend stuff.

wheelsmithy (Joe-with-an-L)
wheelsmithy (Joe-with-an-L) GRM+ Memberand UltraDork
4/17/20 8:40 a.m.

A forum member asked about what I'd do differently, and my general thoughts on this thing. I thought i'd update here with pictures.

1. A strongback. The angle iron I used for an upper jaw does bow in the middle with thicker metal.

like so:
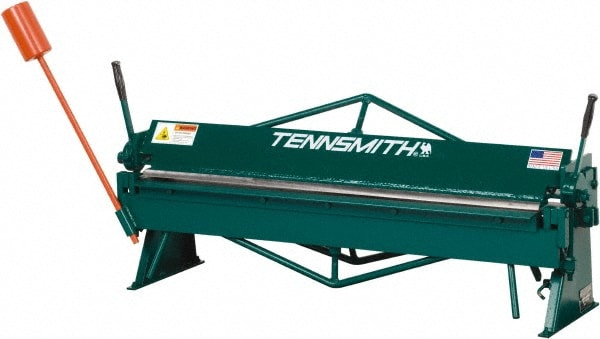
It's that triangle at the top with the threaded section to push in on the middle.

The only problem with that is it would make my upper jaw top-heavy and fall over.

Which brings us to the next thing. Clamping. I like the cantilevered systems I see on store bought brakes, and am sure I could build one with some time. Added bonus, your upper jaw can be raised just enough to get the work in, and clamped with less hassle than my "lay it on there, knock it around, clamp it with C-clamps" situation. So, clamping has to go hand in hand with an upper jaw redesign, in my mind. 

Here's a picture I dug up of a fairly ideal situation:

My best idea of how to approximate this in Upper Jaw version 2, should I ever get there is to make the upper jaw from maybe 1/2"X 8" plate, and machine an edge to 45 degrees. That machined surface would be parallel to the table, and clamp directly to the work. I hope that's clear. I'm crap at computer stuff, so If somebody's interested, I'll do a hand drawing and post a picture of it. 

Edit, here's a better picture:
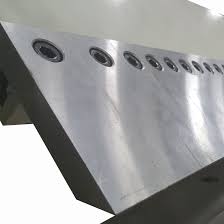
  I'd probably use all thread on the sides for clamping, adjusting for material thickness, and the like, as it would be simpler to work out than the cantilevered system.

The final thing I'd do on a redesign is cut relief slots in this hypothetical upper jaw in places. For what we do, a finger brake is much more useful. If you watch Binky, you see they have voids in their upper jaw to facilitate bending funny little brackets and the like. I believe their brake is home made as well.

Here's the best image I could find of a finger brake:
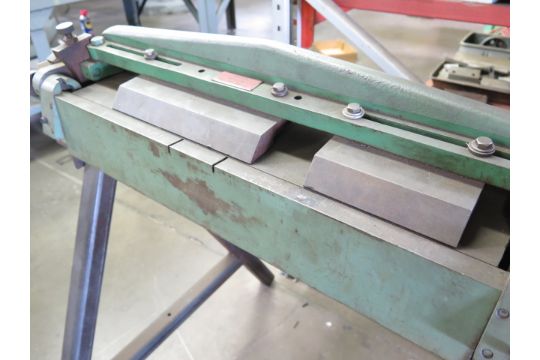
The Binky guys have a continuous upper jaw with 1/4" (approx) voids in it periodically. I'd do something like that. The reason being you can make boxes easier.  The thing is, as long as you initiate the bend on the brake, it is relatively easy to finish the bend accurately by other means., so I don't see these voids as absolutely necessary. Maybe set up a press brake at this for thick, small brackets and the like:


I hope this has been helpful, and if anyone has questions, I'll be glad to answer as best I can.


1 2

You'll need to log in to post.

Our Preferred Partners
Otvif97GJAFWHkejtbdVd2zrX5fs3J4KUccGoVVAqMSmqdPqoIrBC8LfbaG4kZuX