Oh, and also, my alternator wasn't working. So I pulled it and took it to an auto parts store to get it tested, and they verified it's dead-ness. Just for grins, I decided to try replacing the voltage regulator to see if that would fix it, and it did:

So, I need to finish putting the interior back together, install the rear struts and brake pads, bleed the brakes, get the tires mounted and balanced, then I can drive it up to the tire shop for an alignment, and maybe I can actually start driving this thing! For now I've decided to take my chances with the timing belt. It's supposedly 3 years old and the car hasn't been driven much, and I won't be driving it all that much this summer. I'm thinking that over the winter I'll drop the motor, fix all the oil leaks, do the timing belt, clean it up, etc.

A few more things on the interior to clean up. My center console lid obviously broke at some time in the past, and someone put double-sided tape on it to hold it in place. Clearly that wouldn't do, so I ordered a new tray on eBay. I have to say, it's a pleasant surprise how easy it is to find relatively cheap repro parts for this car online:

Stereo is done, too. It works great, though sometimes after I shut the car off, the display on the head unit flashes. Not sure what's up with that, but here it is installed:

Got my tires mounted on my repainted Gullydeckels, and, as a bonus, the tire shop managed to not scratch the wheels:

The LR wheel did NOT want to come off. Usually in this kind of situation I remove the lugs and then give the sidewall a few good kicks and it breaks it loose, but where the car is parked, there's not enough room for me to get in there and do my best Jean-Claude Van Dam. So I soaked it overnight in PB Blaster, then the next morning I used a bit of mechanical advantage:

That's a cast iron pole and an axle strap. Pulled it right off.
Rear brake calipers look OK, and the pads have plenty of material left, but as soon as I removed them, one of them fell apart. Oh, well, best to have the same pads front and rear anyhow. And I'm going to rebuild the calipers like I did the fronts. Might as well. But I don't think I'll paint them. With these wheels, there's not much point:

I'm getting close. Could have an operational, road-going car by this weekend.
What you SHOULD do is....
Post more updates of Stuttgart goodness :)
I'd still paint or coat the calipers, just to reduce the chances of rust build up. Even with your wheel choice, a clean and bright caliper will shine through, like that slight bit of lingerie you might catch site of on a breezy summer day....
Stefan wrote:
What you SHOULD do is....
Post more updates of Stuttgart goodness :)
I'd still paint or coat the calipers, just to reduce the chances of rust build up. Even with your wheel choice, a clean and bright caliper will shine through, like that slight bit of lingerie you might catch site of on a breezy summer day....
Yeah, maybe. I did the fronts, and it made it harder to put them back together. I guess I could just mask off the "slide" areas better.
In reply to Tom_Spangler:
A buddy had his cad plated along with a bucket full of hardware for about $20. Looks great, very factory and no addition to the thickness so it all assembled like stock.
Loving this, been thinking about trying a 944 again.
Yeah, I know. All my photo links are broken now, thanks to Photosuckit. I'm not fixing them, sorry. I did find a new way of sharing pics, so my future ones should work.
Anyhow, I'm so close!! Brakes are bled, wheels are on. I think I'm gonna need some spacers in the rear, too:

But now it won't start. Been running just fine since I bought it, but now, nothing. Won't even cough on starting fluid, so I put a spark tester on it, and sure enough, no spark. So I have (somewhat hastily) ordered a new coil. I probably should have done a bit more investigative work, as it could just as easily be the DME, but I'll try the coil tonight and see if I get fire.
Maybe it has to do with the date. I bought an '84 in late Feb/early March. I just resealed the front of the engine, and ran it in an auto-cross a week ago Sunday. It ran fine all day, drove it home and parked it. Tried to start it a week ago today, nothing. Worked on it over the weekend - no spark. Got a new coil - no spark. The DME is out of it now, nothing looks fried.
I drove it! The no-spark issue turned out to be a bad DME relay. The PO was kind enough to keep one in the glove box, so I swapped them out and it fired right up. I went ahead and ordered a solid-state one from Focus 9 anyhow.
So, the test drive went pretty well. Ran good, suspension felt fine. The alignment even seems pretty close to OK. Couple of issues, though. The brakes still feel a little soft. Also, the clutch pedal is engaging really high. I'm wondering if there's a connection since they share the same fluid. So I'm going to try bleeding at the clutch, then try the rears again.
Also, the HVAC is blowing hot air all the time. Sounds like that may be a heater control valve or possibly something in the instrument panel.
I have a big clunk in the drivers door, so I need to pull the door card off again and see what's loose in there.
I did go ahead and order some spacers and longer studs for the rear, so I'll be installing those when I have the back end up in the air to work on the clutch and brakes.
Jacked up the rear tonight to bleed the clutch and brakes, but first I figured I'd install the new studs and spacers. That meant that the hubs have to come off because there's no room to fit the longer studs in there with them in place. Passengers side came off pretty easy, but once it was off, I saw this:

The grease in that bearing appears to have turned to wax. I'm guessing it dates back to 1985. So now I have another "while I'm in there" job. New bearings ordered.
Had some issues with my rear suspension, but I got them sorted out. So, the rear end is all back together with new wheel bearings, the new Konis, stainless brake lines, and everything.
So, now that it's a running, moving car, I decided to try and clean up the paint a bit. Now, the paint is pretty much crap, it's scratched, scuffed, faded, thin, worn, and oxidized. So here's a shot of the hood with half of it done:

So now it's scratched, scuffed, faded, thin, and worn, but no longer oxidized!
My climate control was blowing hot air, which I determined to be a broken clip on the mix door actuator. For now I jammed it open so it blows cold all the time, because the car will get parked when it gets cold outside, anyhow. I'm not getting much air out of the dash vents, either, so I'll need to dig into the climate control system at some point, anyhow.
Next steps are more short test drives, and an alignment.
Tom_Spangler wrote:
My climate control was blowing hot air, which I determined to be a broken clip on the mix door actuator. For now I jammed it open so it blows cold all the time, because the car will get parked when it gets cold outside, anyhow. I'm not getting much air out of the dash vents, either, so I'll need to dig into the climate control system at some point, anyhow.
That stupid clip always breaks.
Well, last night I put a coat of wax on it to protect the somewhat-revived paint and moved it up into the garage. It's ready to be driven!

ManhattanM (fka NY535iManual) wrote:
Wow, she cleans up good!
Favorable lighting can do wonders for a photograph. She really doesn't. But, she'll do for now. Down the road, I may try my hand at painting it. It's a "working on cars" skill that I don't have and would like to add to my repertoire.
First track day in the 944 today! This is at M1 Concourse in Pontiac, MI:

All went well. I felt pretty outclassed out there as there was lots of much newer, much faster cars, but my old bone-stock 944 held it's own, and it was a ton of fun.
And more importantly, nothing major broke! The only issue I had was boiling the power steering fluid:

I need to look into some options for coolers for that. Some aftermarket sway bars might be a good idea, too. The body roll was.... substantial. But the Firestone Indy 500s have lots of grip, the steering feels good, and the car was just plain fun.
There's a factory cooler built in, the issue is that it sloshes badly.
so run it slightly lower on fluid and it doesn't make a mess.
Even if you do M030 sways, Konis, torsion bars in the rear and non-insane springs in the front it is still going to roll, just a little less. That's just what these cars do with today's tires. All '80s cars were designed around the rock-hard yet squirmy, easy-to-chunk-and-blister tires of the time.
Long time with no update! I parked the car in October, and it's been in my barn since. My two main priorities for the winter are to fix the oil leak and replace the timing and balance shaft belts. Well, that hasn't happened yet for a number of reasons, most of them involving my lack of motivation to be out in the freezing cold Michigan winter. For a while, I was thinking of pulling the engine, reasoning that that would make it easier to find and repair the leak and do the belts. But I decided to make one last try at finding the leak before going to all that work.
I'm also getting an oil smell in my SHO, so I need chase down a leak on that, too. So I got some UV oil dye and a light. Poured some in and ran it for about 20 minutes today, and here's what I found underneath:

So, that's pretty definitive! The good news is that it's the drain plug. Honestly, I suspected as much and replaced the crush washer last year. Clearly, it didn't help. Unfortunately, I think the threads are chewed up. I also saw this a bit farther up:

So I have a leak around one of the bolts, too. So, what do I do here? I could try to drill and tap the drain plug and put a bigger one in and live with the smaller leak up top for now, but given that I'm still a couple of months from driving season, I'm thinking the best course is to replace the pan with a good used one. Unfortunately, Clark Fletcher describes oil pan removal as "one of those jobs that ranks high on my "I don't want to do that job again" scale." However, reading the procedure, it doesn't sound too terrible.
More to come.....
Glad to see you updating this again....

Tom_Spangler said:
Long time with no update! I parked the car in October, and it's been in my barn since. My two main priorities for the winter are to fix the oil leak and replace the timing and balance shaft belts. Well, that hasn't happened yet for a number of reasons, most of them involving my lack of motivation to be out in the freezing cold Michigan winter. For a while, I was thinking of pulling the engine, reasoning that that would make it easier to find and repair the leak and do the belts. But I decided to make one last try at finding the leak before going to all that work.
I'm also getting an oil smell in my SHO, so I need chase down a leak on that, too. So I got some UV oil dye and a light. Poured some in and ran it for about 20 minutes today, and here's what I found underneath:
So, that's pretty definitive! The good news is that it's the drain plug. Honestly, I suspected as much and replaced the crush washer last year. Clearly, it didn't help. Unfortunately, I think the threads are chewed up. I also saw this a bit farther up:
So I have a leak around one of the bolts, too. So, what do I do here? I could try to drill and tap the drain plug and put a bigger one in and live with the smaller leak up top for now, but given that I'm still a couple of months from driving season, I'm thinking the best course is to replace the pan with a good used one. Unfortunately, Clark Fletcher describes oil pan removal as "one of those jobs that ranks high on my "I don't want to do that job again" scale." However, reading the procedure, it doesn't sound too terrible.
More to come.....
The oil pan replacement in situ is difficult because you go through a lot of work similar to pulling the motor without actually pulling it.
I’d probably go ahead and pull it, replace the pan, check the bearings and maybe add a crank scraper/baffle to help with oil control. That’s just me though.
I feel you on the cold garage and lack of motivation. I learned that going to the garage and kicking off the propane heater before getting coffee allows it to heat up fairly nicely while I’m grabbing a bite and finishing my first cup of coffee. In a barn, you may want to hang some curtains or other items around the car to help hold the heat close to the car so that you’re not heating the entire barn.
Stefan said:
The oil pan replacement in situ is difficult because you go through a lot of work similar to pulling the motor without actually pulling it.
I’d probably go ahead and pull it, replace the pan, check the bearings and maybe add a crank scraper/baffle to help with oil control. That’s just me though.
From what I've read, either way you have to drop the front subframe/suspension and the exhaust, but to remove the engine itself there's a bunch more steps. Some of which I suppose I'd be doing to get to the timing and balance shaft belts, though, too......
Making some progress now. The crossmember is out:
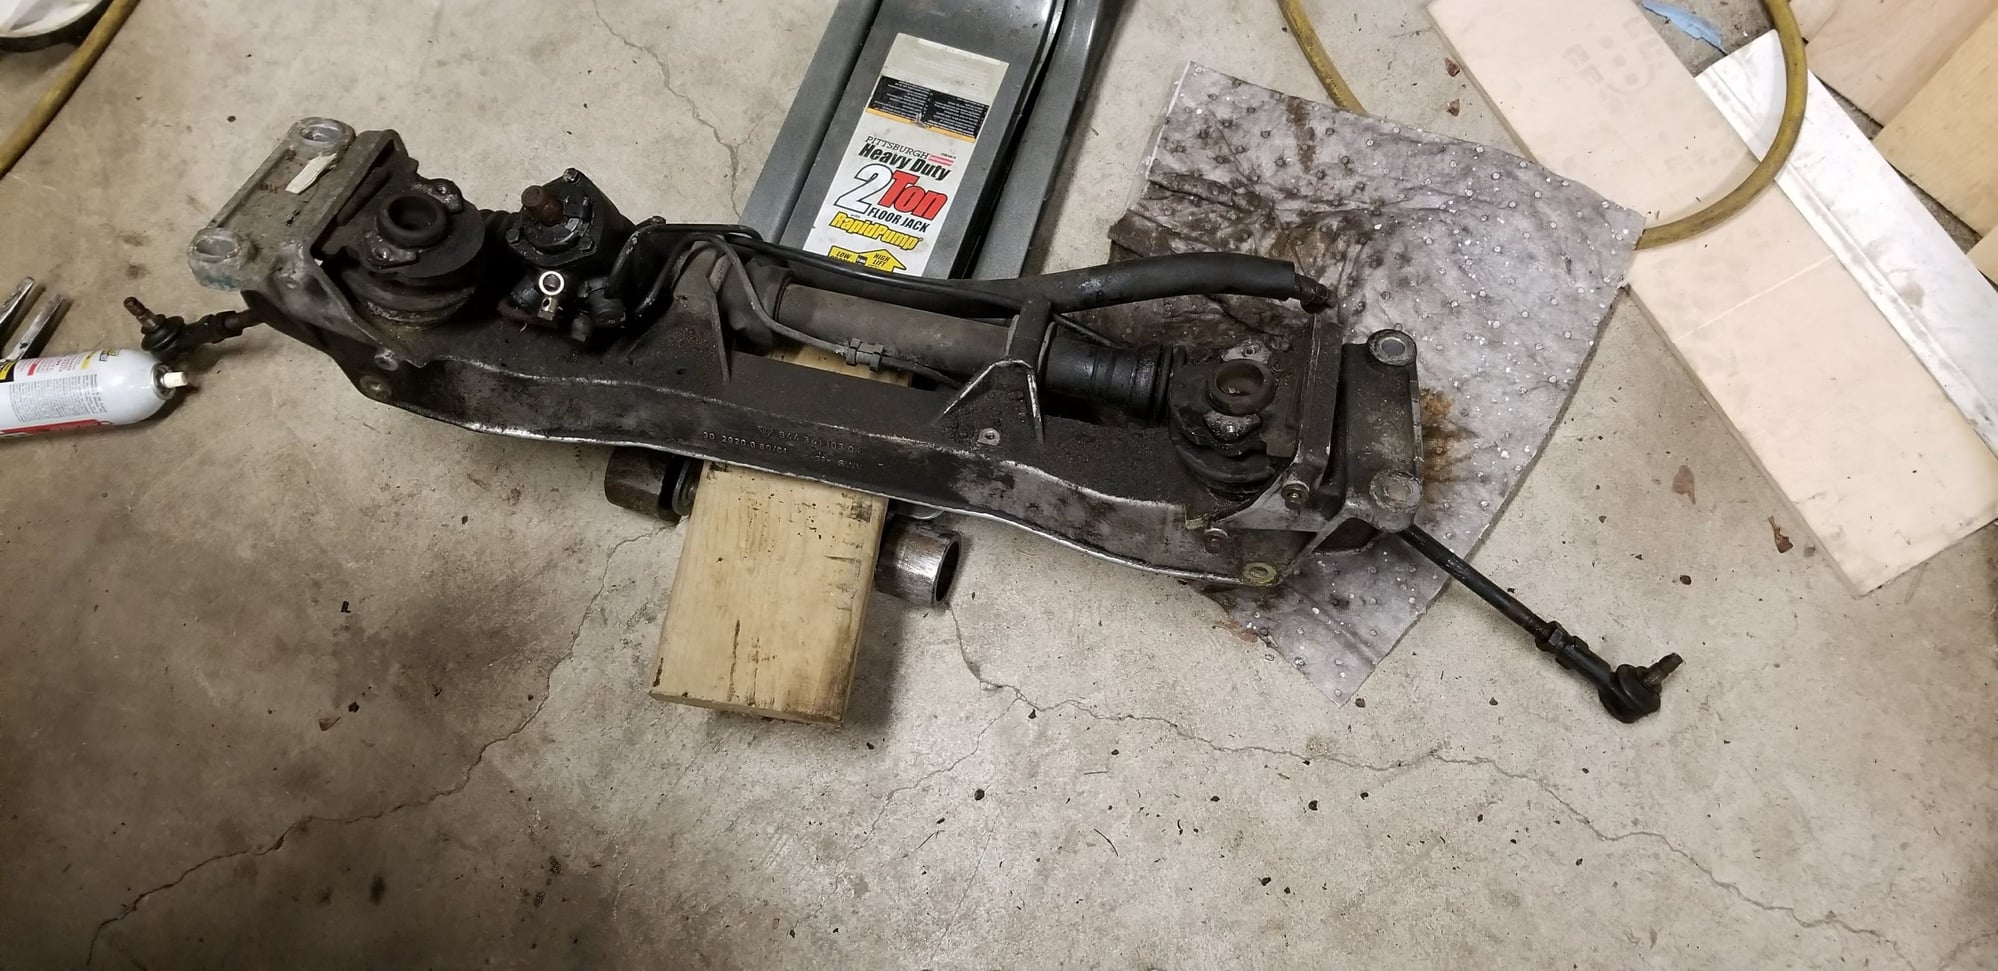
Wasn't too bad of a job. One of my tie rod nuts refused to move, so I ended up grinding it off. Two new tie rod ends on the way. It's not easy getting to the upper motor mount bolts on the right side with the exhaust there, but I eventually got it. Steering shaft was reluctant to depart from the rack, I'm a bit apprehensive about them going back together, but that's a future problem.
So, while I'm waiting for parts to arrive, I spent some time on Clark's looking at the procedures for the timing belt/water pump service and engine removal, since I'm pretty far down the engine removal path at this point. I decided it's not worth it, I'm going to leave it in for now and do the belts and pump in place. Need to order the parts and tool for that, too. The Arnnworx tool is the one to get, right? Anybody got one I can rent/borrow/buy, rather than me spending $170 on a tool I'm probably going to use once?
So, the plan is to remove the pan, replace the rod bearings and nuts, install a new (used) pan with a new gasket and new drain plug, which will hopefully take care of my oil leak. Then it's timing belt/balance shaft belt/water pump, then back together. Debating replacing the motor mounts since everything is out right now and they are probably original and 33 years old, but that's even more money, and I have to draw the line somewhere. Decisions.....
The parts fairy arrived late last week:
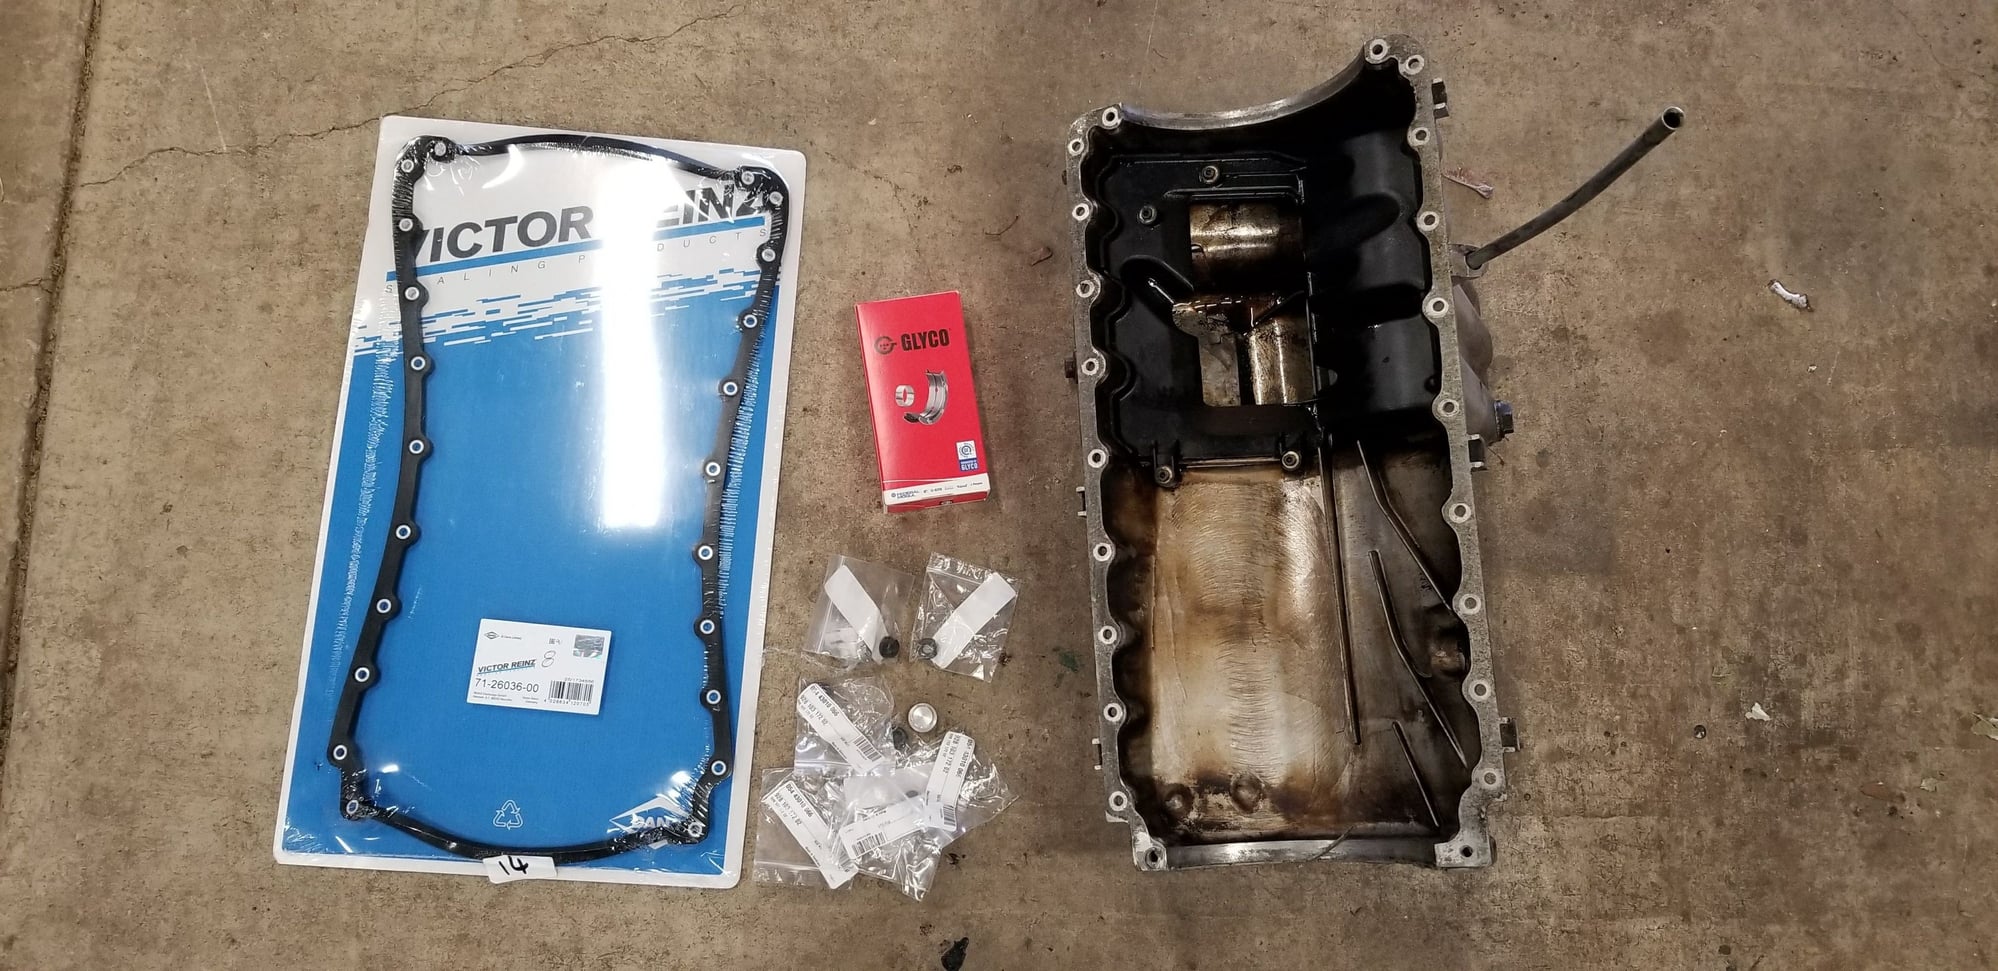
New (used) oil pan, oil pan gasket, rod bearings, rod bearing cap nuts, and new drain plugs.
The old oil pan came off without too much difficulty, so here's the soft underbelly of the M44 engine:
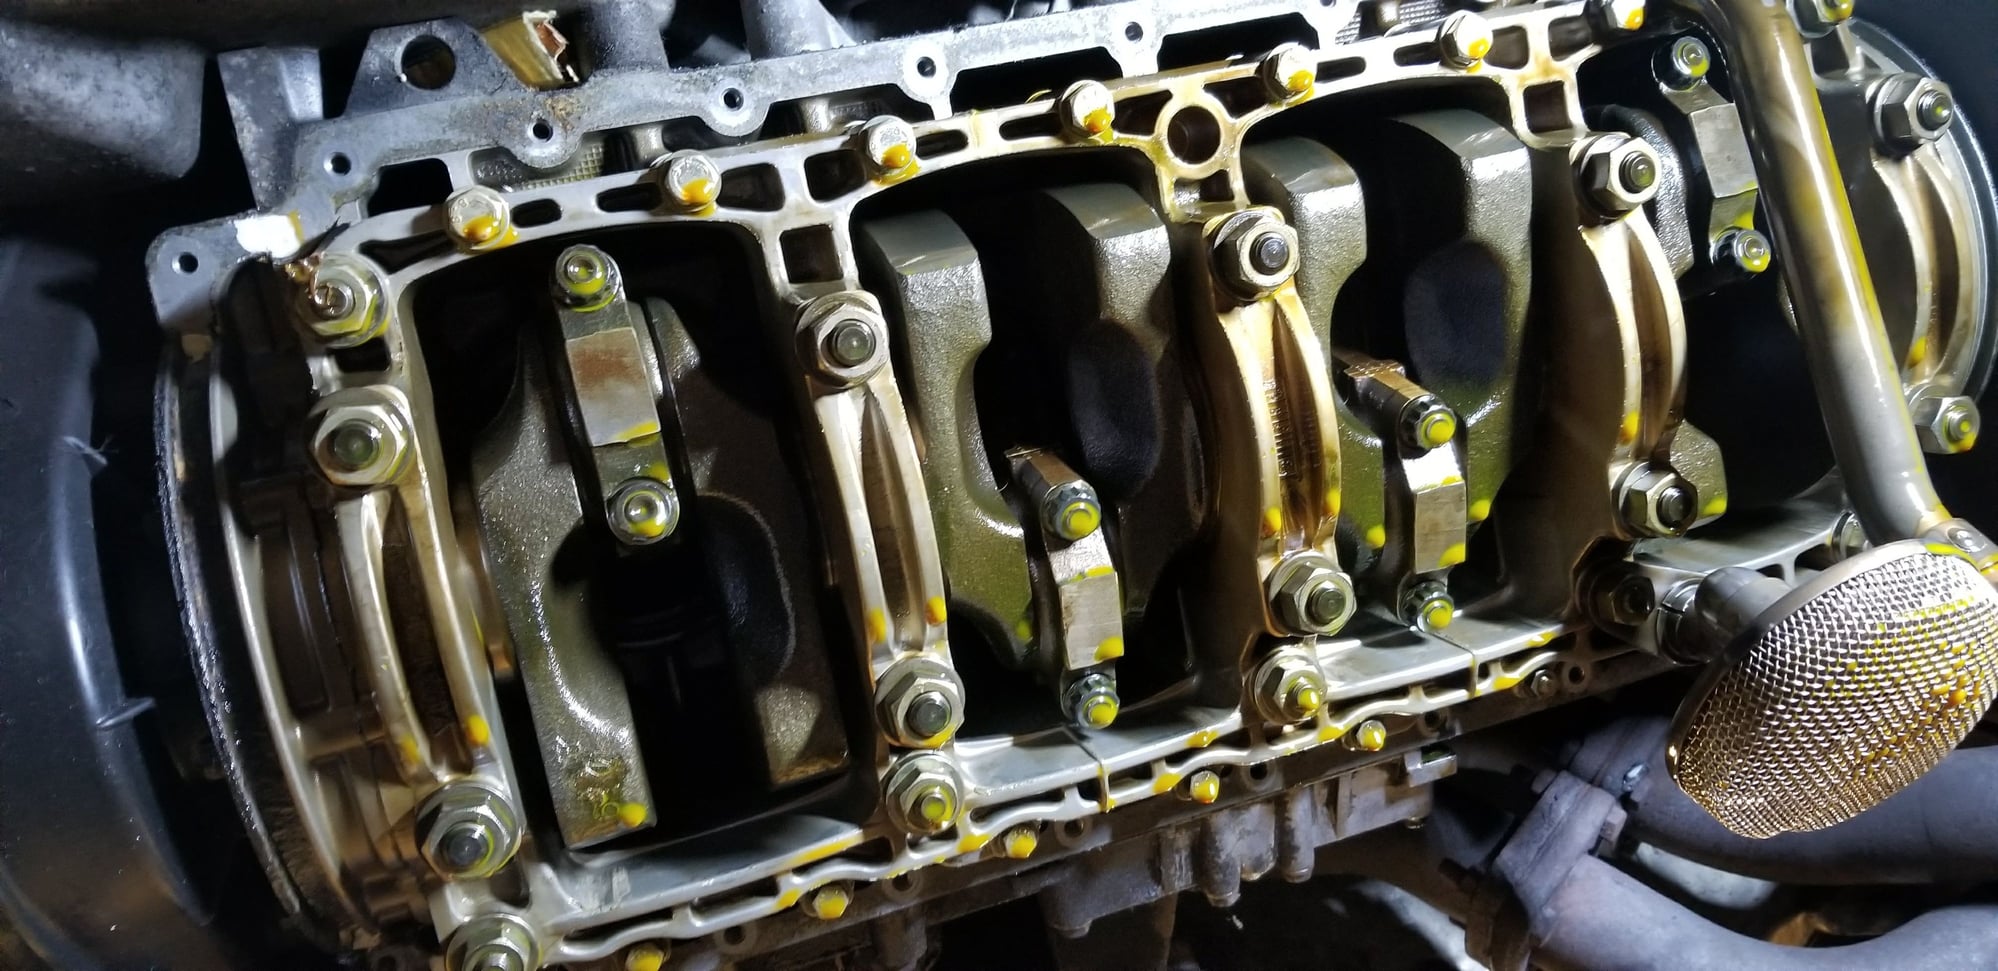
That oil dye is powerful stuff. I think I'll do a couple of oil changes once this thing is back together, just to make sure I got rid of all of it.
I pulled the #1 and #4 bearing caps off to have a look. Honestly, the bearings don't look bad at all:
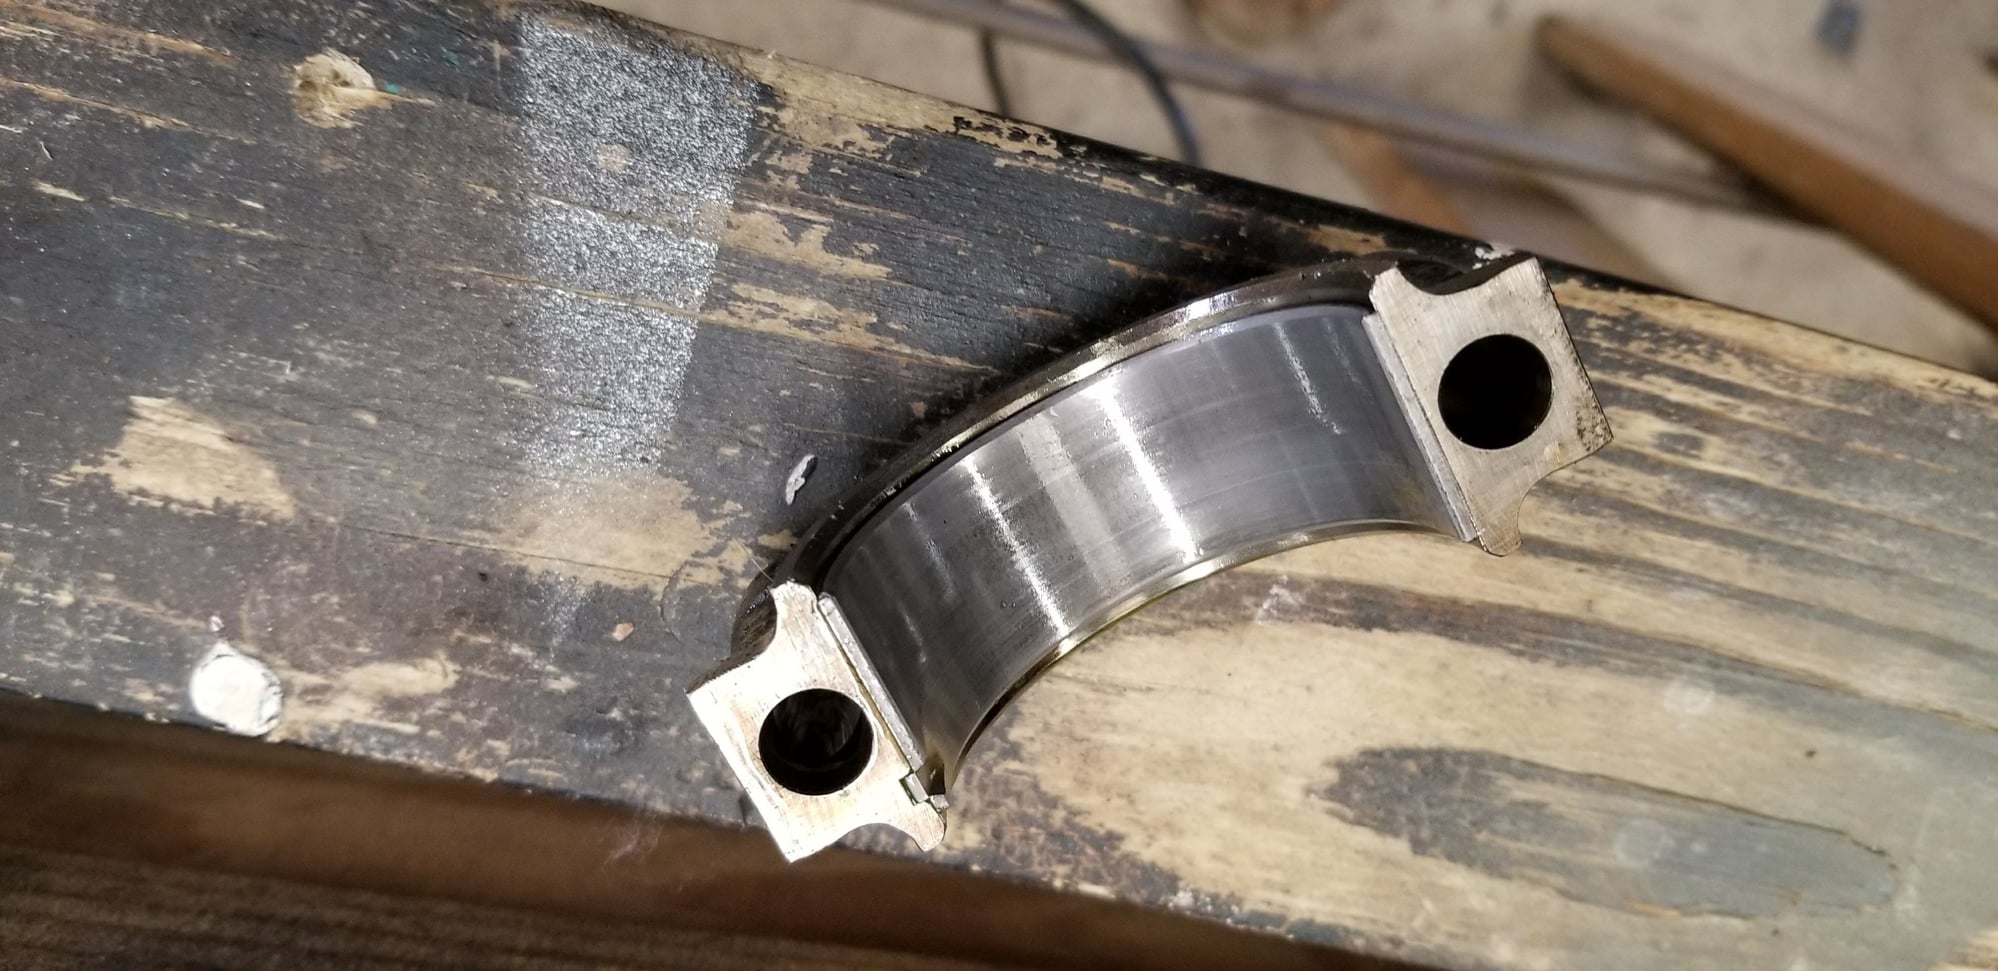
I've certainly seen worse, but since I already have the new bearings and it's all apart, I'm going to just go ahead and replace them anyhow. The only reason I didn't do it yesterday was that I couldn't find any engine assembly lube.
Currently puzzling what to do about my AC. When I bought it, both lines going to the compressor were disconnected, so I'm assuming some kind of failure befell the system in the past. The lines have been just hanging there, so my plan was to just remove the whole system to save a bit of weight and clean up the engine bay a little more, and by removing the condenser, get a little more air to the radiator. Does anyone know if there's a way to bypass the compressor with a shorter belt to the alternator without buying a $200 bracket from Lindsey? I know you can't just run a shorter belt because you lose the tensioner with the AC compressor.


