1 2 3 ... 5
esuvee
esuvee None
1/20/19 7:32 p.m.

So somehow this forum has been totally off my radar but I was just linked here from another site and I think my project might fit pretty well.   I am half-ish way through building a Brunton Stalker M-Spec in a pretty unique configuration. Maybe I can repay some of the GRM build thread binge entertainment that has consumed the last few evenings for me already (started with the V12 308, currently absorbing the awesome Jalpa)

First, on the finished project list for some personal background then I'll copy over the Stalker build:

Volvo 240 wagon, SR20DET with a big turbo and megasquirt, what's not to like? (I heard everyone puts SR20's into 240's so I went for it too) This one is lightly for sale right now, actually.

Build thread (needs updating with the new turbo): http://forums.turbobricks.com/showthread.php?t=284641

My pics are all on Flickr so if you click on them you can then branch out to more in my albums that I don't post.

Custom Frame for a motoped.  50cc 4sp with downhill mountain bike bits.  I used a company called cartesian tube to laser cut everything, it was the most fun welding ever!  This was a test drive of that process since I was still planning on starting from scratch with the 7ish car.  I guess this one is probably for sale too now that I think about itlaugh

Before those two I raced an ITA Honda CRX in SCCA locally for 7 years.  Crashed that car comprehensively.

Given this is a car forum I need to do the GM disclaimer, #IworkforGM.  Day job doesn't suck, actually.  I'm a development engineer on the Corvette and Camaro at the proving grounds in Milford, MI.  I know there's at least one intern and maybe a few others from my area of GM on this forum.  Great shot of a good day at Road Atlanta for the media release of the Z06. Always fun when the photographer asks you to put it on two wheels!


OK, on to the Stalker...

Alex


esuvee
esuvee New Reader
1/20/19 7:37 p.m.

Stalker Build Thread - hope you're patient...

9/29/2016

So, this one is going to take a while but I feel that if I don't start and keep up with some kind of documentation I'll end up regretting it.

After many years of designing my own 7 style car in solid works 'perfect' was clearly becoming the enemy of 'done' and I had a great solid model but years of fab work that wasn't all that interesting to me (I've built plenty of steel car/bike frames). I was an integral part of 4 FSAE cars at Michigan Tech so I had a good handle on what was ahead of me. Fast forward to last fall when I learned that Scott Minehart had taken over Stalker cars and was now building a kit for a miata donor rather than their typical 3800 V6 or LS V8 which both turned me off of their earlier cars. I am not using a miata powertrain either but the layout of this Miata frame worked better for me and saved weight over their LS V8 frames (which I am also not doing, more later).

Overall, it gets me 90% of the way to what I would have built myself but cuts a year or more off the build. I also really like the M-spec bodywork. I wasn't (and still am not) a fan of the M-spec in pictures but when my wife and I walked in the shop to talk to Scott about ordering a car we each independently looked at his car in the shop and said "huh, that looks way better than it does in pictures." Still not a 'pretty' car but also not at all ugly to my eye. During a test ride Scott pointed out that the new rear fender shape cuts way down on the typical 7 buffeting and I realized we were driving in a rain storm and not even getting wet, sold!

Here's a pic of one of their first complete cars and then a shot of where mine sits now:

Mine at home:

I picked it up with a budget rental truck and drove it back from Florida to Michigan. I caught the reverse snow bird timing and got such a screaming deal on the flight and truck that I couldn't justify the $1400 to crate and ship it. Had a fun road trip and picked up some hard to find junkyard stuff on the way home.

Next post will be about the driveline and the first couple days of progress.

Alex


Ransom
Ransom GRM+ Memberand PowerDork
1/20/19 7:42 p.m.

Holy carp! Welcome, and congrats on the awesome projects!

esuvee
esuvee New Reader
1/20/19 7:42 p.m.

So, driveline choices. I've been all over the map.


TLDR if you don't enjoy hearing my justification for what is basically an emotional decision:

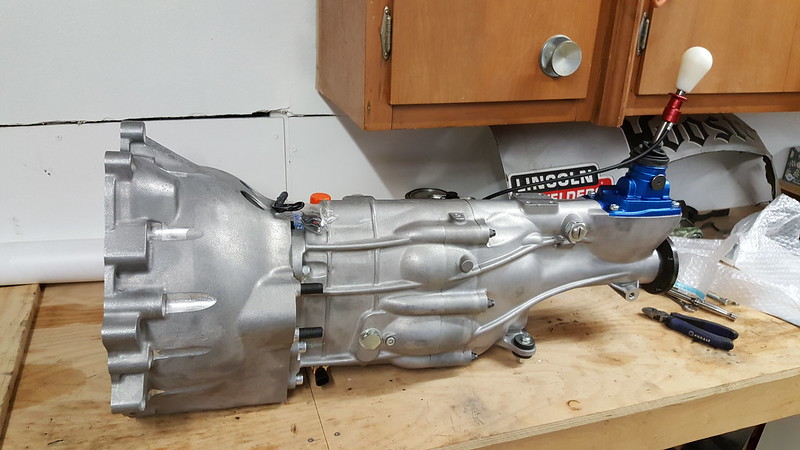
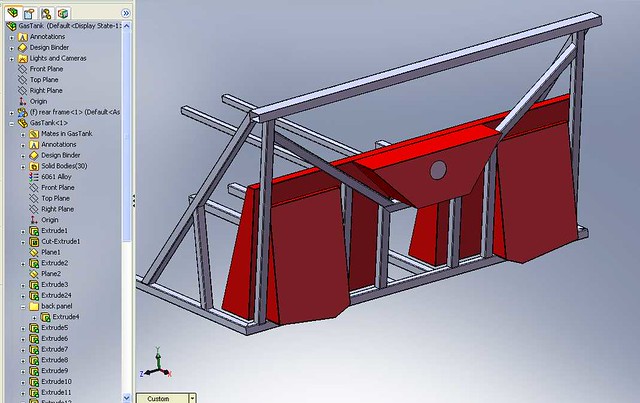
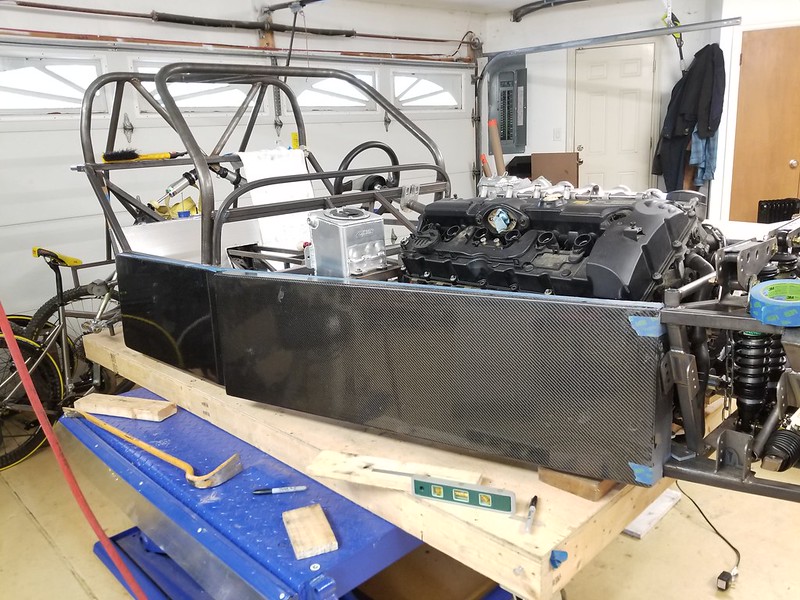
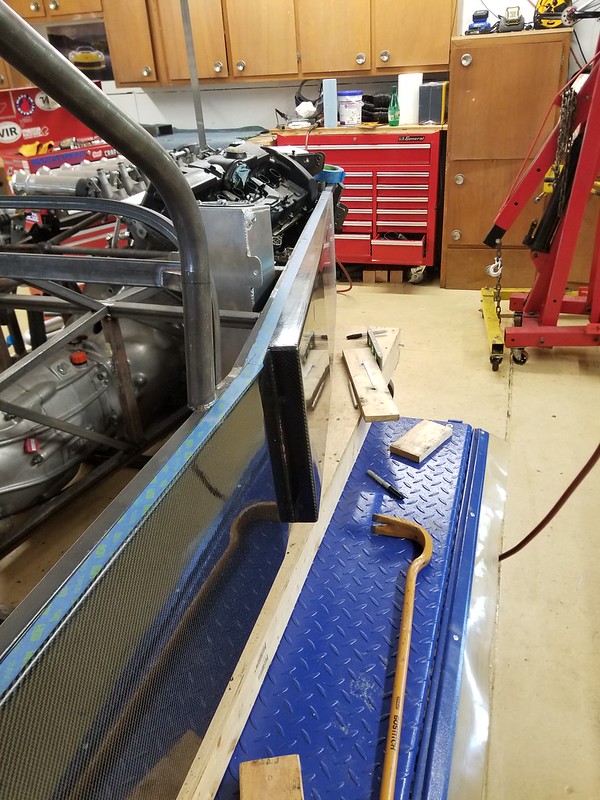
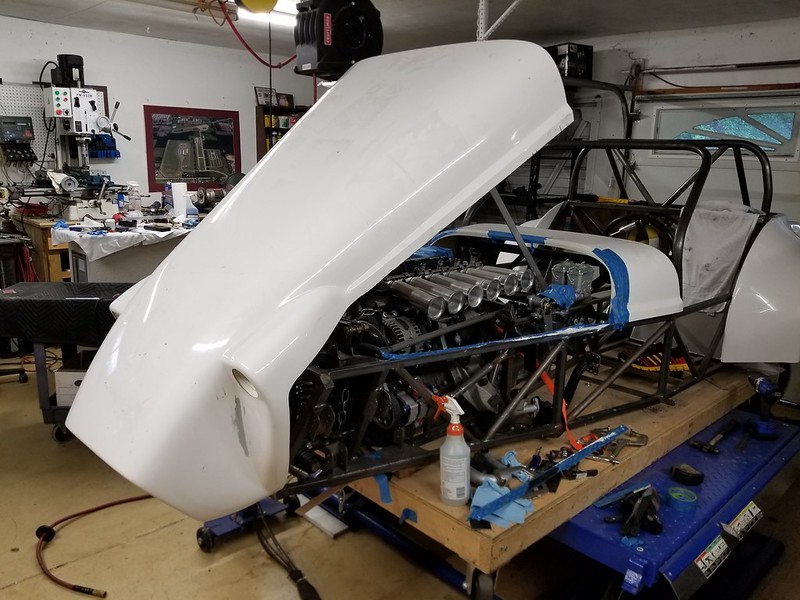
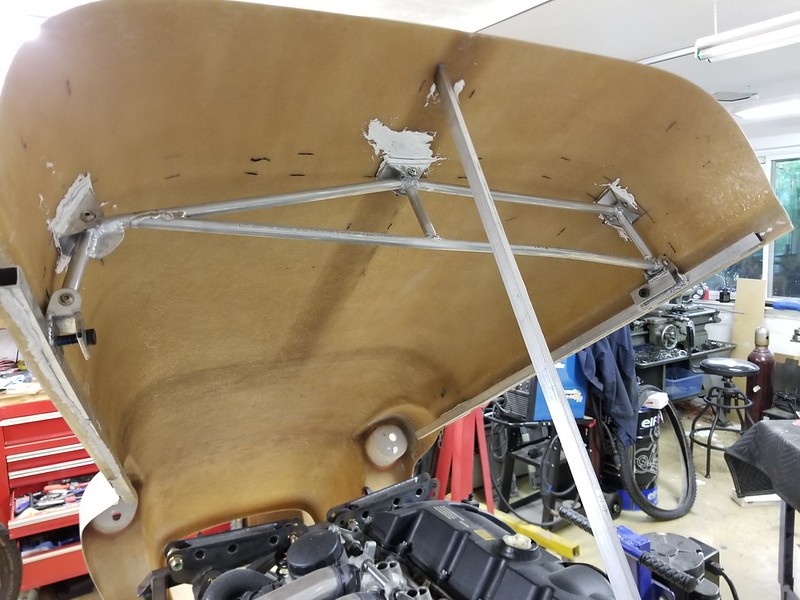
Car is going to be a BMW N52 running megasquirt with a Quaife 60G sequential box.


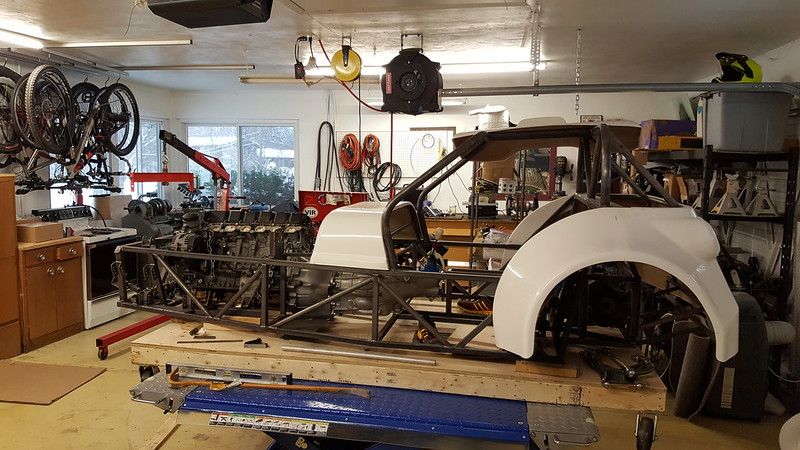
This car's primary mission in life is making me giggle on the way to work on nice summer mornings. Basically looking for a 4 wheel motorcycle (I have tried really hard to love riding motorcycles but just can't) That means the main metric for the driveline is a roll-on left turn getting just a *bit* sideways. Of course, it needs to do track days well but it's not a race car so there will be nothing to measure outright speed against, just has to be really fun.

I'll just get it out of the way and will accept no arguing about this part. It must have a sequential gearbox. That's about 50% of the reason for building it, I've driven a few sequential cars on the road and they make me laugh so much that it's a must do.

This is not cost-no-object but it's not a budget build either. Each piece needs to be 'right' from an engineering perspective but I can't go off the rails on money. Figure $10-12K for a complete driveline.

My day job puts me in the full spectrum of Corvettes and Camaros on a race track a few times a week so it also has to have some balls to keep me entertained. I am not in the category of people who, as the other 7 specific forums all warn against, will be "terrified by a couple hundred horsepower in a car this light." It needs to keep up with, and hopefully beat, a new Z06 from a HP to weight category. That means my goal is an even 300hp. The weight goal is realistically sub 1400lbs but the stretch goal is 1250.

Also has to sound great, no normal 4cyl, sorry. Needs 5 or more cyl or a bike engine to get my motor running.

So, a few options here:

Hayabusa - the gearbox comes with the motor so that shaves huge cost and weight. However, 300hp out of a 'busa reliably is not cheap. Figure $10K driveline cost with turbo or supercharger, trick oil pan or dry sump, gears to make the trans ratios streetable in a car this heavy, etc.

All car engines - nearly $8K cost of entry for the sequential gearbox. No way around it, I've chased every lead I can find for 6 or more years, you just have to pay to play. That means I need to keep the engine pretty cheap to make this option comparable to the 'busa on cost alone. The resale on the box is crazy good if I totally F this up and decide to bail at some point, even after it's complete.

My target, again, based on LT4 powered Corvettes and Camaros is ~0.9G in 1st for that squirmy back end feel we all love and 0.6G in 2nd for that smooth left turn roll-on oversteer without being unmanageable.

Here's what brakes the 'busa option: It only exceeds 0.4G above 50mph in 1st gear. It easily makes the 0.9G target eventually but you're doing 60 by then. I just don't see this being a fun car to squirt away from a stoplight. Of course, you can clutch it and launch like a bat out of hell but that's not what I'm going to do leaving my neighborhood at 7:30 in the morning. I'm saying I want torques. I'm also really skeptical this can be a reliable package.

LS is out. Love the motor. Best power to package size and weight going. I just don't need that much power. If someone made a 3.5 liter LS7 that was half the weight and power I'd be all over it. A full size LS would ruin this car. Someday I will build a car for a really nasty LS, it's just not this car. Also, the engine plus the sequential is way over budget.

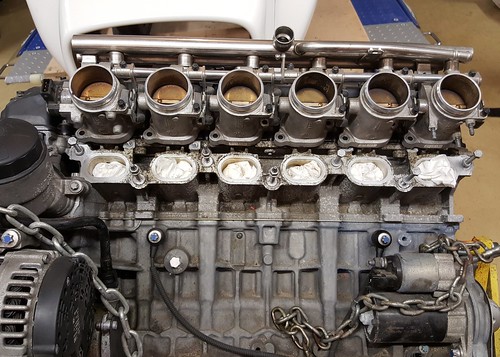
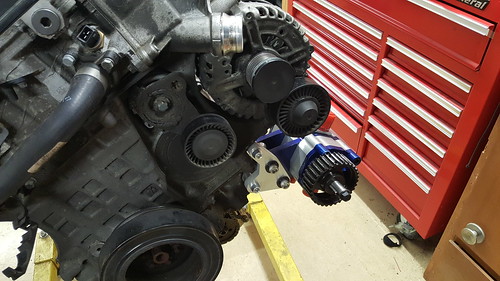
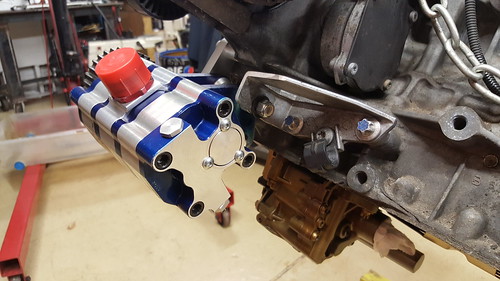
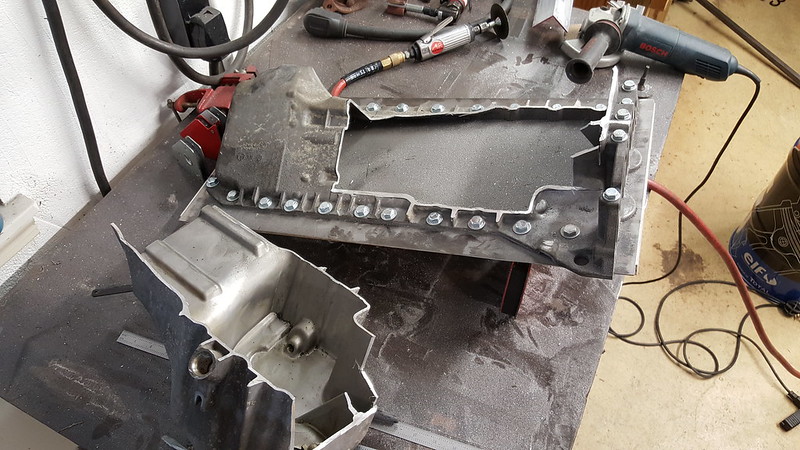
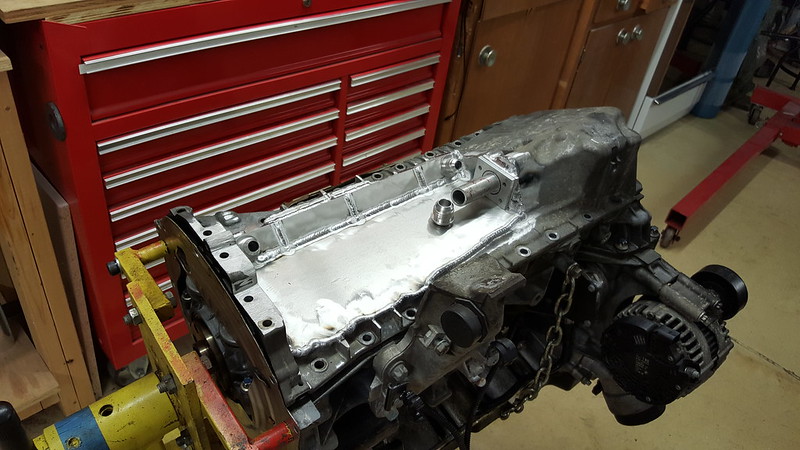
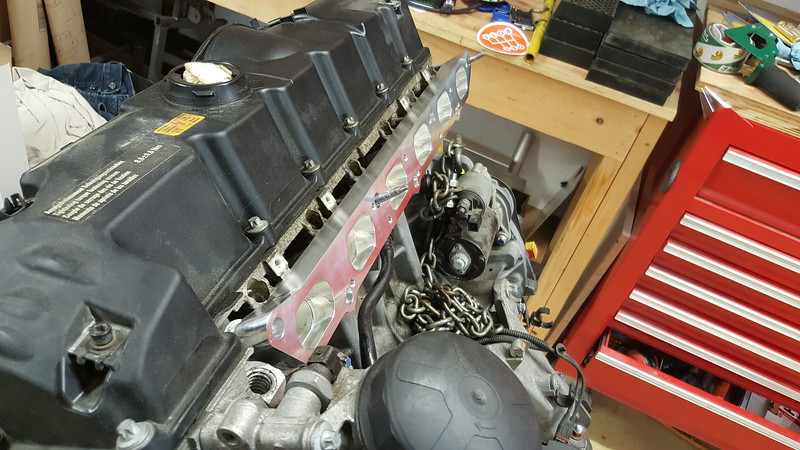
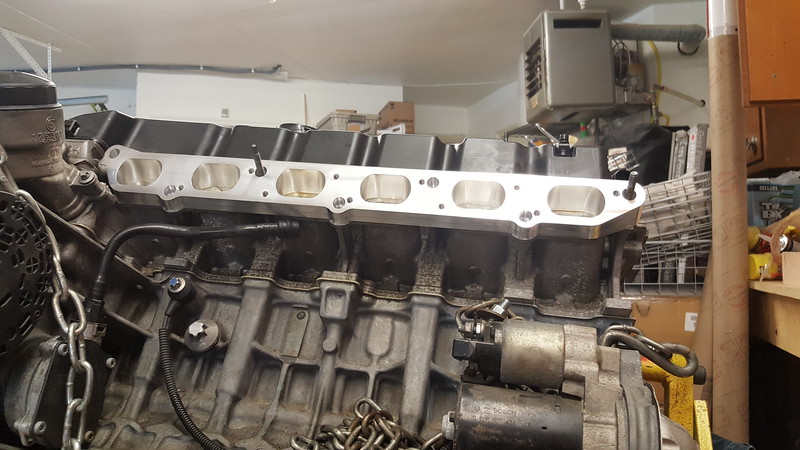
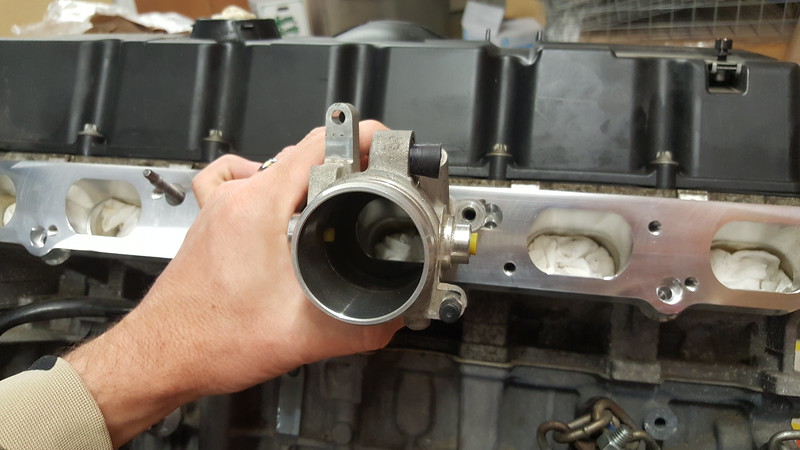
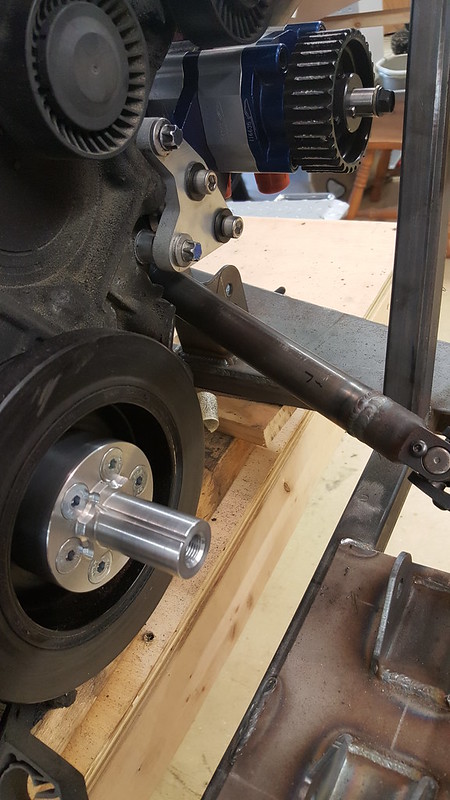
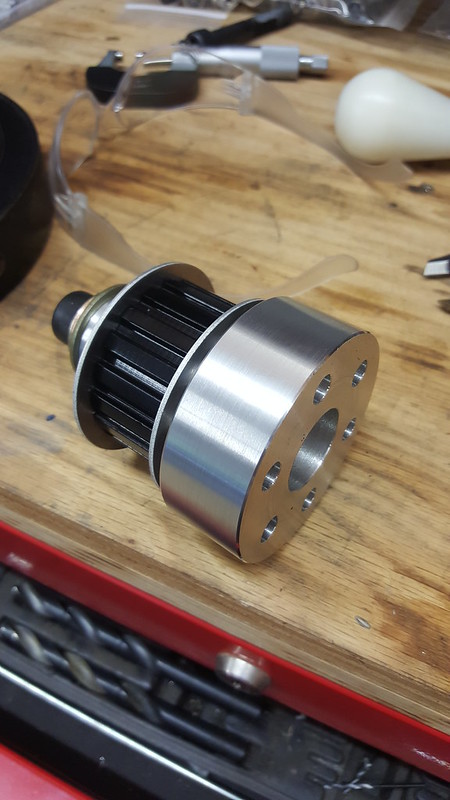
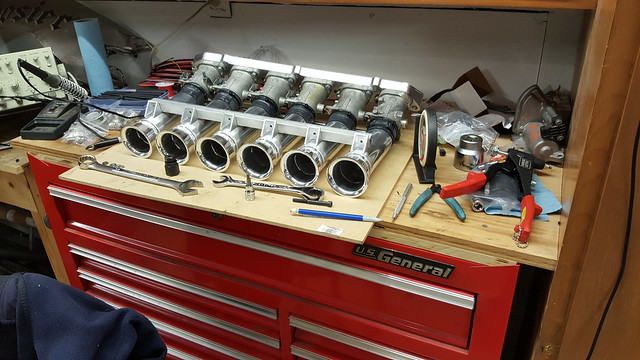
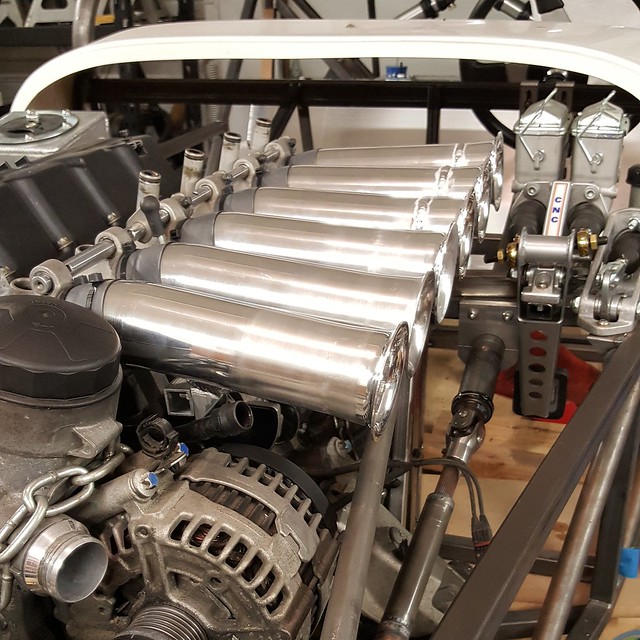
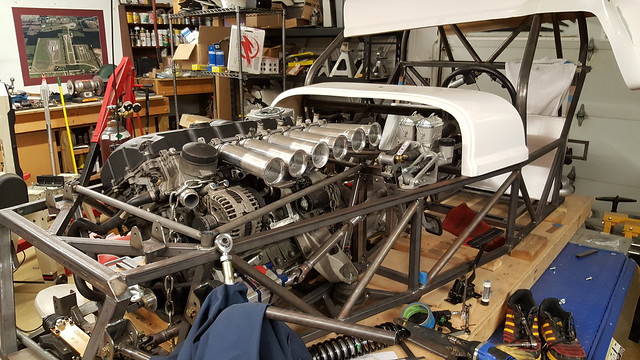
I've settled on a BMW N52. It's their ~2006-11 straight 6 naturally aspirated. Co-cast magnesium and aluminum block and reasonable strength parts make it sub 300 lb for a 3.0L six. That's a pretty awesome deal, basically nearly the weight of a typical aluminum 4cyl. They're also cheap since everyone wants the N54 with boost. I am very comfortable with megasquirt so I don't need to worry about BMW engine management. MS can run dual vanos, electric water pump, variable oil pump, etc. Locking open the valvetronic is pretty well documented already. Also, I love the sound, probably more than any other option here.

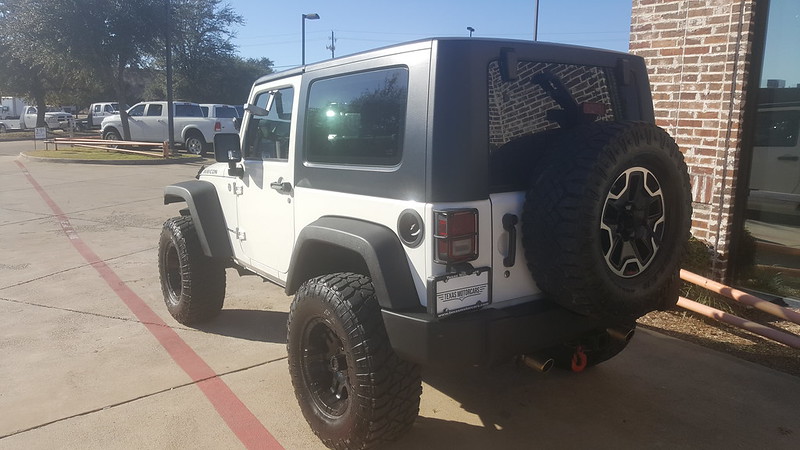
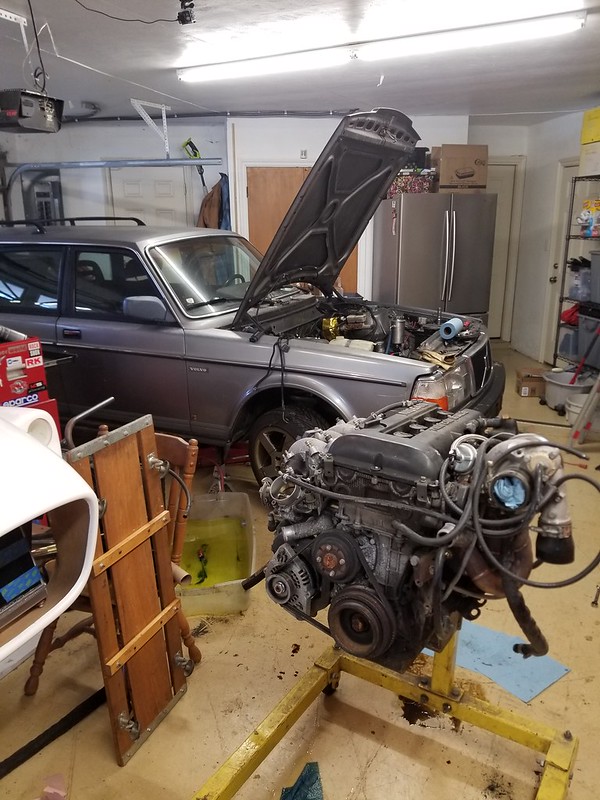
I'm anti 4 cylinder turbo just because I already did a big turbo 4cyl for my Volvo. Doesn't seem like the motor I want in this car and there's nothing new to learn there that I'm not already learning in the Volvo.

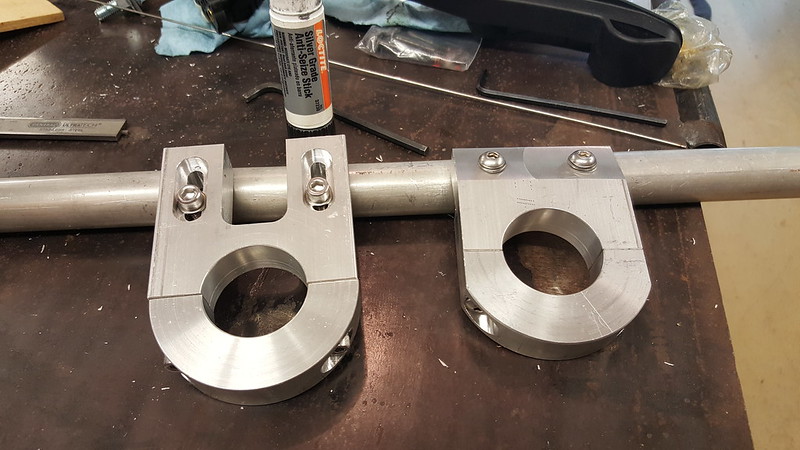
I was actually in England when they 'Brexited' so I called up a Quaife dealer that Wednesday when the pound was at it's lowest and ordered the 60G gearbox with helical sequential gears and the BMW input shaft/bellhousing. Scrap yard N52's are between $1500-1750. Done and Done.

Alex

esuvee
esuvee New Reader
1/20/19 7:47 p.m.

OK, actual progress:

9/29/16

There are a few small things about the Stalker that make sense from a manufacturing/cost standpoint but make the engineer in me twitch too much. One is the diff mounting. The car uses a CTS style rear diff, the one I found after much searching is a 3.23 ratio with a limited slip.

The original Stalker mounts use a rubber bushing up front and then solid mount the rear ears of the diff case. I am sure this must work given how many cars are running hard with this setup, I just can't choke it down. Even the theoretical stresses and noise are too much for me to handle. Today's project was to add the factory rear bushings back into the diff mounting scheme.

These are pretty thick sleeves, they just look like I welded the bushings right to the framewink


Felt good to get the first thing checked off the list. I'm expecting 3-5 ish years of this now...

Alex

esuvee
esuvee New Reader
1/20/19 7:51 p.m.

10/5/16

Finished up the weekend's work this evening. I got the rear suspension mocked up to make sure everything was there and then prepped the rear knuckles.

Here's the finished product:


The upper control arm mount is designed to use the stock Miata flexible RUCA bushing:

The Stalker strategy is to replace the stock rubber bushing with Energy suspension poly bushings. I hate poly suspension bushings with a passion. If a joint needs deflection it should be solid, bonded rubber. If it needs precision it should be a spherical bearing. These squeaky nuggets of E36 M3 are just expensive turkey calls and have no place in a suspension:

I made press in/snap ring spherical bearing inserts to replace the poly. There are sphericals everywhere else so no NVH concerns and it's an important spot to add stiffness. To Stalker's credit their big engine cars come with custom knuckles so this adaptation of the Miata part is not their hot setup (although, I do kind of like OEM validated parts, the FMEA on a knuckle is pretty ugly).

The lower mount needed a piece of tubing that Stalker provided to reduce it to the size of the spherical bearing bolt. I tacked it in place to make sure the bearings were spinning and not the tubing inside the cast knuckle. Was a fun excuse to break out the Nickle rod too.


A friend picked up an Eastwood powder coating kit and I got the oven. I love these guns, I had one in college and they work great. I did the hubs in a textured powder and the knuckles in gloss. I really like the flat, textured black but I think with brightly colored, glossy control arms the knuckles would have looked odd or dirty in the textured finish. Nothing like cleaning up the garage from painting with a blow gun! Also nice to have painted parts ready for assembly in 40 min.


I need to get after the transmission dealer, it should be done any day now and I think I need the trans and an engine to go much further. I can jump into the roof hinge/latch design and fabrication before that stuff shows up, I guess.

Alex

759NRNG
759NRNG SuperDork
1/20/19 7:52 p.m.

Is  JHeinricy on your speed dial?......welcome aboard!!!

esuvee
esuvee New Reader
1/20/19 7:53 p.m.

10/8/16

Engine is home! I got really lucky on ebay and found a local guy (6 miles away!) selling his 2009 N52 out of a pretty sweet 1 series that's getting an N55. He was willing to leave the accessories and harness on so I get all the connectors, etc. Most of the junk yards just cut the motors out with a torch and side cutters.

I like the idea that the engine swapped Volvo project now hauls the engine for the new project.


esuvee
esuvee New Reader
1/20/19 7:56 p.m.

In reply to 759NRNG :

No but I'm on hischeeky

Ha! I didn't work too much with John before he retired but he did do my driver's certification which is quite a process at GM and I'm really glad he was still around for it.  We've talked C7's a few times since.

Alex

esuvee
esuvee New Reader
1/20/19 8:02 p.m.

10/10/16

Pretty good evening's worth of work:

Got the engine torn down to just the parts I will use in the finished car and on the scale. I am still amazed with the BMW attention to detail. There are re-usable O-ring clamps on every water hose and 50% more clips, covers and strain relief for wiring than any other car I've worked on. I also took it all apart without breaking one single connector, never made that happen on anything else.

It weighs 311 lbs in this state (edit, later realized it was FULL of oil, 296lbs is correct). I had predicted 305 to 320 based on internet folklore so I was quite happy with 311. Only items to add to make it a runner are the 12lb lightened flywheel, ITB's and header. Electric water pump, starter and alternator are on there.

One more pic of the state it's in for the weigh in given I was so frustrated with trying to figure out who weighed what engine with what parts on all the various forums:


It even kind of fits! This pic doesn't show the 3 or 4 places where it fouls the frame by more than an inch but those are just details...

Alex

esuvee
esuvee New Reader
1/20/19 8:08 p.m.

10/16/16

I was hoping to get away with keeping the stock oil pan but wasn't sure it was likely given it's tough to find dimensions online. I've cut a welded aluminum pans in the past so wasn't worried about the process, just not looking forward to it.

However, now it's pretty clear that I need to cut 1.75" off the pan to fit everything under the hood. This is way more than I was hoping for. Hood scoop is not an option since the bulge would be in a very awkward location. 

I made some sketches of the stock pan, then the stock pan cut down 1.75," and then the cut pan with a wing added to the driver's side. The sketches show a left and right 1G turn and the oil line to keep constant volume. I know this is WAY oversimplified with so many missing variables I can't even list them. However, it's an OK way to visualize the delta from pan to pan. Keep in mind the pan mating surface is tipped 30deg on BMW motors, the bottom of the pan is level. 

Stock Pan turning left (pickup is the short line at the bottom):


Stock Pan turning right (forgot the pickup on this one):


Cut Pan turning left (with corresponding lower volume of oil):


Cut Pan turning right:


Winged cut pan turning left (wing volume included in oil volume but wing empty due to G force):


Winged cut pan turning right (whole wing volume full. This could be improved with a trap door):


I think the upshot of this is that I'm uncomfortable with any of these options. The depth of the pickup is just too low relative to stock. So, I'm starting to shop for used dry sump systems. We have a lot of experience at work trying to make marginal wet sumps work (better said, good wet sumps with crazy good tires) and it is one of the hardest things to do without learning by engine destruction.

Any thoughts are appreciated, I feel like I'm going overkill but I hate worrying about oil pressure. Also, there should be 5-10 hp available in drawing a high crankcase vacuum with a real dry sump.

I also decided to run throttle bodies. Too much science experiment to work with valvetronic. There may be some benefit to using the valvetronic actuator to lower lift at idle to drop the deltaP across the throttles. That should help with the snuff out issue of fast throttle applies on ITB's. That's stage 2, though.

Alex

esuvee
esuvee New Reader
1/20/19 8:10 p.m.

10/29/16

It fits!


It's as close as it can get, the bottom of the bellhousing touches the table and with everything level and square the oil filter cover is about 1/4" from the inside of the hood. 

A used Raceline 4 stage dry sump pump is sitting on the workbench. As suggested before, I'm going to use the stock pressure pump and remove the pressure stage from my external pump. The BMW pump is a pretty trick variable volume job and it looks like it has more capacity than the pressure stage on the Raceline pump. I can't find numbers but the rumor is that the modern Vanos actuators take a bunch of oil volume to run so I'm worried about just slapping the Raceline on (probably sized for a small Chevy). This makes plumbing a tad easier also.

Also in the works:


BMW S54 throttle bodies. They're on the big side but the time savings in not having to make a linkage for a bunch of motorcycle throttles is pretty huge. I'm 20% considering sleeving them down to 45mm but likely will just run it as is at 50mm to start. 

I did a quick solid model and got a quote back for a CNC'd aluminum 2.5x1" adapter flange to go from the S54 throttle body pattern to the N52 intake flange and it wasn't bad at all. Around $400 for 3 pieces (total, not each). I figure there are at least two other people in the country who would want to do this and the added cost for the 2 extra parts is almost non-existent.

So, more engine modification than I originally intended, especially the oiling, but it's all fun so far.

Alex

esuvee
esuvee New Reader
1/20/19 8:12 p.m.

11/08/16

One step closer on the oil pump. I picked up a used Raceline 5 stage pump for cheap. As discussed earlier, I then decided to just use the scavenge stages with the stock pump providing pressure. Shortening it turned out to be a fun lathe project with some cutting, a snap ring groove, and threading. Looks more appropriate for the engine size now.

Original:


Shortened parts:


Shortened pump:


Also finished up the design for the ITB adapter. It's really tight around that first throttle but it fits.


Next up is the mount for the pump, it's going to involve the steering shaft snaking through there, should be interesting.

Alex

esuvee
esuvee New Reader
1/20/19 8:14 p.m.

11/21/16

The pump mount was interesting. I test drove emachineshop.com for the first time for the main piece of the mount and I couldn't be happier. 

I made an 1/8" aluminum mockup to get everything in the right spot but it needed to be 0.5" thick for strength/stiffness. Making 0.5" thick aluminum parts without a CNC makes it look like you chewed them out of drywall so I wanted to have this one made. I dowloaded the CAD software from emachineshop, swore at it for a few minutes until I found which way was up, and then drew the part. I moved the tolerances around until I liked the price (0.005" and 10deg draft angle, I think allowing water jet, 0.001" or 0 draft angle increased the price by about 40%, still not terrible) and hit 'buy.' 6 days later it shows up at my door looking awesome. 

I know everyone "knows a guy" with a machine shop, water jet, etc. who swears they can do it cheaper but that turns into a PITA 100% of the time. This was easy, good quality, and a pretty good value. 0.5" ~4x4" aluminum with 4 unique hole sizes and a non-square shape was $61 shipped, would have been $105 for the tighter tolerances. That was for a single part, $80 for 2 and $90 for 3.


There's a second bracket on the back to stiffen it some more:


So, overall really happy with emachineshop. Also, I sent them a much more complicated model in solidworks format and they quoted it in two days, also for a good price. Not quite as easy as 'click to buy' with their software but still good service and you don't have to screw around with a second rate CAD program.

Alex

esuvee
esuvee New Reader
1/20/19 8:15 p.m.

12/23/16

Not much actually completed but some progress and an early Christmas present:

Oil pan on an MDF/steel plate to keep it from cracking during the somewhat violent cutting process:


Nearly complete pan, need to add the front scavenge port but that one is easy.


Early Christmas present (well, not really early, 8 weeks late, actually. Doesn't matter, obviously)


It all kind of fits:


Also tried metal spinning some velocity stacks. I learned a lot about how NOT to do it but it was fun to try. This attempt was massively better than the first one I tried a few hours before so I learned, I guess. The dude on youtube had much more success so I'm missing something. It seems hard on equipment. I think I'll buy them.


Next up is some composites work for a change of pace now that the engine is sealed back up.

Alex

esuvee
esuvee New Reader
1/20/19 8:17 p.m.

3/18/17

Work has been crazy so I'm in parts collecting mode right now. 

Here's the latest e-machineshop.com part. It's an adapter I designed to bolt the S54 ITB's to the N52 head. Looks and fits great, can't wait to get it all bolted together. The ports through the adapter are lofted and perpendicular to each angled surface so there isn't just a chopped bend like it appears in the pictures. 

I am sleeving the throttle bodies down from 50 to 45mm which is a PITA but less so than mounting 45mm motorcycle throttle bodies. Hard to figure out why BMW went so big on that engine, they could easily have gotten away with smaller at the power it made. I'm sure having electronic throttle control helped calm down the 50mm off idle issues but I just don't get why (I'm sure there's a reason, though. Being Germans and all). 

CNC brake/clutch pedals arrived. Seats and an aluminum flywheel/clutch are also on the way.

I don't anticipate getting even a day in the garage until May 1.  


Alex

esuvee
esuvee New Reader
1/20/19 8:19 p.m.

6/29/17

Got a new job that has been taking a lot of time but I've been collecting parts and tools. GM shuts down this week so I'm hoping for some progress!

New Mill - Paid as much as I would have for a used Bridgeport but I just don't have the space. This one is well reviewed and fits great in my shop. DRO and power X and Z are nice features too. I got a better quality vice and a rotary table so can't wait to get started!


Seats by JKComposites in the UK. Can't say enough about these guys, you order from the guy who will be laying the fiberglass and everything is pretty custom. Also quite reasonable prices, a pair of seats shipped to the US is hundreds of dollars less than a single Sparco/Momo, etc. No FIA cert but no racecar either.


One actual project complete, this is the motor controller for my Megasquirt homebrew electronic throttle control. It's a pololu part that does quite a bit of the diagnostics for me. Flame away, I've had enough stuck mechanical throttles that I'll go toe to toe with anyone who says this is dangerous. Makes ITB's driveable since you can vary the WOT position with RPM.


So, hopefully some seats, pedals, steering column and trans tunnel to talk about later this week!

Alex

esuvee
esuvee New Reader
1/20/19 8:21 p.m.

7/29/17

I've had plenty of garage hours, just working through a ton of slow, detail stuff.

Overall getting close to steering, pedals and seat being done, seat mounts are all that's left. 

Using a mountain bike headset for the column worked awesome, zero play and super smooth. The whole steering system is 1.125x0.049 tubing. 3 times stiffer than the typical 0.75x0.125 for the same weight (taking a lesson from work, steering shaft stiffness is uber important, too much is not enough). 


Could have done the column mounts in steel but wanted to exersize the new mill:


Seat mounts, oil pump drive sprocket and gas tank are on the short list.

Alex

esuvee
esuvee New Reader
1/20/19 8:23 p.m.

8/12/17

Finished a project I've been worried about in the back of my mind for a while. I needed a drive snout for the oil pump belt and the interface isn't super simple (at least not simple to get acceptable runout). Made LOTS of chips on the lathe and got to exercise the rotary table on the new mill, finally getting used to the machine.

Bare snout on the engine:


Pulley installed:


Full pump drive:


In the background I got the full steering shaft welded up. Next up is seat mounts and gas tank.

Alex

esuvee
esuvee New Reader
1/20/19 8:26 p.m.

10/29/17

No huge milestones but steady progress this fall. 

First is the gas tank. Most people put the tank in the 'trunk' of the Stalker but it fills it completely. I am pretty committed to being able to carry two helmets and a weekend bag back there so the tank was going to be impossible to fit. Given my seats don't flip forward there was totally wasted space between them and the rear bulkhead. I drew up a tank that holds 12 gallons (not going to want to sit in the car for longer highway stints than that) and uses every cubic inch back there but nothing in the trunk except filler neck. Before anyone worries for my life, there will be a sealed firewall between the tank/trunk and the seats! 


I again had outstanding results from emachineshop.com. I exported a drawing to their software, got a price instantly (only $100 more than the raw material for 20 something pieces), clicked 'buy,' and a fuel tank 'kit' showed up at my door 6 days later. 


I took the time in the model to use the right material thickness and work on the overlap for the joints so it went together so easily. No measuring needed whatsoever, just some blue painters tape on the joints and tack together. Had the whole thing tacked up in 4 hours. It would have taken an entire day just to cut out the pieces if I went the arts and crafts route. (and they would have looked like the dog gnawed them out with his teeth)


Probably my favorite part of the project is seeing the computer parts come to life.


Fits!


Got the dry sump tank mounted. The mill makes things so much easier and you get to add speed slots to everything!


Mounted on rubber to save the aluminum mounts from cracking and to keep the noise down.


Slowly working on the two body pieces I need to make. The LS stalkers just shove headers out the sides of the engine compartment but half my BMW engine bay is not that attractive so I need a couple side panels. These also have a step that looks like venting but actually gives you a couple inches wider footbox. Mold is duracoated now, needs some wet sanding before I can pull the two parts out of it. Yes, there's a draft angle so even thought it's not the prettiest composite design it will at least come out of the mold.

I'm no painter and I did these in the driveway (snatching leaves out of the air before they could rest on the wet paint!) so overall I'm pretty pleased with the finish. A bit of wet sanding should knock down the orange peel but even that isn't so bad as is. The duracoat flows really well, strongly recommended over regular paint for a composite mold.


Finally some electrical fun. I've wanted an oscilloscope my whole life. I needed to diagnose the PWM signal from the megasquirt I'm using for the throttle motor so I broke down and ebay'd one. I could have done a digital scope but the inner hipster in me wanted an old analog like we had in high school. Worked like a charm, 10 minutes from hooking it up to fixing the issue. (needed a pull up resistor) The Volvo is my test bed for the throttle control.

This is a video if you're a dork and want to reminisce about analog oscopes.


Next up is a radiator, driveshaft and then maybe some aluminum panels!

Alex

esuvee
esuvee New Reader
1/20/19 8:29 p.m.

Here's the first 18 months, filled my 20gb card today at 1 frame per minute. Pretty cool to review. I figure I had the camera on about 75% of the time and it works out to 143 hours, not as bad as I thought! 

(haven't figured out how to work this forum yet, here's the link:)

https://www.youtube.com/watch?v=YdVxTF0hXSY&t=8s

Alex
 

esuvee
esuvee New Reader
1/20/19 8:30 p.m.

1/6/18

Fun stuff today, finally test fitted the ITB's! I sloped them from above the master cylinder down 2 deg/cyl to the front to clear the hood. Hard to see completely from the photos but it's a really cool effect in person. The last pic is a video link of my bench setup for the Electronic throttle control. Works great! Pretty easy code to write, just using RPM and TPS sensors to limit WOT position at lower RPM, no OEM style monkeying around with driver/throttle filtering.


esuvee
esuvee New Reader
1/20/19 8:34 p.m.

4/8/18

It's been a while since the last update. Lots of work on work, daily drivers, bicycles, and for the Stalker: E36 M3ty, E36 M3ty, slow composite bodywork.

OK, I HATE composite work. Turns out I am, apparently, OK at it but, good lord, it sucks the balls. Lots of pictures here because I feel like I deserve it after this E36 M3show! 

I have no left side headers so I needed a nice panel to finish it off. I also wanted to do a vent that wasn't really a vent but allowed a wider footbox in a good looking way. Here's the vent shape I'm talking about. It's the part right under the hood that flares out before the pass compartment. Many people use the 'vent' area as just a way to buy a little width at your feet. 


So, should have just made the damn thing out of aluminum and been done in a day but it seemed like an easy shape and I've wanted to try some carbon fiber work since we last did some in college. I should NOT have tried it on a part this size. The amount of work to make and prep the mold, cut the damn layups (that took an entire day), vacuum bag the thing with no leaks (another whole day), and infuse it is insane. Further, there is no redeeming quality to the work, it just sucks. It's like drywall. Easily 40 hrs to the finished part that isn't even trimmed yet. 

It did turn out absolutely perfect, literally flawless, so I'm happy in the end. It's just like the day after a big night out, you swear you're never drinking again in your life but you know you'll be dumb enough to do it again at some point. 

Here's the mold, wet sanded and sprayed with PVA. Carbon rolled up behind it, still seemed a little fun at this moment:


Here's the first half of the layup, 2 layers plus 2mm core mat. VERY not fun at this point. My back was already super sore from reaching over the 60" carbon roll to cut patterns, hours behind where I thought I'd be. A couple details I had to guess on were making me very nervous and I wouldn't know the result until the very end.


Vacuum bag finally ready to go. This sucked even more than cutting patterns. 


Here's why I should have started smaller. Even pumping out the damn epoxy was tiring and boring. 4.5kg, I needed about 3.5. I was mixing as it infused so poured back 2 of these before they got hardener. Again, this whole time since it was my first part I thought there was a 50% chance of failure, not motivating!


Infusion happening. Aside from worry, this was actually cool:


Finished infusion, still at 50% confidence here:


Ta da! A perfect finish, popped out of the mold with no issue, I even remembered gloves so I don't have any splinters. The part is F'ing sweet, not sure it was worth it but it was satisfying for sure.


Even the backside looks great:


That's about it for Stalker progress, radiator mounts are done but that was just a couple hour's work. Next up is one more of these parts out of the mold (with some friends helping this time), cooling plumbing, hood mounting, etc. 

As for the distractions if you're interested: Bought a Jeep Wrangler for my wife, what a terrible but fun car! By far the worst highway car I've ever driven but so much joy! No idea why, maybe it's just the idea that every landscape or roadside you look at you think "I could drive over there." She said she didn't want a 'stupid mom SUV' but we needed a winter car and we'd both always wanted a Jeep. Got a great deal on a lifted Rubicon but it included a drive back from Dallas and a throwout bearing that just barely made the trip. Pulling a trans without even touching a jack or jack stands is pretty handy! All good now.


Volvo burned a piston. Pretty done working on this car, going up for sale when it's back on the road. Ping me if interested. Choice of turbos right now, I'll decide myself in a week or two.


Working on my first triathlon so needed a road bike. Went used old school and cool for the tri bike rather than a new carbon job but it's taken some garage time to tune back up. The titanium frame rides super smooth as everyone says.


Alex

esuvee
esuvee New Reader
1/20/19 8:37 p.m.

9/22/18

Lot's of tedious work this summer with some fun stuff lately.

Here's a couple shots of the carbon parts trimmed and in place:


Hood mounted, this was tedious. Stalker recommends Home Depot barn door hinges for the hood which I was not OK with (rattles, rust, etc.) I widened a mountain bike hub and welded dropouts on the frame so I can have a tight pivot and a quick release for taking the whole front end off. I also built a stiffener/hood pin combo to keep it square and mate with the bearclaw latches. Sikaflex got messy but I can sand out the spillage. The whole underhood will be textured black so should disappear. 


Now the fun part. I love building headers, just the right combo of art and engineering. The tubes ended up exactly equal length. I did this for sound more than anything. The overall tube length ended up a bit longer than ideal but I really didn't want tubes randomly poking out of the body, I wanted them lined up 6 in a row when they exited the bodywork. These are a major visual element to the car so I was OK with the tuning trade-off of longer tubes (not a racecar!). I'll be polishing them in case I want to cut up the tubes later on for an un-equal length sound down the road. My exhaust tuning colleagues at work are debating if I will like equal or un-equal based on how I personally like our GM V8's to be tuned and my strong preference for Subaru over Honda 4cyl sounds.

The tube that heads over the top looks good from a few angles but I would probably have preferred to keep it like the others. Unfortunately the front wheel is really right up in there, had to break one out of the pack to get it all to fit.


Next is a lot of finish work on headers. Then fitting the rear bodywork and configuring the trunk opening. Then should be into aluminum interior panels and floor. I also realized I took no pictures of the driveshaft adapter for the CTS-V diff. It's a cool part, I'll have to get pics later.

Alex

esuvee
esuvee New Reader
1/20/19 8:38 p.m.

11/05/18

Same amount work time but tasks are getting more tedious so there's not as much to talk about. It's a good thing but slow!

Bought a 3 in 1 sheetmetal tool from Harbor Freight. This is one of those tools that are literally 15 to 20 times more money for a good one. Given I'm working on 0.040" aluminum it works absolutely perfectly, I actually love the thing.

Pic of my first interior panel and the new tool. This was a big milestone, getting more real. I don't have a picture of it but I'm screwing these in with #4 self tappers. Once everything is painted and I know it's in the right place I'll drill out these holes one at a time for structural rivets.


Today was a ton of time carefully trimming the carbon side panel around the header. I made two carbon side panels and then threw the mold away so I didn't want to mess this up! I had to make sure I could remove and re-install the header as well since the side panels will be pretty permanent at some point. 

I am super pumped about the Yosh pipes. This thing is kind of a big motorcycle in how I plan to use it and I think the whole exhaust really keeps with that image. Plus, I can say it has Yosh pipes! (yeah, was a teenager in the 90's)


Next up is a lot of little stuff, fuel filler, e-brake, rad plumbing, idle air plumbing, days and days of tasks lined up.

Alex

1 2 3 ... 5

You'll need to log in to post.

Our Preferred Partners
Z9sLUm2EtOmuiZZmG4mQwxnVguz3YvW2pDpy60kibqzmcVqacAZD2meywYWIJM2V