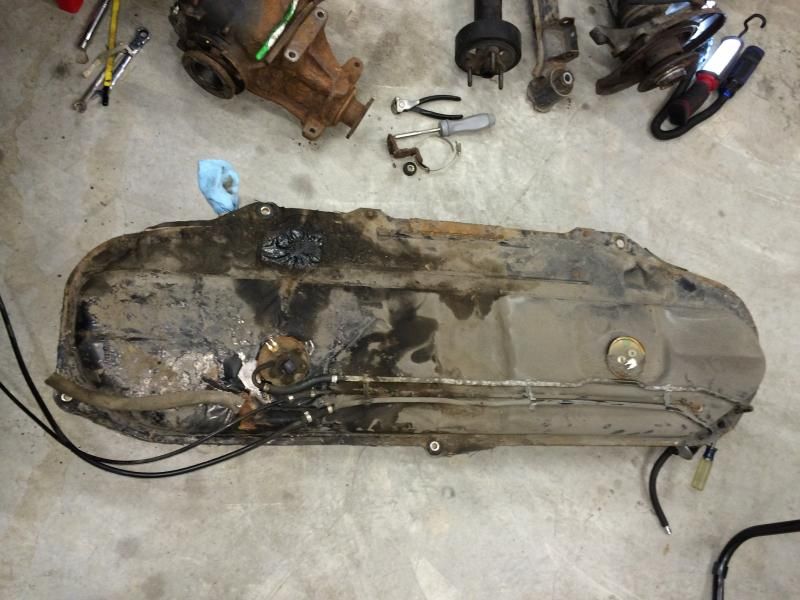
Couldn't half-@$$ it with the work everyone else is doing on here (Tuna, Duster, etc). Decided to paint the top of the tank some Krylon Rust Tough semi-flat and undercoat the bottom with 3M undercoating. Glad I did, looks much better. Should last a lot longer.
Mini review on the 3M undercoating. Good stuff. One can covered the bottom of the tank with 2 coats and the rust touch ups I did in tunnel around the shifter. I'll definitely be buying the 3M stuff again when I finish hitting all the rusty nooks and crannies on the rest of the underside. Stinks like E36 M3 though.
Old tank

New tank after coating


While I was under there. More pics of rustiness. Still can't get the ends of the ebrake cables out of the tubes for the corrosion. I think I'll have to cut them and splice some new tube sections back on.
Brake lines


Rear diff after "black" hammered Rustoleum. No amount of textured paint can cover natures texture.  . I must say, in spite of being a Rustoleum guy, I've been digging the Krylon Rust Tough enamels. Their spray tips and colors are pretty damn good. I may have just switched brands after what I've seen this week.


JThw8
PowerDork
1/20/15 8:53 p.m.
dang that tank came out nice. those brake lines are ready for mr sawzall though.
Parts finally going back ON. Shifts are VERY tight, short and notchy. Snick, snick, snick.
Z4 Shifter,
UUC DSSR,
Garagistic Delrin Bushings,
Condor Speed Shop UHMW Trans Mounts...


@condorspeedshop @garagistic @UUC
Tools. Thanks Amazon. Tubing bender $20 and a Marsen Riv Nut kit $75. Saved some money on riv nut tool buying from Amazon Warehouse Deals. Came with no box meaning they can't sell it as new. Have used them a bunch and never had a problem.

Was going to get the gas tank assembly in one piece today but got into treating rust, painting stuff and drinking beer. At least I got 2 hours in the garage before my wife makes me watch the Super Bowl. 
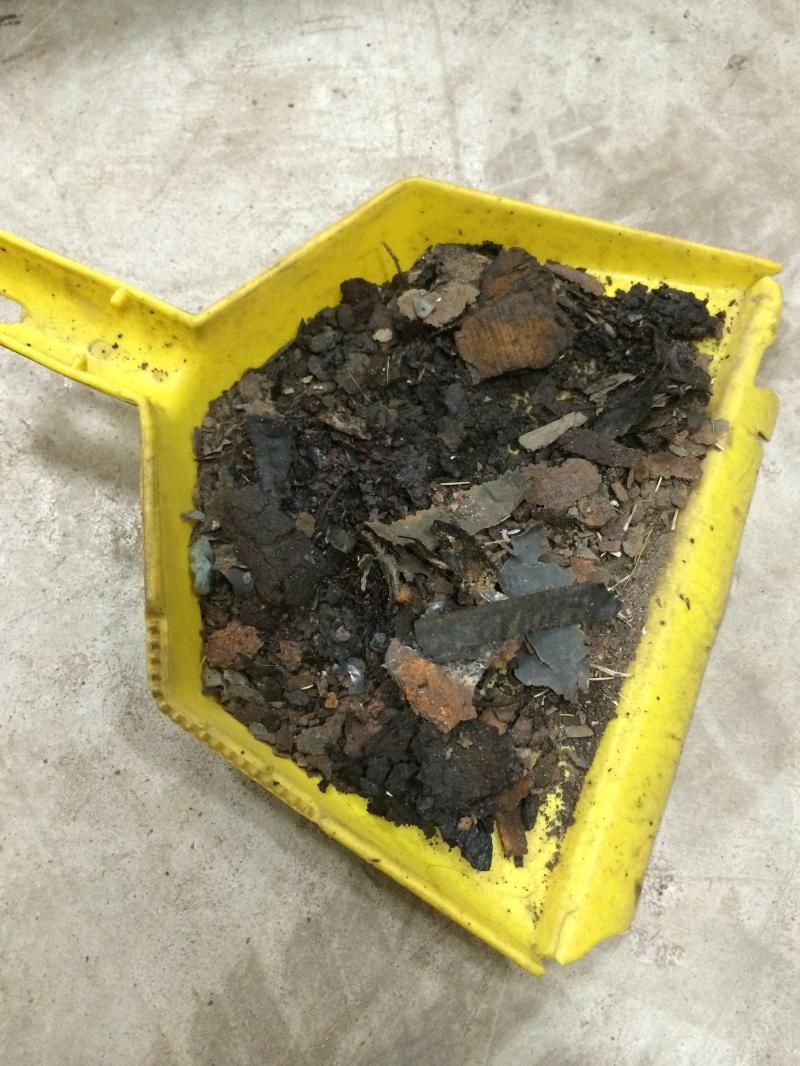
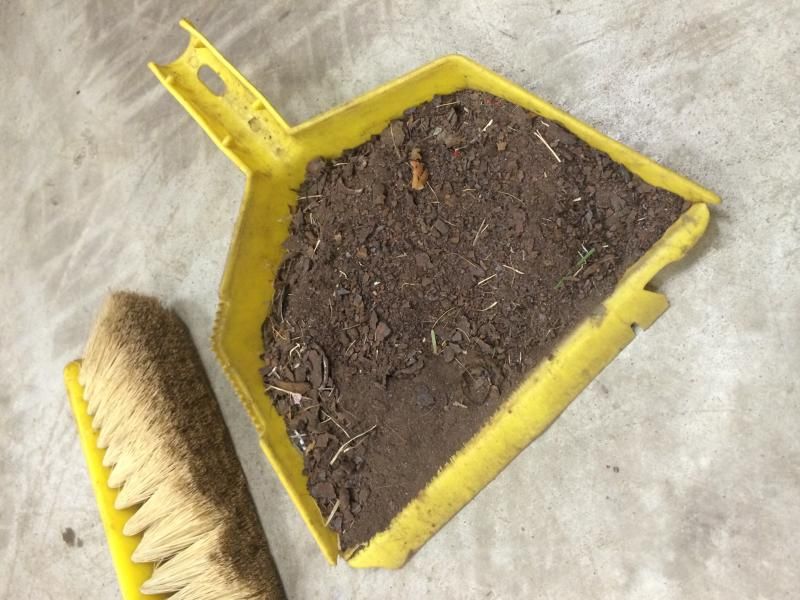
I've been working on this thing since the Christmas holiday. One thing I've been doing to gauge my progress is snapping pictures of the dust pans filled with refuse from working on the car. Today was the first day it really seemed to taper off. Almost no rust. 
First day thru today.


This one weighs quite a bit as it was the cast off of cleaning the rust on the diff.


Gonna be a pleasure to work on this things when the crud and gunk is gone!

Finished treating all the underbody rust spots. Primered and Undercoated. Pictures look cruddy under there. One more dustpan of grime.

Metal shavings in the pan were from the subframe bushing that broke off in the body, fixed. Beam can go up once the brake lines are bent.
To do that I had to drill out the broken bolt that held the rear brake line tee to the bracket. Done.
Still need to figure out what to do with ebrake tubes. Both cables frozen in place. No amount of yanking and break free can loose them. Will likely cut them and weld new sections of tubing in place.
On a completely positive note. When I was goofing with the driveshaft I had accidentally pulled the halves apart before I marked their position. I thought I was screwed and would need it rebalanced. To my utter delight, I found bright white paint marks from the previous mechanic who replaced the center bearing last. So happy I dodged that bullet for now. Right now, I'd rather save $400 for something other than a rebuilt driveshaft. 

Wow, a month and no update. I have been in a total funk since right before the time change. Light on stimulating projects at work, neuro psych eval, kids basketball, car shopping, scope creep, IPA Paralysis, yada yada yada...
I've gotten a few things done but generally sort of just stare at the car most of the time.
Got driveshaft put back together. Center bearing was looking good when I pulled it, no idea where the shimmy was coming from  . U joints feel tight with no binding.

Can't figure out where the dirt keeps coming from.

Bought a roll of fuel line from the autozone and got to bending. Long brake line to the rear of the car is done. Lost steam on the 2 feed/return fuel lines when I burned 3 tries in a row, kept breaking the line at the 90 degree bend for whatever reason.
Evap line is finished.

Traded in Envoy and bought a Fiat 500L as a DD. It was HIGHLY RECOMMENDED to me by my boss at work that I should get a more reliable ride. Envoy got in the habit of throwing the serpentine belt when I was already running late. You'd think someone would've smart enough to throw a 13mm wrench in the glovebox after the first time. But not this guy. Between trade and incentives I paid $16,952 for the 500L Trekking nicely optioned. Just what I need, another car to research and fiddle with.


Met some family at Top Golf for lunch and ball smashing a few weeks ago. Been 10+ years since I picked up a golf club. I was rather impressed with my performance as was my family. I think I'd forgotten enough about golf that muscle memory took back over. Wife says "you need to go play golf with the guys at work, maybe you'll relax and you won't be such a crabby @$$". Ok time for club update. Went and got a proper fitting and was told I needed a +1 shaft (story of my life). eBay came thru for $66 for everything I needed to do the extensions and regrip.


So this week I'll start being more productive, start exercising, drink less beer, stop cussing and focus on finishing the BMW. I promise.
Awesome build so far! I need to update my build thread but yours is coming along nicely!
Too much time away from home lately. Having fun but not working on the car. Decided to start hitting roadblocks in the project to assist in getting parts off of the floor.
Hole in vent line tube in wheel well.

Bent up some aluminium and was going to use panel adhesive until I prices the stuff! It's gonna get a few rivets and some seam dealer. Patch should disappear with some undercoating. Gas tank can now be installed. Let's see if I do it. 

Happy Father's Day!
Gas tank in. Back seat installed. 2 big pieces no longer taking up space in the garage.

Still moving forward. Trying to do a little something every day.
Finally removed stuck ebrake cable ferrules from cable tubes. One was easy the other not quite. No cutting, tubes intact. Very pleased. JB Weld is reinforcing where the rust has eaten a layer of metal, no holes just thinner.


New cables will definitely get some anti-sieze.

Removed stock rubber control arm bushings and pressed in fancy new Condor Speed Shop UHMW offset bushings.

Cut and bent some metal to beef up the sway link mounting point on rear control arms.

One more hard line to bend for rear brakes and rear beam can go up. Hopefully this weekend. Basketball tournament for the boy. Good times.
Oh yeah, guy at work gave me a free flowmaster muffler. Will finally be able to make some noise.

No work on the car today but added garage comfort. Wife bought this for me last summer but didn't put a proper vent in until today. Much better. Dropped 10 degrees in about 30 minutes with two 52" ceiling fans blowing.


Rear hard lines bent and ready for final install. Need a bolt to mount the tee on its bracket and that should be it to install the rear beam. Fingers are sore from bending lines, I never get it right the first time. 


Got a lot of little work done over the last few days that added up to real progress.
The rear brake line tee has an oversized hole and BMW had a special bolt to hold it onto the bracket. Of course they're all rusted solid on most of the junkyard cars and I'm not waiting to order one. So, I bought a little plastic sleeve and ran a drill bit into the hole and was able to clearance the OD against some sand paper. Then pressed it in and stepped up the drill bit until it fit my shiny new bolt. Works great, lasts long time.

All rear plumbing anti-seized and torqued in place. Does anyone else reassemble stuff with anti-seize like I do? So much easier if it has to come back out.

Drivers side lollipop pressed on to freshly painted control arm. Will do the same to passenger side later today when I get to the front end work.

FINALLY, painted and assembled the rear beam with all my Condor Speed Shop bushings, even the ebrake is installed. That was the only thing keeping me from passing the mechanical inspection to get my plates. Will be so happy to get this thing installed.


Great success yesterday. Got the rear installed, by myself, with the assistance of my swank new HF lightweight racing jack. On sale only $67!
Beam installed. Needs hardlines torqued since I was short of the clips BMW uses and have them on order. Backseat is in and will STAY in for the foreseeable futures.
 Got the left side complete.

Driveshaft, heat shields and tunnel supports installed and torqued.
Ebrake cables installed and functional.
Gonna hit the front end later tonight. Thanks for the support.

Long time, no post! Been working nights and my sleep schedule is a wreck.
Anyway, car is together and running! Passed the Texas safety inspection with zero effort and car now has a Texas tag. All of my dreams have come true. Well, almost.... Pics to start catching this post up to date.
One of the last batch of work that needed to be done was back in the passenger wheel well. Once it was finished I was able to plumb all of the vapor/recirc lines, filler neck, clamp it all together and add gas. I'm very pleased to announce that filling the gas tank to the top no longer produces leaks and vapor smell. Great success.
This is the patch I made earlier to cover the exit point for the vent lines. I was going to do something much more visually appealing but you know what? I've been beyond ready for this thing to be back on the road. A handful of self tapping screws will be forgotten years from now.

This after a layer of the Permatex undercoating. I will never use this stuff again. It goes on like marshmallow fluff and you can't modulate the pressure. Spray is on or off. From now on, nothing but the 3M rubberized undercoating.

Up in the top of that same wheel well is this bracket that was hanging on for dear life. I cleaned it up and stopped the rust. After that I decided JB Weld was the answer to plug the hole. I taped off the underside and filled from the top. I'll be honest, this turned out way nicer and stronger than I expected.

I added a small aluminum patch to the inside surface in the trunk to give the JB Weld something to bond to.

Patch job complete, strong like bull. To be forgotten years from now.

I'll post more after lunch.

tuna55
MegaDork
8/5/15 11:51 a.m.
Dude, how did I completely miss this thread?
Thanks for the kind words above. I used a galvanized paint on my tank. We'll see how it holds up.
I also used Chassis Saver everywhere under the truck. Undercoating scares me.

After that, I set about to finishing the Condor Speed Shop bushing install. I've made a promise to myself not to rush a job that I can complete. We'll see how long that lasts.
Motor mounts and offset control arm bushings visible. While I was in there, I hit various spots of corrosion, replaced the o-ring on the oil cooler bypass plug, new hardware on the exhaust bits, much degreasing, etc. Brakes were bled around the same time, along with the ebrake cable adjustment, brakes work as advertised.

Mounts and bushings are UHMW. Between the trans mounts, motor mounts and rear diff busing the drivetrain doesn't move at all. I'm up in the air regarding vibration. I feel like something is binding in the driveshaft and it's giving enough resistance that I burned through a full tank of gas in just 265 miles. I think I'll drop the exhaust and driveshaft again this weekend and see if I didn't jack up the driveshaft install somehow. Maybe the mounts just resonate that much but I doubt it.

Everything in its place. First time in 7 months. No missing hardware, no missing heat shields, it's all where it's supposed to be.

The body isn't without its flaws. Dents, dings, rust, this beauty has it all! I've been going around the car and doing damage control where there's any bare metal or rusty metal. Still have a long way to go but look good from far off and well, you know the rest.
Front right after a rattle can touch up. I may try to blend it some more, trying to decide if this fender is worth saving when I can buy a new one off of ebay for $60.

Rear right is a good example of the bumps and scuffs around the body. I have no idea where all my finished paint repair pics ended up. I'll update it later in spite of the lack of excitement.

Drivers door had this weird rust spot. It may have been a door from another car or just a poorly finished repair. Looks better now with the Krylon, use your minds eye.

tuna55 wrote:
Dude, how did I completely miss this thread?
I apparently missed it as well; I love following the kind of builds you guys do!
I love the irony that Bruce lives in the land of non-rusticle encrusted cars, then ends up with a NE car as a project  .
.
A ways back I was talking about the fuel lines and how much trouble I was having bending them. I failed again and decided to just forget about making one line. For now this is how it's going to be. Please don't judge me.
Only replaced the rusty, crusty stuff. I'll address this eyesore later.

Clean, fresh and new.


NGTD
UltraDork
8/5/15 6:03 p.m.
To answer an earlier question, I live in Salt Country.
EVERYTHING goes back on with anti-seize.
VWguyBruce wrote:
Only replaced the rusty, crusty stuff. I'll address this eyesore later.

No judgement here. I did exactly the same thing:

Looking good Bruce. Man, I forget what e30s look like with a bunch of clean new stuff on them, lol.
![]() . I must say, in spite of being a Rustoleum guy, I've been digging the Krylon Rust Tough enamels. Their spray tips and colors are pretty damn good. I may have just switched brands after what I've seen this week.
. I must say, in spite of being a Rustoleum guy, I've been digging the Krylon Rust Tough enamels. Their spray tips and colors are pretty damn good. I may have just switched brands after what I've seen this week. 


