


In reply to AxeHealey :
Some are much smoother than others. Just as reminder.
In reply to AxeHealey :
Some are much smoother than others. Just as reminder.

AngryCorvair (Forum Supporter) said:NOHOME said:That right there, is some top-shelf A-post repair.
Pete
High praise, and well deserved. You do nice work, Axe. Or is it Mr Healey?
High praise indeed. Thanks, Pete!
AC - Axe. Mr. Healey is my father.
There have been some blow throughs, yeah, but it's mostly just not welding very clean. You can hear/see it. I also don't know if I've mentioned that this section of the floor and the bottom of the vertical part of the foot well were covered in body filler. Yuck.
Unfortunately, I know all too well that rust repair doesn't always go smoothly. I think this method of patching is definitely an inefficient way to do it and it's probably always the right move to just replace an entire panel.
My day is stacked with meetings but I was able to run out last night for more welding wire and I hope to have the floor patch done at some point today.

In reply to AxeHealey :
Still looking good, but yeah, contaminated metal is a bitch to weld.
In regards to "Mr Healey", etc.-
When my dad passed, I became the oldest male of the family. I suppose that means I'm now Mr. Harding...
In reply to Recon1342 :
I had the realization after having our son that, without him, the family name (at least the ones we know as part of our family) would have ended with me. Crazy thought.The only male cousin I have with my last name has two girls.
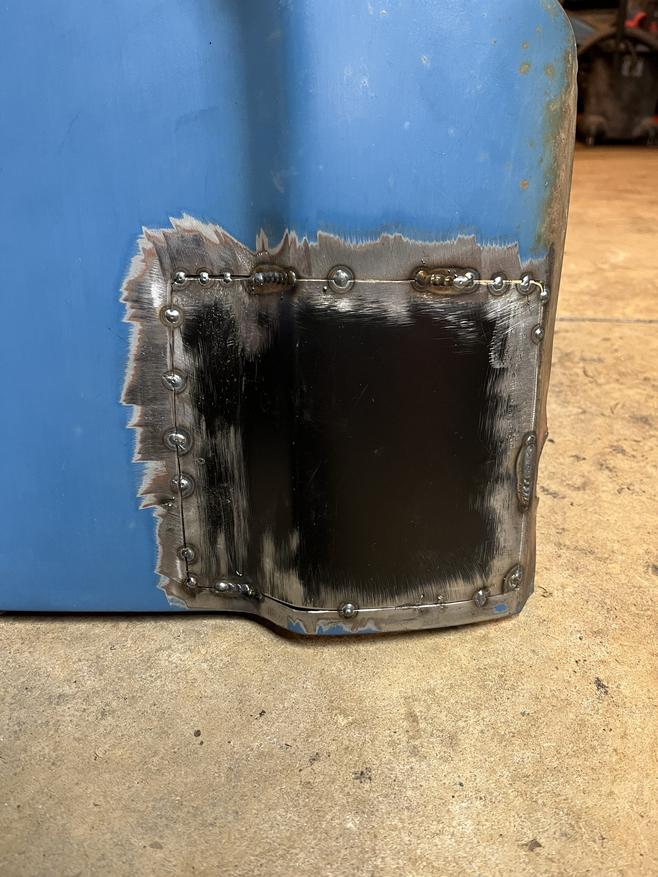
Between the busy-ness that was my work day I was able to finish the floor patch as well as locate and finish a surprise floor patch!

Under the surprise patch is what I think(?) is what Ford designed to be a drain but it was instead packed with tons of E36 M3. It wasn't perforated when I started this process but I'm guessing the combination of heat, some hammering and all the other work I've been doing I noticed a thin crack there in the floor.
That's the finished A-pillar and floor patch! Technically I still need to patch the fender but damn do I feel accomplished especially for how relatively quickly I was able to complete it.
Seam sealing has begun.


I had it all planned out. I was going to get the torpedo heater running pointed at the A-pillar/ floor while I started on the fender patch. Then, once I had the patch roughed in I'd put down some seam sealer. While that was drying I'd weld the patch in.
Well, the igniter on my heater seems to have taken a pooh but I made good progress on the patch.
First was chopping out a section of the door panel repair, tracing and then removing the nasty from the fender.

Then it was the usual dance of carefully fitting in the patch.

It's crazy how much thinner the patch panel is than the fender.
I ran out to the store to buy a new heater but they didn't have any! So I came home, brought the fender inside and laid down some rust converter on the inside.

I may have time this evening to get it welded in.

Man I hope my heater fires up tomorrow. Nice cuts on the patch
In reply to Patrick :
Fingers crossed for you dude!
After actually a lot of work, here's where I left of tonight.
This is the first time I can recall doing a rust patch where I'm more concerned about blowing through the new material than the old.
Patch welded in.

Then, even though it's freaking cold in the garage I hit much of the wheel well with a wire brush, cleaned it and sprayed rust converter.

I also refilled the trans (although I think it's probably still going to be 1/2 qt low) and changed the oil.
We're having a bit of a heat wave at the moment so this morning I seam sealed.


Then this afternoon I laid down various different primers and rust converters depending on location. The original floor got rust converter sprayed before the gray primer.


Tan bed liner is on order and should be here Monday. My plan with that, however, is to do the entire floor at the same time so I only have to pull the seat, shifter, etc. one time.
Not pictured, I got a little carried away on the creeper and sprayed much of the passenger floor with rust converter and then a bunch of it with satin black later on.
I have found one parts store remotely near me that has the capability to mix paint into a spray can for me. Their camera to match the color is down at the moment, however.
EDIT: Oh, and while I did pick up some body filler to use on the fender, when I ripped the top off, the activator went flying across the garage and I cannot find it...
Color-matched aerosols purchased.

I gave a small section of the fender a little polish so it was less chalky and brought it to the paint store. The process of getting it matched, however, wasn't exactly as I expected. I thought the camera they used would determine a mix of various pigments that would match. What it actually did was find the closest match that had a recipe in the system which was 1968 Ford "Medium Blue". It's going to be darker, I think, but should be close enough and will be good fuel for me to give good ole Elmore a polish.
What rust converter are you using?
In reply to Recon1342 :
Rustoleum Rust Reformer.
First color! In the dimly-lit garage it looks like it'll definitely be good enough.

And sanding has begun. I'm going to pick up some 60 or 80 grit before I go much further so I can knock down this initial layer faster.

Three coats and I'm very happy about it!

Where the new paint meets the old by the B-pillar it looks a bit goofy at the moment but it will be less so once that area is cleaned and polished.
That's a really good match, color-wise. Noice!!!

In reply to AxeHealey :
Did you ever think you'd use the phrase "cleaned and polished" when discussing Elmore? 🤘🏻🤣
In reply to AngryCorvair (Forum Supporter) :
Hah, I know! I said to my wife yesterday "You know this means I'll need to polish the whole truck now, right?" Seemed ridiculous as the words were coming out of my mouth.
I have to be careful to not make Elmore too nice. That sentence is a bit ridiculous too...
Should only have one skim coat of filler left before the fender is ready for primer/paint and I've got an order coming from RockAuto with a number of coolant system bits.
The body line here is making things tough. I think I'm to the point where I should lay down some high build and see if that'll do, which I think it will.

It doesn't help that the panel isn't flat to begin with.

That door post looks great. The paint match looks close, too.
In reply to JoeTR6 :
Thanks! Yeah I actually can't believe how good the match is. The real test will be out in the sun but I think it'll be good.
Today I went out and tried to buy some high build but got filler primer instead. It's looking good but I needed to fill a couple tiny holes with filler even after a few coats of the primer.

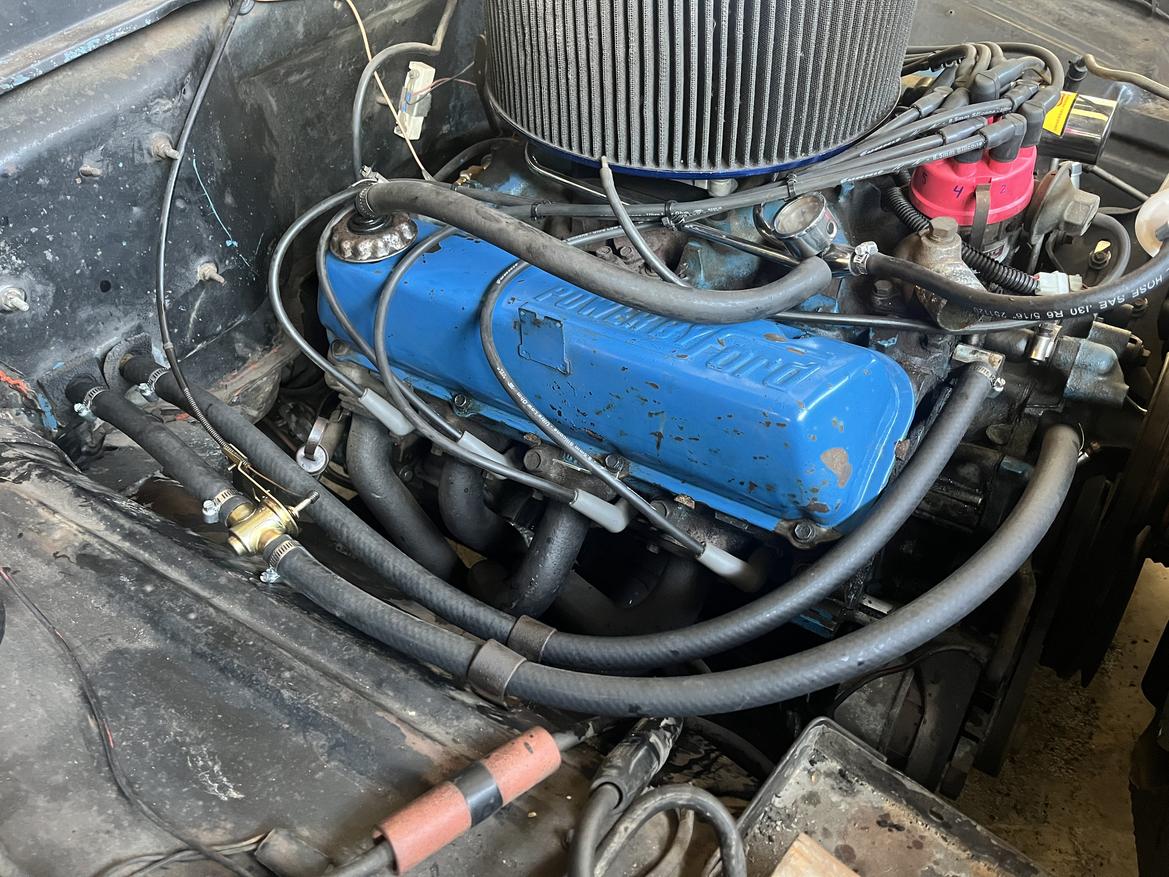
I then ran the new low pressure power steering lines with proper grommets rather than a larger hose slid over top.

I was then about to go inside when I got an alert that part of my RockAuto order arrived which meant I could put the new lower rad hose on as well as the new heater hoses and valve.
Hopefully I'll be putting color on the fender tonight or tomorrow.
OK well I didn't get color on over the weekend but it's got color now!
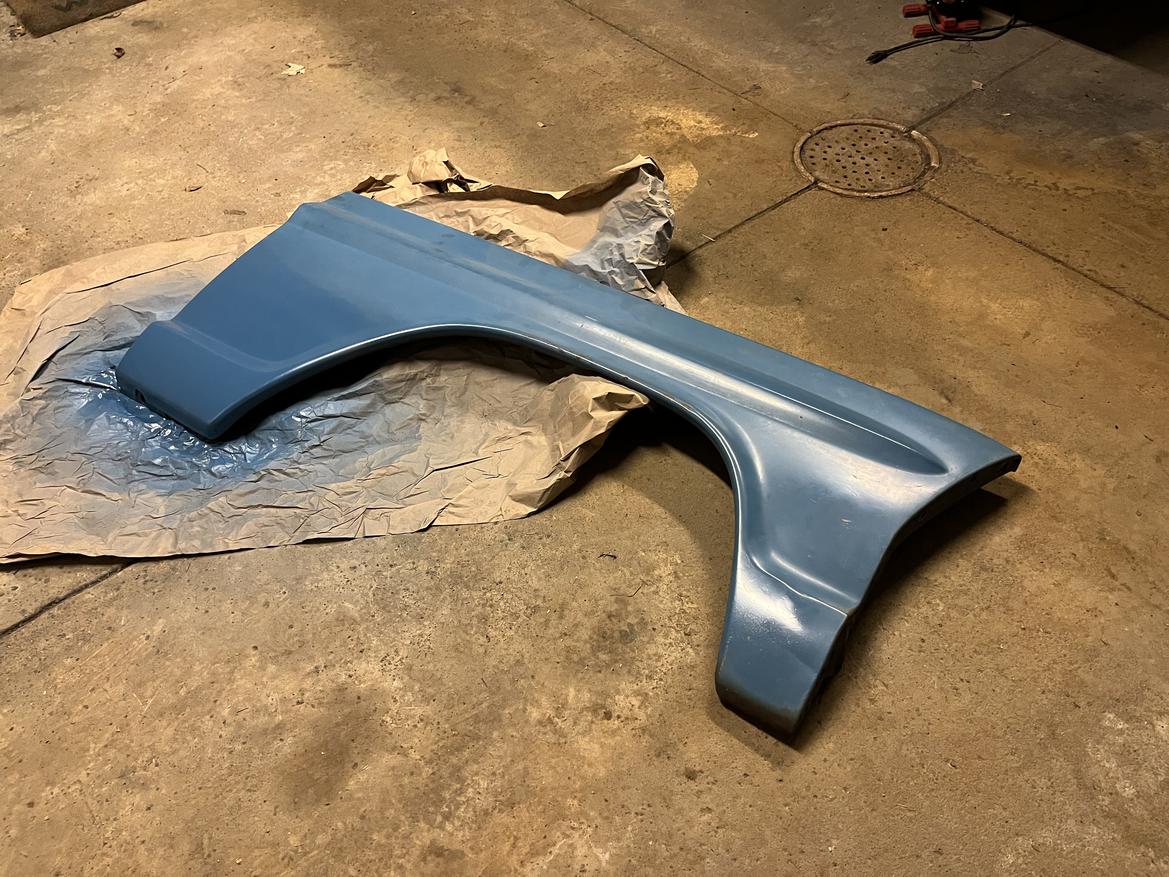
The color difference on the fender is pretty stark at the moment although comparing new paint to the bottom front of the fender where I polished for testing it's much better. My plan is to get it mounted up, potentially wet sand and then polish it all to blend.
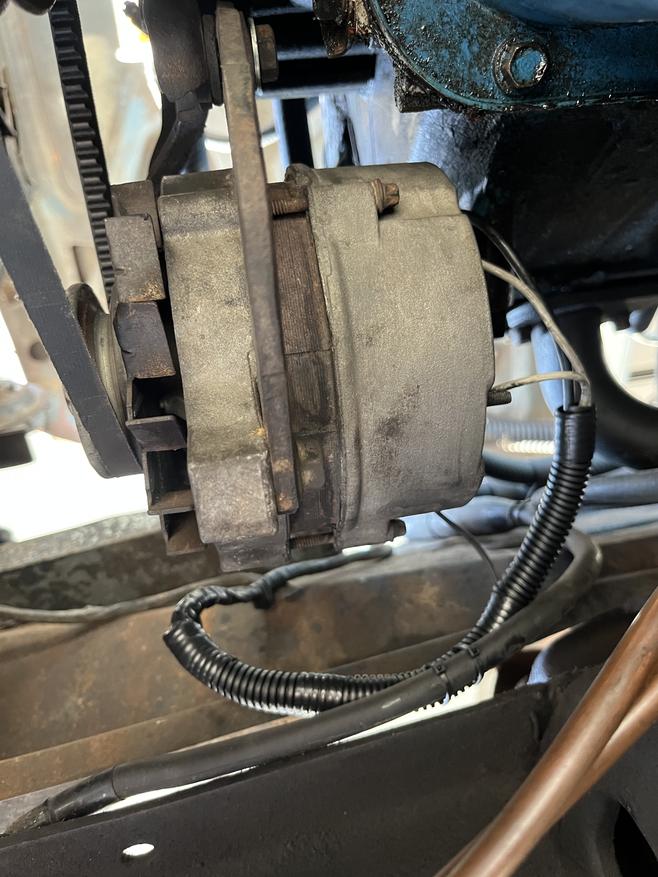
Something on my list for this winter was to "check the alternator wiring". Toward the end of the driving season it seemed it wasn't charging very well although I never actually checked. The battery was never dead when I went to drive it but it cranked a little weak a few times. This could be a reason...

The ground was frayed and missing insulation in a number of places, insulation on both smaller wires was missing in some spots and all of them were rock hard near the alternator. I traced them back to where they were usable and replaced them.

Yesterday I took the alternator to two different prats stores to bench test, neither of which were able to, so now it's back on.
Maybe we get to hear Elmore's new sound this week sometime...
In reply to AxeHealey :
Mmmm, big-block noises... :drool:
berkeley yes.

You can see where I hastily hit it with some compound on a rag and I think it was too aggressive and may be taking some of the old paint off. Either that or it was mixing some of the chalkiness around. Either way, I'm very, very happy with how it looks. It ain't perfect by any means but that means it matches one of the things I love so much about this truck.
Elmore is a runner again!
This is immediately after initial start up. It reaaaallllyyy smoothed out and sounds fantastic with some revs. Unfortunately there's what sounds like a small leak at the passenger header and a couple down below but I may be able to shore those up.
My wife says it's more quiet than before, which I'm not mad at, and the two-into-on sounds just as I want it to while revving.
I spent a lot of time making a mess of trying to bleed the power steering system. I have made progress but it's not there yet. Sunday I should have some time to go back out, sit there and slowly turn the wheel back and forth. With all new components there is surely a ton of air trapped in every place imaginable.
The kids wanted to hear it run Friday evening so my daughter was enlisted as the videographer.
You'll need to log in to post.


