1 ... 8 9 10 11 12
Hungary Bill (Forum Supporter)
Hungary Bill (Forum Supporter) GRM+ Memberand PowerDork
11/3/21 1:39 p.m.
java230 said:

WooHoo! All the torques! (that a 22-RE can make cheeky)

It HAS to be the most optimistically named cam I've ever bought.   Rumor has it though, that I wont have to downshift to third every time the highway gets the slightest incline (or head wind)...  Something I'm definitely looking forward to! laugh

preach (fs)
preach (fs) GRM+ Memberand Dork
11/3/21 3:34 p.m.

In reply to Hungary Bill (Forum Supporter) :

I remember hating this in my '83 pickup.

Unfortunately I did not learn a thing, as I now have to pull 2nd in my '85 Westfalia on those same hills.

java230
java230 PowerDork
11/3/21 6:13 p.m.

In reply to Hungary Bill (Forum Supporter) :

RE gear helps immensely..... I ran 5.29 rear end in my old truck! 

Hungary Bill (Forum Supporter)
Hungary Bill (Forum Supporter) GRM+ Memberand PowerDork
11/4/21 10:22 a.m.
preach (fs) said:

In reply to Hungary Bill (Forum Supporter) :

I remember hating this in my '83 pickup.

Unfortunately I did not learn a thing, as I now have to pull 2nd in my '85 Westfalia on those same hills.

ooooh, man.  I have a soft spot for Westies.  I've been dangerously close to buying one on more than one occasion.  Any chance this "high torque" unit could be made to fit your beast?

Hungary Bill (Forum Supporter)
Hungary Bill (Forum Supporter) GRM+ Memberand PowerDork
11/4/21 10:25 a.m.
java230 said:

In reply to Hungary Bill (Forum Supporter) :

RE gear helps immensely..... I ran 5.29 rear end in my old truck! 

oof!  Man, I'm already having gearing issues as it is on these highways.  I dont like to wind her up too high for too long, but if memory serves me right, I was sitting just over 4krpm any time I pulled into the left lane to pass the semis.  Otherwise I was cruising at 3500 to maintain "normal highway speeds" out here.

maybe I'm a wimp  (or heck, maybe my tach is off...  I might have to lift the rear and do a gearing check.)

Hungary Bill (Forum Supporter)
Hungary Bill (Forum Supporter) GRM+ Memberand PowerDork
11/4/21 11:30 a.m.

Thursday now, and I FINALLY got a decently long session in.  We pick up very much where we left off:


Bolts are installed, torqued, valves are adjusted (same gap as before), valve cover goes on afterwards.... we've been here before wink

Now I was thinking to myself "Self!  If you were smart you would have had the engine at TDC when you took it apart so you could mark the distributor and save yourself the hassle of chasing your initial timing".

Well, I found marks all right.  Two of them.  Once where the #1 plug would be, and one "half mark" just passed the wire grommet there on the left side:


The "non-grommet" mark lined up the best, so that's the one I'm using.  Fingers crossed.

Also, here's a shout-out to the eldest Hungarling and his sense of humor for marking my distributor cap with roman numerals!


It's been so long, I had completely forgotten he had done that and it was just the chuckle I needed.

Anyhoo, next up would be the spark plugs, wires, and we can move on to the PS pump mounts and Alternator mounts and be done with this side of the engine (yay!)

This one goes out to my homie "Mezzanine":


Still the coolest spark plug gapping tool I own laugh

The first plug was gapped right from the factory, and went in finger tight with no fuss (I figure I'll do them all finger tight, and crank them down afterwards).

The second plug was ALSO gapped right from the factory, but when I went to install it with my socket (I'm using my socket as an assist for guiding them in while tightening them down "finger tight") I notice that I'm doing a lot of spinning with the socket, but the plug's threads still have a way to go.

Weird...  I guess I'll have to pull it back out and look at it:


1EA BPR5EY VS 3ea NGK BKR5EY...   berkeley-beans!  Just once I'd like something to go "normal" on this damn thing!!!!!

Fine... Well, I'm not about to mix and match plugs without knowing what I'm doing, and damn if my mobile data hasn't worked on my phone since my return from Germany, and I'm not ABOUT to waste precious time googling the differences between BPR and BKR and so on when I finally got a good afternoon ahead of me...

Heck.

I'm 100% sure the BPR5EY is the one I want.  I'm also 70% sure that the others were mixed up as a batch issue in the store (ie: one stack fell into another and human factors being what they are, the clerk and I didn't notice when I purchased them). 

I have the old ones for reference, and to add more fun to the mix they don't match either (they're 4ea NGK BPR5ES)... Nothin to do now but to put them all away and move on to the diver's side accessories.  I'm sure you're just dying for photos of what an alternator and a power steering pump look like when installed in the engine compartment, but I'm sorry.  It looks like I didn't take any.

Instead, I noticed something interesting one one of my many trips in and out of the garage!


See that there on the left side of the head, towards the end?  There actually WAS a fuel pump blank off plate on the old head!  I was looking at the wrong side!!!!

Two bolts out, two bolts in, and we've saved ourselves an afternoon's work (and some aluminum) making blank off plates we don't need!  (finally!)


D-U-N. 

Unfortunately the EGR valve didn't continue the cooperation spree I had going from the blank off plate.  When I went to install it, all the bolts were too long for the new head casting!


See that air gap in there?  Those bolts were completely bottomed out.  Being rather frustrated, I initially went the route of "berkeley it, it's coming out" and got out my blank of kit*:


But as I was getting ready to pull the trigger, I stumbled across some appropriately sized bolts and got everything installed correct.

that was close...

Having that out of the way, I needed to find the tube that bolts here:


Since it goes under the lower manifold, I figured I had better install it now while accessibility was at a maximum.  Unfortunately I had no idea where I put it...

I must have wasted half an hour looking for this darn thing.  I seriously moved everything in my parts pile of a garage, AND on my mess of a work bench!  Not sure how I found it, but tucked away and forgotten in the deepest, darkest corner was that old bucket of brake fluid I used to soak things in.  Wouldn't ya know?  Still soaking in there was the hose assembly with two broken bolts still in it:


one drill, three drill bits, and a punch later we have two fresh holes to work with!


Now I bet you're expecting me to run a tap through there to make some new threads and bolt it up like the OEM did.

NOPE!  Because that's JUST what they'd expect me to do!  No sir, I stuffed two appropriate (albeit a bit small) bolts through there with a couple washers and LOTS of RTV and cranked it all together with a nut on the back.

Done.

Next up was the lower intake manifold...


Which had to be refitted about 4 times because it...

1) was hitting the EGR, and that had to be moved slightly...

2) there was a hose that runs under it that cant be installed because one of the intake bolts is keeping said hose from being in its happy little home...

3) now the wire routing is bunk because the hose under the manifold is interfering with where it needs to be and none of the connectors will reach their happy little homes...

Luckily I got it right (so far) on the fourth try.

And now that I'm posting this, I'm able to confirm my suspicions that my phone didn't save all my pictures from my wrench session today (See??? I KNEW I took pictures of that alternator and power steering pump!) becsuse the pictures I took of me fitting new seals and o-rings to my old fuel injectors are missing.  A good thing I did that too.  Most of those were crustier than cornflakes (and subsequently, my underwear), with about half of them crumbling off in pieces ...

BUT!  short story long, I got the new seals on and the fuel rail installed:


Boop!

And that's where we had to stop today.  But MAN does it feel like this thing is FINALLY coming back together!  (I can't wait for it to all go wrong).  I spend the next few minutes just hooking up hoses and connectors but nothing major happens.  Just like normal, I don't have a whole lot of time tomorrow afternoon and I'd like to hit the ground running.  I figured if I double checked everything now, I can head straight to the upper intake tomorrow and that will be a GREAT feeling if I can have that done.

Good times.

* A note on those blank off plates:

Obviously I have a history of bad luck on this truck.  Especially when it comes time to try to fix anything....

When I bought it, the exhaust was leaking at its 4-into-2 collector and I bought a set of Doug Thorley headers to replace the cracked and leaking exhaust manifold.  A big reason I opted for the Doug Thorleys was because they let me select an option that would let me keep the stock air injection system.  This is the system that injects air into the exhaust, which I believe heats up the cat faster.

Except when I got the headers, I can say with 100% certainty that whoever designed those and welded those up has never, not once in their life, ever, looked under the hood of a Toyota 22R equipped vehicle and spent even the smallest iota of a second looking at the pipes that make up the exhaust's air injection system...  That's why if you look at any pictures of my headers, you'll notice two vertically installed bolts between cyls 1 and 2, and cyls 3 and 4....  What I did to solve the issue (since there was no possible way in hyades, hell, or purgatory of your choice, that I could make these headers work with that part of the OEM emissions system) I got some JB stick weld and JB welded two bolts in place to plug the holes.

SO!  (On subject) Way back when I decided my remote location was remote enough, AND my truck obscure enough, to need some basic spares to allow me to carry out simple repairs without delay, I ordered a full engine gasket kit to keep on hand for any emergencies (like the one that made all this possible.  Which, damn if it didn't come in handy!).  With that gasket set, I decided that my location was remote enough, and my luck poor enough, that I should probably have a set of blank off plates handy for any parts that might brake and affect the vehicles operation, but would otherwise allow the car to run if they were blanked off.  Hence the reason I go on saying "I don't delete EGR's, blah blah blah" yet, you see an EGR blank off kit in my inventory.  (But MAN if it isn't hard sometimes.  That little plate could get rid of so many vacuum lines, and that damn vecuum rack, and make my engine bay look so much neater...)

That was all.

Hungary Bill (Forum Supporter)
Hungary Bill (Forum Supporter) GRM+ Memberand PowerDork
11/5/21 10:01 a.m.

Friday's another busy one.  I think I clocked a total of 45 minutes in the garage today, maybe an hour tops.

Yesterday, on my way to work, I stopped by "ye olde FLAPS" (the mom and pop shop) and picked up four matching spark plugs.  Today those got installed along with a new thermostat:


I never did find out what the difference was between the BPR and the BKR plugs, but it looks like it might just be the nut size (5/8ths, vs whatever the fat one is.  I can never remember...).  I DID, however, find out that the BPR5EY's were an upgrade to the BPR5ES's I bought.  So if I go out and buy 3 more BPR5EY's, I'll have a set of plugs for my next plug change.  Fun stuff.

Anyhoo, moving on with the program, I was all about trying to get the upper intake manifold on today.  Doing so would be a big landmark towards "completion" for me.  It's simple enough, really.  Just set it in place, and start connecting stuff!


However, back when I was doing my thing with the master cylinder and whatnot, I seem to have managed to install my brake lines over my throttle cable (that I had moved to the side, and out of the way).  When I went to move it back, I found I couldnt get it through the hole that was available ....


No big deal.  I just dropped the bottom two bolts from the master cylinder and was able to finess things through, no prob.

Easy money.


SO, here she sits:


Next up:  The fan and the radiator.


Good times

Hungary Bill (Forum Supporter)
Hungary Bill (Forum Supporter) GRM+ Memberand PowerDork
11/5/21 10:08 a.m.

So obviously, I'm not going to leave my radiator out there to get damaged while I wait fro my next wrenching session (it's the weekend, and I hardly ever get truck time on the weekends).  The previous post was my first 30-minutes of the day (I stole some time after getting through the grocery store earlier than expected).

My next 15 minutes was after I started dinner, and it didn't need to be touched for a bit:

First up was the fan, then the radiator:


That was about all I had time for.  Next time will be belts, shroud, connect the headers, install the o2 sensor....  and dang!  I think that might be it!

We'll see then though.  For now, here's how she'll sit 'till I can get back out to her:


Good times.

Hungary Bill (Forum Supporter)
Hungary Bill (Forum Supporter) GRM+ Memberand PowerDork
11/5/21 10:12 a.m.

With the engine almost back together (notice, I didn't say "done"...  Somethign is bound to go wrong here), I'm noticing that I may have accumulated some spare parts from all of this:


I have no idea what that bracket goes to... or that rusty screw, but weirdly enough I thought that rusty screw was important enough that I felt I needed to purchase a new one?

Odd.


Even weirder is this bag marked "passenger heat shield"...  I have no idea what I'm talking about here.  I don't ever remember there being a passenger heat shield, yet alone removing one! 

heck, the exhaust doesn't even run down the passenger side.  Heat shield from what???

If everything is honkey dorey when I finally get this thing running, I'll just pour those bolts in the coffee can and forget I saw them.

Good times.

Hungary Bill (Forum Supporter)
Hungary Bill (Forum Supporter) GRM+ Memberand PowerDork
11/5/21 1:51 p.m.

I found the internal wrenching bolt's home...


Thank Bob for build logs, huh?

Scrolling up a few posts I can clearly see the empty hole now that I know it exists


Unfortunately, I think that means I might have to take that upper intake back off.  Well, it could be worse...  I could have missed it completely and spent months chasing a vacuum leak.

Good times.

Hungary Bill (Forum Supporter)
Hungary Bill (Forum Supporter) GRM+ Memberand PowerDork
11/8/21 9:22 a.m.

Monday Monday  (Da daaaaa, da da da da).

It was eating at me, so on Saturday I HAD to sneak out and try to install that bolt.  Wouldn't you know?  I was able to sneak the bolt in, AND get an Allen wrench on it:


SCORE!

Anyhoo, that meant today I could hit the ground running and make some good progress.  And you KNOW you're making progress when the ground starts to look like this:


A few mistakes were made.  I installed the intake but had to pull it back out because I forgot to install the fan shroud...  Stuff like that, but nothing major.  Eventually, the engine bay looked like this:


And that made me nervous...  I'm beyond done working on this thing and really want to get to driving it but turning that key scared me to death...

I stalled a bit by installing the boot over the gear shifters.  I even checked the reverse light and 4wd switches to make sure those were working (I have on reverse light out), but eventually I managed to muster up the guts.  And when I did...


"click"


The battery was dead...  How that happened, I don't know.  I've had it on the tender this whole time (with small breaks for electrolysis etc).

Anyhoo, I was laughing so hard at myself I forgot to release the key.  Eventually I started getting that "tickticktickticktickticktick" a starter makes when the battery is "low" which then turned into it cranking over!!!!

I held it for a good 10 seconds, but it never fired up.  I poked my head under the hood and saw I had forgotten to connect the #3 spark plug wire.  Probably not the culprit, but it does need to be connected cheeky  Back in the driver's seat, I turned the key once more and she fired up!!!!!

But MAN was she running rough.  I'm hoping it's just the timing being off because dang.  It was idling at 500RPMs (maybe) and it sounded so dang QUIET!  That exhaust mod I did with the header bolts really sealed that beast up, no more leaks at the head.   But I'm also thinking that means I have the timing way advanced.  I'll have to put a gun on it.

All that thinking took about 5 seconds of run time, and in that time I got out of the truck and looked underneath:


That is oil DUMPING out of the passenger side of my cylinder head (where it meets the timing cover), and gasoline leaking out of the top of the gas tank...

Now, I know why the head is dumping oil.  I didn't put RTV around the timing cover top like I should have...  But why is gas leaking out of the top of my tank?  I didn't touch anything on the gas tank.

Oh well.  It's gut wrenching, but there's nothing else to do but to go back in and take it all back apart.


It goes a bit quicker this time, as I'm doing the bare minimum necessary to get the job done.

The intake is off completely, but I leave the headers bolted to the exhaust.  Alternator and its belt stay in, as does anything that isn't absolutely required to be removed to get access to the head gasket.  In the end, we leave her looking like this:


Bugger.

¯\_(ツ)_/¯
¯\_(ツ)_/¯ PowerDork
11/8/21 9:36 a.m.

Weird occurrences while wrenching, as the start date draws ever nearer- the 4Runner is acting like a rally car already!

Hungary Bill (Forum Supporter)
Hungary Bill (Forum Supporter) GRM+ Memberand PowerDork
11/9/21 10:13 a.m.
¯\_(ツ)_/¯ said:

Weird occurrences while wrenching, as the start date draws ever nearer- the 4Runner is acting like a rally car already!

Man, I tell ya.  I'm used to things going wrong when I touch them, but having things go that wrong that I haven't touched (talking about the gas tank turning into a waterfall here) is a new one on me cheeky

Hungary Bill (Forum Supporter)
Hungary Bill (Forum Supporter) GRM+ Memberand PowerDork
11/9/21 10:57 a.m.

Tuesday now, and it's appointment after appointment.  Between those appointments, I have more appointments.  My day is scheduled like  Xzibit heard I liked appointments and went all "yo dawg...." 

Still though, I did manage to sneak just a little bit of time for a bit of a mad thrash.  One thing's for sure, it's starting to get cold out here and I don't know how many more good days I have left:


I figure the easiest thing would be easiest, and attempting to tackle that waterfall of a gas tank would be a good way to dip in, "git some", and get out before I was late for anything important.

I had some down time at work yesterday, so for giggles I typed "Toyota 4X4 gas tank removal" into teh googles and got a fair handful of hits.  Every last one of them said the same thing:  "It's a bear, unless you have a 4-runner.  Then you have a nice access panel for the fuel pump".


I could hardly believe my eyes.  Something was going to work in my favor!!!


Unfortunately, the three mounting screws have departed sometime in this truck's miserable life.  Expecting the worse (gobs of cement-like sealant) I go get a couple of prying devices, and I briefly ponder snagging the danger wheel too (not above hacking the crap out of fuel pump accesses at all.  Mrs. Hungary's fuel pump went out in her Saab, but there's no access panel.  There is now a three sided square cut into her floor)


Luckily, it popped right off with that butter knife there.  No sealant to be found  (two wins in a row???  What thread is this????)

Unluckily, I couldn't see a darn thing wrong through the hole, or underneath the truck...


Nothing else to it, I'm going to have to pressurize the system with fuel and see where it comes out of.  Really though, with a leak like I was seeing I was really expecting to see the return line completely popped off or chewed up or something...

But dang if I couldn't see anything.

Anyhoo, that was about all I could do for that session.  But more day passes and in one of those passes I get a brief opportunity to have another go at the truck.  This time I decide to go after the power steering pump, and distributor. 


Done and done!

After those, I was on a ROLL and didn't want to stop momentum so I went after the lower intake manifold.  I figure if I can get this bolted in place, I'll be miles ahead tomorrow when I can take my time and hook things up in a slow logical fashion.

Unfortunately, in my rushing I got the wire harness twisted something fierce, and when I pulled it free I broke a wire off of one of the oil (pressure or level) sensors:


Ah yes.  That's more "thread like".

I was able to pull the rubber grommet out with a small screwdriver, but unfortunately I don't have an extra pin to crimp in place.  I'm going to have to make do with the one I have...

I do get kind of lucky though because this particular pin has a crimp portion for the wire's conductor, and a strain relief crimp portion that grabs the insulation.  I'm just going to grab my crimpers and smash that insulation portion into the center conductor and hope it holds:


A minor setback, but heck!  That looks like it just might work!

I hooked it back up and crossed my fingers.  We wont know for sure if it works until I start the truck for the second time.

Still goin strong, I did get the lower intake mounted in place:


Funny thing happened when I bolted this thing in place.  I found ANOTHER missing screw!  (that is, a hole going to the block with no fastener).

Now I just had this bolted in place one day ago, and I immediately put all the screws in the screw bag when I took it off this time but I do remember thinking I saw a SLIGHT coolant leak when I ran this for 10-seconds.  I think I put it in the "please god no" bin, because I hadn't made a mental note to troubleshoot that particular issue any further.

Well, it just so happens that this spot I think I've missed twice now, is hidden under the thermostat housing and could be the cause of the leak I was hoping would go away if I ignored it (it is in the exact right area)  Fingers crossed.

but alas, in all my scrambling I did make a "whoopsie":


In all that frantic moving around, I never thought to remove the upper intake manifold gasket.  Somewhere along the lines I must have caught that corner on something and ripped it right off.  Unfortunately I don't have a spare gasket, but I DO have enough RTV to think I can get away with discarding the gasket in favor of smearing the surface with red-gooey stuff and slapping it together.

So here's how we'll finish today:


Most everything in place and ready to be hooked up.  Tomorrow I'll go after the EGR, fuel rail, the coolant line that bolts to the underside of the lower intake, and then see if I can't slap on the upper intake.  If all goes well, I'm hoping to give that fuel leak another troubleshooting look, and maybe even attempt another turning of the key! 

In an effort to lean forward on ensuring success (or at least at getting a solid day's worth of progress) I've scheduled the day of work laugh*
(Sometimes I love being an adult)

Wish me luck!


*Quick note:  Taking the day off work really only gets me about 3-more hours of wrench time as I work second shift and usually leave around 2pm.  The kids get home just after 4, and very little if any wrenching will be done once that happens.  But still!  Every bit counts.

Hungary Bill (Forum Supporter)
Hungary Bill (Forum Supporter) GRM+ Memberand PowerDork
11/11/21 10:19 a.m.

Wednesday (Tha day off!)

Well, I was thinking about it and I remembered that when I pulled the cylinder head back off that there was some coolant in the cylinders...  Now this is pretty normal, but I tend to worry so of course I was hoping against hope that my new head hasket wasn't leaking (something I'll continue to worry about).  BUT the reason I'm bringing that up now, is because it also dawned on me that if there was coolant in the cylinders then some coolant probably got down the oil passages as well.  So we begin our big day with an oil change:


Cool.  That takes care of that.

Having done that, we can go back to our regularly schedule program.  ON WITH THE RTV!


One bolt here, one connector there, hook this hose to that and soon we have:


Seems like we've been here before...

Anyhoo.  Remember I mentioned there was a waterfall from the gas tank?  Well I have a plan for that.  I don't really want the truck running while I'm under it looking for where the gas is pouring from, but I remember on the L-Jetronic system installed on my Alfa if you push the MAF door open a little, it will turn on the fuel pump.

So that's what I do:


With the socket wedged in there, I can hear the pump running.  I high-tail it to the passenger side of the truck and peer in and underneath:


Nuthin.  Not a drop to be seen anywhere.

Normally this would be a win, but again I DIDN'T TOUCH ANYTHING!  Where did the leak go???  I mean, it was a big one too!

This had me so bothered, I actually had to check and see if the stain on the driveway was still there to make sure I wasn't just crazy.  It was, and I wasnt.

Heck with it.  Heading back to the engine compartment, I do see a bit of fuel spraying out from the pressure line on the fuel rail:


Don't let that photo fool you.  That banjo-bolt is good and tight, but there is a missing copper washer.

I pull it off and it turns out the copper washers were super thin, and I had double stacked them on the fuel rail side of things.  Once I got things moved to where they were supposed to go, everything was honkey-dorey


While in there though, I noticed there was another fuel leak at the fuel filter:


No double stacking this time.  Instead I had only installed one washer.  Luckily I had a bag of copper washers in my spare gasket set and one of them fit.

Easy money.

So that did it for the fuel leaks, time to turn the key and make this happen!


So the first thing I notice, is it's idling much better than it did last time.  Last time it sounded WAY advanced and was idling around 500rpms.  This time it sounds a bit "exhausty" but the cold idle circuit is obviously working and we're running at 2krpms (Right were it was recommended to be for cam break in).  SWEET!

The next thing I notice is the exaust is leaking at the center bolt hole.  That smoke wasn't just from my greasy hands, it was from the exhaust as well:
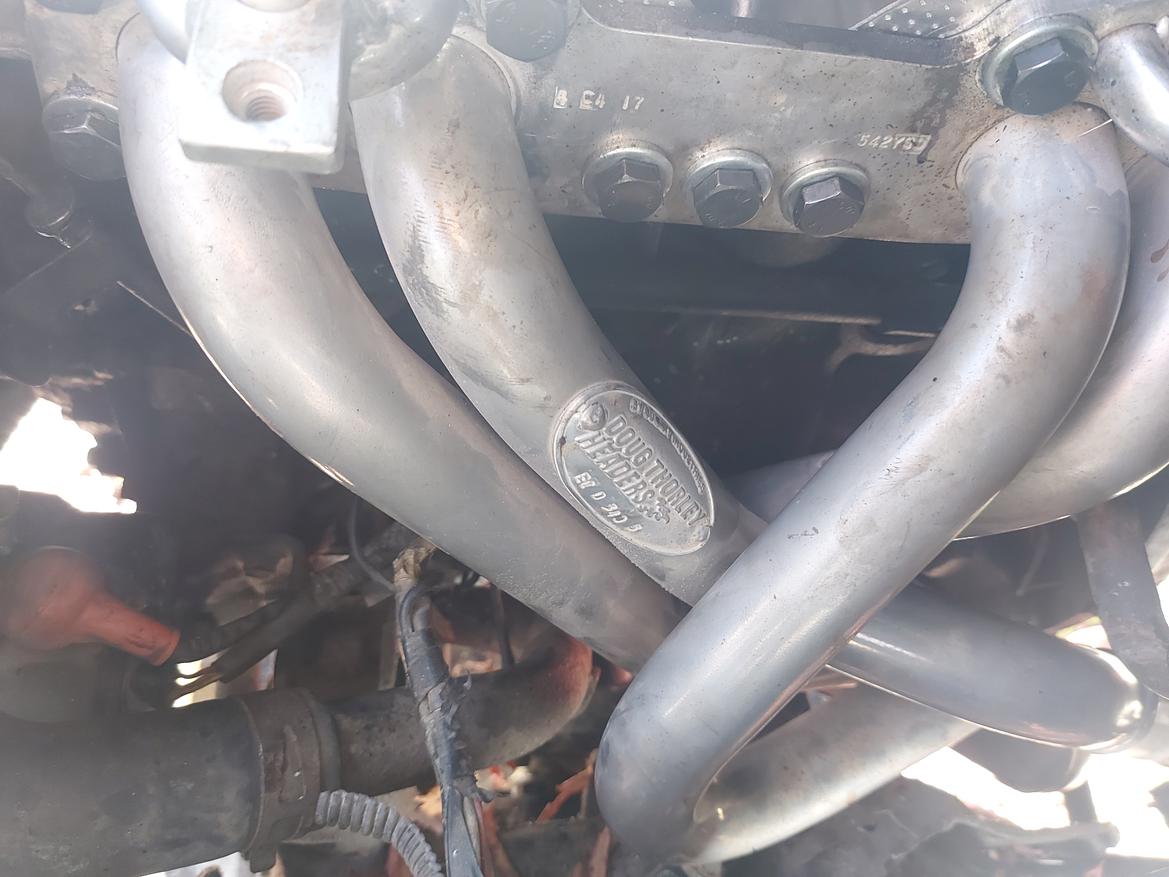
 

Center bolt bolted up, and we're good to go.  No more exhaust leak.  Heck!  I didn't even know an exhaust leak out of that hole was an option!

Ah well.


Up next I notice a water leak that's hitting the fan and slinging stuff everywhere:


I tried to point at the missing bolt hole in the water pump so I wouldn't have to edit the photo later, but it looks like in doing so I managed to eclipse it a bit.  But there it is.  I snag a new bolt from the coffee can, slather some RTV on it, and stab it in place.

Time to start the truck again and this time I notice the fan is still slinging fluid!  Oil this time though, not coolant...


It turns out that that bolt was loose.  It resides right underneath my crank timing marks, so it's reasonable to see how I missed it.  Originally I tried to take the crank pulley back off, but then decided a box end wrench was fine and tightened it that way (photo taken after said tightening)

Good.  done.  Time to start it back up again, and it's STILL slinging oil off the fan!!!  Damnit!

Turns out the crank seal on the oil pump sucks.  SOOOOOOOOO we're back to this point:


Which isn't so bad since I can access everything from underneath.  The only thing I had to do up top was pull the #1 plug and install my trusty rope to keep the engine from turning.

Since the oil pump was out, I decided that in an effort to not have to do this again I would consult with my trusty Haynes FSM and make sure everything oil pump related was installed correctly (and not causing more leaks)


Everything was skookum, but major boo on me for not doing this seal when I had everything apart.  I can't say I've ever had one fail, but that was just pure laziness on my end...

ok, so NOW can we start this back up again?


Yes we can laugh

So the engine is sitting at 2krpms, and it's all warmed up.  For some reason it isn't kicking down and I'm not sure why.  I've just fixed leaks on every fluid system aside from the windshield washer fluid, and I'm poking around my engine bay looking for more leaks when the overflow line from the radiator starts burping.

"Oh dear god, why is it doing that...?"

I should tell you, at this point that I absolutely hate this part of playing with vehicles.  First starts can be huge motivators for a project, and that's great.  But for me, it's the project's opportunity to have all sorts of weird problems.  And when it comes to weird problems after the first start, I tend to diagnose things a lot like Web MD...


That's right.  Burping from the cooling system must mean that head gasket is leaking compression into my cooling system and that's why it's overpressureized and filling my overflow tank...
 

Do not pass go, do not collect $200.

C'ept it wasn't.  In the 2 minutes I took to look under the hood, my coolant gauge went 7/8ths scale.  My truck was about to overheat.

It's always something simple isn't it?

I take a quick break to let things cool a bit, crank it over to circulate the coolant, and then let it sit some more.  Here's where I'm at:

1) the engine sounds REALLY "exhausty".  Like loads of timing or valve issues sort of "exhausty".

2) If I blip the throttle, I get a backfire that hits the intake plenum HARD.  This happens about one in every three "blips"

3) The idle is WAY too high and it's not coming down when it's warm...

4) The engine bogs when I blip it.  It's like a "puhhhh, Vroom!"


To me, this could only mean one thing:  Vacuum leak.  My 1966 Impala used to do the "puh-Vroom" thing and it was because someone had plumbed the PCV into the intake manifold.  Once I found that, I re-routed it to the air filter and all was good.  I'm hoping to find something similiar here.


I've got the idle screw all the way cranked down, and the engine is sitting just over 1200rpms.  It's not overheating at this speed, so I'm good to take my time.

The brake fluid is some strong stuff, and I spray it on just about everything with almost no results.  I do get a bit of something from the #4 injector, but all I had to do was give it a little twist and it seated itself in there pretty well.  Other than that, it's spray spray spray and nothin nothin nothin...

Exhausting the whole can, I've found exactly zero vacuum leaks.  I give up on that idea and just start disconnecting and capping crap.  I start with the power steering pump.  It has two lines that go to the plenum...

Nope.

There are 3 or 4 lines that go to the EGR valve.  Maybe the diaphragm shat itself?

Nope.

Brake booster, PCV valve, valve cover vent?

Nope nope nope.

Nothing.  Not a dang thing was leaking but this HAS to be it.  Not wanting to walk away empty handed I put a zip tie on one or two lines to sinch things up, and then I found this little guy:


(nevermind that big open port, that goes to the brake booster.  I had it capped prior to this)

Anyhoo, I just happened to have one spare vac cap, so I swapped it out like so:
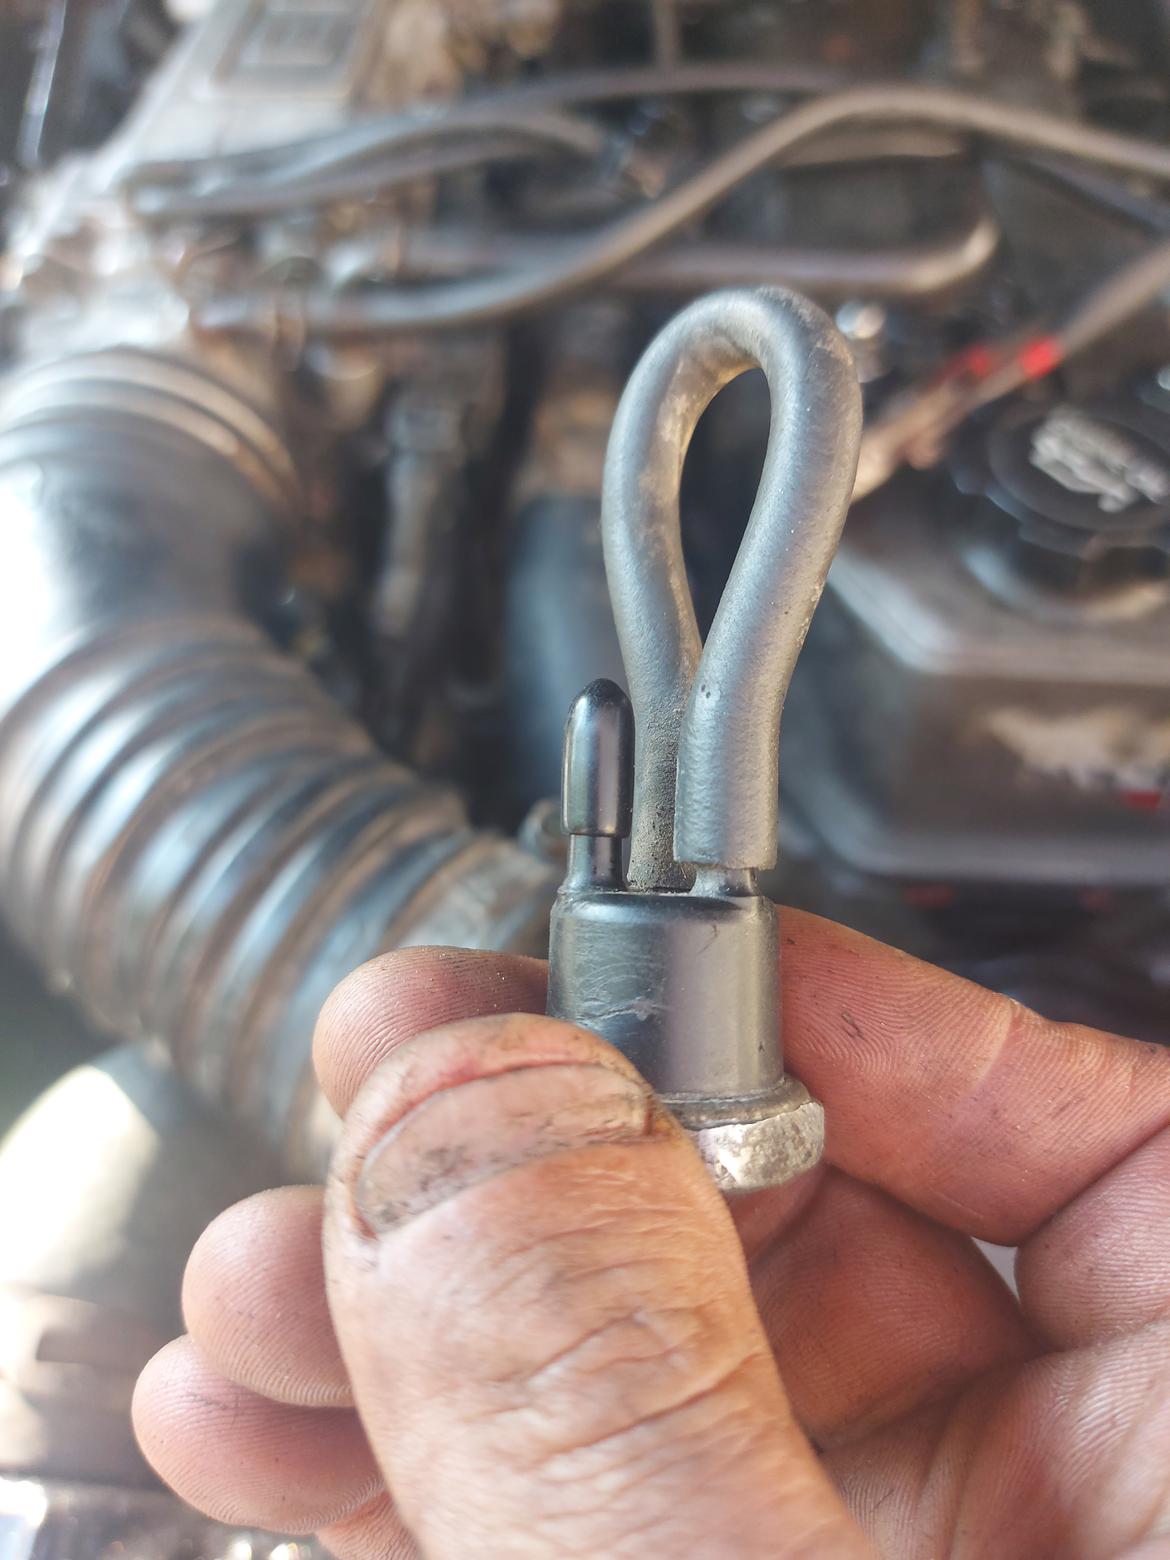


Still nothing though.  Putting that cap on didn't change a thing.

Well, I need a break from vac hunting so I decide now was as good of a time as any to dial in the timing.


Look at that beaut!  It's almost as old as I am, eh?

Anyhoo, to do this properly you're supposed to short out two pins on your diagnostics port and that will drop the computer's advance.  From there you just stab it at 5btdc and done!

Except I never had good results with jumping the connector.  The TPS is always off, or there are two part numbers of TPS with different resistance values and I got the wrong one, or SOMETHING to where it just becomes an all day headache trying to get my timing set right.  BUT last night I did read on the interwebz that you can set it at 12-advanced and that's the same thing, so that's what I do.

Done and done.

The exhaust is a little less "poppy" but not by much, and it's still backfiring out the intake, so mad scramble follows.


I check my valve clearances first, as I figure that's the next most likely issue.  All are a hair too tight, and one or two are probably bad enough to actually need adjusting so I hot set it to factory specs.

Turn the key and things have improved but not by much.  Oh, and I can REALLY hear my valve train now! cheeky  Still though.  "Puh-Vroom" and the occasional backfire into the plenum.

Again, I go over all the connecting points for hoses, gaskets, and seals (this time with WD40, as I'm out of brake clean).  Again, I find nothing. 

Scratching my head, I decide that setting the timing at 1200rpms instead of 800rpms is probably not the same thing and the engine probably could use a bit more advance.  Again, I get out my gun, and I decide that 15btdc is a good mark to shoot for.

It likes it.

The bog is still there, but it's loads less.  The backfire stops completely.

I give it a little more and it likes it even more! 

I start googling "more advance with aftermarket cam" and wouldnt you know?  It's a thing!

Magic happens and the engine starts idling at 500rpms while I'm doing this, so I open my idle screw up a bit and get it right at 800rpms

WIN!

Cool, so let's see where we're at:  (drum roll please) 20deg BTDC

surprise

Woof. 

That seems like a lot.

Unfortunately my day is just about done at this point.  I started at 8am sharp and it's almost 15:00...  I've got just enough time to run out and fill up the gas tank and maybe get a car wash


Hoo-Wee, she looks pretty!


Hungary Bill (Forum Supporter)
Hungary Bill (Forum Supporter) GRM+ Memberand PowerDork
11/11/21 10:36 a.m.

(Wednesday Cont.)

The gas station is only about 3 or 4 blocks away, but immediately I notice a few things about driving this pig:

1) it is gutless as HELL!  First gear pulls fine, but any other gear just bogs continuously while the vehicle accelerates at a snails pace.  Yikes.

2) The clutch pedal is SUPER soft.  It engages, but it's like a feather under my work boots.

3) The brake pedal is REALLY low.  It builds pressure fine, but it does so SO LOW that I'd hit carpet before I locked the fronts.

4) Now the idle wants to be at 2500 RPMS!

So:  Doesn't want to go, doesn't want to stop, no feedback, runs like crap...  100% sounds like one of my projects!

I fill up with super unleaded (lead gas hasn't been a thing since I was a kid, but I still feel the need to specify.  Only slightly less historical is the phrase "eh.  Just put 5-bucks in") as that makes me feel better about mixing it with whatever gas has been sitting in there since March (tank was reading "empty").

Back at the house, I'm wondering WTF is up with those brakes.  With the engine off, I've got a solid pedal.  Start the truck and I can push it to the floor....

I'm not sure what to do with this, so I just do another brake bleed starting at the back-passenger drum.

No change.

Feeling the need to isolate things, I decide I need to find a way to break the system into parts.  To do so, I decide to work my way around the truck wrapping an old garage rag around the brake line and clamping it shut with vice grips (I don't have a hose clamp set)


Clamping off the back doesn't seem to change things, but I was 100% hoping it would just be a drum adjustment that got me out of this.

Clamping EITHER of the fronts gives me the results I'm looking for so I decide that it's "air in the system" and bleed the ever-loving crap out of them.

In the end, there was a small change.  No longer can I push the pedal to the floor with the engine running, but it's not far off.  I'm very much not satisfied with this one and will have to revisit.  Another day though, it's 16:30 now, and Mrs. Hungary is on her way home with the kids.  Man, I tell ya it's been a LOOOOOONG time since I put a full day's work in under a vehicle.  I am absolutely beat.  It's time for a shower and a beer.  Fingers crossed for tomorrow.

Good times.

Hungary Bill (Forum Supporter)
Hungary Bill (Forum Supporter) GRM+ Memberand PowerDork
11/11/21 10:38 a.m.

Woof.  My landlord is going to kill me for this oil slick I've made:


Hungary Bill (Forum Supporter)
Hungary Bill (Forum Supporter) GRM+ Memberand PowerDork
11/11/21 10:39 a.m.

Thursday:

Man.  That first beer I had yesterday really kicked my butt.  I forgot that I'd been so wrapped up in things that I hadn't eaten anything all dang day!  Taking a bit of time to relax though let my mind wander unstressed.  The last time I had a wandering idle like this, the coolant level was low (so no flow through the Idle Air Control Valve (IACV)).  Thinking back to my drive, I DID have the heater on when I went to the gas station and the truck wasn't running when I topped up the radiator.

First thing I did was check the coolant level:


Gross!!!!


Look at all that crap the new coolant worked loose!  That is NASTY!

Not wanting to leave that in there, I got a flat-head out and my old garage rag from yesterday


I know there's going to be more in there, but that's good enough for now.  I fill to spill and crank the truck over:

2500RPMS...

Gluh.

Well, too late to do anything now.  The kids saw the truck in the driveway last night and are all sorts of excited about taking it on the school run.  I screw down the idle adj screw and decide to live with a 1200RPM idle.

Once that's done, I'm back to poking around the engine bay and notice that the coolant line running from the thermostat housing to the IACV isn't ANYWHERE NEAR as warm as the upper radiator hose is, so I pull it off:


I try to blow in it, but sure enough it's plugged.  The problem is, I don't know if I even SHOULD be able to blow through this thing... I mean it makes sense, coolant has to pass through right?

Luckily in my garage I have a spare.

Nope, can't blow through that one either.  Reason?  Because it's packed full of mud!

I clean the mud out, and sure enough I can blow through no problem.  Back at the truck, I stab a screwdriver in the same hole, pull out a bunch of crud, blow the rest through, and welah!  800rpm idle laugh

Cool.  Now, I've also done some reading on my phone about 22RE ignition timing after a cam swap.  Some people are asking about some insane levels of ignition advance.  Like north of 40degrees insane!  Well, having nothing to lose I decide to start at 25btdc and go for another dive.  This time on the highway (one lane in either direction.  55mph speed limit).

The results are less than spectacular (This thing struggles to get up to 60mph), but I've got a plan.  My house is just 4 blocks away from one of the back entrances to the highway.  Turning right from there, there's a small hill (up and down) and then the next crossing has a turnaround I can park in.  I'm going to grab my 12mm wrench and timing gun and keep this advancing going until either I'm happy or the engine is happy.

Each time I go, I try to hit that hill in low RPMS (2KRPM or so) and I floor it going up.  If it pings, I'll stop.  If it doesn't, then it gets +3 degrees at the next turnaround.  Here goes:

bwaaaaaaahhhhhhhh

+3 deg

bwaaaaaaaahhhhhhh

+3 deg.

And so on and so on until I'm WAY less than comfortable with where my timing is, but there's no ping in sight, so I just keep going. 

Somewhere after 30BTDC, I can finally get my "one wheel peel" in when I gas it from the turnaround...  Eventually I get scared and stop to check my cam timing (it was something I was mulling over in my head on all these runs).

I stop back at my house, pull the cover, and drop a screwdriver in the #1 hole:


That there is right on the money.  Crap...

I decide to do another warm check of my valves and I find that the #2 and #4 intakes are a bit loose.  Those get tightened and magically my valve chatter is reduced to background noise laugh

Ok, nothing else for it.  Back to flooring it up hill and twisting the dizzy...

FINALLY somewhere near 50btdc I finally get the marble in a can I'm lookin for!  And boy is this thing gutless again!  I back it off a bit and give it a romp.  Of the settings I've been through, whatever timing I've got now the truck seems to be doing best with but MAN is it still "not fast".   I mean, I don't know what I was expecting from a "torquer" cam, but this wasn't it...  My butt dyno doesn't register a thing over a stock 22RE and I can't tell if it's a bog or just intake noise but 2-3krpms is BORING, and that got me thinking:

When I built up a stock 350 with an Edelbrock top end kit (Aluminum heads, cam, intake, and carb), I had to mess with my ignition timing curve to get things back to skookum.  If I set it to factory spec, it would take off and then fall on its face around 3krpms.  If I set it at max advance, it would bog like hell and then pull like the dickens on the top end.  The solution was changing the ignition advance curve to match the new cam profile (and BOY did that thing PULL when it did!).  Unfortunately, changing the computer's ignition advance curfe is something that's not possible with the 22RE.  There are no weights to change, no vac canister to adjust... nothing.  How much cam was I REALLY expecting to get with a stock ignition curve?

Ah well, lesson learned


So moving on:  What was the magic number that the engine liked the best?


44 degrees of advance at idle surprise

If it's crazy and it works, well I guess it isn't crazy?


Good times

java230
java230 PowerDork
11/11/21 10:42 a.m.

WOOOHOOO!

Hungary Bill (Forum Supporter)
Hungary Bill (Forum Supporter) GRM+ Memberand PowerDork
11/11/21 11:16 a.m.
java230 said:

WOOOHOOO!

YEAH BUDDY!

Here's how I spent the rest of my morning today:


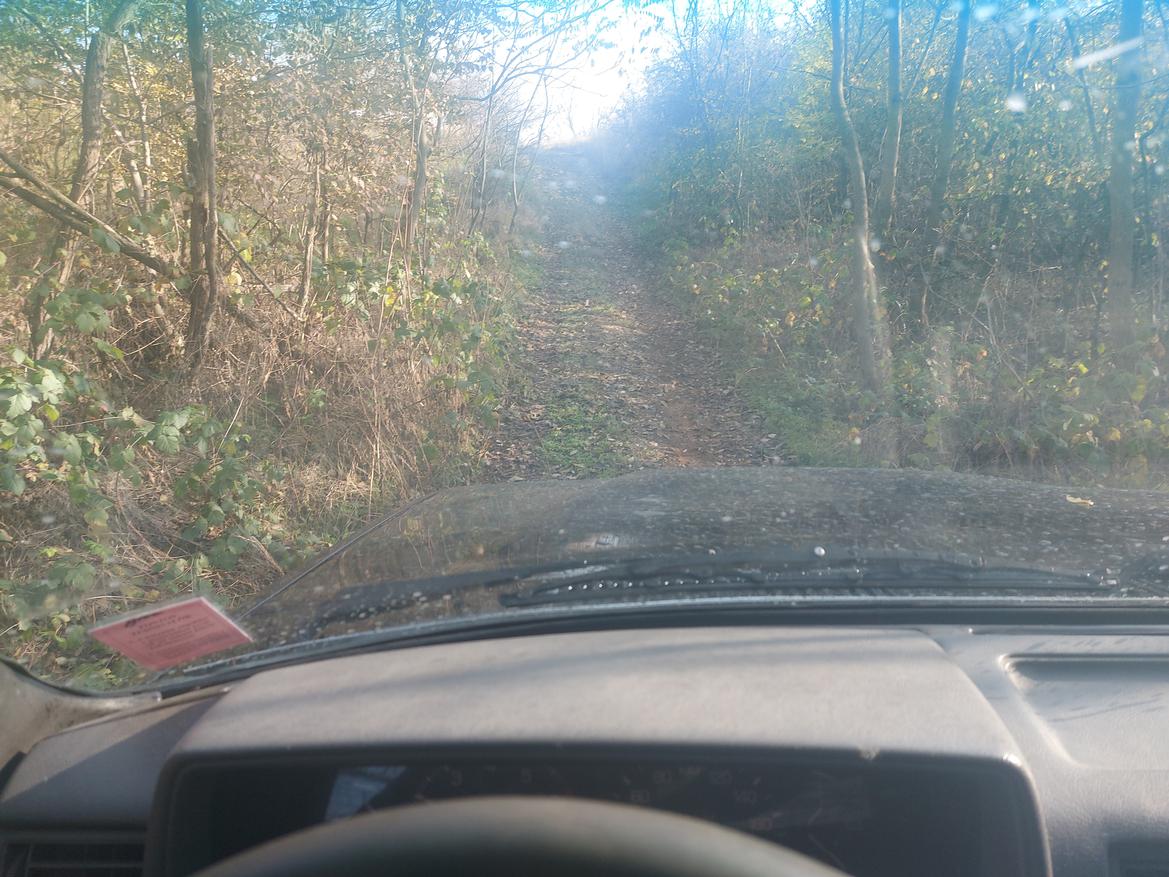
There's an old tank repair station outside of town in some hills.  The last dirt road picture really doesn't do that incline justice, but it was "4-low and hit it running" levels of steep.  Unfortunately, the idle is back at 2500 again.  I'm not worried, it's just crud blocking up that IACV.  But if you guys will excuse me, I'm going to take a break and enjoy this for a bit wink

Good GOOD times

¯\_(ツ)_/¯
¯\_(ツ)_/¯ PowerDork
11/11/21 11:28 a.m.

Testing already, excellent!  What else is planned leading up to the B2B?  Modifications?  Spares kit?

Hungary Bill (Forum Supporter)
Hungary Bill (Forum Supporter) GRM+ Memberand PowerDork
11/11/21 11:52 a.m.
¯\_(ツ)_/¯ said:

Testing already, excellent!  What else is planned leading up to the B2B?  Modifications?  Spares kit?

You know, surprisingly little as far as the truck is concerned.  Having to take her apart the way I did turned out to be a pretty darn good way to prep (as hair pulling stressful as that was).  New gaskets, new seals, everything's been greased, everything's been touched...  If I can get the last couple of adjustments dialed in, she should be good to go.

I'll install a CB, a few extra cigarette lighter hookups (for gadgets), but most our prep will be equipment related (camping gear, recovery gear, spares, tools, etc).  I've spent a lot of time looking at the entrants from previous years on youtube and the truck seems pretty well equipped from the factory when compared to the other vehicles.  Granted, we don't have all the cool armor, and roof racks, and hood mounted hi-lift jacks, or light bars... But I think GRM can do this without all the flash as long as we put our money in intelligent places.

Saturday though will be a big day for the truck.  I'm not sure if I mentioned but I've got two Slovakian teammates lined up and none of us have ever met each other (Stranger Danger!!!!).  The plan is to take the truck to Bratislava on Saturday, play tourist in the old town with the Hungary family, then meet up with the teammates after dinner.  They say the best way to get to know a Slovakian is to get drunk, so that's what we intend to do laugh  They've been updated as to the truck's status and are pretty stoked to see it in person.*

Good times.

*You know, we're a crazy lot on here.  But today I realized that two people who've never met me, or each other, volunteered to team up with some random American in Hungary and drive through Africa with him in a 30-year-old truck that didn't run.  Now THAT's crazy...

¯\_(ツ)_/¯
¯\_(ツ)_/¯ PowerDork
11/11/21 2:01 p.m.

In reply to Hungary Bill (Forum Supporter) :

Seems totally normal in the context of this place- and enjoy meeting your teammates!

Because I like this stuff, I want to talk spares kits- here's the one in our rally car, only missing some hardware:

So, the tools and zipties and whatnot are obvious, but some other basic stuff in there has come in incredibly handy and I didn't know about it when I first started.

  • Self fusing silicone tape is really awesome when a hose springs a leak
  • Foil tape, similarly awesome for other stuff that needs to be sealed, especially body holes that are letting a ton of dust in
  • Stash zipties all over the rig, like a bundle under the hood, a bundle under the dash, etc so they're at hand when needed
  • Quick splice things are the devil in terms of permanent wiring but incredible for quick fixes
  • Baling wire comes in handy more often than it should

If I were embarking on a journey like yours, I'd add loctite 5 minute epoxy and JB weld to the kit- the only reason they're not in our rally kit is that we don't have time to let them work.  They stay with the service truck instead.

You'll probably want to carry other crucial engine/drivetrain parts too, but I bet you have a plan for that already.

java230
java230 PowerDork
11/11/21 3:31 p.m.

In service Blackhawk Note, zip ties, linesman pliers, and rando screw driver.

solfly
solfly Dork
11/11/21 6:37 p.m.

That timing doesn't seem right. Whats the cam manufacturer suggest? Is the distributor timed right? Plug wires in the right spot?

1 ... 8 9 10 11 12

You'll need to log in to post.

Our Preferred Partners
sBLLRK7HUy2OHKbJMQbdnVm5dmath7qk8oAS9Kr9hPBX9WyIN483lhAJTNNU8Wdp