In reply to jgrewe :
Very cool. Getting close. And for the record, that's the way I was trying to get my driveshaft out, by dropping the center to create slack. Just couldn't get it clear with the exhaust collector there. I have a slightly different dimension somewhere, or I wasn't holding my mouth right. I'm trying to remember if I left guibo on the trans or not. Might be the difference, counter intuitively.
Coupe/sedan difference? Maybe the guibo left on the trans flange fights the bushing in the end of the driveshaft. I put the guibo end up against the flange and then the CV up to the diff. Prying the CV out first will be the way I take it back out.

jgrewe
Dork
2/11/25 12:40 a.m.
DISI kit came in. It's so complete it comes with Q tips to clean your ears so you can hear your wife questioning all the boxes that have been showing up.

I worked on the paint prep for the bumpers. When unloading the wrecked car the bumper got ripped off and the tow hook was pulled through it.

I had some a 3M product for bumper repair from another project and decided to try to grow some new bumper to make the hole round again. I put some tape to create a surface to build from.

I roughed up the surface around the back side and filled the gap. I don't think this is the way this stuff is supposed to be used but it cures up in about 20 minutes and sands nicely. I had half a tube on the shelf, I figured it was worth a try.

I did two applications to get the hole looking good and made sure it was lined up with the threaded hole in the bumper.

I stopped the paint project when I could smell the sealer too well through my mask. I have some new cartridges and will get back to all the little parts later.
How did the Dutchman axles work out? I would be interested to see the final product. You'll also have to let us know how well the 8.8 worked out. How are you dealing with the driveshaft with the diff being moved 1/2" closer to the trans? Custom?
Lost my throw out bearing, like I've physically misplaced it (happens, right?) so instead of putting transmission back in, I put my bumper side support solution on. Probably not as sturdy as your setup. I used Quik-Latches mounted to factory body side bumper mounting hardware. Going to VIR in two weeks, will let you know if my bumper falls off!

In reply to rallycamaro :
The wagon project is a back burner right now. The new shop doesn't allow for bouncing around on projects.
In reply to Spearfishin :
I like it. Simple and uses the stock plastic so you get some adjustment. Are the stock parts a little flexible when they are newer? Most of the ones I've handled turn to dust if they are bumped.
Track debut was moved up to March  .I had to make a quick trip out of town this week so I didn't have the need to red label the harness back to me when Kevin got it done last weekend. It was waiting for me when I got home and I spent today stuffing it back in the car.
The first thing I did was take the stock fuse box rack and attach it to the dash bar. I had cut it off the stock dash bar when I stripped it out to do the cage.

It ends up within an inch of the stock location and will still drop down for easier access.

Since I have a month... again.... I can take more time installing the harness. All the runs that are visible will get wrapped with split loom. If I can find my rolls of fabric tape I will cut the zip ties off so they don't give me trouble later.

In reply to jgrewe :
Yeah, those are new, and aren't brittle. If anything have a little too much flex. I started with those and some 3D printed replacements for the "female" end that were meant to epoxy to the bumper, but even after some rivets and epoxy, I just didn't trust the bumper side of my setup. It was halfway ripped off on both sides, so figured I'd try the Quik Latches. They didn't end up quite as rigid as I'd have liked.
And I ended up salvaging my fuse box holder from stock dash bar and just welding it right to the cage bar. Wasn't terrible to get everything installed, but not sure how access will be if I need to get back to it now that dash is back on. To be honest, until I saw yours with stand-off's, I hadn't thought twice about my fuse box, which is another testament to Kevin's work. Knock on wood, haven't thought twice about anything related to the wiring.
Prepping the harness for installation. I used fabric tape to do a spiral wrap around the bundles of wires, cutting the zip ties off as I went. I didn't get a picture but it isn't a tight overlapping wrap, more like a spin every 3 or 4 inches. I ran out of 1/4" and 1/2" split loom, I need about 5' of each to finish. Those boxes both started out with 100', I don't even remember how long ago I bought them. I have 25' of each on the way.
We were supposed to get rain this weekend, instead we got two of the best days to paint that we have had in a long time. With temps in the 70's with low(for us) humidity, I decided to paint all the little parts left to hang on the car. I got 3 batches through my small inflatable booth. Everything is done but the mirrors.


My neighbor is the set building shop for American Stage in St Pete, they have a couple trucks with cool murals.
Checking out the paint job the next day I found signs of moisture making it through the cobbled together air system in the new shop. Every part has little pin hole looking dots in the clear coat. Sometimes you can sand them out but since these are all small parts and a pain to buff anyway, I wet sanded them all with 600 to try again. I managed to sand out 99% of the dots and not get into the color.
I bit the bullet and picked up and 120ft kit of 3/4" plastic line and installed it. The 60' I didn't hang on the wall will be used as a cooling coil right off the compressor all set up to drain into my horizontal pipe.

I have a desiccant drier that I'll hang at which ever drop I'm using.
While I was waiting for the airline kit I figured out how to hold the dash in the car. Zip ties! I had some big HVAC ones that claim 175lb strength. A couple strategic holes drilled and a loop already molded in the dash and it sits tight in the car attached to the dash bar.


The next step in the wiring is to figure out where I want all the switches. Sitting in the seat, I can't reach the dash while belted in. The ignition, start button, and wiper switch will be next to the seat. I don't want to loosen my belts on a hot track to get the car started if something happens. The rest of the switches for cool suit, rain light, fuel pump, dataq, a couple others I'm forgetting right now will be in the dash.
I'm using BEP rocker switches. I've had good luck with them for years and I like the modular mount system to create groups of switches.

Tomorrow I'll cut some aluminum for the dash filler/switch mount and something to hold the switches on the tunnel behind the shifter.
Amazing work. I've enjoyed following along!
In reply to dyintorace :
I'm glad people are checking in. I hope I can feed as much motivation back into the collective as I get out of it.
Short night tonight but I got the dash panel made. I'm trying to come up with two groups of switches that make sense together. I'll cut the holes and paint it satin black.

At the risk of sounding like a paid endorsement, I recommend one of these pads from the orange box store. This squishy thing is my favorite impulse buy this year.


Those squishy pads are the E36 M3. I have two of them. They both have holes burned in them from weld spatter, but they made working in the cramped confines of the foot well of the car--under the knee-buster bar and pedals--bearable, or even reasonably comfortable!
Something that has always fascinated me about this era of race cars (and later) is how we rewire them without completely disabling them. As I learn about all the computer modules that I don't need to make the car work (even some that I can unplug, smash open with a hammer, and burn to death with my laser without the car even complaining about it), I'm becoming more comfortable with the possibility of completely rewiring the car, but I'm not there yet. If you go into a little detail about how you evade the security of your ignition key switch, or how you decide which components need to be wired to switches, I'd love to follow along. The E46 is surprisingly similar to my own A4, and more people seem to race E46s, so I've somehow learned a lot this way. Feeding motivation into the collective? This is it. As I'm reading through this, I'm retracing all of the wiring that I've identified as unnecessary in my head, and I'm planning how I'm going to unwrap the gross sticky fabric that Audi bundled it all together with.
The security work around is done in the ECU with coding. It was an option offered by Epic Motorsports when I sent it to them for the class required tune.
I started thinning a few things that knew I wouldn't need but decided my winter would be better spent doing other things to the car. I will say that I could have probably picked my way through the harness eventually, I would have never gotten it to the point it is now without screwing things up a few times. Tulay's Wire Werks saved me, I don't know, 100's of hours over the next two years? He specializes in BMW's, maybe there is an Audi guy out there.
A lot of the switches are just for things I'm adding to the car. Most of the stuff to make it run is all handled by the ECU. One of the switches is a manual way to kick on the fuel pump for getting a sample or emptying the tank. A couple of the switches will be temporary ways to control the radiator fan and diff cooler until I get my new dash.
I think I've finally gotten everything to wire the car in one pile. I made the switch panel for the tunnel and painted it and the dash filler. I cut holes for two five packs of switches in the dash and three with a push button start for behind the shifter. I figure I'd rather pop out a filler piece to install another switch than have to pull it all apart and hack on it later.
The tunnel will have start button, ignition, wipers and fan. I didn't have the start button(it came in today) for the size hole it needs so I just have a pilot hole right now.


We are expecting rain tomorrow so I'll be in my zen wiring state, crimping ends and hooking up switches. I have to mount the main cut off solenoid and the two master switches, other than that it's just hooking things up. The entire stock harness is hooked up. I picked up a new AGM battery today so if everything goes well it could be running tomorrow evening.
I had to drill a couple new holes for the rear wheel speed sensors to go through. The stock holes are covered by cage mounting plates. I had Tulay's add about a foot of extra wire when he replaced the sensor plugs so I was sure they would reach back to their stock location. The scary part was the spot I needed to go through is about an inch from the plastic gas tank on the other side. I shortened up the pilot bit and wrapped the hole saw with a bunch of tape to keep it from taking a bite out of the tank.

The main switches are installed. I have a temporary one for the fan on the tunnel. The fan will be controlled by the new dash when I decide to drop a pile of cash on that. I need a couple blanks to fill some holes.
It looks like I need to add a few inches to the wires going to the ignition switch, the extra length of wire Kevin gave me won't reach my chosen spot. Once I do that I can wrap them and tidy things up. I've flip-flopped on the wiper switch location about 6 times, tunnel or dash?
I also installed the stock gauge cluster and my Aim dash. As I was looking at the 37 pin harness I see that it doesn't have the CAN+,- for ECU connection. Crap! The 22 pin harness is $400 and I need 2 wires in it at this point. Thinking I could be ahead of the game for the new dash if I buy one, I checked the pin outs on my current MXL Pro05 and the new MXG I'm think of, and they are totally different. The MXG has the ECU CAN connections on the 37 pin.
I dug through my Aim stuff and found that I had purchased the kit to make your own 22 pin harness a long time ago. What I don't have is the correct crimper for the tiny pins. The crimper will be here tomorrow.
The disconnect solenoid had to be put in the same spot the stock primary cable has a threaded connector. I cut the connector out and put lugs in its place. This put the solenoid in a good spot but I had to drill through the cage mounting plate to put in one of the rivnuts. Then I couldn't find any 1/4-20 bolts in the shop to fit the rivnuts, I did find some screws that will work until I get to the store.
I got rid of the smaller primary wire that runs to the fuse box and I connected it to the stud on the bulkhead connector on the firewall.
Yes, I need to clean up the metal shavings...

jgrewe
Dork
3/13/25 10:59 p.m.
The first (expensive) crimper didn't go small enough for the mil spec pins used in the connector. I contacted Aim and they confirmed the wire gauge range I needed. I found one for about $30 that did the job.
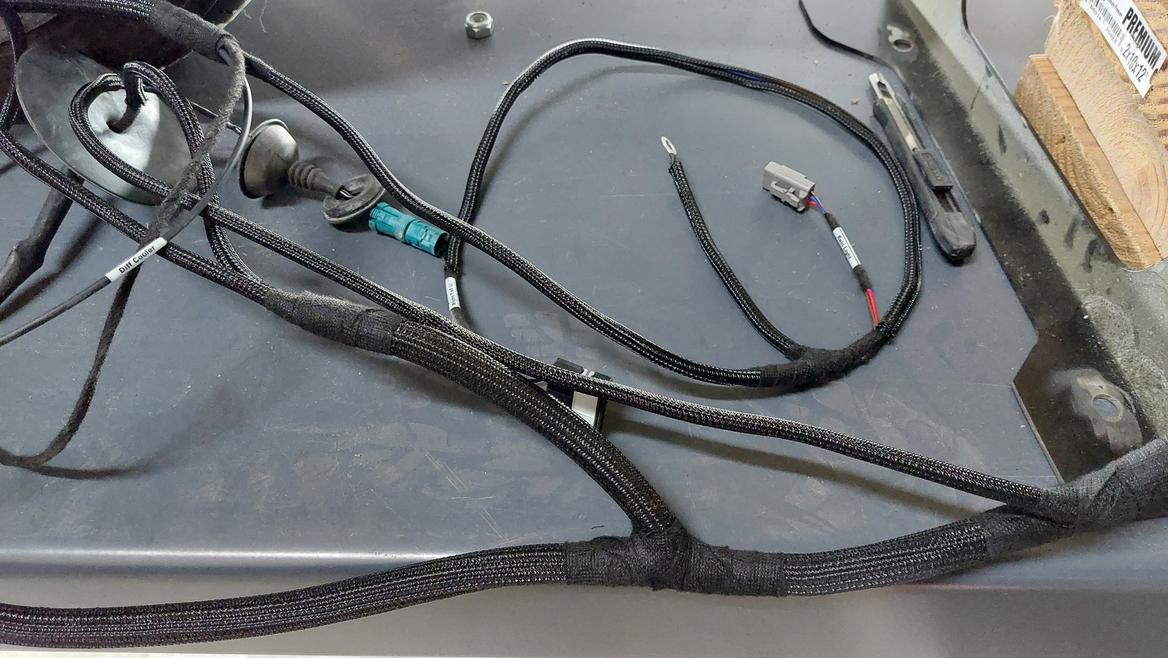
The original 37 pin harness with all kinds of extra channels looked like this.

The new 22 pin one that I had to build to tap into the CAN Bus and power the dash looks like this.


I had to dig into the legacy software files on the Aim site to load Race Studio 2, Race Studio 3 doesn't list this older dash in the configuration options. No big deal. I did a quick run through of what I wanted the dash to do, set the shift and warning lights, etc.

It was time to fire the car up for the first time since it has gotten a full organ transplant and had its nervous system ripped out and reinstalled.


There are still a few things to do to the dash, like let it learn the gears. The gear calc process takes a lap or so for the dash to figure out engine rpm and mph relationships. I need to get a momentary switch for the steering wheel and I can toggle through 4 chosen channels on the bottom row.
I have few things to button up in the engine compartment and its time to bring some weights to load into the seat to simulate me for corner weighting and alignment.
In reply to jgrewe :
Ran fine? Fired right up?
You're good at this! Haha
This thread makes me wish I was putting in hours on my E36... but its under a lot of snow and a few other projects need to take priority first. So I will live vicariously through your work!
Spearfishin said:
In reply to jgrewe :
Ran fine? Fired right up?
You're good at this! Haha
Yep, I didn't have the gas pedal hooked up though, so no throttle blips. I found the hose to the brake booster was unhooked at the booster so the vacuum leak gave me the higher idle than normal.
I mainly wanted to test the solenoid master cut off system, it works as it should.
Tomorrow I'm hanging the new rims and tires on it for the suspension set up process. I also need to install the belts and the rear glass. Once all that is done its time for the final nut and bolt.
T-minus 7 days and counting...
In reply to DjGreggieP :
I remember my days growing up in Toledo when I needed to make a trip out back to a parts car in the dead of winter. It would make me look for something else to do that day,lol. "Maybe I'll clean the shop..."
jgrewe
Dork
3/21/25 11:16 p.m.
Its been a busy week. I've written and checked off a bunch of little jobs on my dry erase board. Any time someone looks at one of my projects and asks when it will be done, my answer is always, "Thursday." I never specify which Thursday. Well, I didn't make it on Thursday but I am down to the alignment before it goes in the trailer tomorrow night.
A few little things that I took the time to get a picture of:
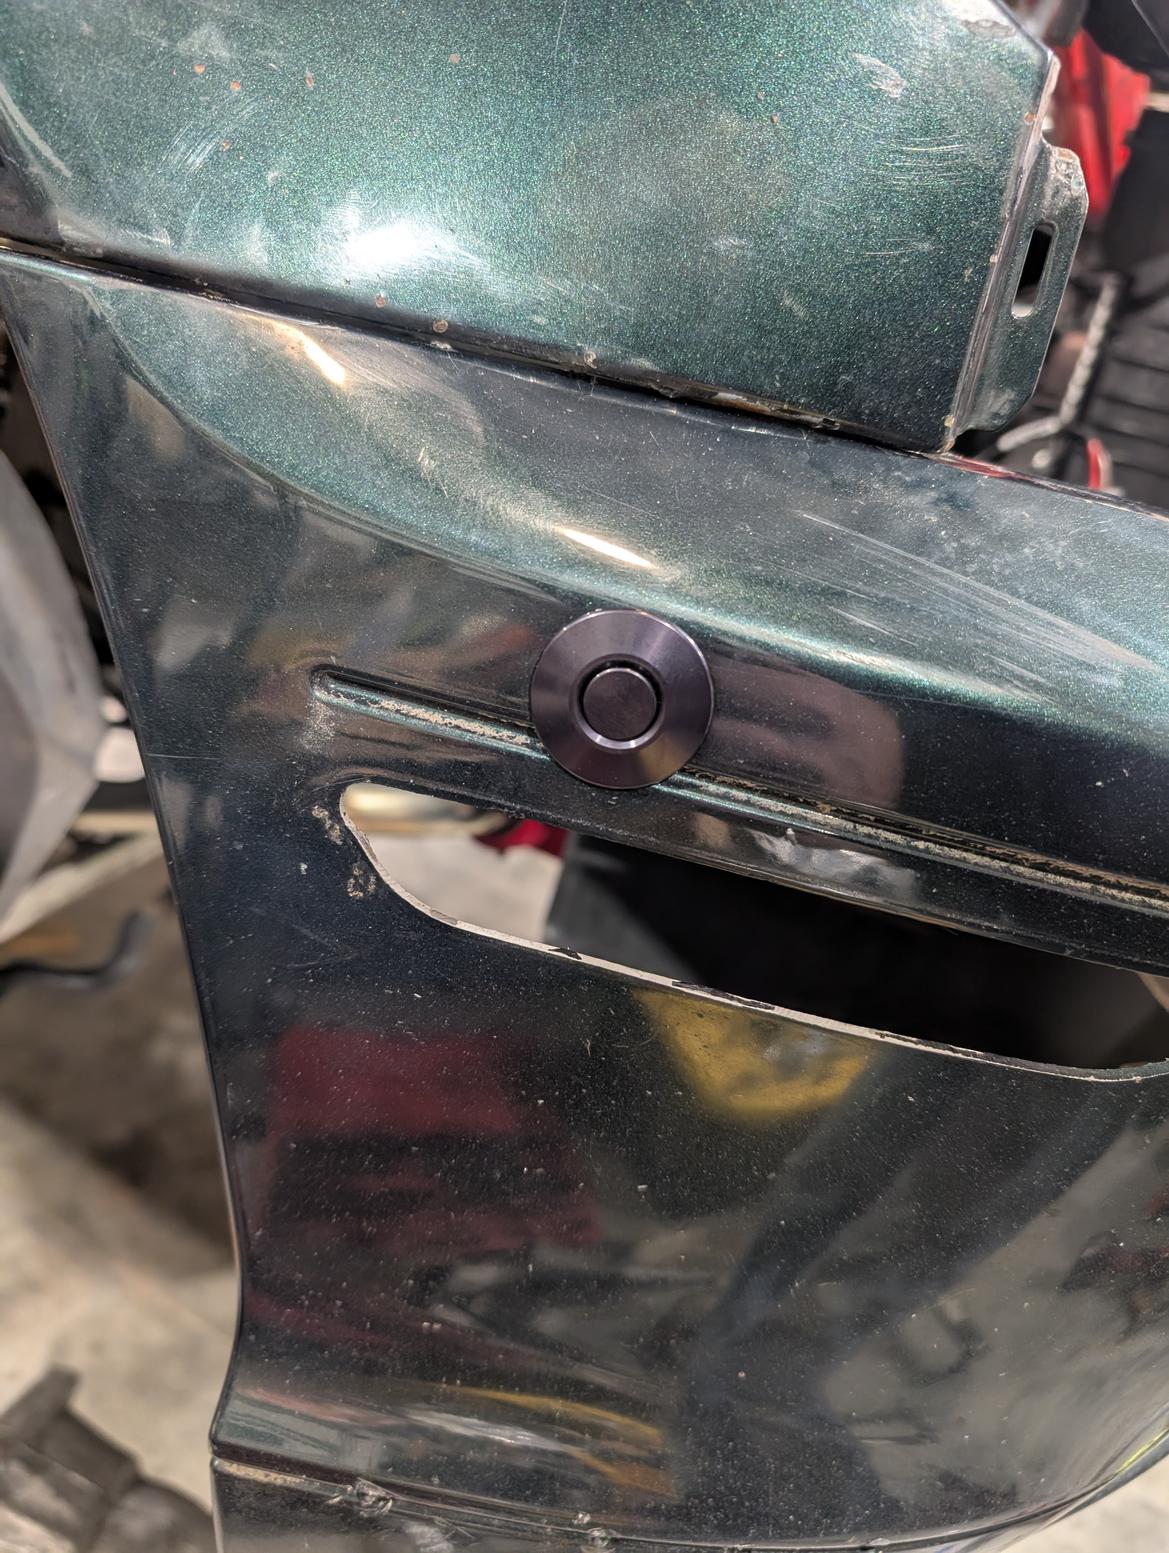
More zip ties! The tabs on the headlights are gone or cracked. I was trying to bend up some new tabs out of aluminum and noticed three little hoops that could be used instead.
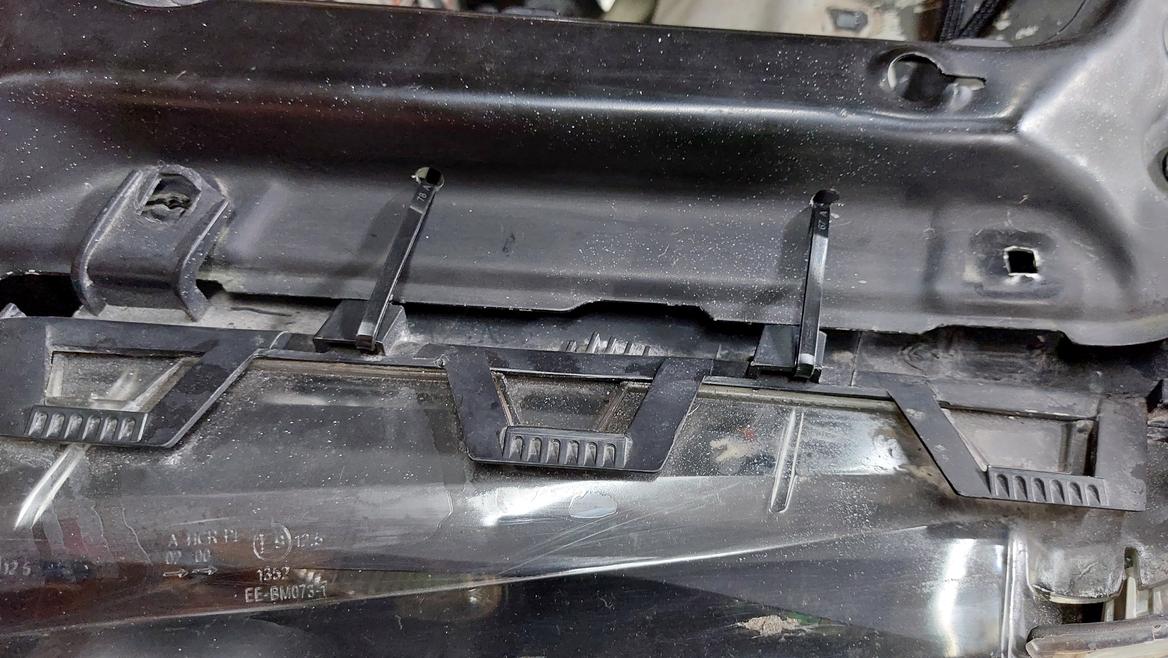
The side trim uses a bunch of snap in clips. Most of them break or the backing on the trim splits when you try to remove them. I bought a few different two sided tapes to fill the void without pushing the trim out of its groove.
3M wins again. I'll get a picture of the installed trim when the car is outside tomorrow.

I leveled my 4 post lift deck by adjusting the ladders the safety locks hook into. I put it on the scales to see where it is after just throwing it together by eye.
The car has 5 gals of gas and the equivalent of me in weights in the driver's seat.
Keep in mind it has to weigh 2850!

I didn't get the diff cooler system installed so I will pick up a few pounds there. Over all I'm happy with the result considering the effort.
In the morning I'll set the ride height and start tweaking the corners.
jgrewe
Dork
3/22/25 11:33 p.m.
Well, the car is in the trailer. I'll be heading out at about 5am.
Highlights of the day. I got the corner weights where they need to be and the ride height and alignment I feel comfortable with on bumpy Sebring.

I figured out a good way to be sure the rears are pushing the right direction so the car won't dog walk. I was able to slide my toe plates forward enough to find a repeatable spot to measure from.


The extra step up front was setting the caster. I got it within a couple hundredths of a degree side to side.

No glamour shots of the car in the Florida sunshine yet, it was dark when it came out of the shop.
Now I'm sitting here thinking if I forgot to load something...
jgrewe
Dork
3/24/25 11:44 p.m.
The car ran great all day. There is still a lot of sorting to do but over all the car is a blast. It responds well to throttle and steering input to change the trajectory in a turn. I'm not totally comfortable tossing the car in some situations, still not sure if will stick or continue the toss into a drift. Steady state cornering is good, I just think some shock work or a change in the rake will help.
I didn't have the time to fix all the little blemishes on the paint but the bright color blinds people enough to look good.

The car also got to meet its step brothers, or whatever term is used for "cars I also built."

Next up for the car is to finish the little details on the body and add a fire system and diff cooler.
When I turned off of I-75 onto SR 64 I realized what I had forgotten to throw in the trailer. The box with the track side beacon for the dash to know the start/finish line. I don't have GPS for the old coal fired/hand crank dataq system so no lap times. An Aim MXG is on the way as of tonight.
In reply to jgrewe :
Very nice! Did you end up with any rear tire rub? I just noticed after my recent VIR weekend that I'm definitely getting some rub in the back. Didn't notice it first weekend with the car (reckon I wasn't pushing it hard enough).
I stuck fire bottle/brackets in passengers rear foot well this weekend to start the head scratching on that install, myself.


