1 ... 5 6 7 8 9 ... 16
V6Buicks
V6Buicks Reader
6/9/21 6:54 a.m.

They're done!  The machinist said that the way he had to make them meant a small raised ring would be in the center.  I believe that off the shelf pins are made the same way because the center is usually machined down.  However, those are solid and these are not.  I do not want to do anything that might compromise the pin.  I don't know of a way to clean this up without potentially taking off too much, and it's hard to see where the ring is anyway.  I'm probably going to put them in a vise and try some careful dremel work first, but if they still have issues fitting into the block and bell, I'll just kiss them both with a big drill bit.

As you can see, .006" isn't very noticeable!

TED_fiestaHP
TED_fiestaHP HalfDork
6/9/21 9:49 a.m.

  The easy way might be a slight counter sink on the hole, to account for the little ring.


V6Buicks
V6Buicks Reader
6/9/21 10:37 a.m.

In reply to TED_fiestaHP :

I agree.  That's what I'm referring to when I'm talking about the big drill bit.  I'm probably just going to do that because the difference I need to make up is so small that you would hardly see it.

obsolete
obsolete GRM+ Memberand Reader
6/9/21 12:11 p.m.

Awesome, love seeing the progress on this! Yeah, I'd be countersinking those holes for peace of mind, because that raised ring seems like it could be the path to a cracked bell housing otherwise.

Which model of TKX did you go with? What's your rear diff gear ratio?

V6Buicks
V6Buicks Reader
6/9/21 1:19 p.m.
obsolete said:

Awesome, love seeing the progress on this! Yeah, I'd be countersinking those holes for peace of mind, because that raised ring seems like it could be the path to a cracked bell housing otherwise.

Which model of TKX did you go with? What's your rear diff gear ratio?

Thank you!  Me tool. lol  It's going so slow that every little step in the right direction feels like a huge victory.

TCET18083.  It has the 3.27 1st, 1.98 2nd, 1.34 3rd, 1.00 4th and 0.72 5th.  This is not one of the more common choices, it was the numbers were closest to the stock T5 ratios which I was totally okay with.  The stock open 10-bolt has a 3.23:1 ratio which I do not expect to live long.  We'll see how these ratios work out for me, and then I'll decide which gears I want in a future 8.8" or 9" swap.  I'm guessing 3.31s will be plenty.

obsolete
obsolete GRM+ Memberand Reader
6/9/21 1:58 p.m.

Okay, cool. You got the "wide ratio" version. That's the one I've been looking at because the 0.72 OD is the best match for my factory 3.54:1 rear end. The more I think about it though, I'd like to replace my diff with something like an 8.8" in the future, which opens up all the ratio options, so I may end up getting the more common "close ratio" version and a higher rear gear ratio to get 1st and 5th back into the range I want them. I wouldn't do the diff for a while, though, so that would mean dealing with the too-tall-for-a-four-banger 1st and 5th until I get around to that project. Maybe that would be less of a problem for you with 3800 torque, though?

V6Buicks
V6Buicks Reader
6/9/21 2:17 p.m.

In reply to obsolete :

I've never had to spec these things out before, so I'm not really sure.  I took a guess, asked a buddy who knows a lot more than me, and he seemed to agree with my logic.  In the end, this is a street combination before everything, but my weakness may show when it's time to do a cam swap.  It's going to take every ounce of strength to not buy an ST5 cam for that insane lopey sound and high RPM power, but deep in my heart I know that it's going to sacrifice a lot of power down low.  At that point, I don't know how much a rear gear swap will fix.  It's probably best to do something a bit more mild and enjoy the quicker spool.

obsolete
obsolete GRM+ Memberand Reader
6/9/21 3:52 p.m.

Quick spool never goes out of style!

It might be too late to really be useful to you, but here's a basic gear speed calculator I made in Google Sheets to compare my T5 and TKX swap options: https://docs.google.com/spreadsheets/d/1VAhCRnHE0CXEUBA5ECHYY3MsV0DuJaoBrXt8bg2XfG0/edit?usp=sharing. There are way fancier versions of stuff like this out there, but this one is simple enough for me to understand. It has rows for various TKX configurations, along with the shortest-geared (Subaru) and longest-geared (Corvette) manual cars I've driven recently in there too, just as something to compare against. Feel free to download your own version (I think Google Sheets will let you do that) and play around with it. Cells in italics are calculated, everything else can be changed to whatever you want.

V6Buicks
V6Buicks Reader
6/10/21 6:27 p.m.

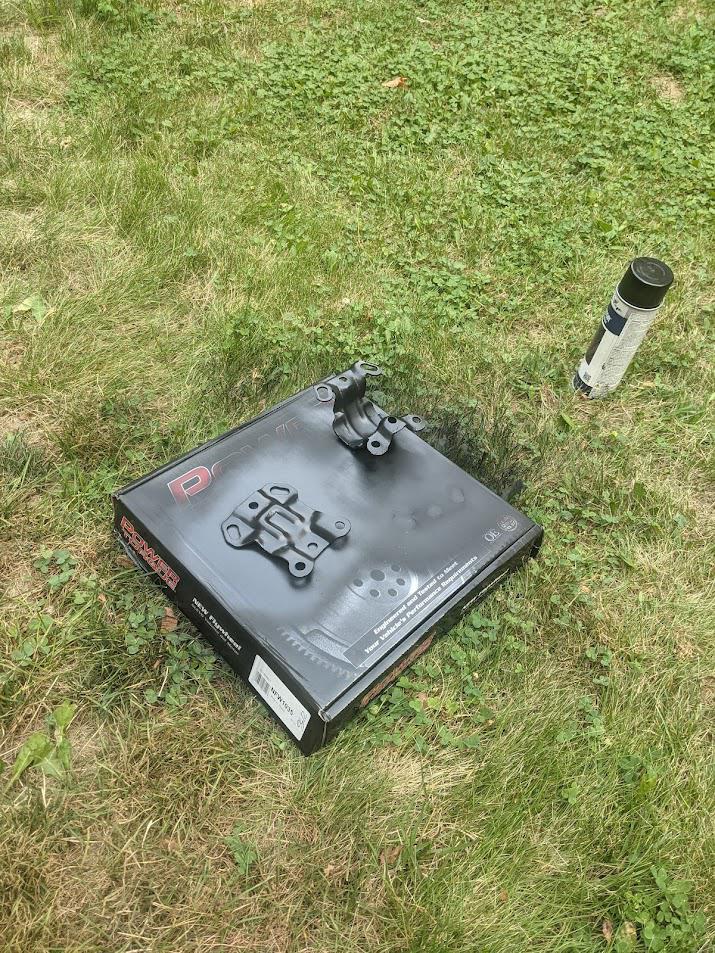
I scrapped the counter bore idea because I couldn't determine which part of the dowel was high or low with the ring in the way.  I just applied light pressure on the grinder and let the pin spin on this bolt.  I used two stock dowels for something to hold to and keep the pin where I wanted it.

Sadly, none of this seemed to pay off.  I pounded the pins into the bores, tightened the bell bolts, and somehow managed to get the same exact measurements as I did with stock pins.  I'm crushed. sad  I have no idea what I'm going to do with this car or transmission because they just don't seem like they're meant to be together anymore.

V6Buicks
V6Buicks Reader
6/14/21 6:25 a.m.

I installed the rest of the bell bolts which made a fairly significant difference of .0015", but that still wasn't enough. I lied under the car and stared for a bit while the humidity started to form puddles on my face.

Then the light bulb lit.  I pulled the bell off again, popped the pins out, turned them 180*, and put it back together...

My final measurement was .004" yesyesyes

This transmission is going to shift like butter.

Professor_Brap (Forum Supporter)
Professor_Brap (Forum Supporter) UltraDork
6/14/21 7:07 a.m.

In reply to V6Buicks :

This is coming along nice! I'm excited for you. 

Dusterbd13-michael (Forum Supporter)
Dusterbd13-michael (Forum Supporter) MegaDork
6/14/21 8:43 a.m.

Awesome!

Bellhousing alignment is one of the most confusing and frustrating things i have ever done on a build. 

V6Buicks
V6Buicks Reader
6/14/21 2:10 p.m.

Thanks everyone!

In reply to Dusterbd13-michael (Forum Supporter) :

Isn't it?!  It was hard to wrap my head around it for a while, but there are a lot of things to consider before thinking "I'm using all factory parts, so it's good enough."  The clunky T5 was not designed for high rpm shifting at all, the tolerances in them were incredibly loose, and the engine didn't make that much power anyway, so it WAS all fine.  When you start dealing with nicer stuff, the bearings are tighter for high rpm stability which means the input shaft cannot be at all crooked without damaging a bearing, creating a bunch of noise, and sacrificing shift quality.  Then you have to do all this goofy math and measuring to fix it while looking at everything upside down. Fun times!

Side note: I wonder if my T5s would have lasted longer and/or shifted better just by indicating the bellhousing.  I mean, Tremec holds the same spec for their aftermarket T5s, and mine was 3 times the limit.  Maybe my old bell was already was in spec?  Who knows.  I don't care enough to remeasure with my old bell just for giggles.  I'm moving on!

V6Buicks
V6Buicks Reader
6/22/21 11:39 a.m.

I removed the bell AGAIN. Then I removed all the flywheel bolts, sprayed everything down with brake cleaner, and reinstalled with new lube, loctite, and full torque. No crank stripping this time.  I THINK I can finally say that the flywheel is staying on the engine until it's back on the road.  Fingers crossed.

Then I installed a new starter from my stash because I broke one of the studs last time I removed the original starter.  I put the heat shield on as well which is now missing a bolt because the block to transmission bracket will no longer be used. This reminded me about the issue I found on the other side. I can't just remove the passenger side bracket because it also spaces the motor mount bracket. I can't tell you how many times I've bonked my head on that thing, so it's for sure not staying in stock form. I might just cut it down so that the mount bracket can't be over torqued and ditch the rest. I just want to be sure that I won't need it before I start slicing!

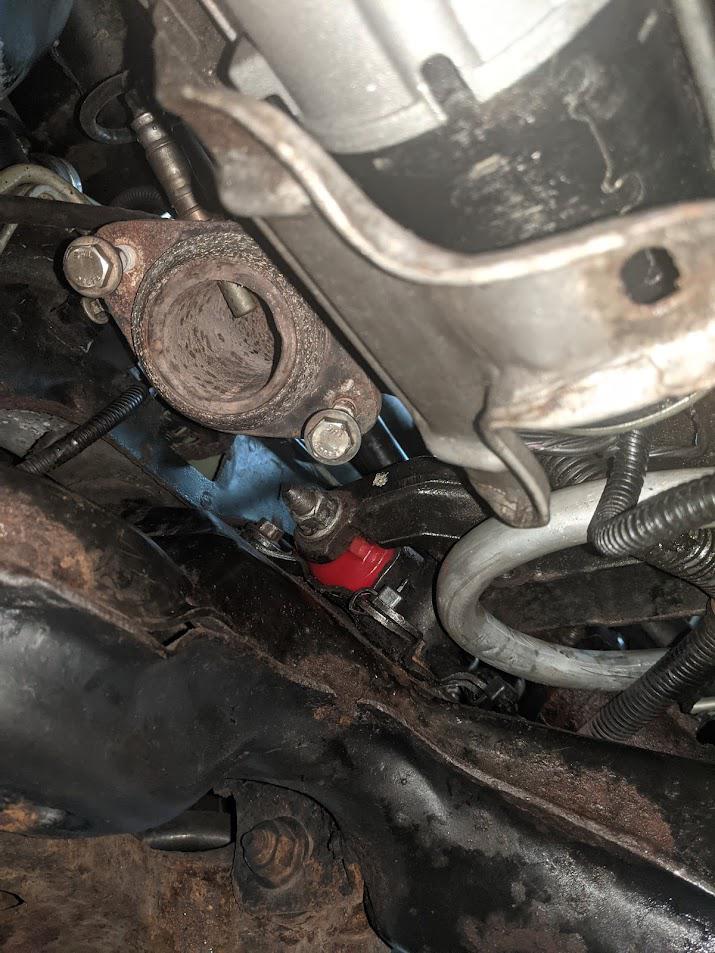
I then decided to take one small system in the other direction before calling it quits. The turbo drain hose needed to come off again. I had a feeling that the supplied o-ring was not going to do anything when I installed it, but I tried it anyway.  As you can see, not only does the fitting leak really bad, but it doesn't flow very well either if it's puddling around the outlet like that.

That oring doesn't even sit above the flange surface.

After digging around at work, I found the correct size piece.

Much better!

Since it's already out and there's plenty of material to grind out, I'm going to blend the transition from square to round a little nicer.  While this is a lot better than the abrupt square to round to offset circle fitting I had before, I have little else to do while I wait for the transmission.  I might as well fix little things like this if I know they suck!

Professor_Brap (Forum Supporter)
Professor_Brap (Forum Supporter) UltraDork
6/23/21 7:51 a.m.

It's fixing the small stuff that makes the car as a whole so much better. 

V6Buicks
V6Buicks Reader
6/23/21 11:21 a.m.

In reply to Professor_Brap (Forum Supporter) :

For sure!  When a bunch of little stuff deemed to be "good enough" or "doesn't matter" starts to build up, it's wild how bad it can make the car.  I have a goal to work out all the mistakes I made before the transmission comes.

By the way, here's another one crossed off the list.  Everything is aimed in a much more favorable direction now.  I think it'll work much better than before even if it wasn't necessarily causing any issues (yet).

V6Buicks
V6Buicks Reader
7/27/21 12:30 p.m.

O M G

Look what showed up.

Promptly modified!

Bell fits nicely.  I still need to drill the holes for upright positioning, but the centering bore is perfect.

Pilot bearing fits great!

So does the 4L60E mount

Wimpy vs. Hefty

Tonight I'm hoping to install the clutch, drill/tap the bell housing, and do a test fit of the assembly.  Then I can get an idea of how much to cut out of the new UMI crossmember and how much offset the new shifter needs.

V6Buicks
V6Buicks Reader
7/28/21 8:05 a.m.

While test fitting of the transmission did not happen, I did get the hard part done.

https://youtu.be/IRWrgZ5S8S8

I didn't want to test fit the trans without the clutch installed, and I couldn't install the clutch with the flywheel I messed up. (long story)  I had a new one ready to go, but failed to remember that the bolt holes needed to be enlarged for my ARP bolts.  As I sat under the car day-dreaming, I also noticed that I still only had one poly motor mount installed.  I'm going to tackle both of these issues before I get too ahead of myself.

V6Buicks
V6Buicks Reader
7/30/21 11:37 a.m.

Despite the heavier weight and similar size, an upright TKX is easier to install than a tilted T5 by a mile.  Whenever I can actually get it to fit, it should be able to go in without any extra hands.
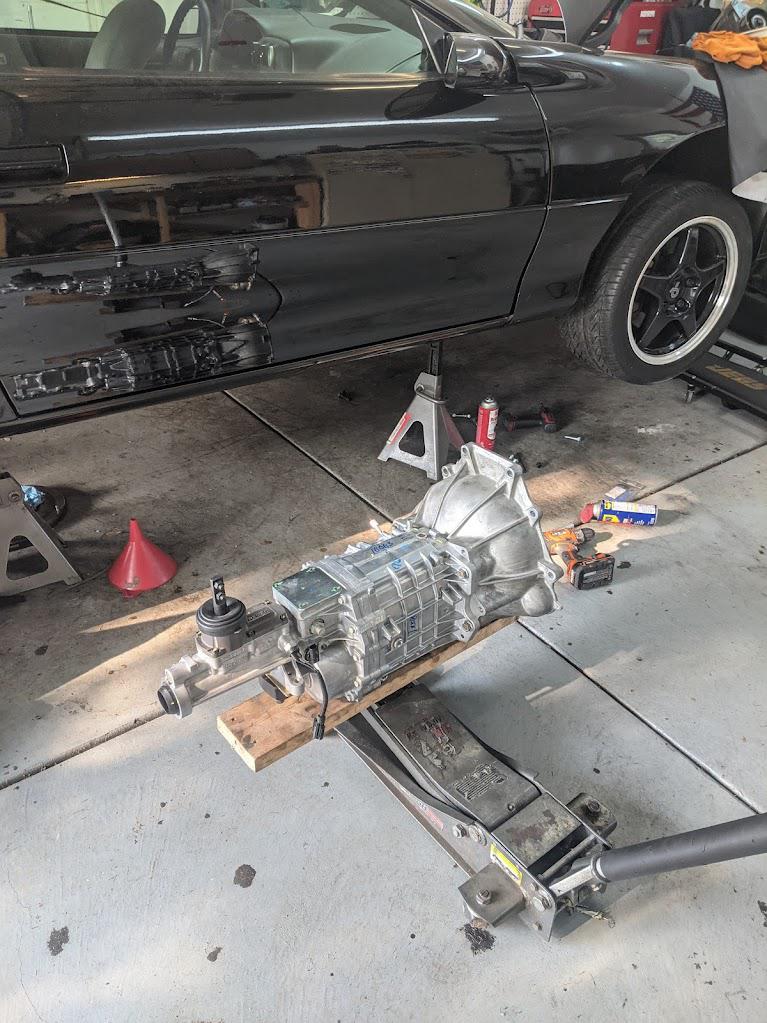
But it won't fit just yet.  The shifter is too far forward.
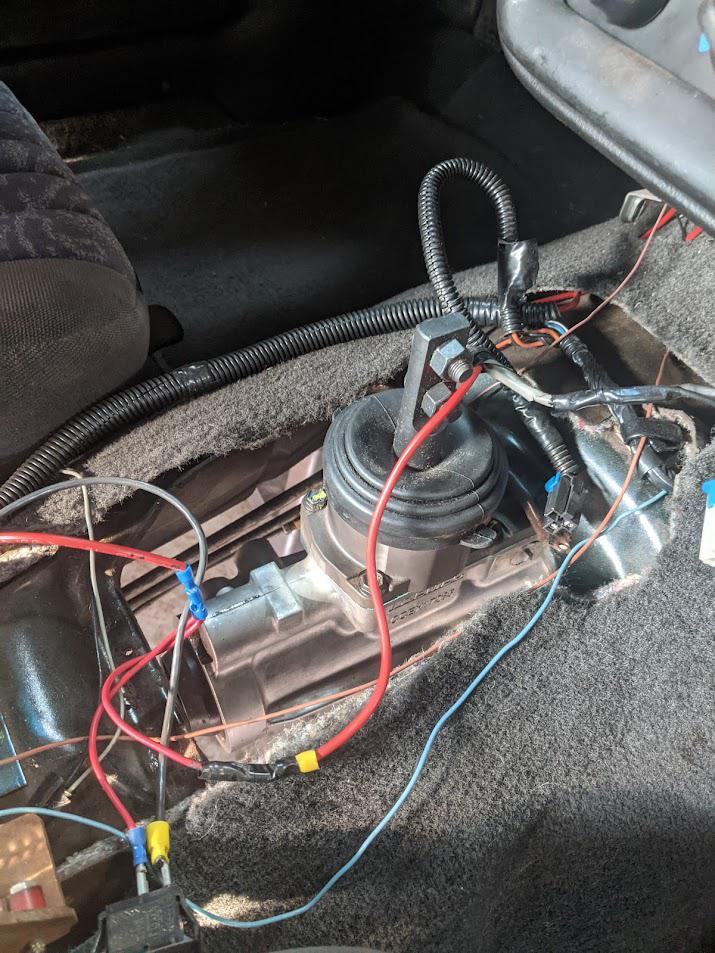
and the mid-shift block-off plate hits the bottom of the body brace.
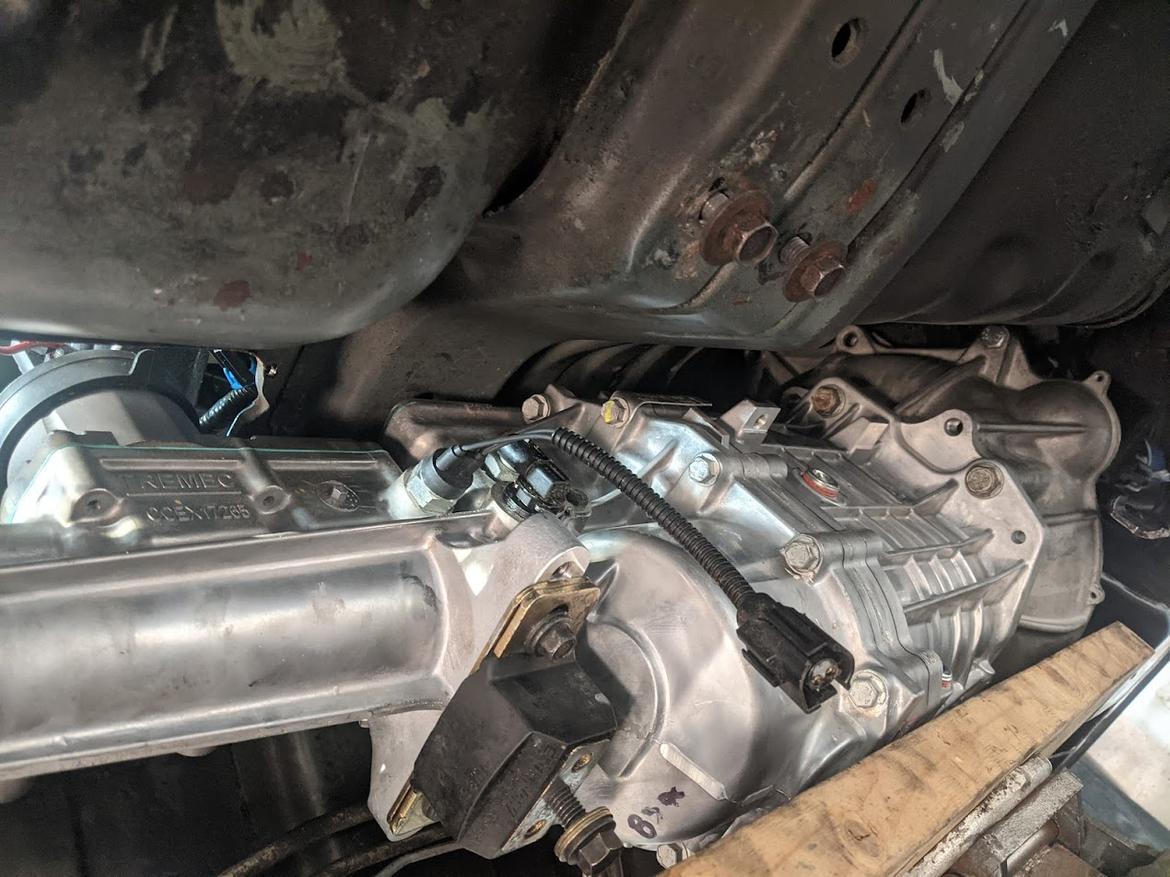
However, it's really close!  I actually had one bolt threaded in.  I'm going to start by cutting a little notch in the shifter hole.  I don't really want to cut the cross brace if I can get away with just beating on it with a hammer.  While the anticipation was killing me, (still is) I needed to force myself to complete some other stuff while it was still easy.

Out came the gooey driver side motor mount, and in went a poly insert.  I didn't take a lot of pictures because I was hot and incredibly dirty.  By the way, it's probably easier to do a motor mount with the trans installed because the trans connection to the cross-member might help keep everything aligned.  Oh well!  It's done now.
What a difference that made!  I knew it would be substantial after I pulled the disintegrated rubber apart, but I thought that the looseness in the engine was mostly from not having a third anchor at the transmission.  There's hardly any movement to be made by hand now.  While this should be great for putting the power down, I hope I don't regret it in the form of a harsh ride.  We'll see.

Not pictured is the flywheel and clutch being installed once and for all.  I managed to find the wrong torque spec for my pressure plate and snapped a bolt.  I couldn't extract it either, and damaged the flywheel.  I got a new flywheel, drilled it for the bigger ARP bolts, started installing it, and stripped another hole int he crank.  *eye quivers*  I pulled the flywheel again, heli-coiled the crank, crossed my fingers, successfully torqued the flywheel, and installed the clutch with the correct torque spec.

NOW I'm finally ready to start cutting the car up and do another test fit, but I'm going on vacation tomorrow.  The anticipation is just going to have to eat me alive for the next week. lol

V6Buicks
V6Buicks Reader
8/10/21 7:07 a.m.

I made a notch in the shifter hole and retested the fitment of the transmission.  It turns out that I might not even need to mess with the body brace because the transmission is mated to the 3800 with all of its bolts!

For now the hole is not pretty, but it will eventually get some material riveted in to cover some of the hole in addition to a new rubber boot anyway.  I might even get fancy and weld the patches eventually, but I'd have to get much cooler weather and a wave of ambition.

The old boot is going to be worthless for several reasons.  To the trash!

Just as I thought, the cross-member is going to need an extension.  Hopefully this will  be no big deal, but that thick plate which UMI welded to the top might make it difficult for me.

Most excitingly, I'm not going to need an expensive custom shifter!  Despite the ill placement, the stub clears the console.  I should be able to make a Z-shaped bar off the stub that connects to a universal handle.  The material I'll be using won't have any flex in it, but I'm not particularly excited about having to push up slightly to get into 1, 3, and 5.  Maybe it won't be that bad, but being 3" off will be a pretty big offset.  A remote shifter would probably feel a lot nicer, but I have no idea how to make one or get one that's universal.  Tips and advise are appreciated!


V6Buicks
V6Buicks Reader
8/10/21 7:44 a.m.

I had never actually replaced a u-joint before until yesterday, so this took much longer than it should have.

The stock one piece drive shaft has wimpy 3R u-joints and 26 spline yoke.  I have to change the yoke to a 31 spline, but I'm too broke to be bothered by custom driveshafts even after saving money on the shifter.

Here's a cool video for any other sickos who find joy in pimple popping. cheeky

https://youtu.be/1ZFXk8gRD4w

I was honestly just looking for ANY u-joint that converted 3R to 1350, but seeing "SKF" and a grease fitting makes me feel good.

There we have it!  The inch longer 1350 yoke from Denny's fits the inch shorter TKX very nicely.  For those unfamiliar with plastic injected u-joints, the replacements are held in by external circlips on the cap.  The 1350 side has internal circlips as shown in the picture.

Tonight I get to pull all this out, set the HTOB height, and start making that shifter handle.  I'm going to need a box fan and a lot of water because it is TOASTY this week.

Dusterbd13-michael
Dusterbd13-michael MegaDork
8/10/21 7:46 a.m.

My miata swap has a welded.in square tube that relocated the ball of the shifter 4 inches back to come out the factory console hole. The shifter stub in my car is buried a little deeper into the das than yours. 

It felt odd when i did it, but only briefly. What i felt was the ball going downward in 2-4-r. Not upwards in 1-3-5.

A round knob makes it virtually dissapear to hand feel while shifting. 

V6Buicks
V6Buicks Reader
8/10/21 8:14 a.m.

In reply to Dusterbd13-michael :

Great to know.  Thank you!  I was planning to use a round knob anyway.

Sgt_Sizzle
Sgt_Sizzle New Reader
8/10/21 11:37 a.m.

I've been reading this from the start and I respect your level of commitment to this car, I also love the look of the engine bay when it's all put together. Watching this brings me back to the days I fantasized about strapping a turbo to a '06 Mustang with the 4L V6. When it's all together and running right it's going to break some hearts that for sure. Keep up the great work

V6Buicks
V6Buicks Reader
8/11/21 7:41 a.m.

Ouch.  I thought I was so close, but I just hit a major roadblock.

See the fancy Tilton adjustable release bearing?

That's fully compressed, but at the very end of it's adjustment range. sad

This is a big boo-boo because you can't just space the bearing retainer.  It holds a fluid path and the input shaft seal inside.

Idea #1) Complicatedly space the whole shebang using the original bearing retainer. (Possibility)
- The original bearing retainer has very little meat for machining. This probably doesn't matter since I really just need to support the threaded section of the Tilton.
- I would need to find a way to mount the Tilton retainer on top of the original retainer which means ghetto standoffs with longer more bolts AND an adjustment locking pin
 

Idea #2) Ditch all the Tilton stuff and go back to original HTOB to eliminate the locking pin. (Possibility)
- This would mean eliminating that QC so that I don't need to drill holes in the bell (fine)
- Likely to work with simple lathe machining
*Remove bearing retainer shaft from original retainer
*Drill/tap two holes

The last two ideas and combinations of both are probably my ticket.

1 ... 5 6 7 8 9 ... 16

You'll need to log in to post.

Our Preferred Partners
JnMP08AscZh08nzBmCR4Aw8PZEJ3cm2Bzk3EbX3mj3SRP66sdsLcXNuSNiAigKLF