1 ... 8 9 10 11 12 13
Keith Tanner
Keith Tanner GRM+ Memberand MegaDork
7/5/21 6:40 p.m.

I did not! Good looking little car, I think the wheels mean it's a non-Si. I'm not 100% sure if the spoiler was Si-only.

While I may not have been attracting internet stalkers today, I did wax the car. It was long overdue. Looks pretty good. I was really supposed to be concentrating on the blue Miata but I got distracted.

greasemonkeyreborne_5x1gs
greasemonkeyreborne_5x1gs New Reader
2/5/22 1:04 a.m.

Keith,

Great story, great read, great car!  Awesome unmodified 85si.   Very hard to come by.  I can't recall seeing an 85si on the road in over 20 years in my area.

Glad yours is getting exercise on the highway.  I regularly take my stock 87  out of Texas.   Did Denver last October, Heading to Florida later this month.    Honda made incredibly reliable cars in the 1980's.  Rust is our enemy.  And then theres our plastics......

Some experiences I've had related to yours....

Alternator: rebuilt a 35 year old original ND alternator last week.  I removed bearings and carefully lifted off the bearing seals.  Grease dried out like cottage cheese.   Focusing on other 35 year old bearings to regrease. 

Back in the 90's when we had to drive 55, I would get 40-42 mpg.  Now i get 36-37, pure highway, no city.

The plastic fenders/header/sil/garnish parts are PC/ABS blend.  Honda called it HP- alloy (Honda Polymer - Alloy).  I bought my 1st CRX in 1993 and worked at the chemical company that manufactured GM's Saturn body panel resin  (PC/ABS blend)  .  After later connecting the dots, I picked up several Saturn door skins off the SL1 and SL2 models and use them to repair my panels.  Its important to repair using the same base material as coefficient of thermal expansion (CTE) is the key here.  Guys that patched using fiberglass during the early years complained about the cracks returning.  Expansion rates differ over temperatures and the bonds pop.  I believe those panels are so old, impossible to find oem uncracked , makes sense to keep a good set for show.

Back in the day, I'd test PC/ABS samples in -40F chambers.  Tough stuff.  Think of PC/ABS plastic as a frozen plate of spaghetti.  The noodles are the carbon chains of the plastic.  The strength lies within the length and interlocking of those chains.  Heat, UV and chemicals break those chains making them shorter = brittle plastic.   Bonding repair pieces together or a plastics welder (soldering iron) are other methods.  Repairing broken mounting bold holes are a tricky situation.  I don't see a better way than what you did.  Trying to keep the repair hidden is a real challenge.

You'll notice when removing header/fender bolts, the holes are over sized.  Honda designed the panels to float on the for body flex and thermal changes.  I had a hard time removing the those mounting bolts the first time as the rubber "bonded" the bolt to the plastic.  Had to be careful to not crack the panels when removed.  I replaced the rubber washers and tightened the bolts just snug enough to to allow the panels to move.  This might help.  Repairs posted  on RPR

Thanks for posting your sunroof repair.  I need to pull mine apart and regrease the cables.  How’s it holding up?  Smooth?

I'll bet your 85 is a blast to drive!  With only 140K, she's gotta be tight and responsive. 

Thanks so much for creating this thread.  Will enjoy following as your adventures continue.


Keith Tanner
Keith Tanner GRM+ Memberand MegaDork
4/11/22 10:58 a.m.

I missed that post back in February. That's an interesting idea to use Saturn fenders as raw material. I have noted the provisions to allow the panels to contract and expand, and kept those whenever possible. The lifter repair for the sunroof didn't work, it snapped fairly early so now the sunroof is kept closed. I picked up a replacement at the Mitty a few years back but haven't dug into the roof again to fix it because I know how many fasteners will not survive.

To the current day - there's a new Cars and Coffee series in town. I decided to bring the CRX out to show it off after a quick wash. It scrubs up okay. I was told by the owner of a second-gen CRX that my car was "nasty", which apparently is a compliment now. I'm such an old man. The car was definitely appreciated.

I've also picked up an S2000 master cylinder and booster, which is puportedly a bolt-in and gives me a bigger master for a better pedal - I suspect I have a bad booster as it is. I'll also pull the pads and find out what they're for so I can get some fresh ones. I know it's a non-stock braking system.

03Panther
03Panther UberDork
4/11/22 9:50 p.m.

My girlfriend at the times brother bought a 85si new, exactly like yours. He still had it, and had not destroyed it, a year later (a minor miracle) so in 86 we bought her an all black si. LOVED that car! Sold it 2 years later, just to dump the payments, but what a fun car. Miss it. 

greasemonkeyreborne_5x1gs
greasemonkeyreborne_5x1gs New Reader
5/7/22 2:33 a.m.

Great to see your car in a show!   I got back from RADwood in Austin 2 weeks ago.  Not a single 1G.    I'm thinking these 1G's are more rare than I thought.   Keep it up!!

My header began cracking several years ago.  I had bought a new Taiwanese version (ABS) of our headers a while back.  The fit sucked, mold quality terrible.    So I cut it up and made these tabs to reinforce the OEM header.  I didn't feel like painting it at the time.


Its not a total abomination.  It gets you by as a DD.  


A crack formed in my lower sill.   after I bottomed out on this....


on a hunting trip a few years ago back in upper Michigan.

I fixed this one w the Saturn material earlier this year.


completed patch.  


Hope this helps for some other ideas.  The plastic panels has to be the main factor why these cars are so few.  It just frustrates the owners


I love these cars!   Glad your getting good use of yours.....


Keep us posted on the s2000 conversion.  I wasn't aware of it.  


Keith Tanner
Keith Tanner GRM+ Memberand MegaDork
6/6/22 5:24 p.m.

The Vanagon trans project kicked the CRX off the lift when I was about the begin the S2000 swap, so it took a while to get it done. But it's in place now.

The S2000 booster and master is a direct drop-in for the stock parts. I had to bend one hard line down a little bit for more clearance for the larger booster, but that's it. For the time being, I have the fluid level sensor bypassed. The biggest thing I had to do was adjust the pedal up quite a bit, which would have been a lot easier to do if I'd been smart enough to check the length of the pushrod on both boosters when they were on the bench.

The end result is a nice firm pedal without all the mush. I haven't had the chance to drive it much - it needs one more adjustment - but it's definitely more boosted than before and with a nice firm floor on the pedal travel. I may play lego with the parts and see if I can put the S2000 master on the CRX booster.

Front calipers have been identified as 1991 CRX Si, which means I can order some real pads for it if I want.

Keith Tanner
Keith Tanner GRM+ Memberand MegaDork
5/1/23 5:12 p.m.

So this happened. The CRX ended up on the cover of GRM.

Want to read it and you're a GRM+ subscriber? https://grassrootsmotorsports.com/articles/living-with-an-original-honda-crx/

It reads like a conversation between myself and David, because that's basically what it was. He asked a few questions about the car and I infodumped on him. Had I known it was for publication, I might have worded things a little differently. But it's got an informal feel and hey, cover shot! In all my years of dealing with cars and magazines, I've never had a single car the focus of the cover before. I'm pretty jazzed about that.

Those who have been reading this thread for (gulp) nearly 9 years might recognize the photo shoot as one that was done nearly 5 years ago. If you're curious about how that cover shot was taken, the rig was documented on GRM because of course it was.

greasemonkeyreborne_5x1gs
greasemonkeyreborne_5x1gs New Reader
5/14/23 10:04 a.m.

Great story Keith!   Great car.....

Keith Tanner
Keith Tanner GRM+ Memberand MegaDork
7/4/23 7:23 p.m.

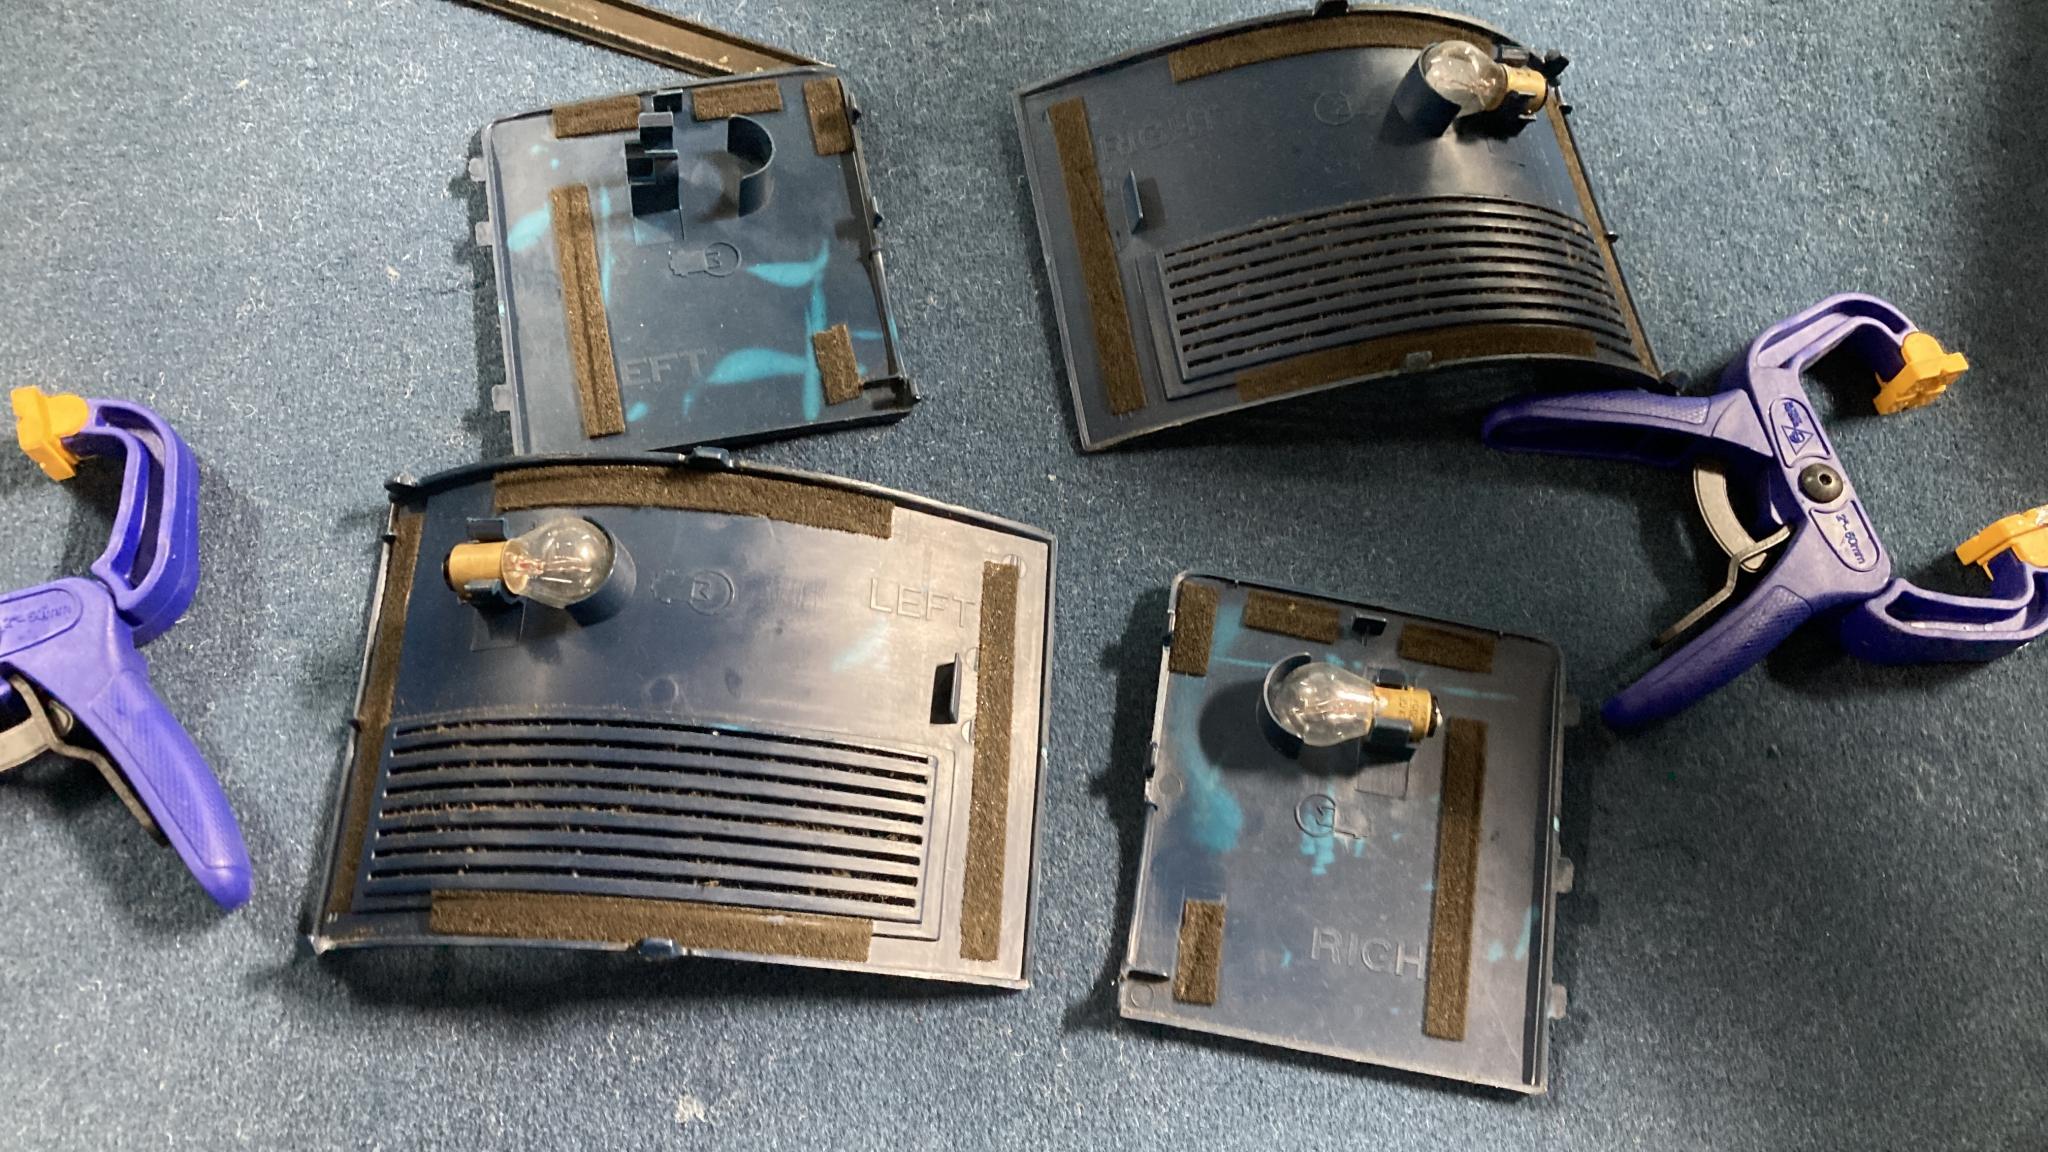
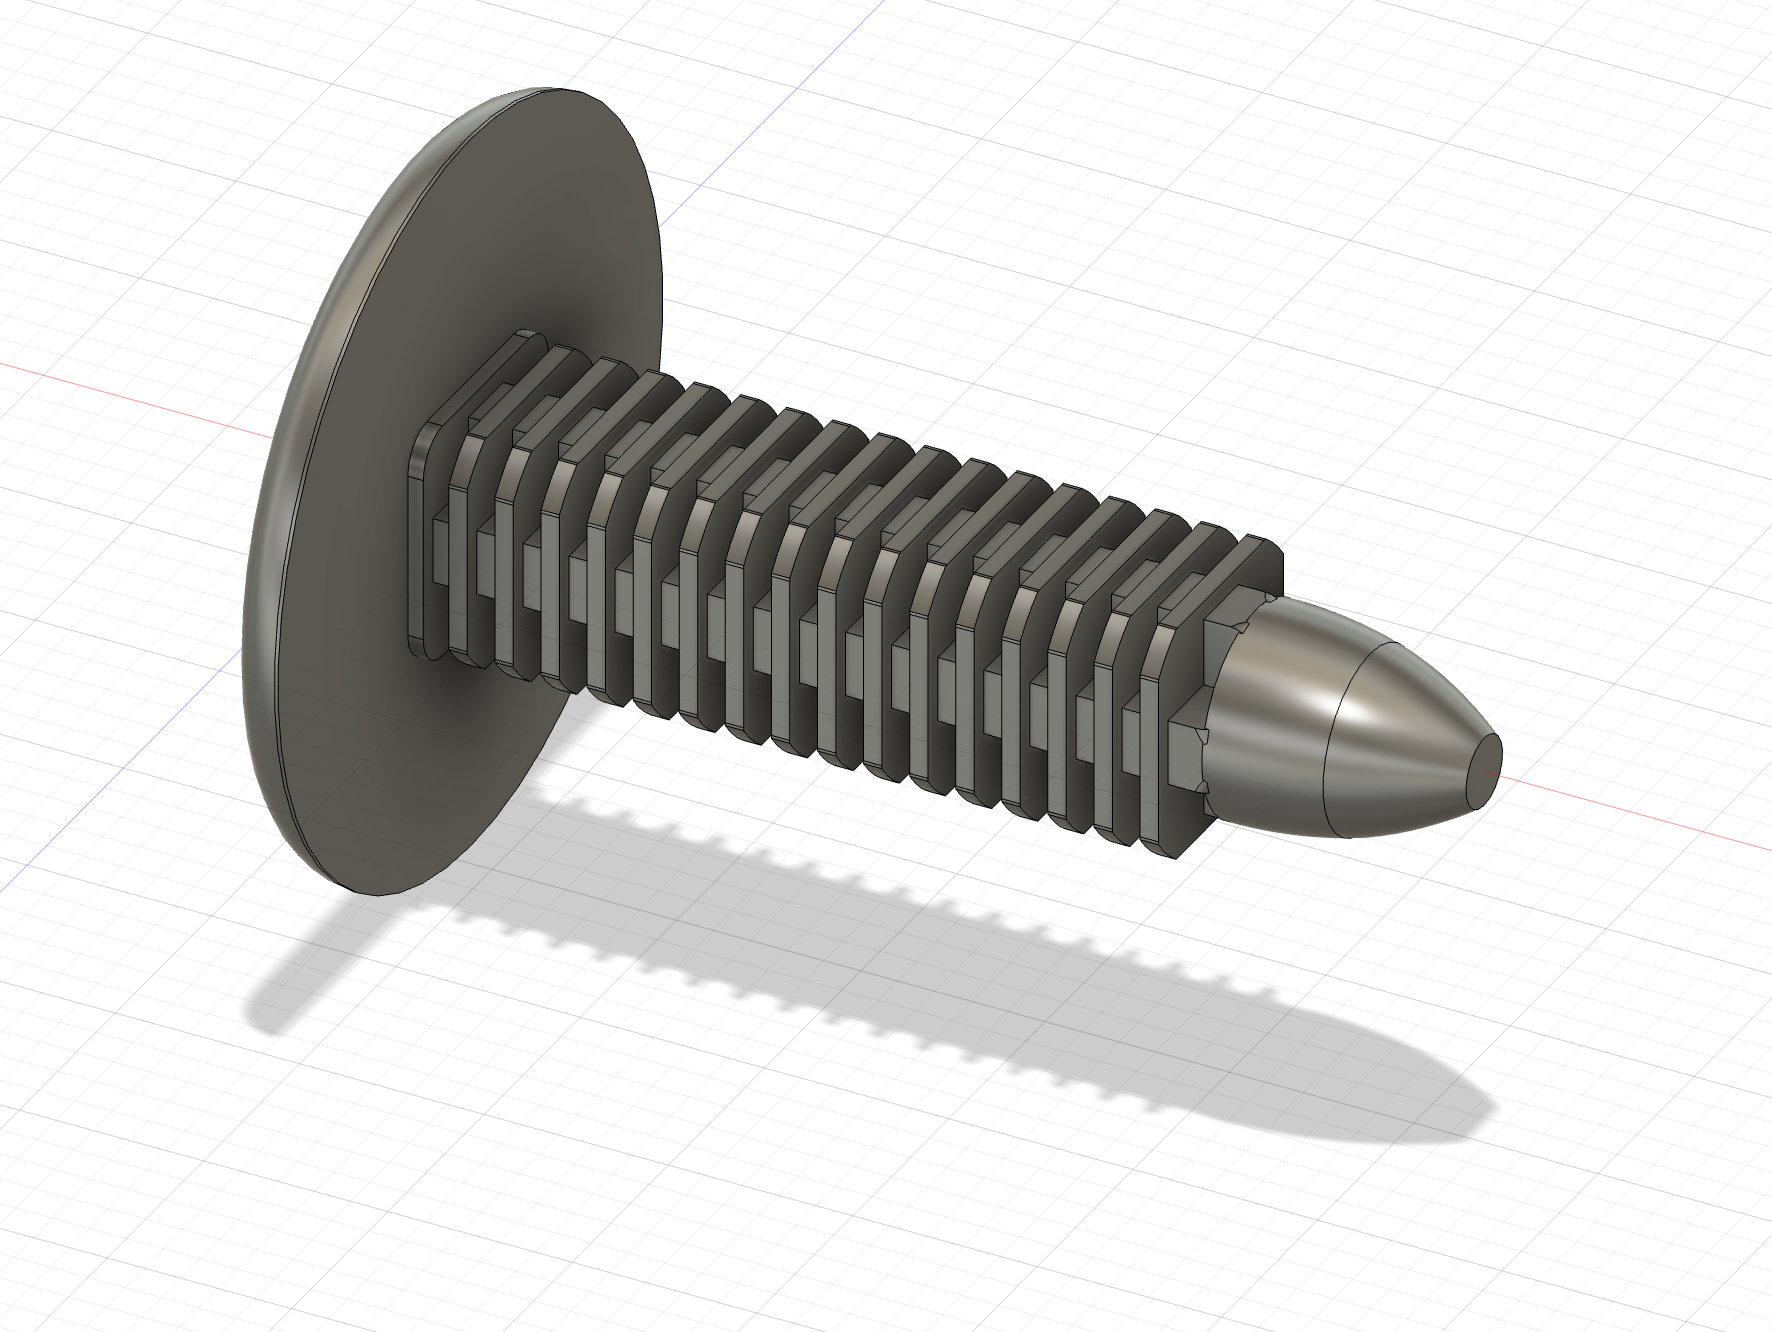
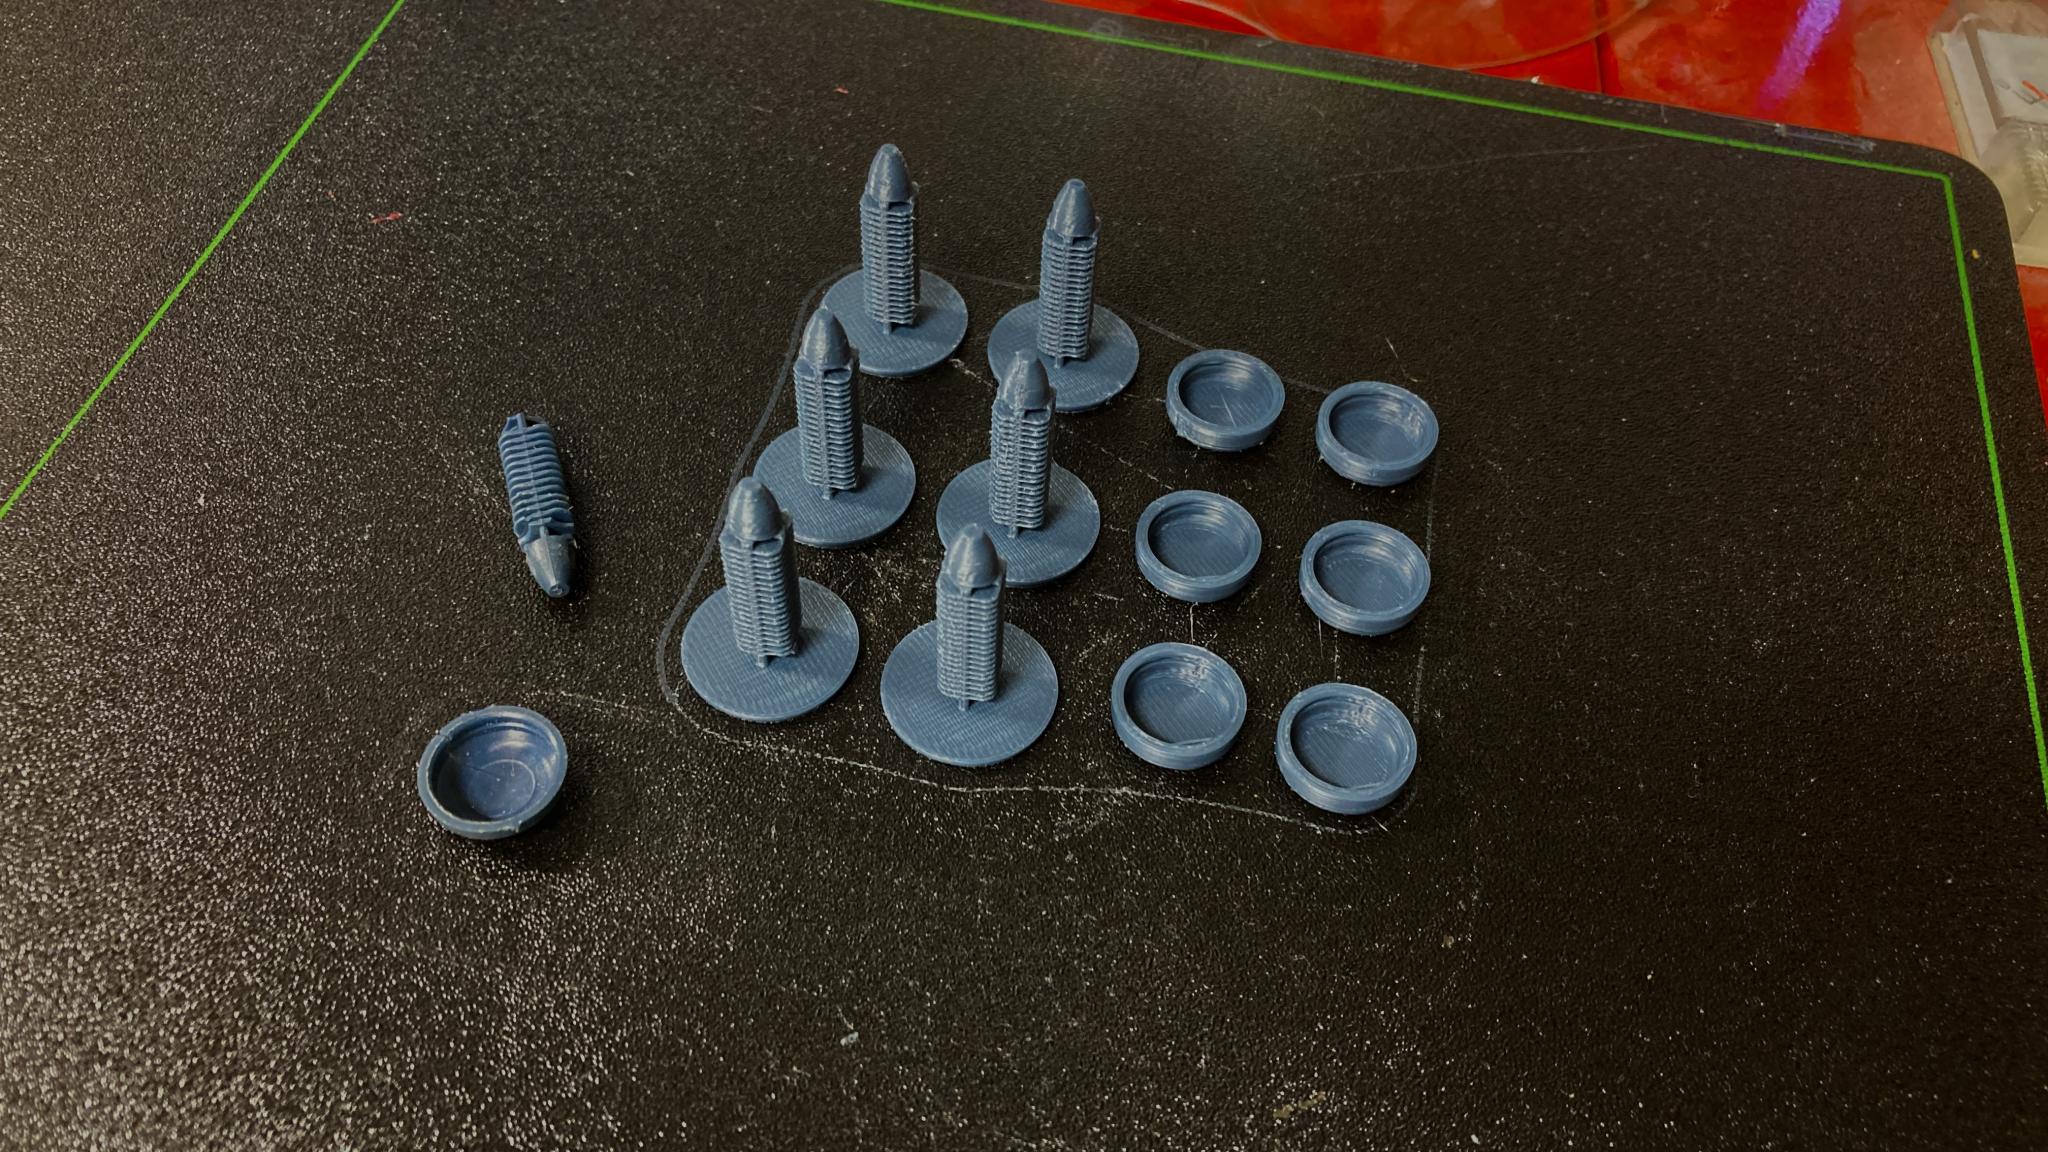
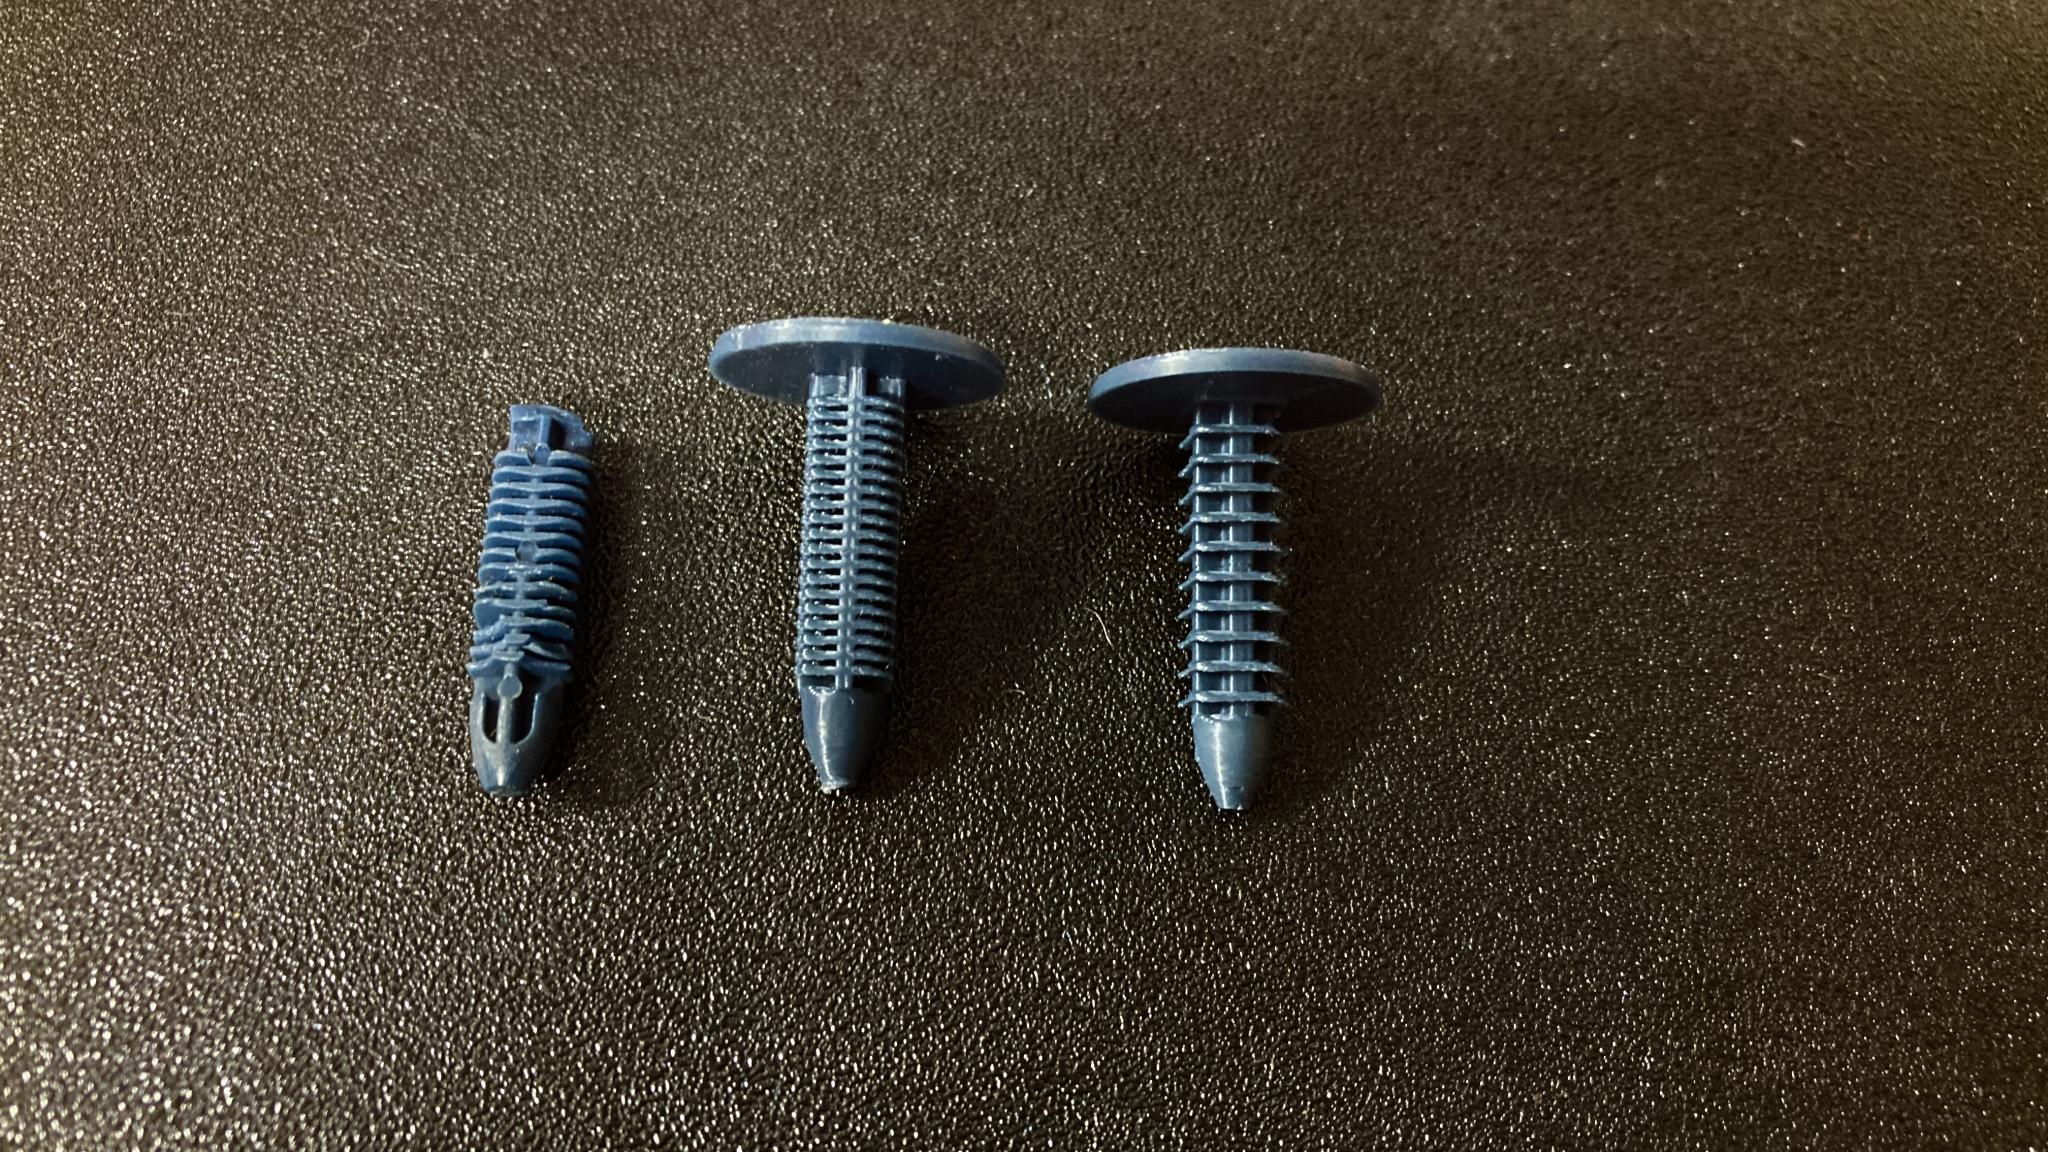
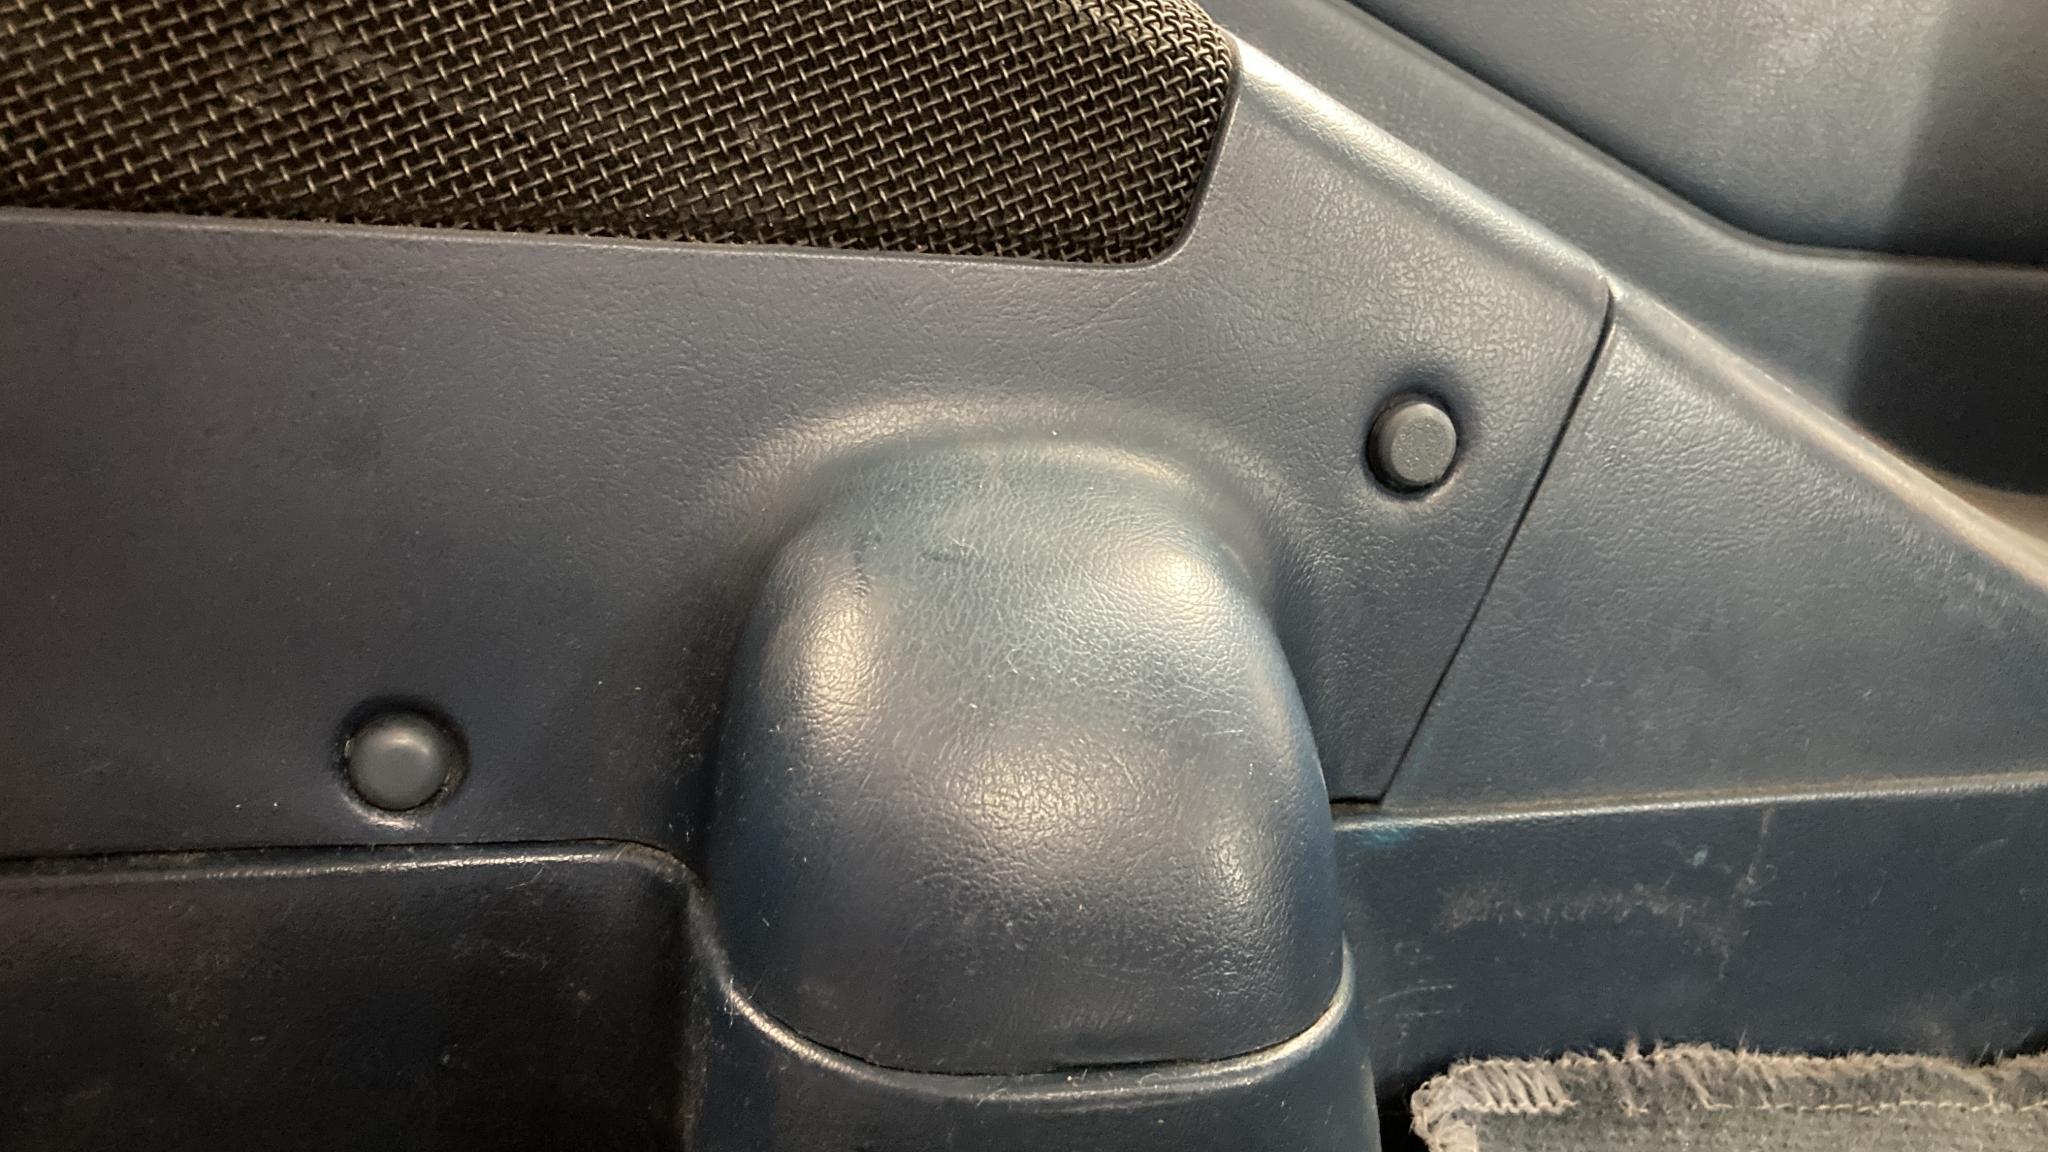
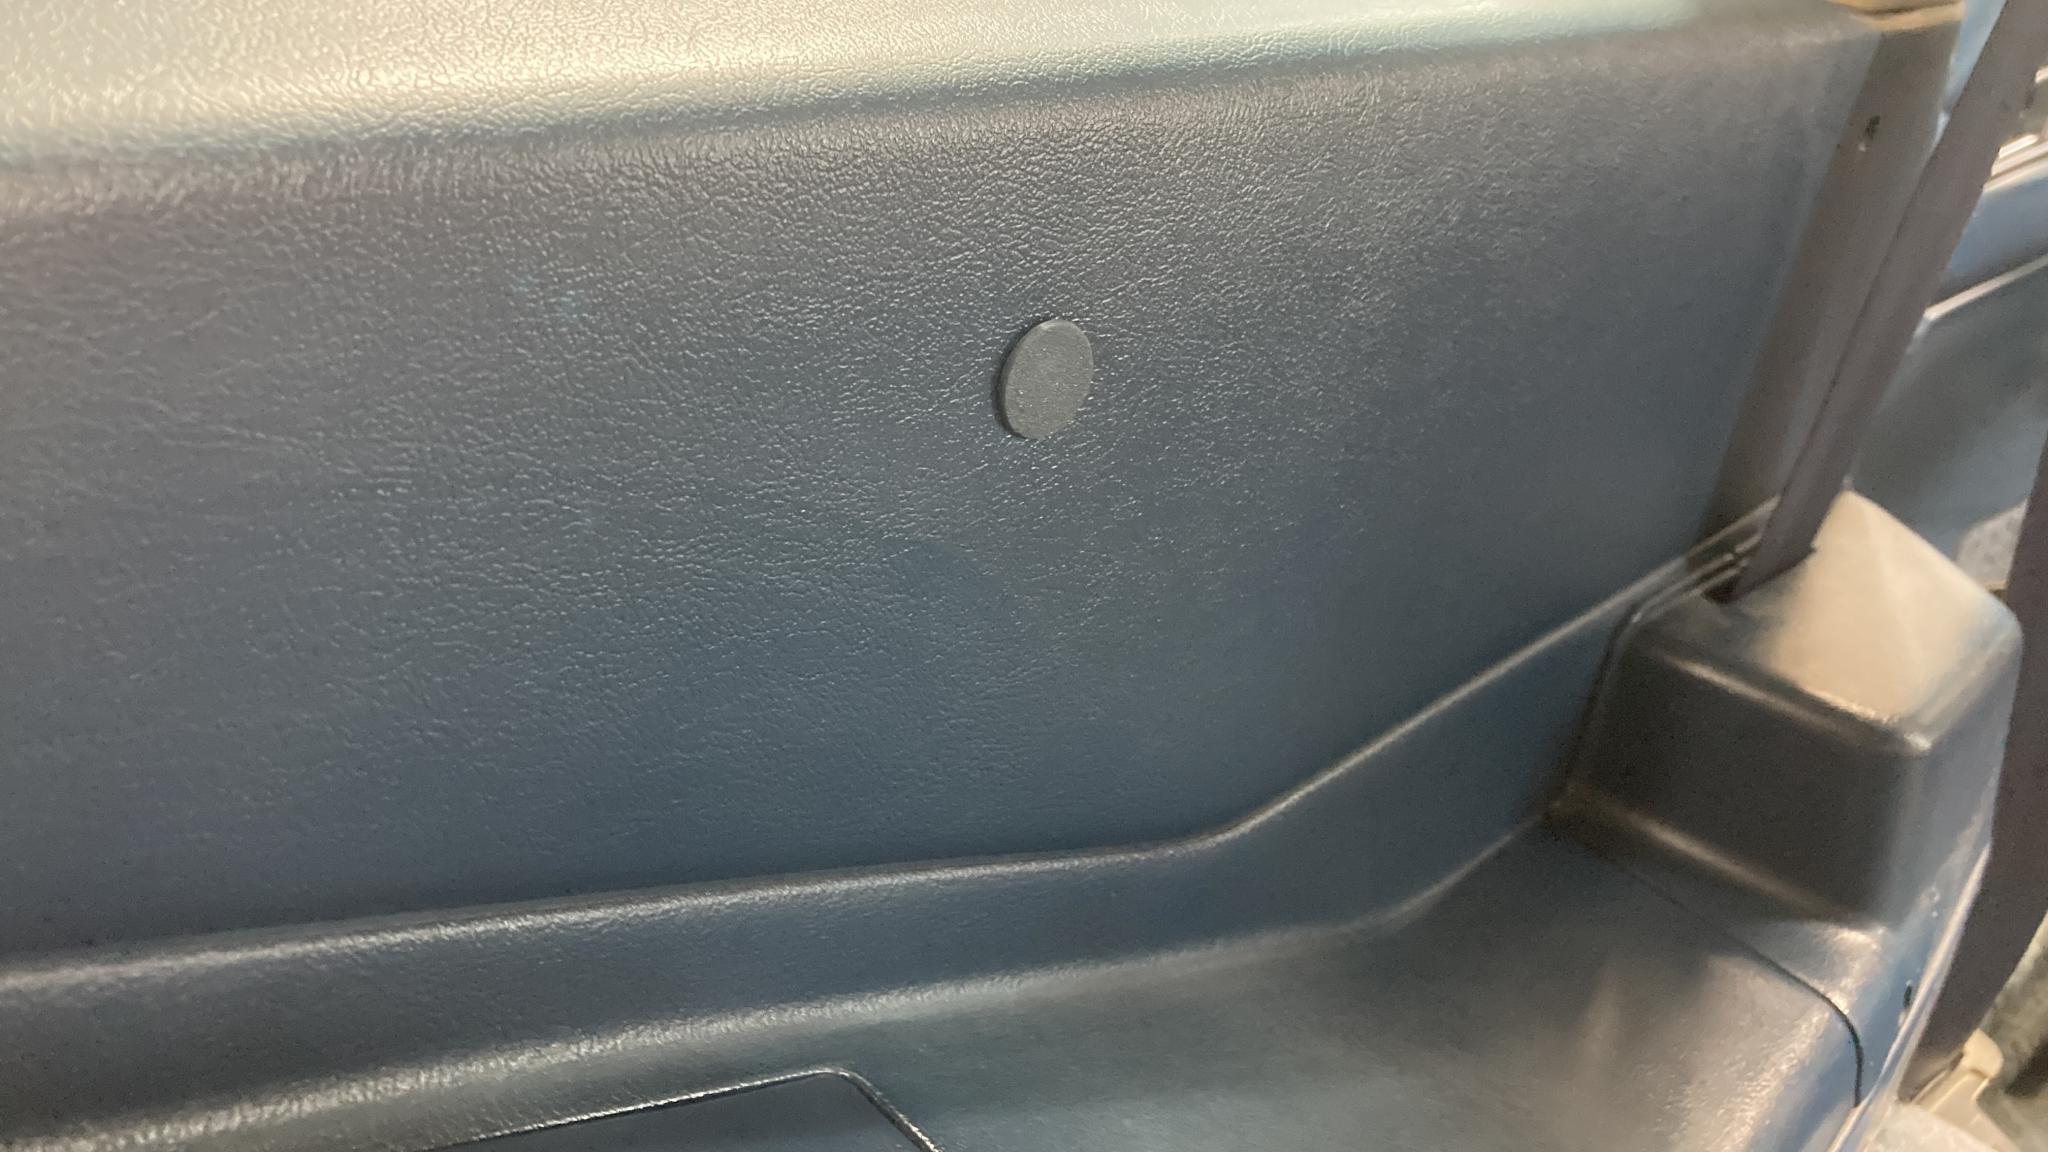
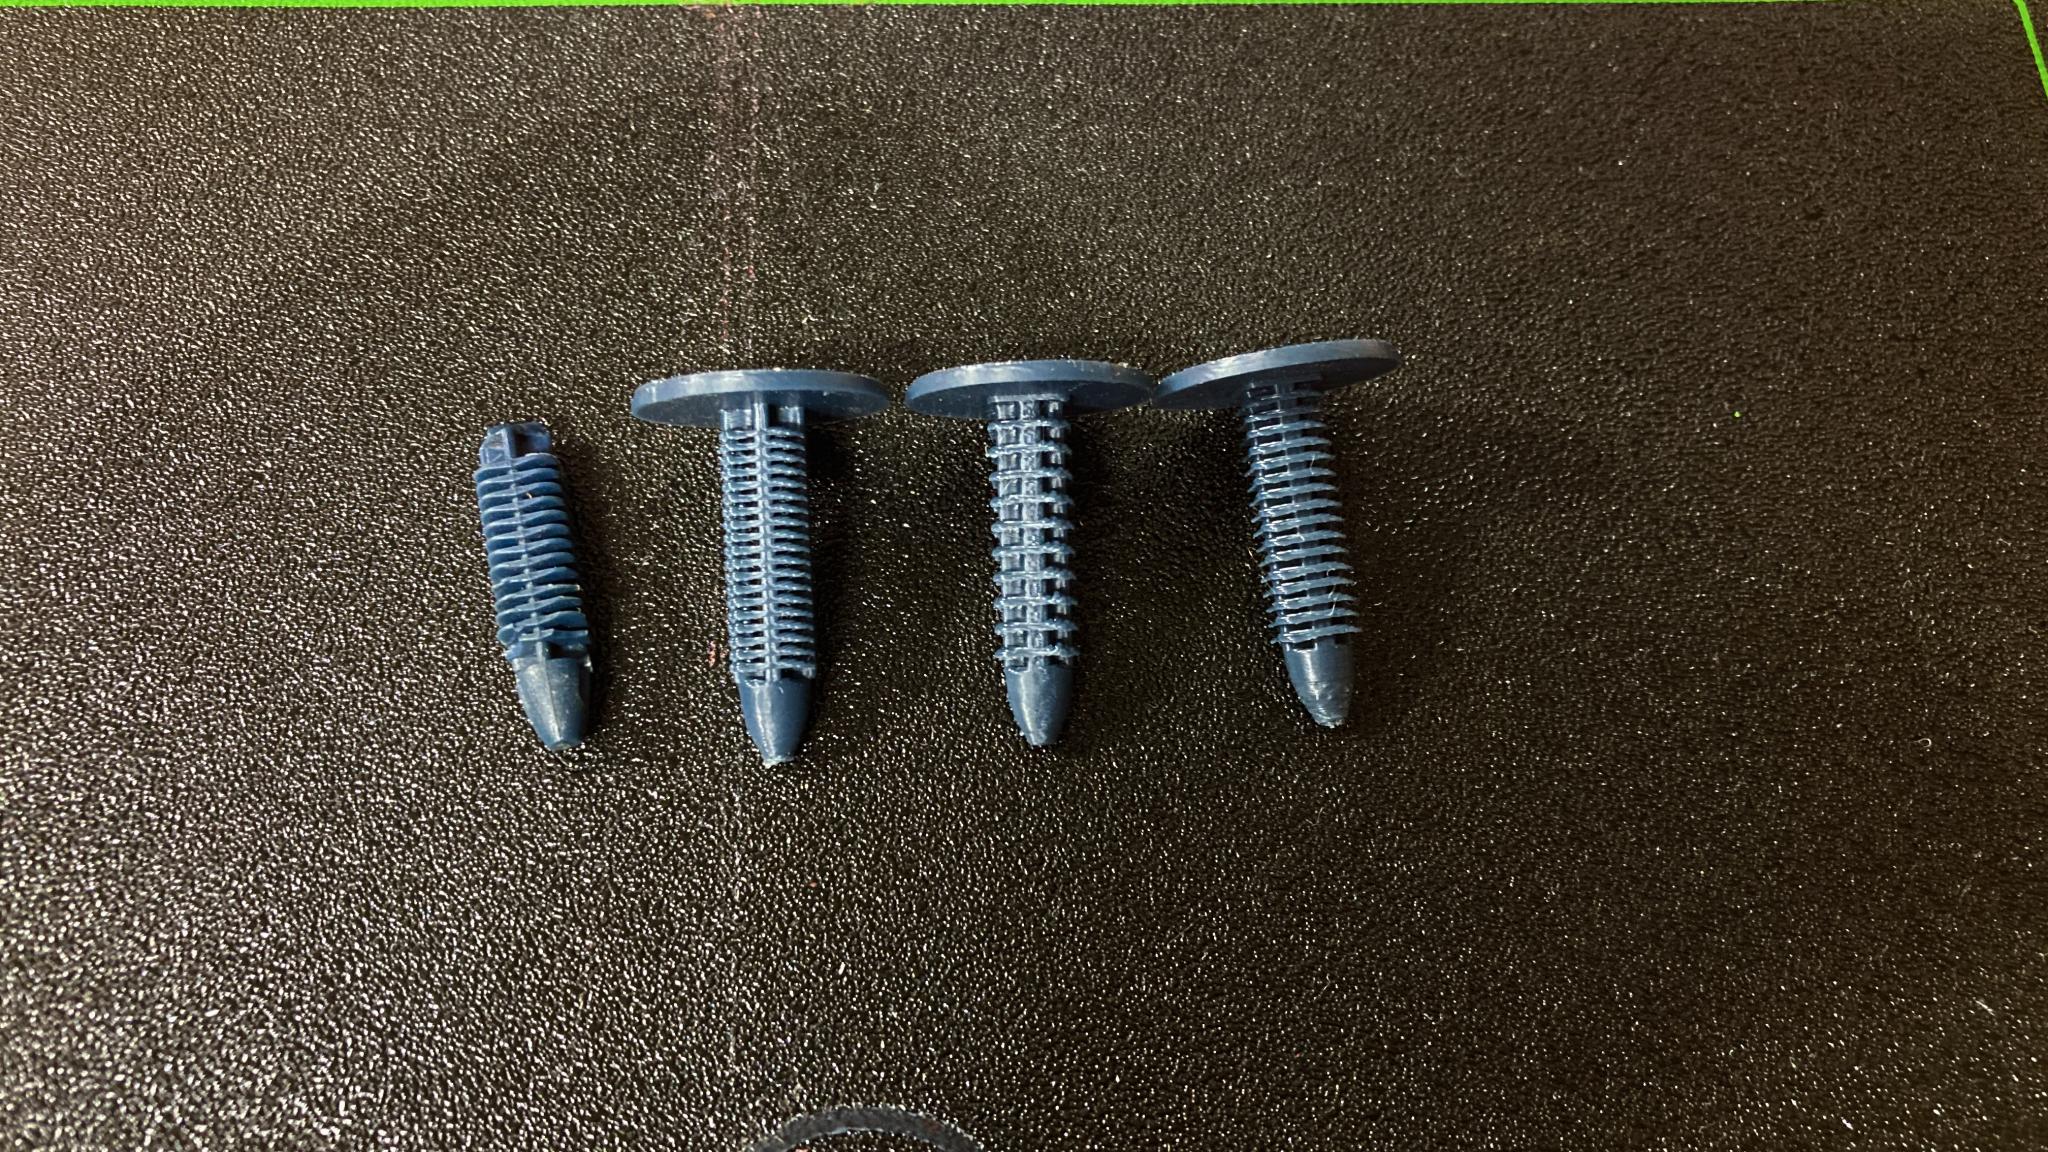
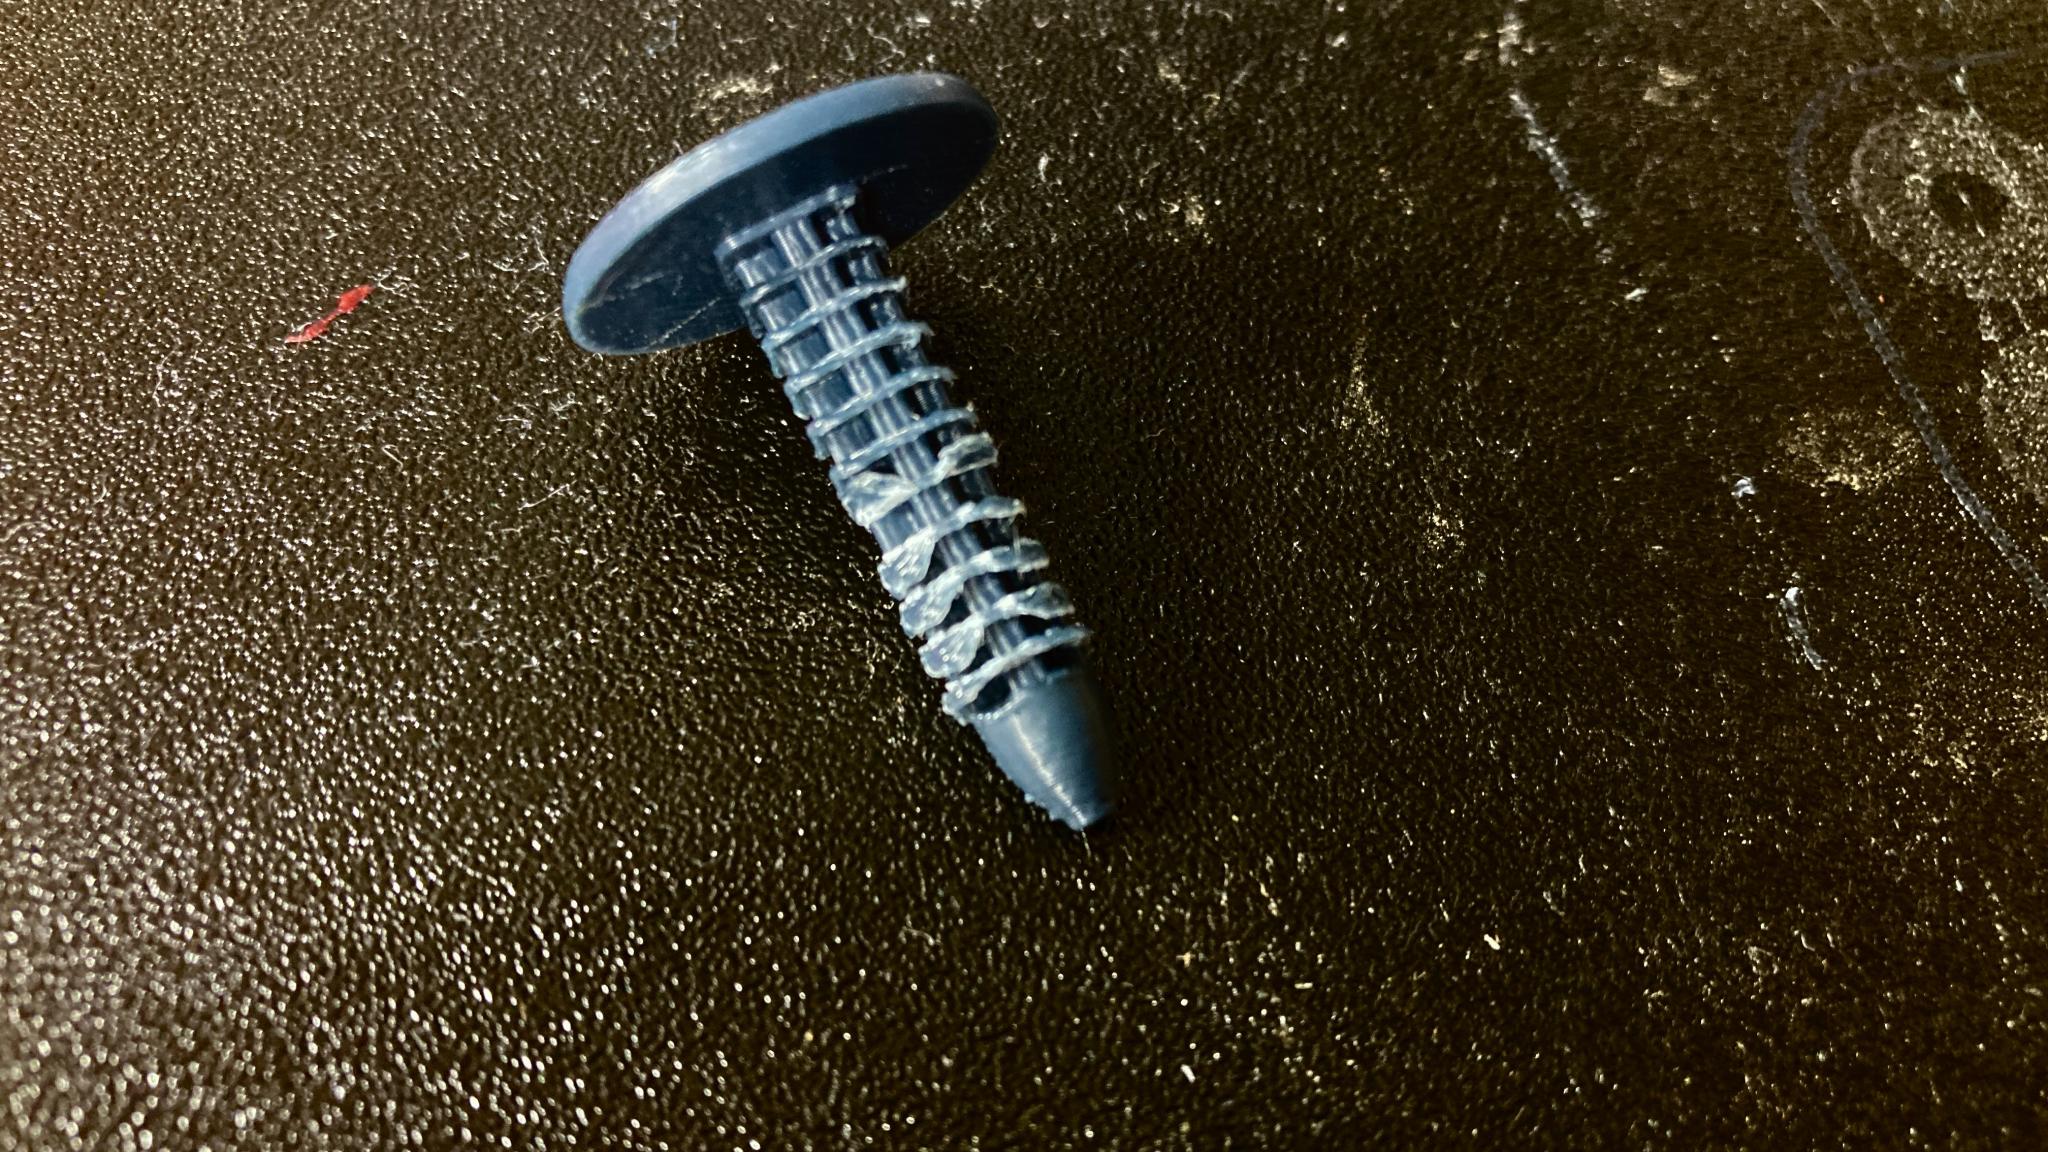
Time for a bit of work on the CRX this weekend. First was a job I've been putting off for a long time - fixing the sunroof. Back on page 6 of this thread I changed out some worn cables then managed to break a lifter arm. In 2016 I picked up another complete sunroof assembly at the Mitty and, well, the thought of pulling the headliner and abusing all those little plastic fasteners had me putting it off. But finally I decided to be a proper owner and do the work.

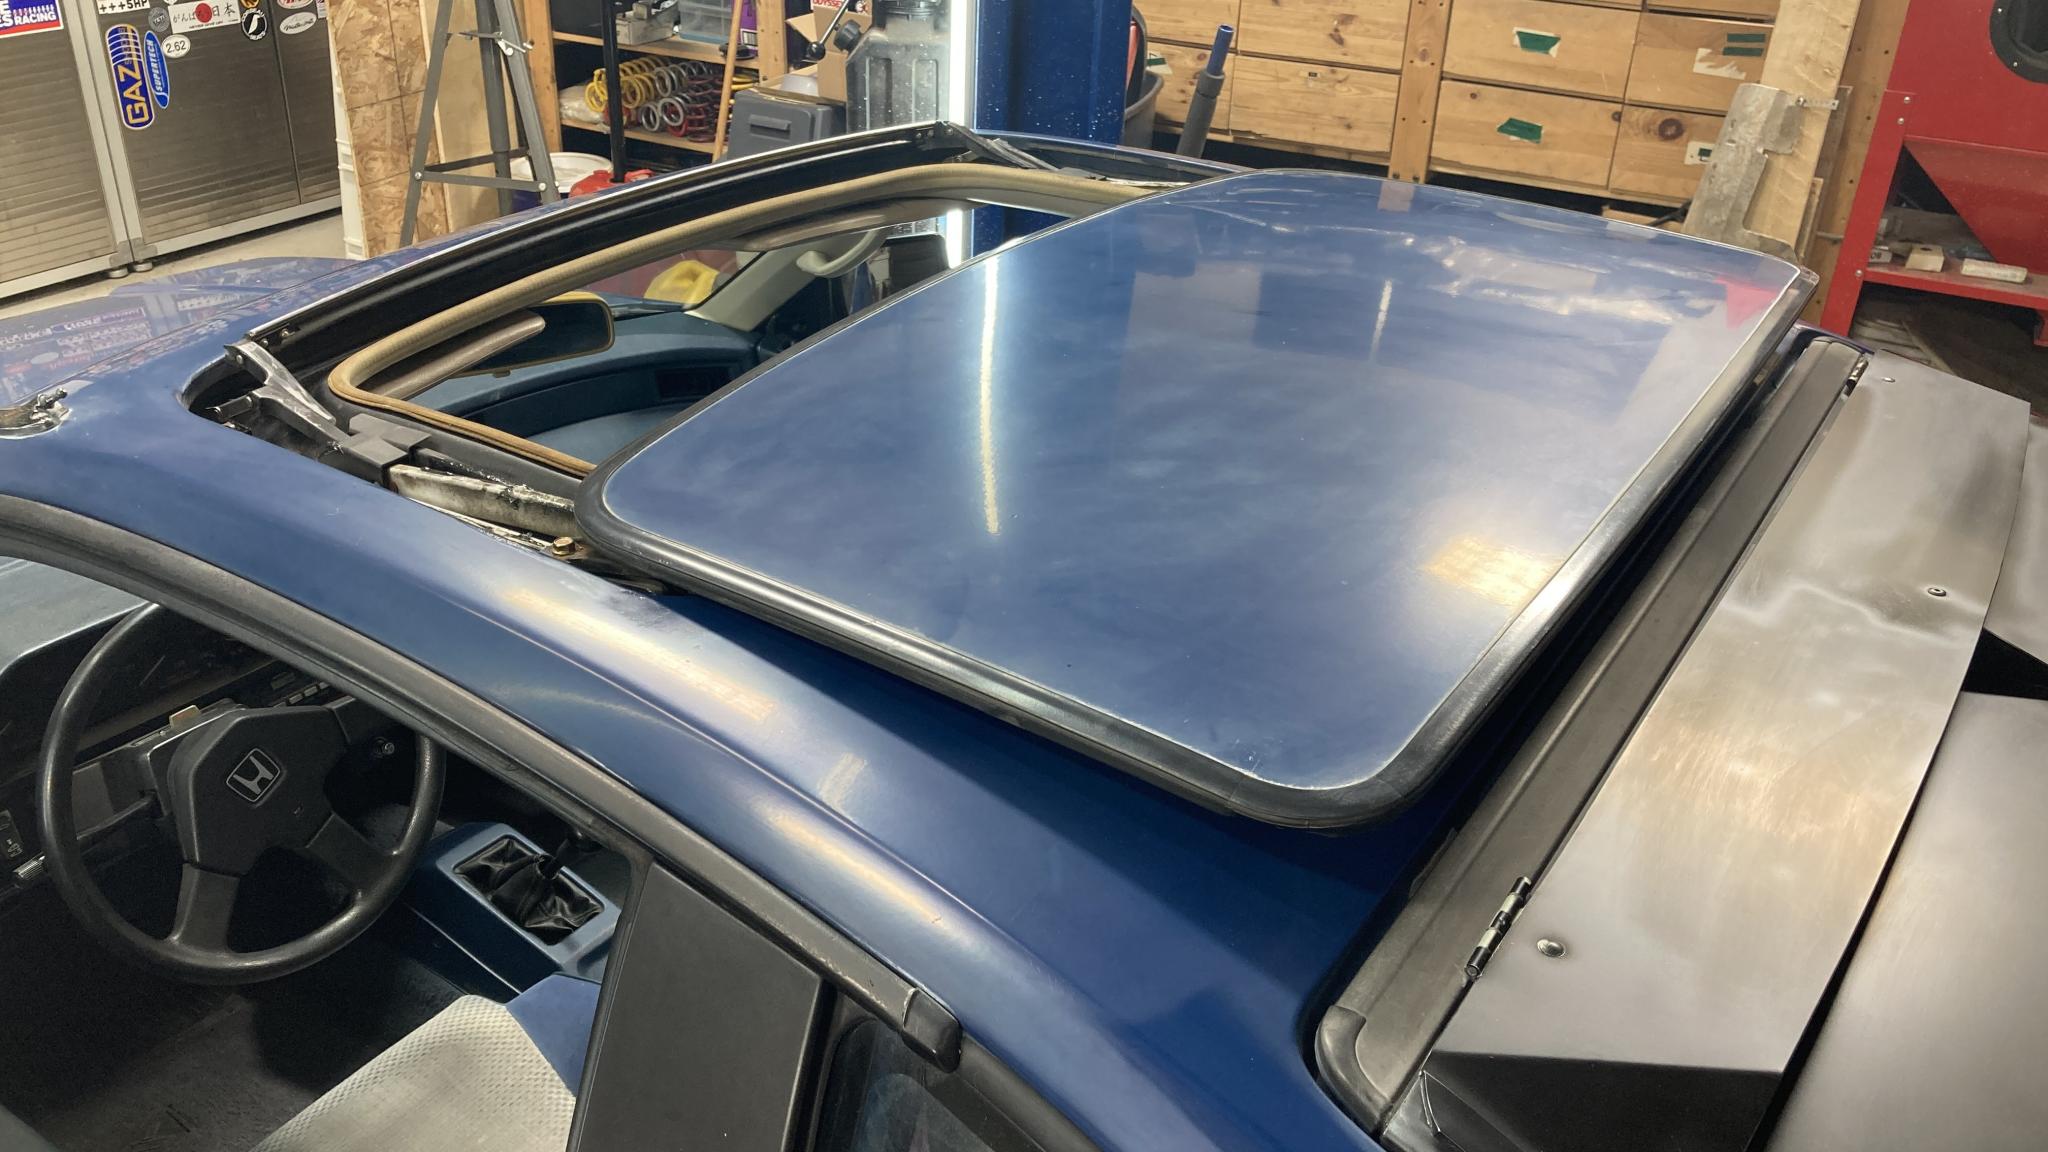
Pulling the sunroof out again wasn't too bad. I took my time and didn't do any further damage to the fasteners - I think I broke all the at-risk ones last time. Since I had a complete replacement assembly, I decided to simply drop that in instead of messing about with cables again. The new tray is merely in very good shape as opposed to the excellent shape my old one is in, but the difference wasn't enough to matter. Made for a fairly quick job and voila, a proper functioning sunroof. This little lift is the thing it couldn't do before.
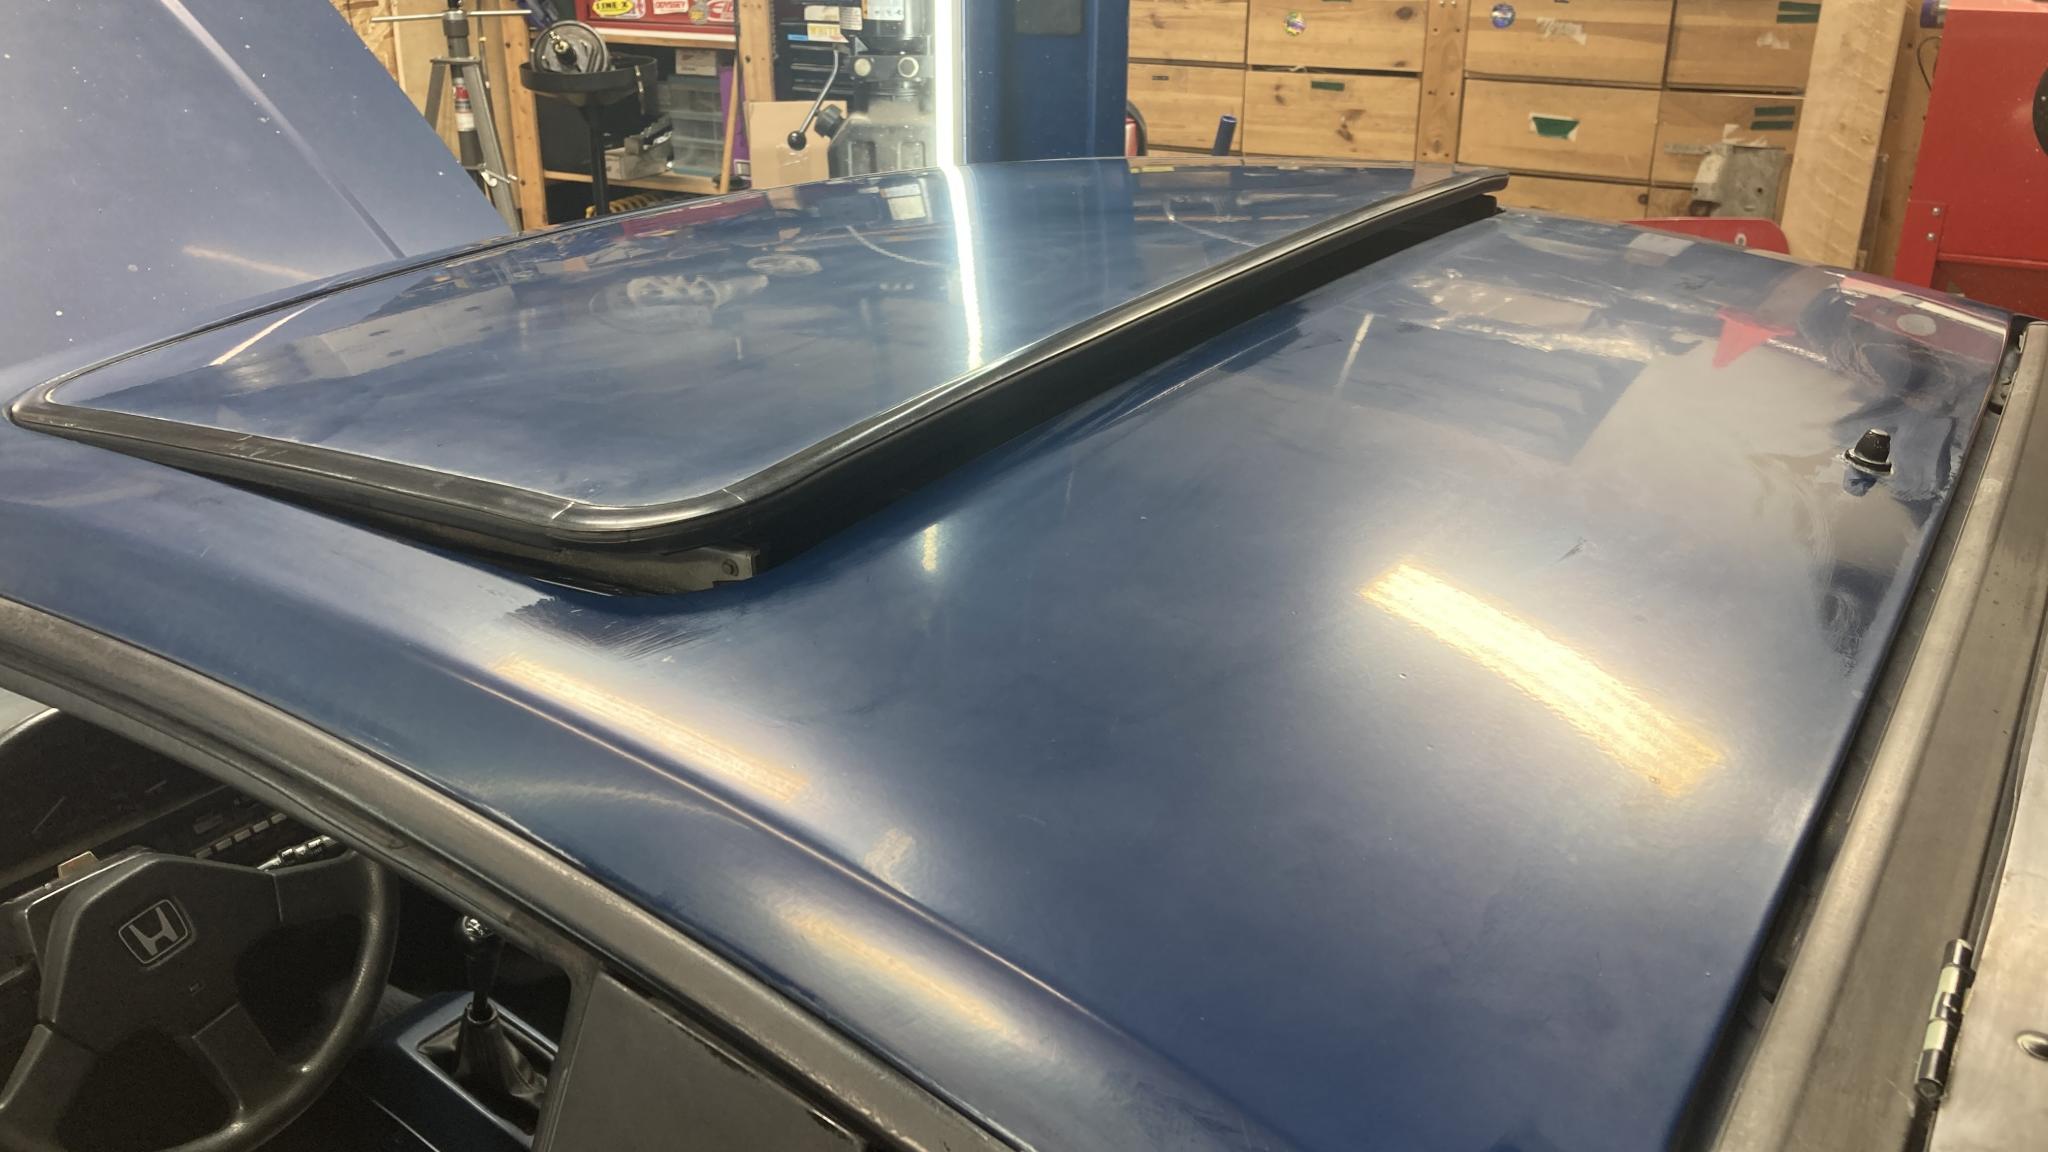
Open wide!

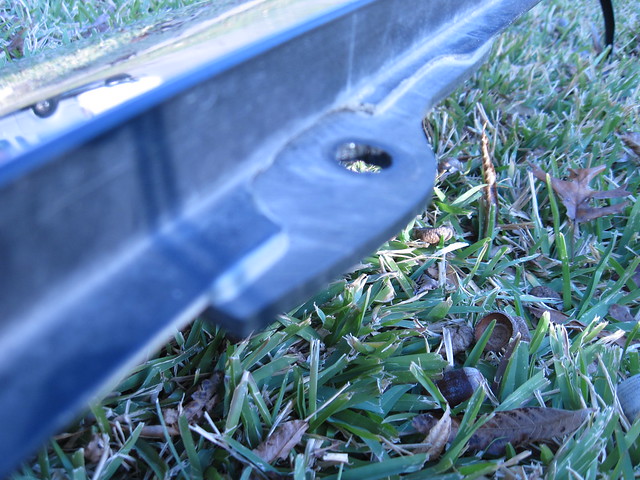
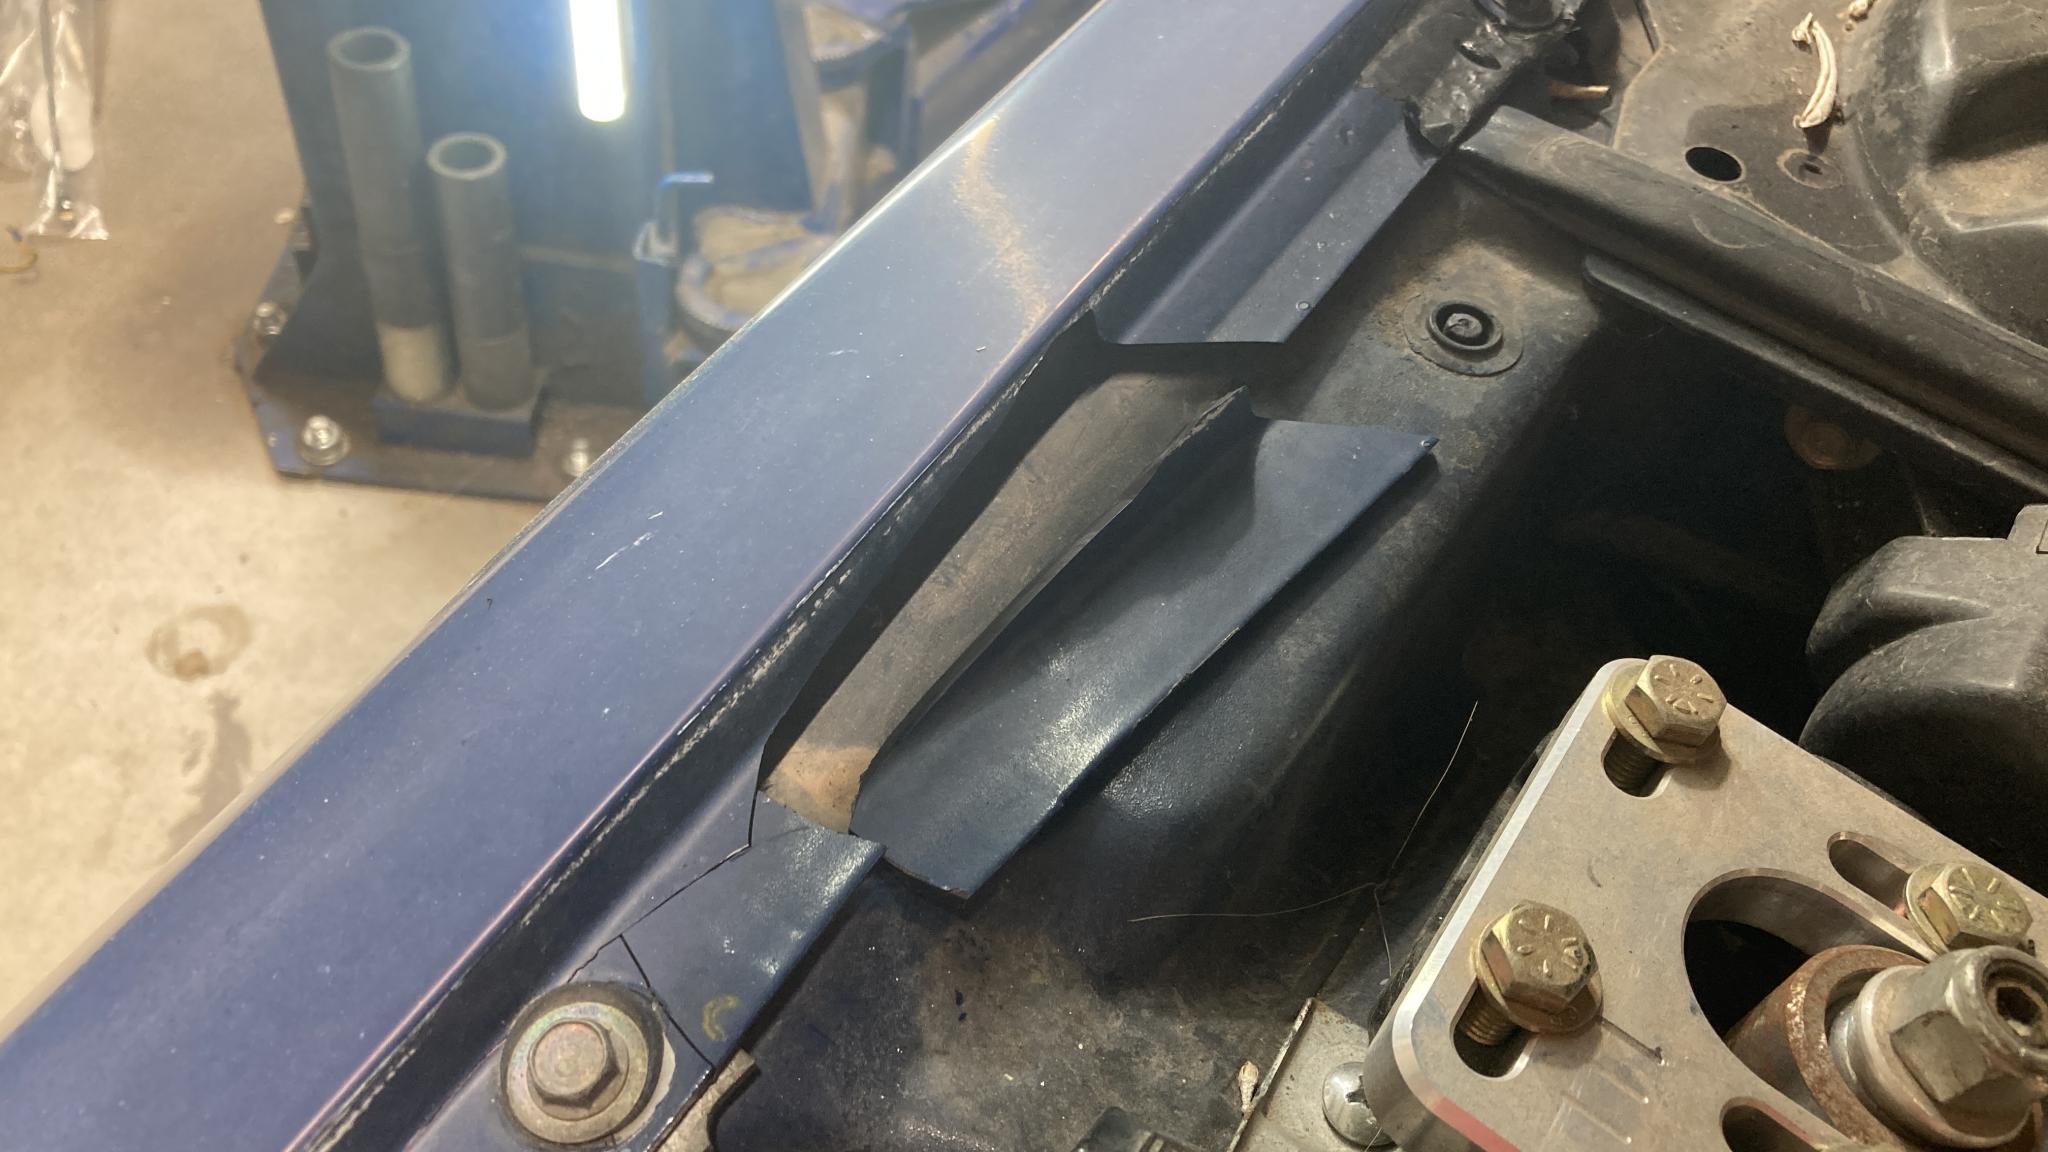
I also screwed up when working on something underhood. I was about to lean on the fender when I said "whoops, no, bad idea" and moved my hand. But it turns out I was still leaning on the flange on the edge. I had to walk away for a day after doing this.

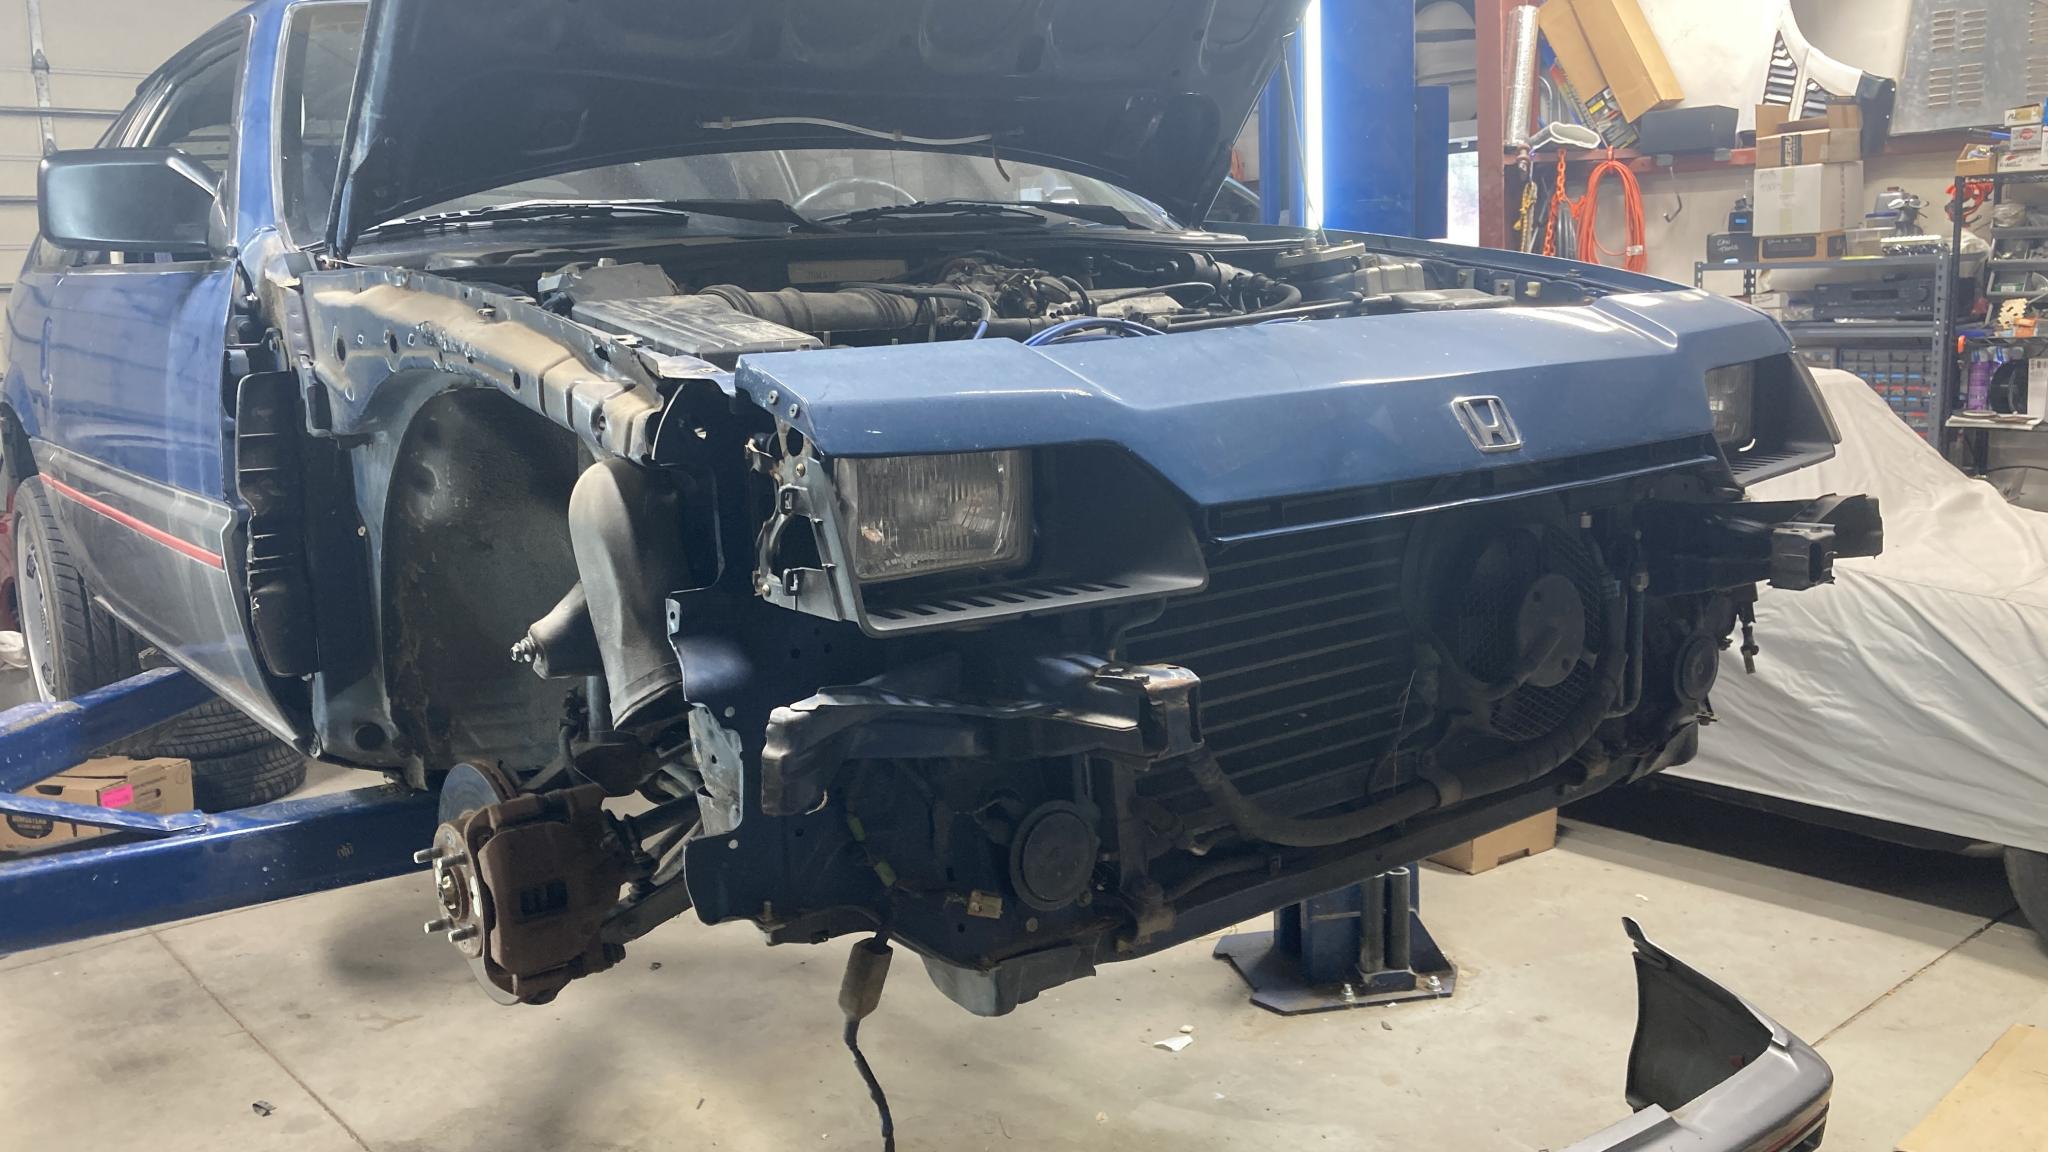
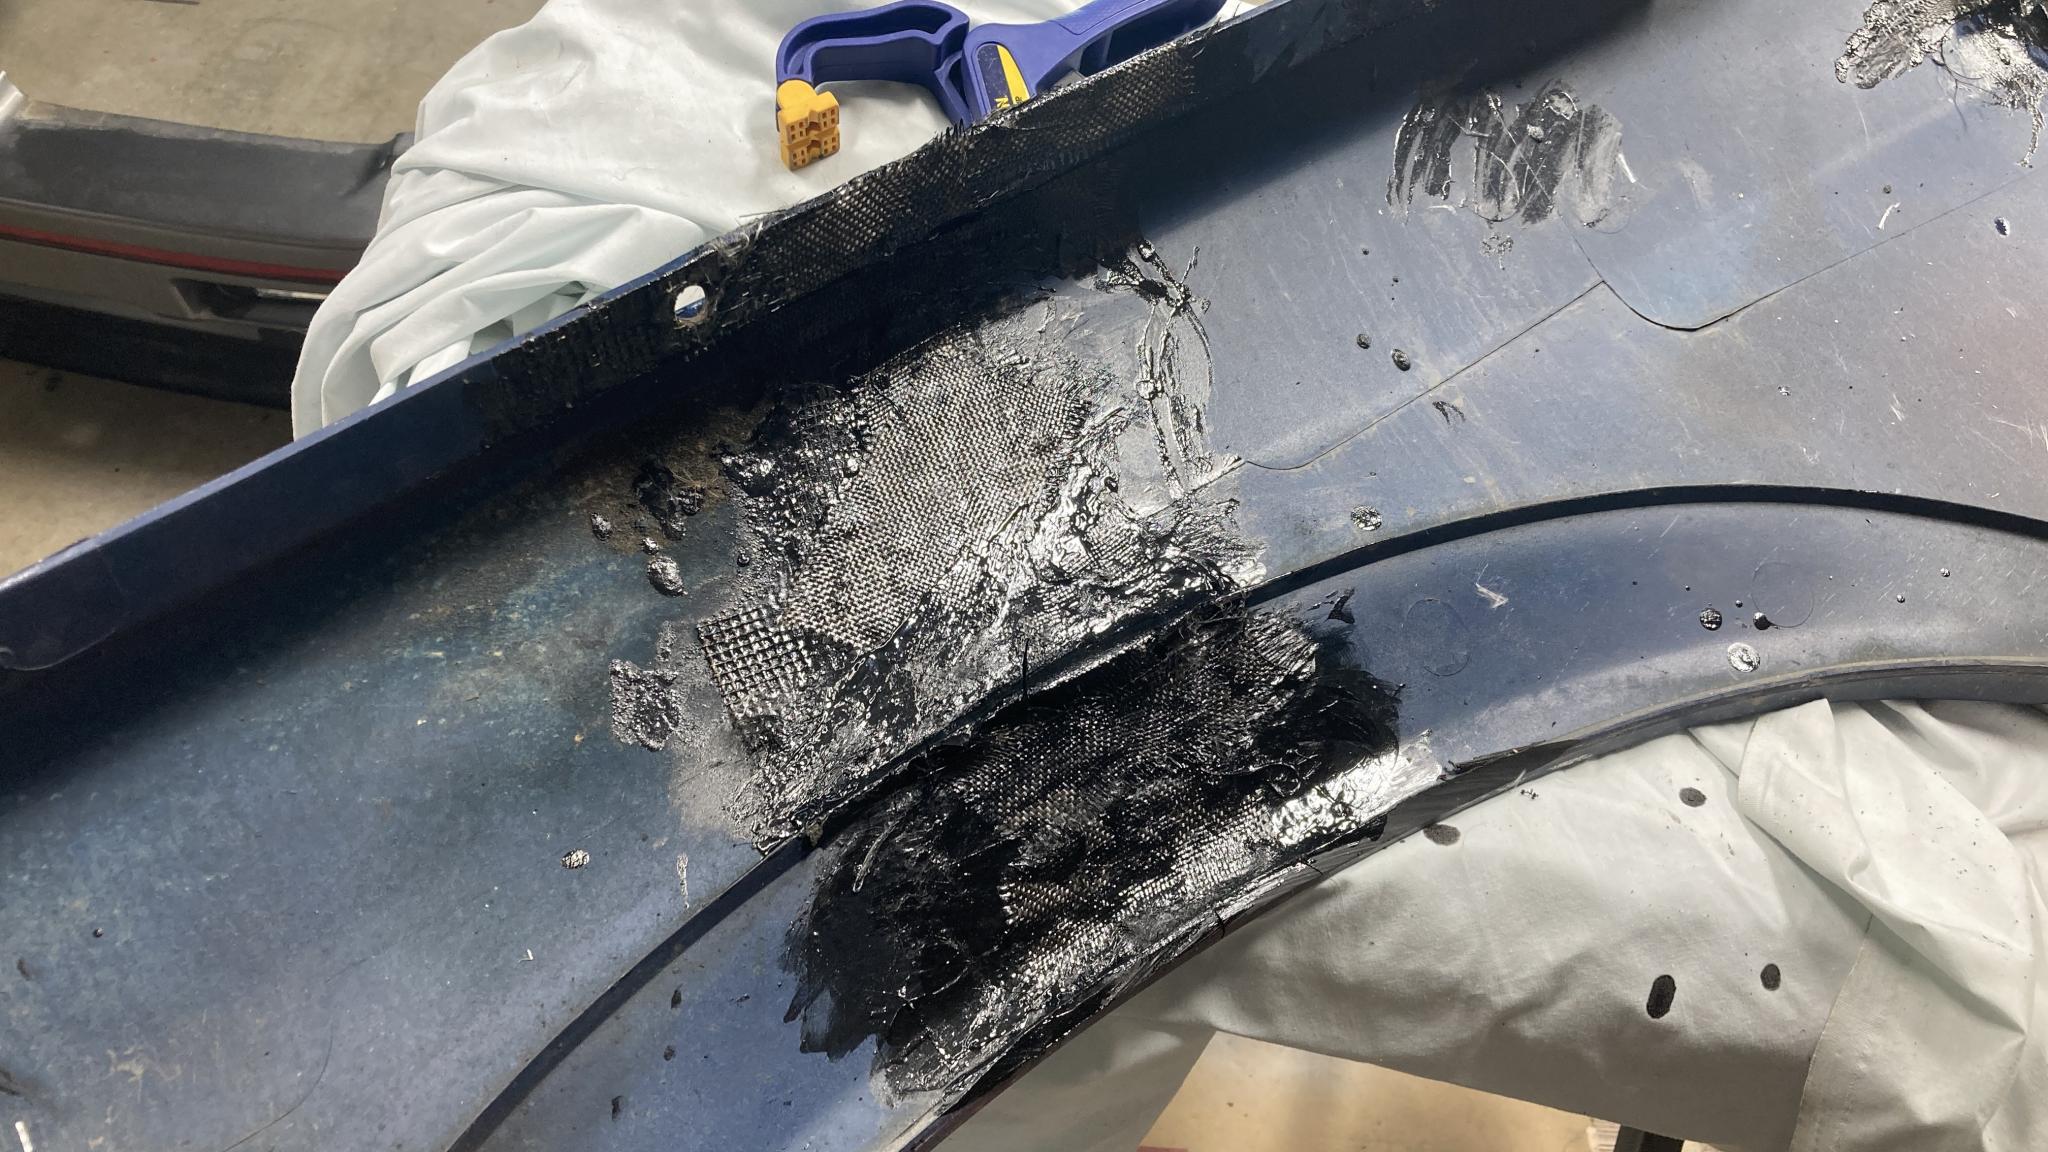
That fender also has a crack that's been slowly moving up from the center of the wheel well. I figured the right thing to do was to pull the fender and get happy with the ABS/acetone slurry and some fiberglass. First, this car appears to be 100% rust free.


It's not pretty - I laid up the 'glass in a bunch of different directions on purpose - but hopefully that broken part will stay together.

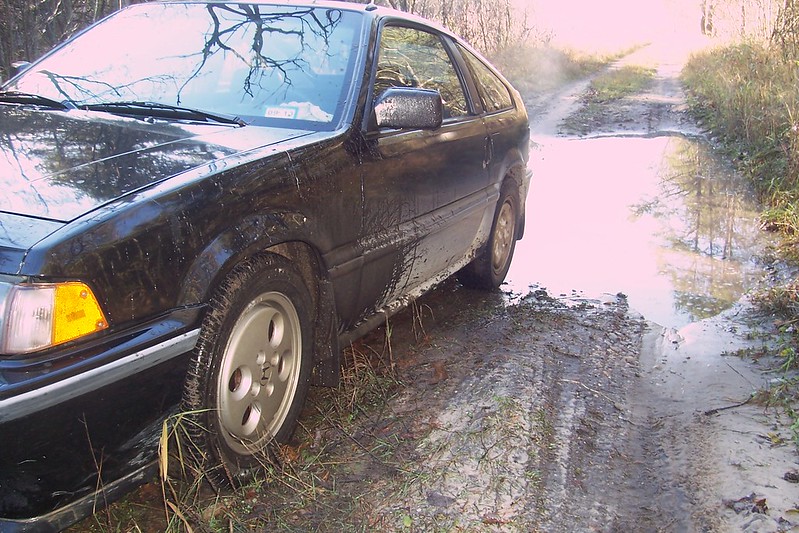
I also discovered that I have (or had) some tire rubbing on the front. ABS versus rubber apparently doesn't make a noise, but you can see in the above pic that the inside edge of the lip is worn away. So I dialed in a little more front camber on my front wheels to make sure, then fixed the resulting change in toe. I can always use more front grip :)

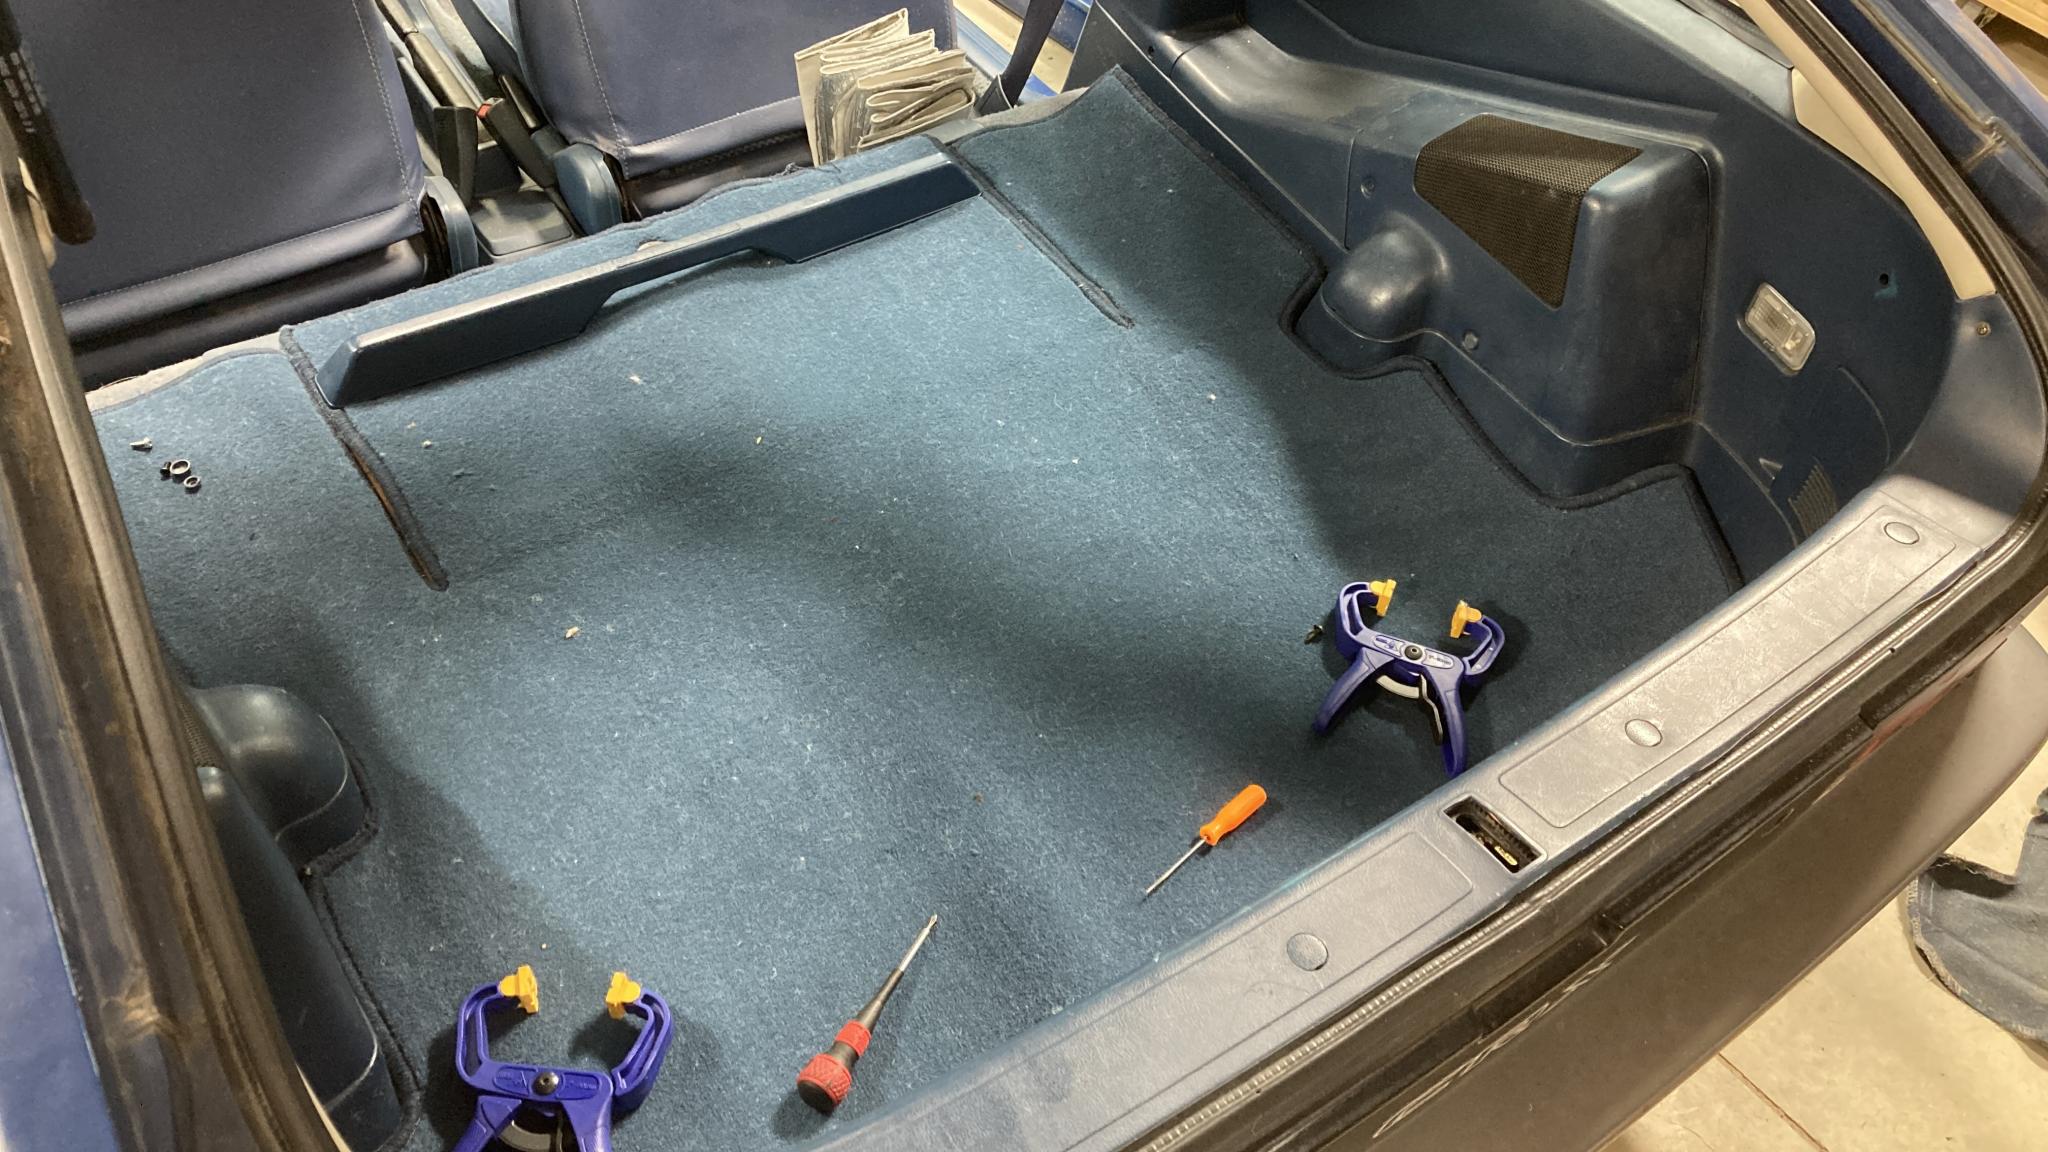
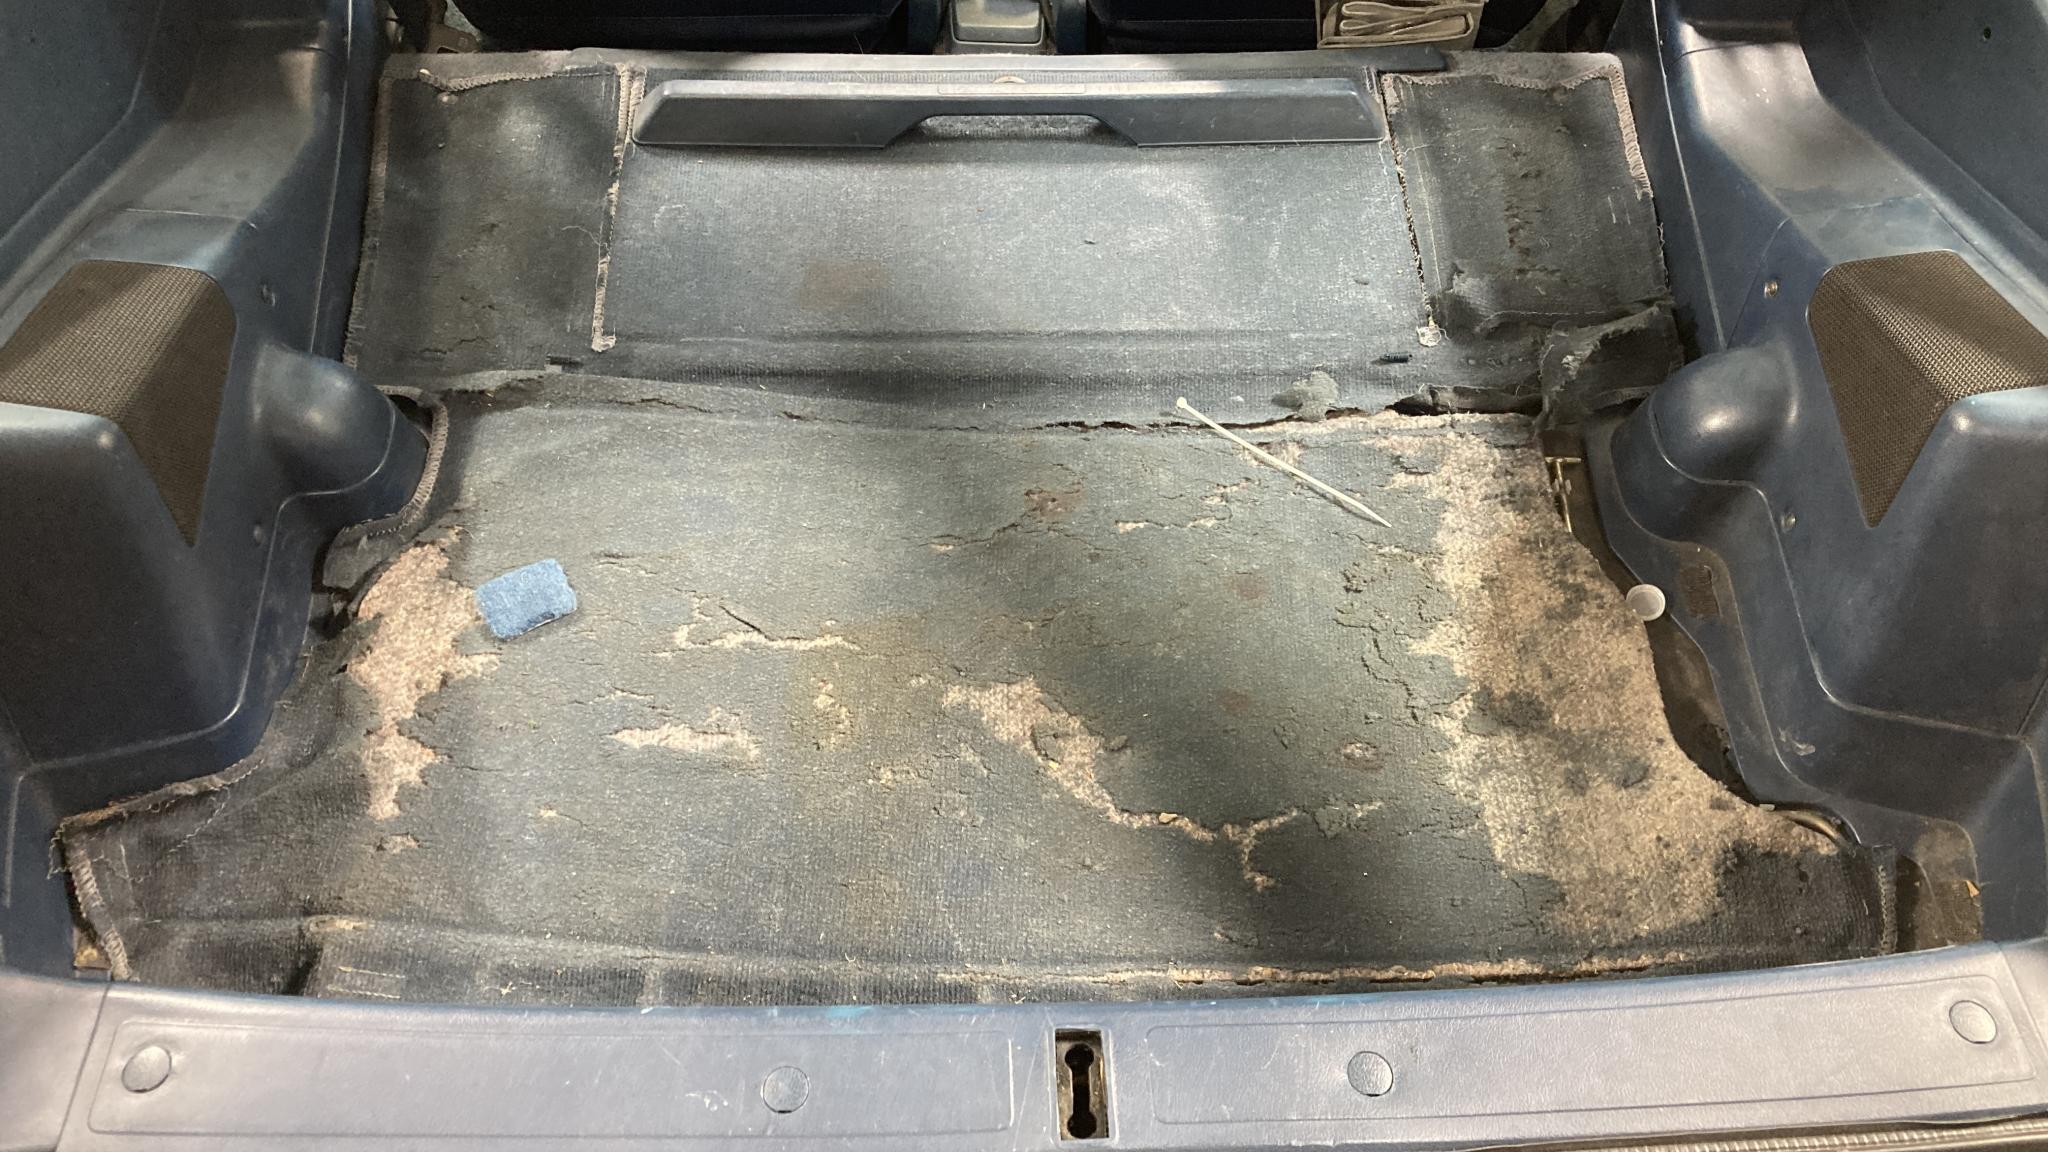
I also discovered while climbing around in the load area that the rear carpet is literally crusty. It's turning into dust. I knew it was rough, and a few years back I requested some carpet samples from Stockinteriors.com. They can do a fitted front carpet as well as a rear. I decided to order the rear only as my front is in decent shape and the install would be a pain. Hopefully I'll see that in a couple of weeks. That's the sample sitting in the load bay now - it looks like a terrible match, but it's almost exactly the color of the carpet under the front mats. If this works out, I'll consider refreshing the whole thing.

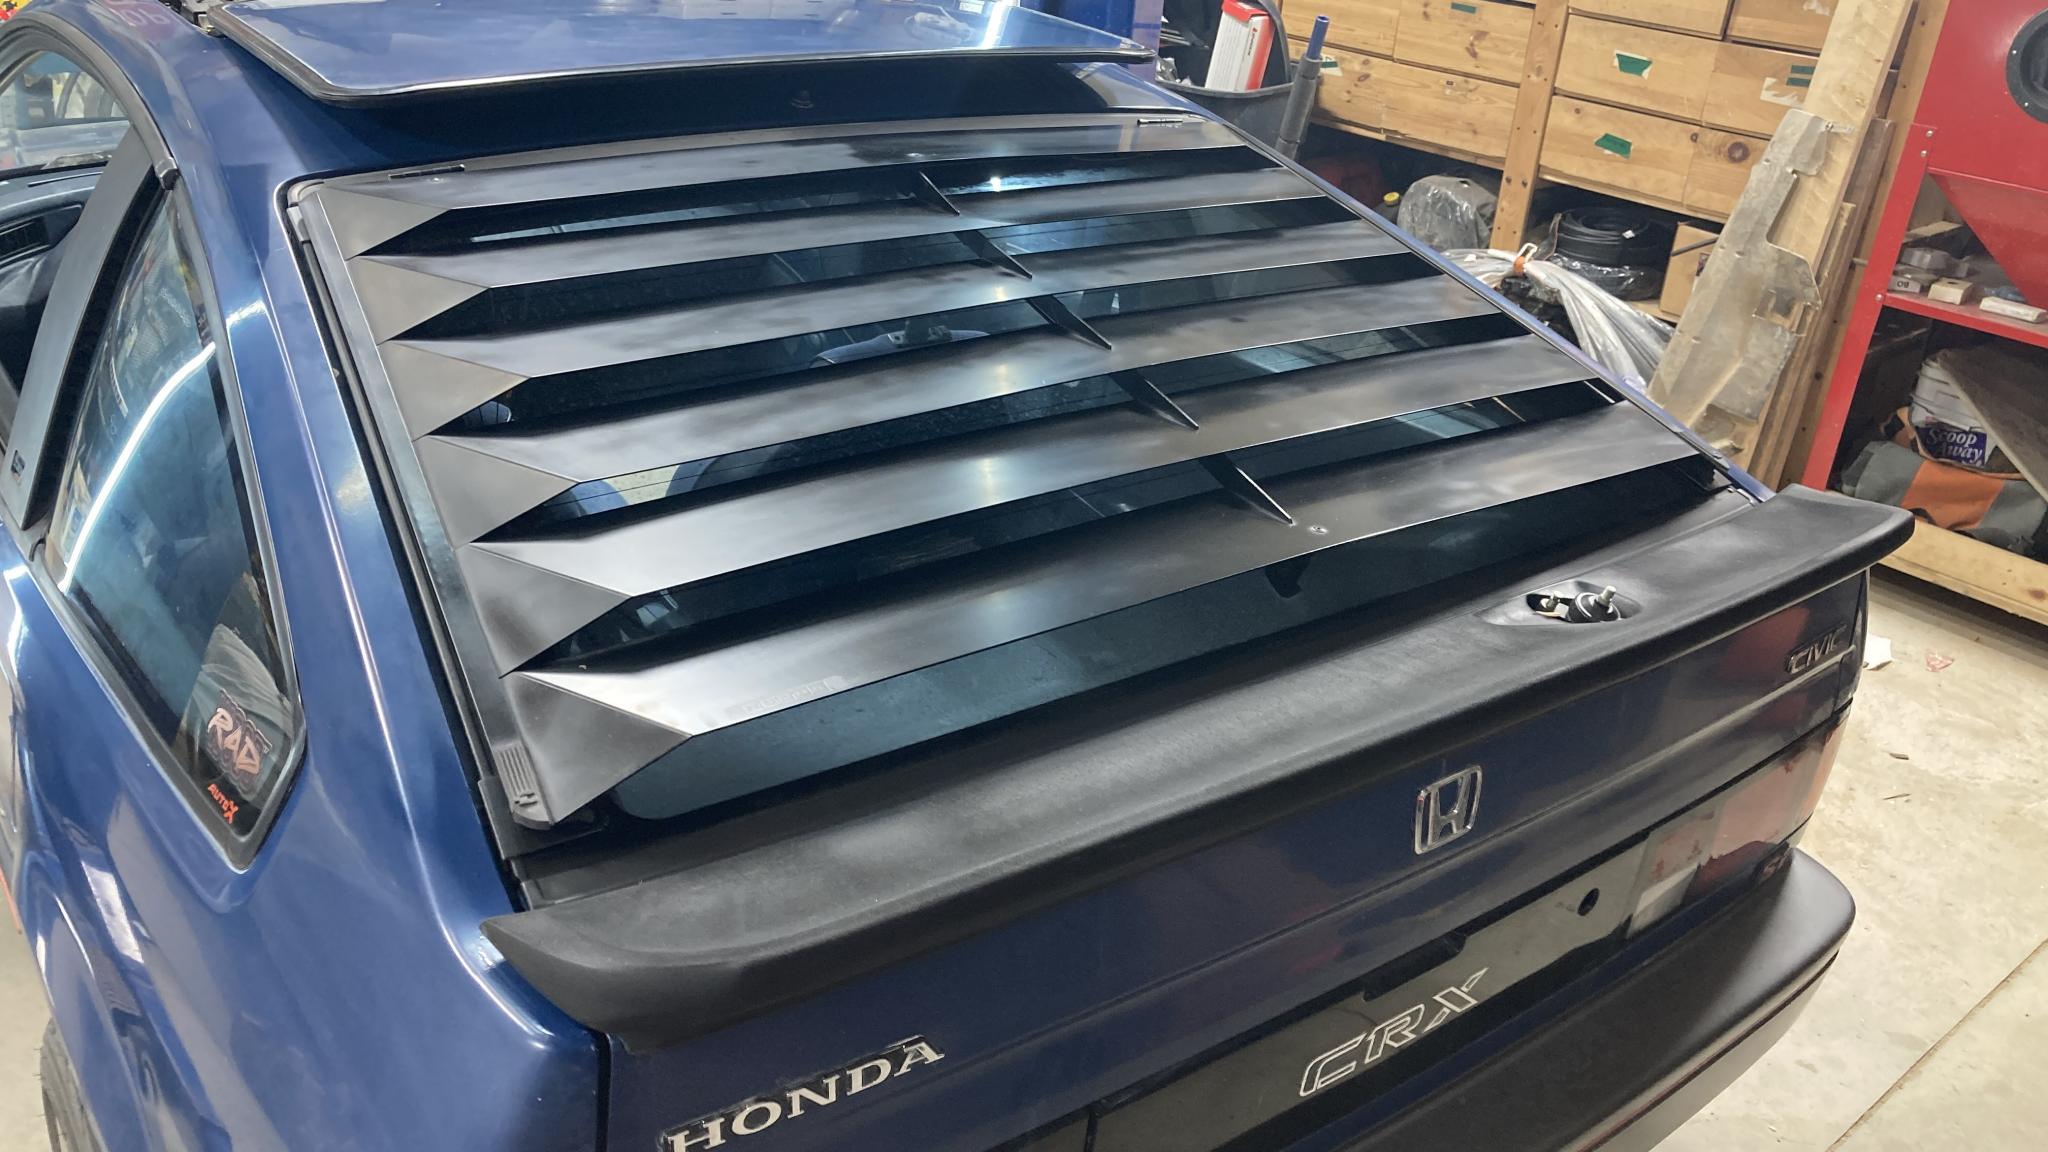
I really need to wax this whole car, it's pretty badly oxidized. But instead of doing that, I soaked the rear spoiler in the Mothers equivalent of Armor All (because it's what I have) and also touched up the louvers because it's easy.

What I REALLY need to do is fix the AC, because it's 100F outside. Not sure how big a job that's going to be, but I have a coworker who's an AC kinda guy and we have the tools, so I'll see if I can keep his attention for a while and check it out.

jimbob_racing
jimbob_racing SuperDork
7/4/23 9:42 p.m.

You've got the rare dealer installed rear speaker kit. 

JoeTR6
JoeTR6 Dork
7/4/23 10:14 p.m.
jimbob_racing said:

You've got the rare dealer installed rear speaker kit. 

I put some round speakers in the sides of those panels on my brand new '86 CRX.  I like those much better.  Man, I miss that car sometimes.

Keith Tanner
Keith Tanner GRM+ Memberand MegaDork
7/4/23 10:44 p.m.
jimbob_racing said:

You've got the rare dealer installed rear speaker kit. 

Cool! I wasn't sure if it was an Si thing or something else. They're not in the 1984 service manual, I know that  :) 

Ive got the window sticker, I'll see if there are any clues there. 

jimbob_racing
jimbob_racing SuperDork
7/4/23 11:06 p.m.

They were dealer installed. Back then,  dealers installed A/C kits, antennas, radios and speakers. 

I worked at a Honda dealer in the mid 90s and you could still get some of those accessories from the DC in New Jersey. I bought a set of those rear speakers in black for my 85 CRX DX.  Most people just hacked up the rear trim panels and installed surface mount speakers.

Keith Tanner
Keith Tanner GRM+ Memberand MegaDork
7/4/23 11:53 p.m.

I might have an accessory brochure as well, I'll check.

Forgot to mention, I also installed a set of fresh R4S pads on the front. Took no time at all, they're built exactly like Miata calipers. Even lubed up the slider pins. Then I put the box on the driver's seat to remind me to bed them on the next drive.

The ones that came out were relatively fresh "Select Ceramic", which appear to be an O'Reilly house brand.

crankwalk (Forum Supporter)
crankwalk (Forum Supporter) GRM+ Memberand UltraDork
7/5/23 6:33 a.m.

It would look pretty sweet with some coco mats in the front and on the rear deck. Just saying. 

Keith Tanner
Keith Tanner GRM+ Memberand MegaDork
7/5/23 11:51 a.m.

In reply to crankwalk (Forum Supporter) :

Coco mats don't push my buttons. Nice OE-looking carpet is more my jam.

Keith Tanner
Keith Tanner GRM+ Memberand MegaDork
7/7/23 2:26 p.m.

After jimbob_racing pointed out the accessory speakers, I pulled out my paperwork. And here's what it says in the back of the 1985 CRX Si brochure.

My car came to me with the rear speakers and AC. I found the receipt for AC, $995. I also found the speakers, $46.78 discounted down to $31.19. Interestingly, they were sold by a different dealer about two days after the car was purchased. 

Keith Tanner
Keith Tanner GRM+ Memberand MegaDork
7/12/23 3:55 p.m.

It's New Carpet Day! StockInteriors.com delivered pretty quickly and it looks like a decent quality product. My "deep pile" carpet came with some backing that wasn't attached and doesn't really work with the various fasteners, so I left it off. Fitment was pretty solid, just very slightly wide at the front - it's good enough to work, though. I'm fine-tuning the fit now, but this is SO much better.

One piece of trivia: apparently Honda engineers are very worried about people not having any spare bulbs. These are the access panels to change bulbs. Guess I need to restock!

84FSP
84FSP UberDork
7/12/23 4:11 p.m.

A hair dryer will be your friend getting a nice lay flat on the carpet to the formed panels.  Looking good sir.

Cousin_Eddie (Forum Supporter)
Cousin_Eddie (Forum Supporter) Dork
7/12/23 4:12 p.m.
Keith Tanner said: 

I have quite an infatuation with Honda already, and this picture with the spare bulbs further cements that. They really cared about doing things right and not just shaving a few pennies off the cost.

Keith Tanner
Keith Tanner GRM+ Memberand MegaDork
7/12/23 4:31 p.m.
84FSP said:

A hair dryer will be your friend getting a nice lay flat on the carpet to the formed panels.  Looking good sir.

How about I park it in the sun on a 100F, 10+ UV day? :)
There's not much rigidity to the backing of the carpet so it should relax pretty easily. I was supposed to let it sit for a day after unpacking but it's not formed and I am impatient. I have a few fasteners to install as well - watch this space for that...

Keith Tanner
Keith Tanner GRM+ Memberand MegaDork
7/12/23 7:15 p.m.

Still letting the carpet relax - I think it's cut about 1/4" too wide at the front and that's why it won't sit flat. The original had velcro on the backside to hold it in place, I might see if I can add some to this one. It's just a matter of millimeters for most of it.

But in the meantime, it's time to solve my broken fastener problem. There are three types: the usual push pin that's used on the side panels, a slightly smaller one that's used to anchor the carpet and a color-matched cap for the screw heads. The push pins are the ones that took the most damage even with the correct tools, they're nearly 40 years old and brittle. You can buy replacements at NAPA - but only in black. I wanted some to match my blue interior.

Well, this is the sort of thing that 3D printers are good at. I sourced some blue ABS, it was way too bright. I found some "Fighter Jet Blue" ABS from Paramount 3D that looked really good, and it turned out to be a perfect match. I spent some time building models and voila!

Those are the original parts off to the side. I found that the "bristles" on the push pin were too stiff on the ABS, so I made a second version with altered dimensions and fewer bristles. I've got a third design I'm going to try with a middle ground number of bristles (that's it in the model above), but in all but one case the second design is working perfectly. Goes in with a bit of a push and holds.

How do they look? The cover on the left is stock, the other is my reproduction.

The push pin looks pretty good too.

Yay for modern tech! What a ridiculously cool tool to have in your garage.

Keith Tanner
Keith Tanner GRM+ Memberand MegaDork
7/12/23 8:41 p.m.

Final version was the bomb. I'm going to put the model up on Thingiverse for other Hondaheads.

Here's what version 2 looks like after use.

759NRNG
759NRNG PowerDork
7/12/23 9:21 p.m.

" I spent some time building models and voila!" I'm thinking that there are other threads on the forum discussing in depth the intricacies of 3D modeling? What was the degree of difficulty with these or was it an 'ain't nuttin to it' type of exercise? oh yea well done maestro! 

Keith Tanner
Keith Tanner GRM+ Memberand MegaDork
7/12/23 10:57 p.m.

Let SkinnyG show you the way.
 

It's not a terribly difficult model. It could be used as a beginner how-to for Fusion360.
I drew a cross-section of the part and then rotated it (like turning a part on a lathe). That gave me the basic shape, especially at the head and nose. Then I used another cross section on a different plane and extruded it out to form the cross shaped supports and trim the circular bristles into their rounded square shape. That all got mooshed together into a single piece. 

The hardest part is coming up with how you're going to construct the model, and different 3D programs have different ways of doing. Correction, that's second hardest - the hardest is getting all the dimensions right when all you have is a piece of a damaged original :)


1 ... 8 9 10 11 12 13

You'll need to log in to post.

Our Preferred Partners
dA3KLkcTWvKqkSVecaRo6yaqmhKAQp3ZqPzVcj1GY3GugNuyvhx7O6MH9EiE7vrh