Challenge budget so far:
previous challenge budget: 1877.19
recoup total: 820
new money:
another can of white from lowes 3.98
heim: 1 from my magic bucket
driveshaft safety loops: 40 from J&t welding
giant K&N air filter: 2.06 pull-a-part
Recoup: 820
new total: 1902.29
so, ive been chipping away over the holiday weekend. Tuesday on my lunch break, o swung by J&T welding I alblemarle to get the 2x1/4 plate I needed for the driveshaft and CV axle safetly loops, and have it bent. $40 later, and 30 minutes, I had this in the back of the car. We needed roughly 6 inches between the verticals on the legs. So thats what I asked for, and pretty much what we wound up with.
 20181119_124615 by Michael Crawford, on Flickr
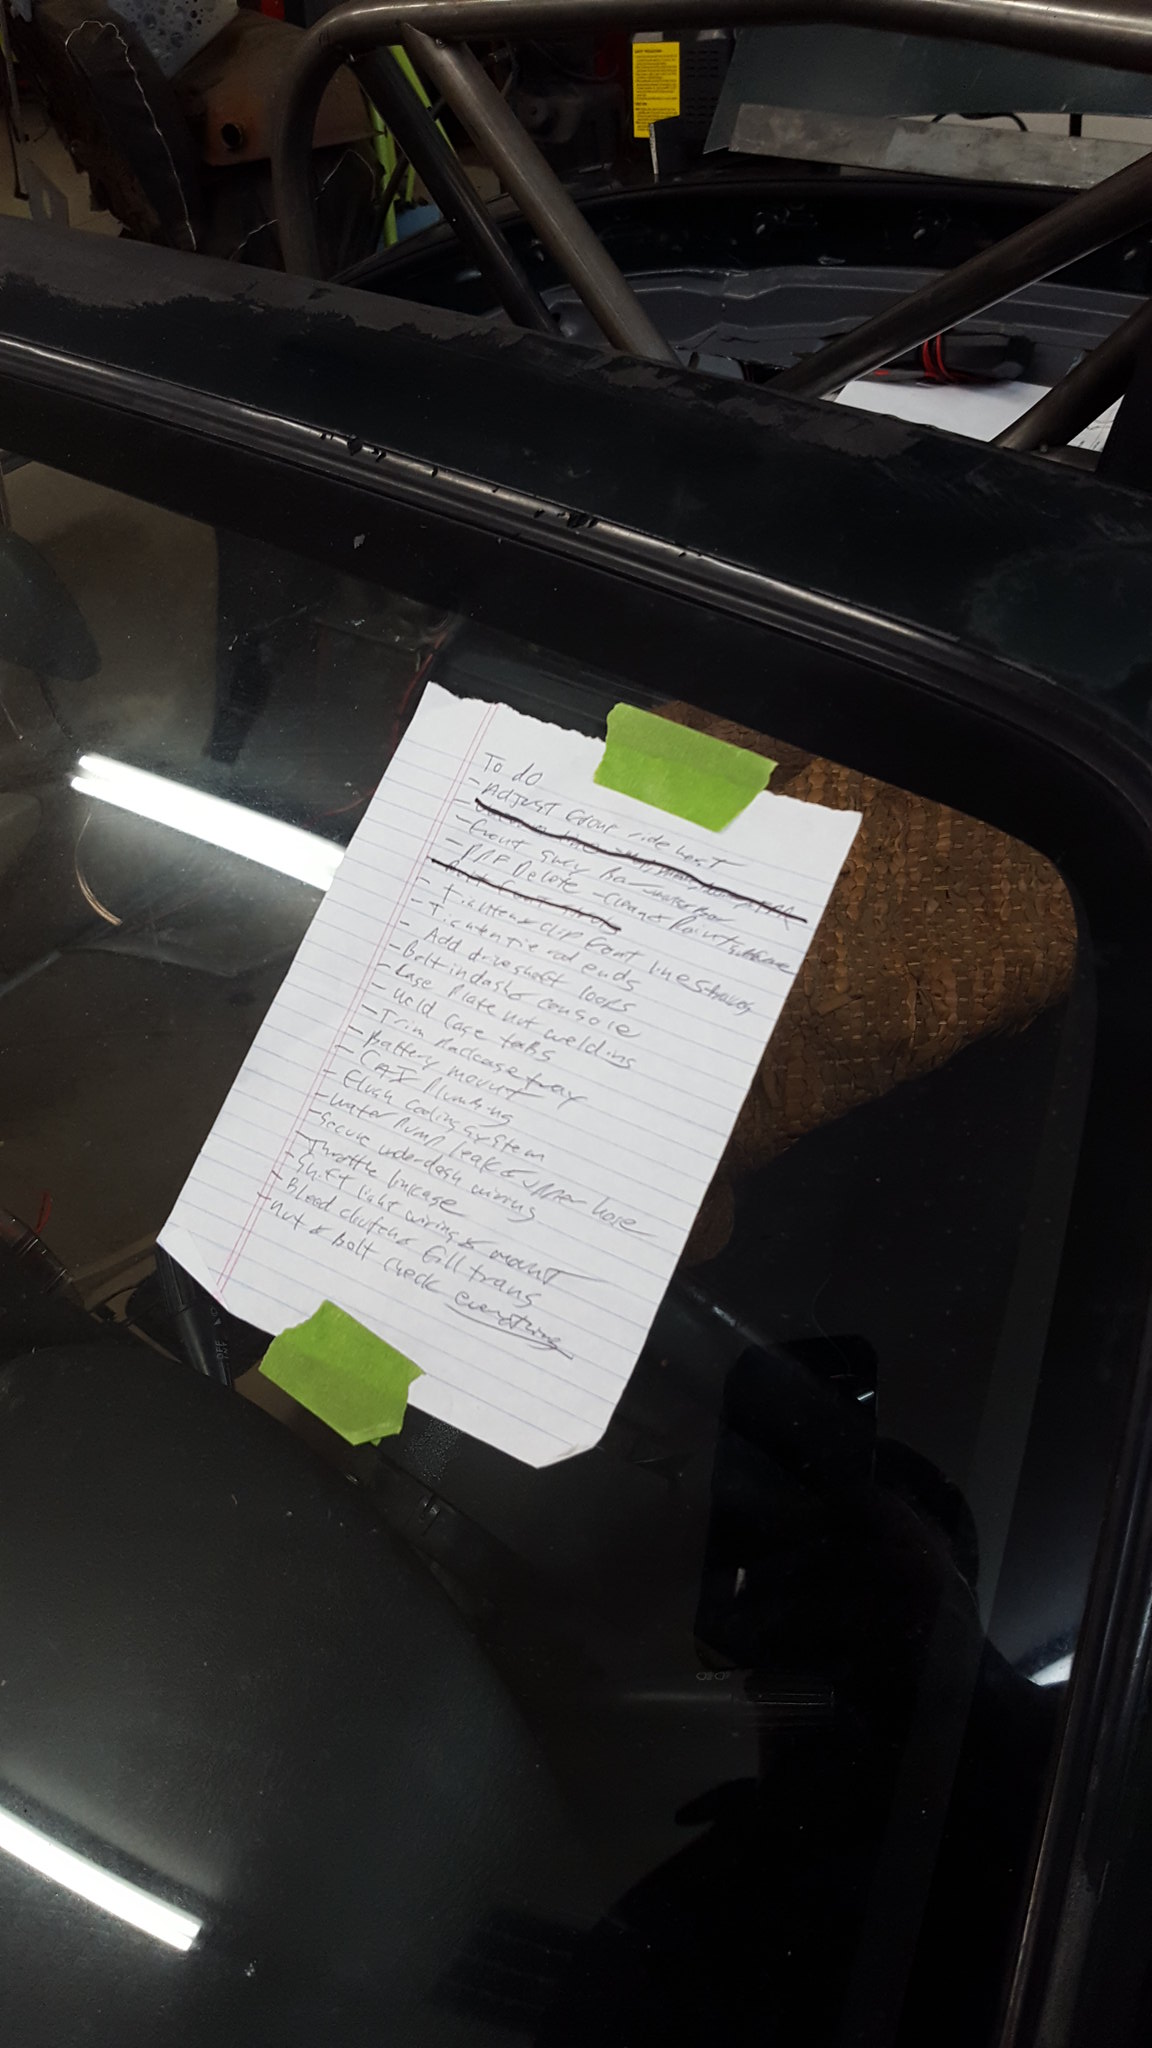
Tuesday, while waiting for an appointment, I made a to-do list.
 20181120_183625 by Michael Crawford, on Flickr
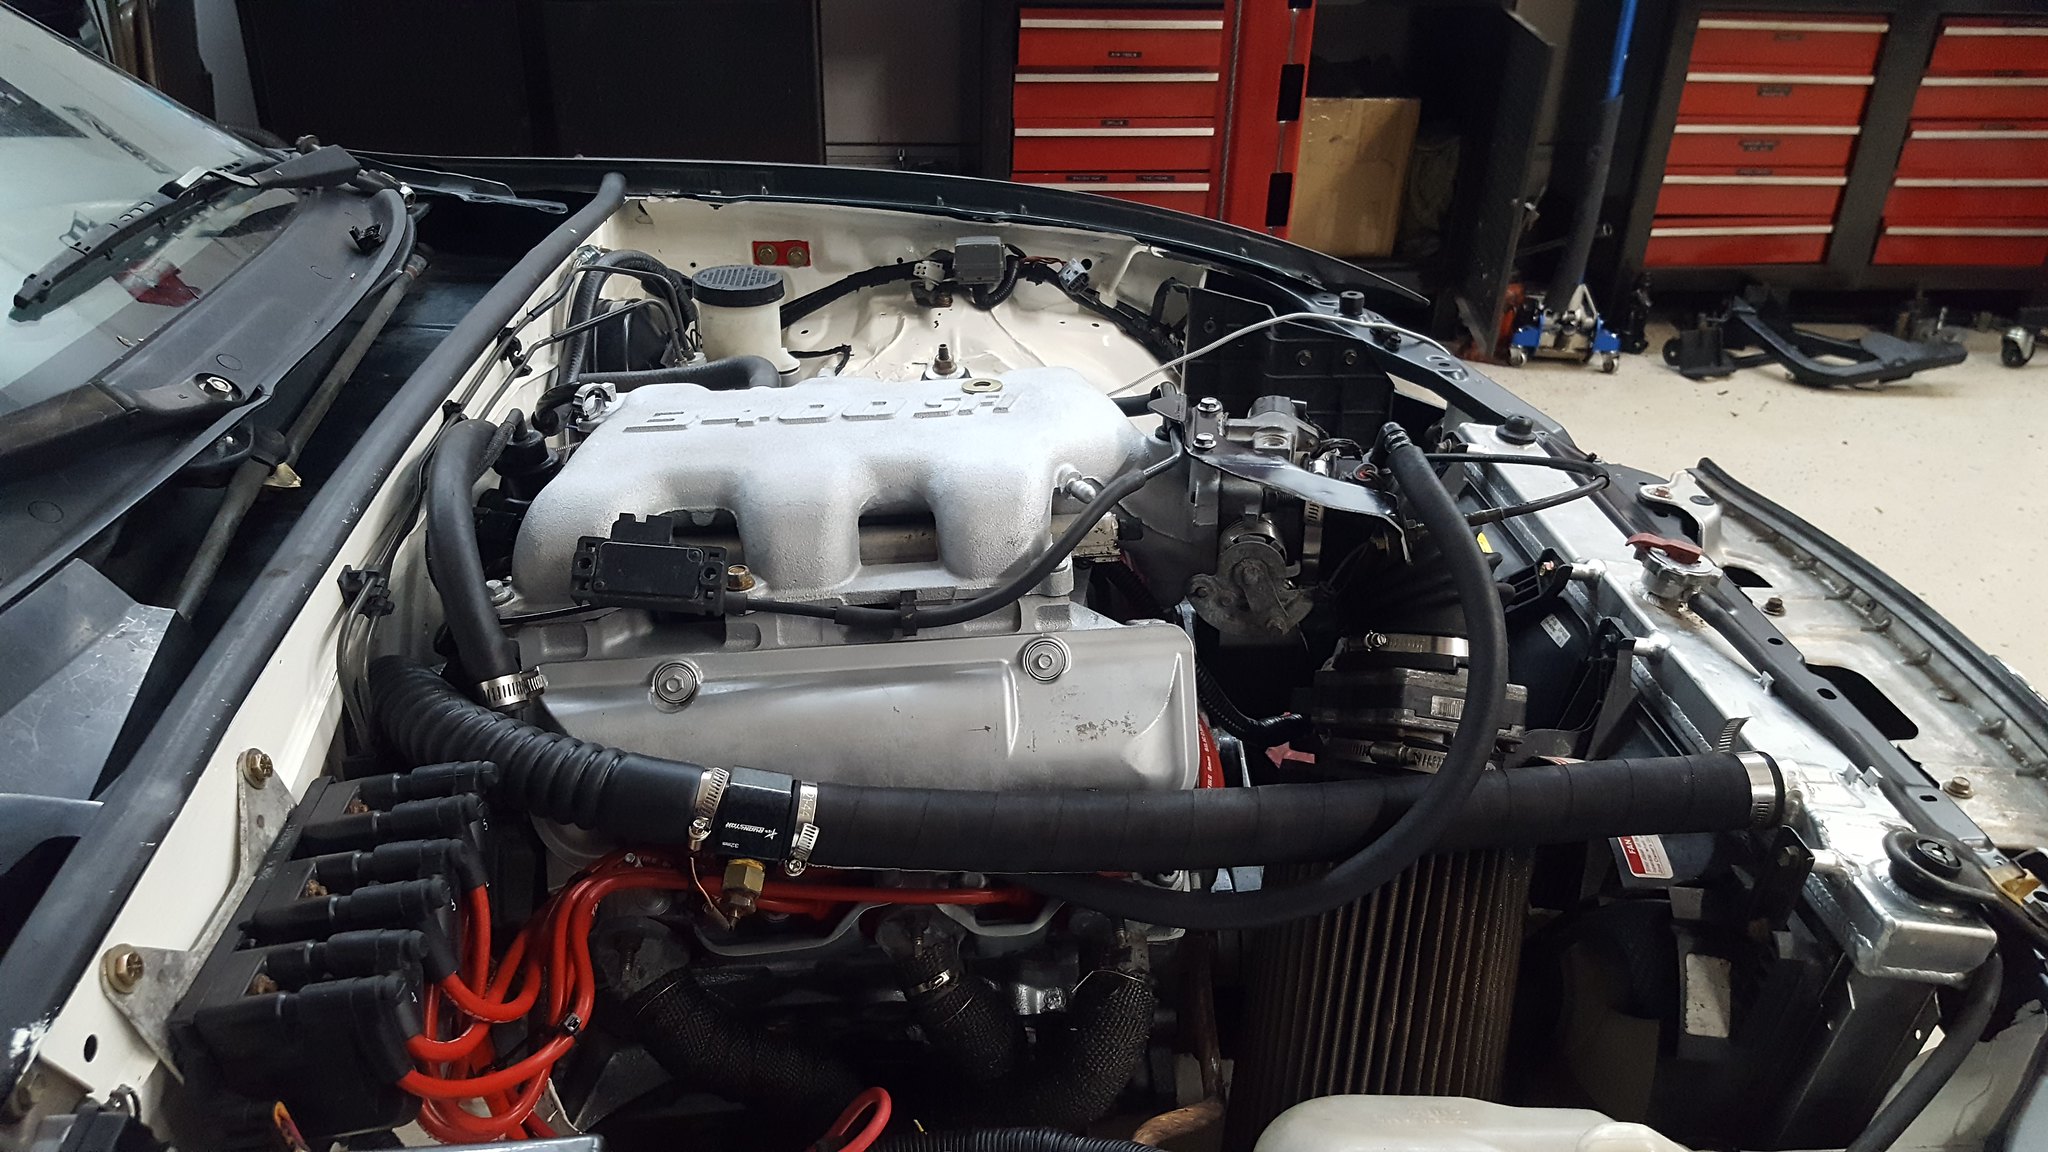
step one was Tuesday night, which was getting the CAI built, vacuum lines finished, and the throttle linkage sorted out. By the middle of the evening, I thought I had it all sorted out. I used one of my multiple aftermarket air filters, and the biggest I could fit. It happened to be a K&N. See, I buy them any time I see one at pull-a-part. For 2.06, I figure I cant lose. I have AEM, K&N, Spectre, ebay, and a greddy. Seriously, I have like 9 different aftermarket cone filters in storage. This one, If I remember right, was on a 3800 Buick. But don't quote me on that, its been in storage for probably 5 years. Maybe longer. I mounted the giant filter directly to the end of the MAF, tucked low behind the radiator. I dug it. Also, I cut and bent the stock throttle linkage bracket until it looked like it would clear, pretty much mimicking the car version of the GM bracket. (I bought a car version Wednesday morning, but it didn't wind up being the solution).
I also finally did all the vacuum hoses and lines. Used scraps of hose ive scavenged from various cars over the years, as well as scraps of the factory nylon vacuum lines. Still need to get a factory style MAP sensor mount (didn't take the right tools with me to the yard for that) or make one, but its otherwise done!
 20181120_193804 by Michael Crawford, on Flickr
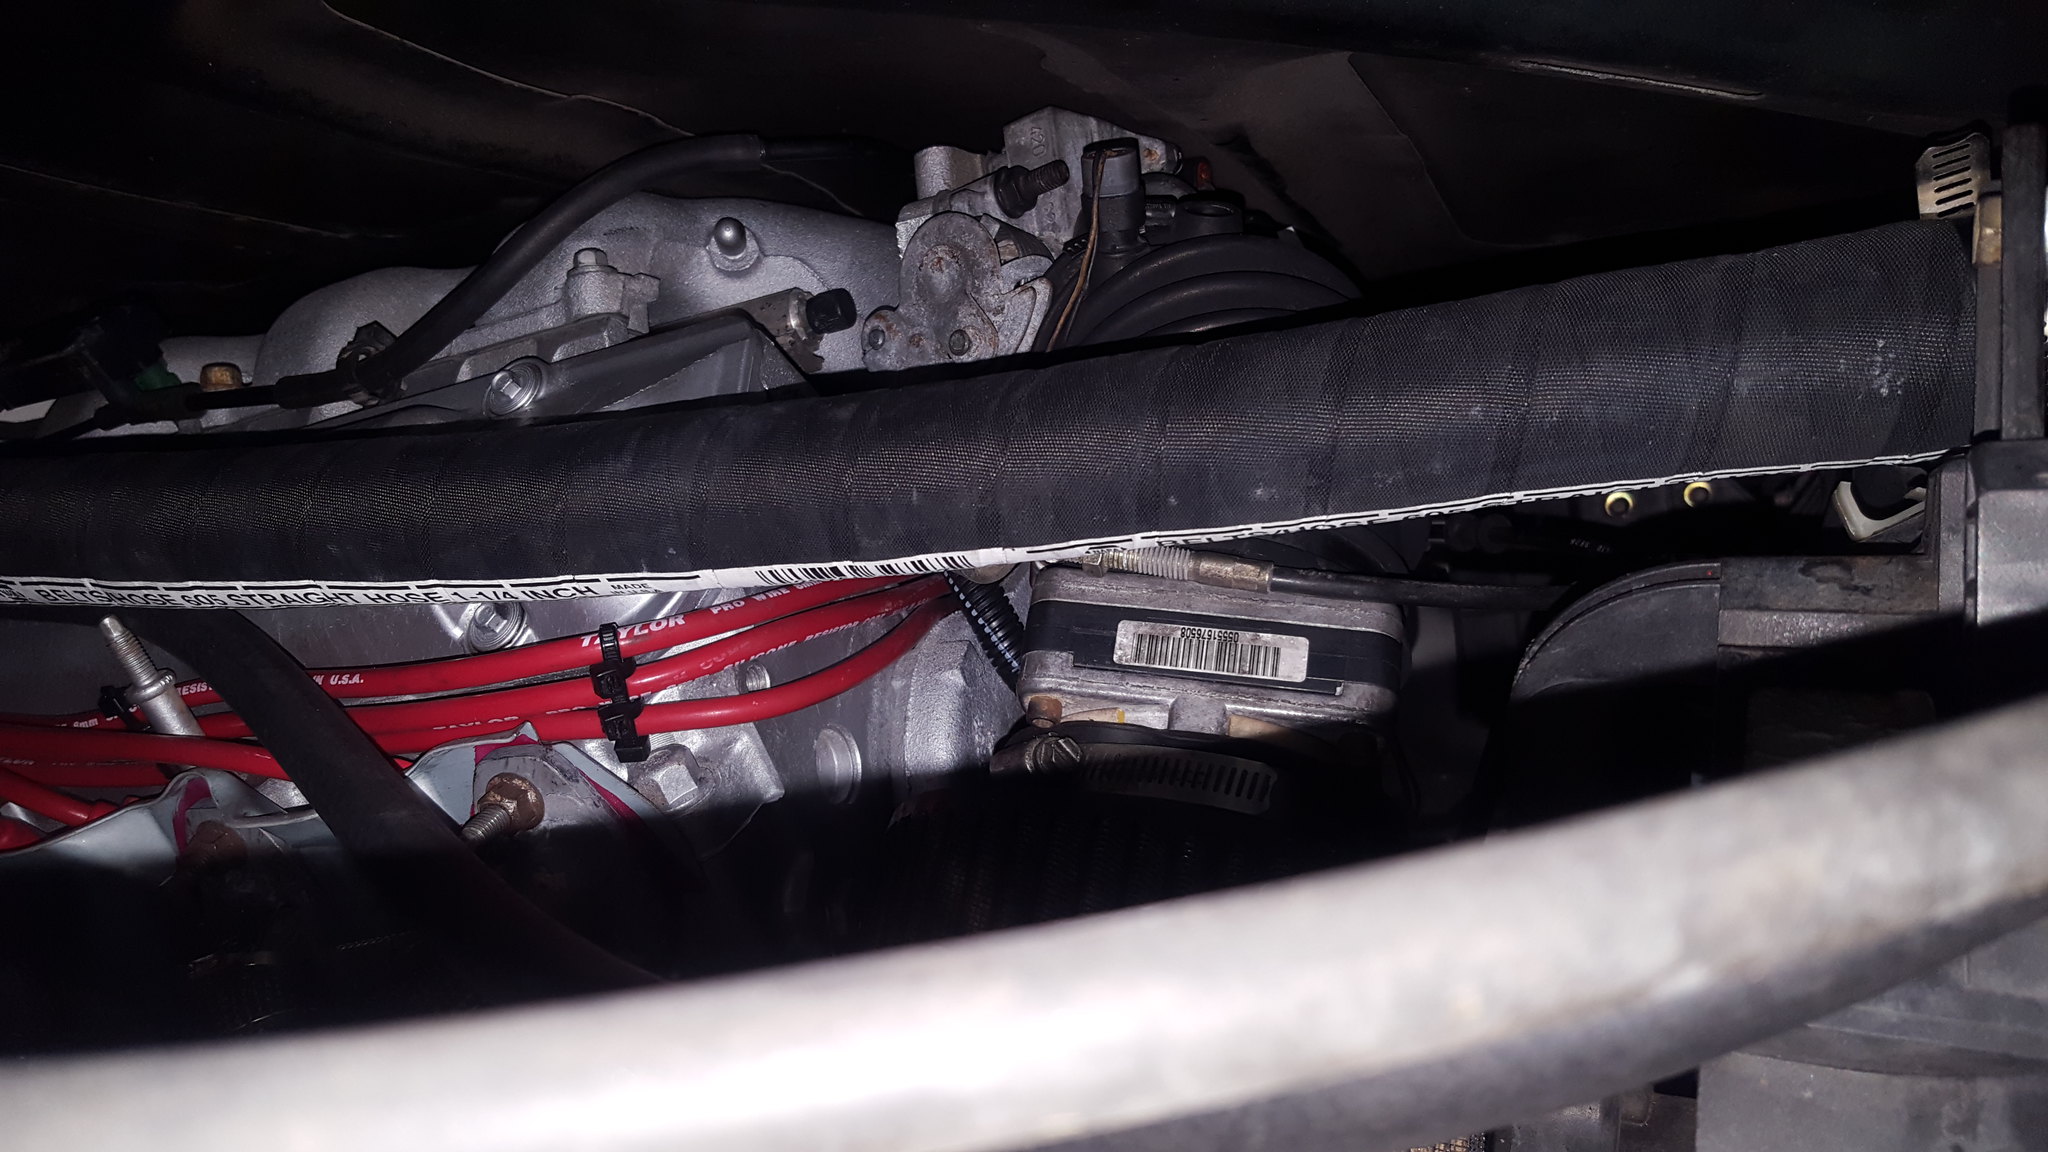
however, I wasn't feeling like the hood was going to fit without a giant hole being cut.
 20181120_193809 by Michael Crawford, on Flickr
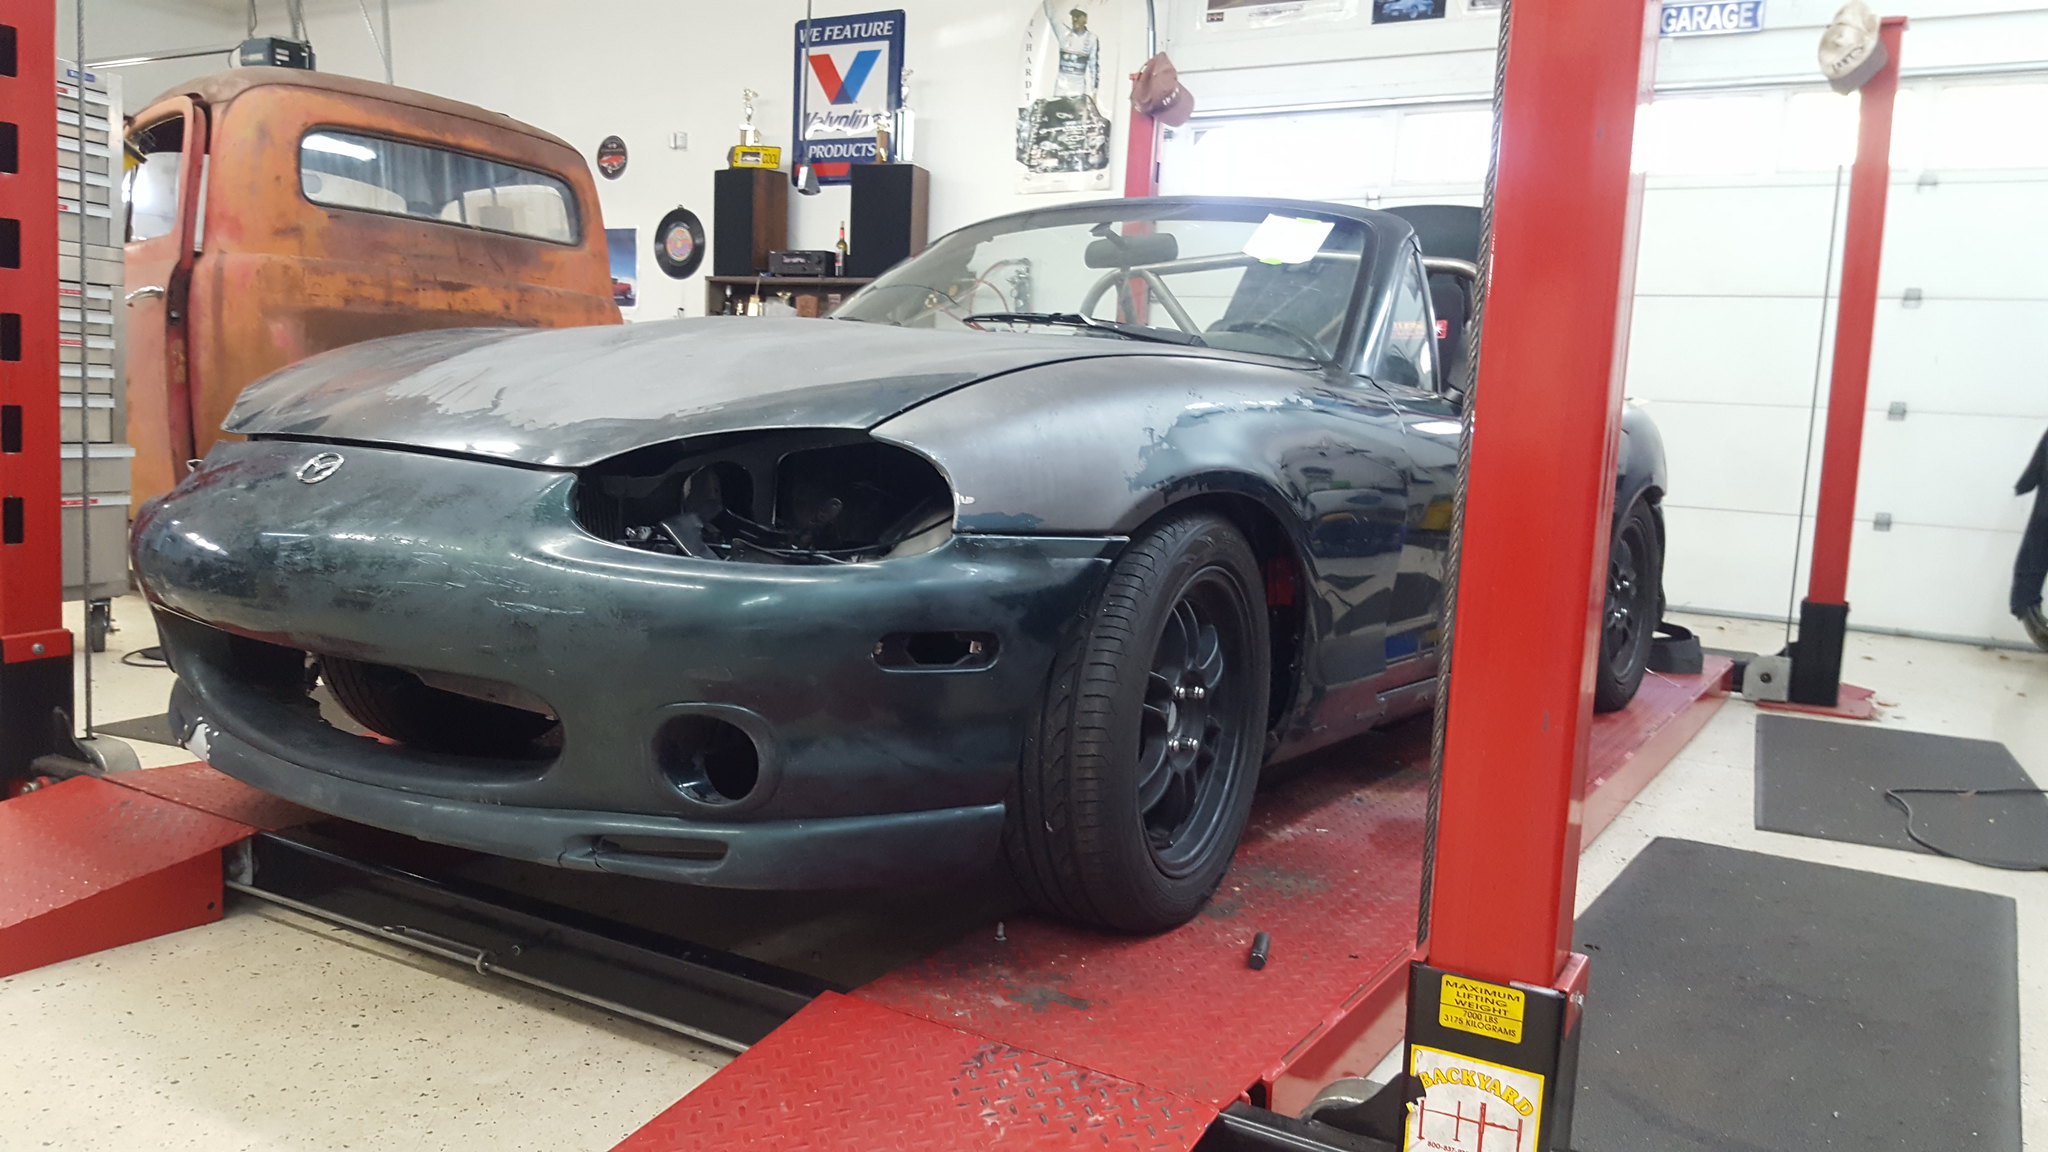
Wednesday I ran by the junkyard real quick, had an eye-doctors appointment, and then spent the day helping my wife around the house.
Thursday (thanksgiving), we had dinner at my folks place (where im building the car). I was specifically told I could NOT get dirty or stinky before dinner and family portraits. So I looked at the list, and decided to bolt the dash in (not picture worthy), secure under dash wiring (not picture worthy), and see how big a hole we would have to cut. Initially, it was looking REALLY BIG.
But then, I pulled the entire CAI (hood was hitting breather hose fitting and IAT) and then the throttle bracket (again, hood hitting it). Without ANY cutting, we get here:
 20181122_113126 by Michael Crawford, on Flickr
via horrible cell phone pictures and some guesstimation, we see that we only have to notch a 6 inch wide underhood brace to clear the intake manifold. Ill then need to build an underslung throttle cable bracket assembly, and a completely different CAI setup. But having an externally stock appearing hood was worth it!
 20181122_095559 by Michael Crawford, on Flickr
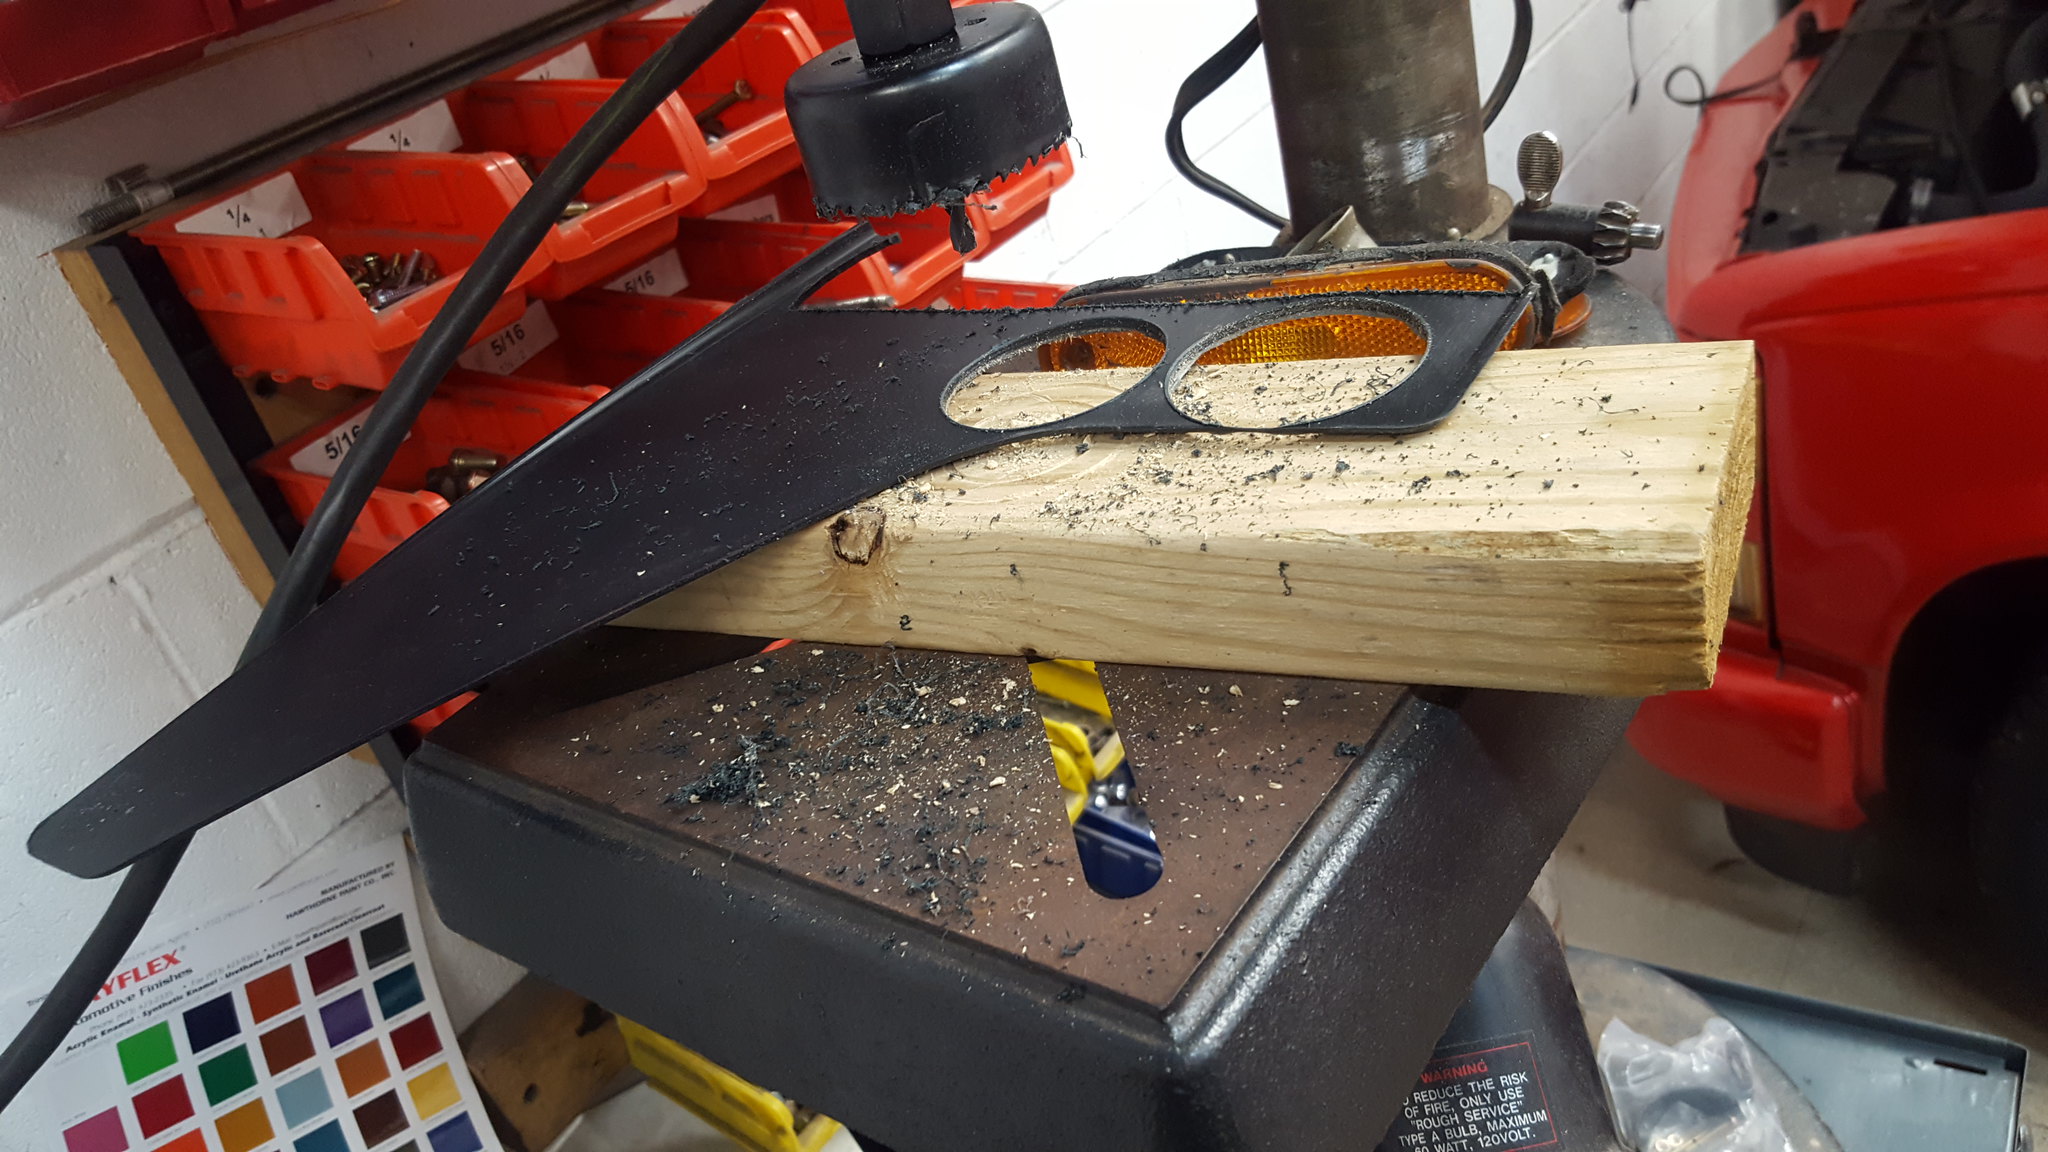
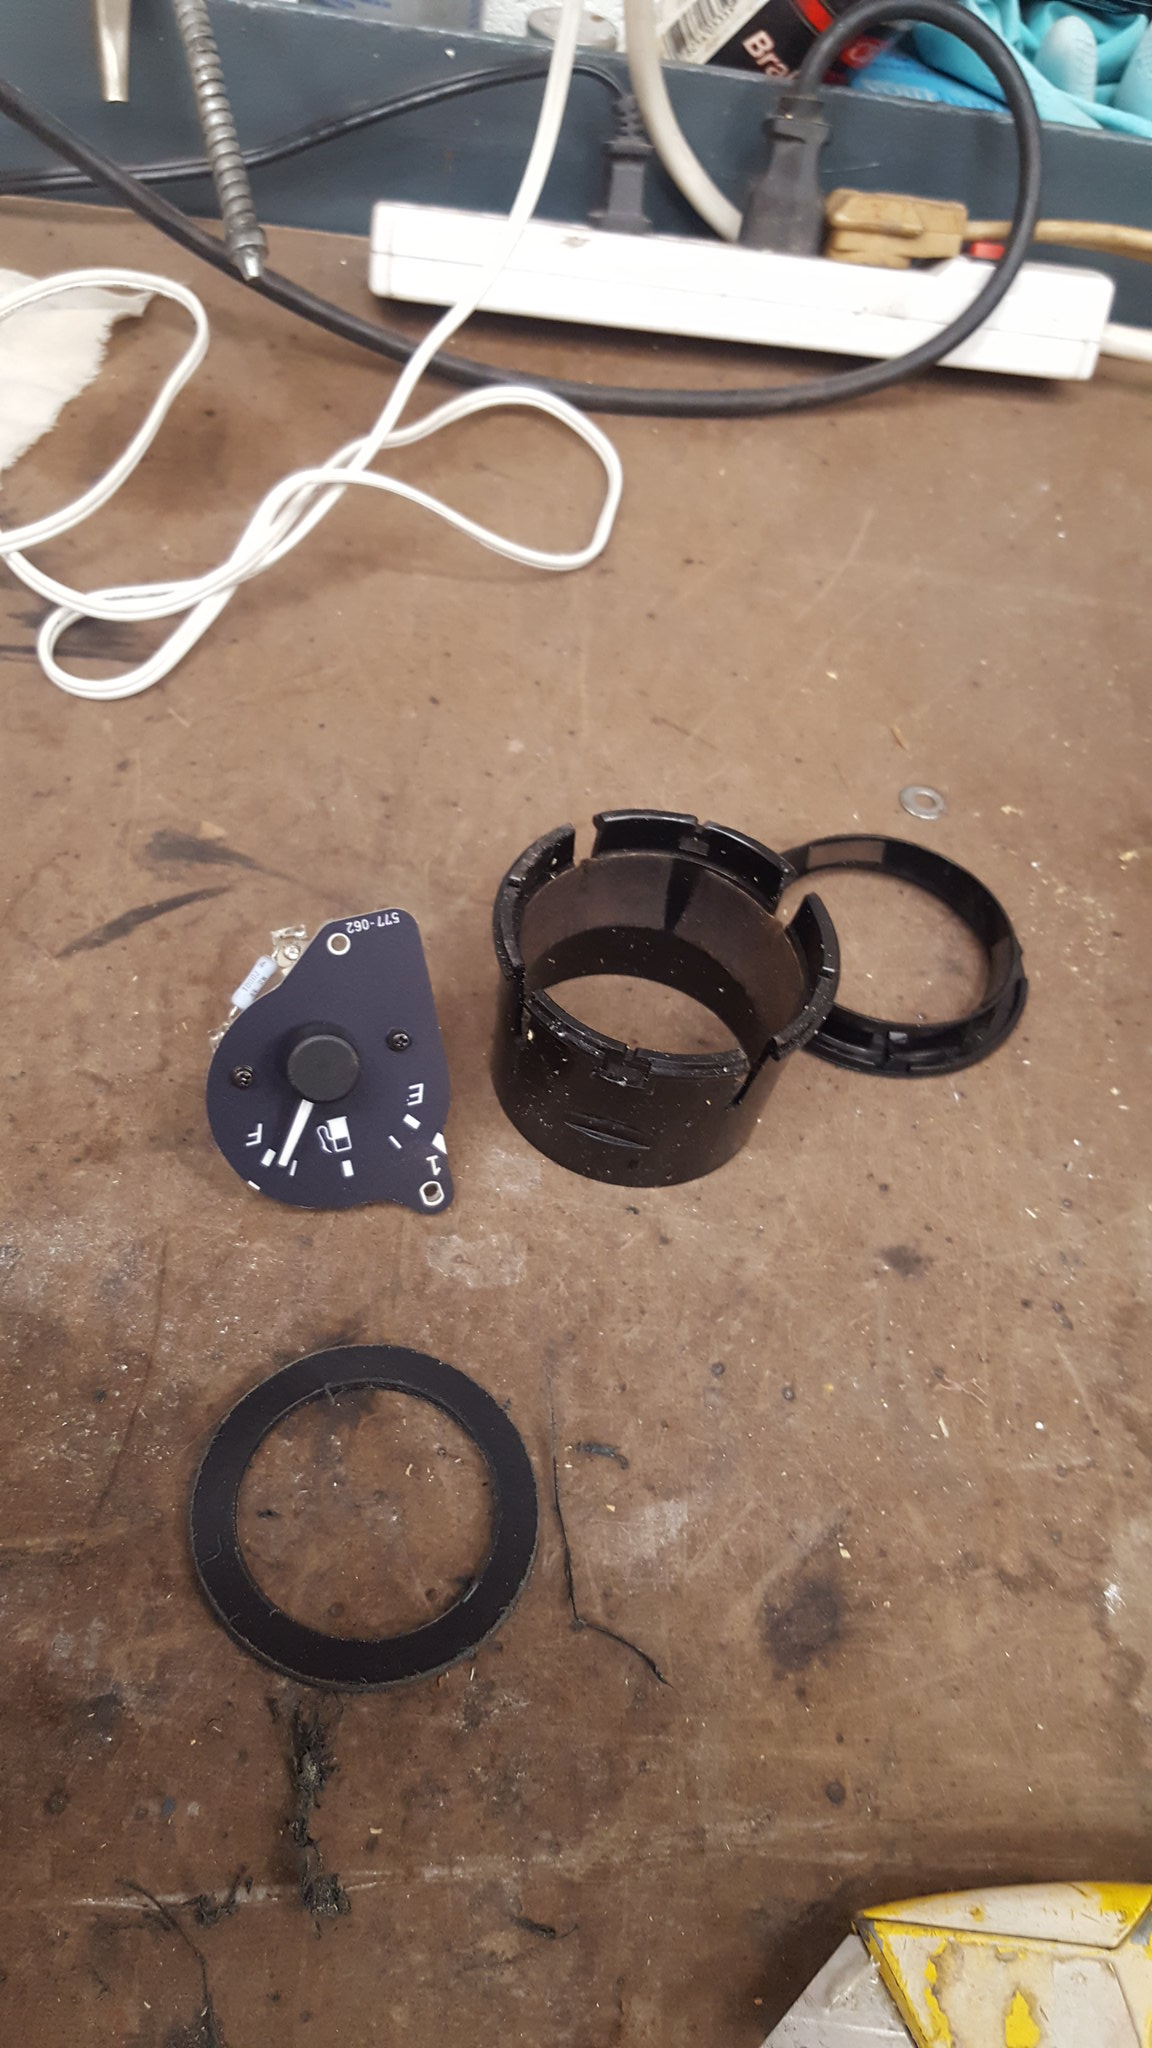
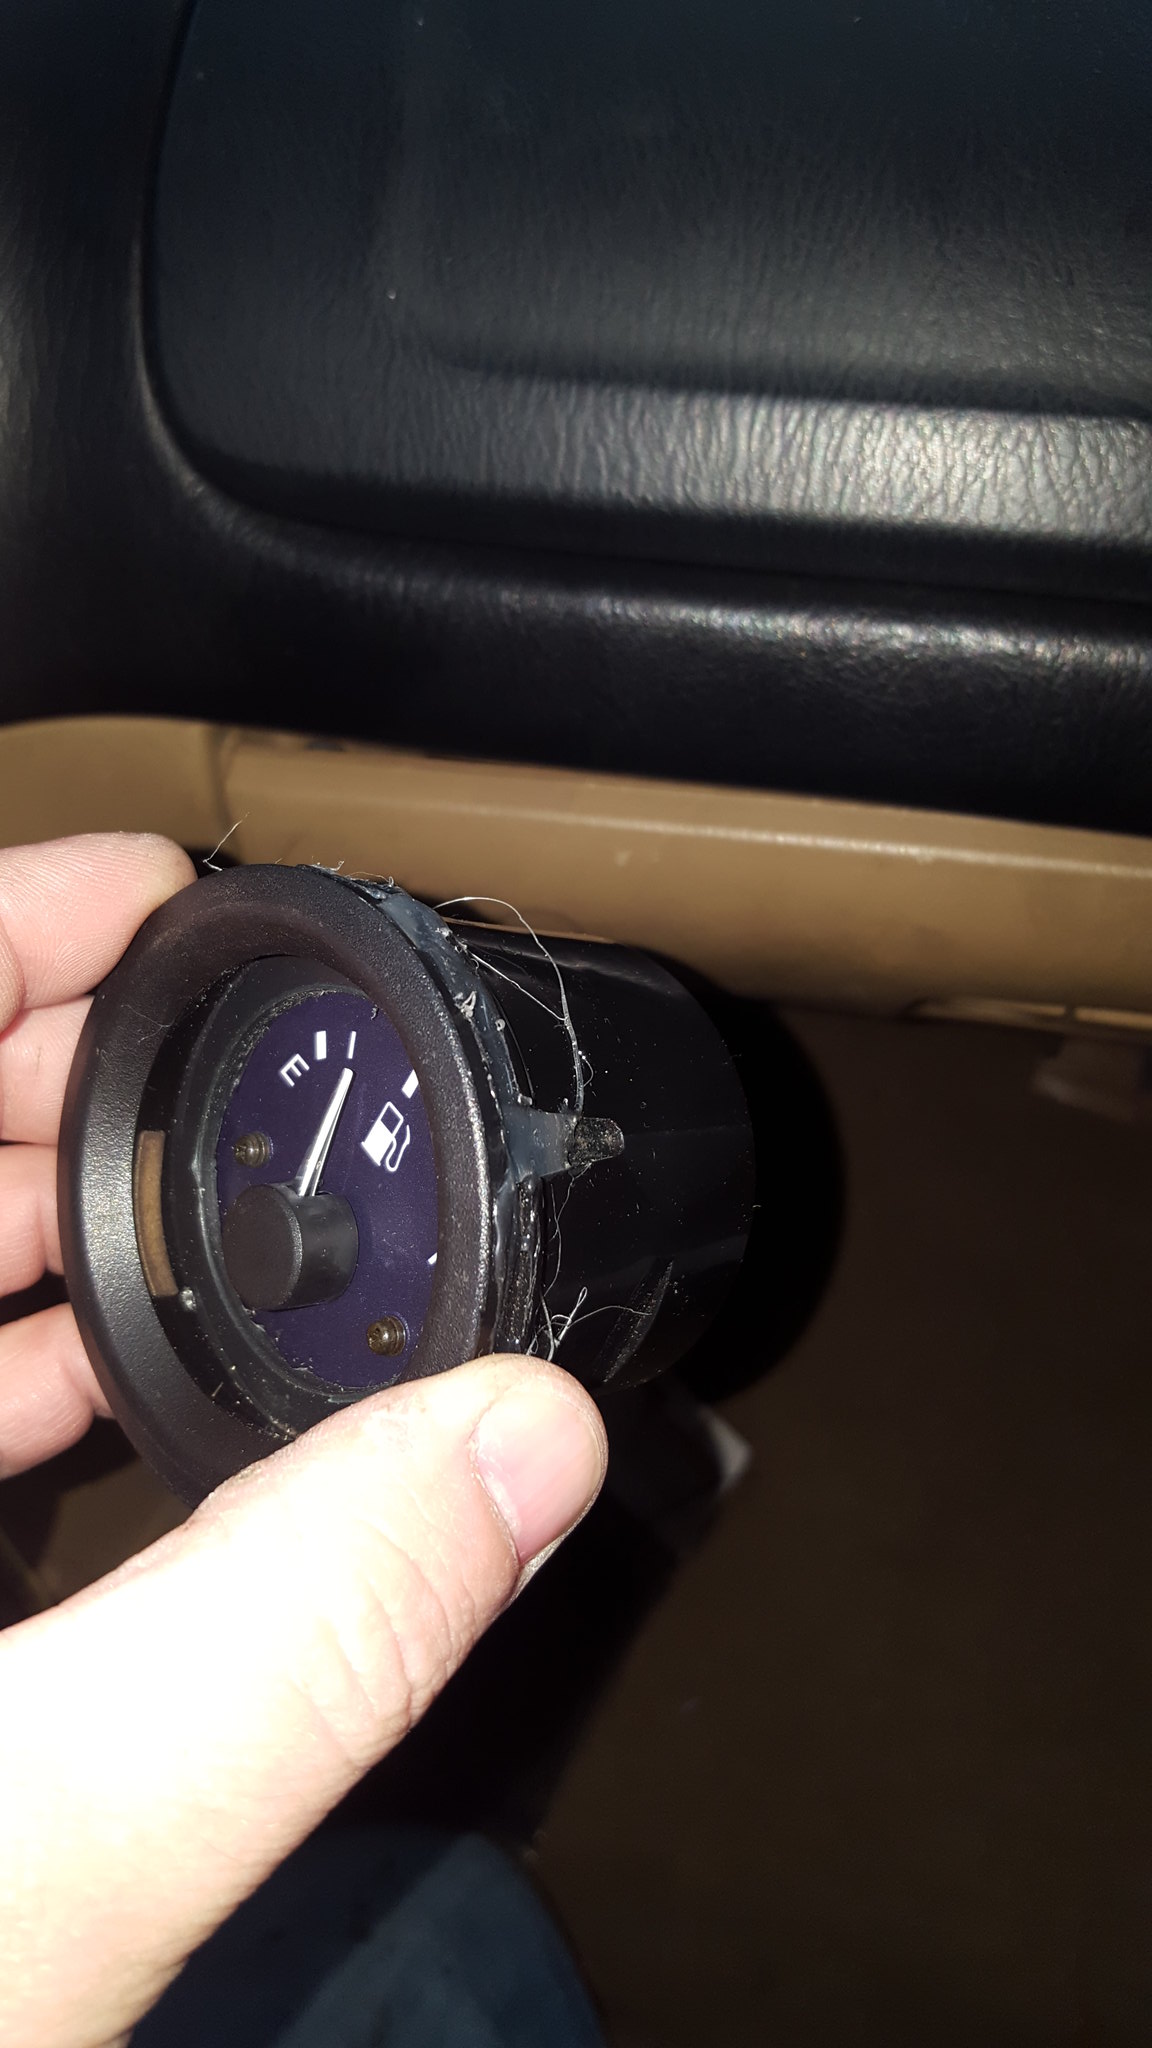
Thursday night after portraits, I finally made our fuel gauge. Used an old mudflap, some hole saws, my drill press, and a glue gun to turn the passengers side eyeball vent into a fuel gauge. I found that the gauge will read accurately when entirely divorced from the cluster, just like a GM gauge. That was a very nice thing to find out.
 20181122_175346 by Michael Crawford, on Flickr
 20181122_175711 by Michael Crawford, on Flickr
 20181123_092810 by Michael Crawford, on Flickr
 20181123_093202 by Michael Crawford, on Flickr
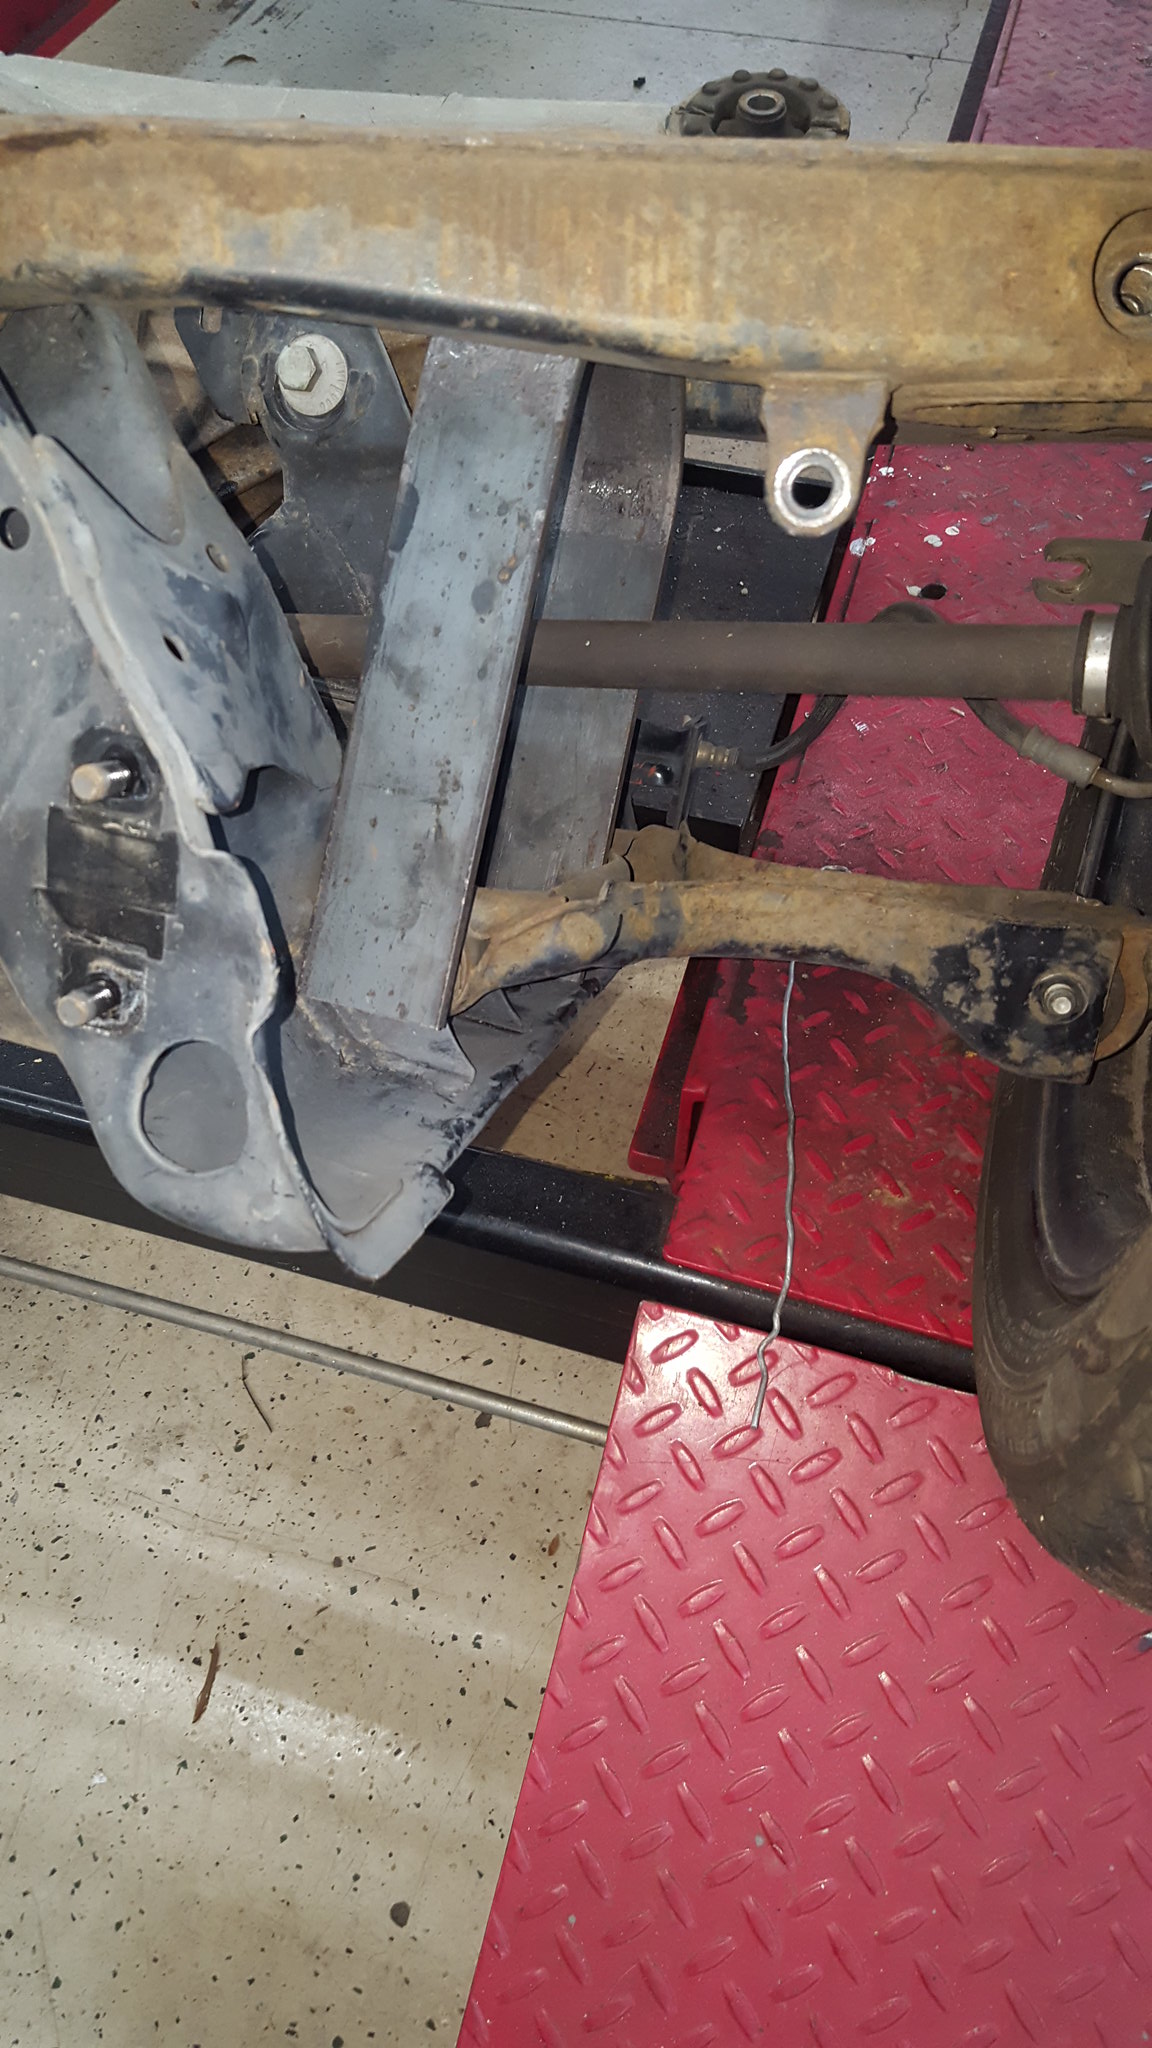
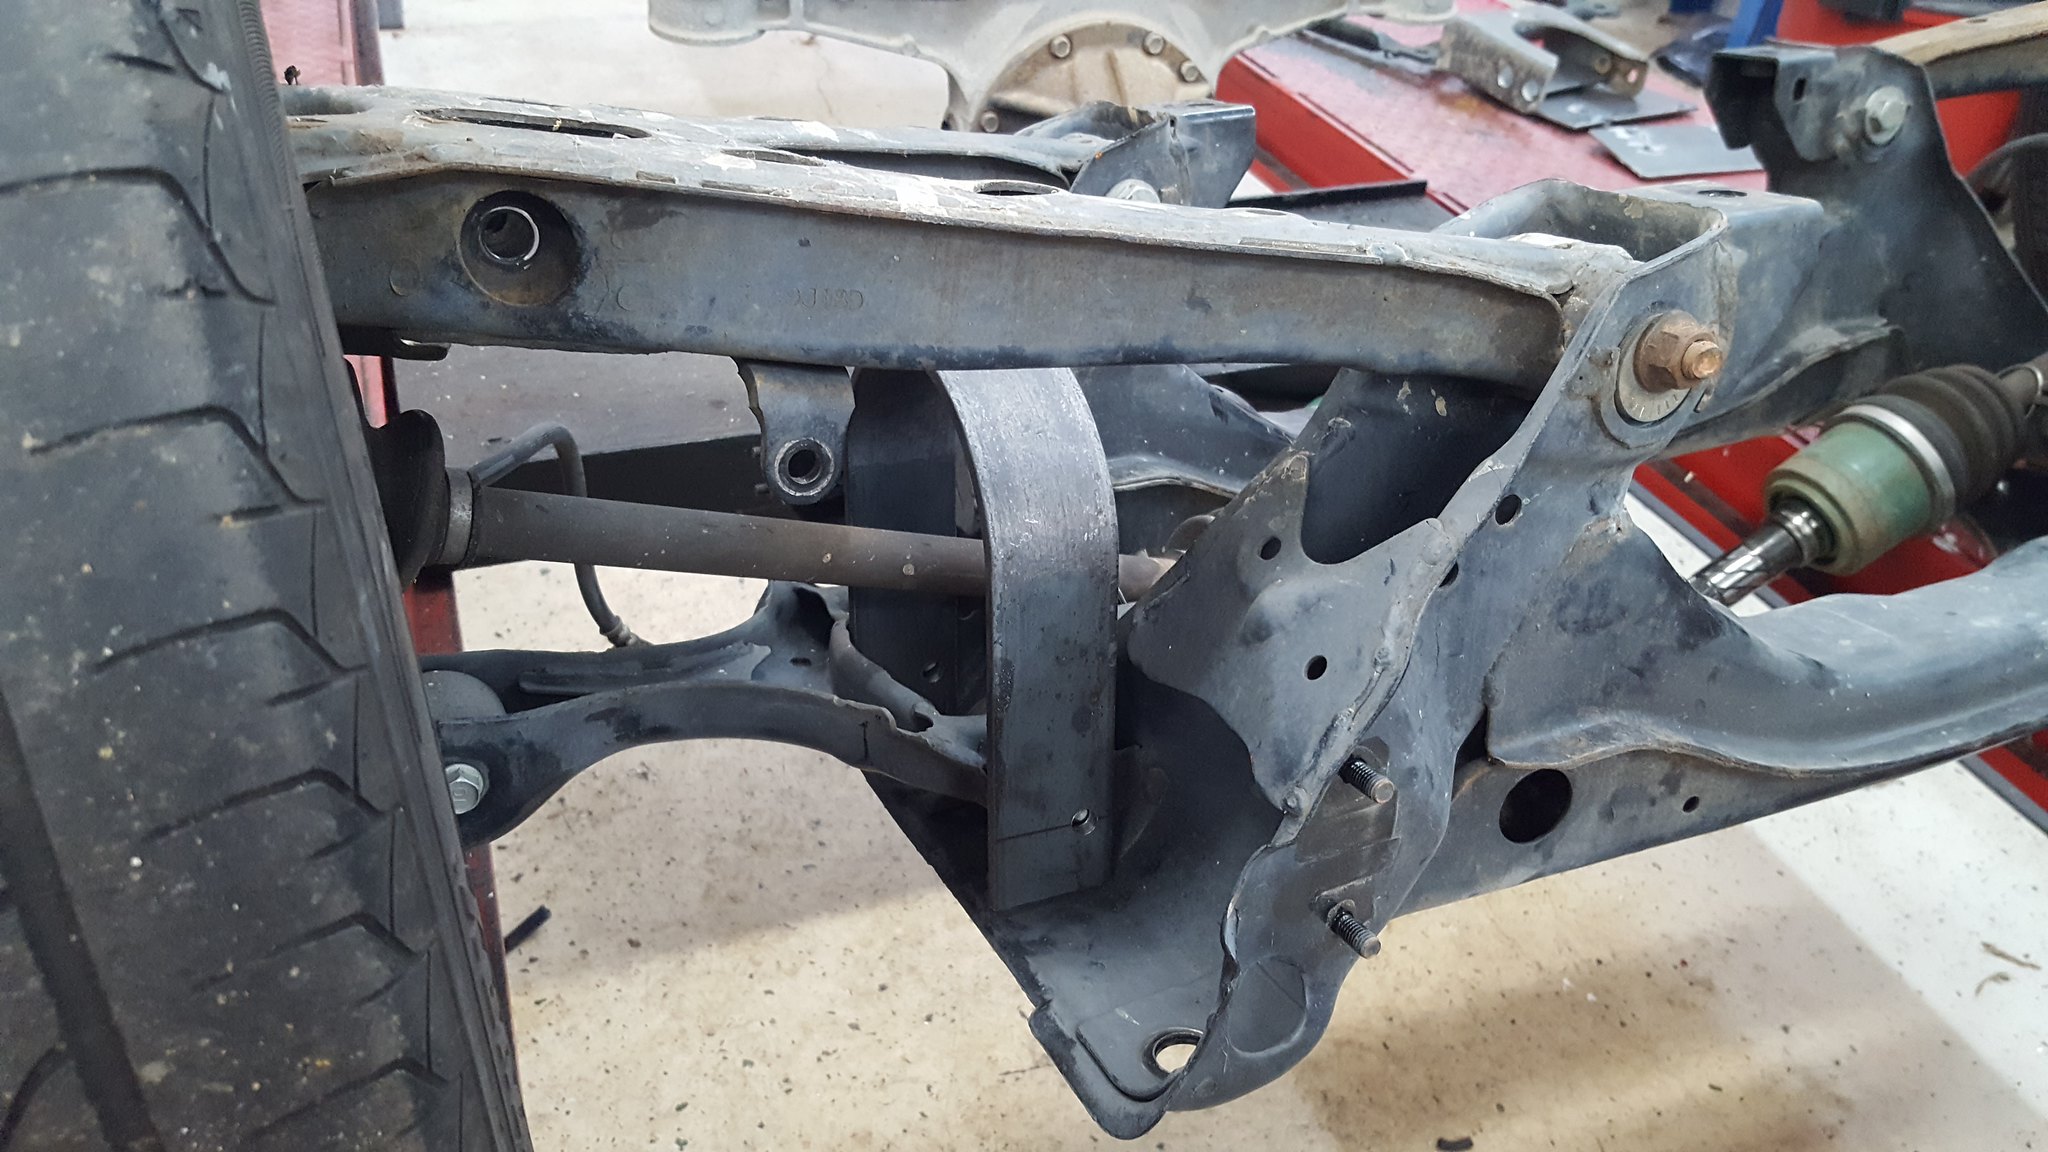
yesterday, I decided to finish tackling the PPF delete, as well as get the car ready to finish cleaning and painting parts, as well as replace the bent driver side rear suspension arms.
To attach the upper joint, I had previously made this:
 20181116_201858 by Michael Crawford, on Flickr
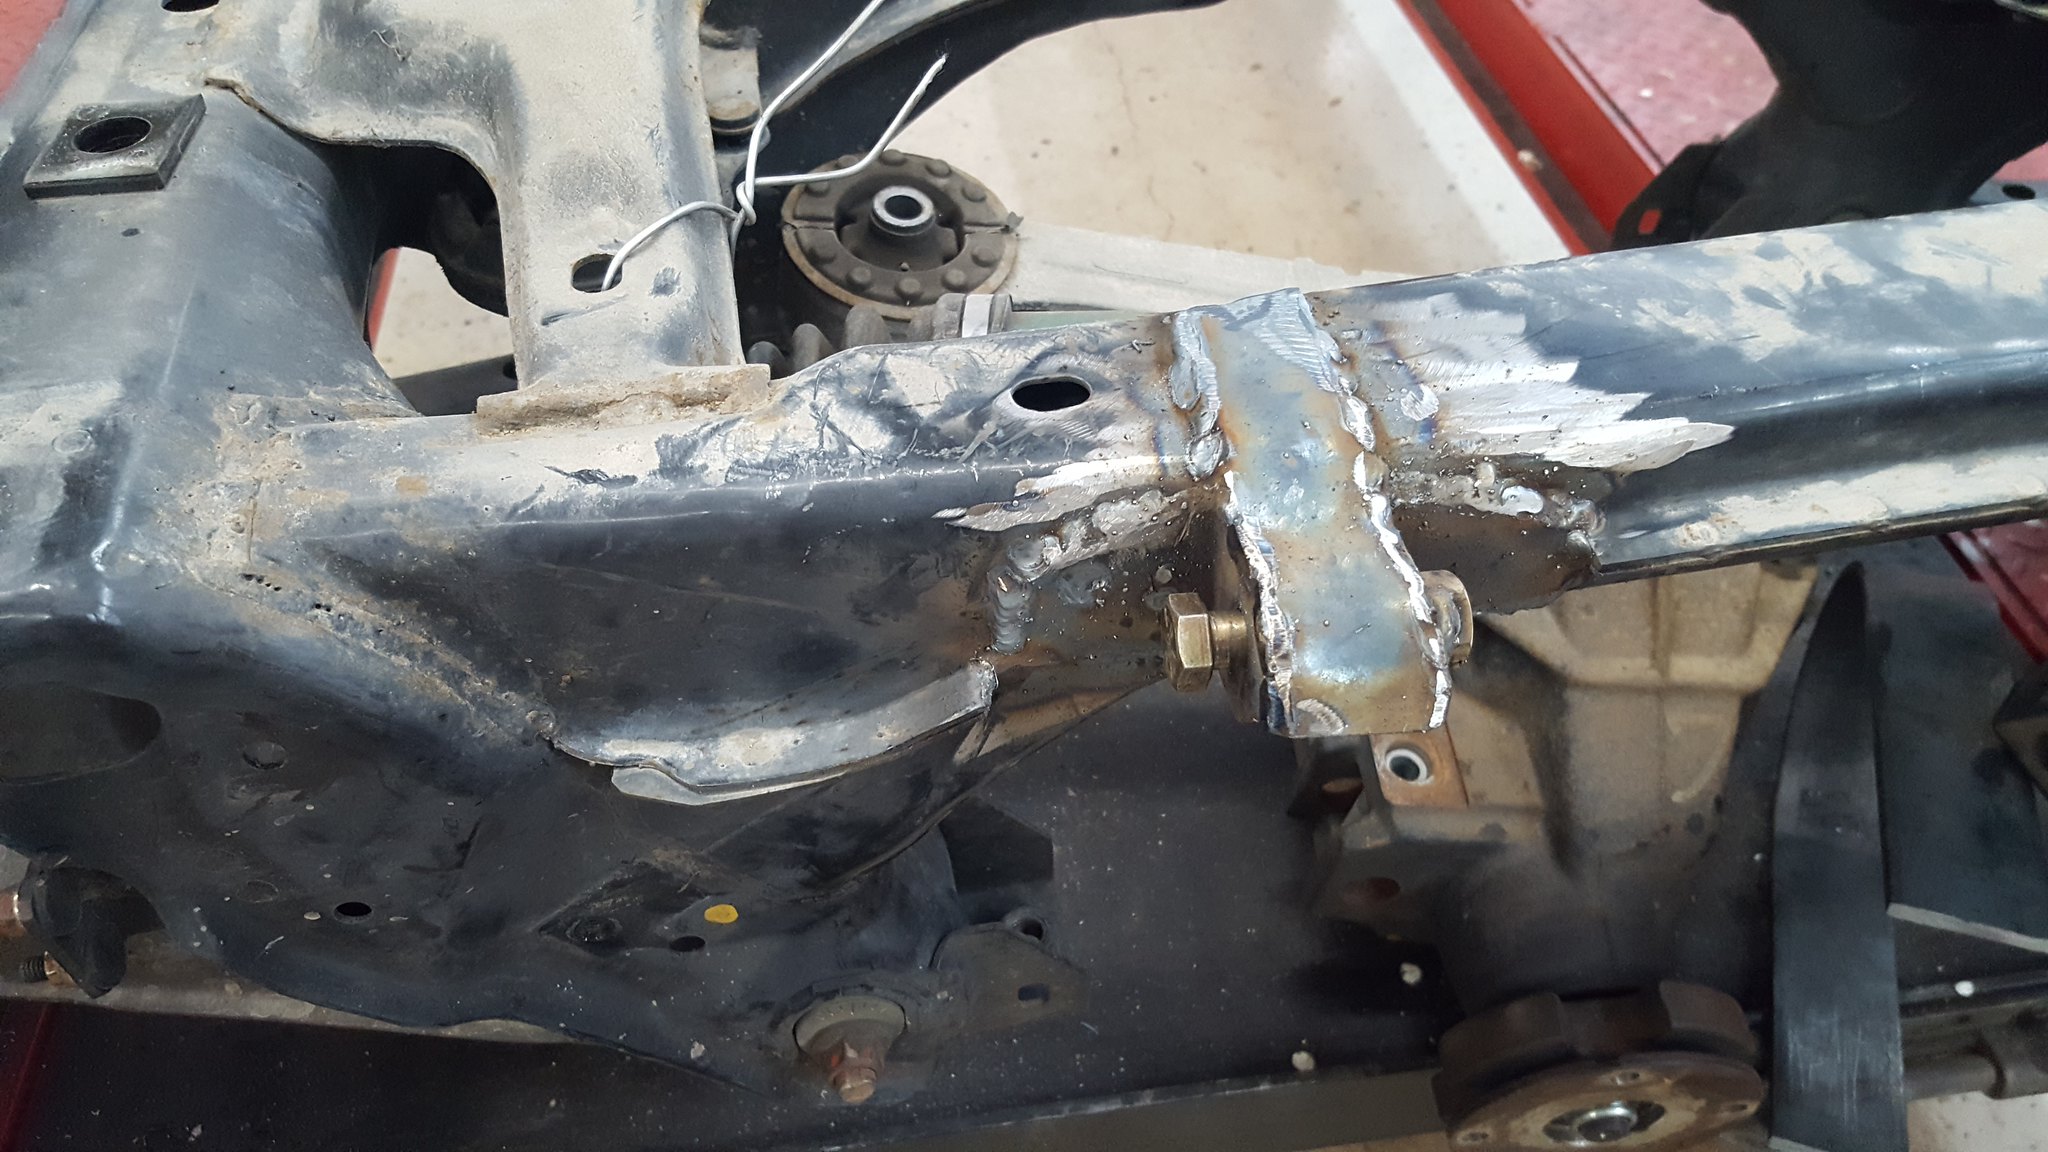
to actually attach these brackets to the subframe, I pulled the subframe out, cut the spot welded flange down, welded the L brackets, then added a reinforcement/boxing strap up the subframe. Should be stronger than the metal its attached to, which is all I can ask for.
 20181123_134620 by Michael Crawford, on Flickr
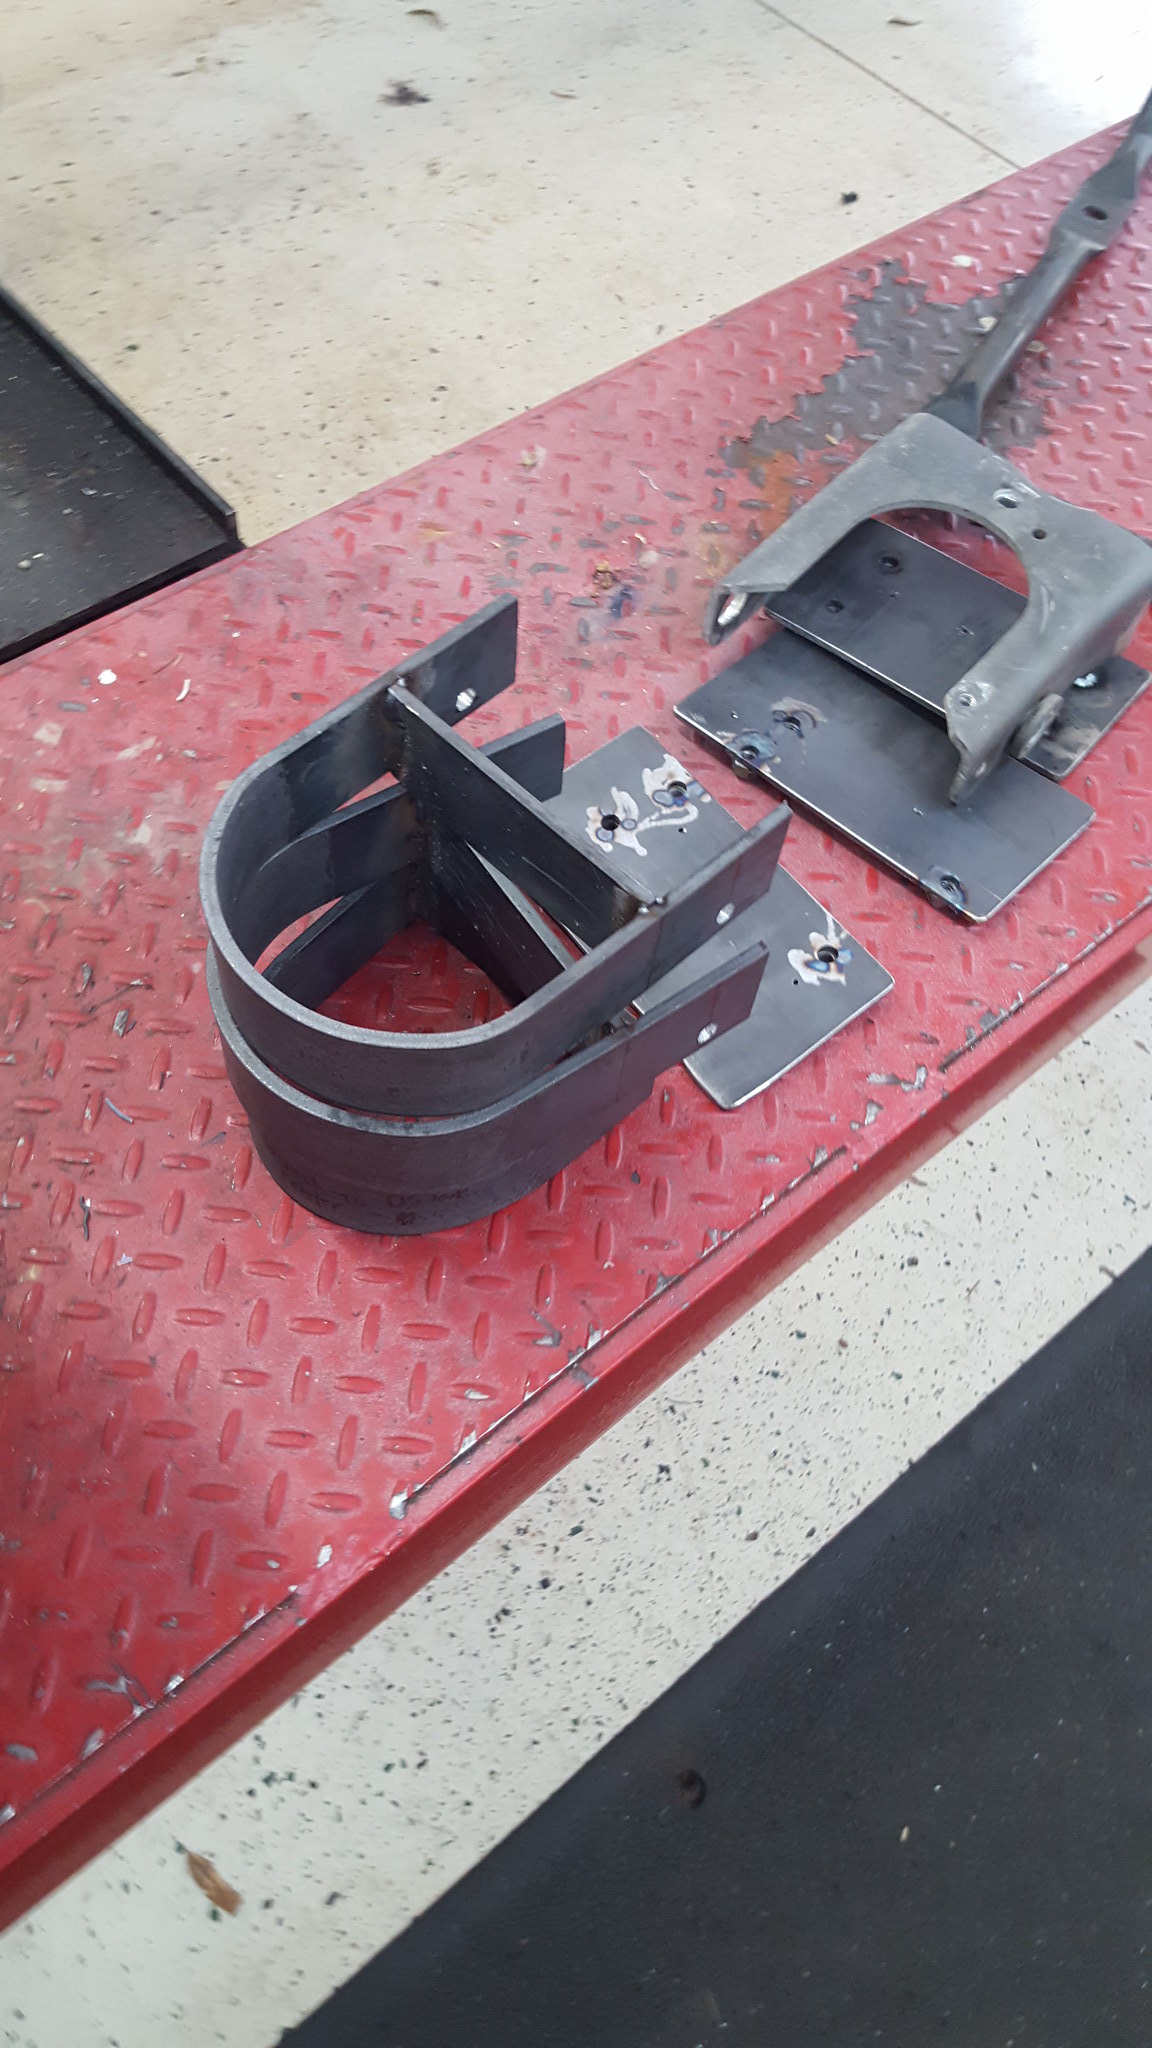
while I had the subframe out, I figured it was a great time to make the CV axle loops. After all, I had the fab tools out already, right?
My plan was to use the UCA mounting bolts to hold it in, thereby supporting the midpoint of the shaft in the event of failure. So, measure, mark, drill, weld, cut, repeat...
 20181123_134518 by Michael Crawford, on Flickr
 20181123_143618 by Michael Crawford, on Flickr
 20181123_151618 by Michael Crawford, on Flickr
there was a little more trimming and profile work done after these pictures, but you get the idea. The D shaped one will bolt through the passengers side of the trans tunnel just above the merge for the exhaust. You know, in all the spare room I have here.
 20181123_134653 by Michael Crawford, on Flickr
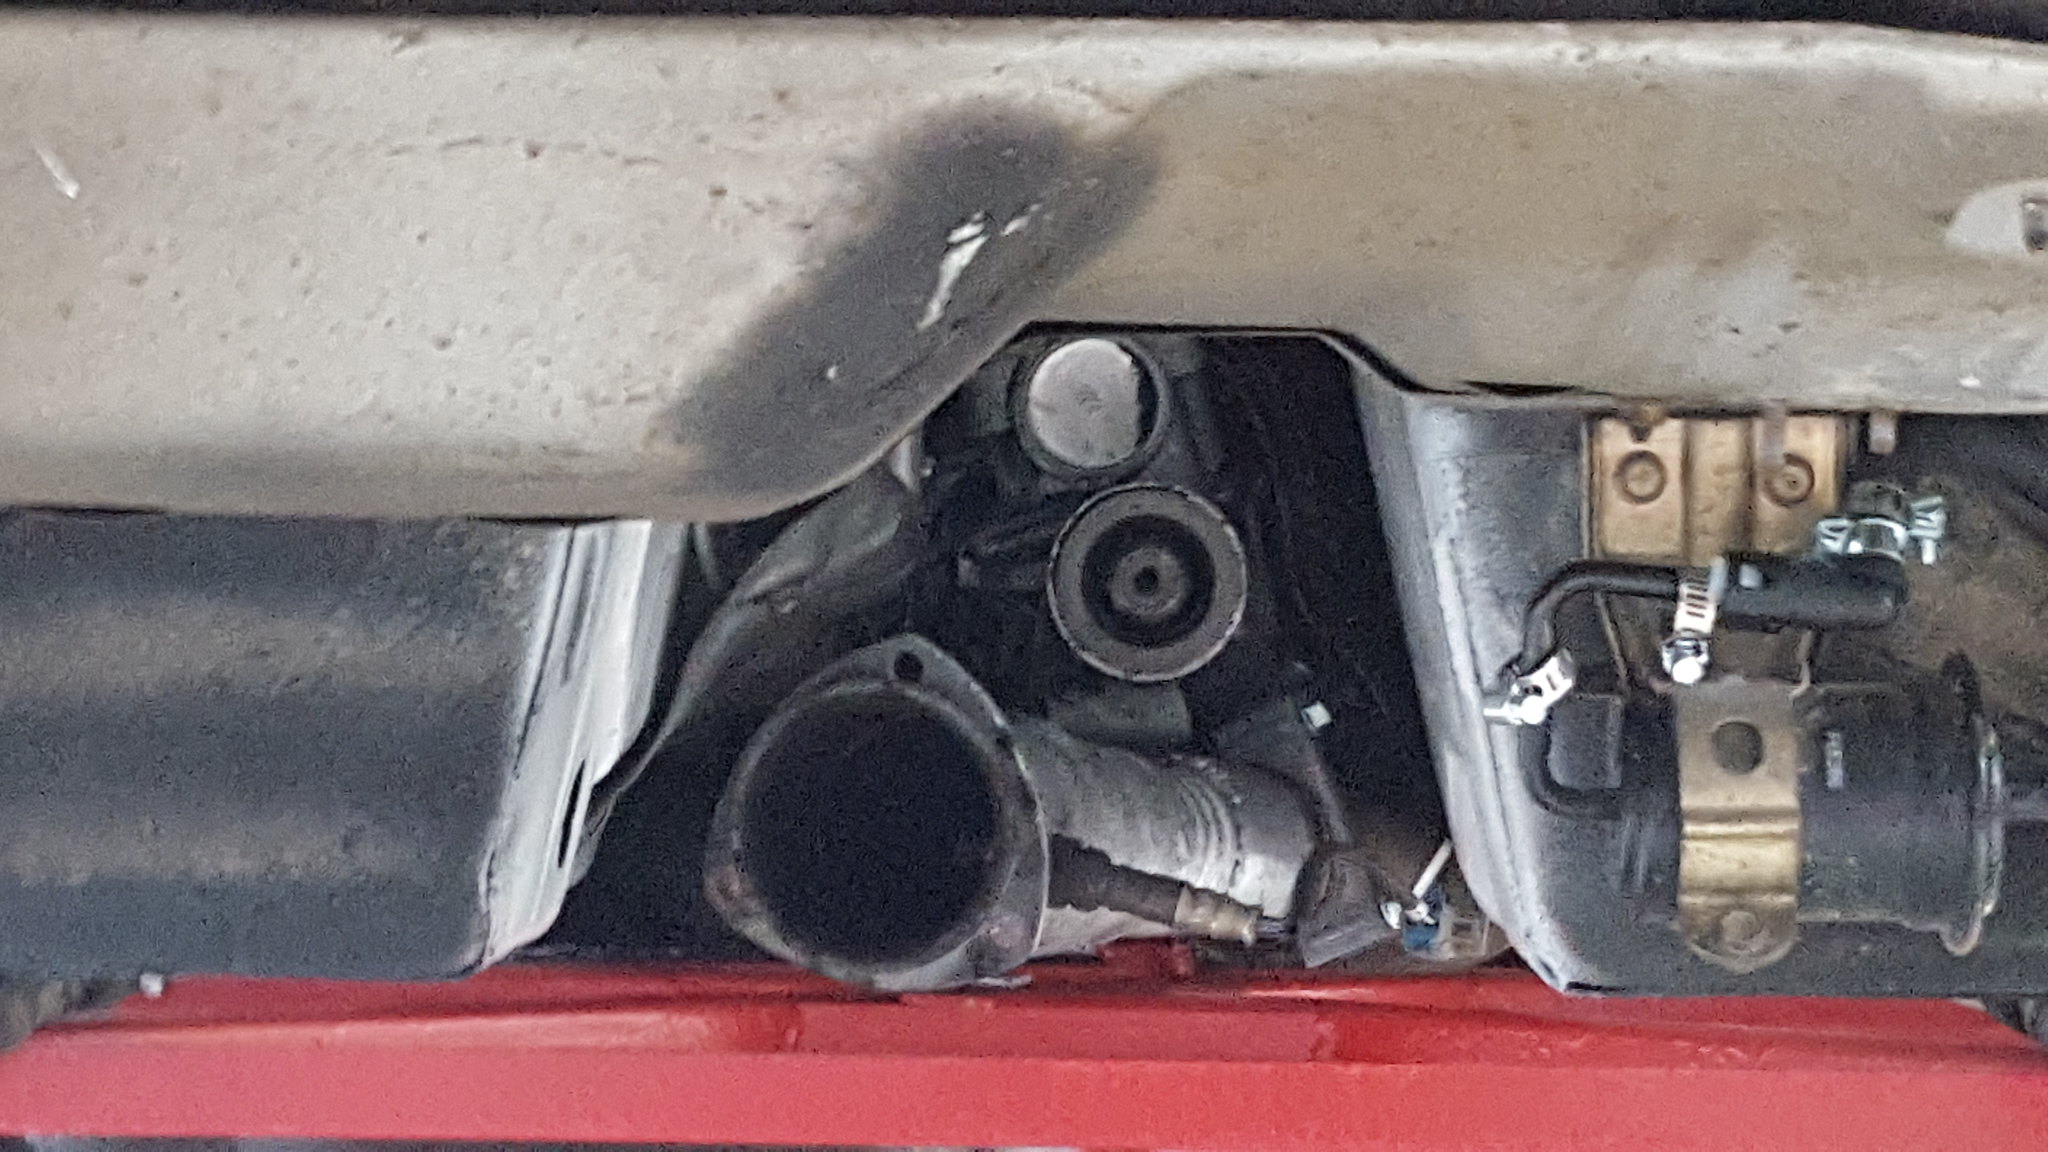
I then switched gears for the last part of the day to cleaning and painting the underside of the car.
I have to say that since I quit smoking, I have become much more susceptible to fumes. Spray paint never used to bother me. The following pictures gave me a hell of a headache. But the AMC proved to me just how nice working on a car with white engine bay and undercarriage can be. So I HAD to do it.
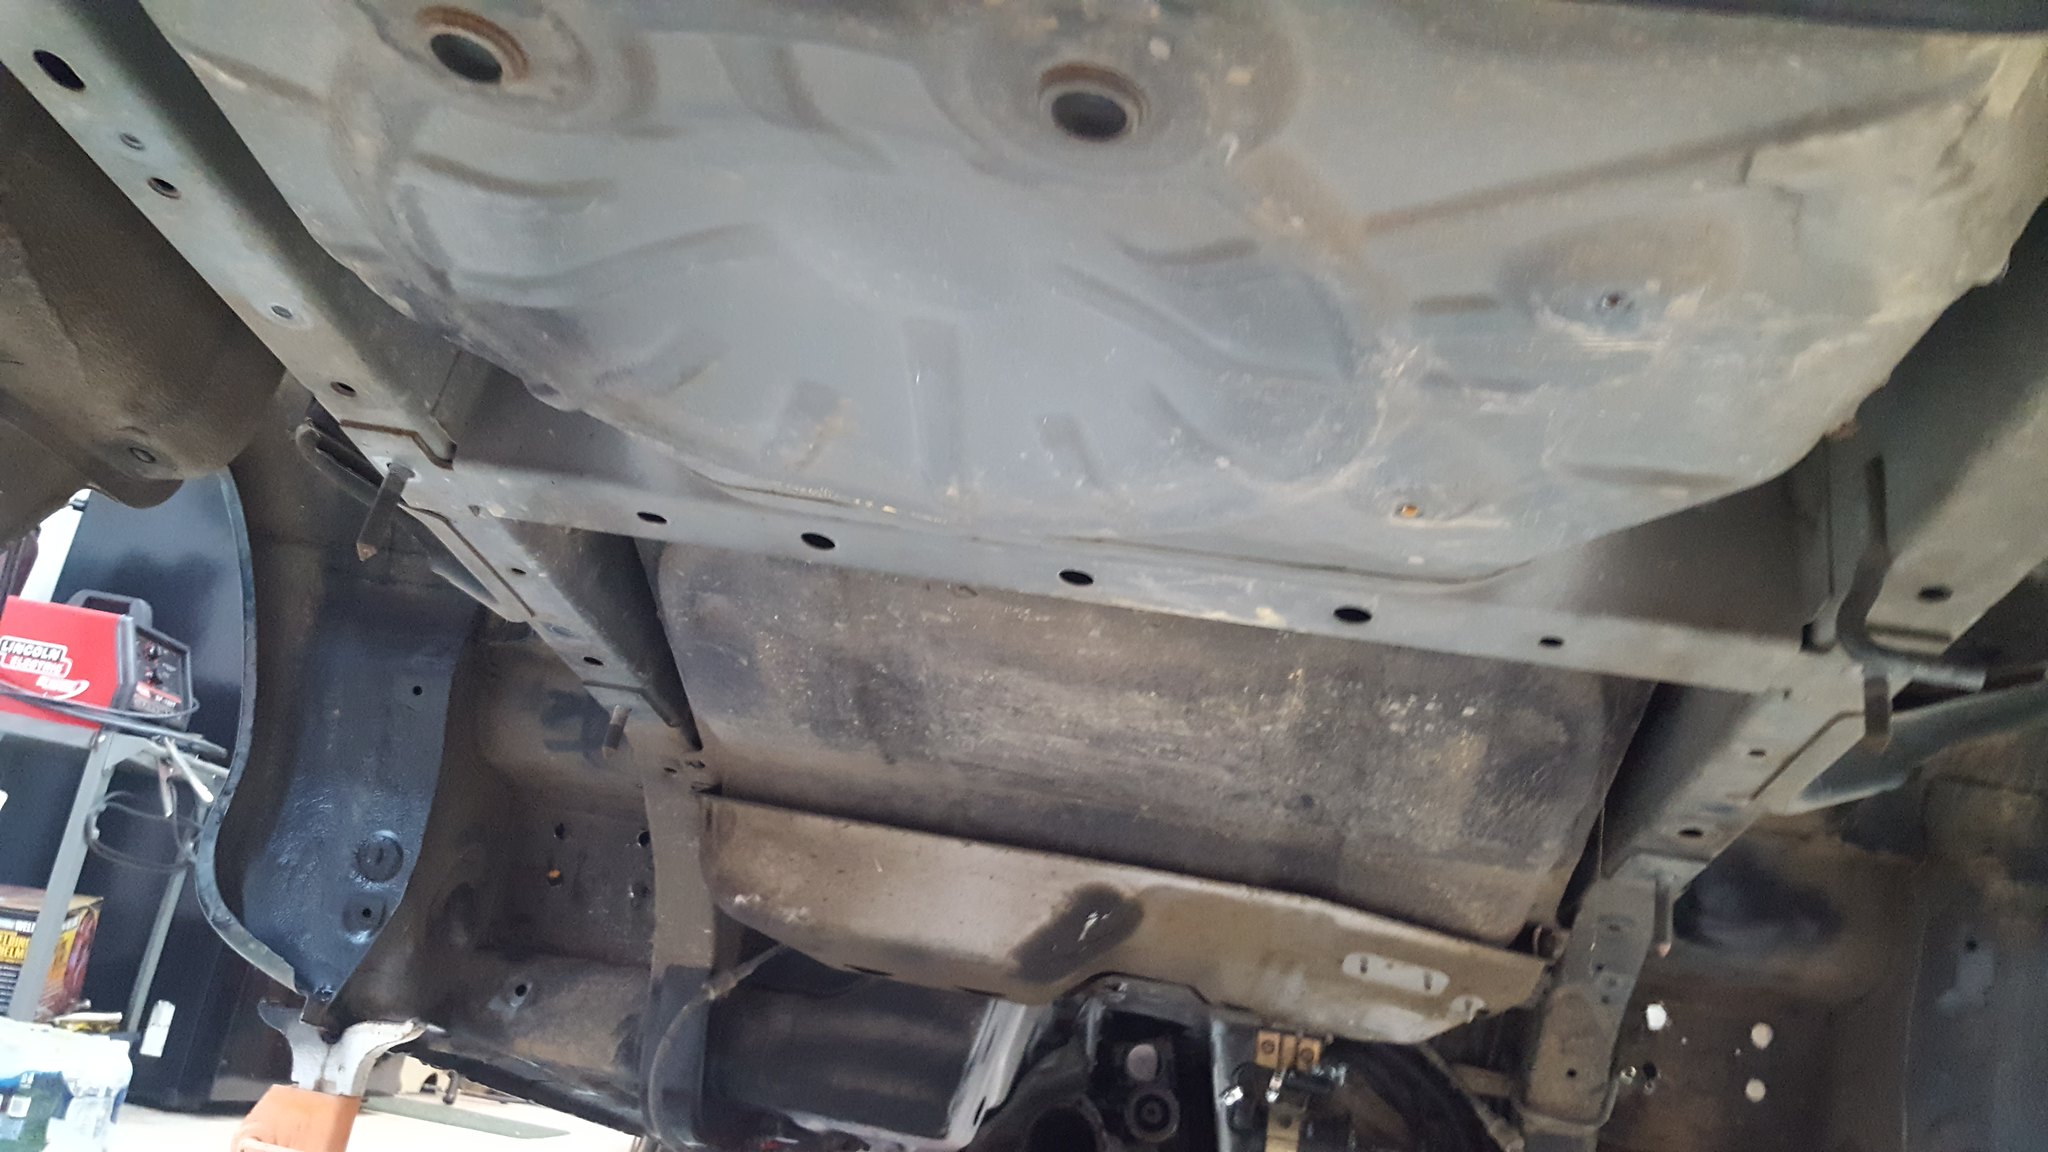 20181123_134645 by Michael Crawford, on Flickr
 20181124_130927 by Michael Crawford, on Flickr
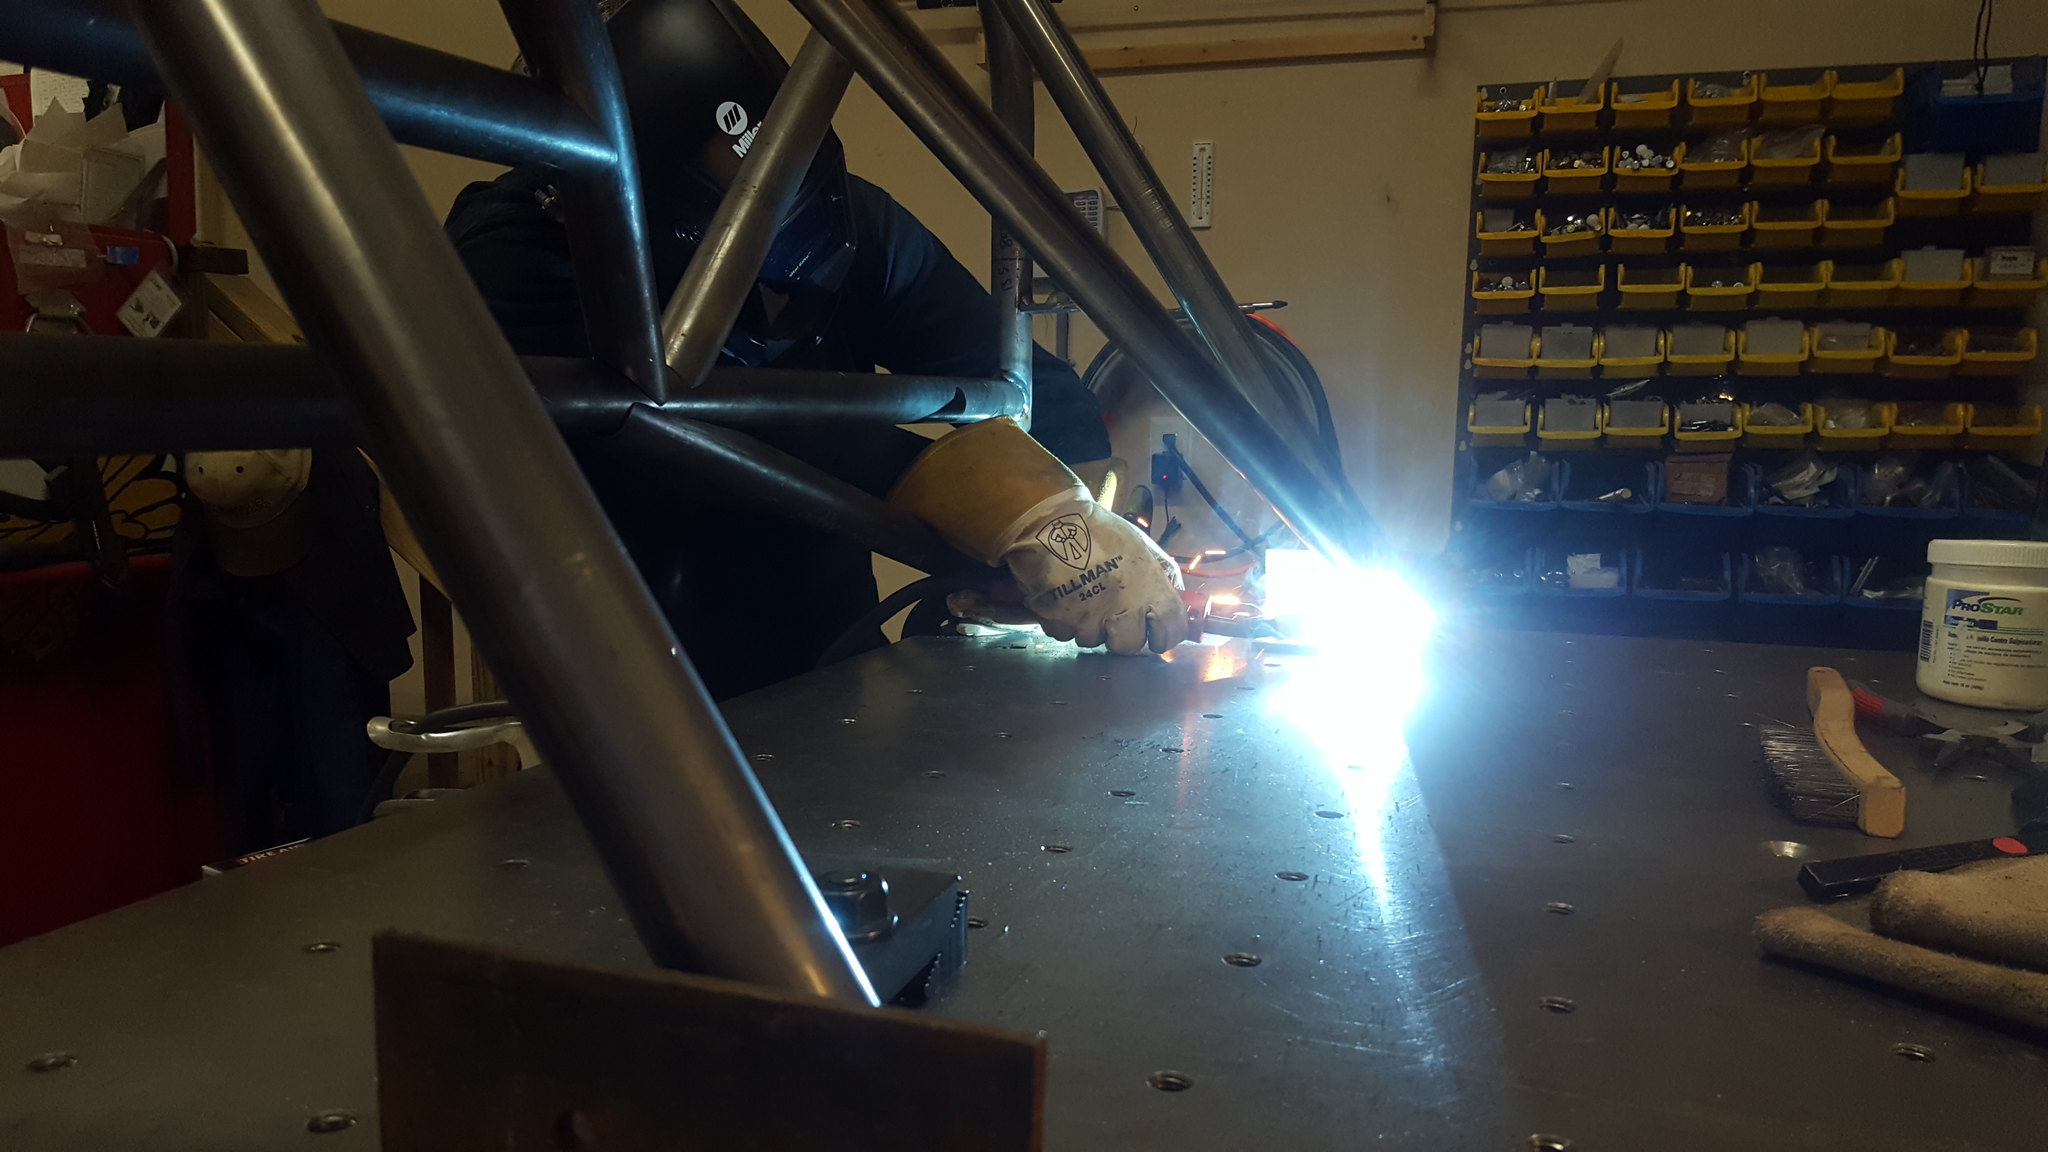
Today, I finished cleaning all the suspension parts and loops and cage plates and such for painting. No pictures. I also spent the morning over at Steve's place, where he used his welding talent, 220 welder, and surface plate to finish weld my roll bar. Now I need to clean it, and paint it. Im debating between satin black, or color matched tan to match the interior. Both have their advantages and disadvantages. But cosmetically, with no top at all, dark green paint and tan interior, I don't know which would look better. I also didn't take a picture of the finished welded product, and for that I apologize. But heres one of Steve welding!
 20181124_102538 by Michael Crawford, on Flickr
tomorrow is thanksgiving with my in-laws (fried turkey and homemade collards. I ain't missing that!) so I don't know if I will be able to swing by the shop to lay some paint down or not. Hopefully I can, but no promises. Im really pushing to have test drive by Christmas. If I can do that, ill be really happy. And were awfully close!


 superclean and a concrete brush, followed by superclean and a paper towel.


