


In reply to wvumtnbkr :
He thinks he can assuming hp tuners supports it.
However, we haven't actually tried yet. But give him a call!

In reply to wvumtnbkr :
He thinks he can assuming hp tuners supports it.
However, we haven't actually tried yet. But give him a call!
Challenge budget so far:
previous challenge budget: 1950.13
recoup total: 820
new money:
1 sheet .030 aluminum: .50
5 point harnesses (challenge budget exempt, but $54 on amazon)
Recoup: 820
new total: 1950.53
the last ten percent of work takes the other 90 percent of the time.
So today doesn't look like 8 hours worth of work and thinking....
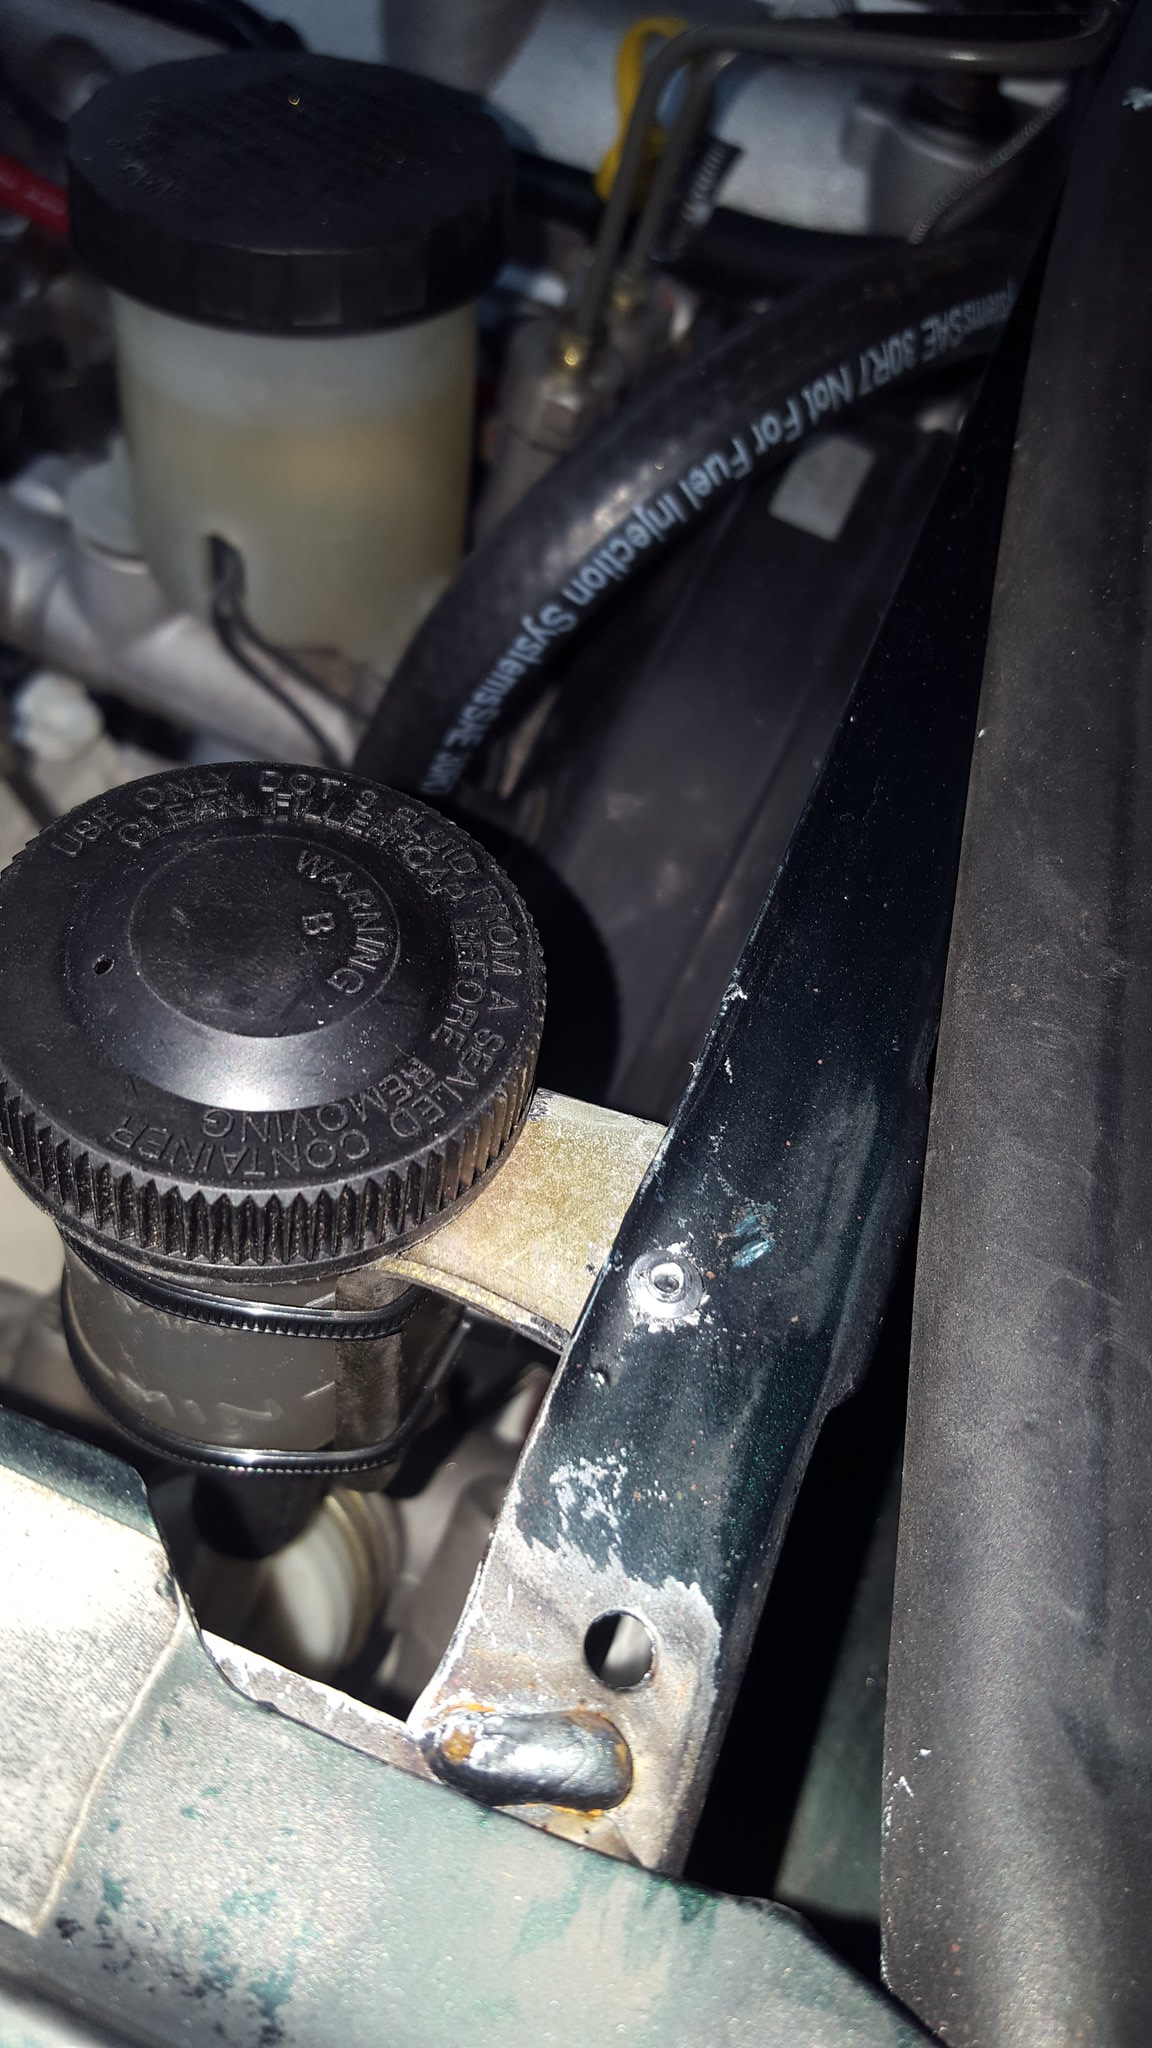
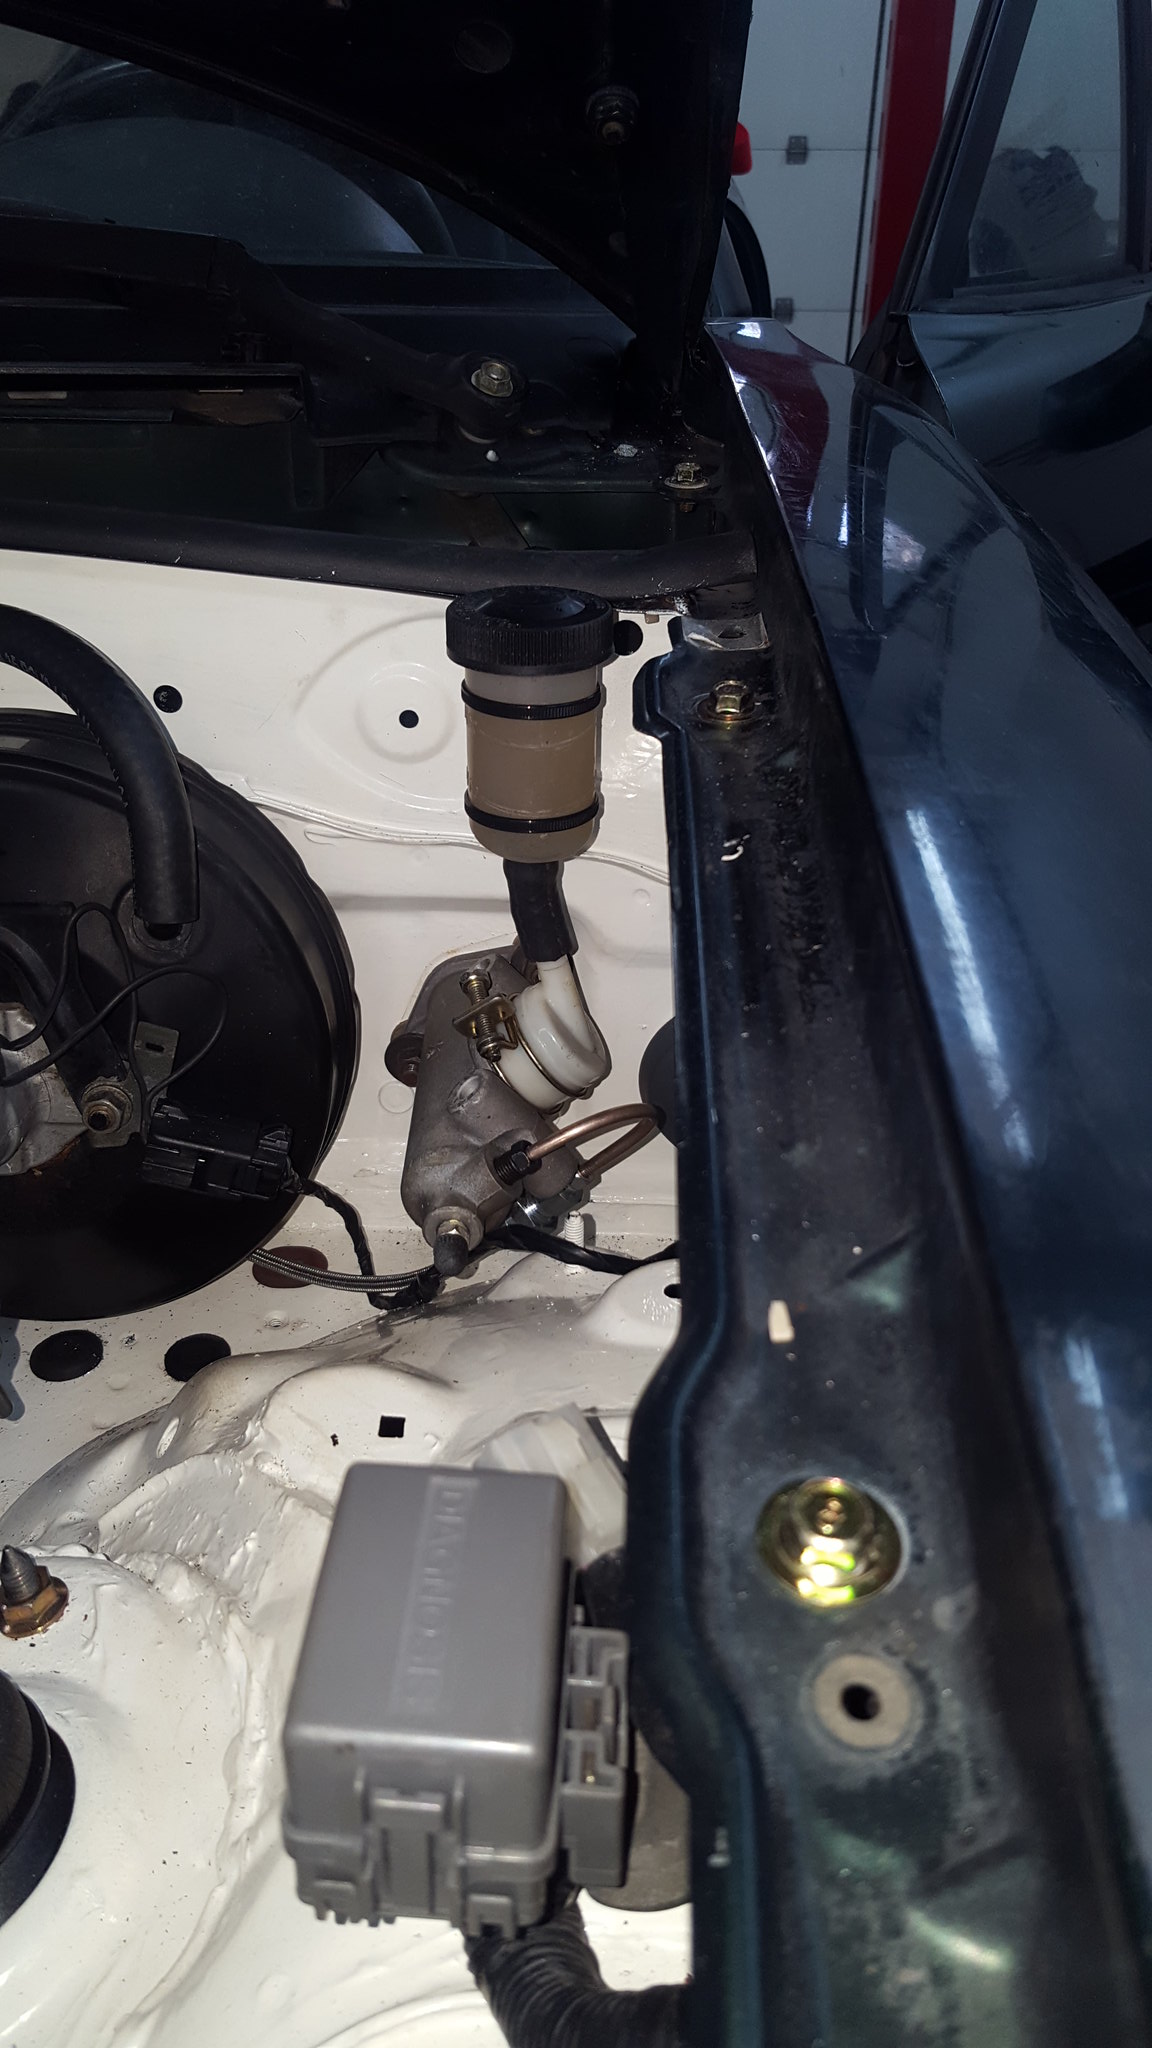
first, I re-purposed some random engine bay bracket for a clutch master mount. Little cutting, little grinding, a pop rivet, and a couple of zip ties makes for a nice install that's hard to photograph because its hidden.
 20181226_121347 by Michael Crawford, on Flickr
 20181226_131250 by Michael Crawford, on Flickr
 20181226_131257 by Michael Crawford, on Flickr
next, I finally made a mount for the upper radiator hose. Well, made is a little too strong a word. More like found a random sheet metal bracket in the 5 gallon bucket of random crap that lives in the corner. Worked perfect. The goal here was support, and to make the temp sending unit the highest point in the system. No matter what, the upper hose was going to trap air in the cooling system due to basic design issues, so I figured I may as well as use it to my benefit. Bolted it down to one of the original coil mounting studs, couple of zipties, and good to go!
 20181226_173411 by Michael Crawford, on Flickr
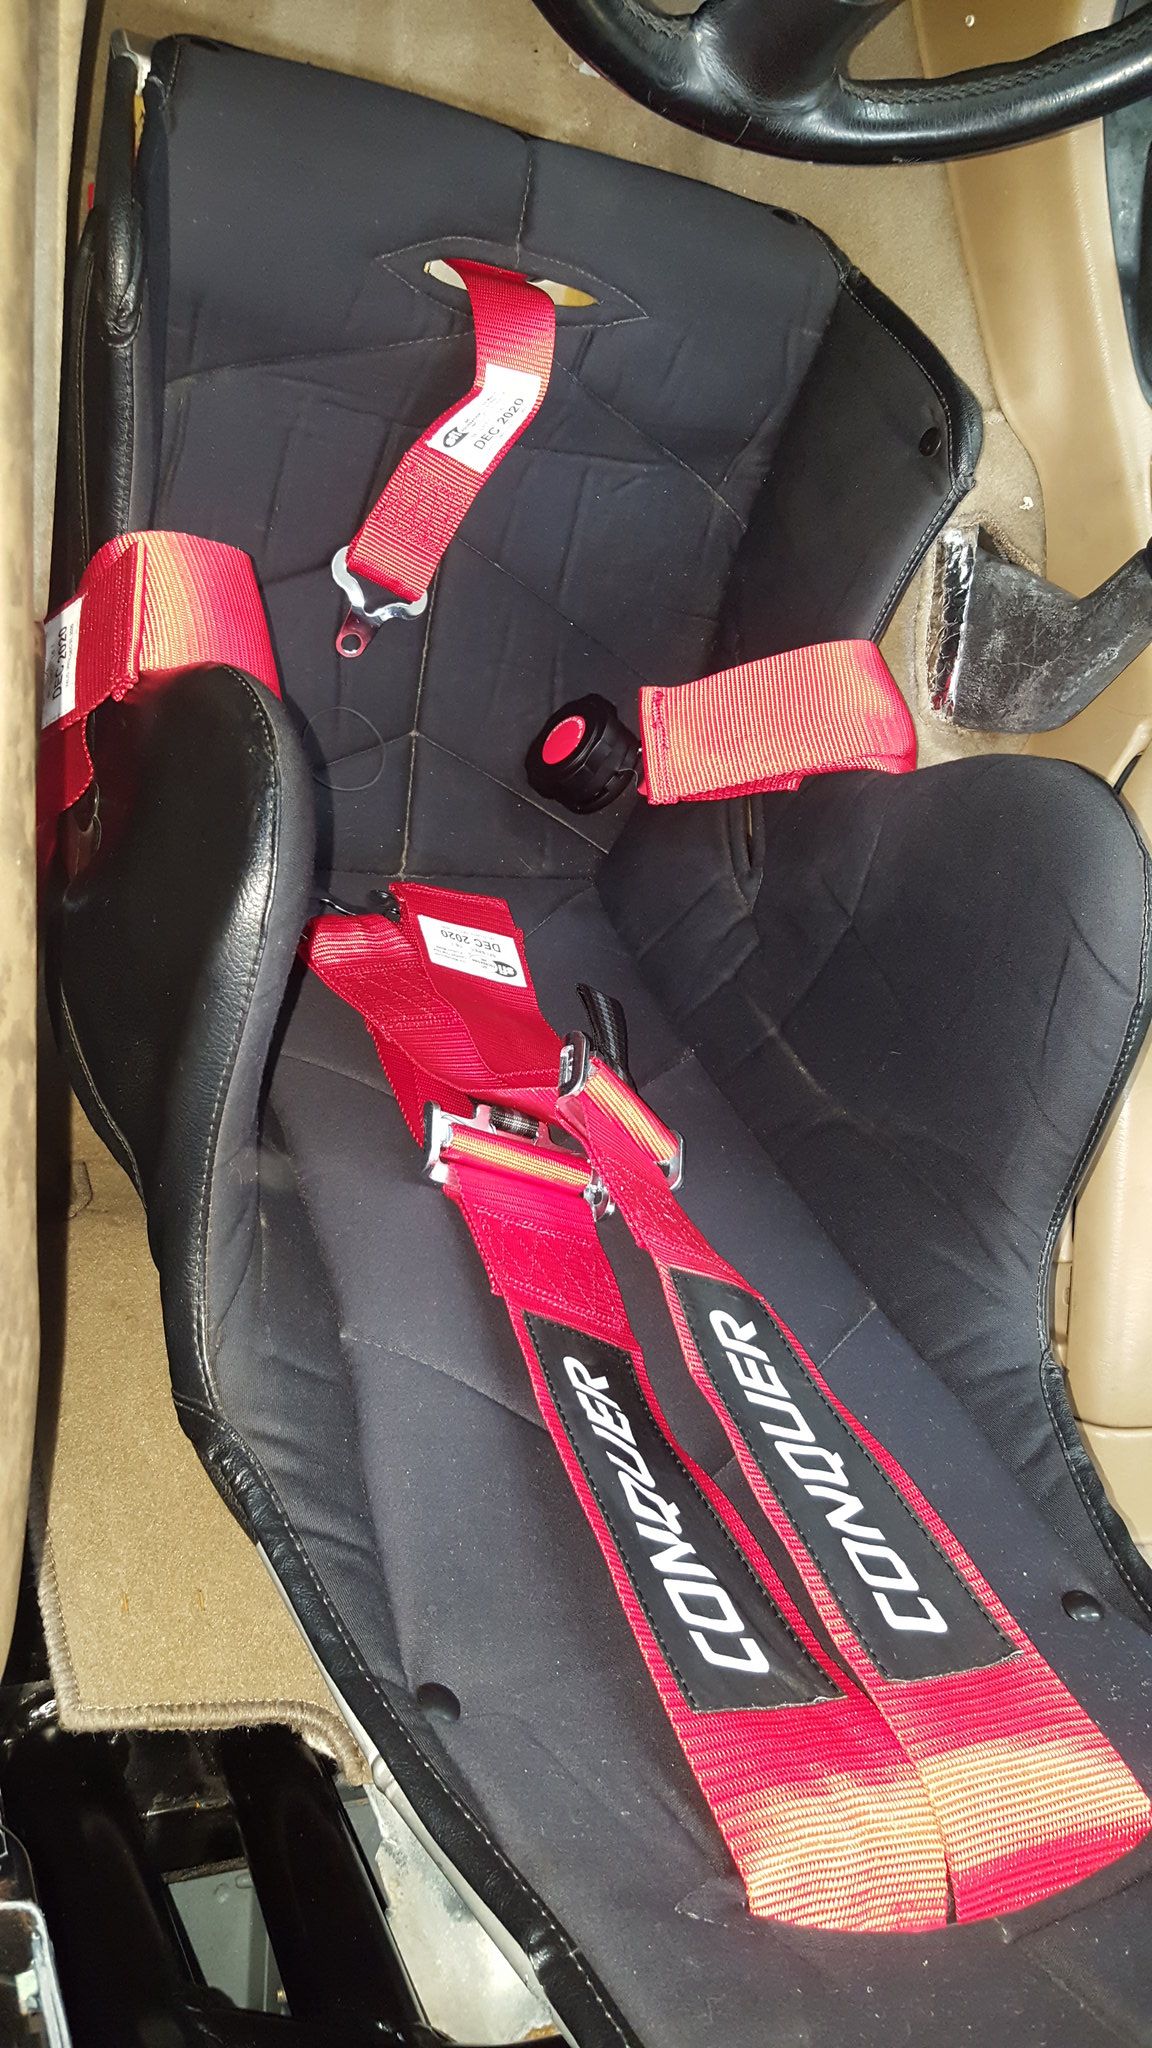
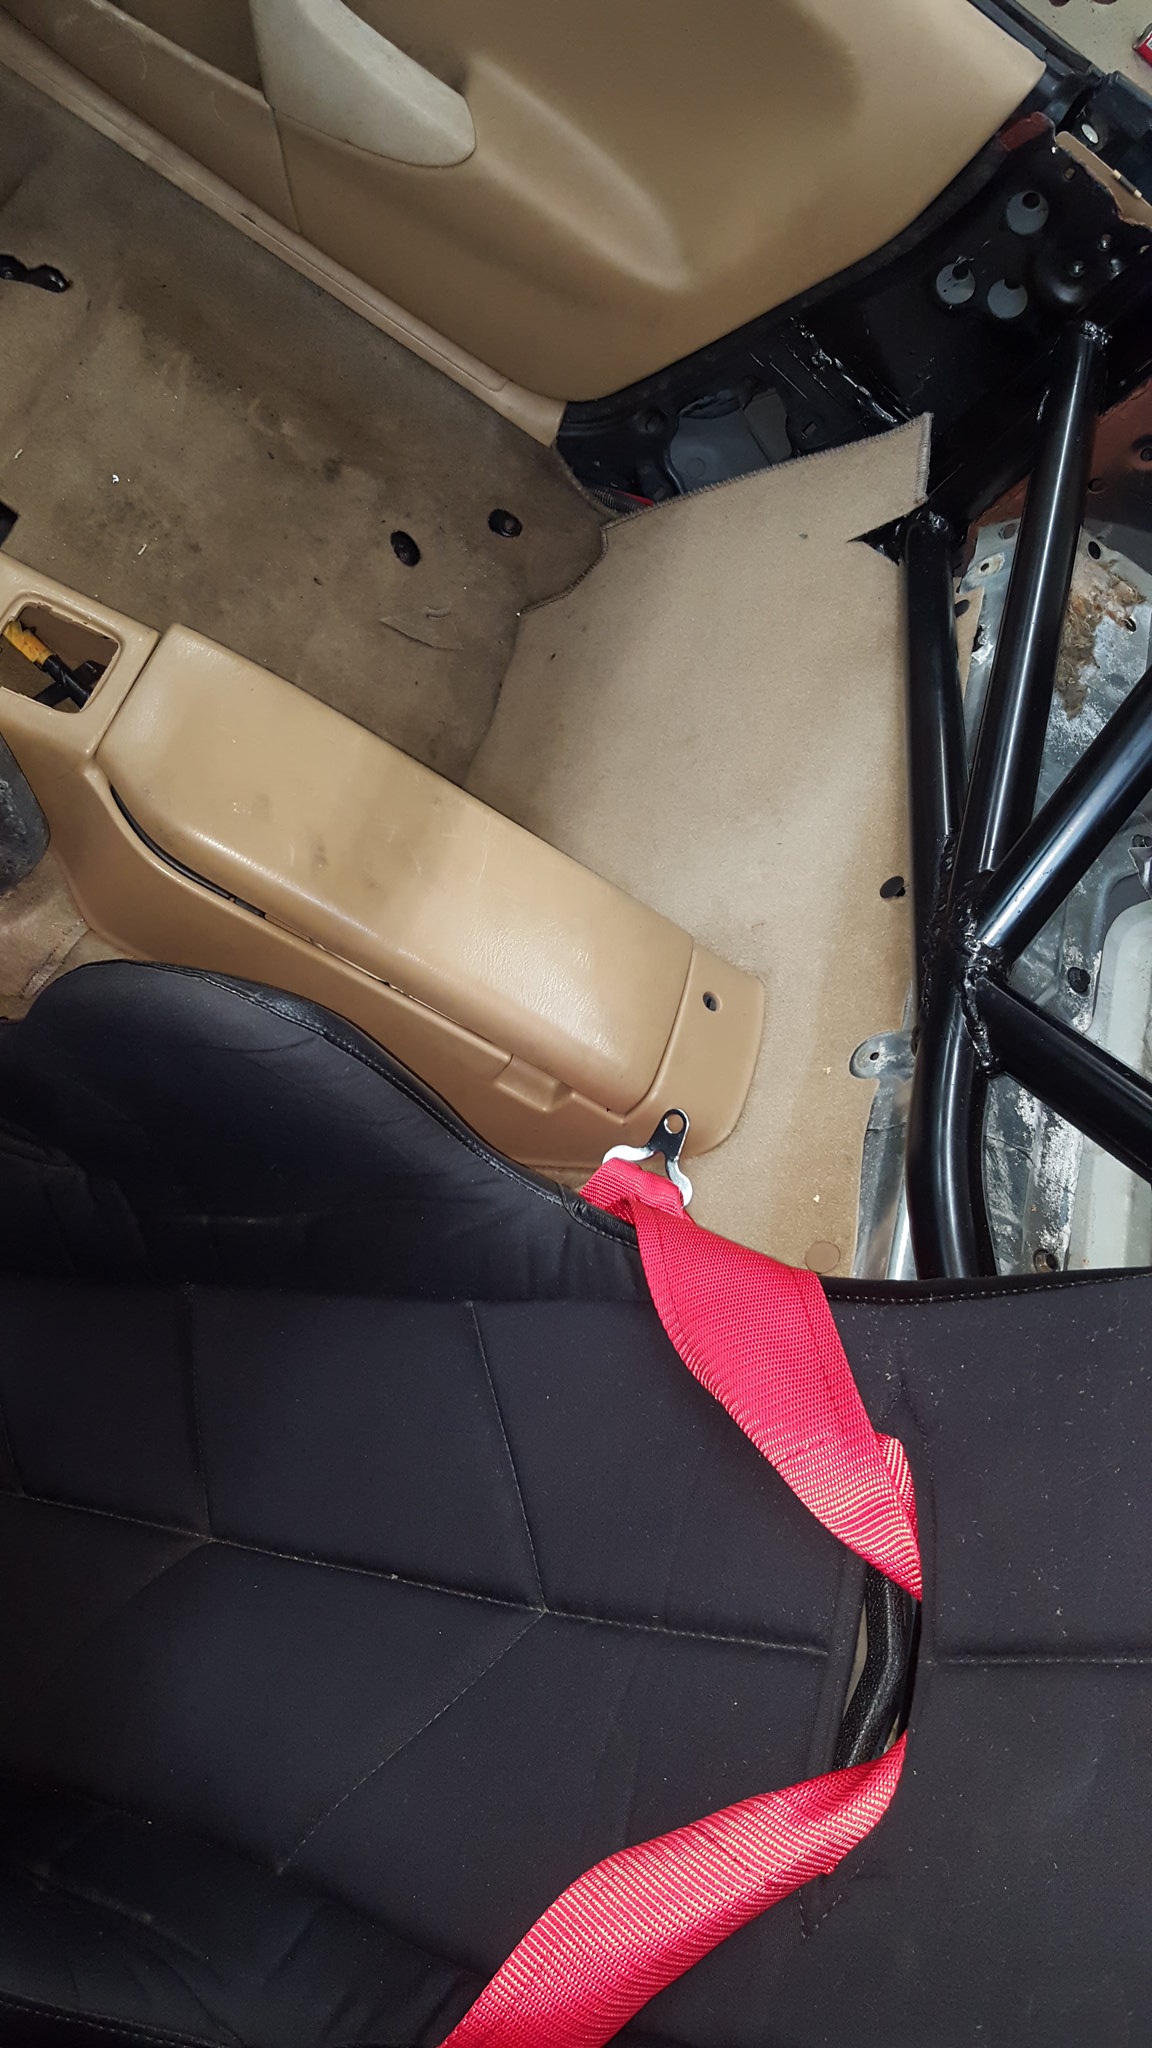
next, seat belts. My wife got these for me for Christmas. Not a brand I've ever heard of, but the stitching is good, they're SFI rated, and cam lock. Cant ask for much more than that!
To install, I had to add a hole and backer plate through the trans tunnel for the inboard lap belt, wrap the shoulder harnesses around the roll bar, and the antisubmarine strap around the seat mounts. Really, nothing unusual. Roll the excess strap up, ziptie to keep contained. Done.
 20181226_163525 by Michael Crawford, on Flickr
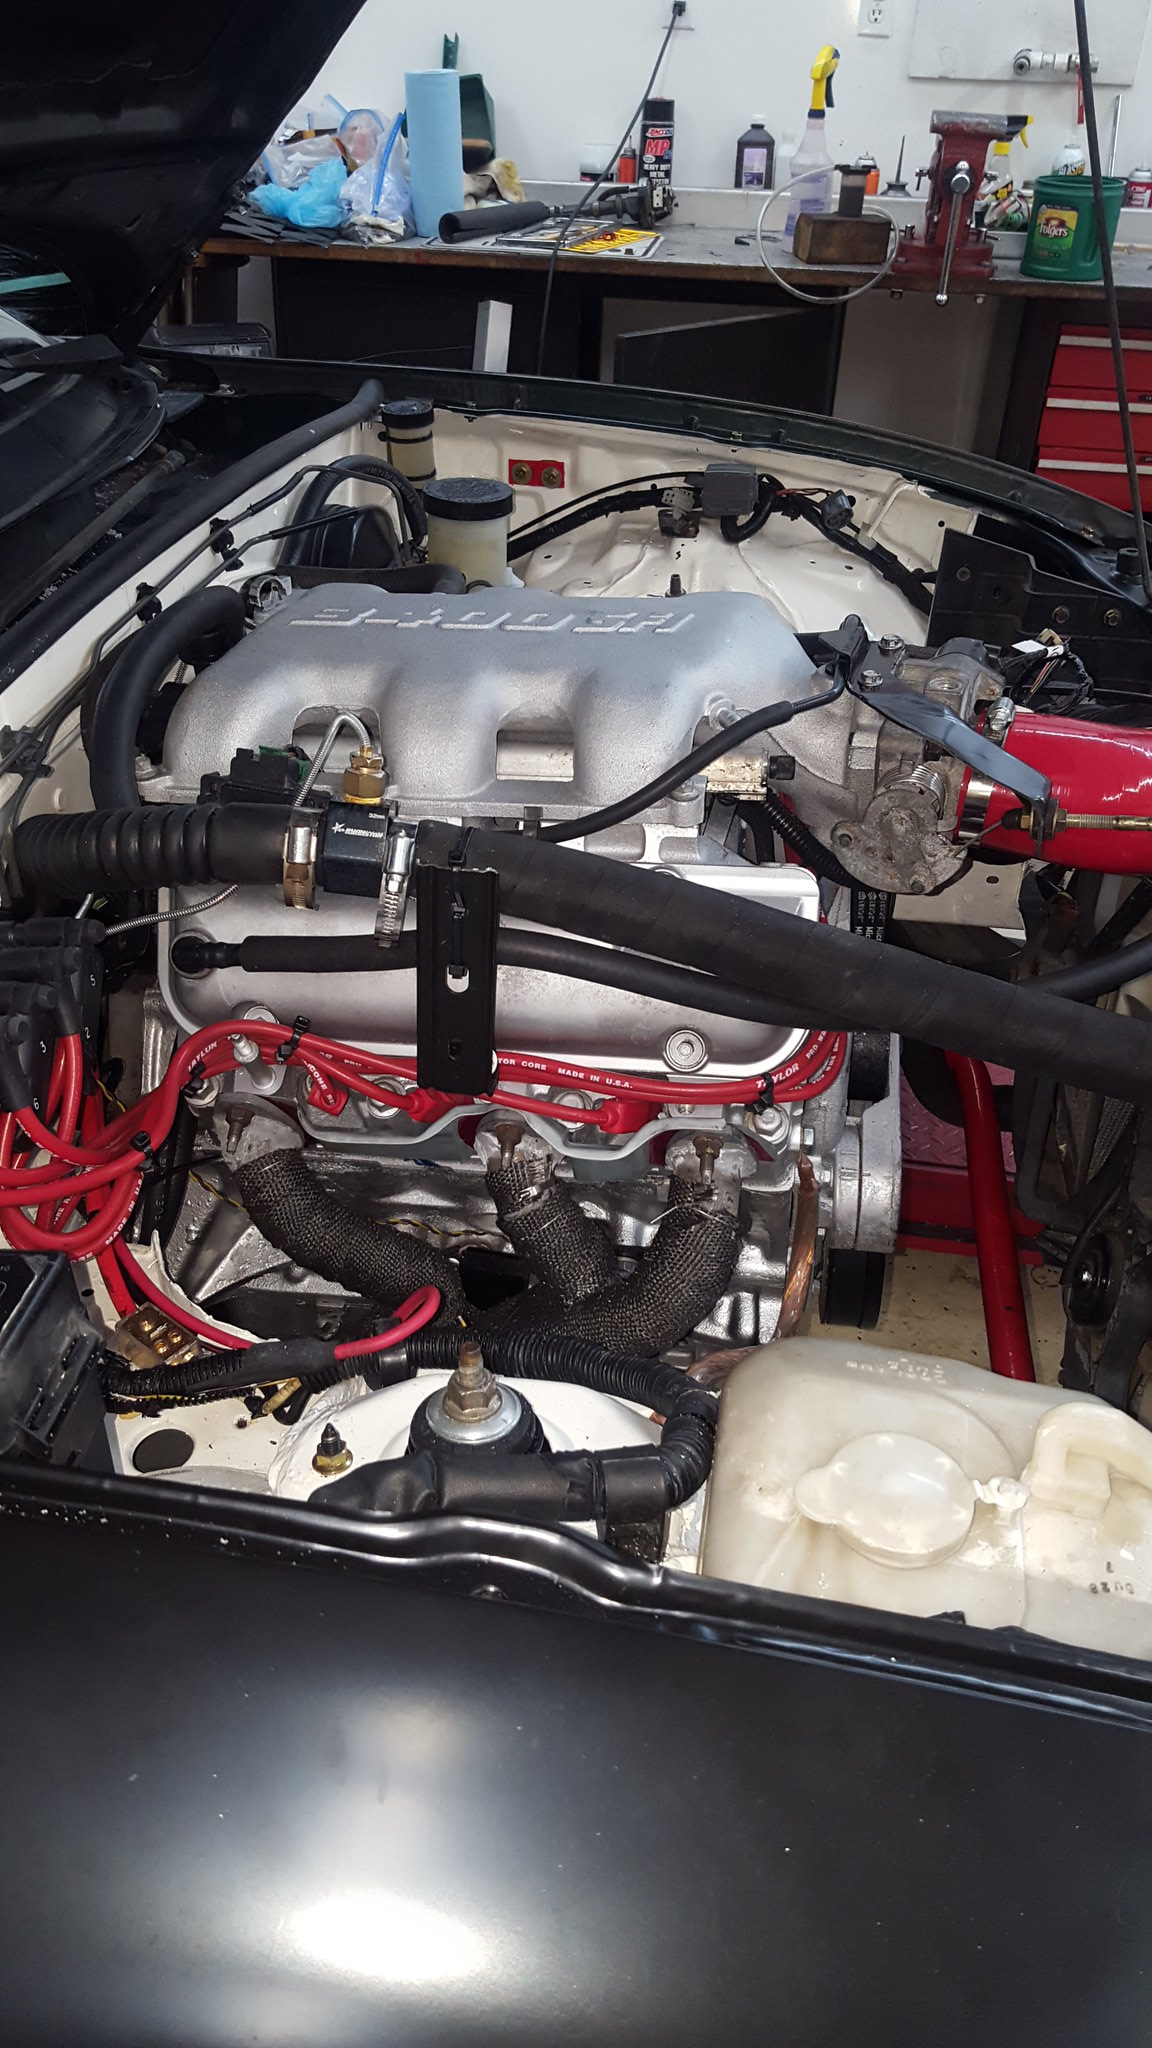
I went ahead and did my interior nut and bolt checks. Every fastener between the firewall and trunklid. That's a lot of bolts and nuts, by the way. Oh, and screws. Don't forget the screws. I also installed the rear bulkhead carpet, and used a ex-printing press sheet of ,030 aluminum (I bought and inch thick stack from stampie at .50 a sheet a couple of years ago. Sheets are roughly 3.5 feet by 2.5, but I should really measure them.) to close out the rear package shelf where I cut it for the rollbar so the package tray carpet would lay nice. Went ahead and finished installing the steering column plastics as well.
 20181226_163536 by Michael Crawford, on Flickr
 20181226_163506 by Michael Crawford, on Flickr
 20181226_163456 by Michael Crawford, on Flickr
the last thing we did was solve the sway bar interference (helps if you center the damn thing before tightening the bolts), bleed the clutch and brakes again, nut and bolt check the exhaust, butterfly brace, and transmission fasteners, added a couple of missing bolts undercar as well. You know, stuff you cant really photograph.

In reply to Dusterbd13-michael :
I just noticed you kept all the FWD FEAD. Awesome work!!
I think youre talking about the accessories, right? If so, the only thing i didnt modify was the timing chain cover and water pump. I used the buick alternator in a different location, relocated the tensioner, used a coupleof idlers, and created a custom belt routing. But, no real money spent, or unobtanium parts that cant easily be replaced at autozone.
Yep!
Most of the 60* V6 RWD swaps went the opposite route and used the timing cover and other accessories from the 3.4 Camaro/Firebird.

In reply to Dusterbd13-michael :
FEAD = Front End Accessory Drive

Strike_Zero said:Yep!
Most of the 60* V6 RWD swaps went the opposite route and used the timing cover and other accessories from the 3.4 Camaro/Firebird.
Yep, thats what i did.
It was easier for me, but I was not budget constrained.
The camaro may or may not have been easier/fit better. Dunno.
But, this setup works so far, and should be transferable to any fwd 60*v6 in the future.
Same with the oil pan.
The intakes would need redone for a 3500/3900 though, and im not certain about the headers and oil pan.
Why would the intake need redone for a 3500/3900?
I believe the oil pan and headers would work just as they are.
Fom what i can see, port shapes are different on the lower intakes. Dont know if the upper would restrict power.
And lets notengine swap the engine swap project yet.....
Ah gotcha. The 3400 post 2000 intakes are apparently the ones to have anyway.

Well then.. That is looking great. I was glancing through the posts and at some point I realized it was not a Honda mini van. And then I noticed the lower case "o" in the title.
Still well done, just not the Challenge car I was looking for...
It isn't a minivan, but id does have a coilover sleeve kit for an accord!
And a minivan engine!
 that took most of the night right there.
But, now i can get it to the test and tune in February. If i just finish the damn thing.
Note to self: check and make sure quick release wheel setup is locktite-ed

I also need suggestions on how to pretty up the clockspring area. Right niw its just a clockspring.


Something like a yogurt container, or something with the right size/taper to fit between the clock spring and the trim. Put a hole the right size, paint, install. Alternatively, find a ball the right size and cut it in half, hole, paint. Just keep your eyes open for something with the right diameter to fit right over the clock spring and it should work.
I really like the rubber ball idea!
I also wouldn't have thought of any of those suggestions, seth. I appreciate it. Was making it far more complicated than it needs to be....
Plastic cereal bowl? Toddler size if need be
In reply to Justjim75 :
Oooooooo
Wheres my tape measure and dishwasher?
No real progress will be made this weekend. Very good friends from Prague fly in today, and i only get to see them one weekend a year. So, it's going to have to wait.
On a side note, our county has switched to safety only inspection. Which means that with lights, horn, and tires with tread that i can register this and do LEGAL street testing.
This will happen. I believe the lack of shakedown is what caused most of my issues with the amc. So, i can hopefully correct this. It still wont be a street car, but a streetable race car.

Dusterbd13-michael said:It still wont be a street car, but a streetable race car.
Awesome!!

Streeting a racecar is much more fun than racing a streetcar

Thread continues to impress.
Question: What's happening with the wiring and fuses on the dash? Permanent or temp?
In reply to pres589 (djronnebaum) :
Originally it was going to be permanent. But I figured out a better way to do it and now everything but the fuses can go away and they can be hidden. That's where my nitrous arming switch and fire suppression release handle will live once I get there
You'll need to log in to post.


