1 2 3 4 5
bigdaddylee82
bigdaddylee82 UltraDork
3/31/15 10:18 a.m.

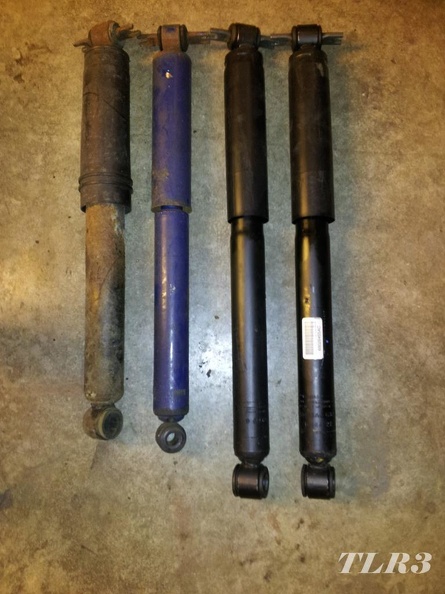
Here's Moby's old rear shocks next to the new JK Sahara/Sport shocks I put on. The JK shocks are obviously longer, they're supposed to be good for up to a 4" lift on an XJ. I found it odd that Moby had two different rear shocks, the longer blue one still had some life in it, the shorter black one was shot. I know Moby has had a couple fender benders over the course of its life, but as far as I know they were both front impacts. I have no clue why someone would replace A shock, and with one that's a different size?

You've got to remove the bushing sleeve from the bottom shock eye to get it to fit on the studs on the rear axle. I didn't realize that until after I had both shocks mounted to the XJ's body already. I love doing the same job twice. If I read that somewhere I had forgotten it. I knew I had to add a bar pin to the front JK shocks to use them on an XJ, I simply pulled the bar pin out of the old shocks, cleaned them up, and pressed them into the new shocks. I have some apprehensions about not having a metal sleeve in the rear shock eye bushings. We shall see.

bigdaddylee82
bigdaddylee82 UltraDork
3/31/15 10:57 a.m.

The RE lift kit comes with a longer braided stainless rear brake hose to accommodate the distance the lift kit adds between the axle and rear brake circuit hard line. For the front, the directions state to straighten out the bend of the front hard lines and reattach the stock hoses to the inner fender well at a lower point. I really wasn't too keen on the idea of bending my hard lines, and the hoses looked like they were original anyway, so I figured I'd just replace them with new longer hoses, I'd be bleeding the brakes regardless.

Most of the aftermarket options for longer brake hoses are braided stainless, and silly expensive, cheapest option I found were Rough Country brand, I'm fairly opposed to using anything they make, I doubt they made the brake hoses themselves, but they've got their name on it, so that doesn't bode well for their reliability or quality. Not trying to offend anyone, if you're happy with your Rough Country stuff, good for you, but I'm not a fan.

After looking around for off the shelf options I decided to use front brake hoses for a YJ. Jeep used a lot of the same parts on just about everything, XJ, YJ, TJ, MJ, ZJ, etc. for eons, so it's no surprise that the front brake hoses from a YJ fit on an XJ, bonus is that the YJ hoses are longer and accommodate the extra length the RE lift kit requires.

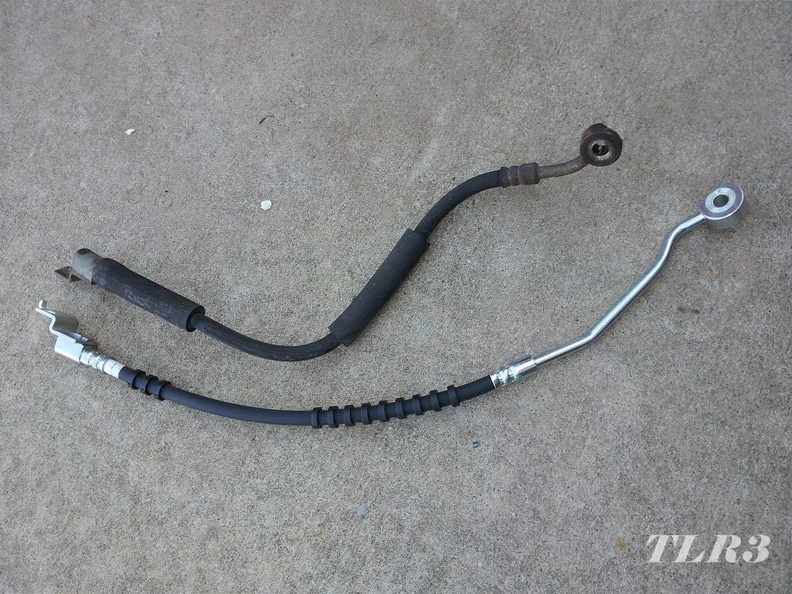
I used Raybestos BH38861 and BH38862 (one's right the other's left). I think I used a '95 YJ as my search parameter for these hoses. Here's the new longer Raybestoes hose next to a stock one. The bends in the hard line snake perfectly between the top caliper pin, and bleeder screw on the XJ's caliper.

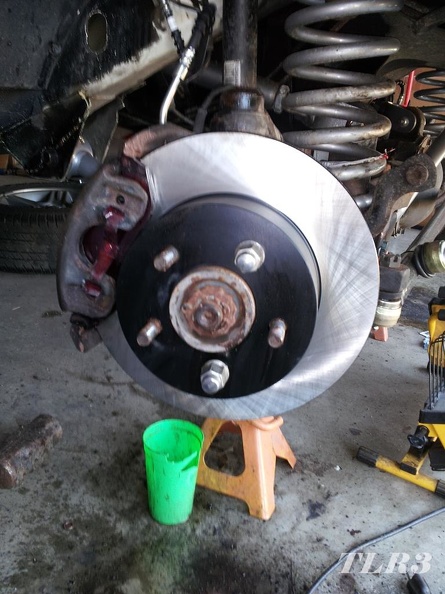
Since I was doing brake work, I figured I might as well address the front pads and rotors too. The brakes didn't have the best feel when we got Moby, a little spongy, and while there was a decent amount of pad left the rotors needed turned at a minimum. I decided to go ahead and replace pads and rotors, the calipers cleaned up okay, and the piston seals were in good enough shape. So a few cans of brake cleaner, a wire brush and elbow grease, followed by fresh grease on the caliper pins, with Centric E-coat rotors, and Hawk LTS pads got the front brakes taken care of. The front brakes should be good to go for a long time now, and will be more than capable of handling the new slightly over sized tires.

You may notice the BFH, in the bottom left of that picture, it was required to get the rotor off of the hub. I cleaned the hub surface with a wire brush and applied antiseize, hopefully between that and the E-coat rotors, they won't be quite the struggle to remove in the future.

ssswitch
ssswitch Reader
3/31/15 11:10 p.m.

I really like this thread. You're making me feel like I could reasonably work on an XJ by myself without having to worry too much about the heavy drivetrain parts.

I'm glad it's at least back on level ground again.

Adrian_Thompson
Adrian_Thompson UltimaDork
4/1/15 9:18 a.m.

Learning lots of cool XJ stuff here.

Can you explain the difference between the two transfer cases again please. I'm not sure I understand

Swank Force One
Swank Force One MegaDork
4/1/15 9:50 a.m.

In reply to Adrian_Thompson:

NP231 is part time 4wd. If you drive it in 4wd on dry pavement, it'll burn up. It's slightly stronger than the NP242, but more of a "use this WHEN you get stuck, not to avoid getting stuck" kind of thing.

NP242 is full time 4wd. You can drive it around in 4wd on dry pavement if you want.

bigdaddylee82
bigdaddylee82 Dork
4/1/15 10:51 a.m.

In reply to ssswitch:

Thanks! Speaking of heavy drivetrain parts... I did feel that little pop and instant shock of pain in my lower back, herniated disc, when I stooped over and picked up one end of the D35 when it fell off of the floor jack while jockeying it around under the Jeep.


In reply to Adrian_Thompson:

To expound upon SFO's post, the 242 has selectable part time, high and low just like the 231, but also adds a selectable full time high option.

242 = full time high, part time high, neutral, part time low
231 = part time high, neutral, part time low

You can disengage the 242 and drive the Jeep in RWD just like the 231. Strength differences are minor if there are any, the biggest disadvantage of the 242 is the near nonexistent aftermarket for it.

bigdaddylee82
bigdaddylee82 UltraDork
4/1/15 11:03 a.m.

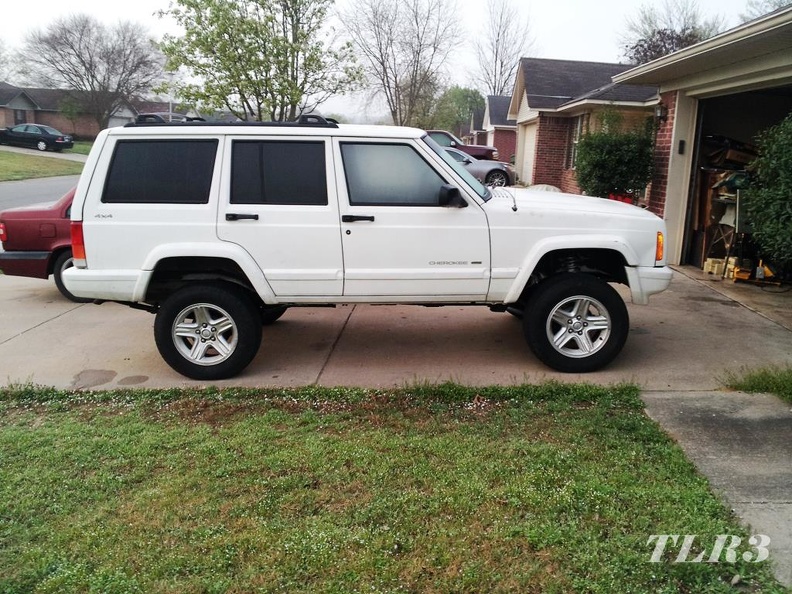
In other news, keeping the trend of "Momentous Moby Moments" going, I drove Moby around the cul-de-sac a few times, and then around the block. No one died, to the best of my recollection, and it stopped when I pressed the brake pedal. I crawled under it with the flash light inspected everything afterwards, no leaks, and no loose bits.

So Moby is no longer on jack stands!

Please excuse the general dirtiness and greasy hand prints all over.

I hope to finally get the tires mounted and that alignment I've mentioned so many times tomorrow or Friday.

ssswitch
ssswitch Reader
4/1/15 8:21 p.m.

The problem with the handprints is that the Cherokee is white. If you bang it into some branches and then repaint the car in combat tan it'll look much better with greasy handprints on it.

mrwillie
mrwillie Dork
4/2/15 10:30 a.m.

Looking good Lee. I always wanted one of those jeeps.

Adrian_Thompson
Adrian_Thompson UltimaDork
4/2/15 11:11 a.m.
bigdaddylee82 wrote: In reply to Adrian_Thompson: To expound upon SFO's post, the 242 has selectable part time, high and low just like the 231, but also adds a selectable full time high option. 242 = full time high, part time high, neutral, part time low 231 = part time high, neutral, part time low You can disengage the 242 and drive the Jeep in RWD just like the 231. Strength differences are minor if there are any, the biggest disadvantage of the 242 is the near nonexistent aftermarket for it.

So, Eerr 'Normal' people want the 242 as you get part time 4WD for iffy conditions and mall crawling. thanks

daytonaer
daytonaer HalfDork
4/2/15 12:52 p.m.
ssswitch wrote: I really like this thread. You're making me feel like I could reasonably work on an XJ by myself without having to worry too much about the heavy drivetrain parts. I'm glad it's at least back on level ground again.

When I first started working on my xj, I had been spending serious time working on my c4 corvette (clutch u joints etc). The mechanical parts on an xj seem miniature and fragile compared to the 'vette.

They are a well engineered platform with car size manageable parts. Fortunately there were a bajillion made. Unfortunately they rust everywhere. I miss mine.

bigdaddylee82
bigdaddylee82 Dork
4/2/15 8:59 p.m.

In reply to ssswitch:

It's "hers" and white was her first choice, so I doubt there's anything I can do to change that, unless, ya know, I want to be another domestic violence statistic. Our Sportwagen is white too.


In reply to mrwillie:

Thanks Will, Jewels is pretty tickled to have it out of the garage. I feel slightly responsible for the 850 wagon, so if you wind up with an XJ don't go blaming me.


In reply to Adrian_Thompson:

It's up to you, the 231 is easier to find, more common, and will serve most well. I want the Ron Popeil, "Set it and forget it," AWD ability of the 242 for SWMBO. I searched forever and couldn't find the "right" XJ with all the features I want, that's why I bought Moby with a 231, and then bought a 242 to swap in its place.


In reply to daytonaer:

This rust stuff is for the birds. This is my first, and last experience with a rusty car. I know, I know, all you folks north of the Mason Dixon or on a coast, will say it's not "rusty."

Tom_Spangler
Tom_Spangler GRM+ Memberand SuperDork
4/2/15 9:02 p.m.
bigdaddylee82 wrote: This rust stuff is for the birds. This is my first, and last experience with a rusty car. I know, I know, all you folks north of the Mason Dixon or on a coast, will say it's not "rusty."

I've bought my last rusty car, too. If/when we start looking for an XJ for my son, we'll be heading south to get it. I'll deal with mechanical problems all day, but I won't deal with rust again.

bigdaddylee82
bigdaddylee82 UltraDork
4/2/15 9:19 p.m.

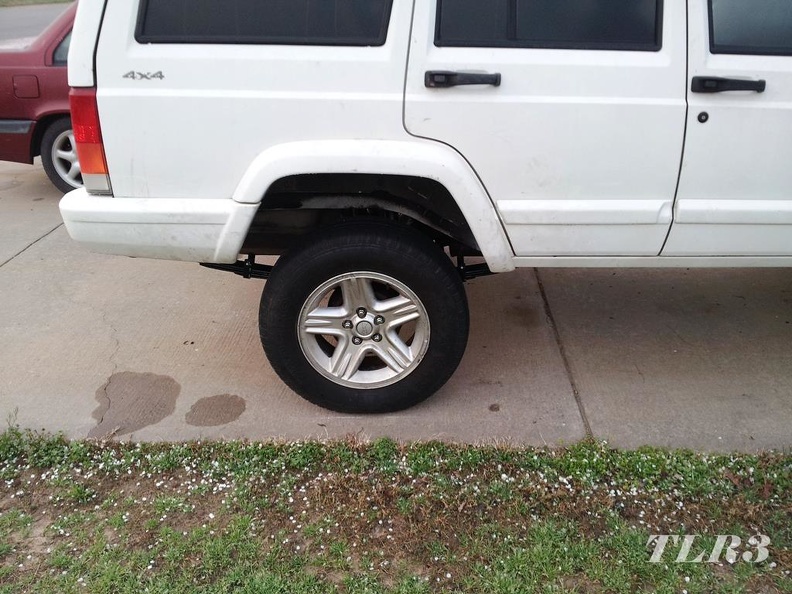
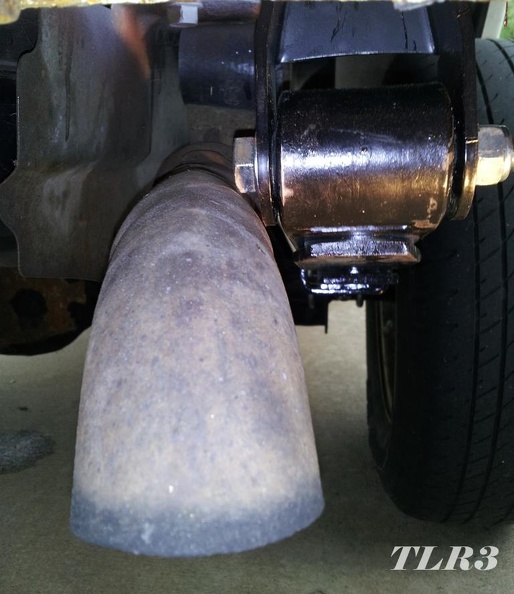
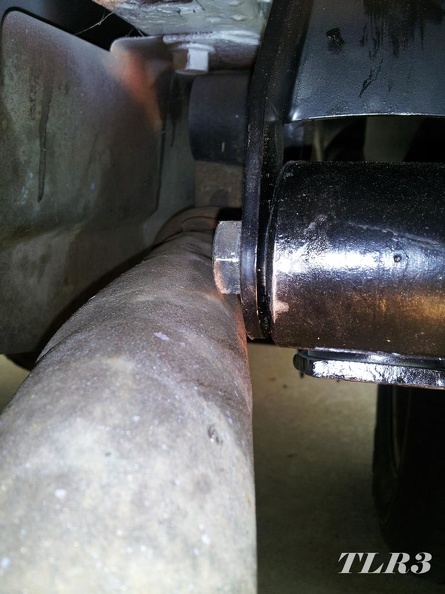
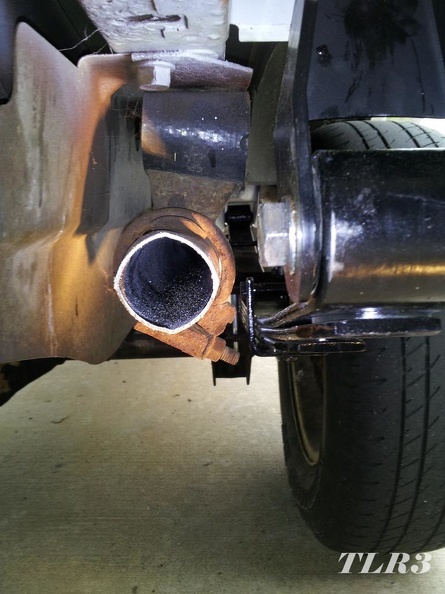
The lift caused a minor, though majorly annoying issue. The new shackles I used are slightly longer, thicker, and angled compared to the stock ones. All those "slightlys," add up to enough to come in contact with the tail pipe. Makes a pretty annoying near constant rattle.

My, oh-so-elegant solution was pretty simple.

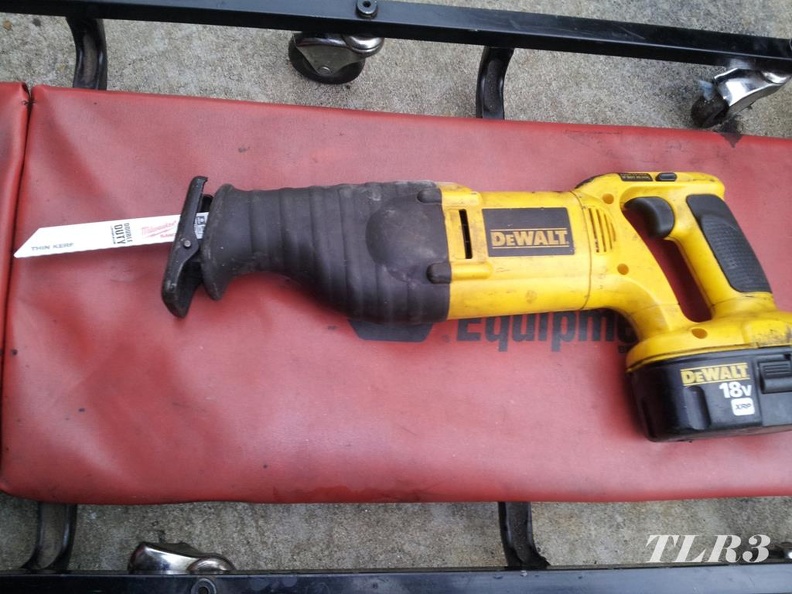
Yeah, it's a little hack, well it's literally hack, but the rattle is gone.

It's temporary, I'll at the very least put a straight piece with a turn down back on there. The exhaust needs some attention in other areas too, previous owner had the catalytic converter stolen while they were out shopping. The replacement they had put it was likely the absolute cheapest option, and has a smaller in, and out, that the pipe it was booger welded onto.

bigdaddylee82
bigdaddylee82 UltraDork
4/3/15 9:02 a.m.

I have a 12:30 appointment for tires and alignment, I'm loaded and ready. This might actually finally happen.

mrwillie
mrwillie Dork
4/3/15 9:38 a.m.

@Lee -- The 850 wasn't your fault. I was very much a willing participant in that venture.

Swank Force One
Swank Force One MegaDork
4/3/15 9:51 a.m.
bigdaddylee82 wrote: The lift caused a minor, though majorly annoying issue. The new shackles I used are slightly longer, thicker, and angled compared to the stock ones. All those "slightlys," add up to enough to come in contact with the tail pipe. Makes a pretty annoying near constant rattle. My, oh-so-elegant solution was pretty simple. Yeah, it's a little hack, well it's literally hack, but the rattle is gone. It's temporary, I'll at the very least put a straight piece with a turn down back on there. The exhaust needs some attention in other areas too, previous owner had the catalytic converter stolen while they were out shopping. The replacement they had put it was likely the absolute cheapest option, and has a smaller in, and out, that the pipe it was booger welded onto.

Same thing happened with rattle exhaust on the blue one. Don't think it would have hit with a factory exhaust, but i have a 2.5" Magnaflow setup.

chiodos
chiodos Reader
4/3/15 11:03 a.m.
ssswitch wrote: I really like this thread. You're making me feel like I could reasonably work on an XJ by myself without having to worry too much about the heavy drivetrain parts.

Dont be a wuss, I put in a 4.0, with auto and transfer case in my xj...by myself without a lift or trans jack. only a skateboard, floor jack, and a chain hoist attached to a rafter.

bigdaddylee82
bigdaddylee82 UltraDork
4/6/15 12:16 p.m.

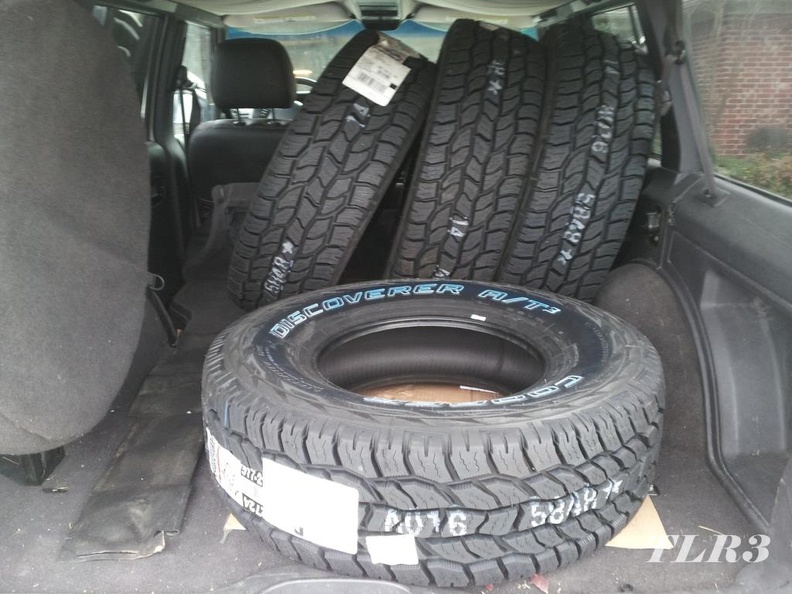
I got the tires mounted and balanced, and got the front end aligned on Friday. The guy that did the alignment wasn't too wild about the aftermarket steering linkage, it requires a bit more work to adjust. I gave them the documentation for the steering and recommended toe and caster settings, I'm taking them at their word that they set it correctly.

Before I paid for the service, the tech had me come out to where Moby was parked, and pointed out that the front right tire was rubbing on the front fender when the steering was turned. My initial thought was, "I'll just trim the corner of the plastic bumper covers, no big deal." I had already suspected this might be an issue, RE states the lift I installed accommodates 31" tires, and the 265/75-16 tires I put on are about 31.6"

It wasn't until I got home that I realized the tech specifically pointed out the front right corner, because that was the only spot it was rubbing. Well crap, I knew why it was rubbing there and no where else.

One of Moby's fender benders in its previous life had squished in the front right corner, not severe, but there was a slight buckle in the front right fender, and the front right bumper cover was a little contorted. For no more than we paid for Moby, it wasn't bothering us, and was merely cosmetic, until I put the over sized tires on it.

And so it begins... It's very much the Butterfly Effect, one thing leads to another, my dad calls it "tripping over stuff." You go to fix one thing, and trip over 3 others that need fixed before you can fix the thing you set out to fix in the first place.

It wasn't an immediate goal, but I was eventually going to replace the fender, build a winch bumper to replace the tweaked stock bumper, and repair/replace the header panel. Instead of just trimming off the spot that was rubbing, I decided to go attempt to fix it "right." I use quotes, the stock bumper will eventually get tossed, as well as the corner bumper cover thingies, so they're getting repaired, but I'm not looking for concourse good as new perfection here. The fender needed replaced too, and thanks to my buddy Brian (ridinwitcj73 here on GRM) I scored a matching stone white front right fender from one of his parts Jeeps.

Here's the tweaked bumper, with the plastic bumper cover off, it was pushed back about 2-1/2" and down about 2" compared to the left side.
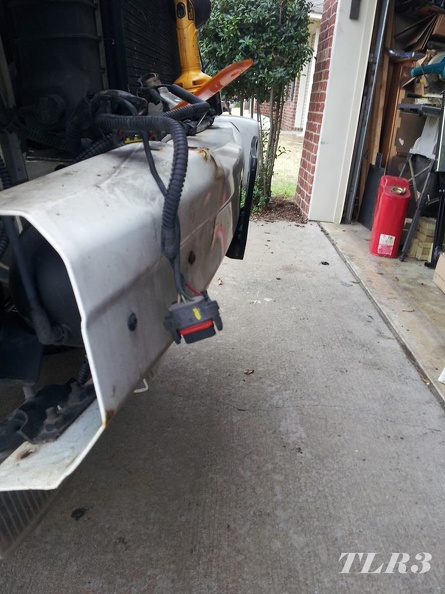
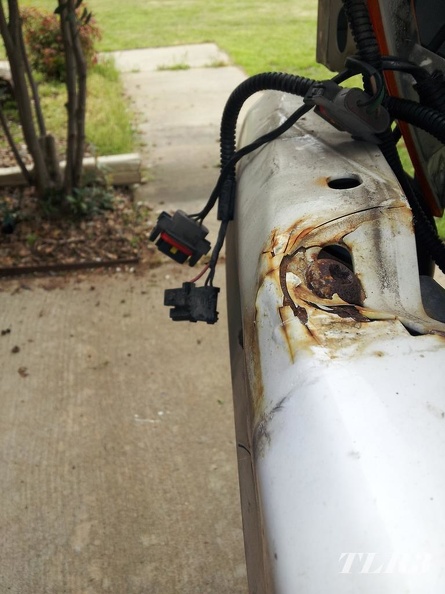
I used various modes of persuasion to get the bumper to submit, and do what I wanted it too, including various large blunt instruments swung with great fervor, and a long piece of pipe for leverage. However, this wound up being the most efficient, and maybe just a little bit dangerous method.
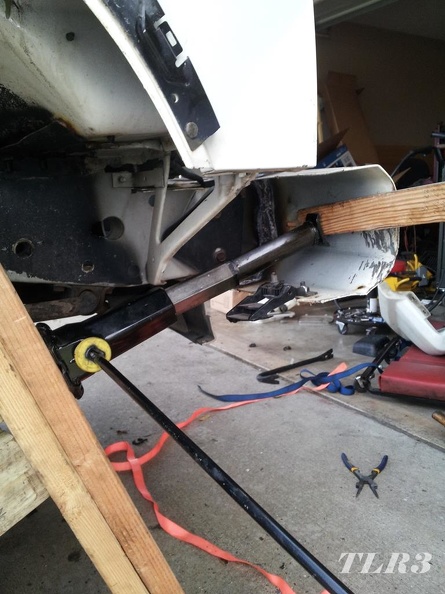
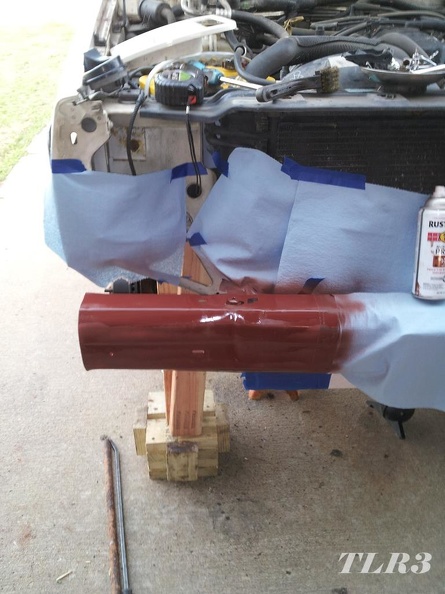
With the right side of the bumper now persuaded within ~1/4" of what I measured the left side to be, I decided that was close enough, cleaned it up with a wire cup brush on the grinder, then slathered it with some Rust-Oleum primer, and some Dupli-Color stone white. Yeah it's still a little crinkled, and there's a crease where I bent it back, but that'll be hidden under the bumper cover.
Before I put the new fender on, I cleaned up some previous repairs I had done when I welded in a new nut for the body/chassis ground, cleaned up the inner fender, treated a few minor surface rust spots, and put a coat of Eastwood Internal Frame Coating on it while I had access.
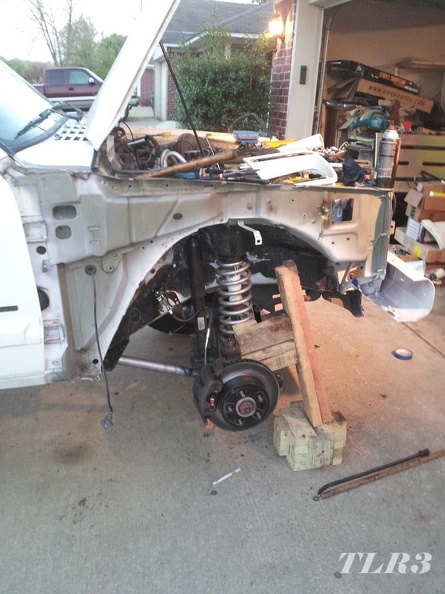
I've currently got the new fender Brian gave me on, and panel gaps good enough. I've been doing some fiber glass work. I used my heat gun and a pair of pliers to reshape the bumper cover, then it got some fiberglass reinforcement, some Bondo, sanding, and some primer. I ran out of white paint, so I'm in a holding pattern until I get more. It's plastic and if I bump anything with it, the paint may very well crack, but it should last long enough, and look good enough to keep SWMBO happy until I build a new bumper for it.

The header panel is a challenge, it was broken, had several cracks, and the bottom right corner, was folded under for so long, that it's now permanently that shape. A smart man would just get a new one or good used one. Every time I've been to Pick-n-Pull the XJ header panels are already gone, or in the same shape or worse than the one we've got. The header panel is fiberglass, and I've managed to repair part of it, but the section that was folded under is being difficult. Maybe I'll persevere?
bigdaddylee82
bigdaddylee82 UltraDork
4/6/15 2:07 p.m.

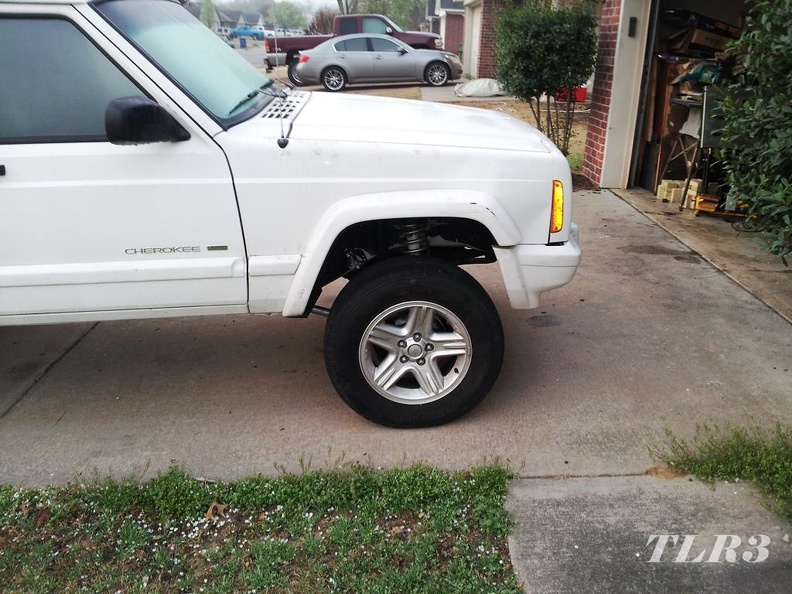
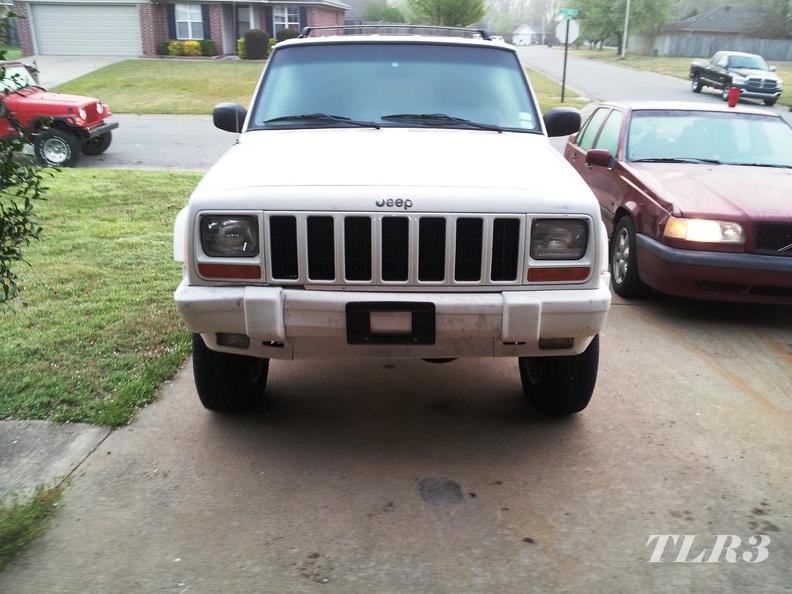
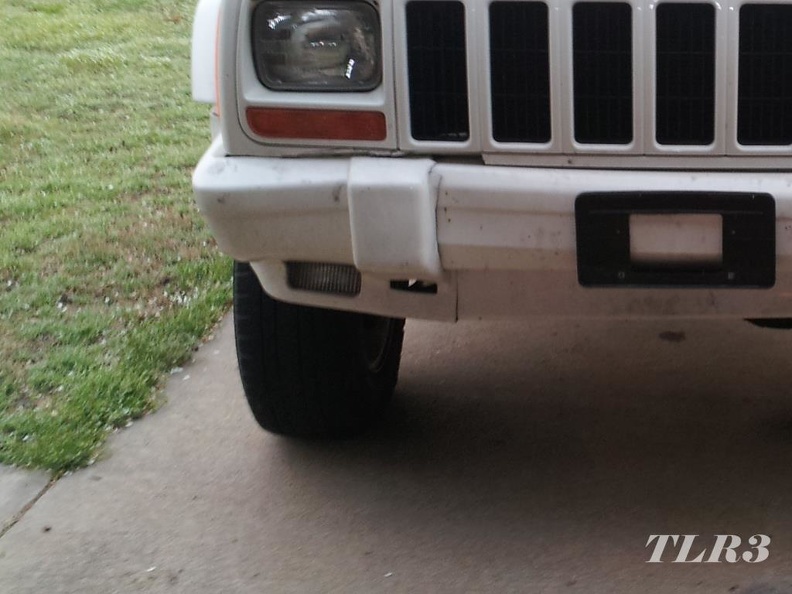
These two pictures from above on this page show the damage I'm repairing pretty well.

You can see the tweaked right bumper cover, and how the header panel below Moby's right headlight (left in the picture) and grille is broken and folded under.

Here you can see just how much that damage pushes the corner bumper cover back into the wheel well. The fender flare, and "flare" extension of the bumper cover should be aligned with each other.

bigdaddylee82
bigdaddylee82 UltraDork
4/8/15 10:22 a.m.

I'm still doing "body work," but in the mean time, while the paint dries, I've been doing other little upgrades/repairs.

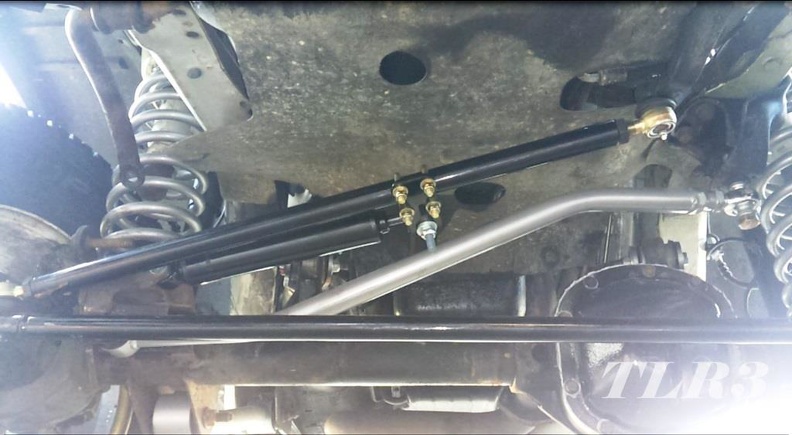
I recently installed the steering stabilizer, as I mentioned earlier I've "upgraded" the steering on Moby with an aftermarket tie rod and drag link assembly. I got a Steering Tie Rod Conversion kit from Rusty's Offroad. Actually I got it from Quadratec, Rusty's shipping prices are insane, I can't imagine anyone buys direct from them?

The Tie Rod Conversion kit replaces the stock Jeep Y link steering, with a heavy duty inverted T linkage. I was originally just going to throw on the adjustable track bar, and use Moog V8 ZJ parts, I used the ZJ parts on the other XJ and they worked out great. I had bought this Rusty's Steering Conversion for our TJ, Muffin, but have since decided to go a different direction with that project. Since I already had the steering conversion kit, I figured I might as well put it on Moby.

Directions are pretty vague for steering dampener installation. I know there's not much to it, but there aren't any pictures to confirm your interpretation of what they're telling you.

Rusty's Offroad said: Install stabilizer bracket to the bottom of the drag link, leave loose, pull stabilizer out 1 inch and turn wheels to the right and lock wheel and tighten bracket. The stabilizer bracket should be horizontal, parallel with the ground, on the bottom side of the drag link, and the stabilizer mounting on the top side of the bracket. If you don’t have an aftermarket stabilizer, this is a great time to replace it, the factory stabilizers have a tapered style stud, it sometimes does not fit the Rusty’s steering stabilizer plate properly. You can replace the stud with a ½ inch bolt and a sleeve and it will work fine.

The drag link is angled from the pitman arm, to the tie rod, so it's impossible for the bracket to be "parallel with the ground." I referenced some of Rusty's photos, mine looks like theirs, there's no binding, but the drag link sure flops around a lot when turning.

Here's mine (yes I know I need a shorter bolt to attach the stabilizer to the drag link bracket):

This is a picture of theirs:

I guess it may be the nature of the beast, after some google searching, "tie rod flop" is a common search term associated with this style of steering.

I made a video of my drag link flopping around. https://www.youtube.com/embed/_roGwU4zfYM

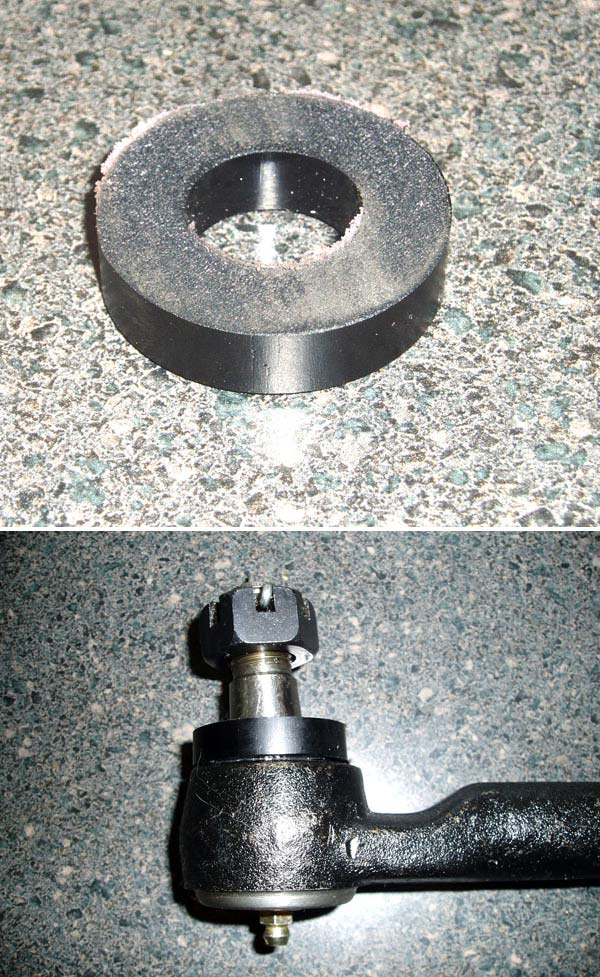
I'm not so much comfortable with the flopping, I'm thinking about putting a polyurethane donut/bushing/thick washer-thingy between the drag link's lower TRE and tie rod.

JCR sells a bushing for just this purpose, for their version of the inverted T steering upgrade. I'm not sure how that little slice of polyurethane costs $7, but seems like it would fix at least most of the flop.

Swank Force One
Swank Force One MegaDork
4/8/15 10:33 a.m.

FWIW, i did the ZJ upgrade on the blue jeep with a Rubicon Express track bar. Stock ball-joint style tie rods and such. It all flops. It all seems to flop on my stock setup red jeep as well.

Bothered me badly when i first noticed it, but it doesn't seem to really hurt anything.

bigdaddylee82
bigdaddylee82 Dork
4/8/15 2:59 p.m.

In reply to Swank Force One:

I didn't notice any excessive flopping when I put the ZJ stuff on the other XJ, and I've never really paid that much attention to the stock stuff.

Nothing's binding, the TREs aren't limiting out their range of motion beyond the amount that the steering stabilizer is causing them to flop. Once the TRE flops to its limit either way, the stabilizer gives, and I could push/pull the stabilizer (dampener) in and out by hand with out a whole lot of effort. I may be unnecessarily concerned.

I may buy an overpriced poly washer, anyway.

bigdaddylee82
bigdaddylee82 Dork
4/9/15 9:52 p.m.

Drove around the neighborhood tonight, no more rubbing! It's storming, the front wipers work okay, the inside of the window is nasty, but the defrost did a decent job, I need to clean the window before I try any more test drives. Rear wiper is still inop, going to need to do something about that eventually.

Whirring noise, seems like it's coming from the rear, I had attributed it to the hard as nails, old, weather cracked, and separating tires, but it's still there with the new tires. May need to pull the drums and have a look-see.

Brakes aren't stellar, quite a bit of pedal before it does anything, been so long since I've really drove the thing, I don't remember if that's normal or not. I bled the crap out of the brakes, with my vacuum bleeder, pedal is solid after you press id down through 3/4 of its travel. I may just be overly sensitive/paranoid after all the brake parts I've replaced.

It's dark and stormy, I'll try and get some pictures up sometime tomorrow.

bigdaddylee82
bigdaddylee82 UltraDork
4/10/15 9:33 a.m.

"Body work"

Like I said earlier a smart man would have just bought a new header panel, painted it, and called it a day. There's fiberglass header panels on eBay for less than $80, plastic ones for around $60, but I'm a project masochist. Why would I choose the easy way out when I can do it myself for about the same price and wind up with a final result that's about 80% as good as the one I can by new?

So here's what I was working with.

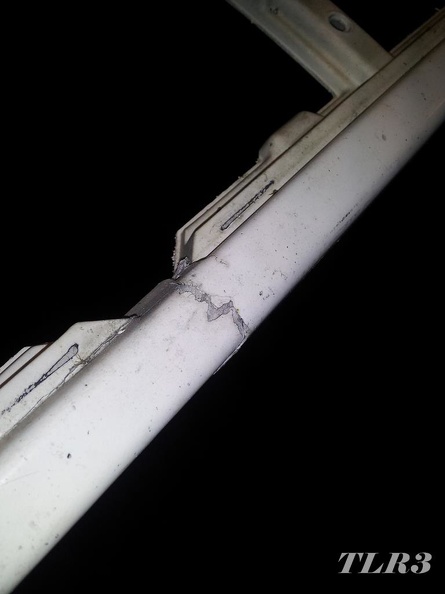
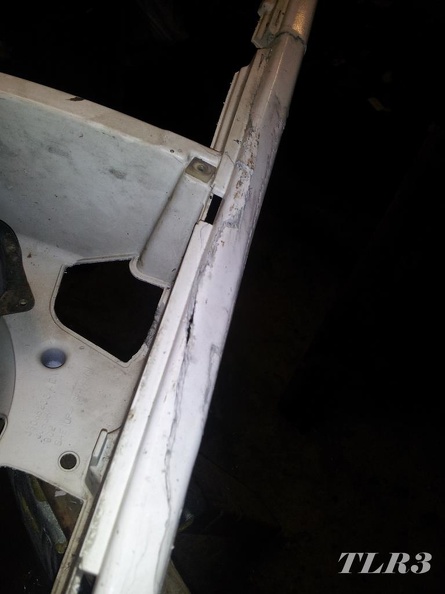
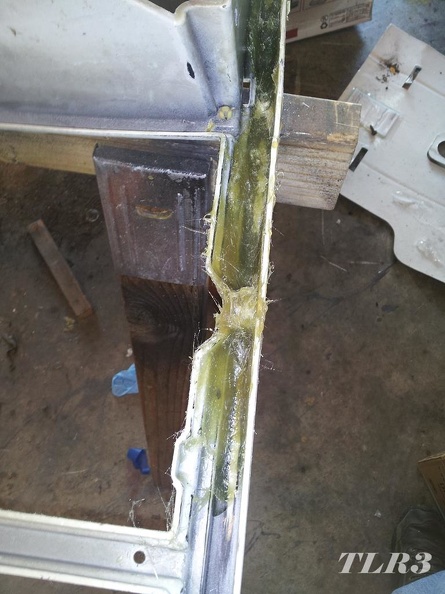
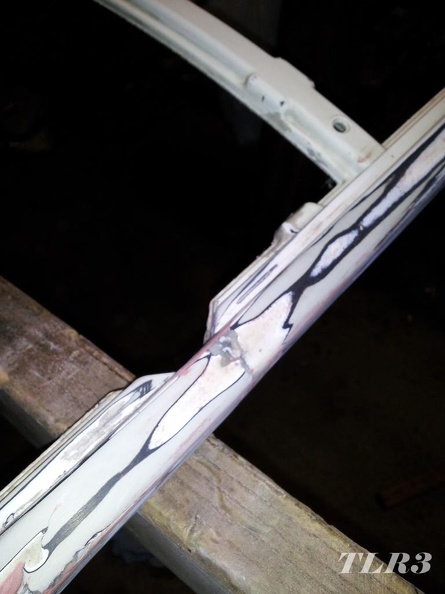
This was broken through, the bottom part of the header panel could be separated at this break.

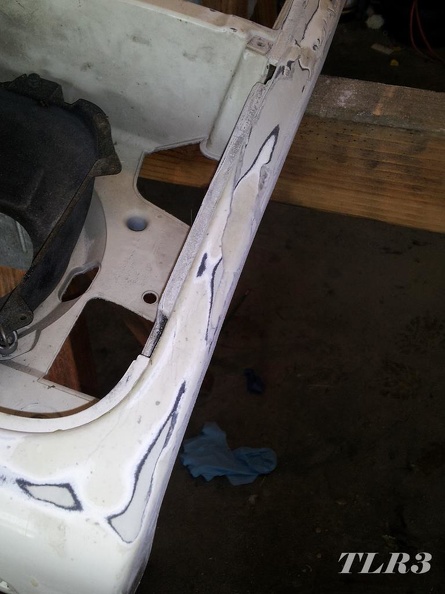
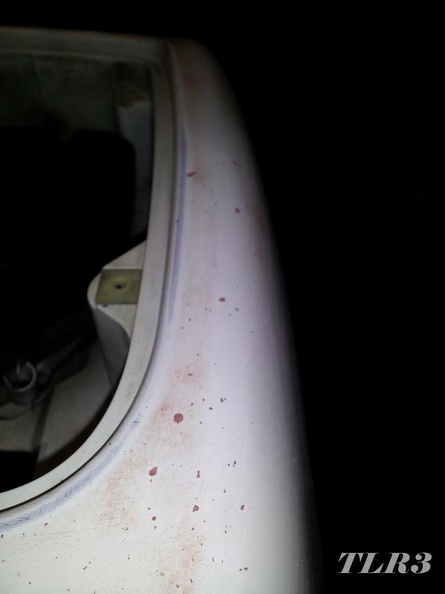
Many cracks of all sizes, in this corner below the right headlight bucket. It had been folded under and mashed in place by the bumper, this is as far out as I could get to stay by hand. This required many strategic C clamps and patience to get it back to, close, to its original shape.

While the C clamps, chunks of wood, and prayer held the header panel, I used chopped fiberglass mat, and polyester resin to add structure, and to get the header panel to maintain its original shape.

Then a lot of sanding.

And more sanding.

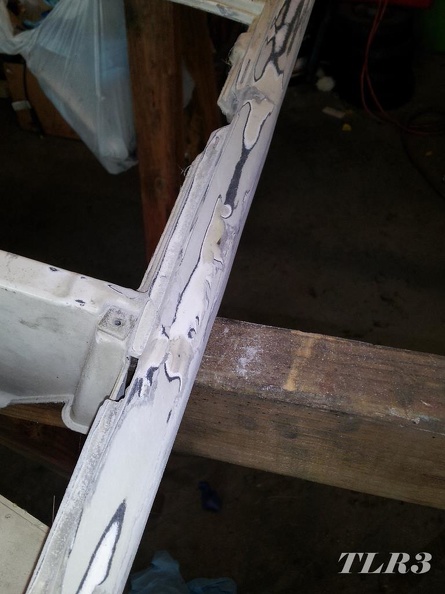
Then a little Bondo glaze, and more sanding.

Followed by more Bondo, and you'll never guess it... more sanding.

Then I got to the point that I was relatively satisfied.

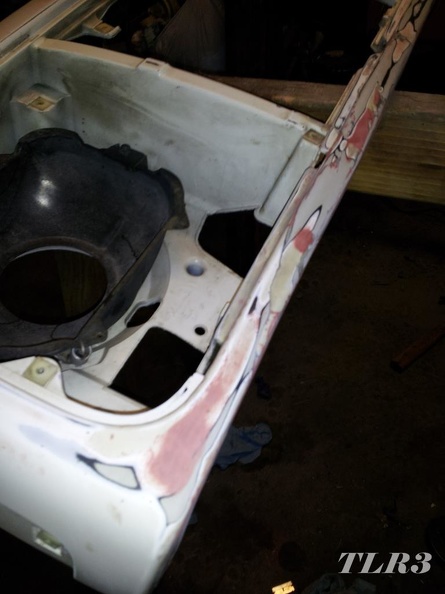
But then, I decided I hadn't had my fill of sanding quite yet, so I filled in all the stone chips on the header panel with Bondo, and sanded some more.

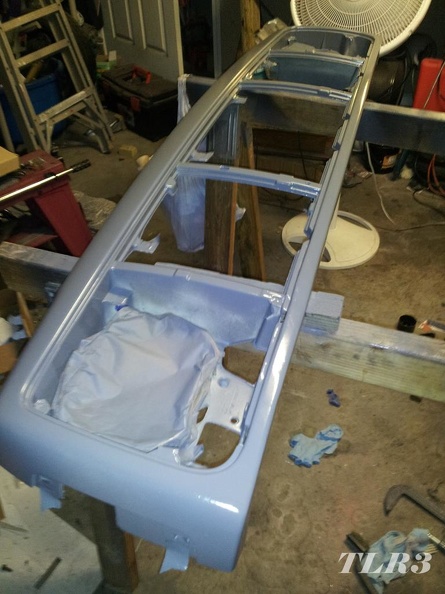
Then I sanded the whole thing with some 150 grit, cleaned, then cleaned, and then cleaned some more. Followed by masking the headlight buckets, and screw holes. Then I shot some leftover Summit Racing 2 part epoxy primer on it.

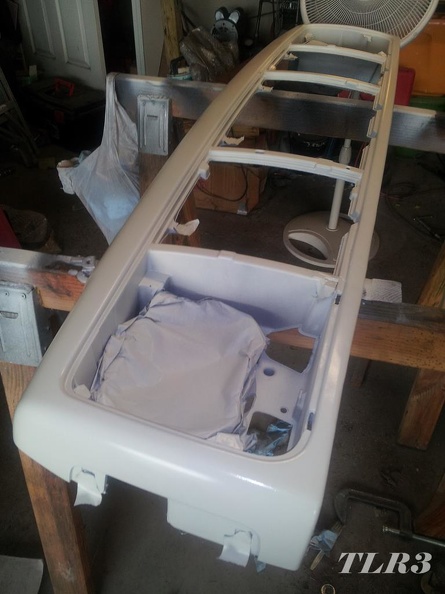
Finally I top coated it with Dupli-Color's Perfect Match, Chrysler Stone White, and OE Clear rattle cans.

I'm not satisfied with the Dupli-Color's coverage, though it looks way more white in person than it does in the the photo. If I had to do it again, I'd just go down to O'Reilly's and have them mix me a quart of Nason in Stone White. Coverage with those Dupli-Color cans SUCKS, they're tiny and $7.50 a can. 5 cans of white between the header panel, bumper, and bumper cover, and 2 cans of clear. I'm not satisfied, but I got it to the "good enough" for now stage.

1 2 3 4 5

You'll need to log in to post.

Our Preferred Partners
6UyDUunBMgz6iKX4BR7I4WbZycuJB37LcgYtCGAR1zNGyDaRDNQXfMERcZupowjv