


+1 lolz for the PCV setup. Love this car and the thread. Still following along from home.

+1 lolz for the PCV setup. Love this car and the thread. Still following along from home.

I took the car out for a long ride around the city last week. Gorgeous night for a drive with air temp in the 80s, but beating on the car on the thruway I was seeing 240F IATs at the end of a pull. Even cruising for extended periods as the evening cooled down they never went below 120. I realized I was spending a ton of time staring at the handheld worrying about IATs, so I decided it was time to do something about it.
The reason I never installed an A2A in the first place was a lack of space, and mostly me using the parts I had laying around. The truck water pump worked but needed a bunch of adapting to fit. Old FEAD setup: Truck accessories/WP, bunch of 90s and hose splices to route the top rad hose under the turbo outlet. Overly complicated and took up a bunch of space.

The LS3 (2010 Camaro) water pump has the outlet in the front with truck spacing, but was about the same price as buying an LS1 Camaro pump, new Camaro top hose, new tensioner, 2 sets of gaskets, and the water pump spacers (.700"). So...

Tore it all apart, removed some of the plastic bumper shrouding between the hood and the bumper. Made up some new tabs to mount the bottom of the radiator isolators. The whole radiator/fan assy got shifted back 2-3". The radiator was previously mounted dead center (fore/aft) on the lower rad cradle, whereas now the front of the rad is flush with the rear face of the crade.


Few more shots showing the movement. It's best visible looking at the cutout for the rad filler cap.

The other issue is that the belt now rubs ever so slightly on the bottom of the intake coupler at the throttle body. I can probably find a smaller tensioner pulley in a catalog to bring the belt away.

I'll have to figure out something for the header panel, chop out the middle section or something. The plan is to throw in one of these now that I have room:
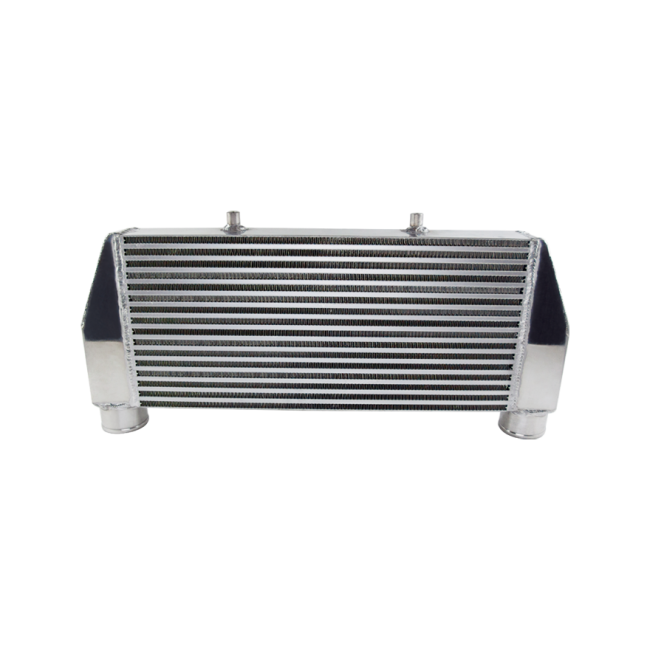
3" aluminum charge piping will run up and over the top of the radiator.
Plenty of room now:

Aftermath of TMP and WGI 1 day events. I'm almost positive these rotors were original to the car. Pour one out for these bad boys


New SS lines and fresh annual fluid


New pads up front for street use only to replace the OEMs. These are awesome, there is little to no dust output.


Big beefy Hawd DTC-70s for track use. Got them through FCP and will be utilizing the Lifetime replacement to ease costs.

Quite thick

The next step in extending pad and rotor life was getting some cooling into the front brakes. For whatever reason there is absolutely no ducting to the brakes on the M3...even my lowly 2001 540i had ducts that shot some ambient air in the general direction of the hub.
I picked up some aluminum backing plates that use a 2" inlet. They needed minor massaging to bolt up, but protect the tie rod ends from heat fairly well.

https://www.aliexpress.us/item/3256805170661695.html?srcSns=sns_Copy&spreadType=socialShare&bizType=ProductDetail&social_params=20980123854&aff_fcid=95348624f8e9420689383a29a556999c-1690227427717-02933-_mNqd5Jw&tt=MG&aff_fsk=_mNqd5Jw&aff_platform=default&sk=_mNqd5Jw&aff_trace_key=95348624f8e9420689383a29a556999c-1690227427717-02933-_mNqd5Jw&shareId=20980123854&businessType=ProductDetail&platform=AE&terminal_id=41a9b5dc604440cd9a97a80ececb7e37&afSmartRedirect=y&gatewayAdapt=glo2usa4itemAdapt
I adapted the 2" inlet to 2.5" hose with an off the shelf exhaust adapter and bolted it all up.


For the fresh air inlet, I cut holes in the face of the undertray and bolted up 3D printed ducts made by a member on the E9X Track and Race Discussion FB group.


Clearance is good, it's very close at full lock with 275/35/18s by the subframe but I used a few extra zip ties to suck in the duct and oval it where it was close to the tire.
Fresh rubber - love these tires for their endurance, durability, and price point.

Turbo LS Jag waits patiently for its turn in the garage.

Update - Still had the issue with coolant escaping the radiator cap under boost, but I don't really think it's the headgaskets. I pulled all the plugs and scoped the bores, all pistons had a nice buildup of carbon and didn't seem to have evidence of steam cleaning.
That's not entirely conclusive since it seems my "headgasket leak" would have been pressurizing the cooling system and forcing coolant out the radiator cap, rather than allowing coolant to get into the combustion chamber. To confirm that, I pressurized each cylinder with shop air (100psi) and let it sit for a few minutes, looking for evidence of bubbles coming out the radiator cap or surge tank cap - nothing. I also did a compression test, with all 8 coming in with at least 170-175psi.
So, I pulled out the F-body radiator and installed a new C5 radiator, which is the same design/footprint, just without the integral radiator cap. F-Body fans slip right in, no modifications needed. While the system was drained I also swapped the thermostat for a Motorad with a 160F opening temp, and changed the fan temps to come on sooner (#1 - 190F, #2 - 200F).
The old thermostat on the left was a mystery truck unit that came out of one of the half dozen spare truck water pumps I have. It had a 187F opening temp and the design looked a bit different than the new one I installed.


Result - no more coolant loss (at least externally). Runs usually around 180-185, if it sits for a minute at a light it'll sneak up on 190-195 and fans bring it back down quick. Haven't logged coolant temp during a long pull yet.
I also finished up the intercooler install. IATs are now nearly ambient (perhaps 20F above, after a pull) rather than 240F.


Wrapped the pipes (mostly cosmetic, maybe keeps some heat out).


Laying some stripes on my 35th birthday for durability testing
https://youtube.com/shorts/FumOtGFOf_g?feature=share
I run pump ethanol all the time. Even though there's a station 15 minutes from my house, it's out of the way, so I'll head out there every other week and stock up.

Slowly getting my little guy (19 months) into cars. He will see my M3 or Jaguar and yell "DADDDAAAAAAA"

Went for a cruise a while back.


Rerouted some items under the hood to add the Corvette engine beauty covers. Yes, the motor in the car is a plebian iron 6.0 and not an aluminum 5.7, but the covers came off my personal C5 FRC that I owned from 2016-2020, so they have sentimental value.

And finally, hit the local Cars and Coffee with an old acquaintance in his all original 1970 Series 1 XJ6.


Original steering wheel was gross, the leather was sticky and in bad shape, no amount of cleaning would get it reasonable. I splurged on a new wheel and hub adapter, which is about 1" smaller in diameter. Way better. The horn button required a small sub-harness to mate up with the horn button, no biggie. I am on the hunt for a small (1" or so) Growler/Jaguar emblem/badge to put on the wheel, if anyone knows of a reasonable example let me know.

Starting to work on refinement of a couple little items that have been bothering me.
-Get the stock gauges to work, I want to see if Dakota Digital has an interface that will talk to the Terminator X Max and translate RPM and Speed to the stock gauges.
-Work on front end alignment, currently there is a fair amount of toe out which is causing it to be very darty. I plan on trying my hand at a DIY alignment.
-Polish the lips of the wheels
Always happy to see this thread on the front page. Good luck on the gauge integration - let us know how you do it. I need to do that with my Colorado. Or pay $400 for the integration harness Current Performance makes.

Great picture......the Jag ....werkin' the big grin OHY .....yur best buddy !
Just curious, is there a inlet filter assembly for the turbo?
No filter at this time, space limited, only about 2" between it and the radiator.
I'm trying to get more into the Youtube thing. Spent some time making a video about my recent lapping adventures this past fall. If you're bored, check it out and consider subscribing. Always open to commentary and suggestions.
https://youtu.be/QJp_zCMPW2A?si=x73nT_uVXtSiCkAB
When I bought the car over 2 years ago (man that went quick) the front outer tie rods were shot - lots of play and boots torn. I replaced them during the engine swap and did a very quick eyeball alignment which got me on the road but the car never drove quite right. It was darty, the steering would follow grooves in the road, both characteristics of too much toe out. I decided to try my hand at a DIY alignment and learned some interesting facts along the way.
I drilled some holes in aluminum square stock cut to exactly 24", mounted them to the hubs, and set the toe that way (1/4" toe in).

I then put the wheels back on, set the car on the ground, took it for a spin, and it still drove poorly. After doing some research, I decided to measure the toe difference between loaded and unloaded. Turns out as the suspension compresses, the wheels toe out quite a bit.
I put the car on wooden wheel cribs to be able to access the tie rods, settled the suspension again and zip tied the bars to the wheels.


Measuring the front of the bars compared to the rear, wowza! There was close to 1" toe out. This explains why the car was so darty, and why it would leap all over the place when coming off full throttle. The nose would come down, wheels toe out and the front end would want to pull. After dialing in 1/4" toe in with the suspension compressed, the car drove straight and the darty feeling was gone.
I got the SGI100BT installed and am having trouble getting the tach working. To verify that the actual tachometer itself works, I hooked the tach signal from the Holley directly up to the tachometer (no SGI100BT). It works and reads rpm (although low). Keep in mind I have the 330ohm resistor soldered in per the following link
http://www.jaguarspecialties.com/tech_tips3.asp
With the SGI-100BT installed inline, the tach doesn't work. It has a good 12V switched power source and ground and turns on with the ignition. When I hold the SET button with the engine running it shows a number bouncing between 048 and 052, which rises with RPMS. I assume that means it has a good input signal from the Holley. I confirmed this by verifying that I have a 14V AC signal on the input wire from the Holley. However, the tach still does not work. I tried both the Normal and High Voltage outputs per the diagnostic guide but didn't have any luck.
So in summary, I know I have a good input signal and a good tachometer.
The only thing I can think of is a setup error that I'm missing, or that the tach has a 330ohm pull-up resistor soldered in.
After putting the kids to bed, I spent Saturday evening tinkering with the tach. I snipped out the resistor and resoldered those leads, returning the tach to OEM spec. Just for testing purposes, I left the tach loosely installed with the signal wire hanging loose.

I fired up the engine and was met with a working tach! After a few minutes comparing the RPM readout on the Holley handheld to the analog tach, I used the Dakota Digital app to apply a correction factor and bring them in line. Success!

The Christmas miracles continue. I enabled the speedo output in the Holley with the default 4000ppm signal, wired it up, and we have a speedo!

I did have to apply a correction factor of 2.0 via the DD app which means that the Jaguar speedo is looking for a 8000ppm signal. Now, I need to figure out what I want to do with the rest of the auxiliary gauges (fuel, temps, etc) and clean up this mess of temporary wiring.

What an awesome feeling seeing the OEM tach and speedo just "work".

Nice progress.
First "issue" with the car since the swap was done - original diff gave out. I was coming home one night and started to hear a knocking from the rear end consistent with vehicle speed. Figured it might be a driveshaft issue, but decided to chance it and limp the car home.
The chassis is an '84 with 172K on it, but the rear end assembly has "85 XJ6" written on it in ink marker so I am assuming it was swapped out some time in the last 39 years. No clue on the mileage on it though.
Drained the diff. This gear oil has only a few thousand miles on it.

The rear end comes out as an assembly so 2 hours later I got this.


The folks in Quality Assurance came by to check my work

The culprit is the retaining pin that holds the cross shaft in place, which walked out and allowed the shaft to knock into the pinion.

Pinion took a little beating

It's a shame because I think the 2.88 ratio suits the setup very well, so I am reluctant to regear. The damage is in a non contact area so maybe I'll deburr the pinion teeth and see how it runs.
I hammered out the cross shaft (shouldn't have to do that) and found that it had pretty bad galling on the spider surface. Definitely a lack of oil at some point which caused it to get mega hot.


I actually had to hammer out the cross shaft halfway, cut off the exposed stub, then hammer out the remainder as I obviously wasn't able to pull it out with the carrier flipped.
Thinking back, when I dragged the car home it was on the back of a tow dolly since there were no car trailers available due to Covid madness:

Even though the original trans was probably going to be scrapped, I still unbolted the driveshaft from the pinion flange so that it wouldn't cause anything to seize up and lock up on the thruway. Once I got the car home and up on the lift for the first time, I drained the diff and only a few ounces of gear oil came out.
My theory is that it drained out due to a bad leak on the driver's side output shaft while in storage before I bought the car, it got very hot on the way home, and then I continued to beat it to death with new oil for the next 2 years behind the LS.
Game plan - try to salvage the ring and pinion, order an Auburn locker, replace bearings, and put it back together. I'll also check on the condition of the output shaft bearings, hub bearings, and various seals while I'm in there.
If anyone is in the PA/NY/Ohio area, we're having an HPDE in May that's an excellent event for both novices and seasoned track rats.

Made a video about my last build, 2011 Crown Vic with the turbo LS. Give it a watch (Jag content at the end).
https://www.youtube.com/watch?v=NQ2kaYHQSE8
Getting apart the IRS was dirty, tough work. This chassis is remarkably rust free but it seems the rear end was worked on at some point since I found evidence of a rebuild in a few spots. Driver's side hub carrier assembly missing the bronze phosphor spacer ring (huge endplay), the words "85 XJ6" written in paint pen on that same carrier (this chassis is an '84), and some missing tie wire.
I spent the better part of a few weeks trying to get the hubs out of the carriers. My person 12 ton press and a friend's 20 ton press were defeated even with the use of a torch to melt the loctite on the splines; it took a 50 ton press at a heavy truck shop to get it loose. Unfortunately the end of that hub was damaged beyond repair, but Dave @ EverydayXJ saved the day with a spare.


Another week was spent beating/pressing off races and bearings and cleaning. Both my carriers exhibited the cracks that seem to be present as a result of the casting process.


I dropped those off for welding and reinforcing, and while I was waiting busied myself with other items.
Originally I wanted to reuse my 2.88 ring and pinion since the long gears were great on the highway and loaded the engine nicely, which helped spool the turbo. Since the original 2.88s were destroyed when the open diff let go, I purchased a used set of Jag 2.88s from DTS in Detroit. Unfortunately, I found out that these gears are not compatible with the Auburn 546085 19 spline Posi limited slip. They physically bolt up to the differential carrier, but the flange is too close to the pinion and will not allow the carrier to be mounted.
I have to give credit to Bill at Rear End Specialists, who worked with me to find a solution. He was patient and welcomed the challenge as he had not done a gear and carrier swap in a Jaguar Dana 44 before. I recommend his services.
https://www.rearendspecialists.com/
A well known shop local to me, Denny's Driveshaft, came through with a new set of Dana 3.54 gears and the required 26 spline pinion yoke. They are located 10 minutes away from my axle builder, so no shipping was required, and Bill picked up the parts from Denny's for me. Big thanks to both shops for helping me out.
https://www.dennysdriveshaft.com/index.html
Once I got the diff back, I started the process of building it up. I rebuilt the output shaft assemblies with new seals and installed the rotors/calipers.


The diff cover got cleaned up with fresh paint. I noticed that the breather vent had some mangled threads, so I welded in a stainless 1/8" NPT elbow for the vent to mount to.

I designed a set of conical differential to cage mounting sleeves. My OEM bolts on top of the cage were tight, but I figured this was an easy way to ensure the diff wouldn't come loose due to the lack of thread engagement with the OEM bolts.
![]()
1/2"-13 threaded studs were trimmed to size, installed with blue thread locker, and self locking nuts installed on top of the new spacers to ensure alignment.


Winter is wrapping up here in Buffalo, so I got my other fun car out of storage and ready for the warm season. The summer is the first where my son is old enough (2) to face forward, which makes it much easier to load him into his seat. He and my daughter cannot get enough of "Blue Car".


Next up: Axle carrier rebuild, full u-joint replacement, fulcrum shimming.
I realized I never wrapped up my notes on the 2023 HPDE season.
Around mid-summer 2023 the car threw its first CEL in my ownership, for a Thermostat code. I hooked up my OBD dongle and monitored coolant temps to find that it was hovering around 165F when "warmed up", so obviously the thermostat was stuck open. Although the car already had the water pump replaced early in its life, I figured it was cheap insurance to do while I was in there.

Surprised to find a plastic impeller, but pleased to be replacing it with a metal one.

I also replaced union o-rings and hoses as a precaution. FCP Euro includes a nice kit for all this.


Of course I broke this little bugger (radiator drain plug) before I realized it was a one time use and had to pay a ridiculous fee for a new one. I also replaced a noisy belt idler pulley/bearing.

The GVC Chapter of the BMW CCA hosted their fall event at Watkins Glen at the end of September. This is one of my favorite events due to the cooler temps.
I always make it a point at each HPDE to spend time walking through the garage and to snap photos of the machinery. I remember as a teenager wishing I could spend time around these kinds of sports car when I was older, especially at a racetrack. It's so easy to get wrapped up in worrying about my driving technique, lap times, making sure the car is mechanically sound throughout the weekend, so it's important for me to live in the moment and make sure I appreciate my situation. Really cool to see C8 Vettes out on track getting thrashed.


An old friend of mine came to spectate and drove his B13 SE-R down from Buffalo. Really cool car, I'm trying to convince him to do an event with us. He has a couple of these cars, I think this one has an SR20 with a small turbo on it.


I had a feeling my brake cooling scoops might be too fragile, and sure enough the track heat beat them up a bit. I jury-rigged them well enough to continue running the rest of the weekend without flying off. Always bring a bag of zip ties.


More cool stuff.


Sunday dawned clear but cold. My wife and kids made the trek down to check out the track and spend time with their beloved "Blue Car". Some really awesome memories made.


Loaded up and en route home in one piece:

At home, coming off the trailer I snagged the undertray on the ramps and that was the end of the scoops. I later remade them using steel.


October brought a fun weekend spent at Pittrace. The Delaware Valley Chapter sponsored an HPDE over a weekend, so I got to catch up with some familiar faces.
Although my M3 is nearly stock, I still choose to trailer it to events since I don't want to be stranded in case a mechanical issue comes up (or worse yet, an on track incident). My trusty F15 X5 has put in a couple years of towing duties now and performed really nicely. The combination of a shorter hitch and Airlift Bags have reduced squat significantly. Having a support vehicle also gives me the flexibility to bring spare wheels, tools, extra gas cans and food/drinks to reduce trips into town. Also, I don't really know why, but I love towing stuff.


The Uhaul trailers are okay functionally, but it was getting old renting one for every event; not only was it inconvenient to have to go grab it and return it, but obviously made little financial sense to rent. I am making a conscious effort to keep costs in control with this hobby, so I picked up a car trailer at auction:

I'll be modifying it once I get it back home to better suit my needs. I'd like to store a spare set of tires on it permanently, and mount my toolbox and a rack for gas cans. The idea is to minimize the amount of unloading when I get to the track, and packing when I leave. In the meantime back to Pittrace:


Pittrace is small in comparison to the Glen, but I think it's more scenic and a more "playful" track. It rained on and off Saturday but really started pouring Sunday. No problems - just kept the defroster running and heated seats on. Sometimes not having an all out racecar is awesome...


Obligatory cool car little kid appreciation post

I put together a video of some typical prep and laps.
No issues other than guzzling gas and wearing out a set of pads up front. I am convinced that DSC/MDM is significantly contributing to pad wear by applying the brakes whenever it likes. This year I'll be running with all that jazz turned off and am curious to see if my pads last longer than a weekend.


I'll be back in May for the Genesee Valley Chapter's first event of the year.

I squeezed in one last track day at the end of October by heading over to Toronto Motorsports Park in Cayuga, Ontario. I've been going to this track since 2016 and love it here. 1 hour away, lots of runoff, low stress easy seat time.

Because it's so close, it's easy to get a bunch of friend together to head out. This time around we had the turbo B13 SE-R, a supercharged E46 M3, an FR-S, and my buddy's 339,000 mile E39 M5 set up for track work. He actually just picked up another M5 that he's converting to track duty - check out his channel for more detail.
https://www.youtube.com/@technician1177
Again, cool temps made for a really enjoyable day with the boys.


Since my buddy with the SE-R loves to hate on V8s, I had to give him a hard time about lending him gas for the 4 cylinder...

The E39 M5 (affectionately known as EPICJRNE), was fighting some limited slip diff issues and kept lighting up one tire in certain corners.

The supercharged E46 M3 did really well considering the owner just bought the car. Cold temps and older rear tires made for a loose rear end.


Oddly, I can see your video captures, but pictures aren't showing up in your last few posts. :(
In reply to dyintorace :
weird, everything is working for me, just a bit slow to load.
You'll need to log in to post.


