
The MG has Kirkey 56LW seats that I removed the rib protectors from leaving more traditional shaped seats. This is good they are comfortable and light however the problem is without rib protectors there are no off the shelf seatcovers. Also off the shelf seat covers for aluminum race seats generally fit horribly and and very expensive for what is some vinyl and button snaps. If I'm going to have horrible fitting seat covers they might as well be ones I've made myself.
In classic me style this thread is pretty much real time. Your also watching me do something for the first time so expect to see lots of the wrong way to do things and probably a small fire at the end when I burn down my terrible seat covers and we will all agree to never speak of this again.
Ok that out of the way on to the good stuff.
Supplies:
Marine Vinyl or other fabric of your choice. I went with Black because none of the other colors matched the base "fabric" I have selected.
Heavy Thread. Scissors (you should probably get sharp ones, mine are terrible).
A Sewing Machine (Obviously I'm not doing this by hand). This is a 1989 model singer of some kind that belonged to my Grandma Margie. It's got cool 80's-tastic graphics and sews 13 kinds of stitches I'm scared of, and 1 I am going to use.
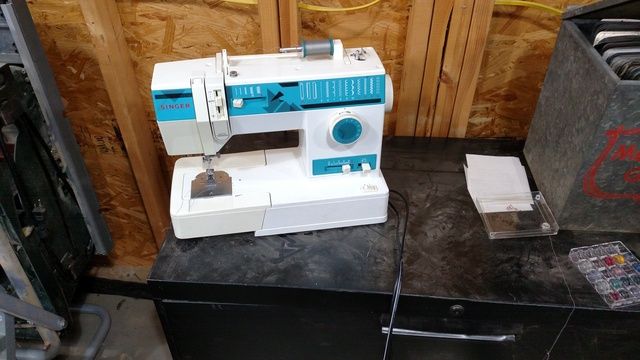 Since I've never used one of these by myself before I read the manual to learn how to thread it. I'm sure there is a segment of society that still does some of the things the manual suggests (Like sewing together your own underwear) but given what I saw at the store when I went to get supplies with CAD embroidery machines I'm not sure. For now we are sticking to the normal foot, a mildly fat single needle and a normal bobin.
The first job was to make sure that it would stitch through 2 layers of my "fabric" + 2layers of vinyl. It seemed to be able to do that. In fact this random 80's machine seems to be able to punch through about 5 layers of vinyl. I tried a couple different seam types.
Since I've never used one of these by myself before I read the manual to learn how to thread it. I'm sure there is a segment of society that still does some of the things the manual suggests (Like sewing together your own underwear) but given what I saw at the store when I went to get supplies with CAD embroidery machines I'm not sure. For now we are sticking to the normal foot, a mildly fat single needle and a normal bobin.
The first job was to make sure that it would stitch through 2 layers of my "fabric" + 2layers of vinyl. It seemed to be able to do that. In fact this random 80's machine seems to be able to punch through about 5 layers of vinyl. I tried a couple different seam types.
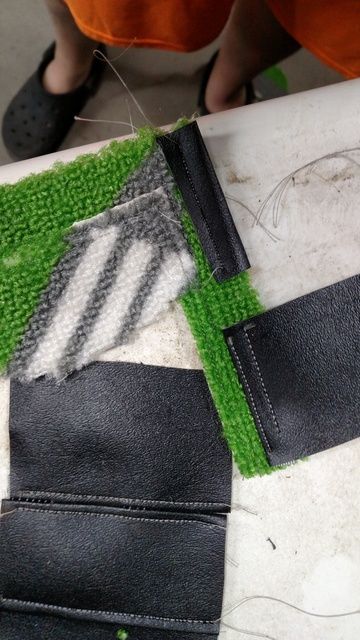
The one on the bottom is what I'm going to use for the seat. Obviously when you are doing Man things in your Man Cave you wear Manly shoes. You can see that the "Fabric" I have selected is in fact short pile carpet. Better than that it's Racetrack carpet. I wanted something that had some natural padding and was durable. I originaly was just going to use generic automotive carpet in a light grey but then I went to Ikea, and they had these for $14. Two found their way into my kart.

Next post we will get to actual seat covering.
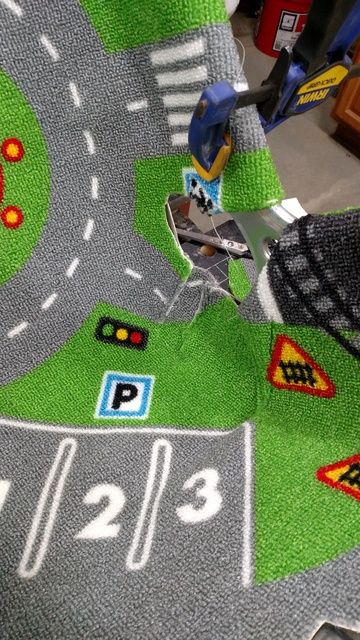
The first step was to push the carpet into the seat and cut a general template out. I had the bottom and back as flat as I could and centered the template. Once I did that I slowly cut the shape of the seat out. The hardest part was the area around the hips where significant overlap occured. I forgot to take a picture of the template but I have traced it on the back of the other carpet so I will get a picture when next time of it.
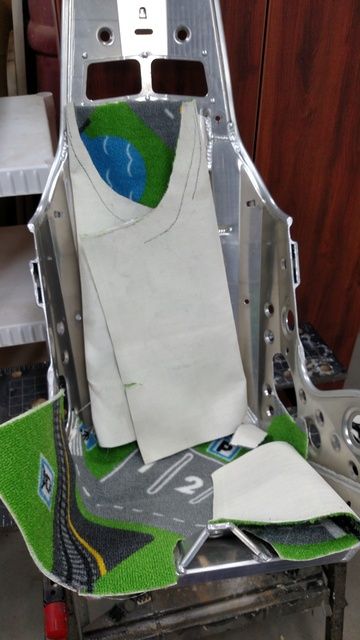
Once you've cut it all out it will sit in the seat pretty well. Folding it back on it self helps a lot. I found best success by finding 2 spots on the seat to make the reference that I always bring the part back to when I remove it for trimming or sewing.
When I stitched the overlap portions I rolled them up from the back or bottom and marked the seam that way I could replicate it on the sewing machine. I found the carpet sewed the best facedown. The foot would tend to get stuck on the piles and make a mess but If I had it on the feed table it didn't have that issue. It seems backwards because of the little teeth on the drive mechanism would seem to really get caught but it worked well.
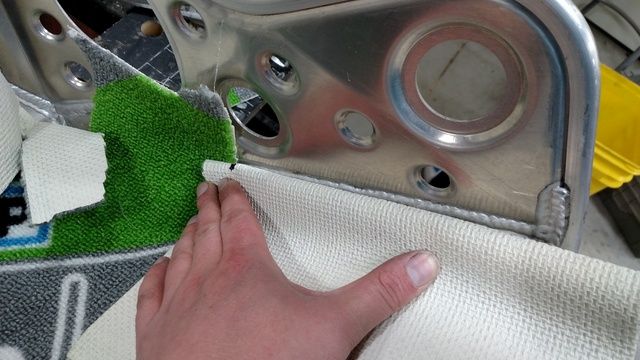
here you can see the result of all the seams. It's not as clean as I hoped but it lays pretty flat. I will add some button snaps or sew on some velcro to help it sit on the seat better. The area around the belt hole will get some vinyl trim which will make the carpet seams sit flatter.
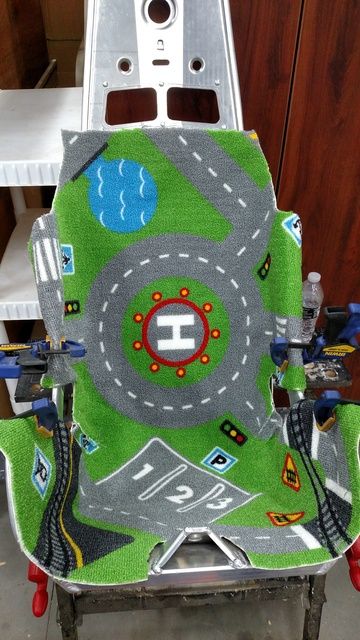
Here is the current status, I am at this point done sewing the hip area and am ready to move on to vinyl edging next. I do wish I could have found something a little more racetrack and less town but all the racetrack carpets were to small.
Very cool. The passenger seat in the Abomination needs so help so I'll be following this closely.
Very cool! There is a great Youtube channel called 'Home Built by Jeff'. He recently made seat covers for his Porche. You may be able to pick up some tips from him.
Neat. I have to do this on the challenge car, so im learning from you.

RossD
UltimaDork
4/3/17 7:12 a.m.
What happened to your home made seat?
Now you're just making me want to go drift a roundabout
This is great! I have a similar seat that needs help. It has a cover glued onto the factory cover for the challenge but that wasn't as successful as I hoped it would be
umm not to be a downer but I bet that carpet lights off like you would not believe and a safty tech is going to have issue with it.
In reply to wearymicrobe:
I'm going to do some testing but my plan was to use a commercial fire retardant spray and reaply annually or if the car is caught in a rainstorm. The manufactures of the products rate it as maintaining NFPA protection for 3 washes. I was going to test before and after application. I also was going to try the Borax+boric acid DIY approach to compare to the commercial product.
https://www.amazon.com/No-Burn-1005-Fabric-Fire-Protection/dp/B002TKLD14
That's rad you can sew that many layers with a hobbyist level sewing machine.
A friend of mine bought an old HD commercial machine to recover the seats in his 928 and tried to get me to buy it off him before he moved back to CA. I regret not taking him up on it.
Progress update:. I've actually only worked 1 additional day on the seats since last update.
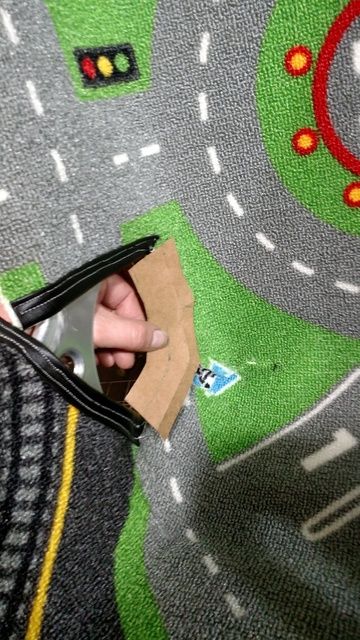
I've started doing the edgeing and purchased some more supplies. I chose the seatbelt area as the first edge to do. Turns out this was a mistake. I thought that since I would likely screw it up I'll make it first since it is covered by the belt. The problem is because of the curvature it is also the hardest to do. Because of the material stretch I couldn't do it in 1 piece so I ended up with 3. I cut the third piece out of some paper as a pattern and transferred it to fabric.
I also did some testing on flammability of the fabric.
The first thing I did was heat a piece of metal to red hot and set it on the fabric. This was to rest it's self ignition. I was pleased to see that it would not self ignite. The material just melted and that was it. I did it on both the front and back of the fabric.
The next test was with fire. I took a Propane torch and held the fabric in it and pulled it away. I was surprised that if I pulled it away <5 seconds after ignition it would self extinguish. If I held it for 10 if would burn but it burns slowly. I expected more shocking burning out if polyester and urethane. As a control I tested the vynil which is DOT certified flame resistant and it was nearly the same form a rate of burn and duration required to start burning. It also would not auto ignite on heat only.
I then treated the fabric with two products. The first was a commercial product from Amazon. No burn fabric fire protection.
The second was made from Borax, roach killer (boric acid), and Water.
Both worked about the same. Flame spread was reduced to very very slowly. A 1*3 sample took almost 2 minutes to burn once it started. This is compared to about 30 seconds for the untreated. Ignition took 30 seconds of flame exposure. This was much improved and I am satisfied given that it is better than the DOT approved vynil.
As a final test I set an old Fiero seat pad I had on fire. It burned much more vigorously than even the untreated carpet. I'm not suggesting that this flame stop makes the seats perfectly safe or that it makes any fabric safe but based on the testing I have done I am comfortable with the results of this fabric. If I get grief at an event the seat covers will be easily removable if needed.
Well that is 10000% more work then 99% of people would do. I am convinced.
Also check the foam, from personal experience some of it goes up real quick as well. BUt only if you are using it on the seat.


 Since I've never used one of these by myself before I read the manual to learn how to thread it. I'm sure there is a segment of society that still does some of the things the manual suggests (Like sewing together your own underwear) but given what I saw at the store when I went to get supplies with CAD embroidery machines I'm not sure. For now we are sticking to the normal foot, a mildly fat single needle and a normal bobin.
The first job was to make sure that it would stitch through 2 layers of my "fabric" + 2layers of vinyl. It seemed to be able to do that. In fact this random 80's machine seems to be able to punch through about 5 layers of vinyl. I tried a couple different seam types.
Since I've never used one of these by myself before I read the manual to learn how to thread it. I'm sure there is a segment of society that still does some of the things the manual suggests (Like sewing together your own underwear) but given what I saw at the store when I went to get supplies with CAD embroidery machines I'm not sure. For now we are sticking to the normal foot, a mildly fat single needle and a normal bobin.
The first job was to make sure that it would stitch through 2 layers of my "fabric" + 2layers of vinyl. It seemed to be able to do that. In fact this random 80's machine seems to be able to punch through about 5 layers of vinyl. I tried a couple different seam types.


