Crap, 7 weeks without progress!!!! Well after the last mini write up, the car was outside, Most of the interior was in the garage, then workmen came and dumped more stuff in the garage for repairing the chimney and doing some brick work, then more snow, guests, vacation….. Progress stopped. Not totally as I did clean all the interior panels then clean and re-dye the carpets, but I’ve got no pics of that, not that it’s very interesting.
So, vacation over, visitors gone, workmen basically finished, most of the snow has gone and no other commitments meant that I finally got out for a couple of hours yesterday.
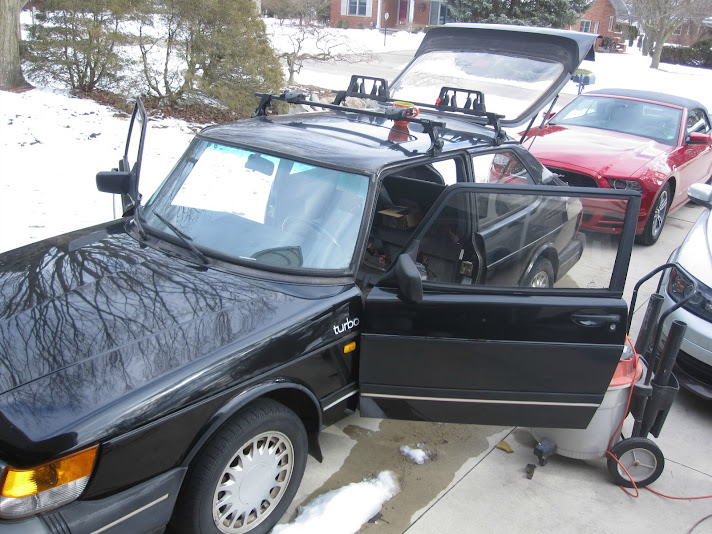 Work at last, note I said most of the snow had gone, not all of it.
No I didn’t achieve much, basically clear a car size hole in the garage, sweep up a bit then clean out the car. When I pulled out the interior and panels it was pretty groaty in there with 25 years’ worth of stuff getting under seats, through the consul etc. I hit the car hard with the shop vac and a stiff paint brush to dislodge years of compacted dirt. Much better to see what there is. There was some water in the footwells and the rear under floor spare tire, tool area had standing water. Everything is now dried out and the car is in the garage with an 80+ year old Sears brand de-humidifier inside sucking out every drop of water. I did pull off the rear hatch trim and get the external hatch release working, although I had to disable the hook from the key/solenoid to do so. The key doesn’t fit and I don’t know where the internal hatch release button should be. So not much real progress, but it was a couple of hours out there and a lot of think time.
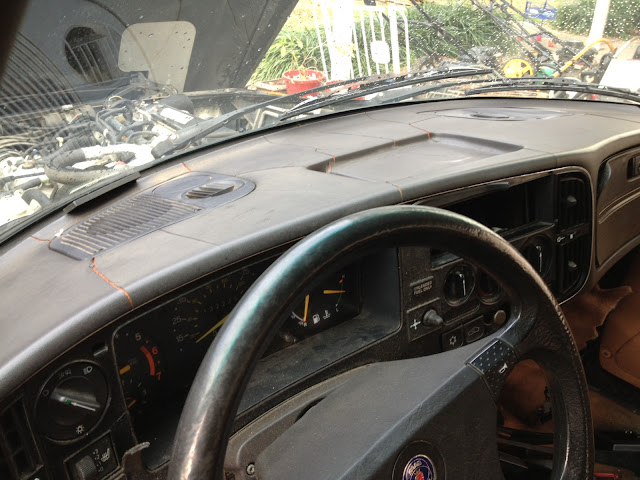
This is what the interior currently looks like.
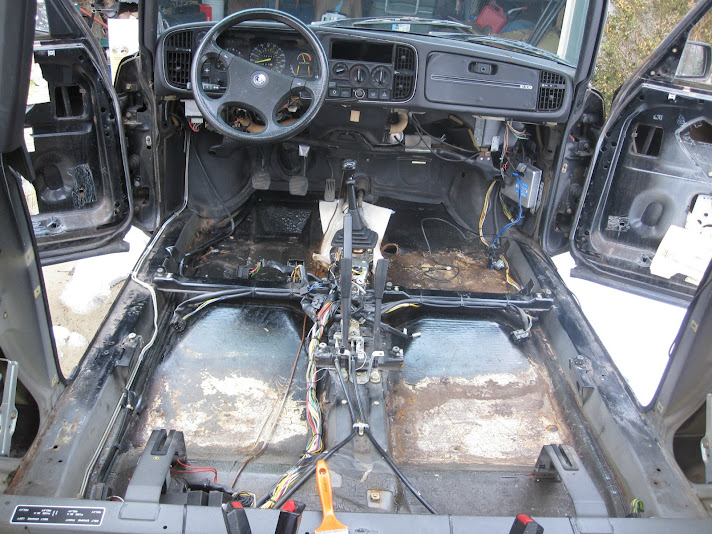 Interior looking forwards, the brown is not rust, it’s paint that’s come of the sound deadening mat that looks dirty
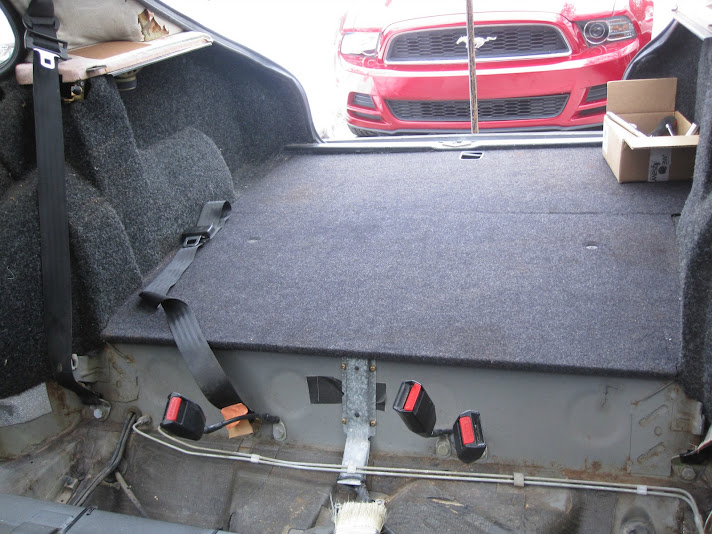 Looking back
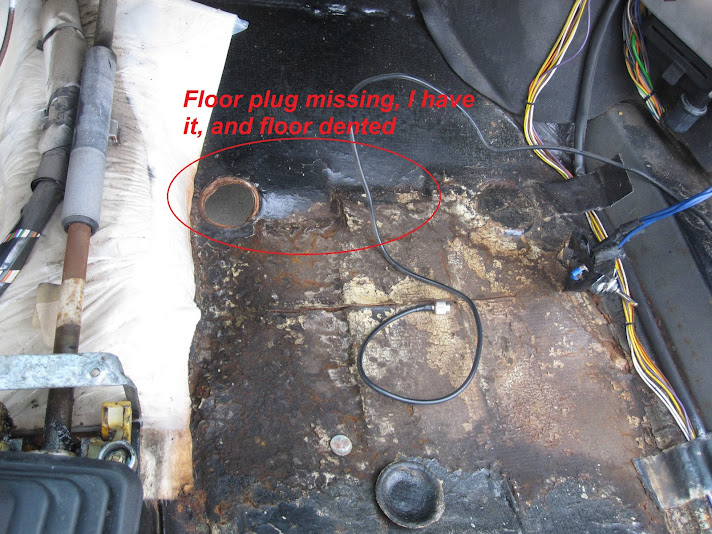 passenger side floor had a big dent and the drain plug has come out. Time for a big block of wood and BFG hammer.
 Drivers side next to the rocker panel, there is a crease and some surface rust, I didn’t see anything underneath, I hope if I hit it with the angle grinder and wire brush attachment I’ll find it’s also solid, BFG and wood time again then hit it with rust bullet. I hope I don’t need to do any welding here.
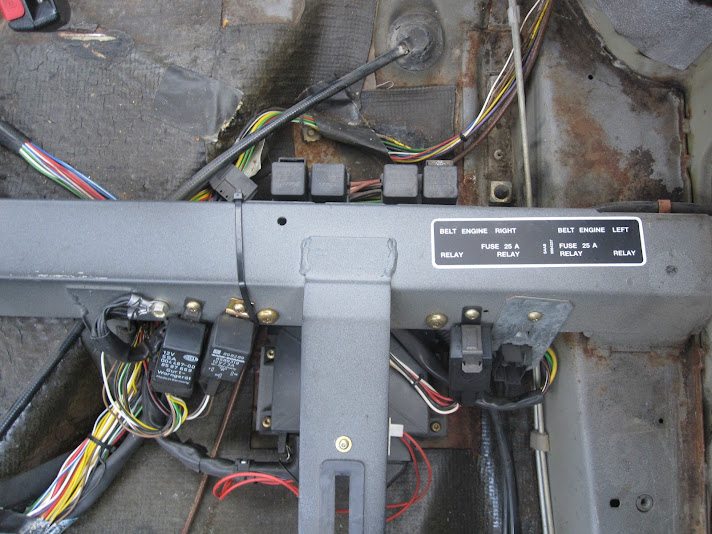 I need to check what I can get rid of here, I hope it can all go as I’m getting rid of the nonfunctional rat trap seatbelts and replacing with regular 3 point or 5 point, more on that in the next post.
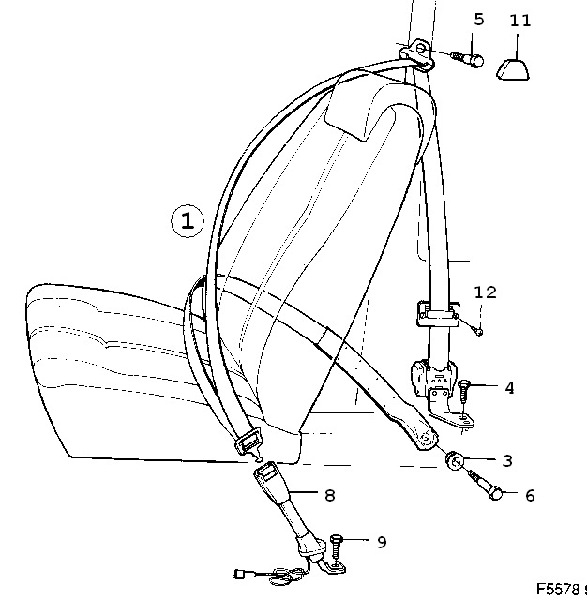
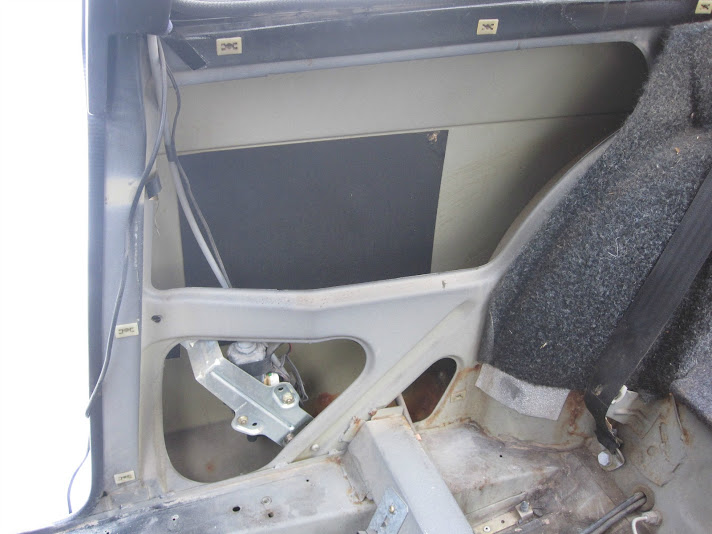 This is the rat trap seat belt mechanism itself to be removed. I’ve been told that the lower mount is still here for regular 3 point belts as they were still used In the rest of the world at this time, but I’m not sure which or where that is, can someone help out with that?
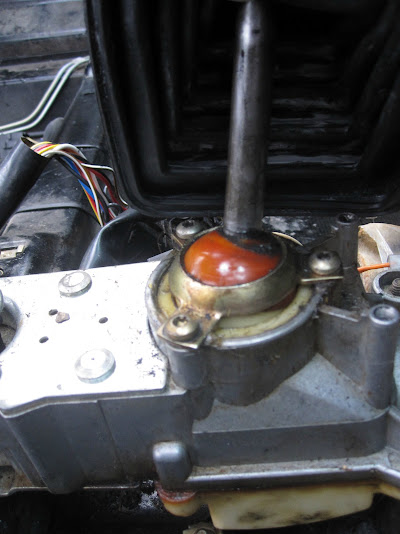 Some good news here. It doesn’t show up well, but I found that the 3 screws visible here holding the shifter in are loose adding to the slop in the change. I still have no 2nd gear syncro, but this will help. I have a new (old) shifter assembly in the parts so I plan on seeing which is better and setting up from scratch.
 This is the heat blanket over the center tunnel, I think this is just surface rust, but I’ve heard of cars rusting under here so I think it needs to come out, inspected and be cleaned up and painted


 <img src="
 " />
" />

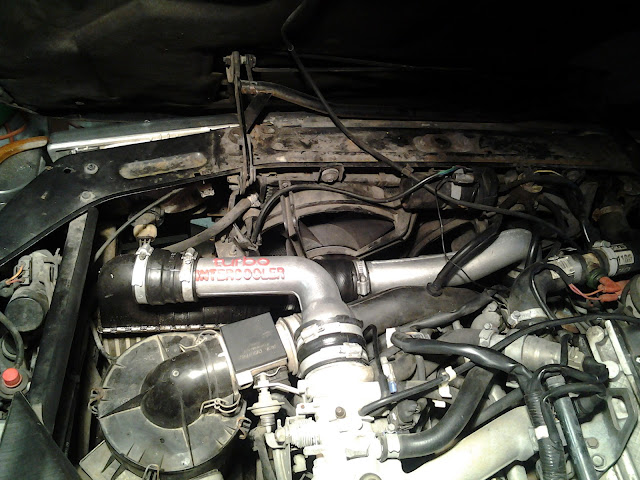
 While everything was out I’d blinged up the intercooler pipes a bit by cleaning the old paint and grime off, so then I had to throw some pretty red paint at the lettering.
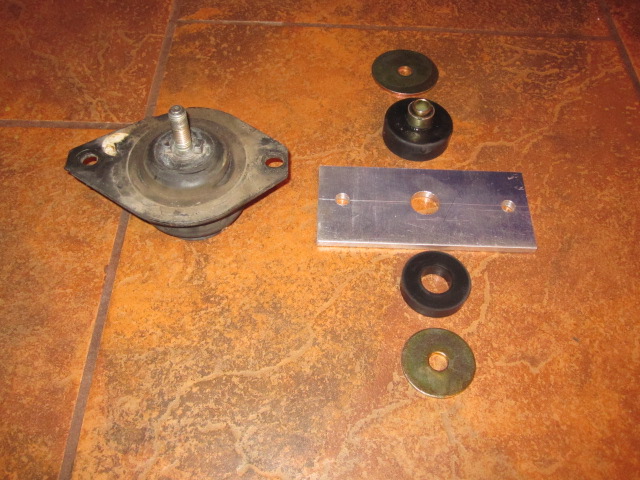
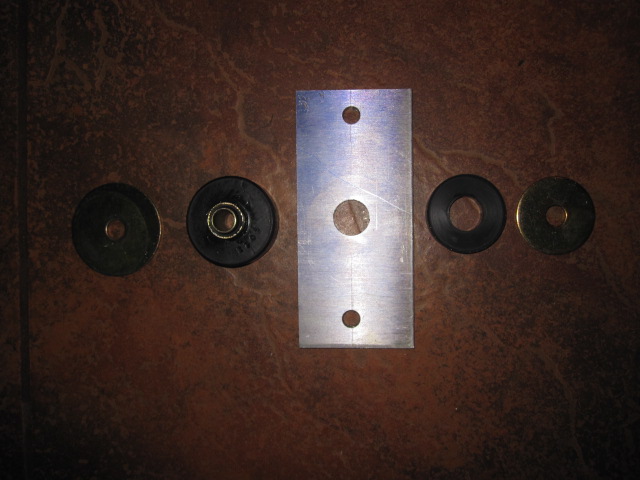
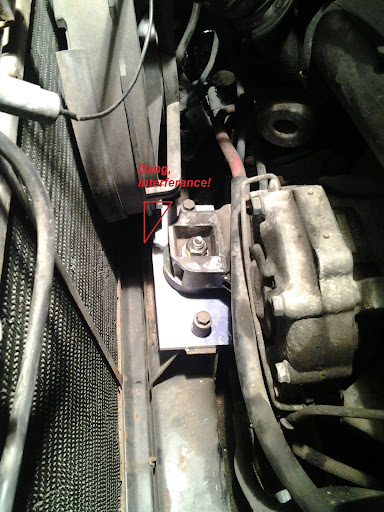
Now I’d found that the battery had nothing to hold it in place, it was just sitting on the tray, retained by the cables. I went rooting through the piles of E36 M3 I’ve never thrown away and found an old battery top clamp (the red bit below) so I got some ¼” studding, nuts bolts and washers, drilled a couple of holes and used that. Now it had been recommended on Saabrally.com that I move the battery to the trunk or under the rear seat, I wish I’d done it now as the clamp is just about touching the turbo outlet elbow and I don’t like it as a long term solution. The thing is the current batter works so I don’t want to buy a new gel cell while this one is good and I don’t want to put a lead acid in the passenger compartment because out gassing.
While everything was out I’d blinged up the intercooler pipes a bit by cleaning the old paint and grime off, so then I had to throw some pretty red paint at the lettering.
Now I’d found that the battery had nothing to hold it in place, it was just sitting on the tray, retained by the cables. I went rooting through the piles of E36 M3 I’ve never thrown away and found an old battery top clamp (the red bit below) so I got some ¼” studding, nuts bolts and washers, drilled a couple of holes and used that. Now it had been recommended on Saabrally.com that I move the battery to the trunk or under the rear seat, I wish I’d done it now as the clamp is just about touching the turbo outlet elbow and I don’t like it as a long term solution. The thing is the current batter works so I don’t want to buy a new gel cell while this one is good and I don’t want to put a lead acid in the passenger compartment because out gassing. 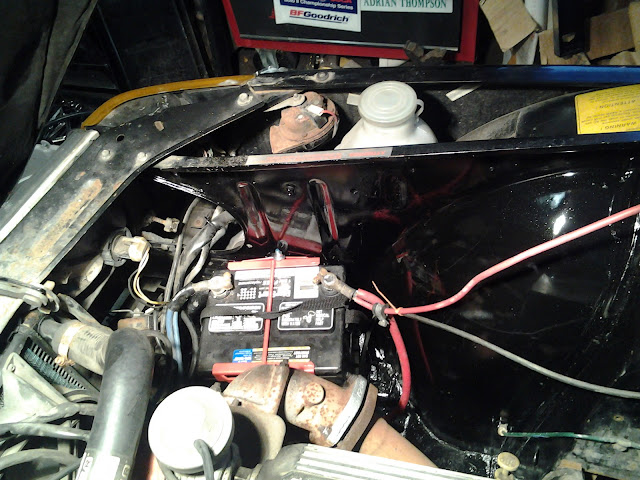
 So, it’s all back together except for the sump guard which I’ll leave off until I’ve pressure washed the engine bay and one of the horns that I can’t figure out where it attaches. So, it doesn’t look much different from before, but it’s back together and running again.
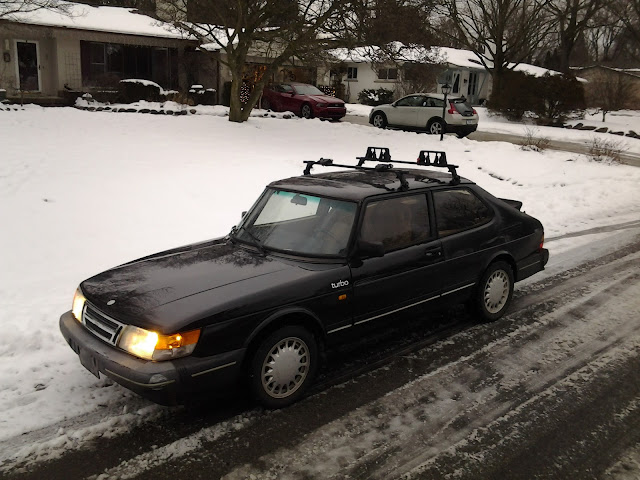


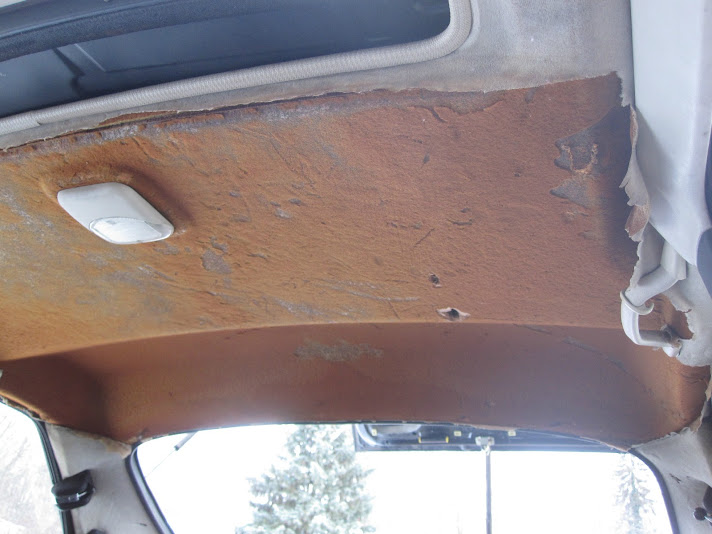
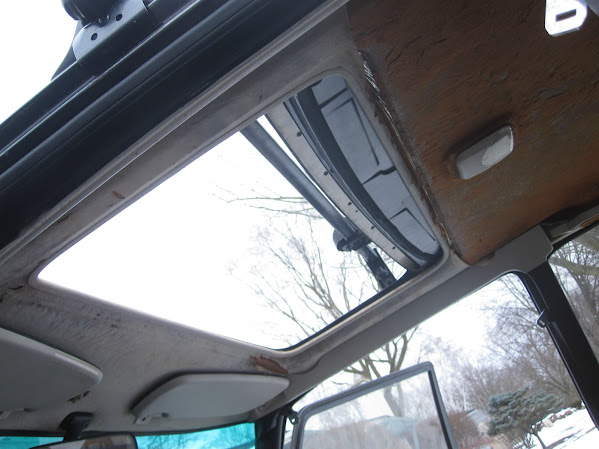 As you can see the headliner is fubbard, I had planned to pull it, strip it, recover and reinstall. But I don’t have the cover for the sun roof part, so I was thinking, just scrub it to get rid of the remnants of material and foam, then spray bomb the whole thing with fabric paint to make it look not toooooo bad. But then we have the issue of the sun roof. It’s leaking somewhere, I don’t know if it’s blocked trains, the seal, poor fitment or a combination. I do know that the sunroof opens electrically, but won’t close without a struggle. When bought the car and opened it took three people to close. One pressing the button, one manually winding the motor at the back (it’s mounted vertically inside the rear vertical panel behind the bumper, run by long cables!!!) and one pushing the roof from above. I know the motor works, I assume that the gears are stripped at the motor end (it kind of sounds like that) or the rook end. Question, can you swap the gears or do you have to replace the whole cables. Also is there a how to and supplier for parts? I’m definitely not prepared to go for the sheet metal riveted over the opening method of repair no matter what class I end up in, this car will see street miles so no striped interior and I like sunroof’s.
  Pic in front of a tarp so you can actually see it and not lose it in the clutter behind. What is it? It’s a bolt in six point cage for a 1g DSM with the rear bars missing. I’ve thrown up a couple of ad’s in the past with no bites, so I was thinking of using the main hoop with the existing flanges cut off as the basis for a roll bar for Loki.
Outside it looks like this.
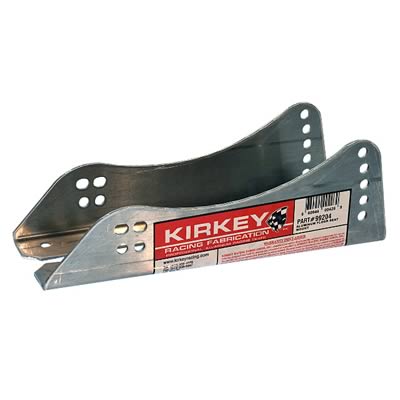
Pic in front of a tarp so you can actually see it and not lose it in the clutter behind. What is it? It’s a bolt in six point cage for a 1g DSM with the rear bars missing. I’ve thrown up a couple of ad’s in the past with no bites, so I was thinking of using the main hoop with the existing flanges cut off as the basis for a roll bar for Loki.
Outside it looks like this.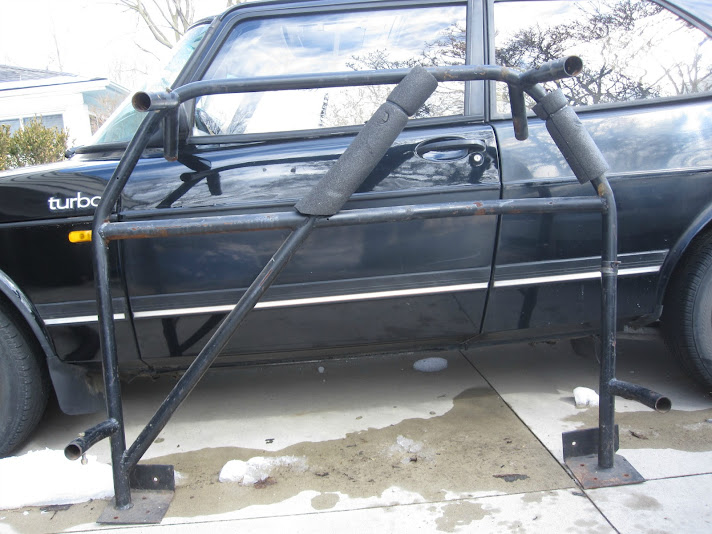 I’d cut off the bars for the front section, door bars and rear stays then get someone else to weld in new rear stays to the rear upper shock mounts.
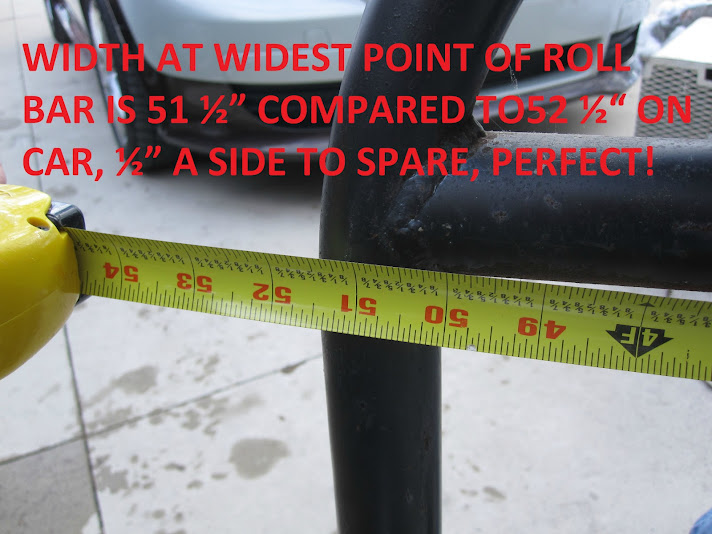
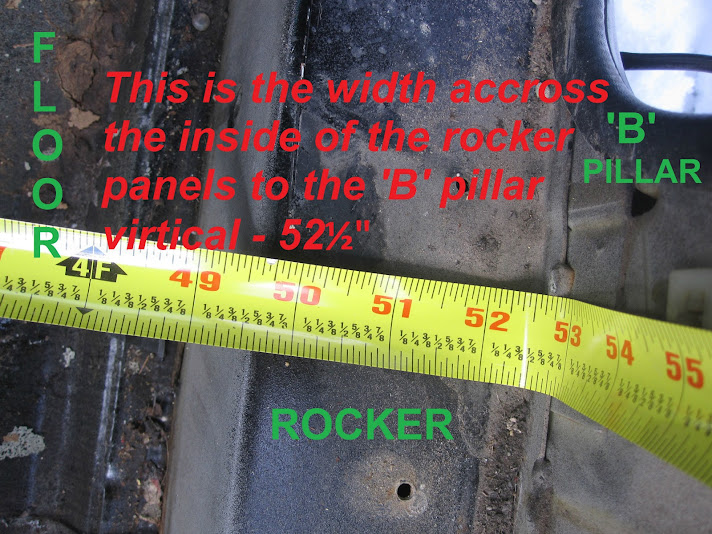 As you can see it’s the perfect width, right around 1” narrower (½” per side) than the sheet metal of the ‘B’ pillar, great. It would need new feet and boxes that came off the inner sill/rocker, but you expect that, and it would be solidly mounted on the sill, not the weaker floor.
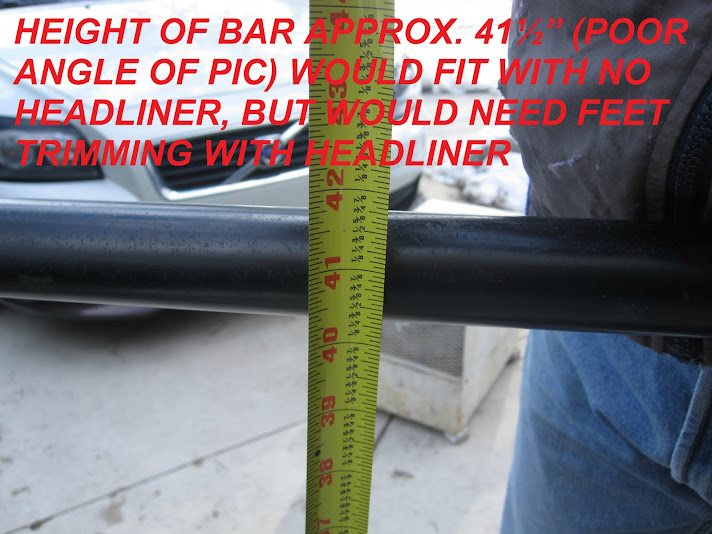
 So height, it’s a crappy angle, but from the floor to the top of the bar is approx. 41-41½” while the car from inner sill/rocker to headliner is right around 40½”. Perfect, the old mounts need to be cut off so if I keep the headliner I cut up 1”, If I remove the headliner I keep it full height.
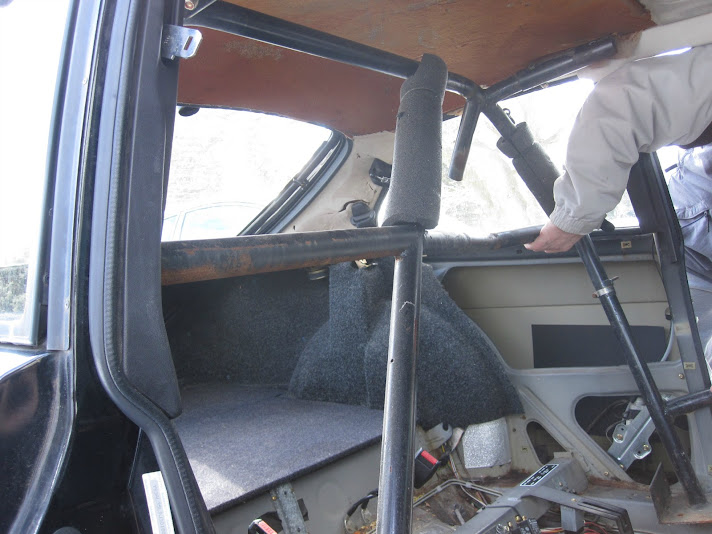 I can’t get it to stand up fully, but I knew that already, it’s looking good though.
 The tumblehome is actually perfect, it catches on the wide ‘B’ pillar trim of the rat trap belts, but they are going roll bar or not. The top corner is actually much much closer than the angle looks in this pic, it would be just about perfect after all.

 This would also push me into PF (Prepared FWD), but does it matter? I’ve never driven on dirt before.
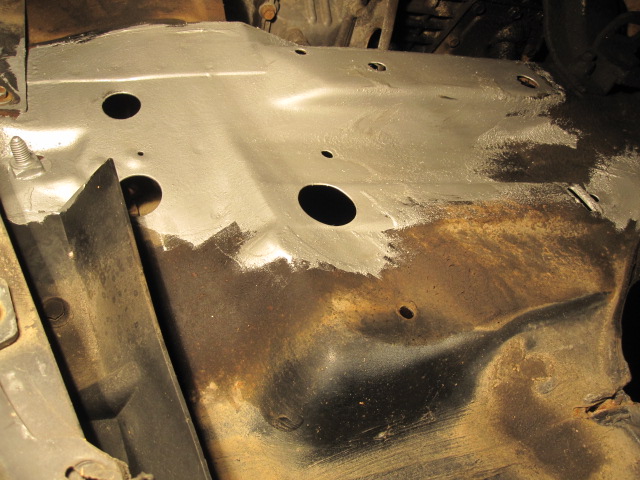
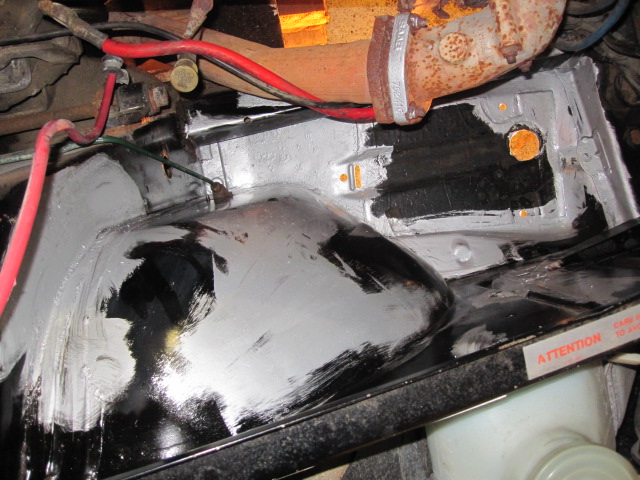
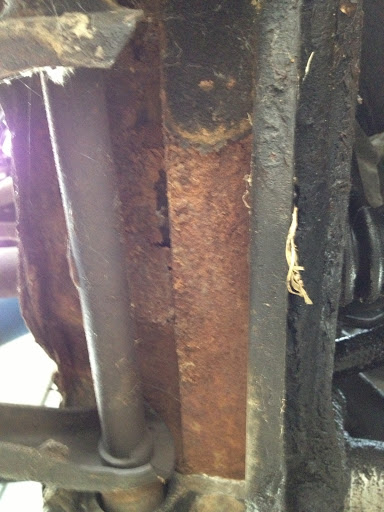 Underside of Right Front lower control arm mount. This is the most serious rust on the car and the area that normally kills 99's and 900's. This isn't bad and very saveable. Initialy I will get rid of the rust, treat and cover with POR 15. This will be cut out and re-welded inthe future, but really isn't as bad as it looks.
 Another shot of RF LCA rust. This is good, I've seen many pics were there is nothing here. Worst case there is a panel available for approx. $200
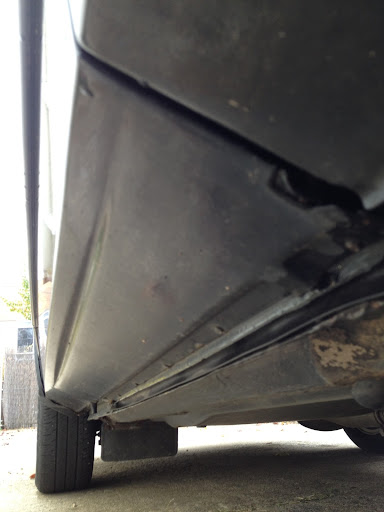 Look, rust free rockers and underbody!!!!!