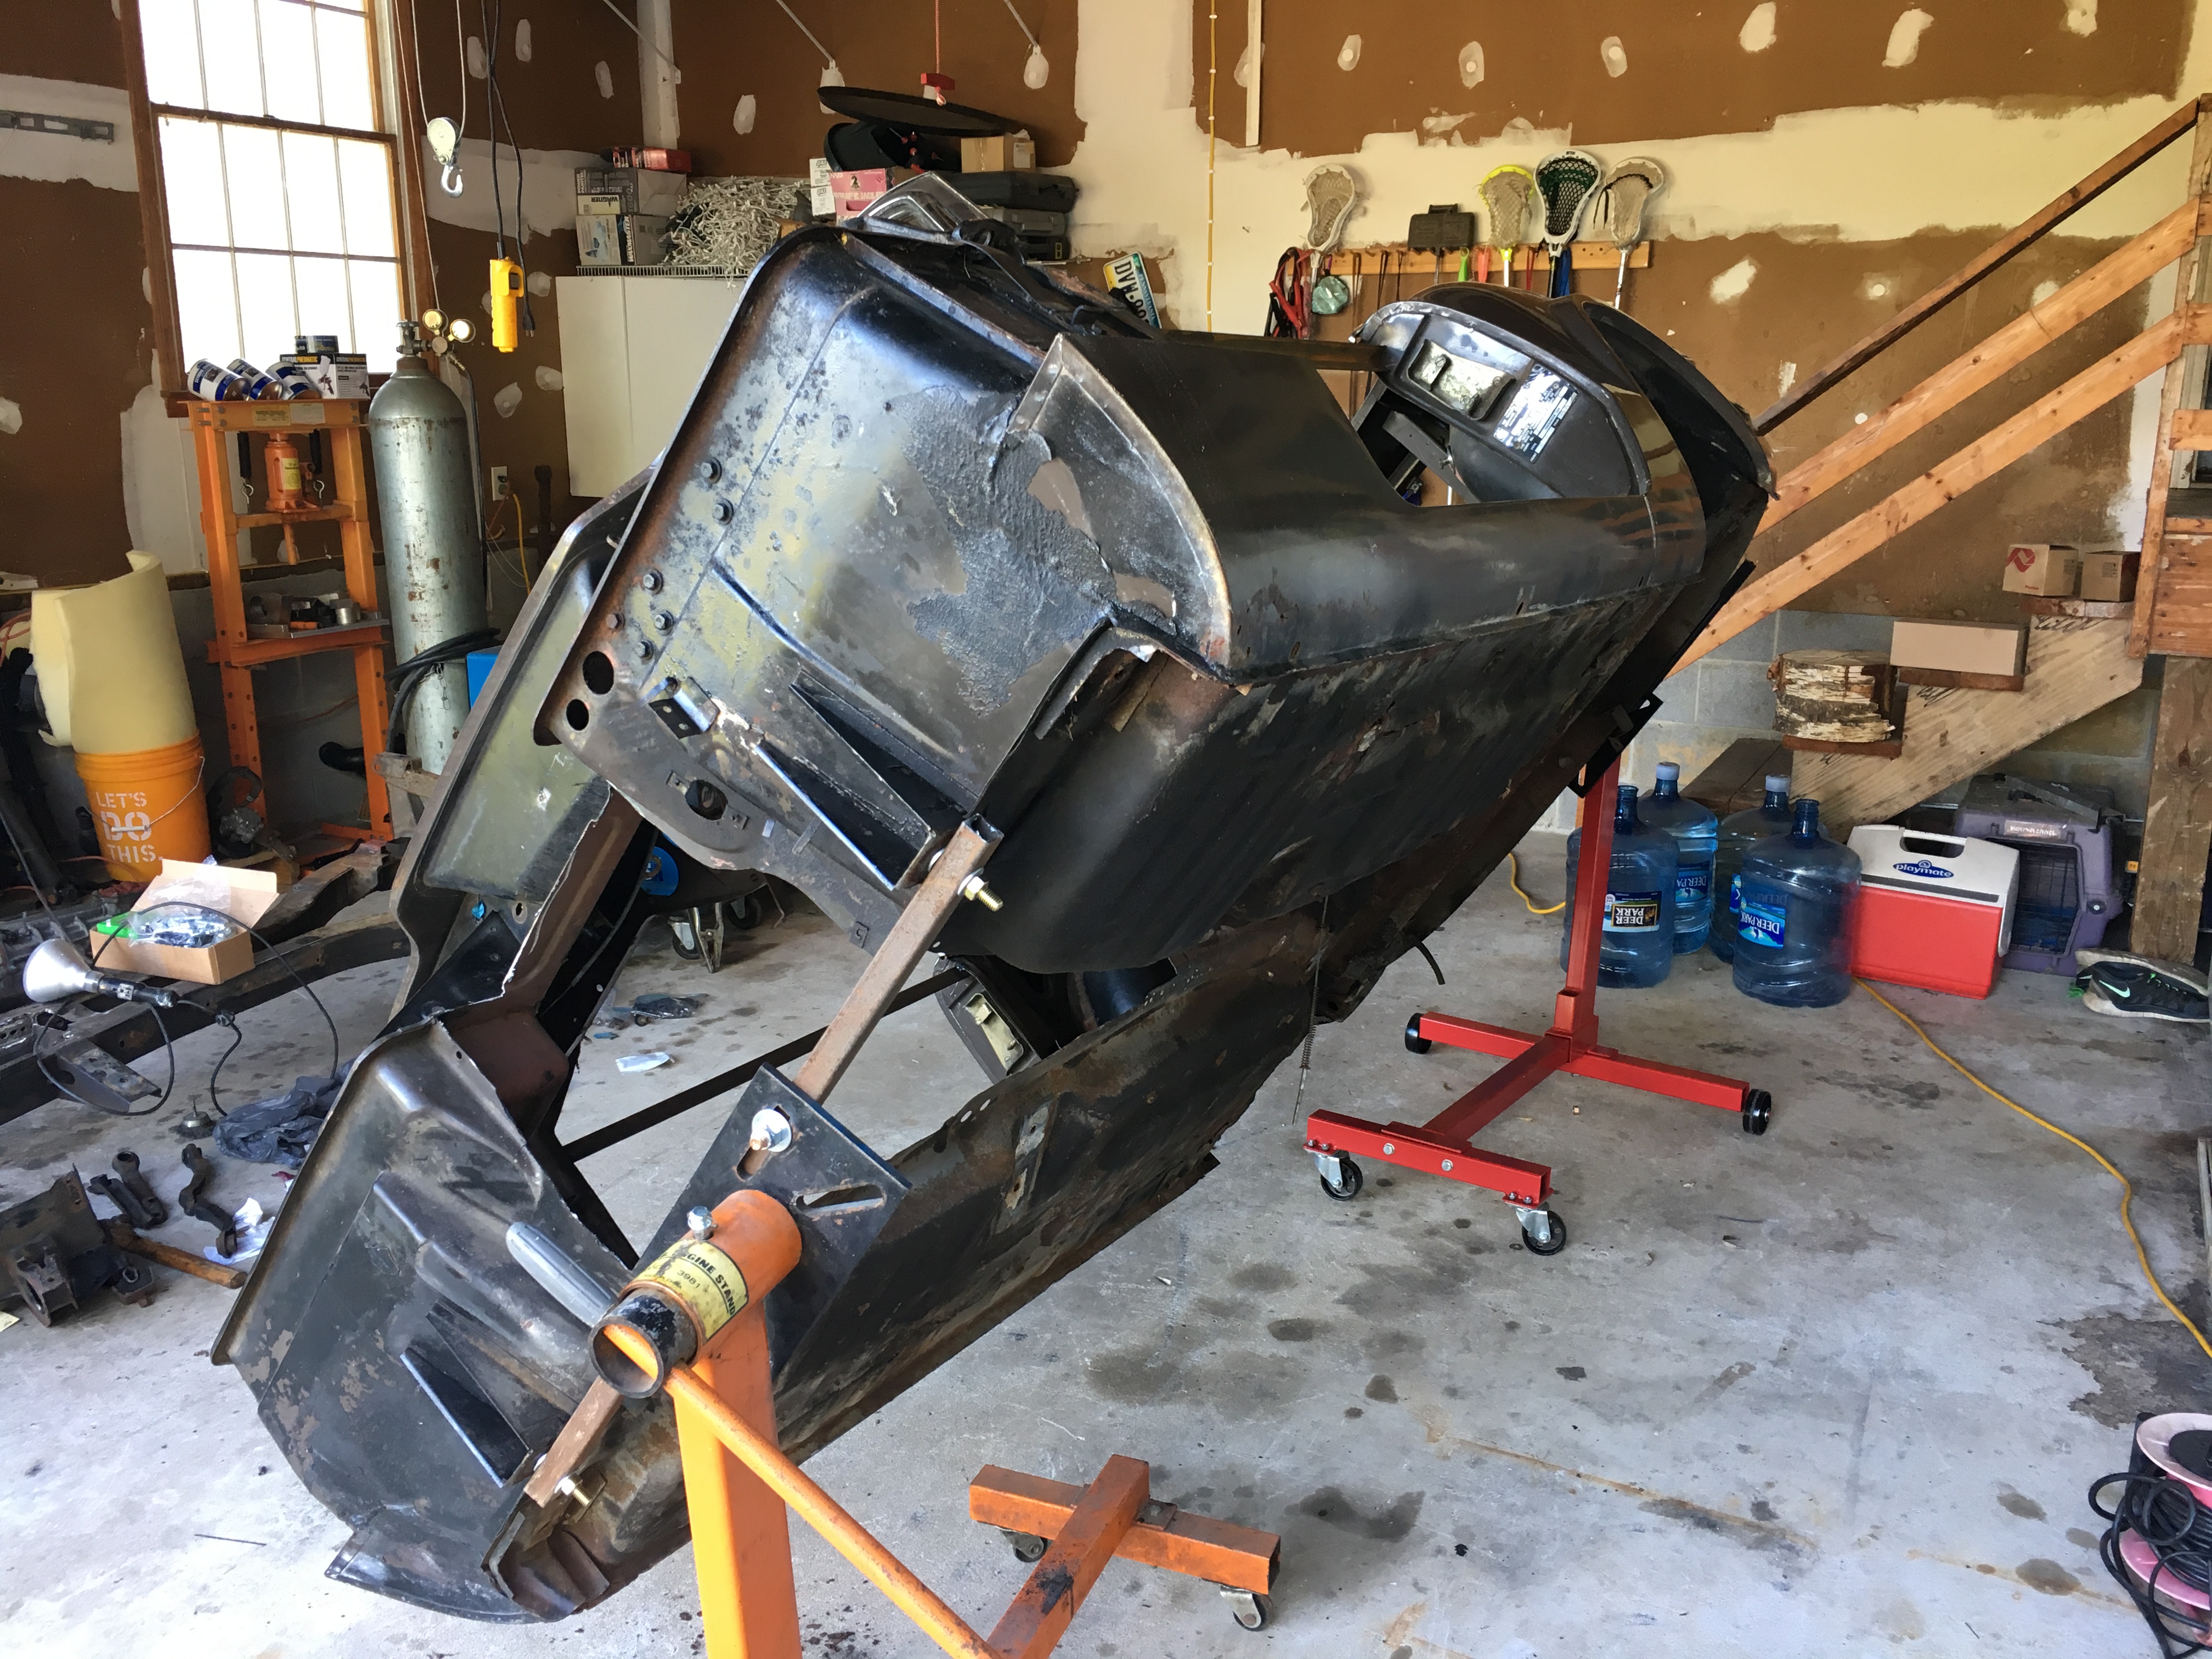
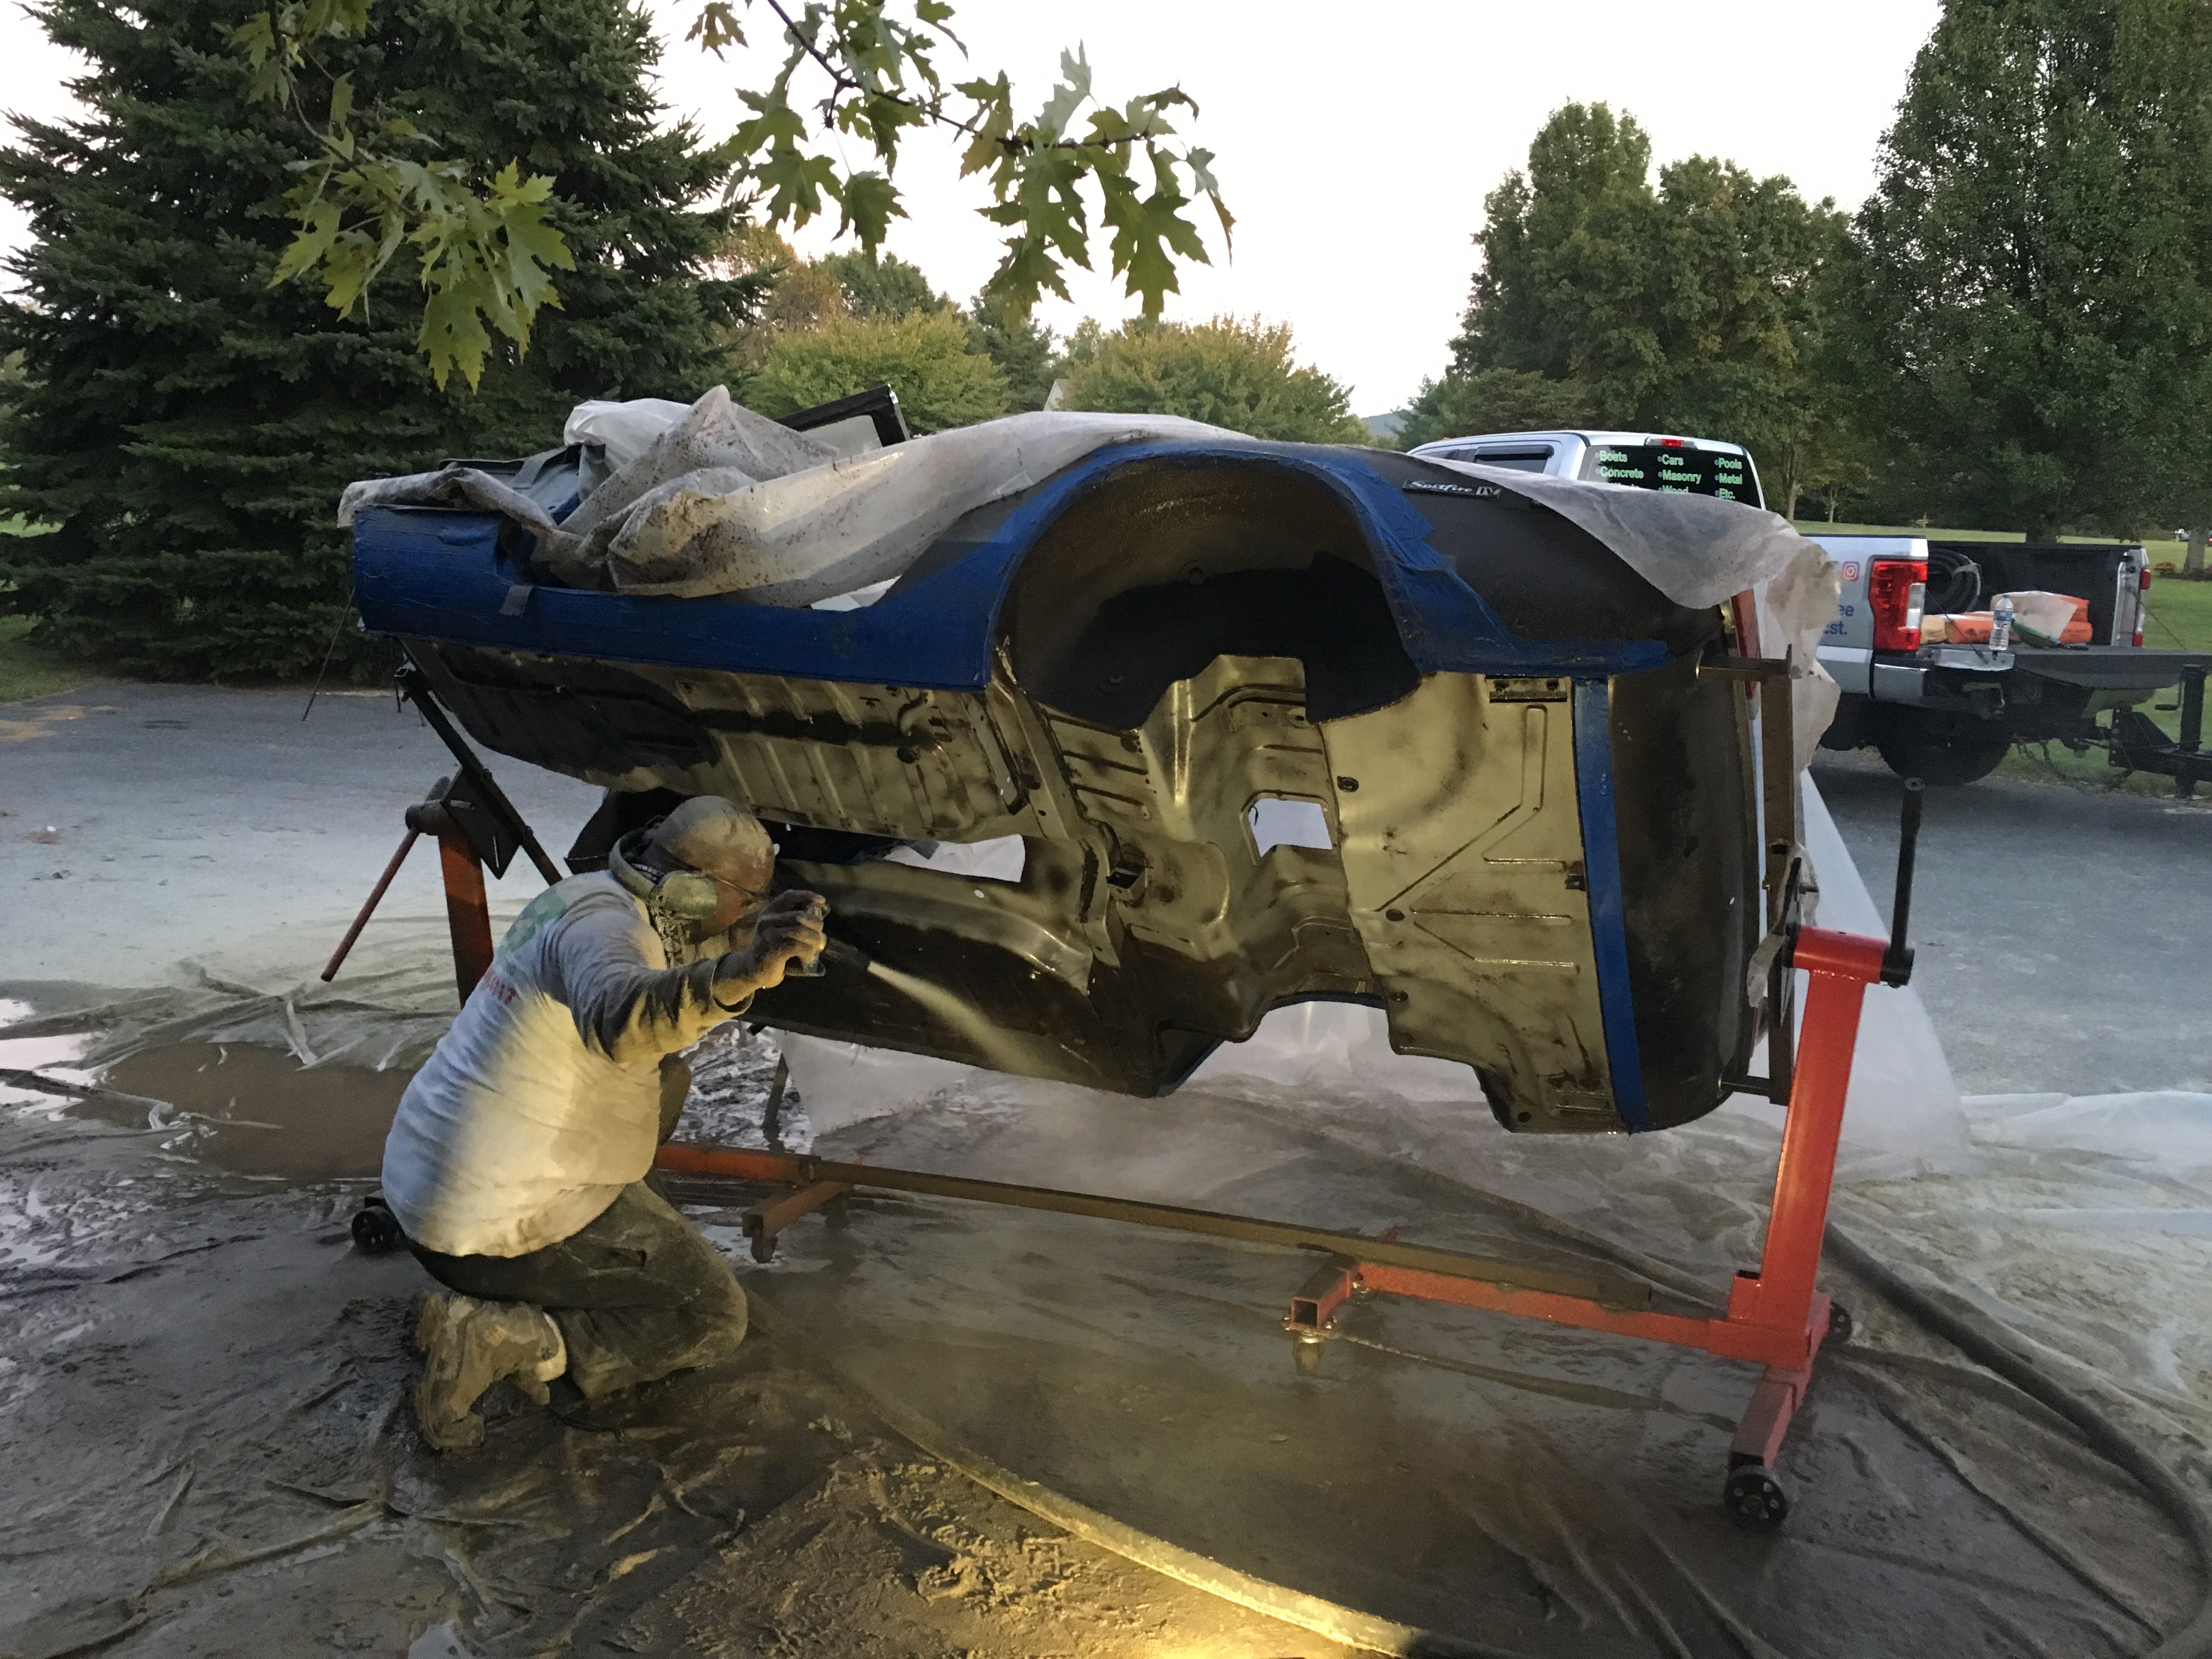
Thanks for that, I am going to mount the body on two engine stands so I can rotate it for the work done and also to allow me to paint and undercoat it prior to mounting it back on the frame. That will make it much easier to clean off the protective coating if necessary. Total cost is less than $500 and it saves me a ton of time and effort and does a better job. The body shell on this car is really solid, so it deserves to be preserved. I am thinking of using bedliner for the undercoating and firewall areas.
Built a rotisserie this weekend with a 2nd harbor freight engine stand. Really makes it easy to work on the body shell. Turns out I do have some body work to do, but overall this is still a really solid Spitfire bodyshell to work with. Body and frame get stripped on Thursday by a firm that does wet sandbasting, can't wait to see the results!

Willis
New Reader
10/17/17 11:14 a.m.
Cool. I've seen a lot of guys put a rod of some sort between the two engine stands to keep them acting as a single unit. If you aren't moving yours around a ton, probably a non issue.
I've wanted to research the wet blasters in my area. I'd love to see a before and after picture of the ground where they actually blast the body.
This has escalated quickly.
I am trying to resist the urge to just strip the entire body and paint it. The cost to do the cosmetics will add thousands to the cost and will then make me want to keep it pretty rather than have fun with it. My current goal is to have done the entire chassis 100% as I would want it done and to prepare and preserve the body to prevent any further rust and to repair any bad areas, but then to use bedliner or similar as undercoating for the bottom and paint the firewall and bolt the body back "as is" complete with dents and scratches. Again, I'll treat any areas to prevent any more corrosion, but would keep the body as an old survivor. The interior will be done nicely with new gauges and carpet/panels and probably Miata seats. This way I can autocross or have fun without being concerned if it gets stone chip or I hit a cone.
The "modular" nature of a Spitfire means I can always have it disassembled and the body shell painted if later on I change my mind.....
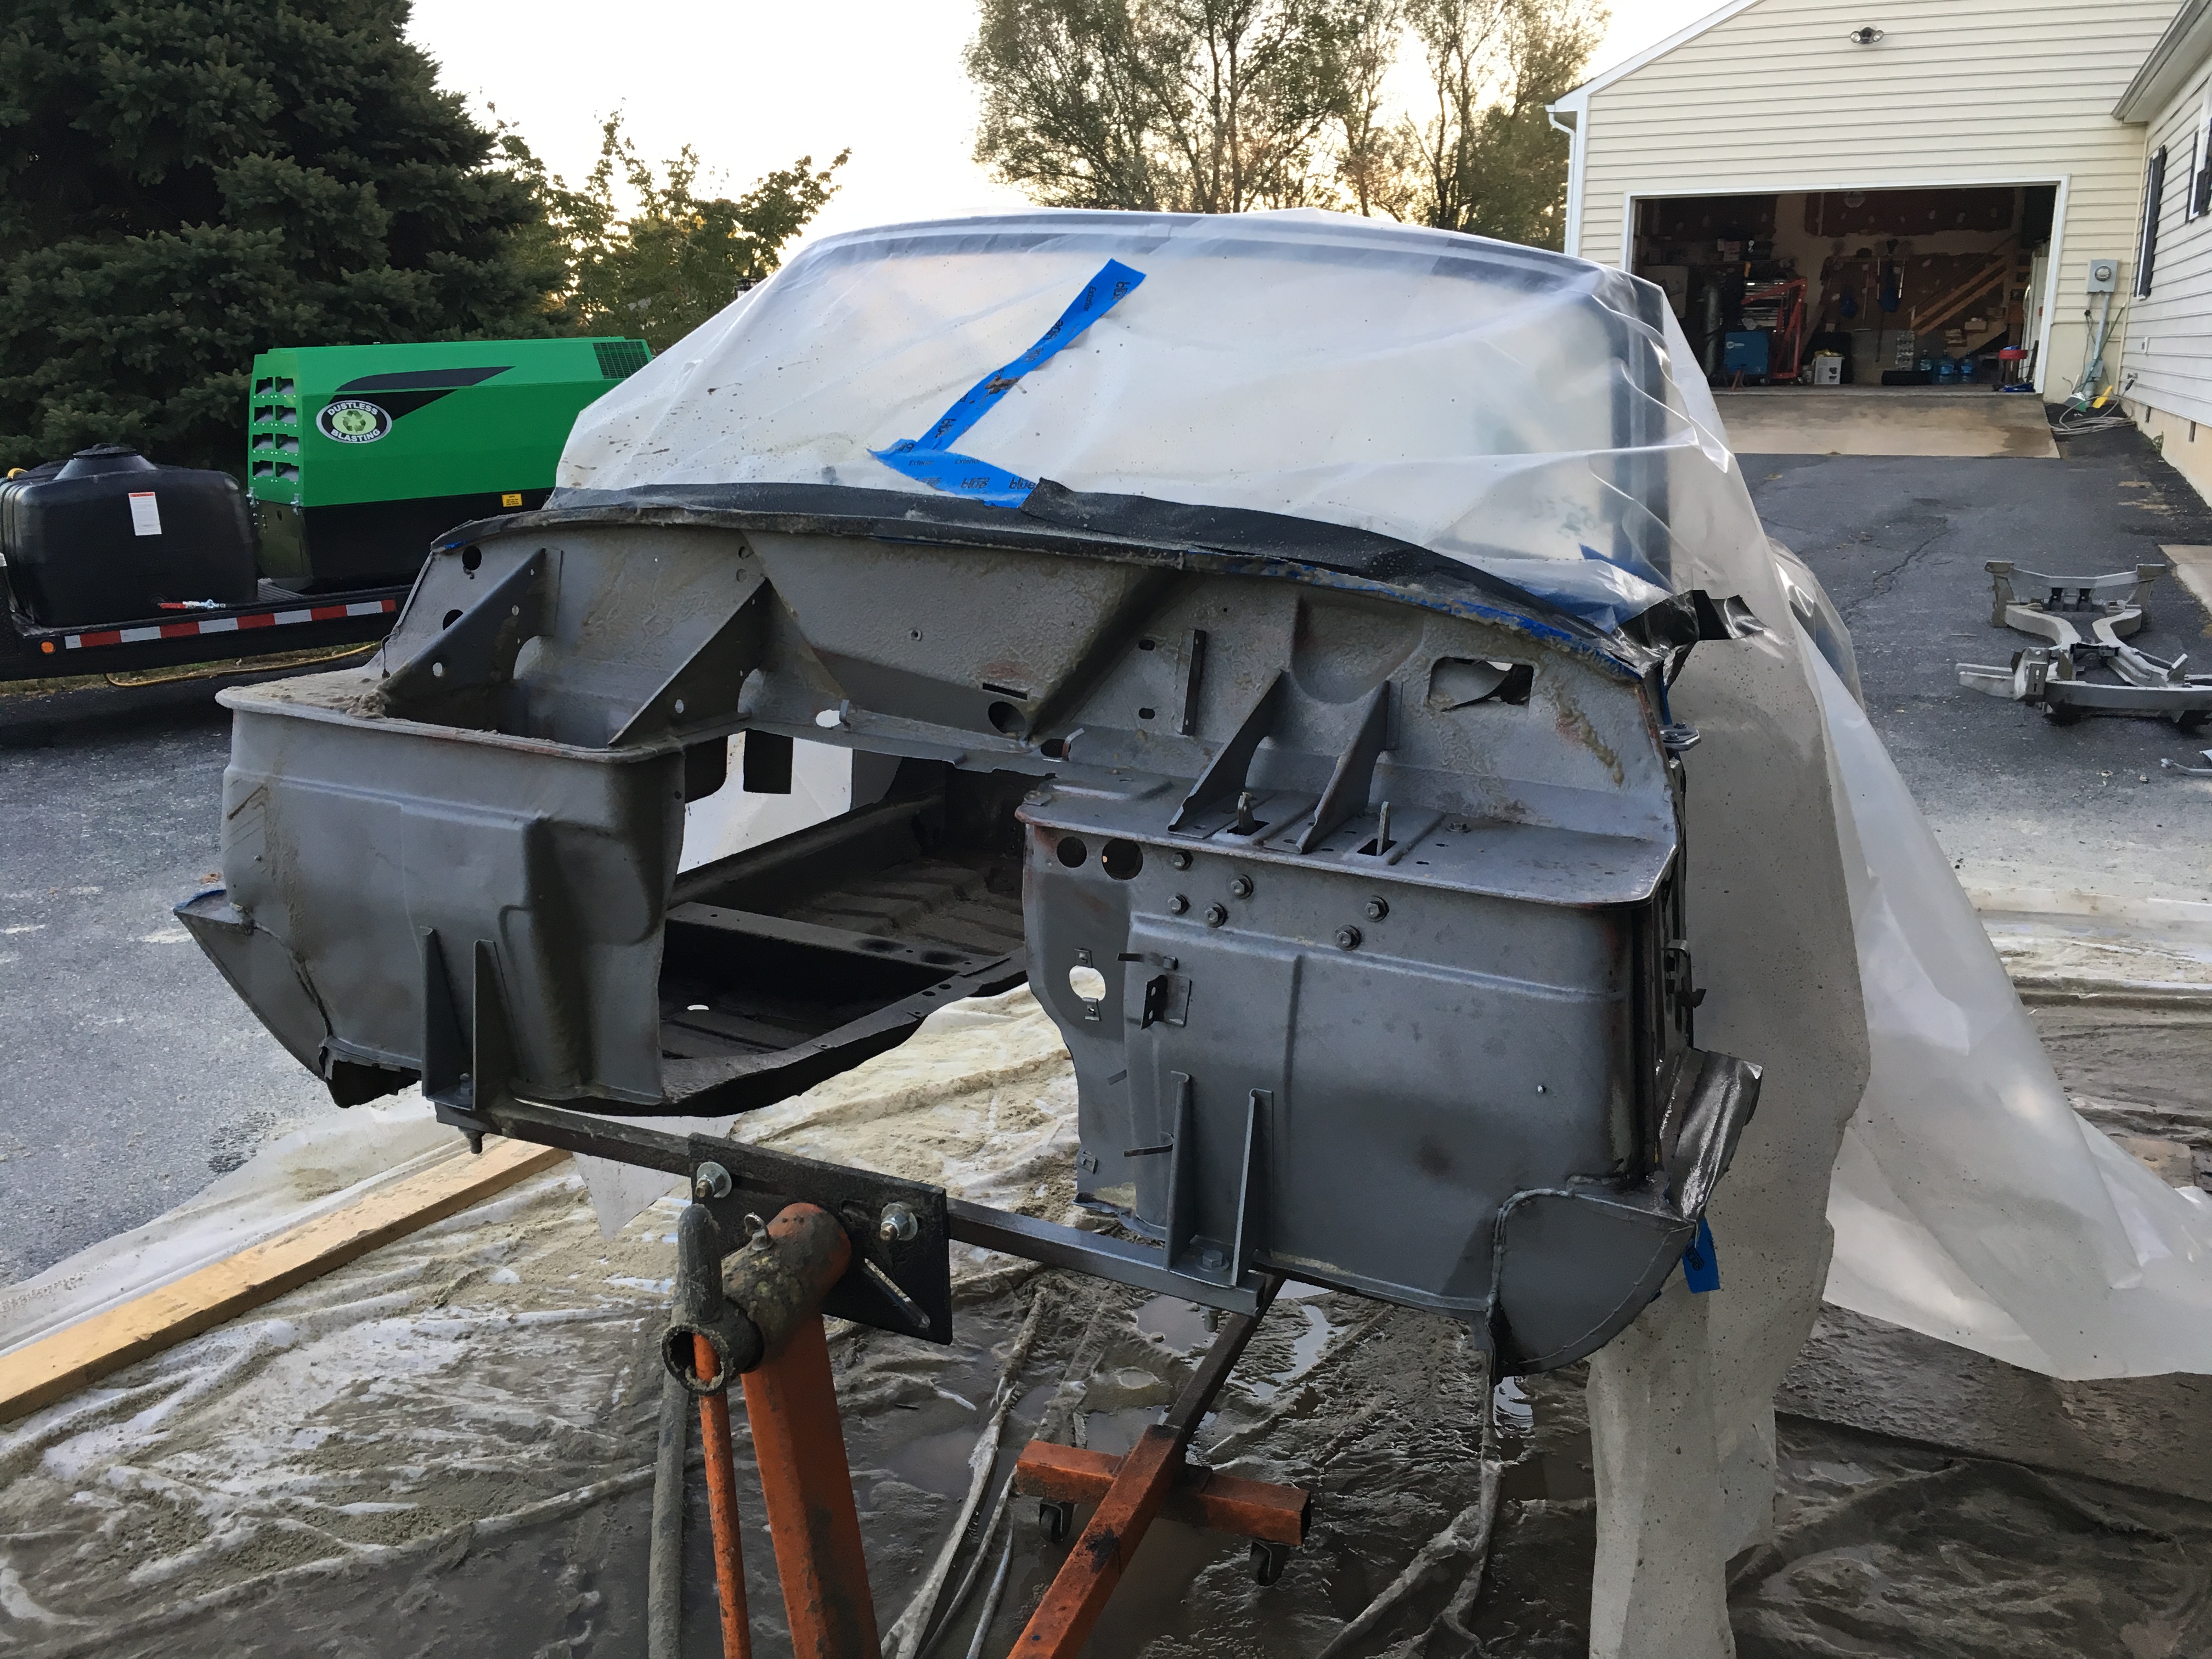
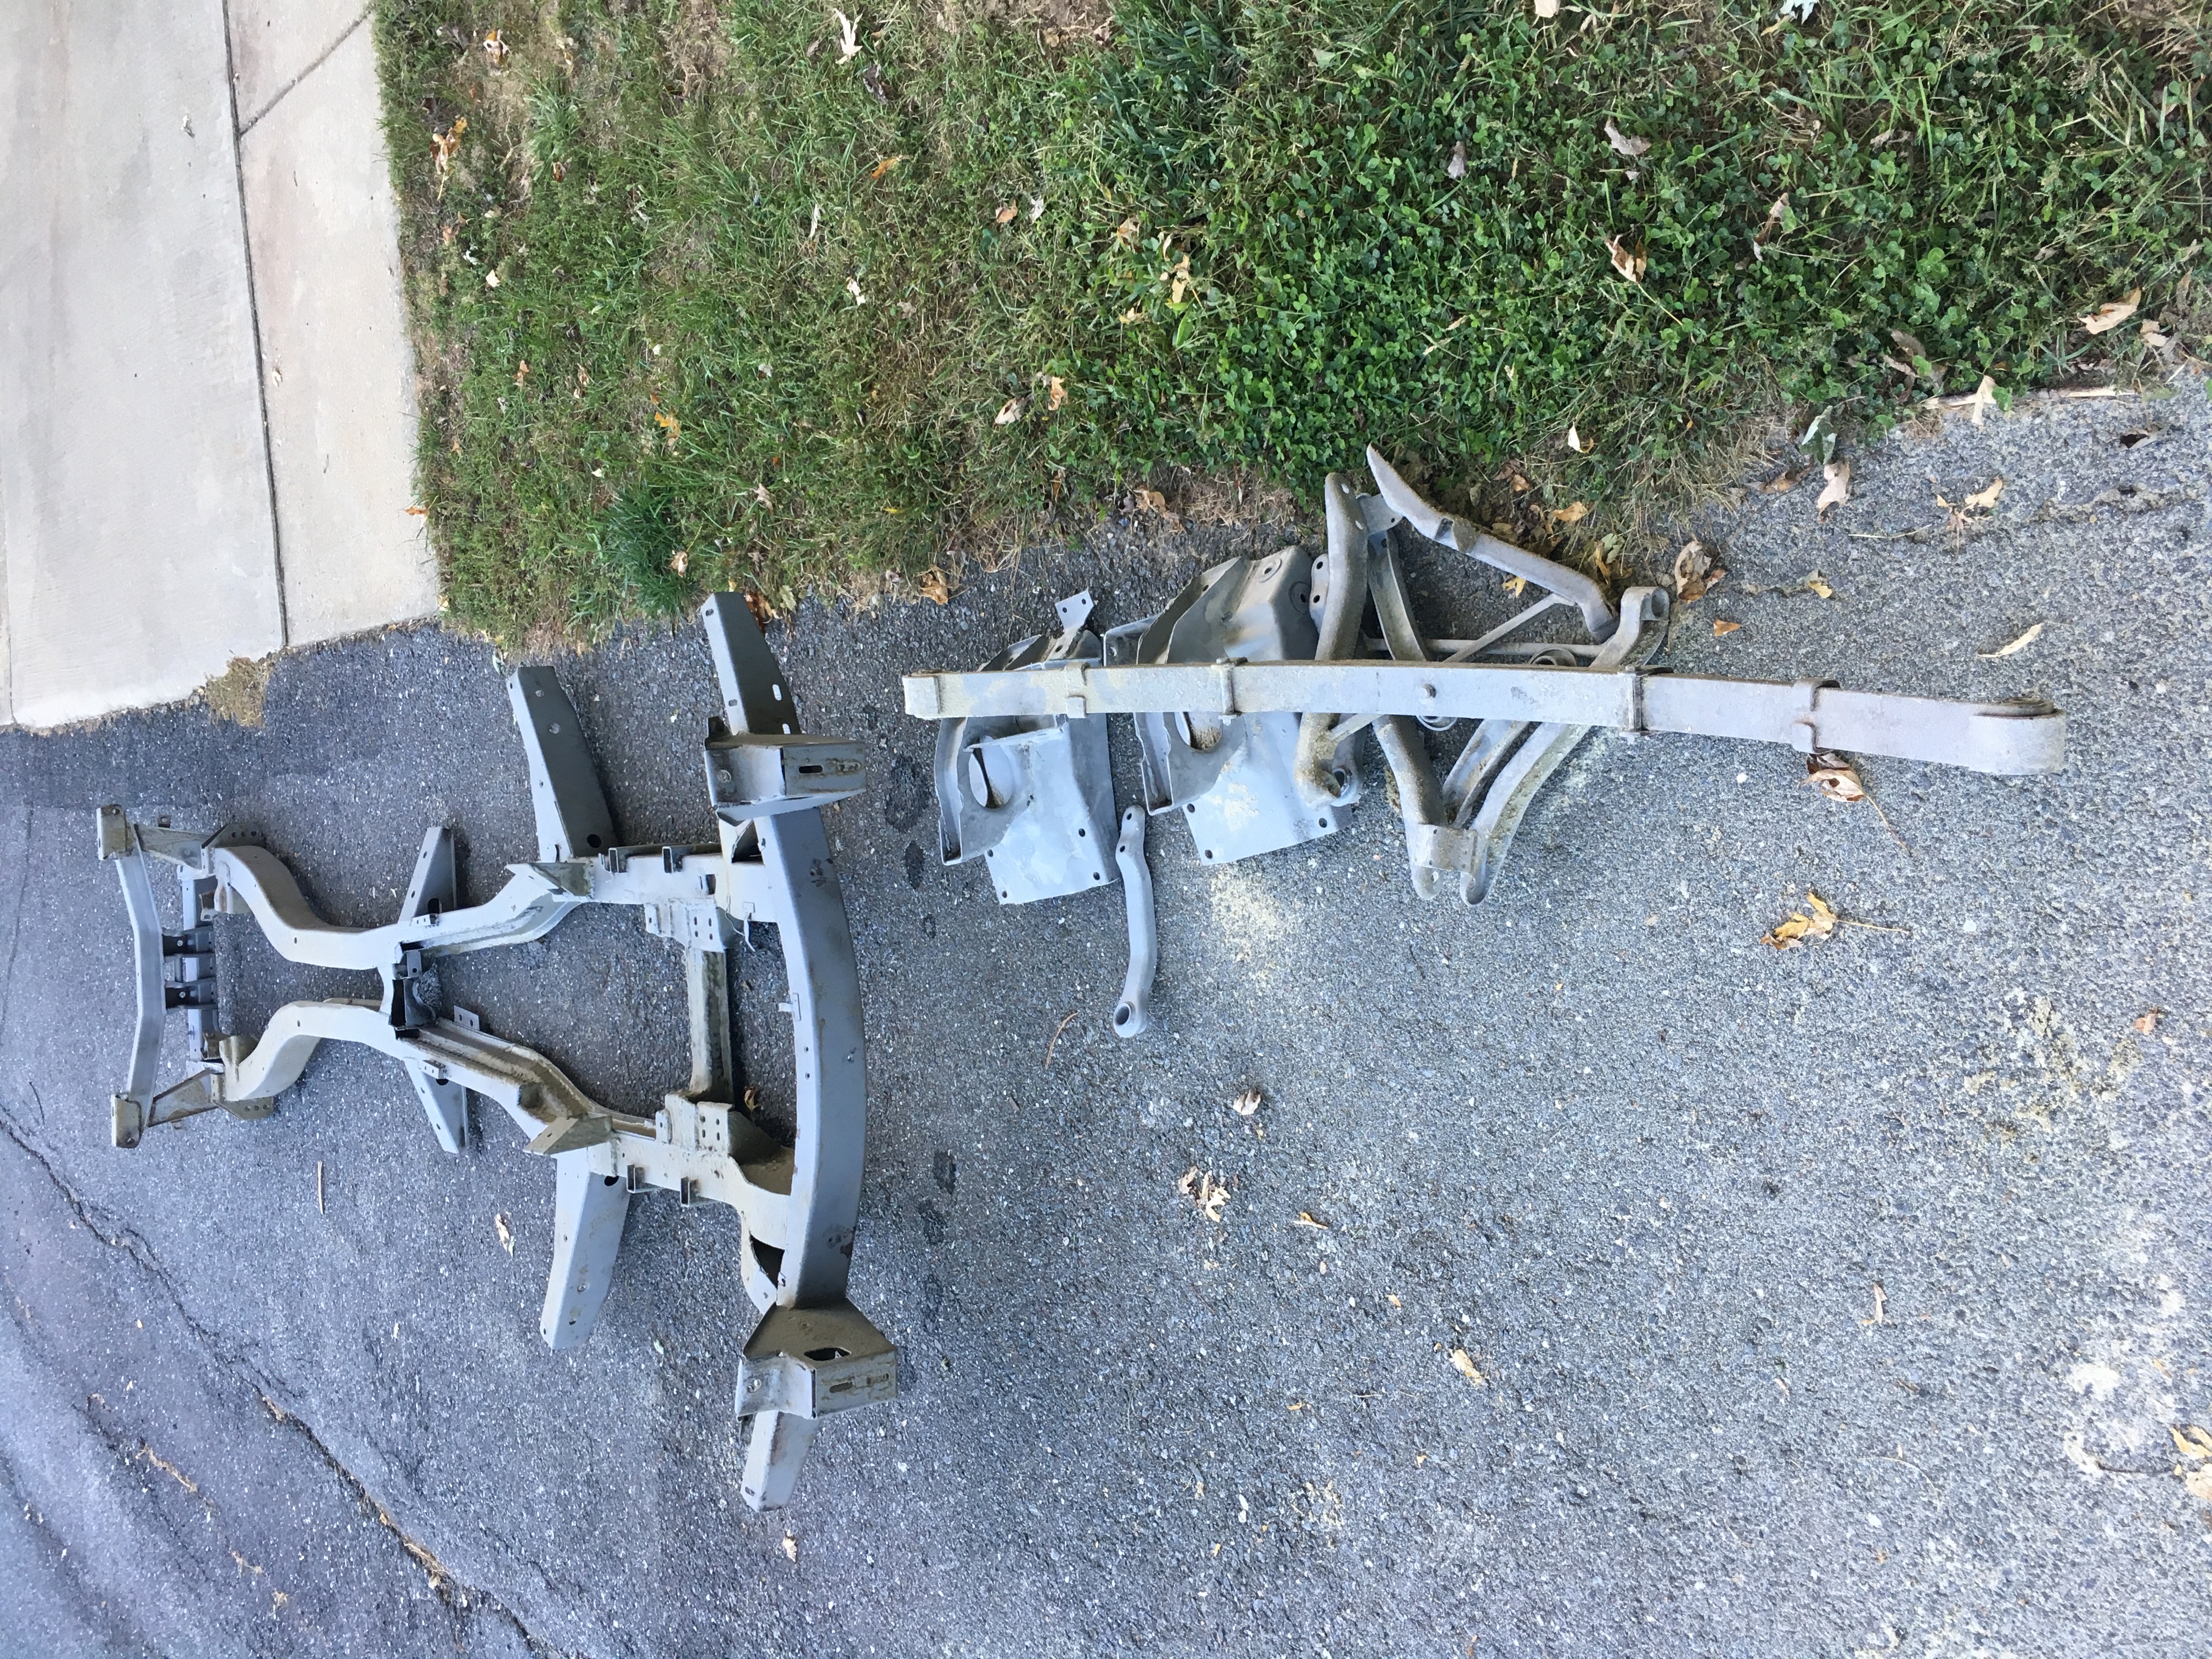
So I have been out of town for two weeks but before I left, I had the "dustless blaster" people over to clean the frame, suspension and floors/firewall of the body. I taped off the areas I did not want cleaned and am pretty happy with the results.
I did some finish up welding on the frame today and will complete it tomorrow so I can paint the frame this weekend. The frame will be painted with Eastwood's rust encapsulator and then sprayed with their extreme chassis black paint. The body shell will need some rust repairs in the floors that was exposed by the blasting and then will be painted with the same rust encapsulator and finish painted with Eastwood's brush on bed liner. That will make for a good solid foundation to prevent any future rust on this otherwise solid body shell.
Neat!
Is that dry ice blasting?
No, it is a water and glass abrasive system. Very little water, lots of abrasive and tons of air. They put down a tarp and plastic to clean up the mess and then blew the driveway clean as a whistle the next day. I found them online and Andre here in Frederick is just starting his new business (they come to you). It was well worth the $500 spent to get it all cleaned up for welding and painting, saved me a ton of time!
https://www.dustlessblasting.com/how-dustless-blasting-works-video
^ as endorsed by Dennis Gage on the My Classic Car television show.
It looks like it worked pretty well, I've always wondered about that - I've seen the commercials a million times but haven't known anyone who has actually used them.

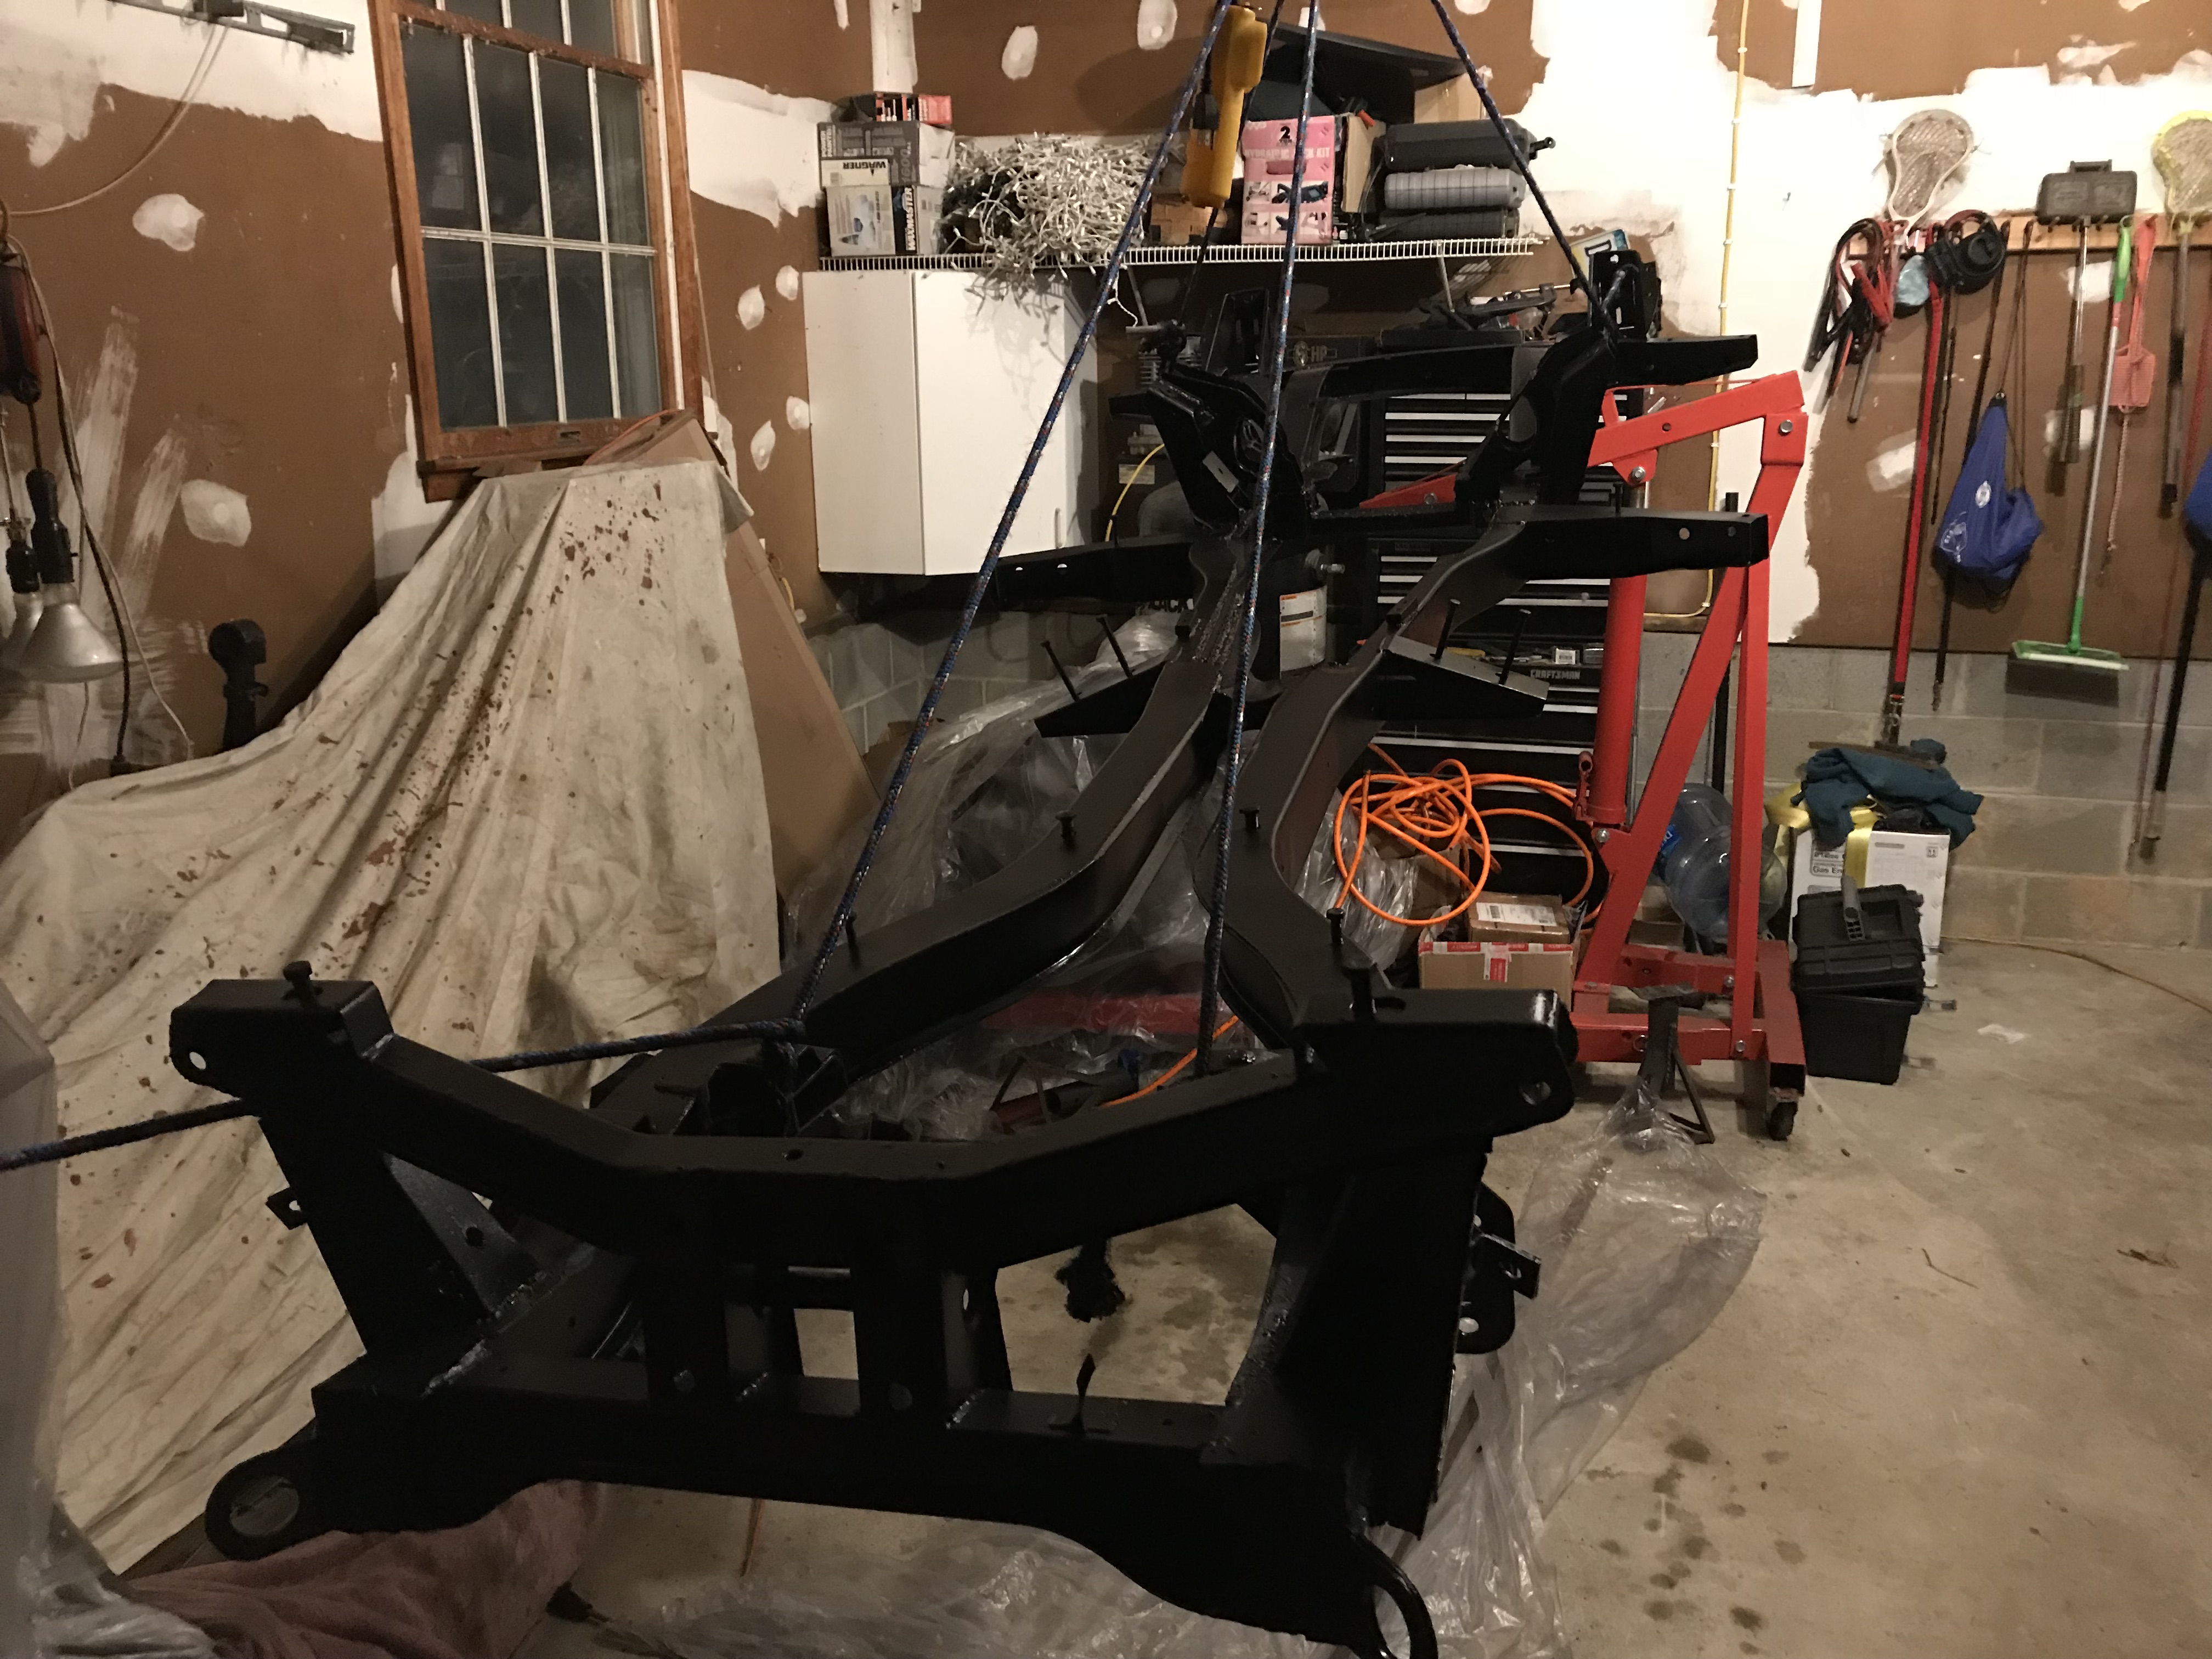
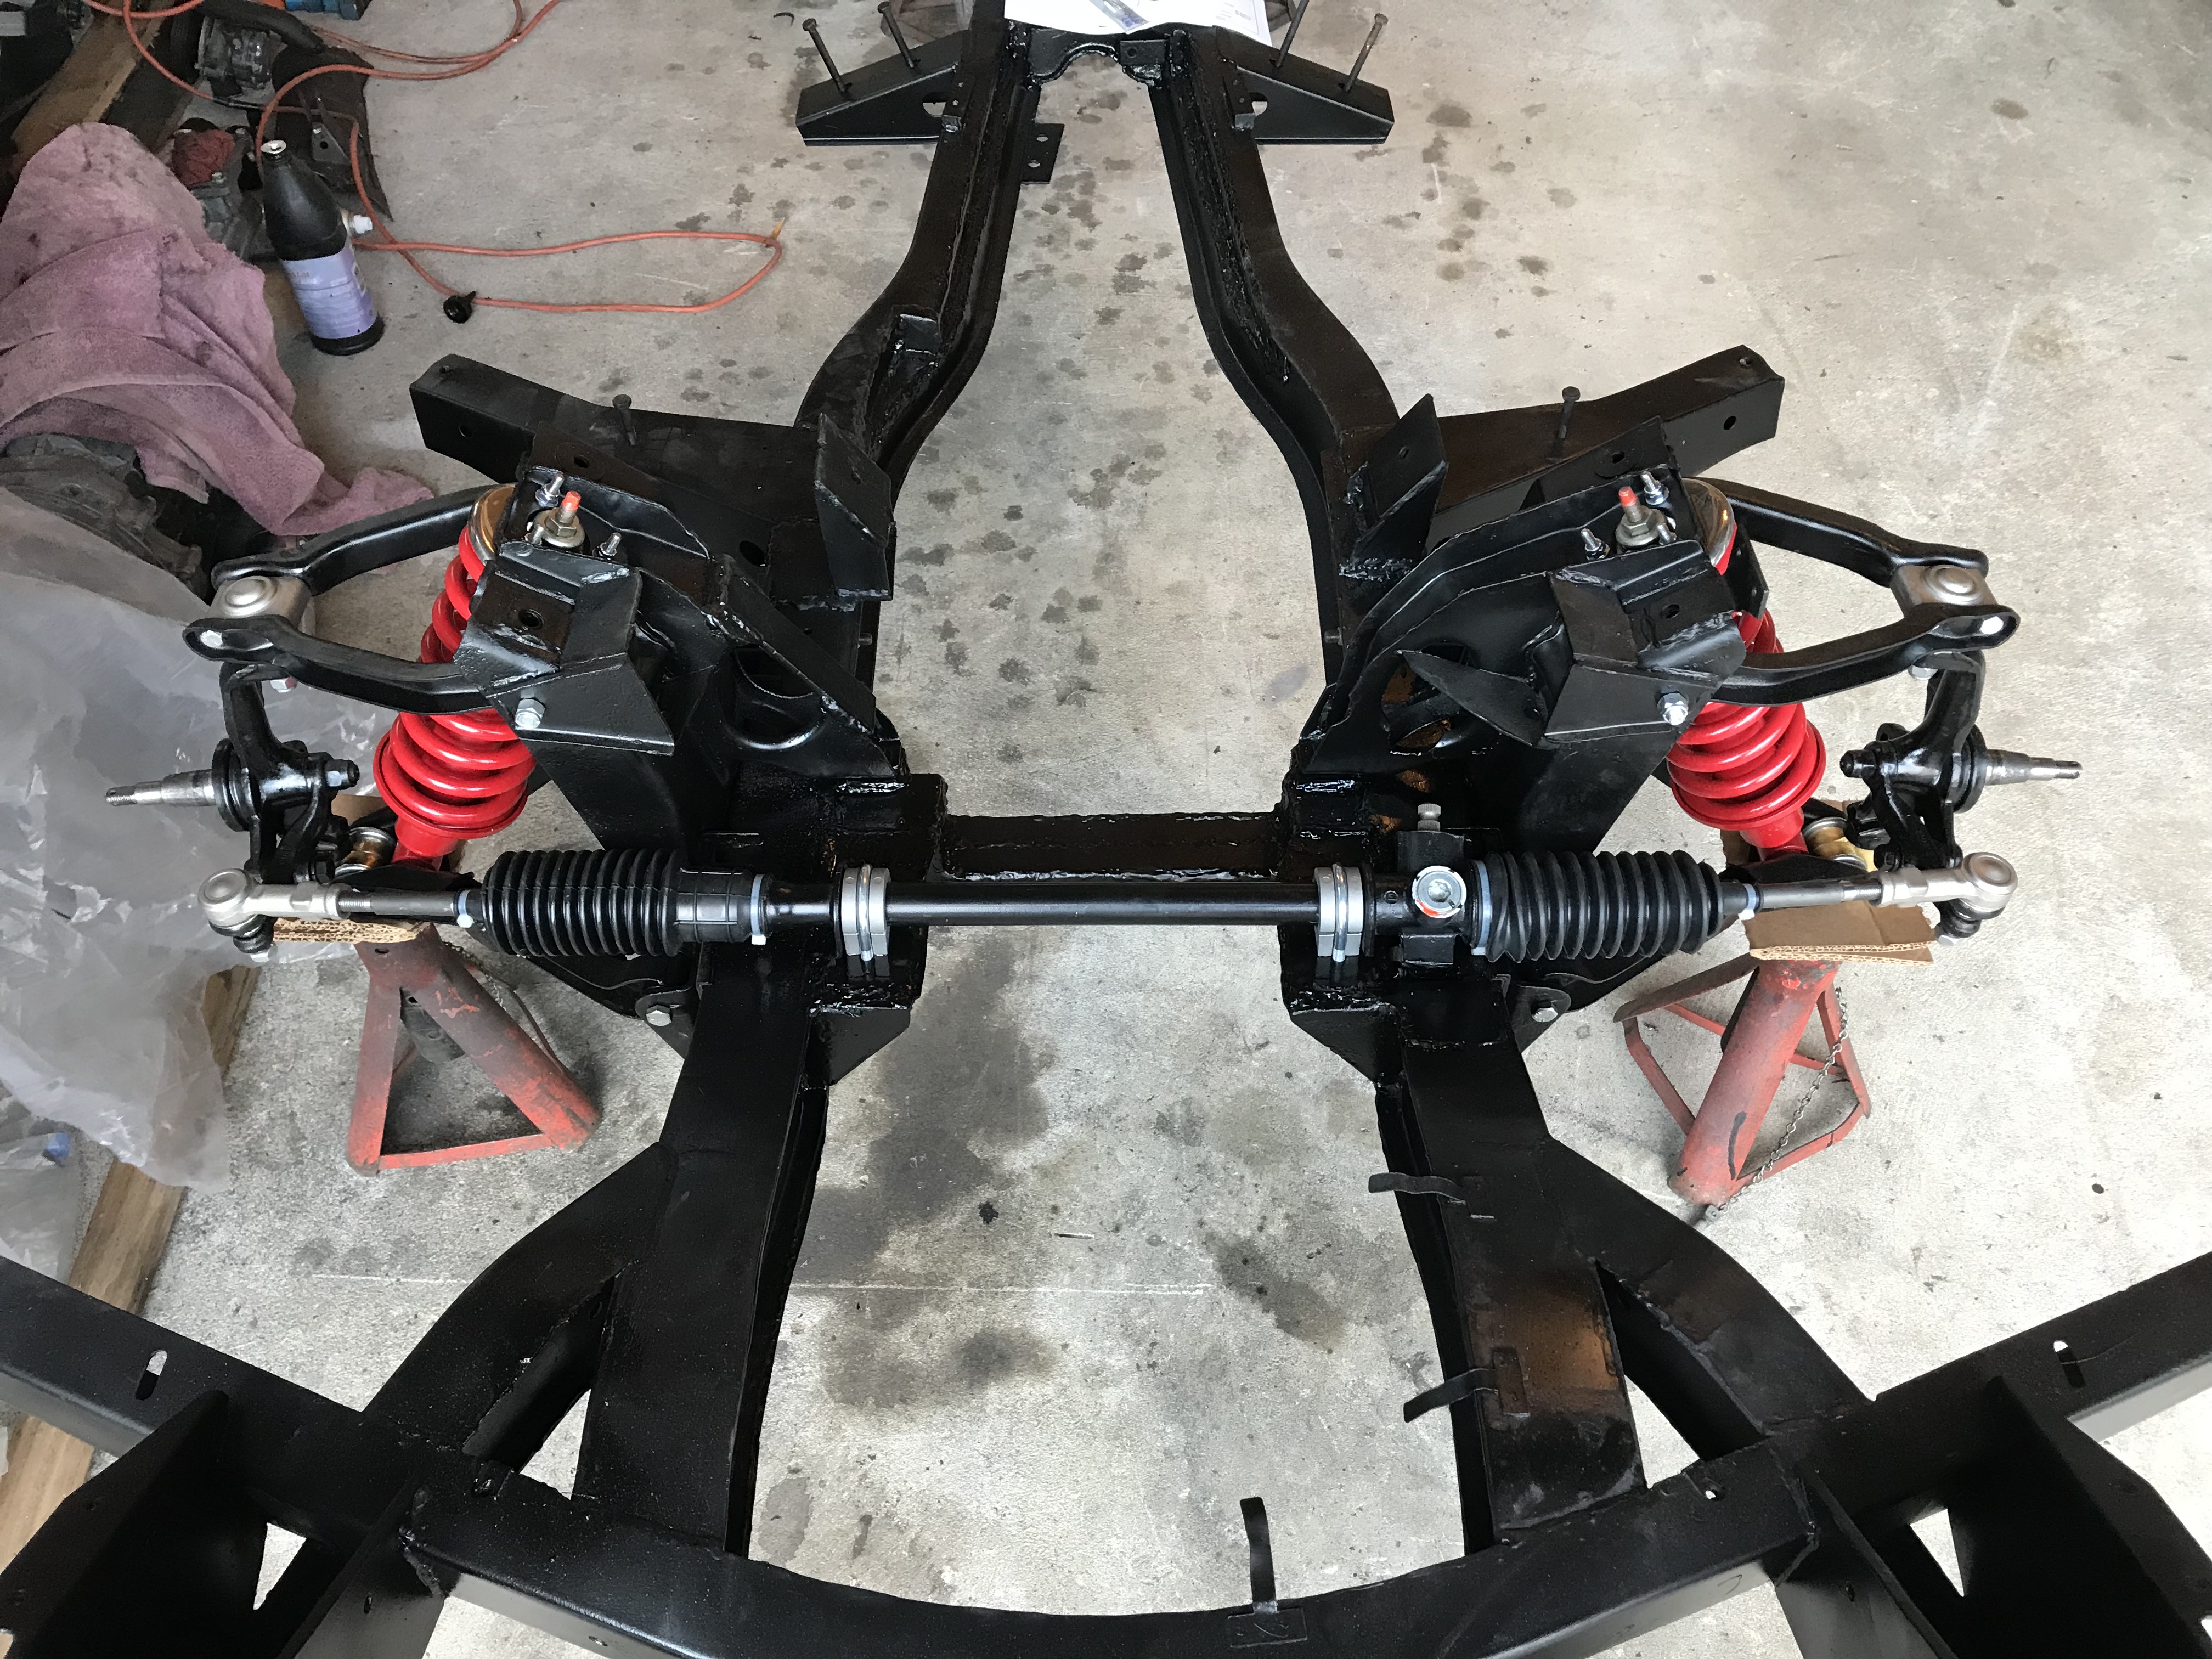
So the build is now finally moving toward reassembly rather than disassembly. I painted the frame this weekend with Eastwood's rust encapsulator and then with multiple coats of their Extreme Chassis Black. I also finished the shock towers as I had to modify both of them, one needing one side cut at an angle to clear the alternator and welded up with a straight piece to add back the structural integrity to it and the driver's side needed notched for the steering since the rack has been lowered. Frame was suspended on the hoist and painted with several costs of Chassis Black. I also welded a tab across the front sway bar mounts as these are notorious for tearing off as the factory welds are weak. I also found some replacement stickers for the Koni shocks so I can repaint them as new. I have inventoried all the parts I have and ordered the remaining missing pieces including a "fast rack" and aluminum mounting pieces so the steering will be as quick as the rest of the car. I have one of these on my TR4A and it makes the car much more "flickable". Will be painting parts this week and then the reassembly begins!
With the chassis painted, now I can start working on the front and rear suspension hubs and sub assemblies. I have everything replaced with poly bushings and will be reusing the Koni shocks as they were barely used. I need to clean and paint the remaining brackets and assemble the front and rear hubs and finally build the bracket to bolt to the Subaru R160 rear to mount the leaf spring and to adapt the R160 to the front mounts on the frame (all done before, so just following other's that have well documented their work). I love this part of a restoration, my build reminds me of the Elan build that Tim is doing but on a much smaller budget  I also have to give a plug to Eastwood's Extreme Chassis Black, this paint is fantastic, it really does a great job on suspension and frames and is much more durable than other paints I have used.
In many ways, this car will be similar to an budget Elan, as it will weigh under 1750 pounds, have 145+ HP and a proper suspension front and rear with a LSD, all under the disguise of an older "survivor" Triumph Spitfire MK4 body.
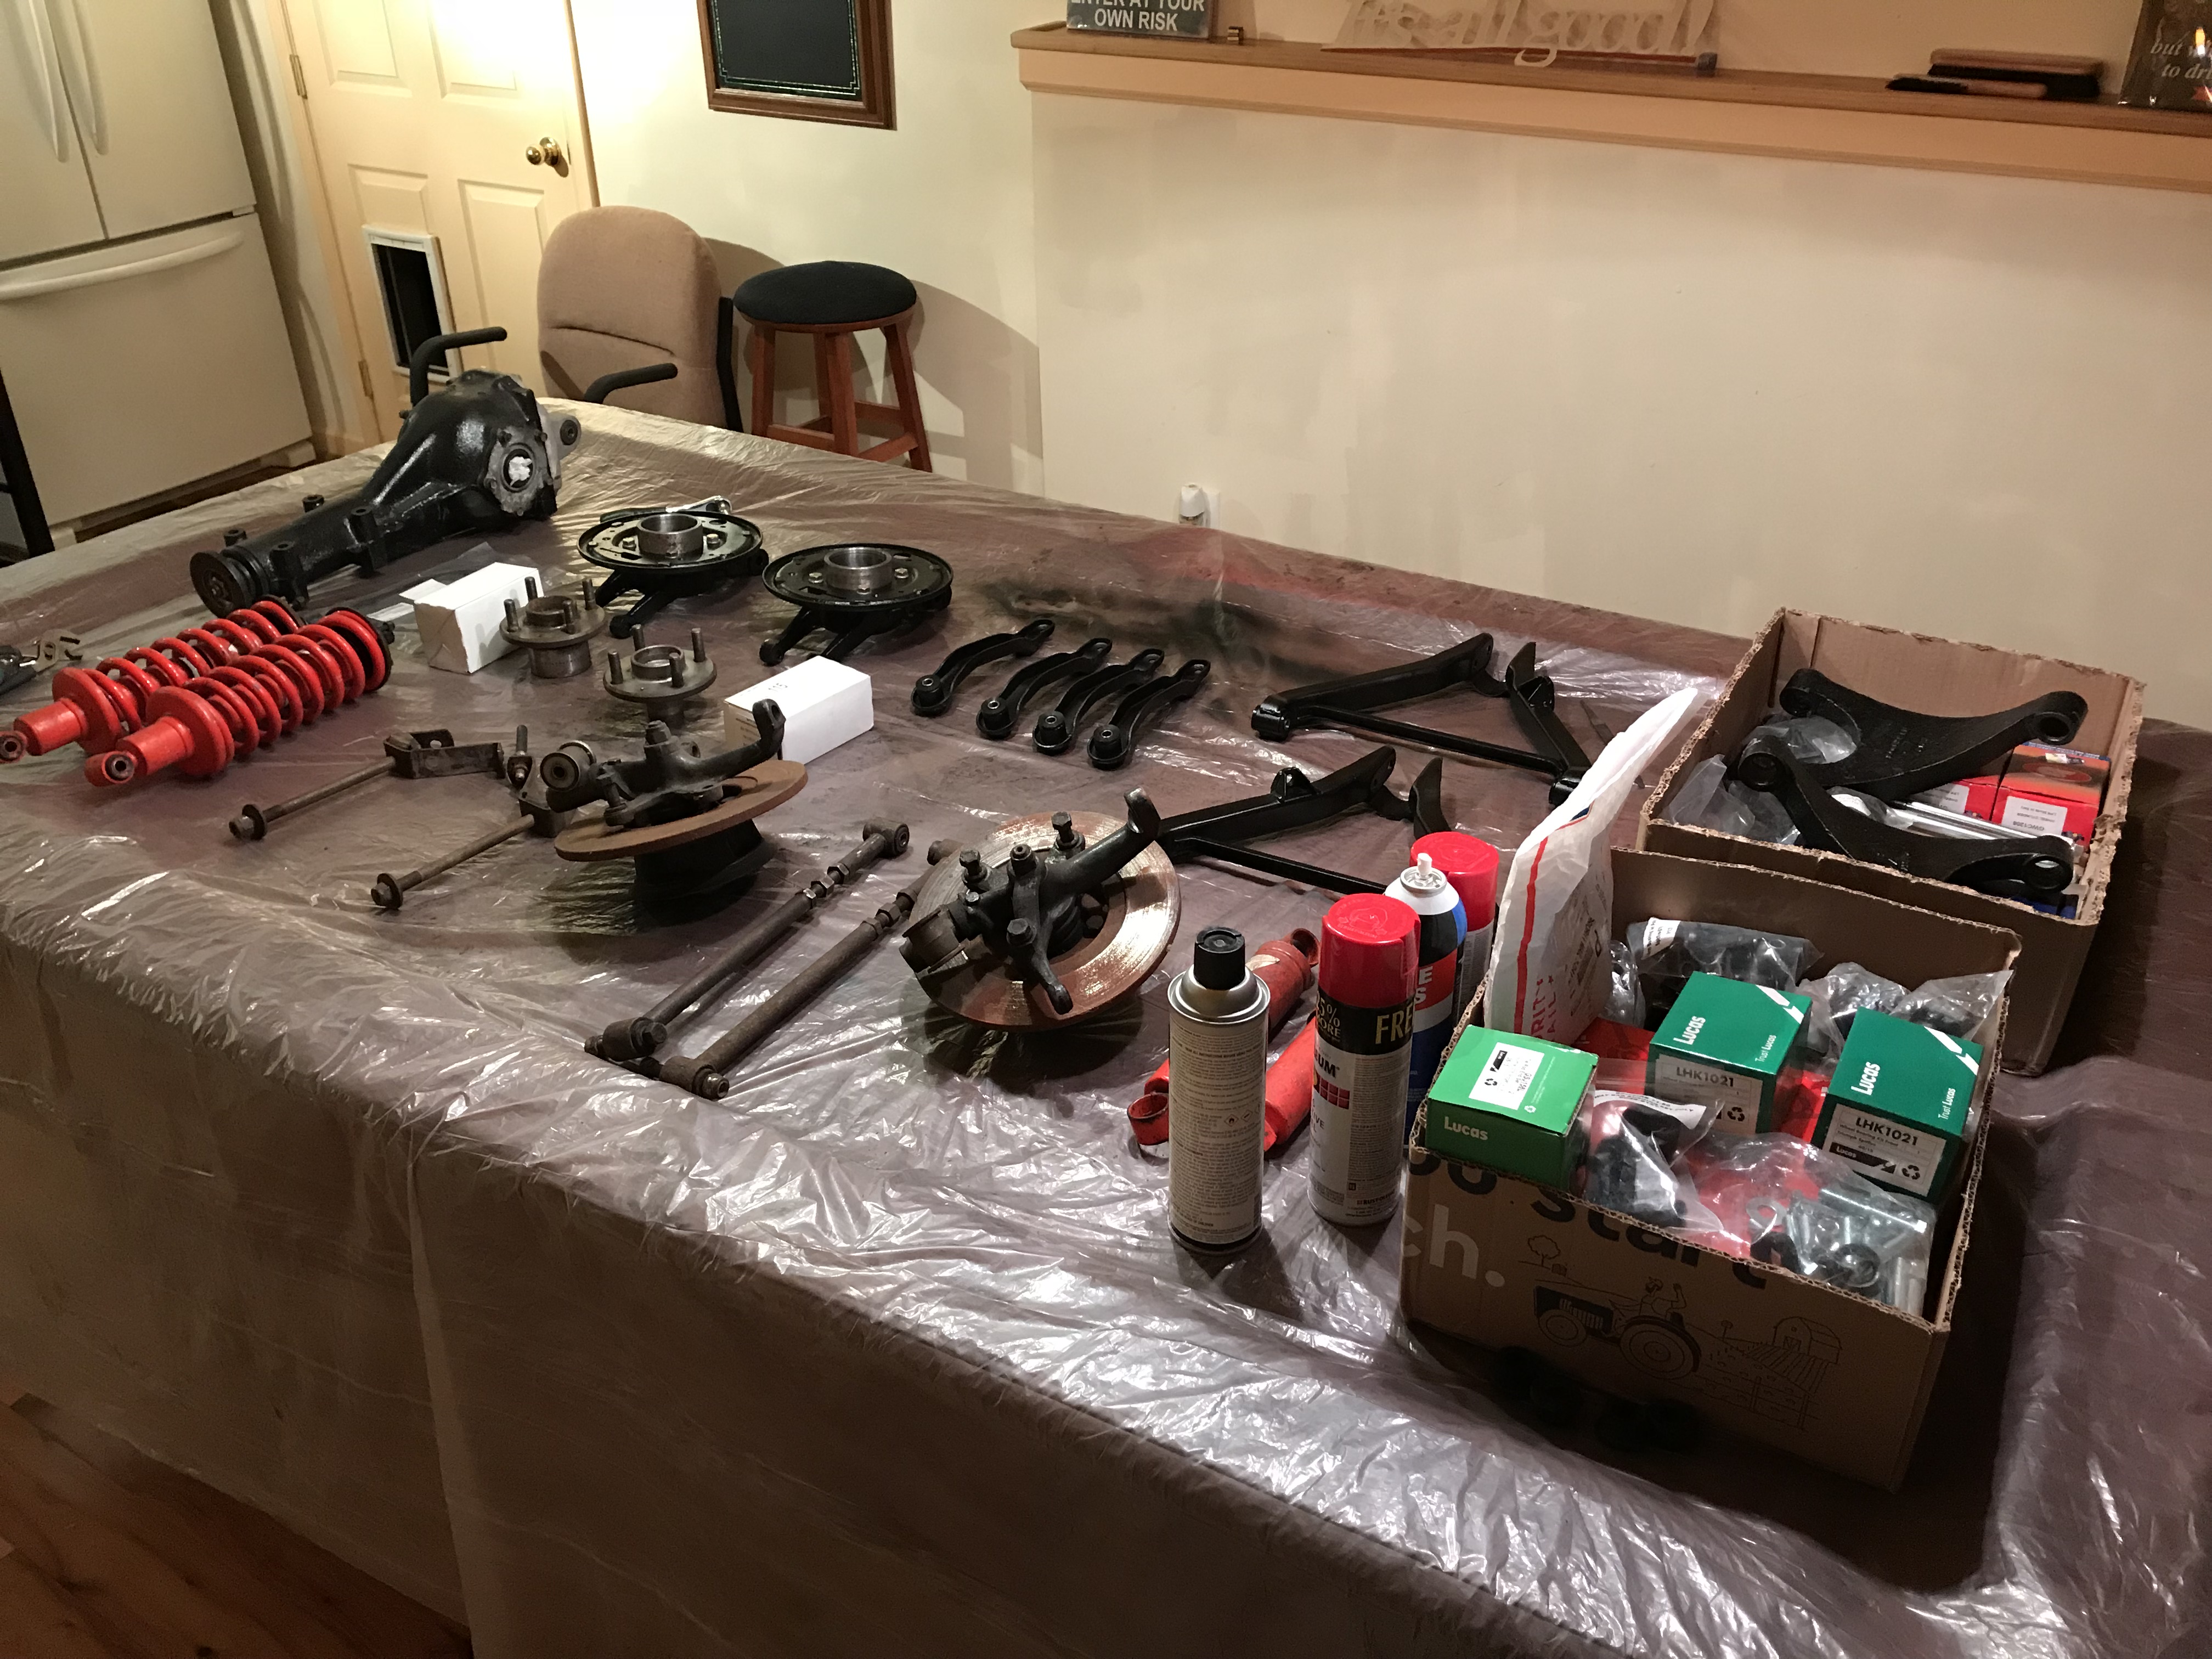
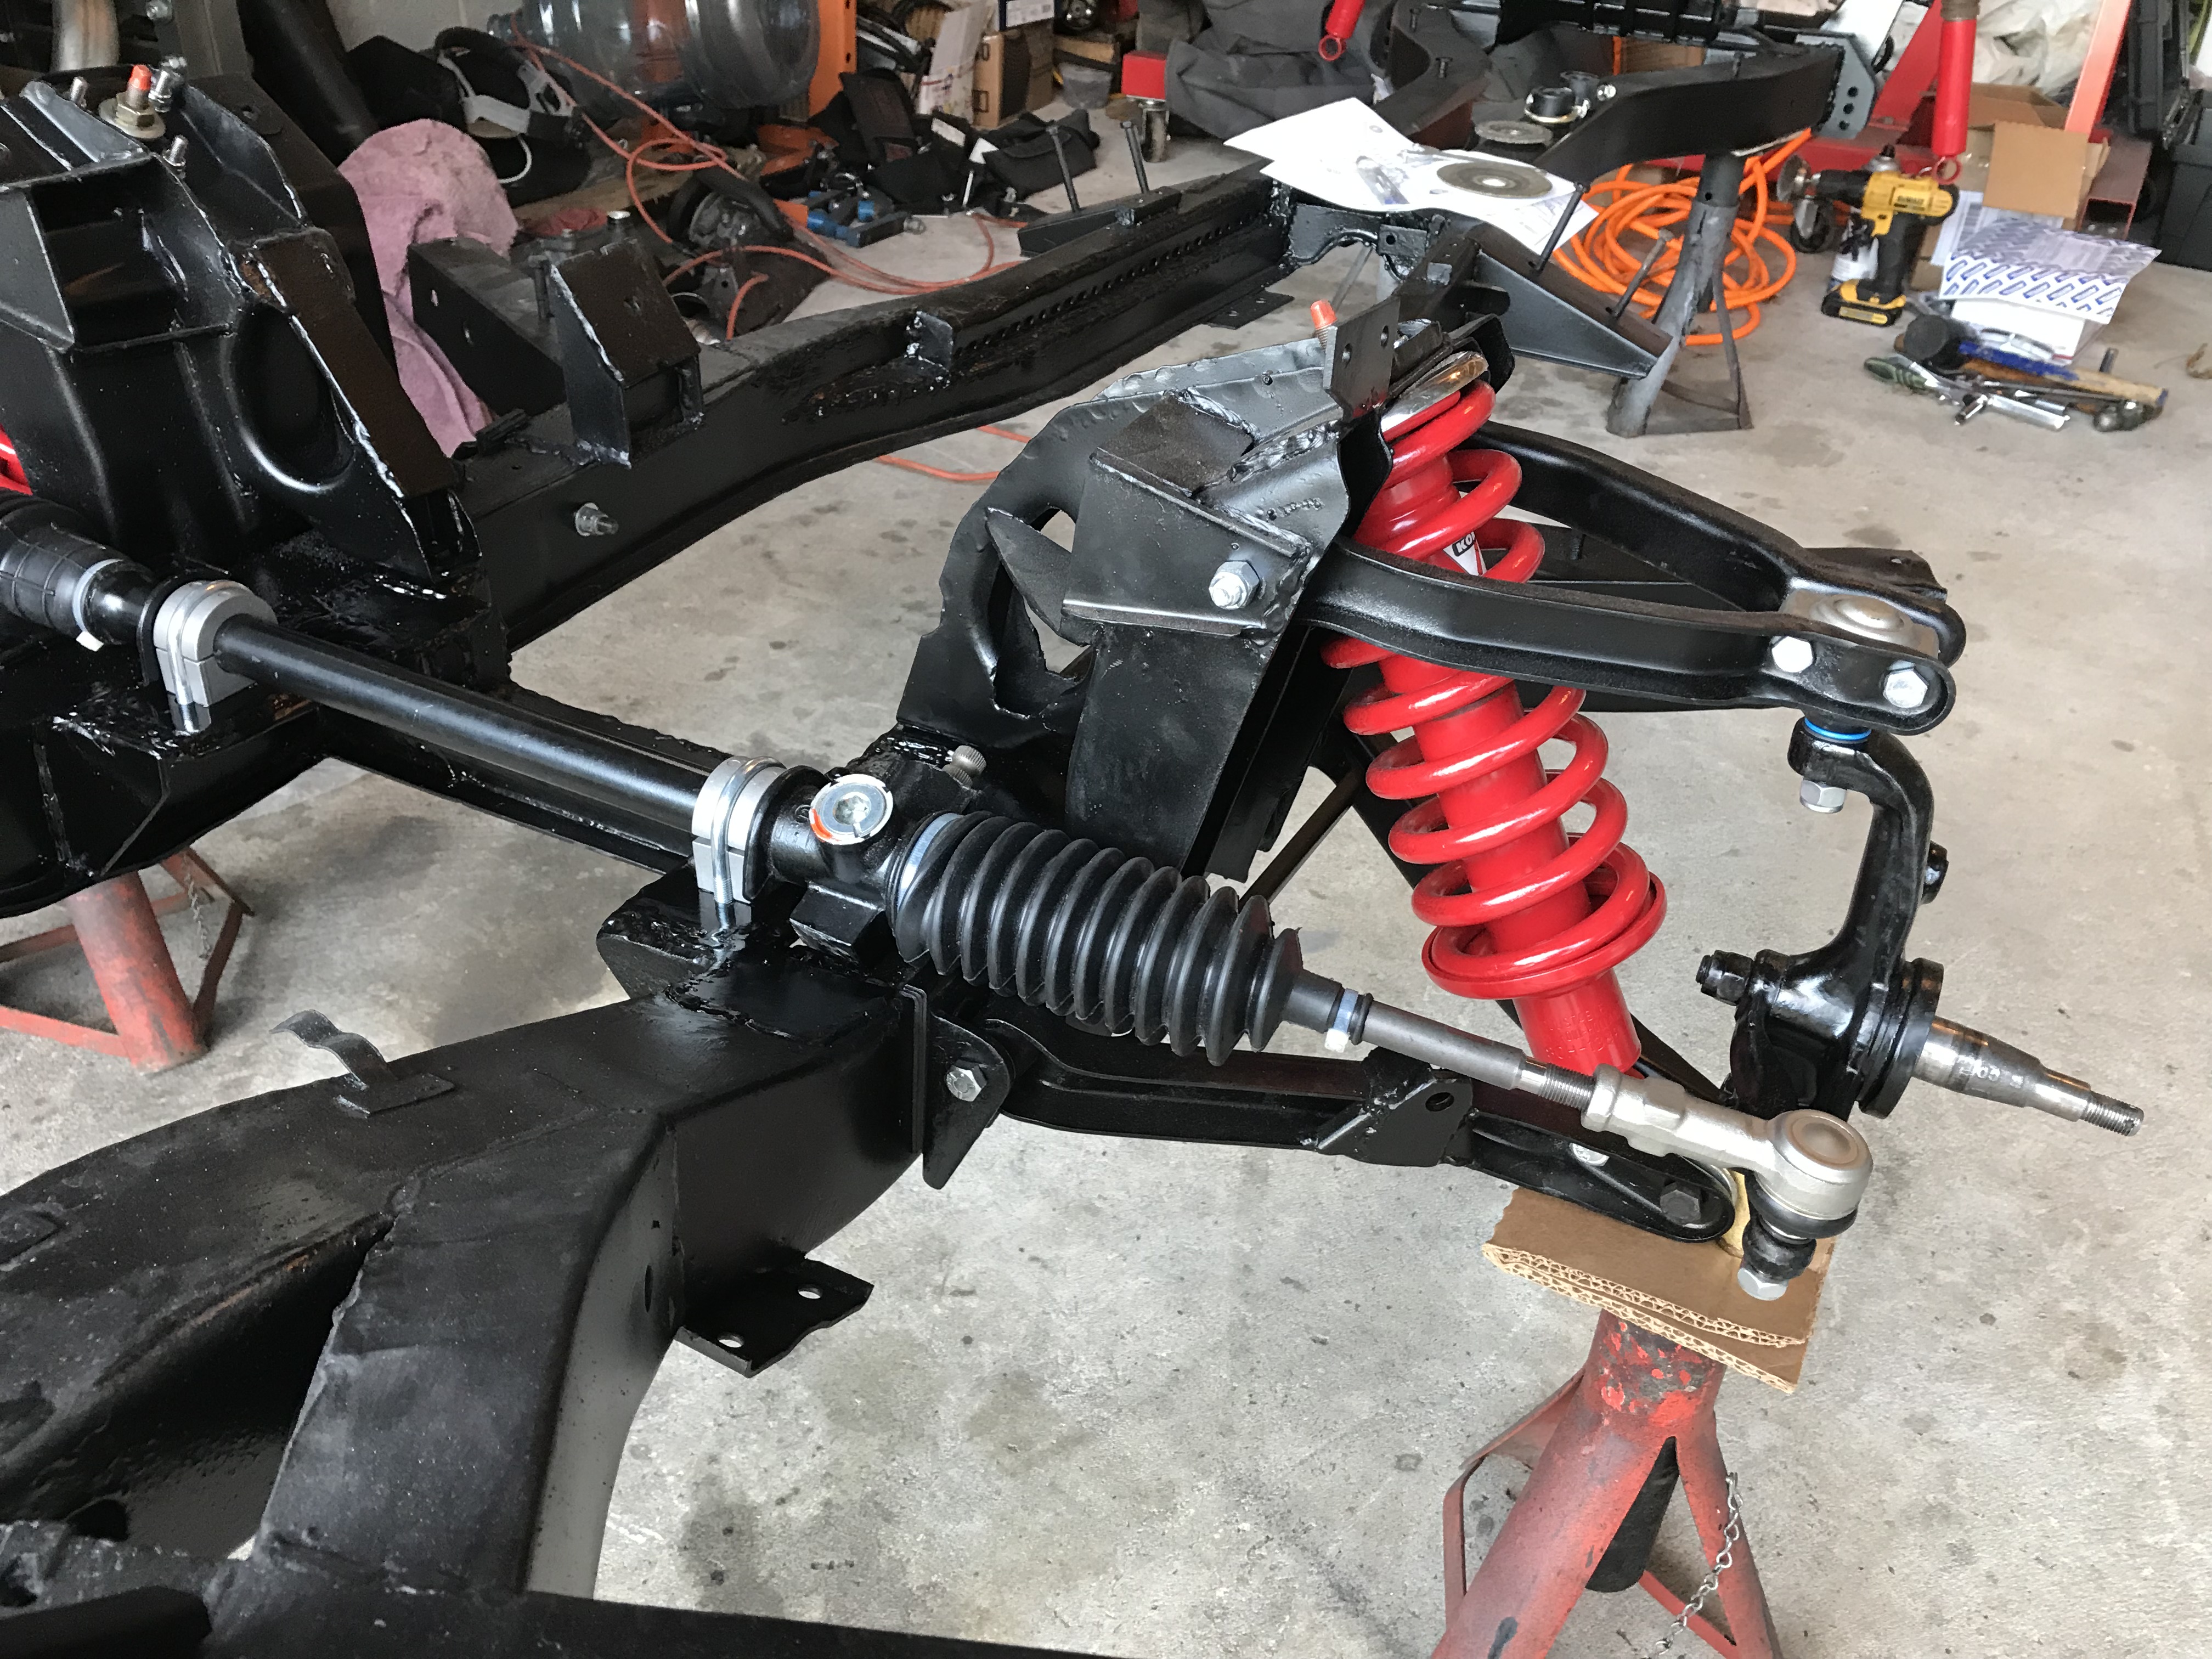
So the reassembly begins.... Front suspension pieces were all replaced with new consumables, only pieces kept were the Koni shocks and I had a set of Moss 330 pound front springs from a previous project. So Poly bushings, ball joints, tie rod ends, trunnions, all hardware new. I also purchased a 2.5 turn "quick rack" for the steering as I like it in my TR4A so figured it would be even better in my Spitfire. The rack had to be lowered to clear the Spitfire front balancer, which meant making a frame modification to allow the rack to be as flush with the frame as possible. I will probably build a brace that will bolt between the two front A-Arm bracket bolts on the inside of the front of the frame so that it is better supported in this area so that flexing does not crack the front of the frame here. Other than that, I am happy with how it has all turned out.

Ian F
MegaDork
11/16/17 4:12 p.m.
How much did you lower the rack? Do you think that will improve the bump steer or Akerman any?
Looks good, although I agree about reinforcing the cross-member. Especially considering how lifting the car from that point is a matter of habit for many Spit owners.
I saw your post over on Triumph Exp about the R160 plates. If there is a better quantity price, let me know. I might be interested in a couple of sets.
The rack is mounted about flush with the frame (so instead of rack mounts being one inch higher than the frame), the mounts are almost flush with the frame, so it lowered the rack by about an inch. I had to cut a notch in the bottom of the drivers side shock tower for the bottom of the steering shaft to clear and the rack moved back probably 1/2 inch towards the shock tower, which should help with the well known bump steer and Akerman issues. It looks pretty reasonable without any odd angles, so I don't think I made anything worse.
Yes, I would really like to get a set of those plates, if he PM's me, I'll let you know what I find out as far as cost. Looked like around $150 USD if the NZ $220 price still holds.
I am not worried about the current cross member at all. While it looks much thinner than stock, it is now made up of two sets of 1 inch square tube set inside the crossmember and seam welded all around, it should be twice as strong as stock if not stronger. Where I am concerned is that I had to cut a whole in the top of the frame where the front lower a-arm is bolted on. The tube and frame is fine there. but just to be safe, I will make a second crossmember (bolt-in) that will go between both of the front a-arm mounting bolts to help reinforce the mount location just as piece of mind here as I don't want it flexing there.
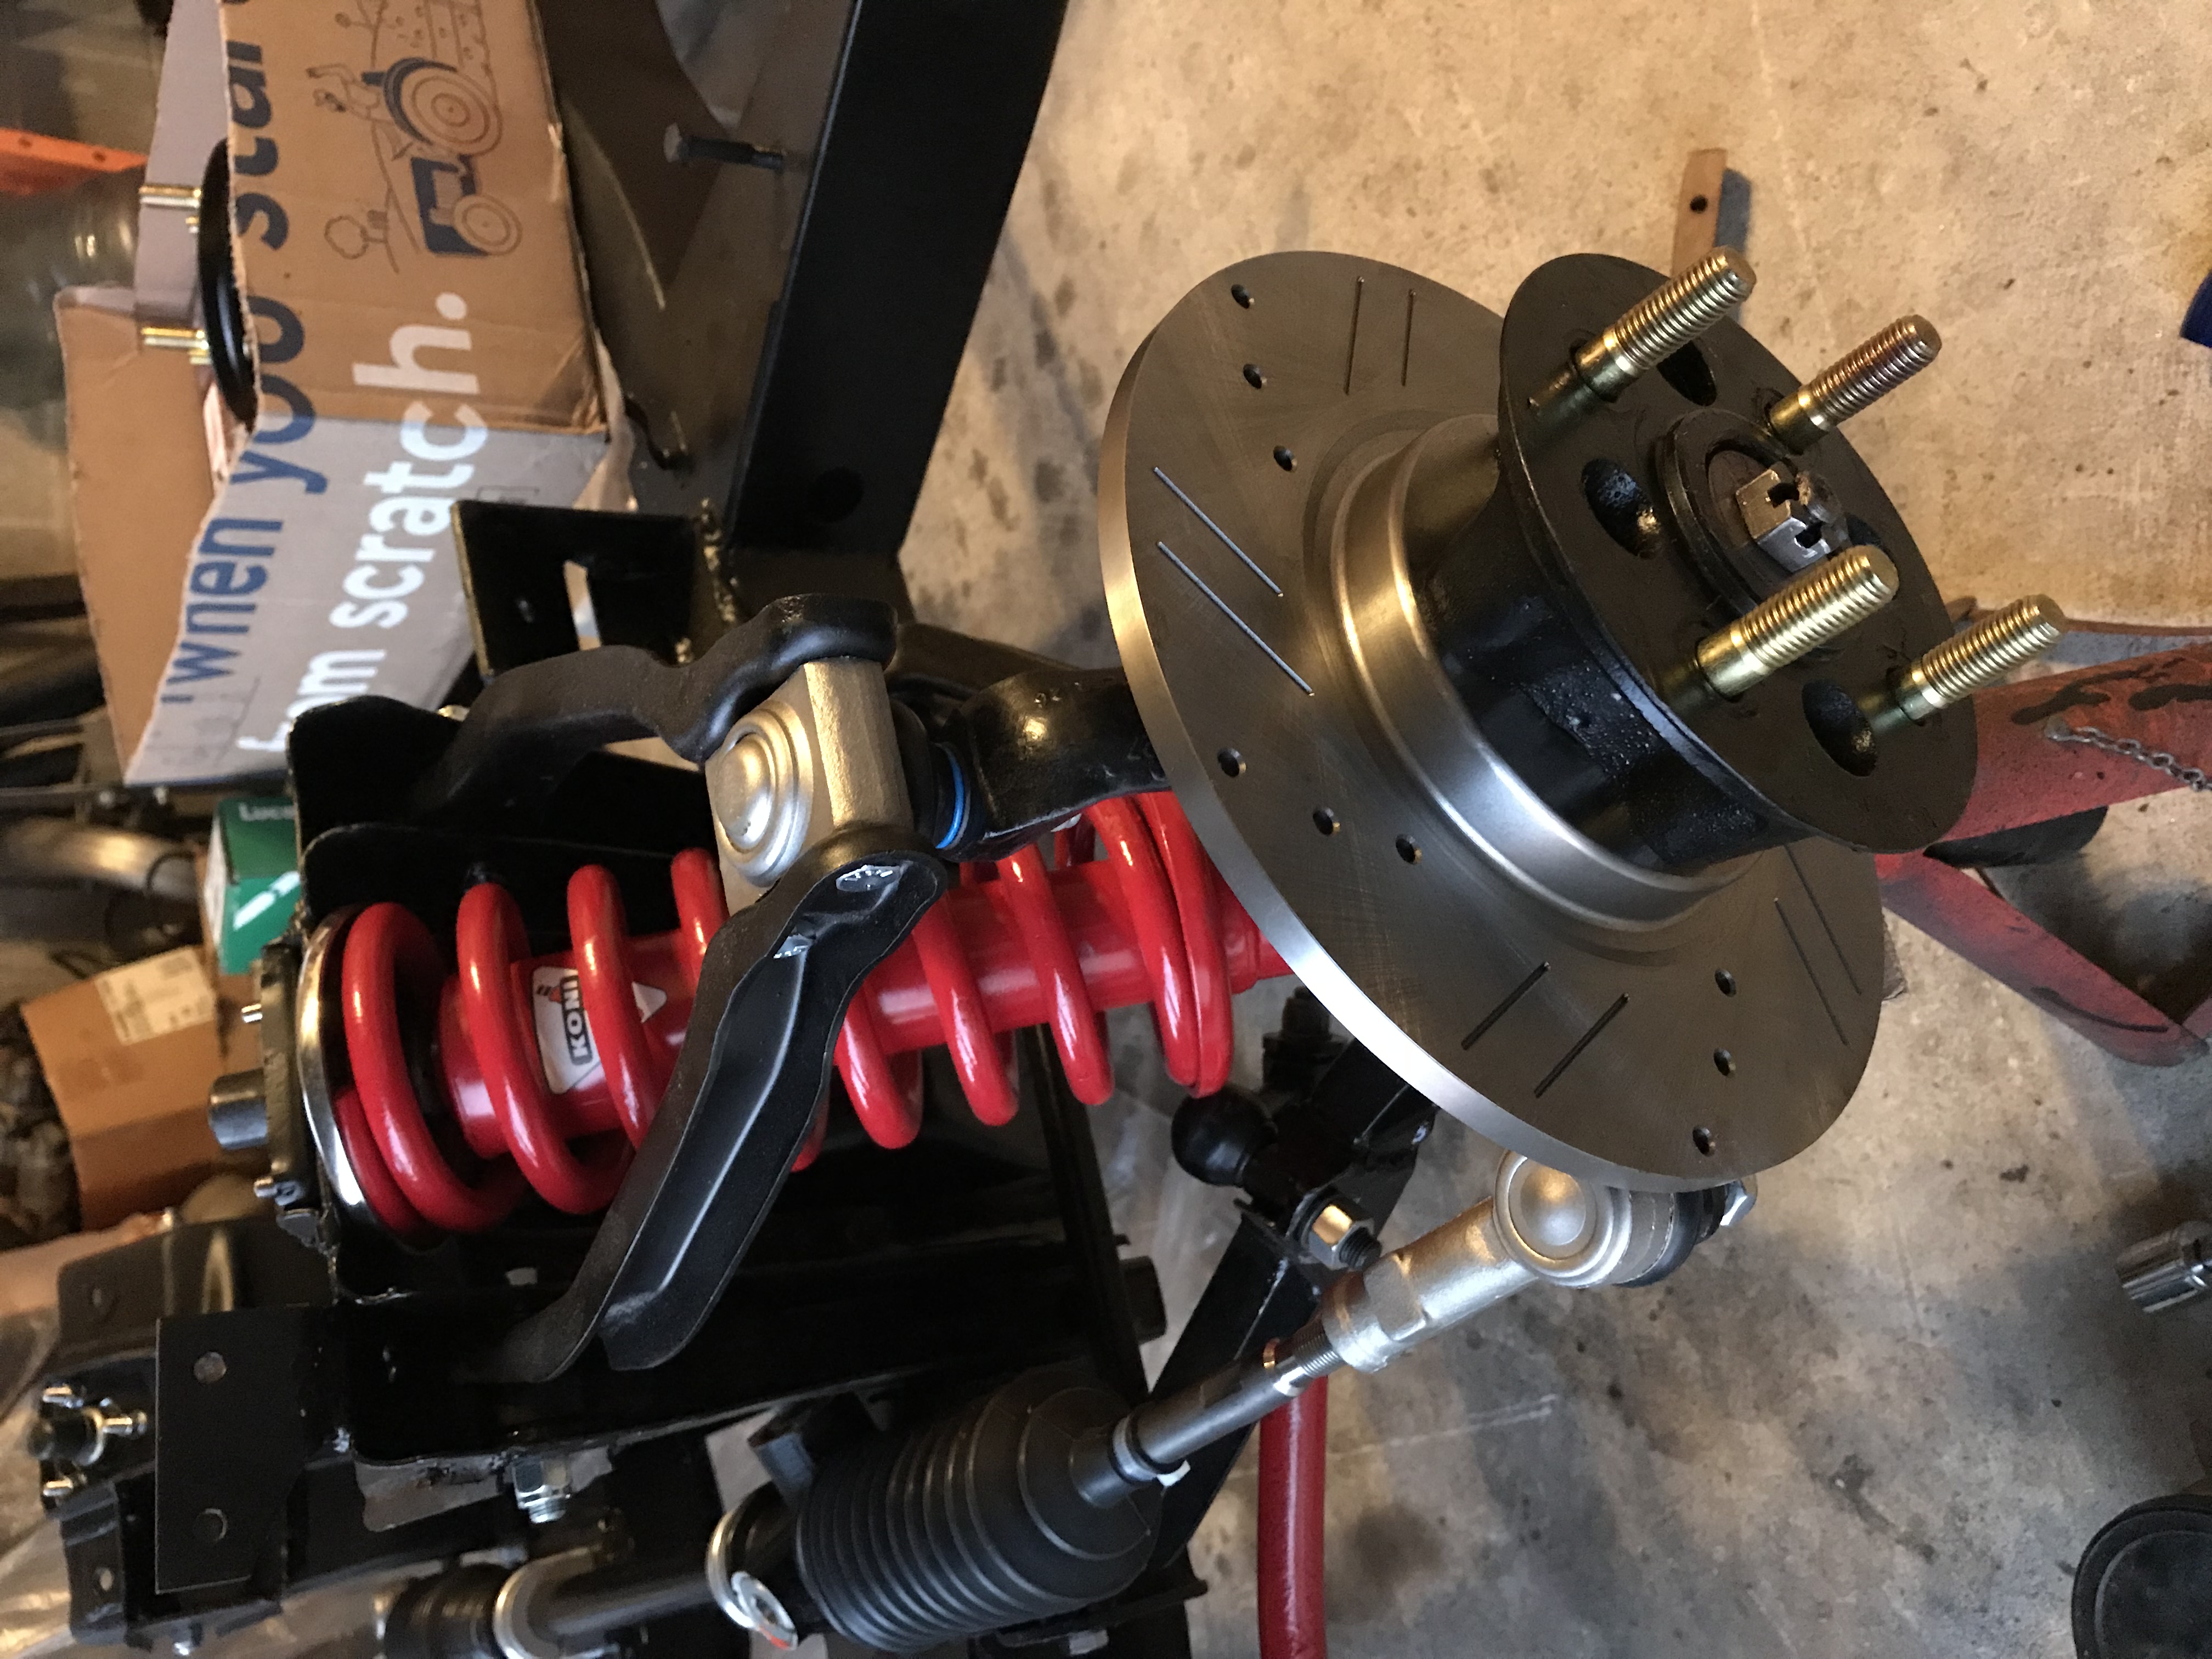
So the front end is almost done, just need to get the brakes rebuilt and pads installed as well as a set of Stainless Steel flex lines. I debated trying to find some GT6 front brake parts, but the car will weigh less that stock so I decided to go with the smaller and lighter Spitfire parts, with rebuilt calipers, Hawk Blue pads and new TRW rotors, it should stop just fine. Rear brakes will be the slightly larger GT6 drums with all new hardware.
Front should be done this week, then I can start on the rear suspension and Differential which will involved having to get CV axles made to mate my Subaru to MGF hubs.....
Ian F
MegaDork
11/27/17 4:18 p.m.
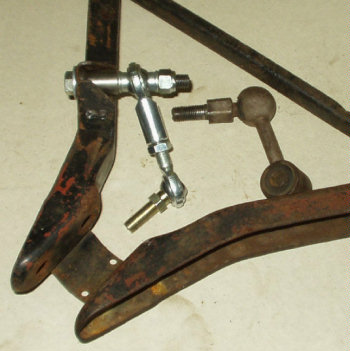
Just noticed something: a couple of my Spitfire friends recommend adjustable end links for the sway bar. It allows the bar to be set unloaded when the suspension is static. Usually, it torques the suspension to one side or the other.

In reply to dherr :
I’d avoid a bed liner or undercoating. Two reasons. first it adds a fair bit of weight
second getting it off can be a royal pain. On some cars I resort to torches and scrappers followed with wire brush and acetone.
Cheap quick and dirty? Spray bomb it with Lacquer. Less mess? Buy a two inch and a 4 inch good quality paint brush. Buy your paint , to get decent pain at a reasonable price shop on line. If you use Lacquer buy two gallons of Lacquer thinner for every gallon of paint. I use big box stores brand like fleet farm, Home Depot Lowe’s etc. Do it in the hot sun or with the temp as hot as you can stand. Brush it, honest! Up until the 1930’s most low production cars like Rolls Royce and Bentley were brush painted. Lacquer dries fast and can be sanded smooth. Use a sanding block start with 180 grit to get big runs and goobers switch to 320 then go to 600 grit. Once you have a Matt finish use a rubbing compound to bring out the shine followed with a good waxing. You’ll have a deep finish which you’ll be able to take pride in for decades. I painted my MGTD back in 1974 and it still looks really presentable.
Use Black for easy matching but it will show flaws in bodywork. White is hard to match but doesn't show flaws as easy.
Awesome build. I was thinking about doing this with my old MkI that is a rusty POS except using more Miata parts (diff and suspension components).
Thanks, I had considered more radical chassis changes, but really wanted this to be a street car so I could use it often. The front suspension from the Spitfire is more than adequate for my purposes and the rear suspension with the Rotoflex pieces and custom CV axles, spindles and Subaru R160 should fix the back end as well and did not require the major surgery of using a narrowed Miata subframe and differential. If you car is really rusted, than major surgery is not a problem.
dherr said:
Thanks, I had considered more radical chassis changes, but really wanted this to be a street car so I could use it often. The front suspension from the Spitfire is more than adequate for my purposes and the rear suspension with the Rotoflex pieces and custom CV axles, spindles and Subaru R160 should fix the back end as well and did not require the major surgery of using a narrowed Miata subframe and differential. If you car is really rusted, than major surgery is not a problem.
Curmudgeon (IIRC) had done some neat builds combining Spitfire and Miata parts rather then just narrowing the subframe. I am probably going that route.
In reply to Ian F :
Yes, I won't know until I get the car sitting on the wheels with the engine in place to see how they sit, but it looks pretty simple to build something up or just buy a set. Paul Geithner has a good example below from his web site on Sptifire enhancements.

In reply to frenchyd :
Appreciate the feedback. My plan is to do this "once" so once the body is mounted on the frame, the floor pans and rockers need to be rust free and completely weatherproofed. So I used the dustless process to clean to bare metal (agree with you that removing undercoating, old paint, etc is really a pain. I too have ended up using propane torches and scraping. Dirty job for sure. I was planning on welding up the floors where needed, and then painting with Eastwood rust encapsulator, chassis black and a final coat of Eastwood bed liner for insulation and sound deadening.
As far as the rest of the car, the plan is still to keep the body in "survivor" mode, so no plans to paint it, just keep it as nice as possible in the current condition and treat any rust so it does not spread. For now, while I would love to paint it to match the chassis, I also want to use the car for autocross and other events and like the idea of a fully restored car (mechanically) but having the patina of an old survivor. If I do decide to paint, I would consider doing it in Lacquer, as that would keep the cost down and might come out looking pretty nice when wet sanded and completed.
In reply to dherr :
You're right since most sports cars were originally done in Lacquer you won’t have any reaction.
Since you have a rotisserie set up it would be easy to brush paint ( or spray if you have the equipment and skill) just the bottom and interior. If the paint matches (or is close) to the original you won’t really lose the patina you seem to prefer. Yet still have some for touch up
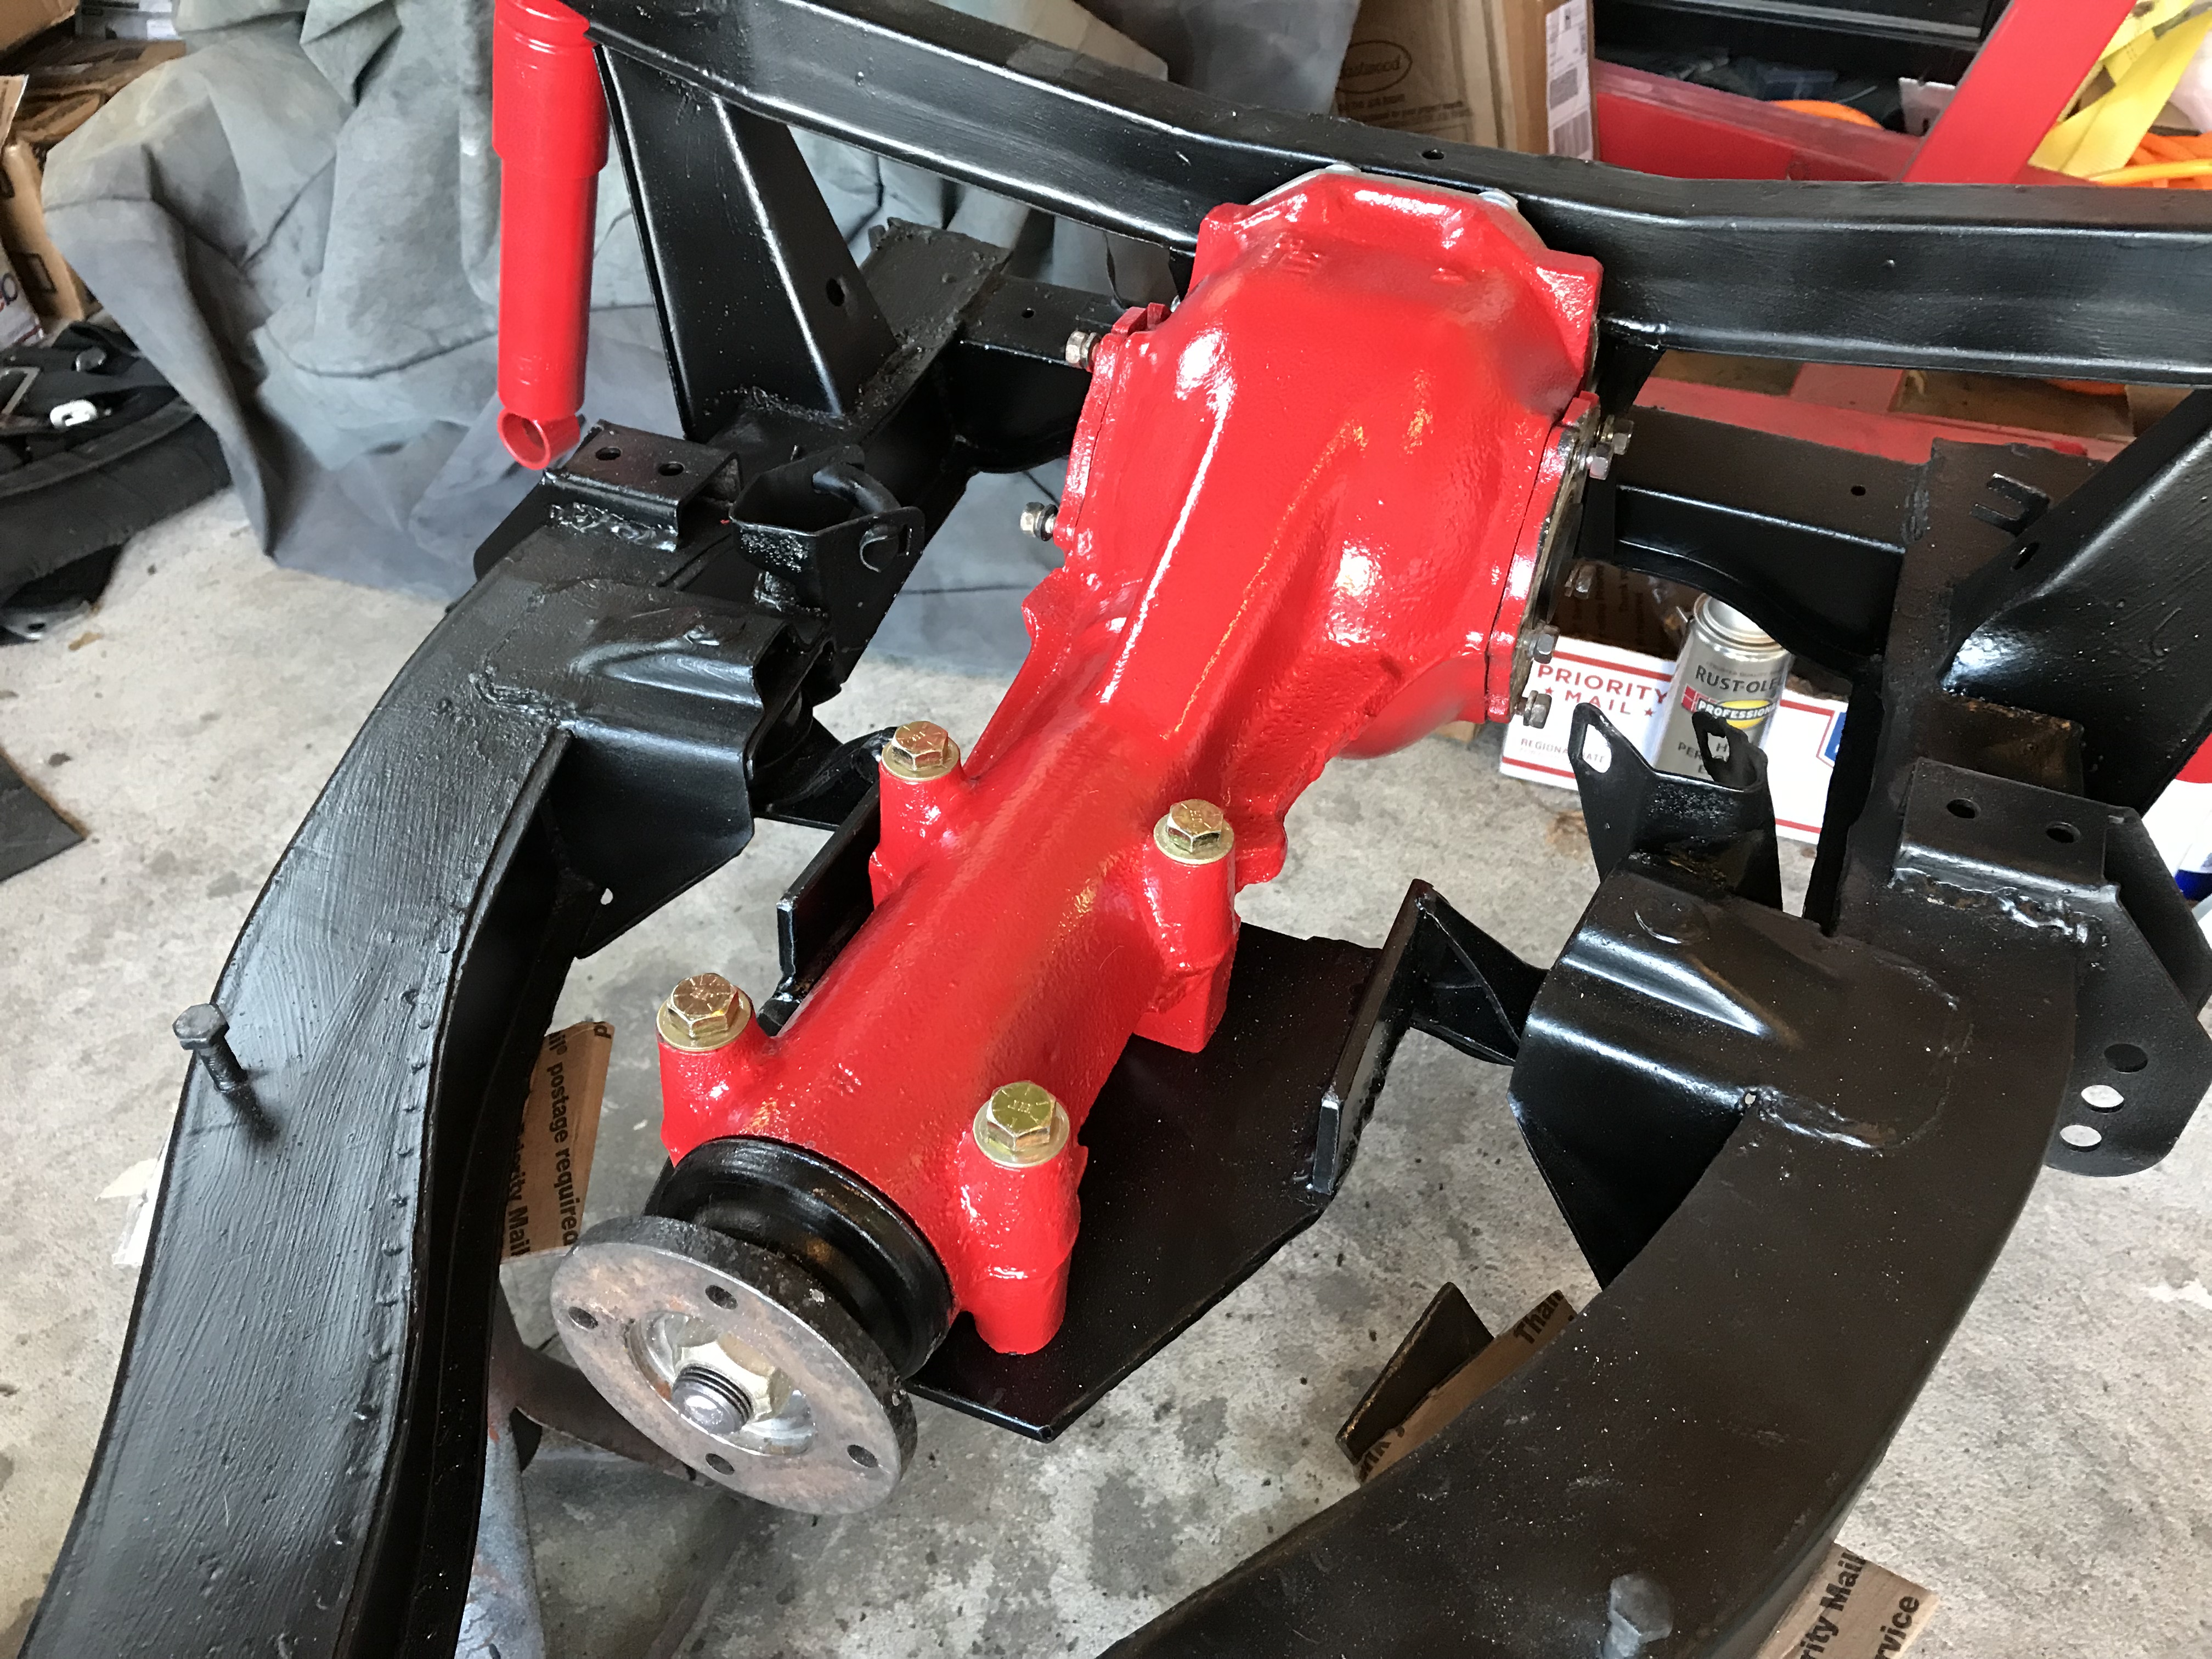
Started the rear Subaru differential mounting project. Since I already had the fancy aluminum rear plate, that worked fine (except even after machining it flat and having the holes drilled for the fill, drain and vent) there were still some clearance issues to resolve. Specifically the inside needed some clearance for the bolts on the diff gear and one of the bolts holding the cover needed some space ground away to fit a socket on it. But over all it is really good and mounts just like the stock rear with the same Triumph bushings and bolts used.
The front mount required more work. I decided not to use the typical flat bracket that most people use as it would flex under load. Instead, I took the stock Spitfire front mount with ears and cut it down so it was just the two ears that bolt to the frame and a small piece at the bottom holding it all together. I then did a cardboard template for the plate for the front of the differential mounts and replicated it in 1/4 steel. Then it was just a matter of bolting it to the differential, then welding the end to the cut down Triumph plate and then removing it and adding stiffening pieces on both sides. The result is a bolt in mount that allows the subaru rear end to be removed and replaced as easily as the stock rear end using all the stock mounts and locations (in my case, all poly bushings instead of the stock soft rubber). I put the transmission in place and used a piece of PVC to mock up the drive shaft angle, looks really good, so now it will all be cleaned and painted and reassembled tomorrow so I can then get the top spring plate built and then finish the rear suspension so I can measure for the CV axles. Looks like Dutchman can take my existing MGF axles and shorten and cut Subaru splines on them to my measurements pretty inexpensively.
Pictures posted tomorrow assembled.
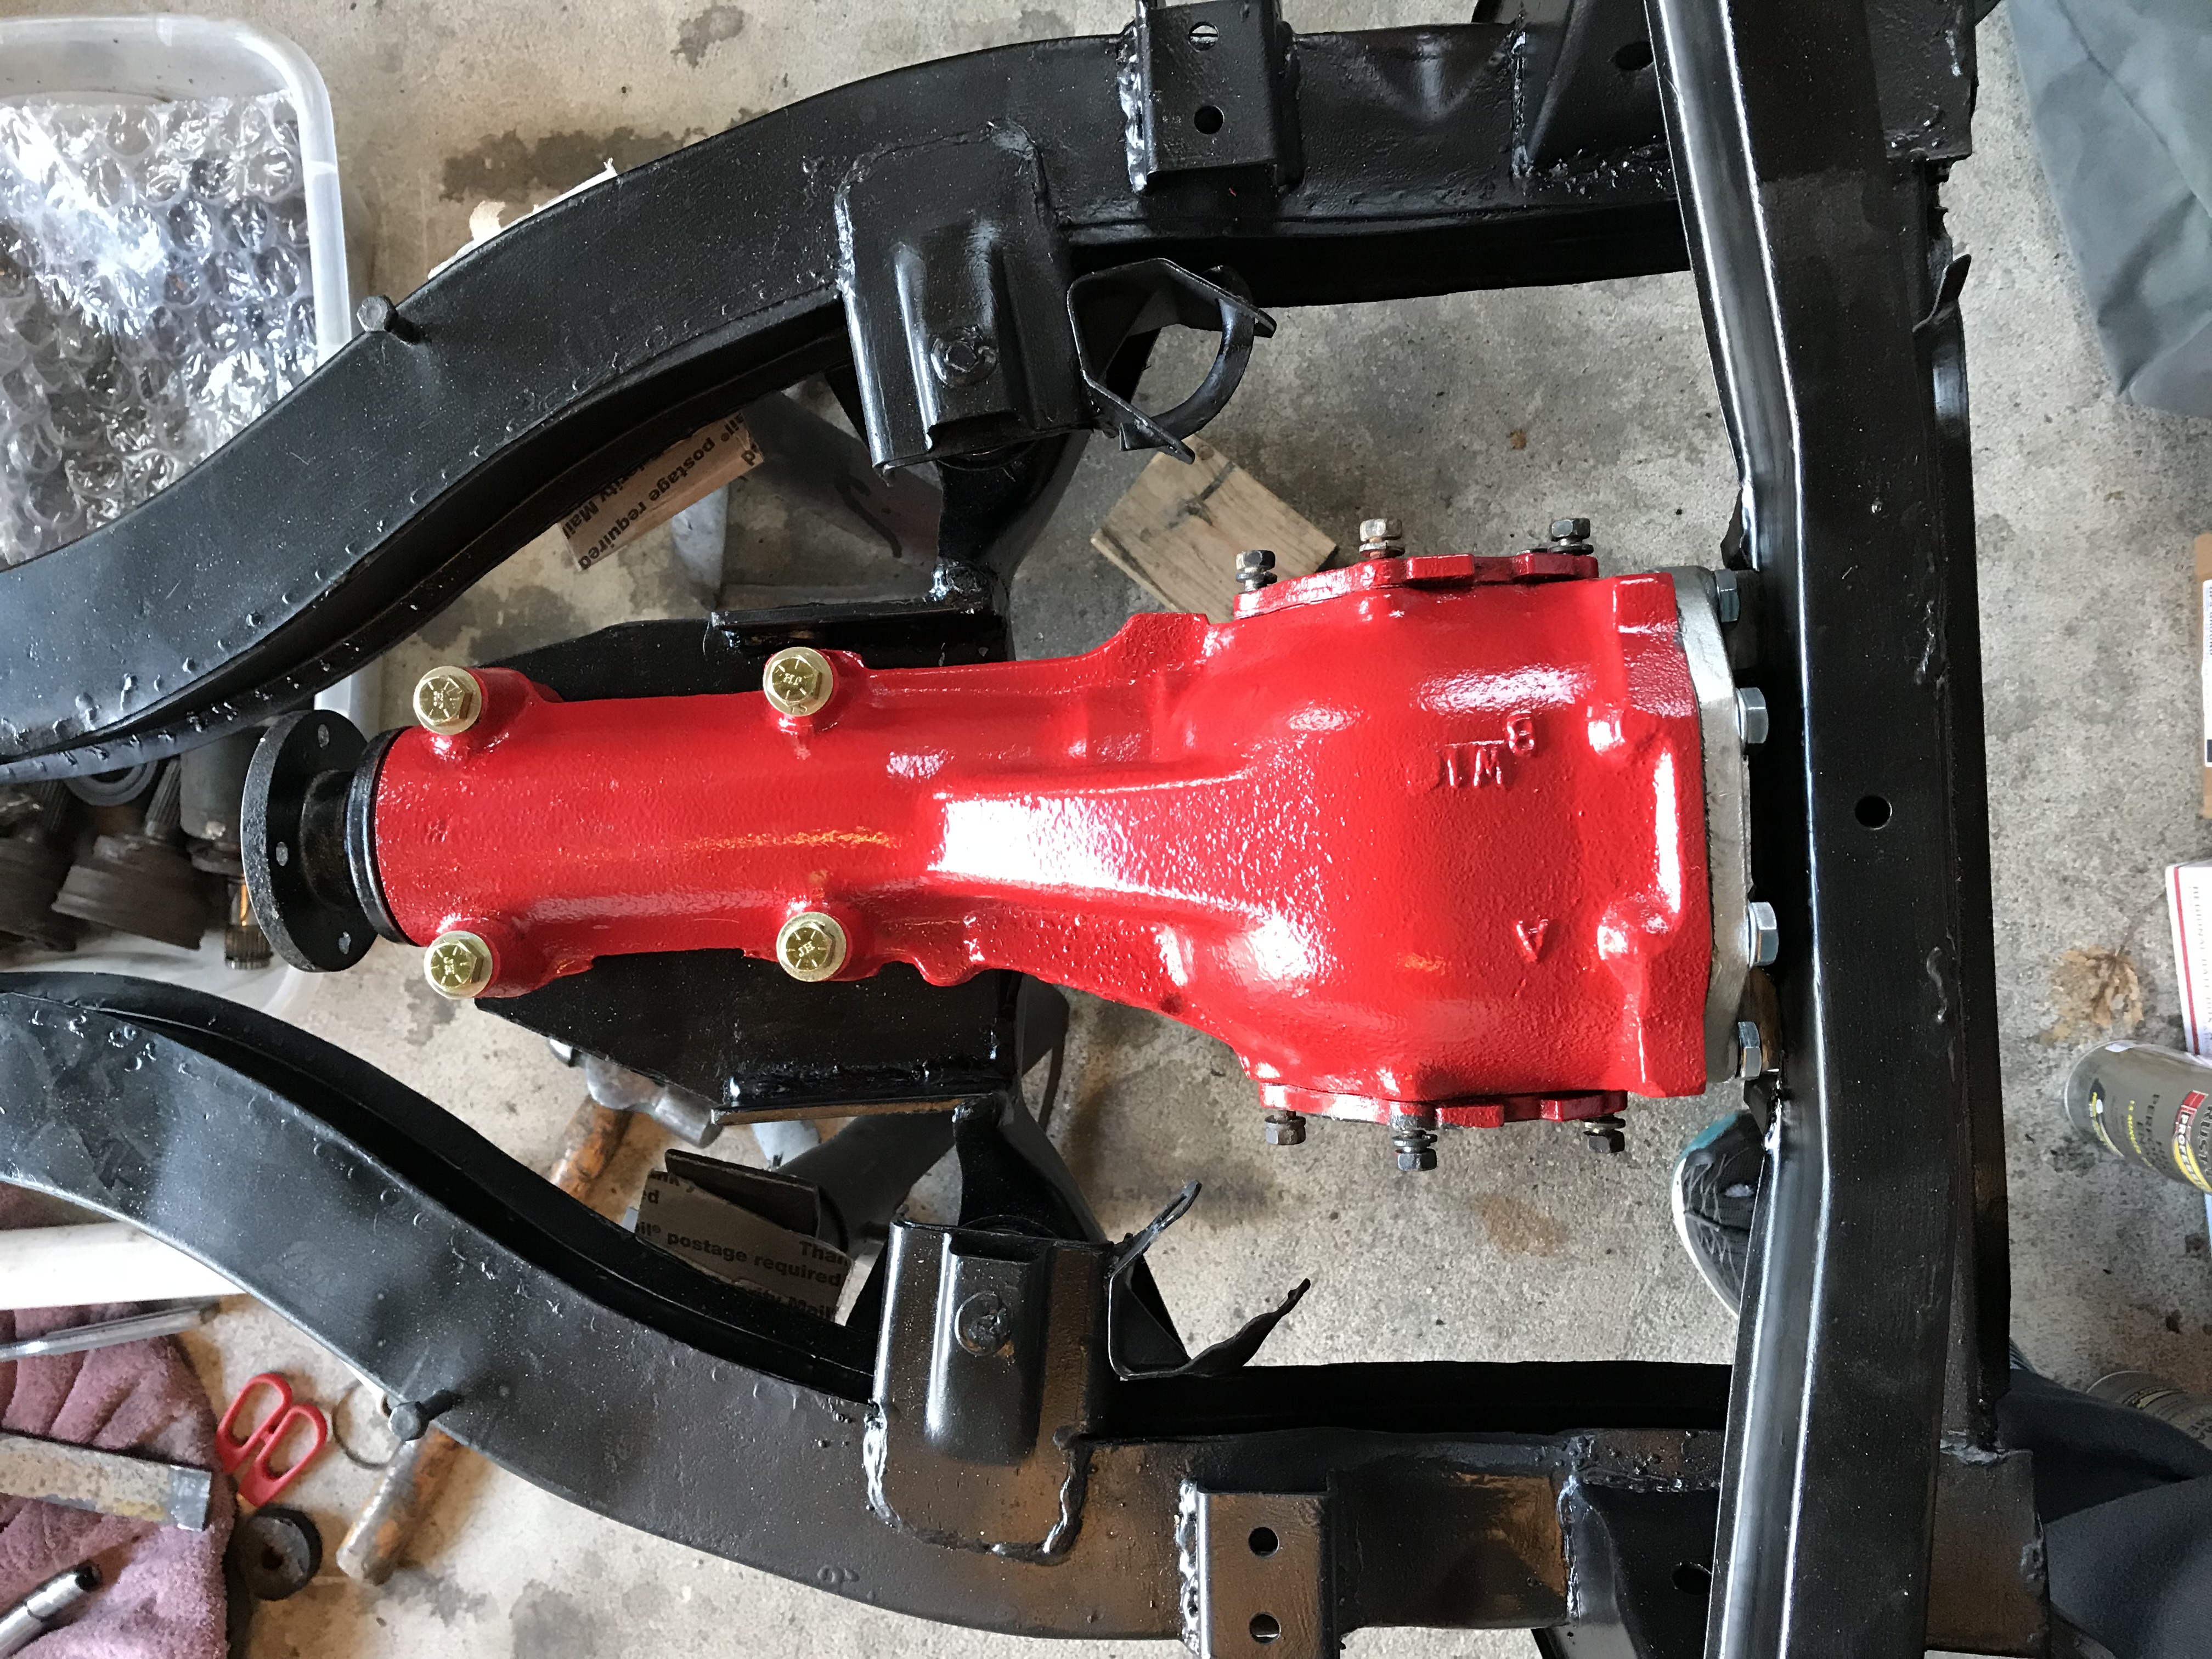
Subaru Differential is now in the Spitfire! Even after test fitting it yesterday, there were still some "tweeks" to do, specifically now that all the bolts were in the back diff mount, had to clearance the frame a 1/4 inch to clear the heads of two of the bolts so it could slip into the stock rear mount location. Looks good, drive line angle looks good, mounted pretty solidly on the poly bushings. Looks like there is good access to the fill and drain plugs too! Next steps are to do the spring mounts and then install the rest of the suspension so I can measure the axles for the CV axles.