1 2 3 4 5
Will
Will UltraDork
3/1/17 9:02 p.m.

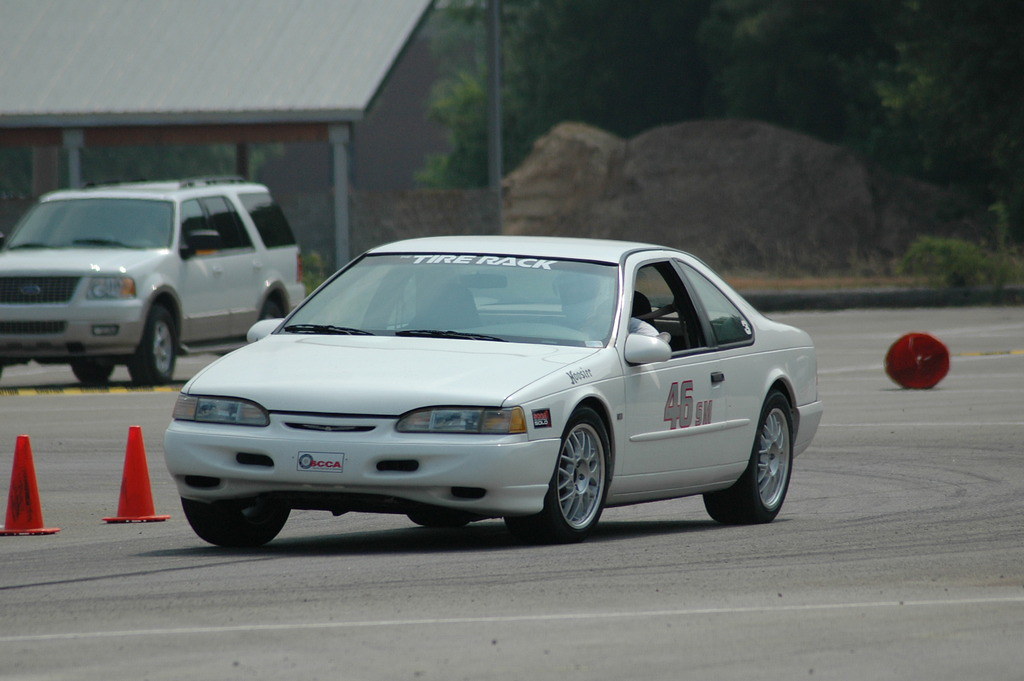
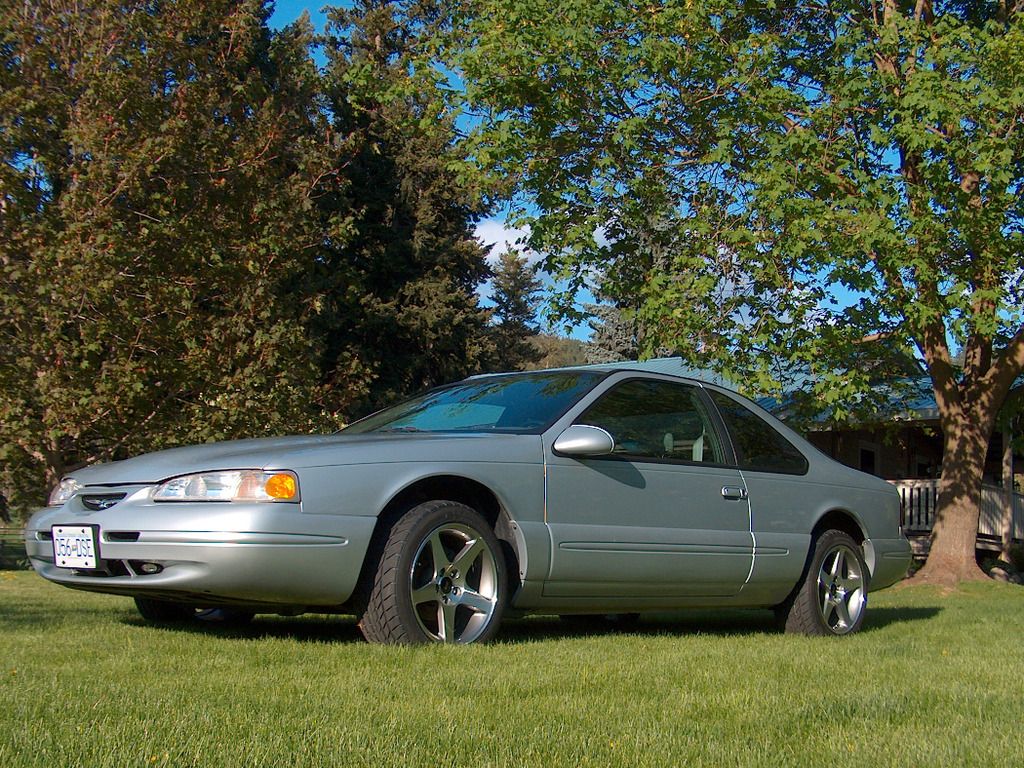
It's been raining too much to get anything done on the car the last few days, so in the meantime, here's a pic of the car running in Street Mod at the 2007 SCCA Huntsville National Tour:

0005

I think I finished 5/8 that weekend, which isn't great, but hey...three guys had to say a Thunderbird beat them.

Will
Will UltraDork
3/2/17 6:02 p.m.

Story time:

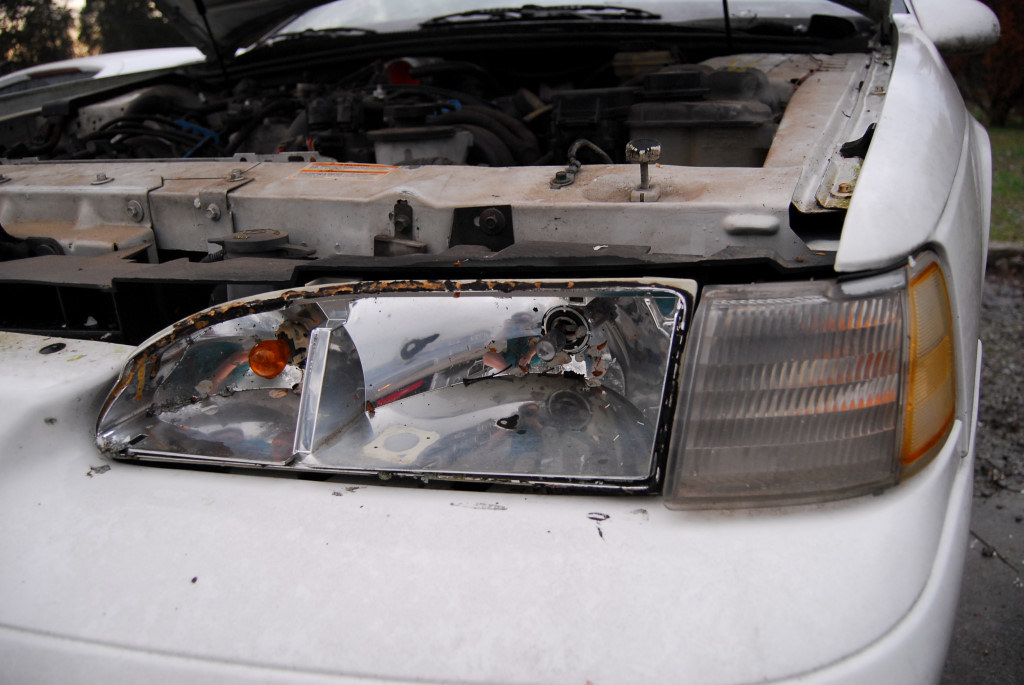
January 2, 2003, I was driving North on the 101 just south of Mulholland. I hit a Christmas tree that some shiny happy person had presumably let fly out of his pickup. It did a fair bit of damage to the front of the car, and I replaced both headlights and corner lights.

Well, the quality of those aftermarket headlights wasn't too high. One day, several years back, I came home to find one headlight lens just lying in front of the car. The next day, the other lens fell off. 0044

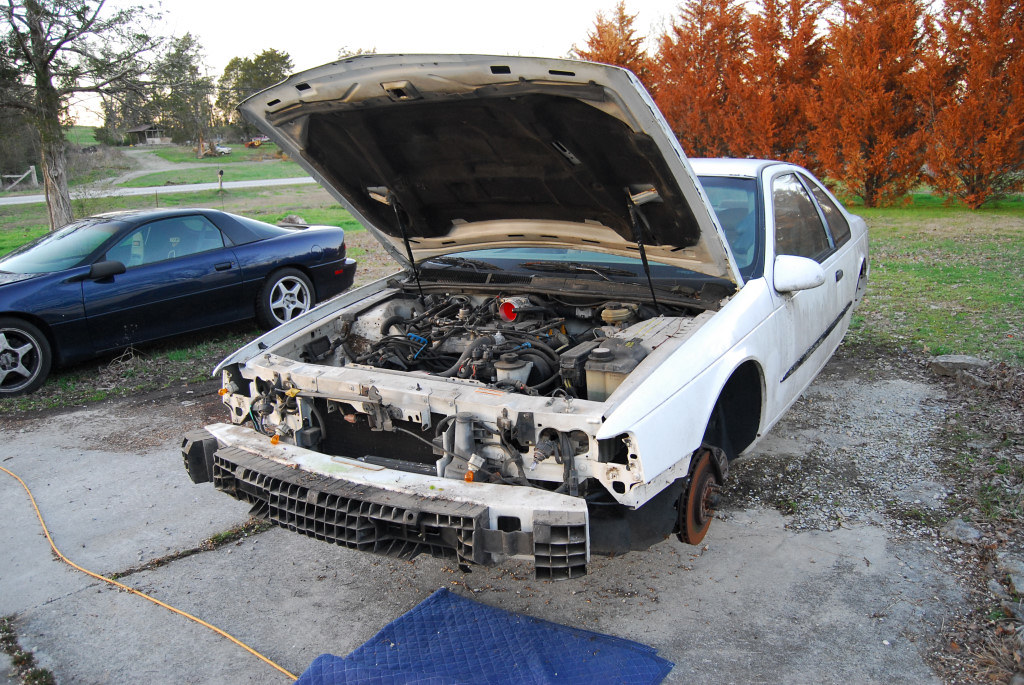
The good news is that after the 96/97 headlight conversion I did on my SC, I have a really good set of 94/95 headlights and clear corners already mounted to the headlight panel. So tonight's work (and part of last night's too) was to remove the bumper cover and headlight panel.

0045

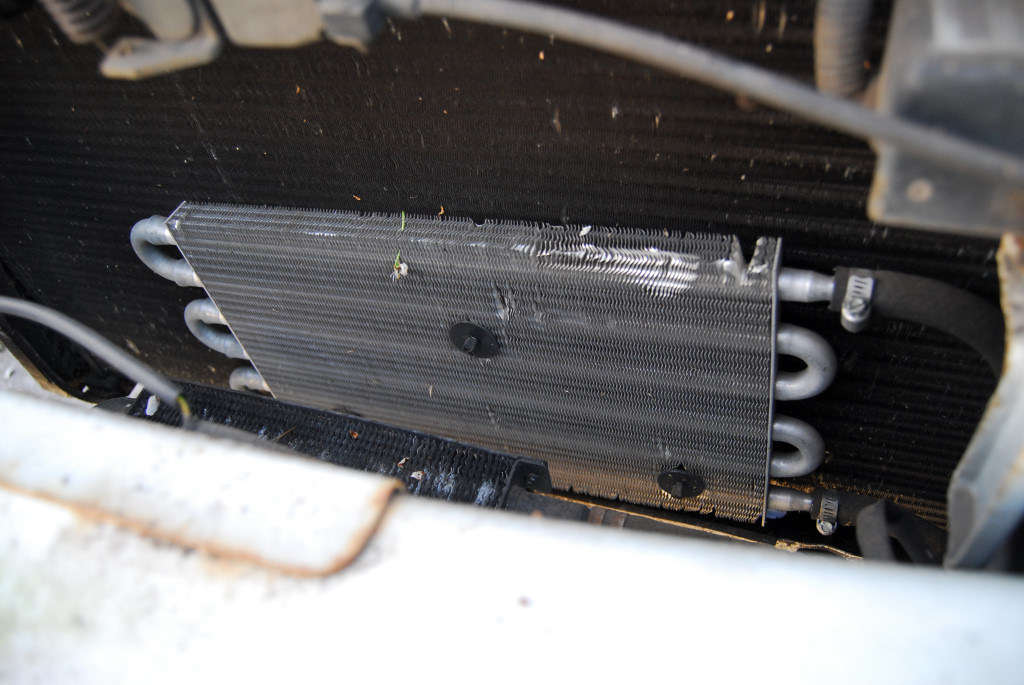
Like most modern cars, the plastic headlights on these cars turn yellow and cloudy, so I won't install the new ones until much later in the project. But this should also make a few later jobs easier, and revealed the transmission cooler I installed some time back.

0046

Will
Will UltraDork
3/3/17 6:52 p.m.

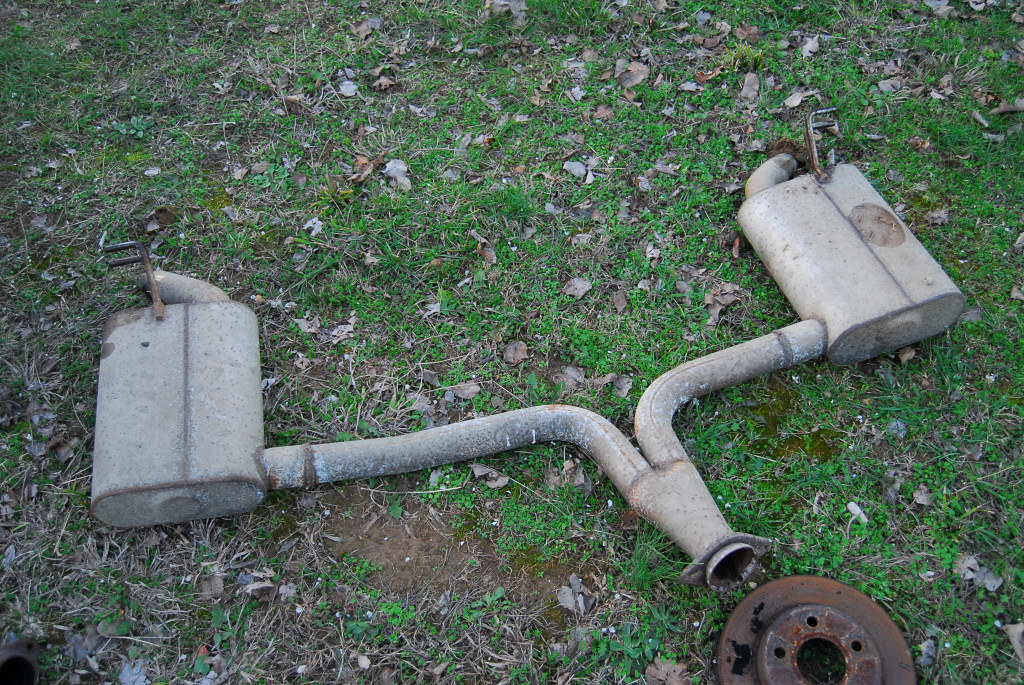
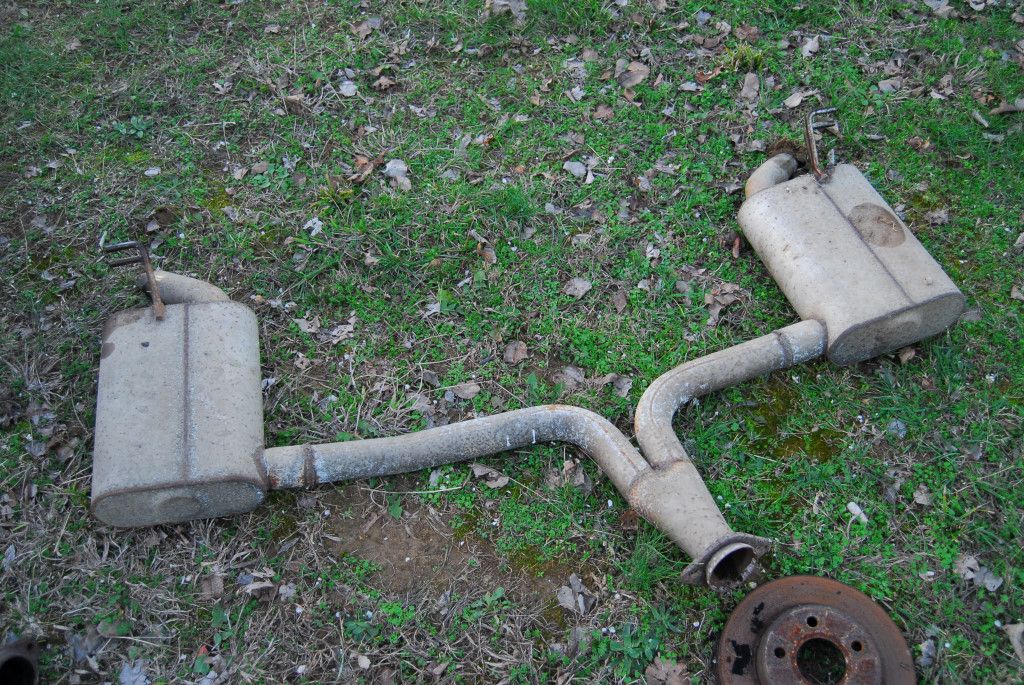
Tonight I drained the oil and transmission fluid, but that's not much of a picture. I did have time to pull the rear of the exhaust off the car:

0047

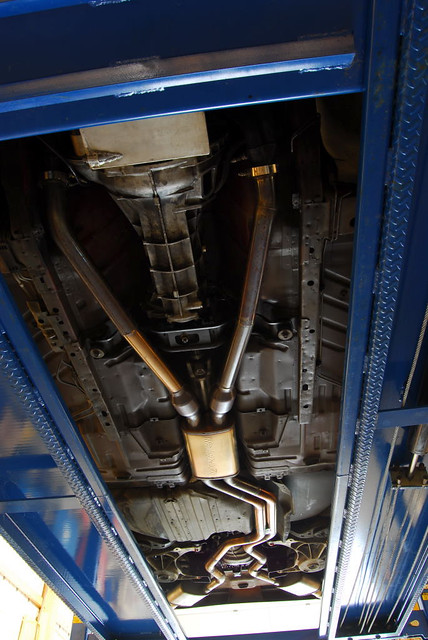
A Flowmaster catback was one of the first things I did to this car, but I suspect I won't reuse it. I'm probably going to go with true duals on this car, and no one offers those in a kit form. It'll have to be custom. Here's a pic of my SC to show the sort of thing I have in mind: SCexhaust

TIGMOTORSPORTS
TIGMOTORSPORTS HalfDork
3/4/17 9:27 a.m.

High five on the build. There is a sense of satisfaction to rebuilding/updating what you already have for a fresh view.

Will
Will UltraDork
3/4/17 5:39 p.m.

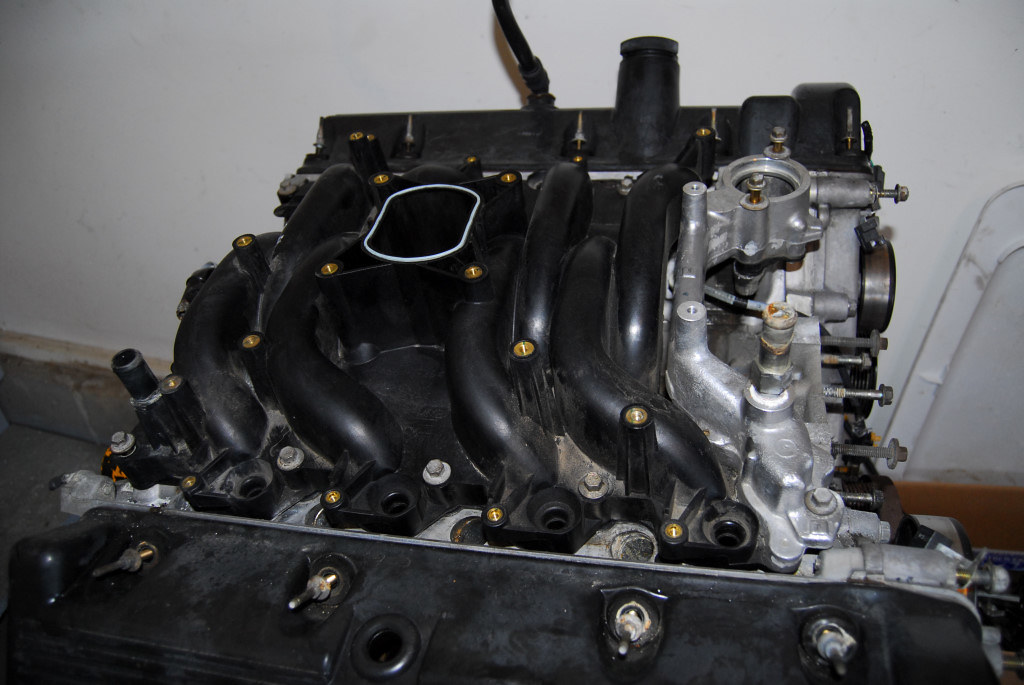
Today was a productive day. The first thing I did was head to the post office to pick up the intake manifold I ordered to replace the broken one that came with the engine. Hiding underneath are new Fel-Pro gaskets that were on closeout--for the most part, mod motor gaskets are reusable, but I didn't like the look of the ones that came with the engine.

0048

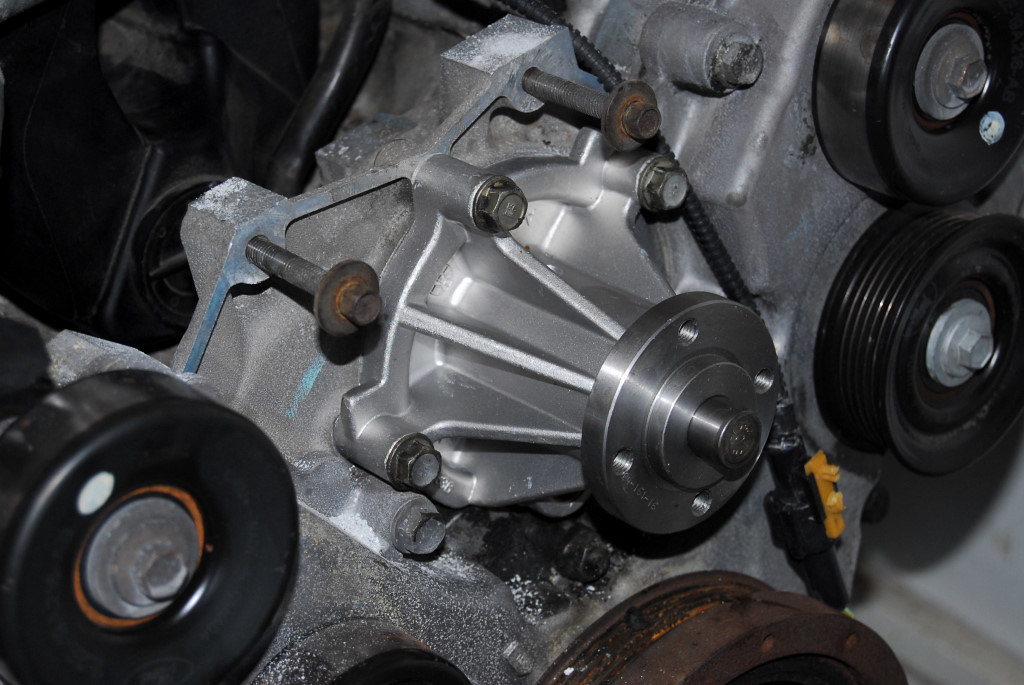
I've had this water pump sitting in a box for over 10 years, so now seemed like a good time to use it.

0049

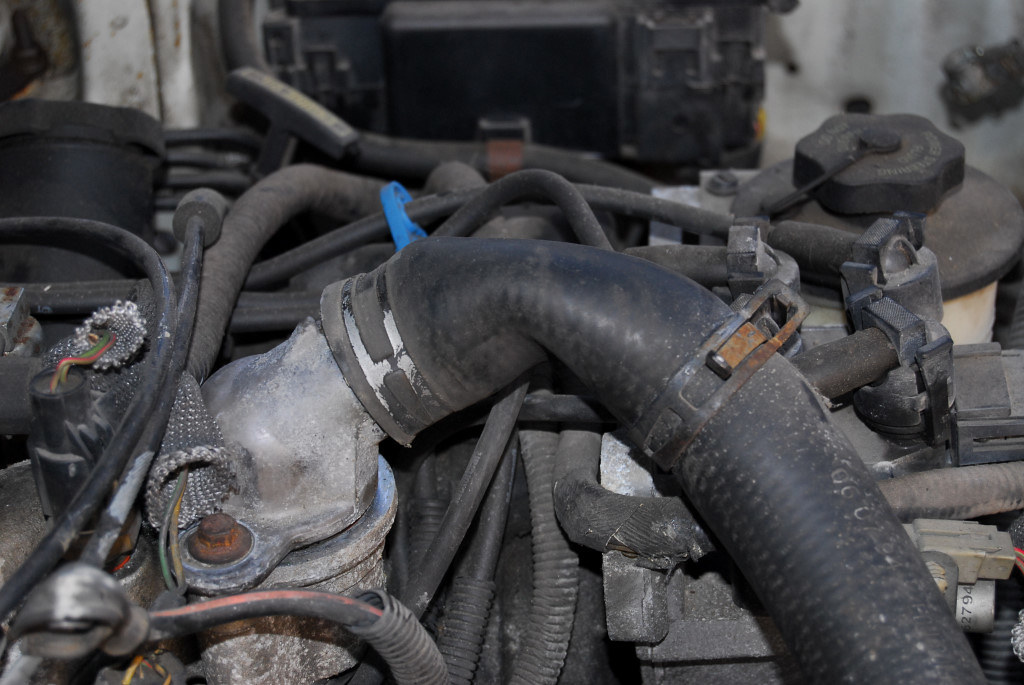
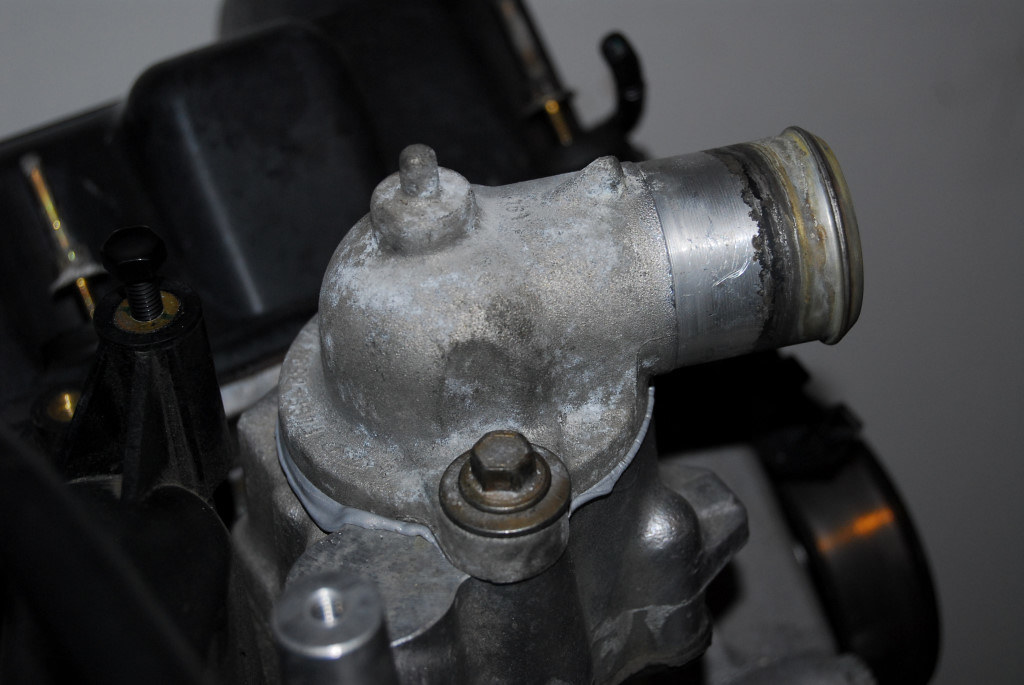
The Explorer and T-Bird thermostat housings are different--the Explorer one was in better shape, but after test fitting it in my T-Bird, I didn't like the way it put a kink in the hose.

0056

So I cleaned up the T-Bird one (a bit, anyway) and installed it on the Explorer engine. Note: the sealing surface is different between the two housings, so I used some silicone to make sure I got a good seal.

0055

It occurs to me I probably should have waited until the engine was in the car to test fit the thermostat housing to make sure they both sit in the same relative position, but if I have to swap them out later, no big deal.

Will
Will UltraDork
3/4/17 5:48 p.m.

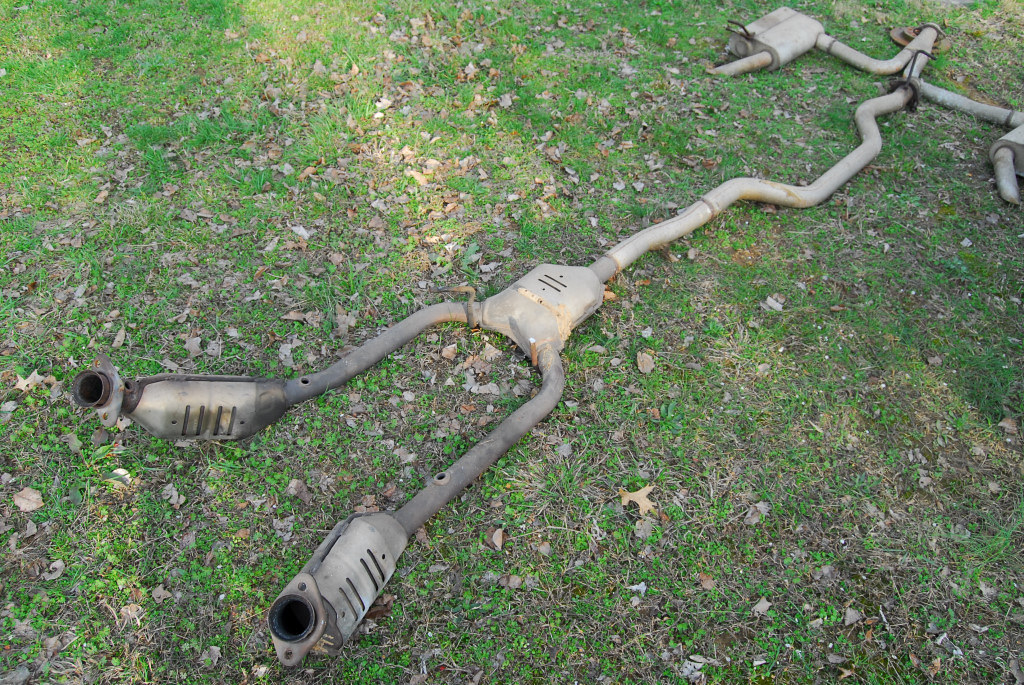
This one picture represents more hours of work than I care to admit.

0053

Ford didn't design the MN12 platform with a V8 in mind. Remember, this was the era when the Probe was allegedly going to replace the Mustang. Ford thought V8s were passe, and for the first two years, the only MN12 engine options were the NA 3.8 V6 and the supercharged 3.8 V6.

In 91 Ford finally gave in to customer demand and offered the 5.0; in 94, they replaced the 5.0 with the 4.6. But the 4.6 is much wider than the 3.8 or 5.0, and it really takes up all the space in the engine bay. All I had to do to get this piece out was disconnect the header collector bolts. Three were easy; one was near impossible. The only way to get to the upper passenger side collector bolt is to remove the starter, but it's virtually impossible to remove the starter with the exhaust still in place--Catch 22. Disconnecting the oxygen sensor plug was also a fun time.

I was finally able to get the starter out, and then the rest of the exhaust (which still wasn't easy).

I also admit to using the Sawzall on the exhaust hangers when I couldn't slide the whole assembly far back enough to drop it free. I regret nothing.

Will
Will UltraDork
3/4/17 6:06 p.m.

Compared to the exhaust, getting the rest of the day's work was a snap.

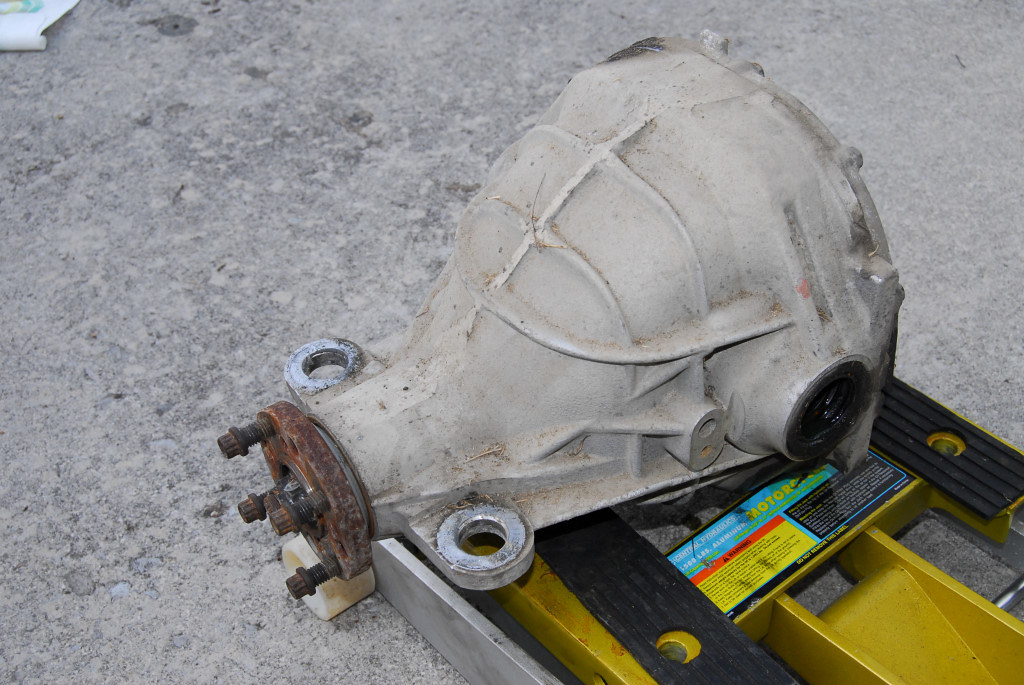
Years ago I replaced the factory iron diff carrier, 3.27 gears and open diff with an aluminum Mark 8 carrier, True Trac diff and 3.73 gears. It's about 12 pounds lighter than the original parts. When this was my only car, it only got the good stuff.

0051

Incidentally, a Harbor Freight motorcycle jack is the best thing I've found for removing/installing heavy stuff like this. The wide base makes balancing awkward parts like this or a 9-inch third member a breeze.

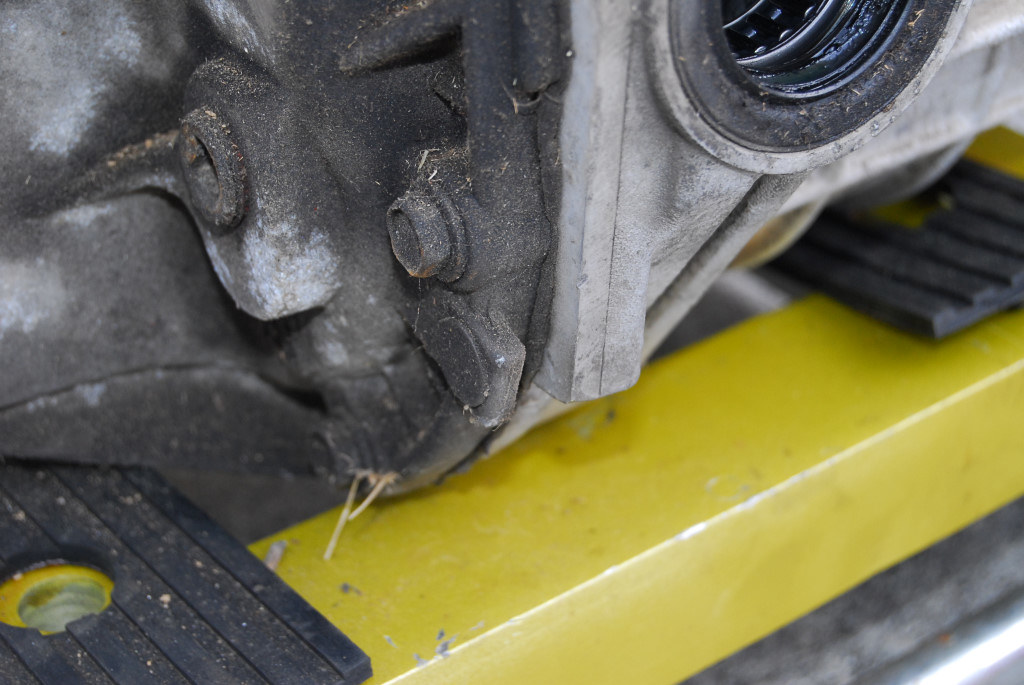
Check out the little tab below the bolt on the diff cover. Not all MN12 covers have this tab--I don't know why, and I'm not sure which cars have them, and which don't. But none of the covers have a drain plug (just a fill plug), so to drain them you have to pry the cover off. This little tab makes that job much easier. The only way I've found to do it on tab-less covers is to hit the cover with a hammer.

0052

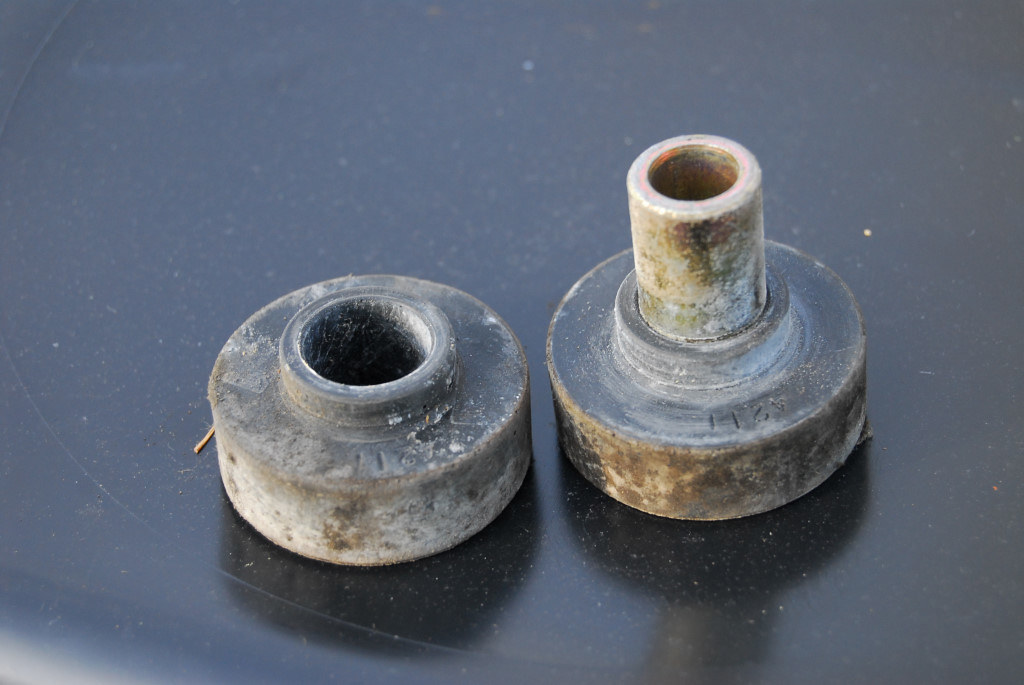
The front carrier bushings are urethane, and they're probably good enough to reuse. There are two different styles available: The two-piece design here is the one you want. There's another three-piece design that uses an inner, upper outer, and lower outer bushing. I had a very, very strange failure with that design: The inner bushing somehow started forcing its way out past the lower outer bushing. I don't recommend that design.

0054

Behold: The world's longest driveshaft.

0050

This is an aluminum piece I installed back when I first did the diff swap. However, I suspect it's the source of the car's driveline vibration, so I'll get it rebalanced and replace the U-joint bearings.

My back hurts and I'm tired, but this beats working or staring at the TV all day. I may not have seen my name in the lights of the Goodyear blimp, but I gotta say, today was a good day.

Will
Will UltraDork
3/5/17 3:23 p.m.

The last major task before actually preparing to remove the engine was tearing down the front suspension.

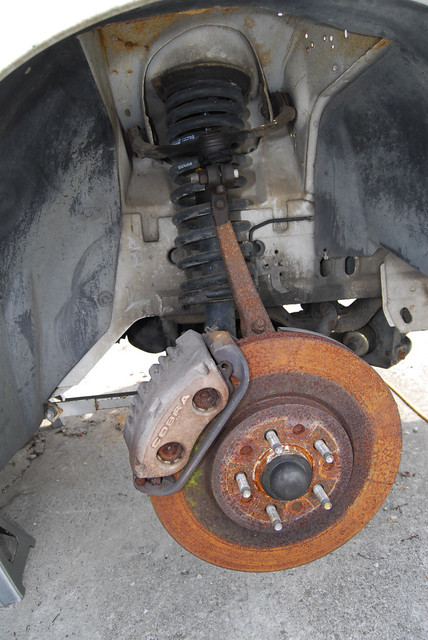
Like the back, the front has Eibach springs and Koni shocks (inserts in this case). It also has Cobra calipers and 13-inch rotors redrilled for the T-Bird bolt pattern. I had installed urethane control arm bushings, and I absolutely hated the way they made the car ride, so I'll be going back to rubber the next time around.

0057

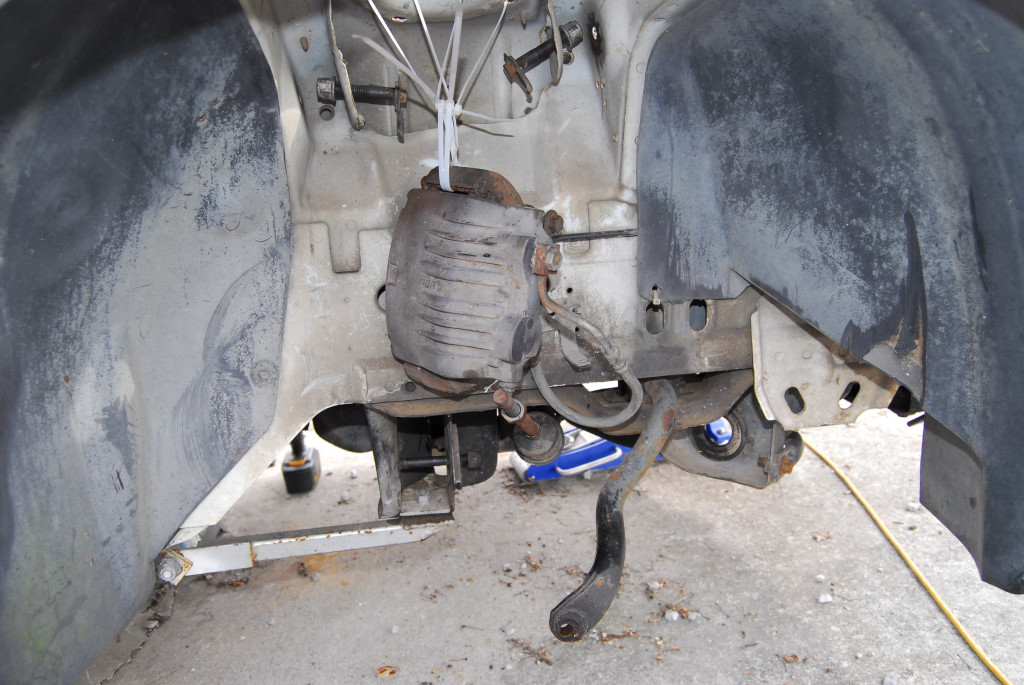
As nasty as the spindle and rotor look, everything came out without any trouble. I did make the rookie mistake of completely disassembling one side and removing the spindle before remembering the spindle nut. Ford calls for a torque spec of 250 lb-ft, so getting it off without being able to use the whole car for leverage kind of sucked.

0058

Note the lower engine cradle brace that ties the rear of the K-member to the unibody. Not sure it does any good, but I doubt it's hurting anything.

The sway bar endlinks, control arms, tie rod ends, hubs, rotors, spring perches/isolators and all the bushings are going in the trash or scrap pile. There are definitely some parts you don't want to use, so I'll talk about all that stuff when I get to the rebuild stage.

One quick note: You will hate life if you try to remove the passenger side upper control arm without an 18mm ratcheting wrench.

turbo_bird
turbo_bird New Reader
3/6/17 12:34 a.m.

I should probably follow along with this one, I used to drive a 96 with a 4.6. I still have the car, but it's been in my parent's garage for almost 7 years. I had to buy a pickup for work, so there wasn't much point to keep the car insured. I bought mine from an old guy in 2006. Never winter driven, always garage kept, even still had the original tires. It was almost like buying a new car. It had 77k km's when I got it, and I added about 20k to that. Here's a picture after I swapped to 5 x 4.5" wheels. My wife has been telling me I should start driving it again instead of it just sitting there, might have to give in this summer. Before I parked it, I was thinking about a PI head and intake swap, and it also needs to be lowered a bit. They are very nice cars to drive on the highway, but I do wish it was a standard, and I had also thought about swapping one in.

Kristian

Will
Will UltraDork
3/6/17 5:29 p.m.
turbo_bird wrote: They are very nice cars to drive on the highway, but I do wish it was a standard, and I had also thought about swapping one in.

The good news is that it's easier to do a manual swap now than it used to be. The problem with the old T45 was that the shifter came up underneath the radio, more or less. With the T3650 from the 05-? Mustang GT, it ends up in just the right spot.

My only progress tonight was to remove the center console so I could get to the shifter. Now that I've done that, I'm not sure it was actually necessary for transmission removal.

turbo_bird
turbo_bird New Reader
3/6/17 6:43 p.m.

In reply to Will:

Does the 3650 have a speedo gear? I think I remember that being an issue before, but there's probably a solution for that now too. I got as far as buying a nearly new super coupe clutch pedal and bracket back in the day, as those were already getting hard to find in good shape. I may have to dust off the old bird and revisit this stuff.

Kristian

Will
Will UltraDork
3/7/17 5:13 p.m.

In reply to turbo_bird:

I'm not sure. I thought briefly about a 5-speed swap for this car, but decided against it because my SC is a 5-speed.

But this article may be relevant to your interests.

Will
Will UltraDork
3/8/17 6:09 p.m.

Got the electric fan removed, drained the radiator, disconnected the fuel lines, cruise control and throttle cable before I ran out of light tonight. I still need to disconnect one transmission line before the radiator can come out, and I still have to drain the coolant from the block and overflow.

Will
Will UltraDork
3/11/17 1:17 p.m.

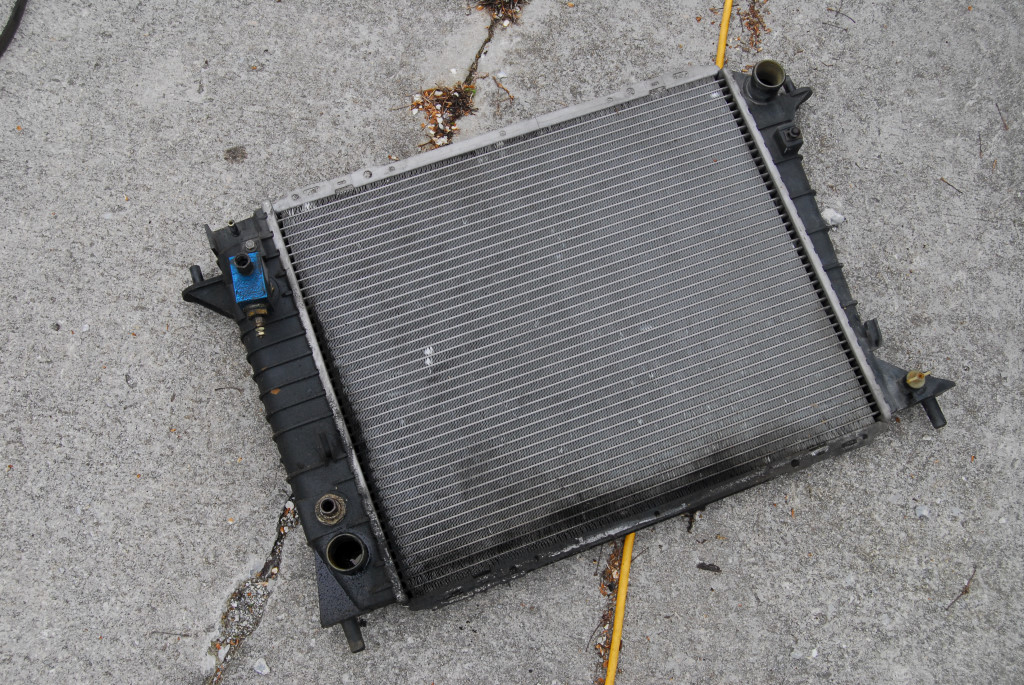
It's too cold to get a lot of work on the car done today, but I did want to get a few things taken care of. First, I disconnected the rest of the coolant hoses and transmission lines and got the radiator out.

0061

There's a part of me that wants to replace this with an all-aluminum piece to eliminate the plastic endtanks as potential failure points. They're cheap enough on eBay, and some people like to use 03-04 Cobra radiators (which supposedly just require flipping the upper brackets left to right). But another part of me says this radiator has always worked great, so don't spend any money unless you actually have to. I'll probably keep it. Also, notice the block for the trans temp gauge.

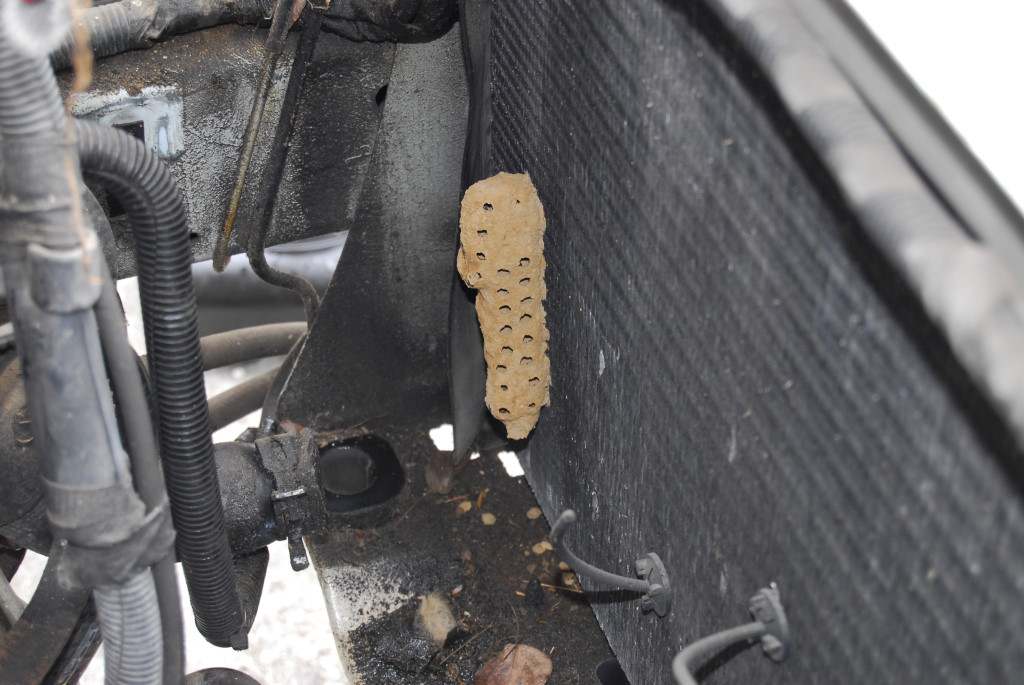
Here's a reason I'm glad I'm not doing this in the summer: another giant wasp nest on the back side of the AC condensor.

0059

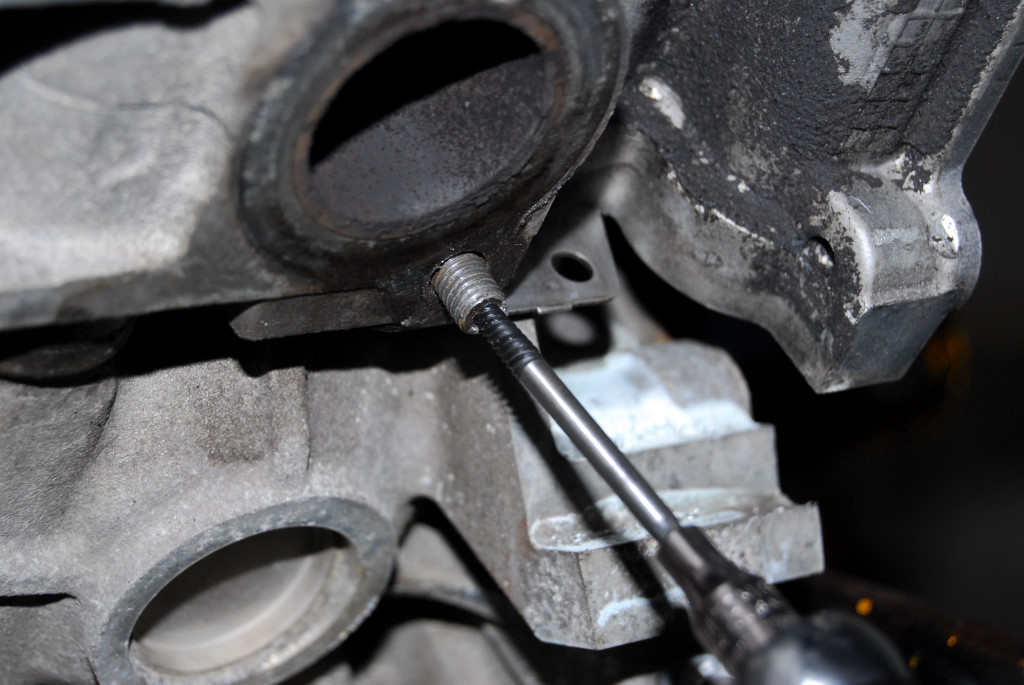
The last thing I got done today was to get the final exhaust stud out of the Explorer engine. Three snapped during removal, but two were still long enough to double-nut. But this one was snapped off below the level of the flange, so I had to drill it out and use a #2 EZ-out. There are hugely expensive tools out there that act as a locator for your drill bit, but I can't say I had any problem without one.

0060

Will
Will UltraDork
3/12/17 1:39 p.m.

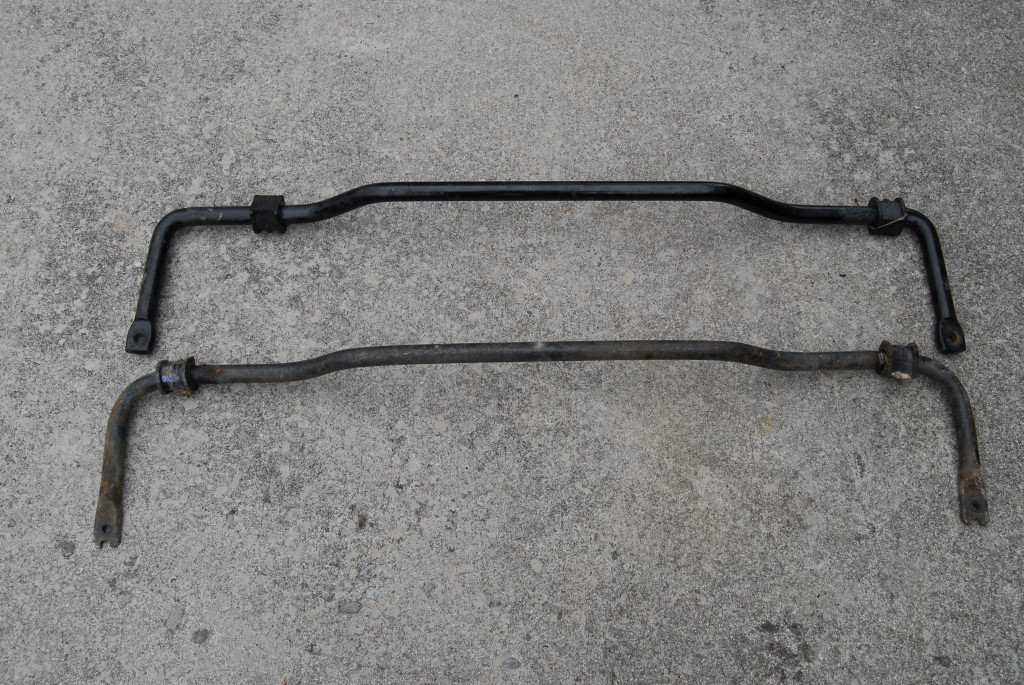
This car is a long way from actually needing sway bars, but I replaced the rear bar today just to clear some shelf space. Supposedly, my car came with a .94" solid rear bar, but for some reason, the one I removed was a 1.04" tubular bar from an NA V-6 car. I have no idea why I had it, or why I put it on my car. Honestly, I was expecting to find the stock rear sway bar from my SC.

I'm replacing that bar with a 1.125" Addco bar (top). One nice thing about messing with the same platform for 15+ years is you end up with a lot of nice spares.

0062

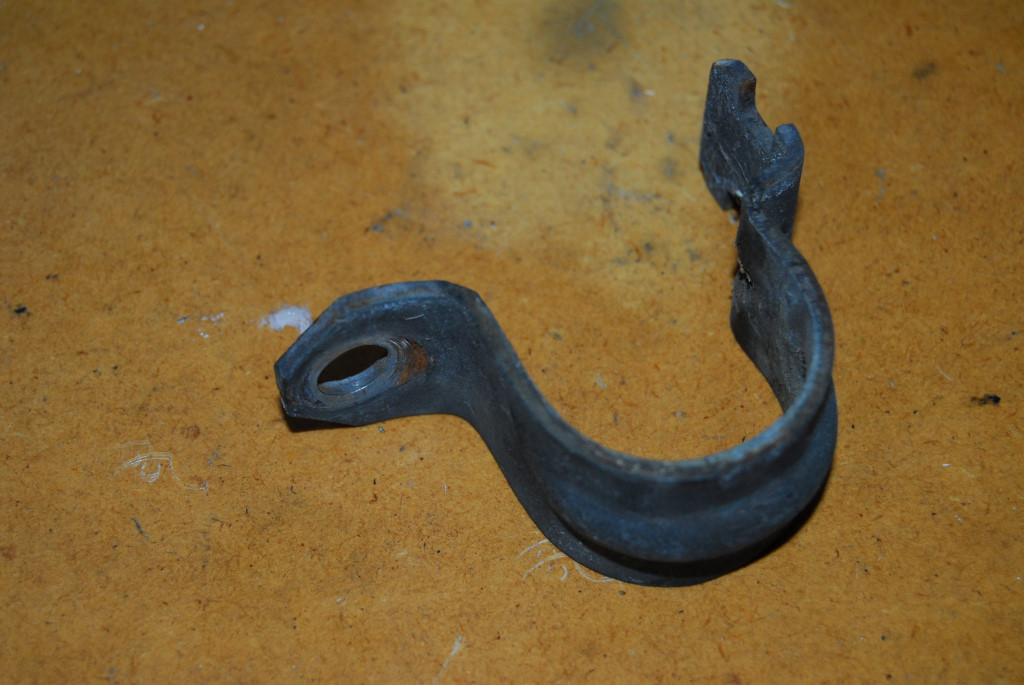
The stock rear sway bar bracket is below. I could have reused them, but they sometimes break at the front tab (left side) when using a larger bar.

0067

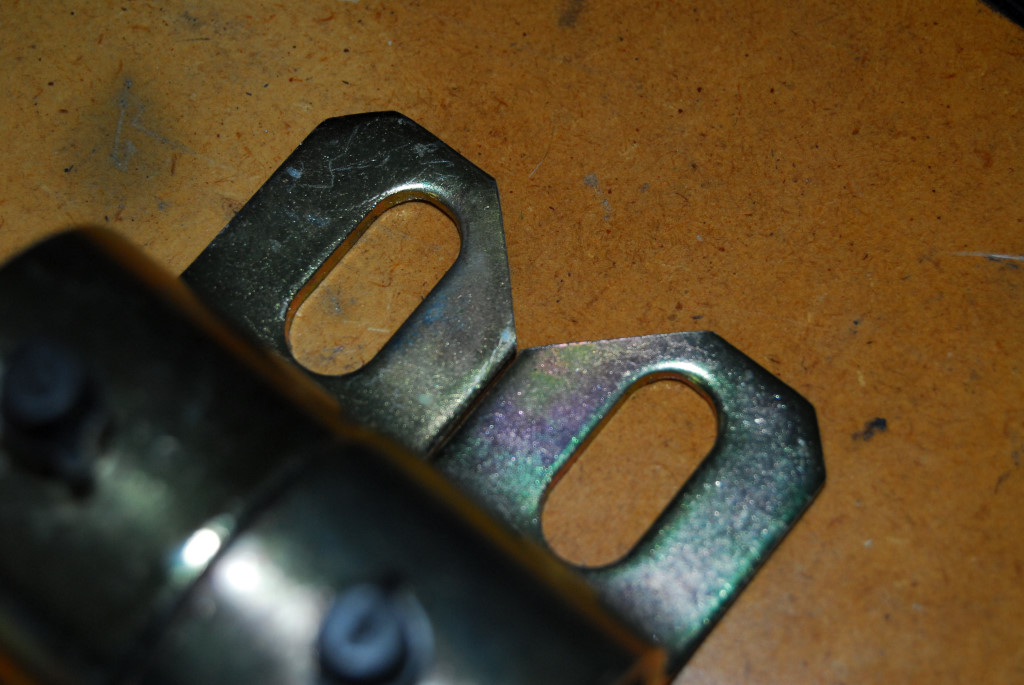
To prevent that problem, I ordered urethane sway bar bushings & greaseable brackets from Energy Suspension, but you can't just bolt them in place, because that would be too simple. One of the rear subrame mounts is so close to the front sway bar bracket hole that you have to trim the brackets a little, like this:

0063

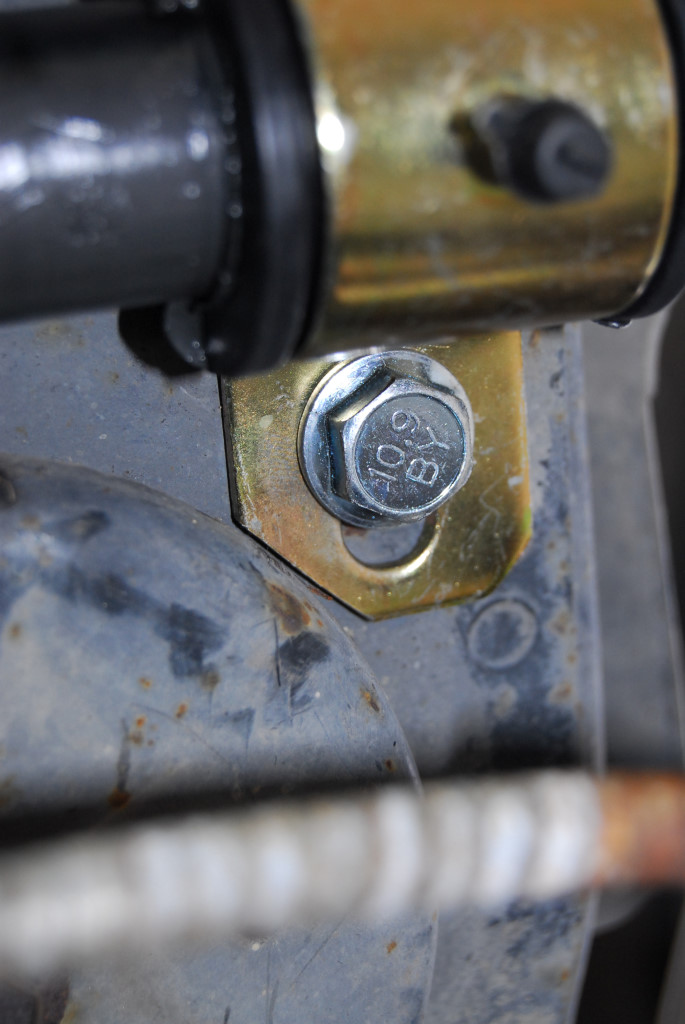
Here's a look at how close the bracket sits to the subframe mount:

0064

jfryjfry
jfryjfry Reader
3/12/17 2:54 p.m.

I can't believe you got the stud out with an ezout ! You might be the first person I've ever known to have one work properly.

karplus2
karplus2 GRM+ Memberand New Reader
3/12/17 4:35 p.m.
jfryjfry wrote: I can't believe you got the stud out with an ezout ! You might be the first person I've ever known to have one work properly.

I have spent many hours drilling out EZouts that snapped off with a wisper of torque applied to them.

This build thread sent me to craigslist looking for Tbirds. I like how you are inserting facts from your obvious wealth of knowledge on these cars.

Will
Will UltraDork
3/18/17 3:37 p.m.

Actually, I removed two studs using the EZ-out. One snapped so far inside the head I didn't notice it until I chased the threads.

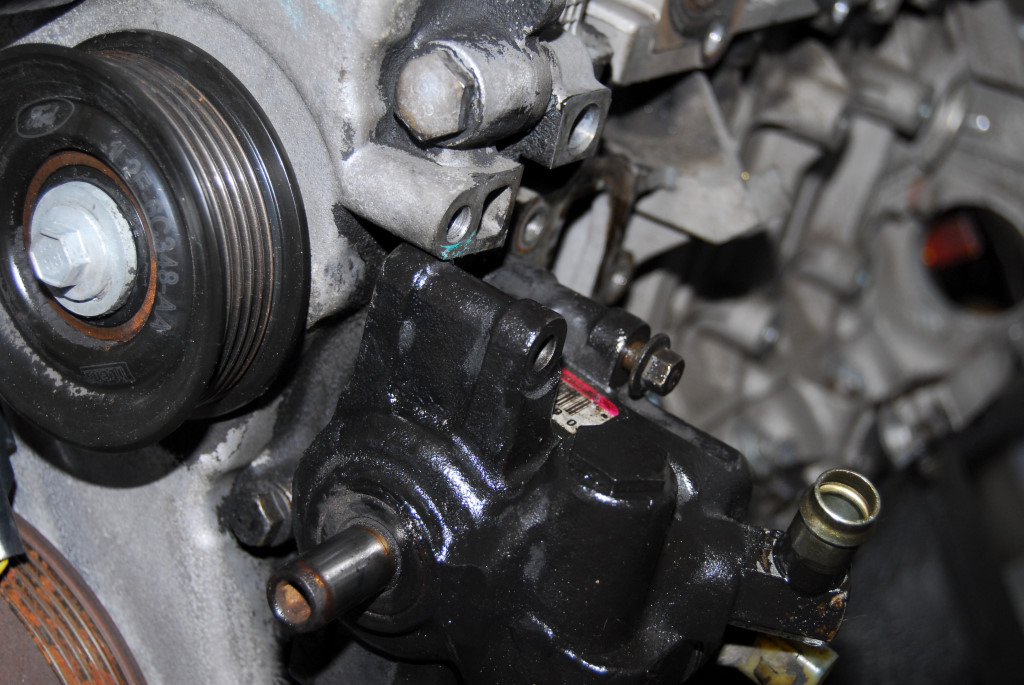
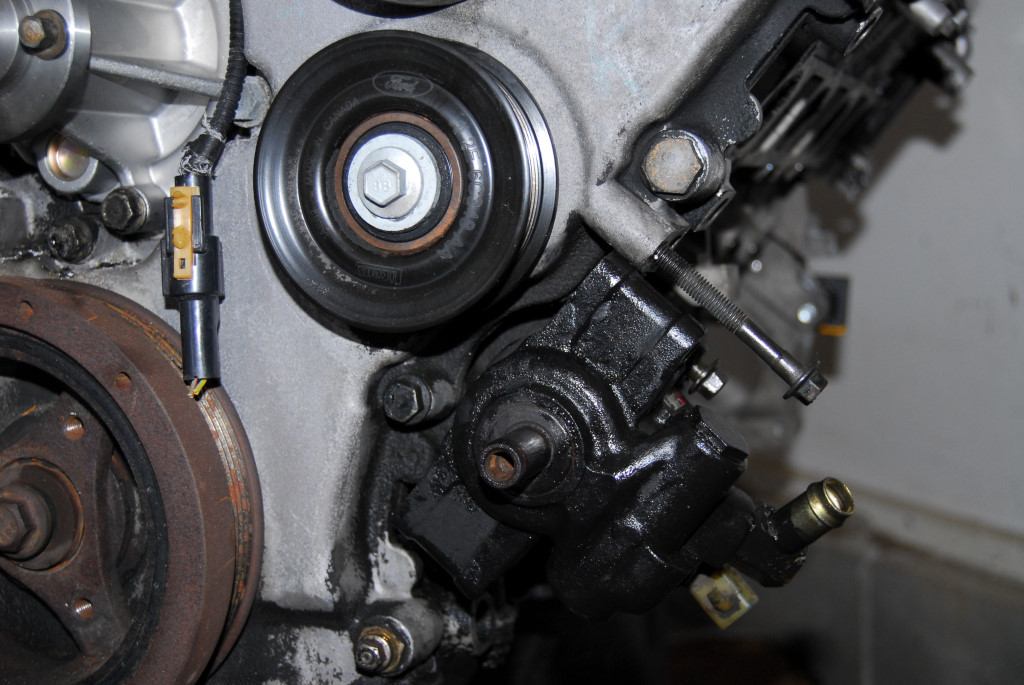
Today I unbolted the AC compressor from the current engine. My plan is to just let it sit on the K-member without disconnecting the lines. I also removed the power steering pump to transfer to the Explorer block. This creates a problem:

0069

This is where the pump needs to sit in the T-Bird. It bolts to the block just fine, but you'll notice that the third bolt (where it should bolt to the timing chain cover) is way off. The fourth is absent entirely. In the Explorer, the pump mounts higher up. See that bolt hole with the blue gunk below it? That's the bottom mounting hole for use in the Explorer.

This PS pump situation means that if you're installing an Explorer block into a Mustang or T-bird, you need a 94-95 T-Bird timing chain cover. That works out well for me, as my car is a 95.

Even if for some reason you were tempted to just use the two bolts that hold the PS pump to the block, you can see there's no way you could use the Explorer timing chain cover, as there's an idler pulley in the way.

0070

Maybe you're asking why I didn't just leave the pump in place, so I didn't have to disconnect any of the power steering lines, and bolt it in place when I have the new engine in the car. The answer is below:

0068

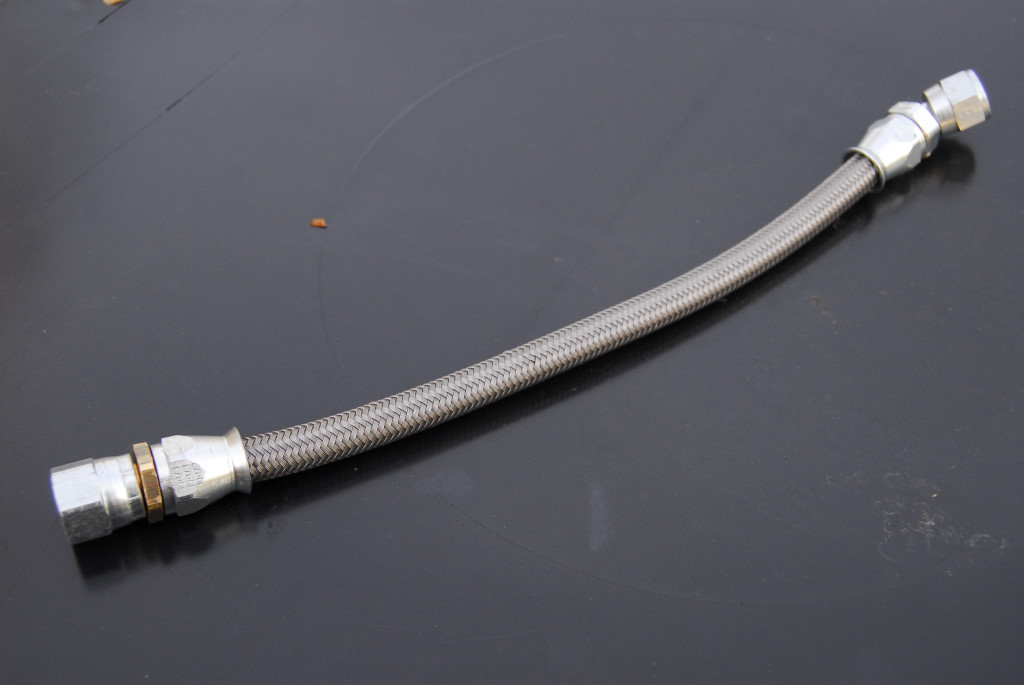
That's the high pressure PS line, and it's laid out more or less as it is in the car. The inlet and outlet are only a few inches apart, but it taks a big detour from the rack across the K-member, along the core support, and then back to the pump. Ford probably did this to increase PS fluid capacity, but in practice, it's directly in the way of removing the oil filter and creates a huge mess every time you change the oil. The problem is even worse if your sway bar is larger than stock. I hate this thing, and I'm replacing it with a short length of braided PTFE line. More on that another day.

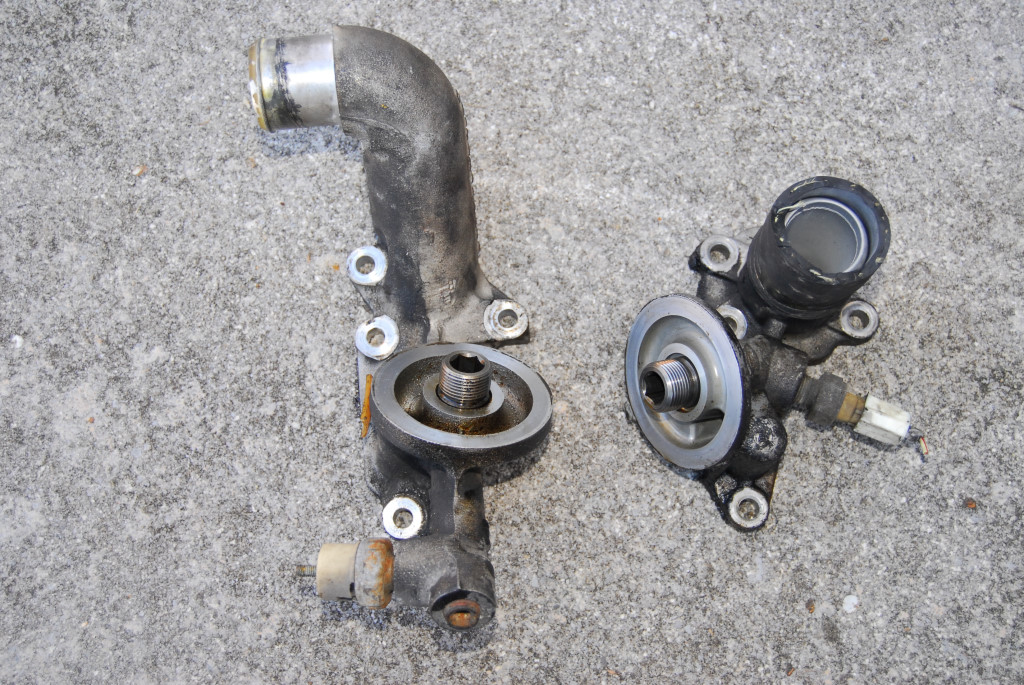
Speaking of the oil filter, mod motors don't have an oil filter boss per se. Instead, they use chassis-specific adapters to put the oil filter and lower coolant hose where they need to go. The T-Bird piece is on the left; the Explorer one is on the right. We need to use the T-Bird one.

0065

More on this thing when I have the fittings I need to mount a proper oil pressure sender.

Will
Will UltraDork
3/19/17 4:02 p.m.

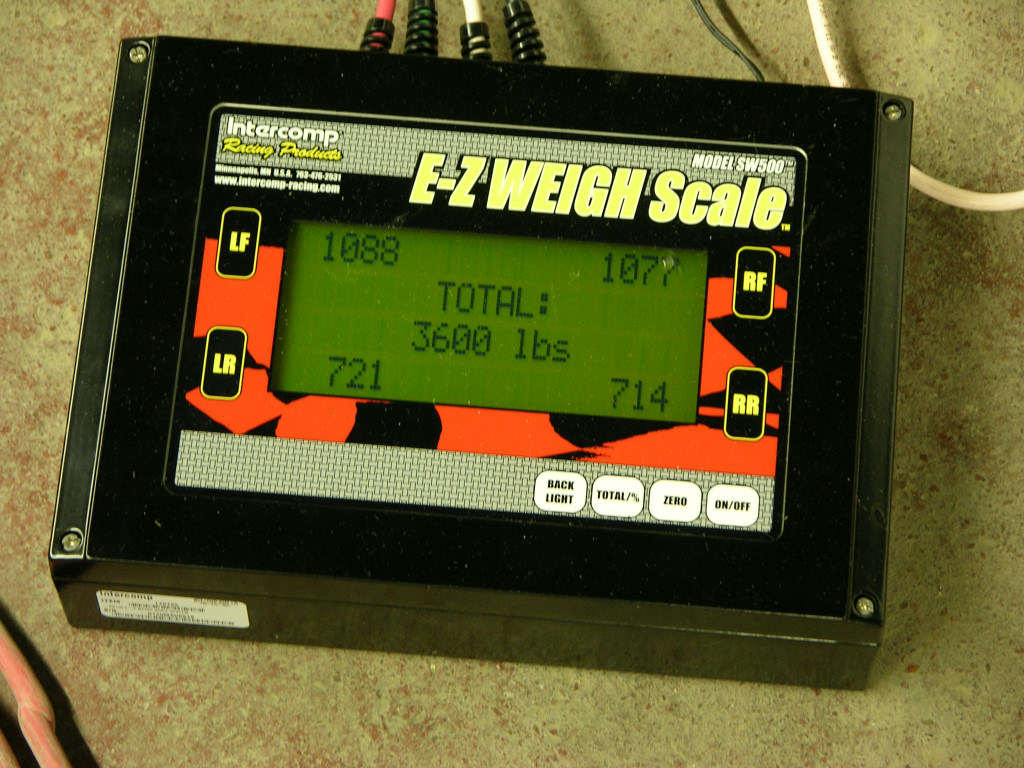
The only thing I did for the car today was a bunch of research to make various upcoming projects easier. But in the interest of posting some kind of update, here's what it looked like the first time I ever weighed the car:

0002

That's not light, but it does show that with the right options, these cars aren't nearly as heavy as some think. And it might have actually been heavier then than it was stock--the driveshaft and diff housing shaved some weight, but the rear sway bar, Cobra brakes, 17x9s and various chassis braces added more back.

I'm curious to see how much the car weighs when I'm done with all this. The engine and rear control arms will obviously shave a lot of weight, but it definitely gained some from the leather seats, and will probably gain a bit more before I'm done.

I didn't know it until I saw the picture data, but I took that shot 11 years ago tomorrow.

Will
Will UltraDork
3/20/17 6:17 p.m.
Will wrote: 0068

I'm quoting myself because the replacement for the monstrosity of a hose above is this little thing:

0071

Yeah, that's it. I put it together using the following parts from Summit:

Aeroquip PTFE -6 AN straight hose fitting: FBM1103

Aeroquip PTFE -6 AN 45 degree hose fitting: FBM1112

Aeroquip PTFE -6 AN braided hose: FCC0603

Russell -6 AN to M16x1.5 adapter: 670530 (you'll need two of those)

Dorman teflon washers: 82540 (one pack of two needed)

I do want to make it clear I'm not the first to do this. There's more info here--depending on which engine and sway bars you have, you might need slightly different fittings.

Overall, I'm really not doing anything to this car other people haven't done before. I'm just taking good ideas from a lot of different people and putting them all on the same car.

NOHOME
NOHOME PowerDork
3/20/17 8:36 p.m.

I find this picture reassuring: I am about to modify a set of Flowmaster 50 series mufflers to have this same side-entry. If Flowmaster already did it, I should be on somewhat safe ground.

Will
Will UltraDork
3/20/17 8:40 p.m.

In reply to NOHOME:

You want those mufflers? I don't plan on reusing them. That's my scrap pile.

NOHOME
NOHOME PowerDork
3/20/17 9:34 p.m.
Will wrote: In reply to NOHOME: You want those mufflers? I don't plan on reusing them. That's my scrap pile.

Thanks for the offer, but unless I screw up the mods, I have two brand new 50 series flowmasters for the job. I went with 50 series since it is the wife's car and figured the 40 series might be too quiet.

Then again maybe if the 50 series mufflers and cats are too quiet...

Will
Will UltraDork
3/22/17 7:08 p.m.

The other night I had an epiphany of the sort only a car nerd will appreciate. I realized I still had a Cobra oil cooler from the 4.6 DOHC Cobra engine that's in my 57 Thunderbird. With that car, I had to choose between the oil cooler and the steering rack. Below, the Cobra oil cooler is on the left, T-Bird oil filter adapter in the middle, and Explorer oil filter adapter on the right.
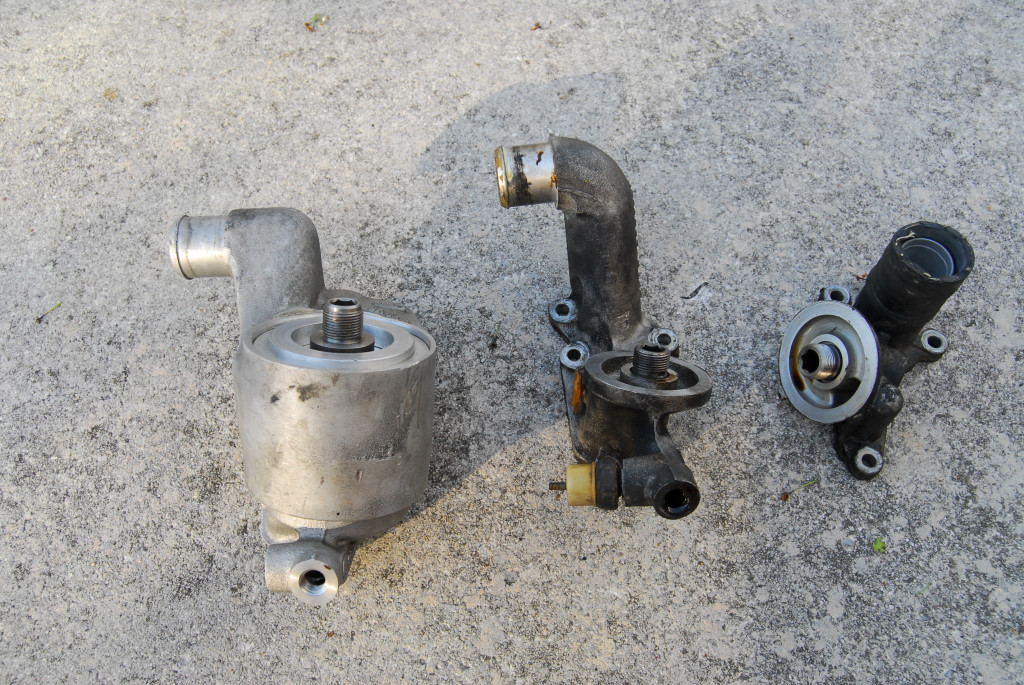
0072

The coolant pipe ends up in exactly the right spot. The only problem with installing the oil cooler is going to be that I'll need to remote mount the oil filter--the cooler will fit, but the sway bar bracket would be in the filter's way. That's no problem, since I was already planning to relocate the oil filter.

No matter what oil cooler/filter adapter you use, you'll need to learn a little bit about the gasket situation. There are two different kinds: A blue gasket for use on Teksid aluminum blocks, and an orange gasket for use on all other mod motor blocks. Or at least that's what the Internet said, and what I thought. But...:
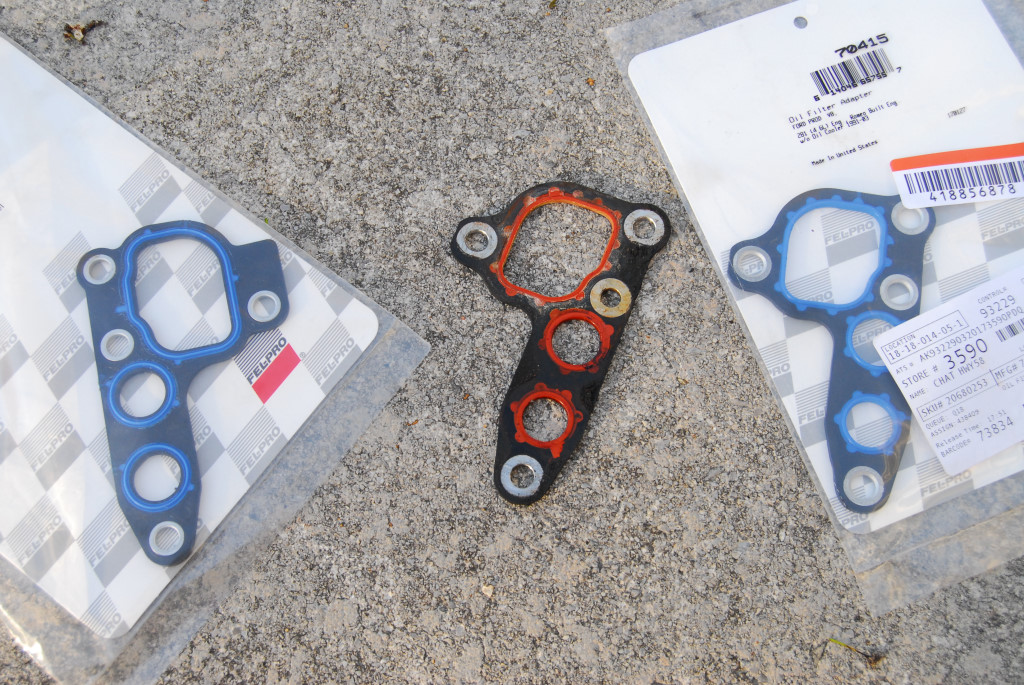
0073

In the picture above, the original Explorer gasket is in the middle. The big hole is the coolant passage, and note the shape at its top. Now note the shape of the one on the left (see how it goes up relative to the topmost bolt hole). But now there's a new wrinkle: The gasket on the left is the same design as the orange one, but it's obviously blue. Nonetheless, it's the one to use on the Explorer block and most others. It's Fel-Pro PN 70415.

With that figured out, I disassembled the oil cooler. It's in three big pieces, and you can't install it assembled. Bolt the adapter to the block and torque to 15-22 lb-ft.
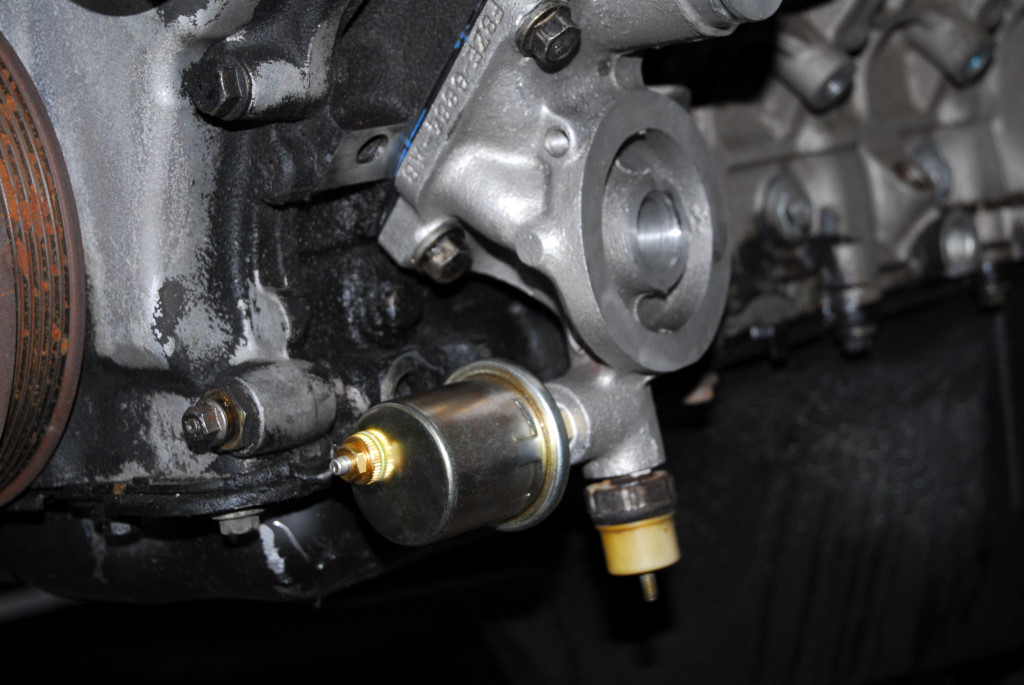
0076

In that picture you'll see an Autometer oil pressure sender screwed into the port normally used for the stock sender. On the T-Bird, the oil pressure gauge is just a fancy dummy light. It only has two real positions: All good, and oh E36 M3. You can see the stock sender behind the Auto Meter one. Both use the same 1/4" NPT thread and both locations are threaded from the factory, so this is really easy. Fitment with the Auto Meter sender is tight, though:
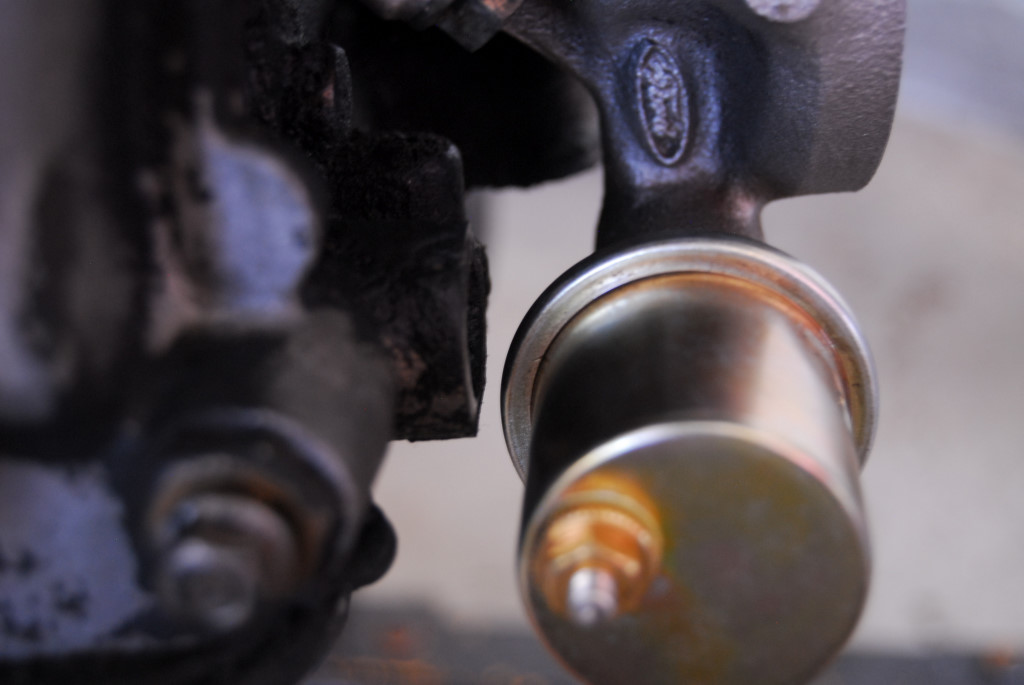
0075

All that room was actually an unexpected bonus from using the Cobra oil cooler--the sender interfered with the block when using the T-Bird oil filter adapter and wouldn't have worked. I picked up 45 and 90 degree fittings to try to make it work, but now there's no need.

Here it is mocked up. I'm replacing all the O-rings and gaskets in the oil cooler, so until they arrive, this is just for show.
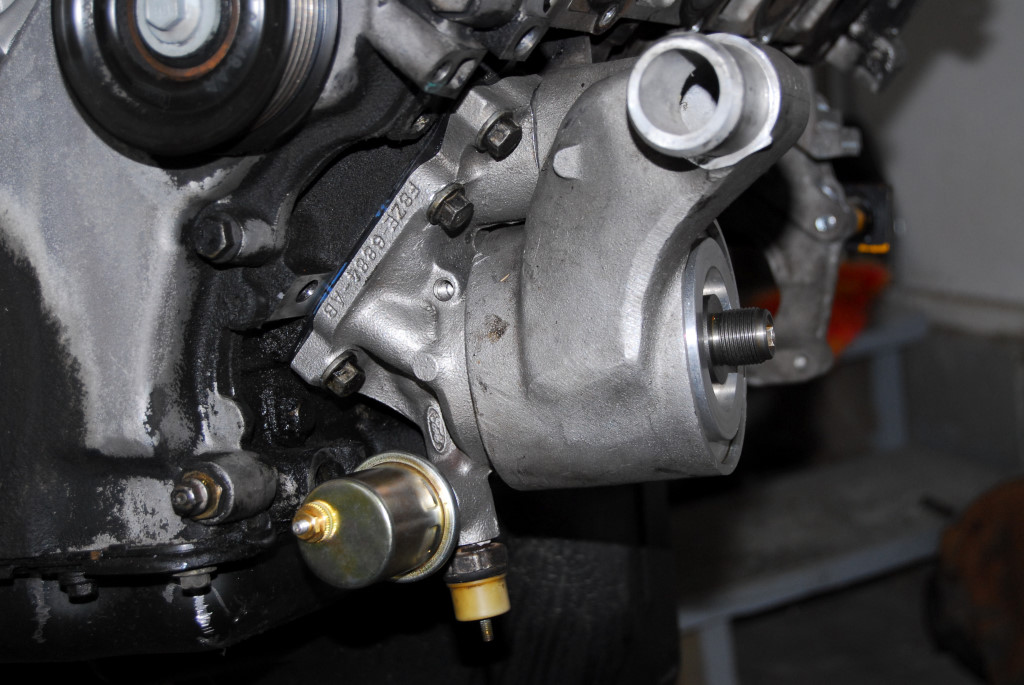
0077

RossD
RossD UltimaDork
3/23/17 7:17 a.m.

Nice work.

1 2 3 4 5

You'll need to log in to post.

Our Preferred Partners
3Th01m5Icu9m5p807XdLL2R9UmKmJpp4TTPSNDnRkz1ntpgNLWMLduPtfBHCo5fQ