4/1/23:
Thanks Guys.. We'll see how all of this goes.
more work today:
Got the Engine Pulled.
Also got some air filters fitted on the EFI ITB's.. Still hafta fiddle with some Throttle Cable stuff as well as some linkages too. I dont know that I will like these bugeye filters but I can fuss with other options later.. at leat they will keep small animals and rocks out of the engine.
Hopefully tomorrow will be a pull down of the Engine and Begin to clean the tins and possibly see what might have gone wrong.
Engine out - ready to be put on the stand for some disassembly.
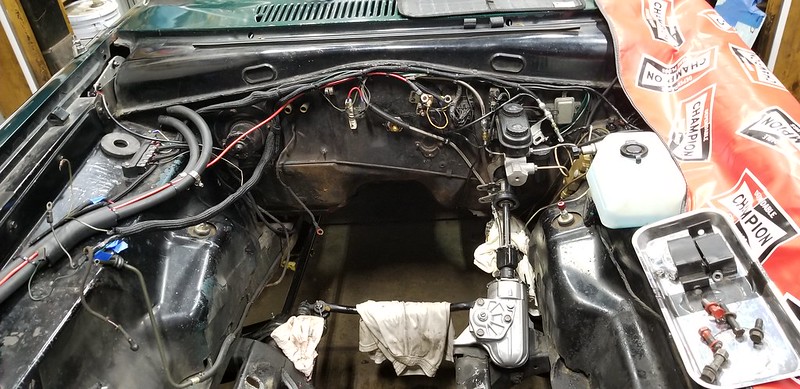
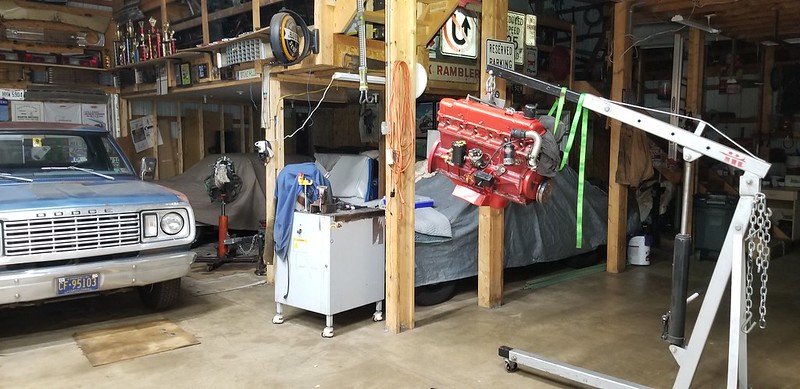
Thanks guys, Here is an update:
Matt - Question for you: if I plan to run an AlphaN fueling / timing strategy based solely on TPS/RPM then do I need to feed a vacuum source at all to the MS III?
4/2/23:
Pulled the Engine apart today down to the short block. - Found my problem.
From all Evidence It was Just a Loosened off Valve lash screw / lock nut. (I remember futzing with the lash a few weeks before I took the last ride in October). - I Must have missed tightening down this 1 adjuster lock screw tight enough or at all.. It kicked out a pushrod and that was it.
So as I remember it It felt like a lost a cylinder and when the car was idling on 5 cylinders the oil pressure went real low like 10 PSI... So I got scared and shut it down... After Pulling all the tins off I think there is no damage to the short block.
- Oil Pump Gear looks Good
- No Glitter in the Oil or pan
- Oil was super clean when drained it last week.
- Oil had been Changed 135 Miles before my lost valve adjuster / push rod.
This short block was on loan to me from Lou, so It needed to be pulled and replaced anyway, I am glad that I can give him back a block that is not total trash (Hopefully).
I mocked up the EFI Setup.... The #6 intake runner hits the #6 Exhaust Tube on the header :( :-(
Will hafta to figure this one out. I hate to cut up or ding up this set of headers as they are coated pretty nice as they sit now.


You can run alpha-n without a vacuum line, but I prefer to leave it connected for data logging if nothing else. And it's good to keep options open if you want to try speed density. If running without the vacuum line, make sure to turn off "multiply MAP" in general settings.
Glad to hear the engine damage was nothing serious. I managed to "lose" a cylinder the same way on my Dart. Are those a set of Cox Brothers rocker arms?
Looks like longer studs and matching intake spacers would fix that issue. Don't think it would hurt performance any. Plus you can put a heat shield in to keep the intake from being heated up.
Thanks for the Ideas guys, Appreciate it.
It is possible to Ding / cut / weld on the header tube.. I really don't want to do that as this set is all pretty and coated already.. but this is the first & easiest solution to this problem. Might be a last resort if needed.
On a slant 6 the Intake and Exhaust share the same gasket face so the spacer could work, but spacing only the intake would likely cause other install issues with the triangle washers and installing the manifolds / tightening them down.
Another thought that I entertained was machining the head side of the intake a few degrees so it is "kicked up a bit" as there are no carbs / jets / fuel bowls here it should not matter much.
Still contemplating :-)
In reply to MadScientistMatt :
Thanks for the tunerstudio tips. I probably am going to run the Vacuum line on the install when it comes time to do that.
Those arms are second hand from someone - Howard Davis Probably. They are not the Cox brothers set. Bespoke parts I bought off another crazy slant 6 racer.
Can you put a slot in the side of the intake spacer at the proper height to clamp with the exhaust flange? With studs you could then clamp the intake separately onto the spacer. I might not be understanding the predicament fully, will scroll back a few pages. The intake looks sweet!
That's fairly similar to the setup on my TR6. It looks like the throttle body flange is contacting. Could you trim that enough to fit the intake? If there's any contact, the header coating may get rubbed off anyway, so maybe try dimpling it with a soft (plastic?) hammer.
In reply to JoeTR6 :
Thanks JoeTR6,
I found some bits on your build and I might be picking your brain a little bit when I get to actually installing the itb's on my car.
5/13/23:
I got the Rotating assembly buttoned up.. it was a comedy of errors there that held me up a bit.
I had a crankshaft that did not fit... then I plucked another crank out of my menagerie of slanted parts.. Got it balanced and polished, So that was sorted out. Next, after getting 5 rods and pistons installed with no issues, the last one did not check out correctly. I found that I had mixed up the caps on the rods when I had cleaned them and disassembled them. I found the correct rod cap installed on another of my core rods in a box. Got that all sorted and degreed the camshaft for 102°

I also started to paint the block last night and hope to get some tins on there for the end of the week.
5/21/23:
I got almost the entire engine finished up today on the build stand.
Did a bunch of small things that add up and take time to get correct.
- Corrected the multiple but small interference issues on the crank scraper(s)

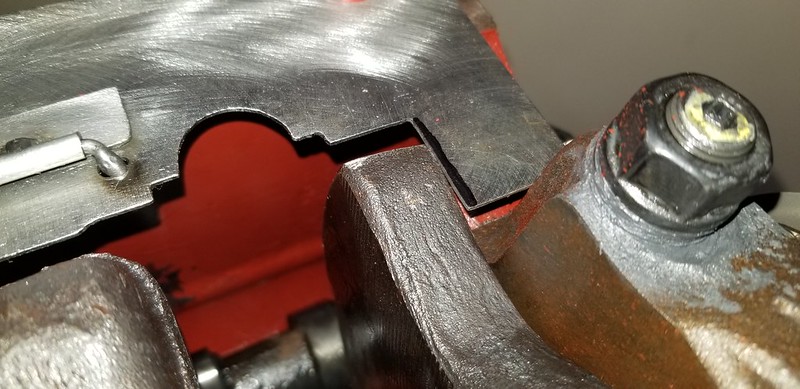
- After I got that all sorted, I "glued down" the crank scrapers with a bead of RTV sealant and let it setup for a few hours whilst I completed other engine building tasks; installing the tins, water pump, etc.

- Installed the Freeze Plugs and ancillary "stuff" ( oil pressure sending unit, and sensors, oil pump, misc plumbing, and the distributor) on the side of the engine as well as the tins.

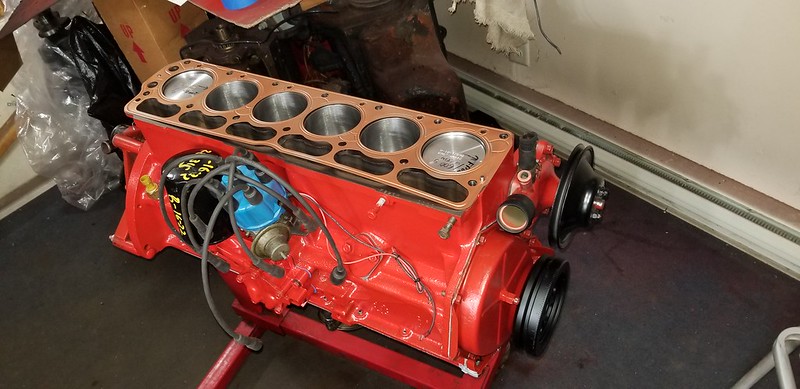
Picture does not show it, but I did get the head installed and torqued down as well as the oil pan - I have a bit more sealing to do to finalize the pan. I set the cold lash, and set the distributor rotor for a "fast fire"
I broke one of the lash adjuster screws, so that is on order from Smith Brothers. It should be here sometime this week.
Another few focused days of work and I should have the engine back running it the car!
I think I will get the engine running and resorted on the Carb then swap to the EFI Bits in the fall or winter.
Intake temp might not be as critical with the fuel injection, can't boil the fuel like a carb.
Having the intake actually touching the hot exhaust might not be ideal, seems the easy fix would be to just trim that intake mounting. Just trim the aluminum up to that stud washer. Then maybe add some header wrap. No harm in denting the header, but that will damage the coating, so maybe don't do that.
I would think you would want a vacuum signal, to account for engine load, and acceleration.
I bet you will see a huge improvement with the new intake, the original intake has to be a major pe4formance limiter. The injection on my Honda, fairly simple system, is basically 1) vacuum, 2) RPM 3) throttle position. Temp provides mostly cold start help.
Maybe get bare header flanges and move the headers away from the head. And of course custom spacers to tighten it all down.
Thanks for all of the suggestions. The Problem on a slant 6 is moving or spacing the headers / intake away from the machined surface on the head creates sealing issues for the intake / exhaust combination as they are retained by the same studs with "floating" washers.
Whilst all suggestions are notable so far, I am looking for another set of headers that I can cut or ding / weld on for that # 6 tube and then I can send them out to get coated or finish them myself. It will be a bit before I get to the EFI anyway - I just want to have the engine back in the car soon, so for simplicity's sake it will be with the 'ol carbby for now.
6/26/23:
This has to be the slowest progressing engine build I have ever done.
Some of it is my fault, and some of it is ...... no it is all my fault, I work alone on this garbage so it's all my fault.
I should have had this thing jammed in the car and driving it etc. by the middle of June... but here we are and that has not happened yet.
I got the engine placed in the chassis without much fanfare. - That went quick and good. These pictures are from May, when the job should have been done, completely.

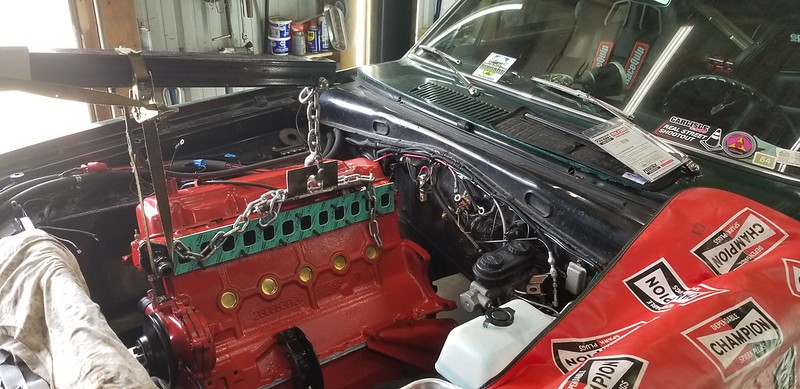

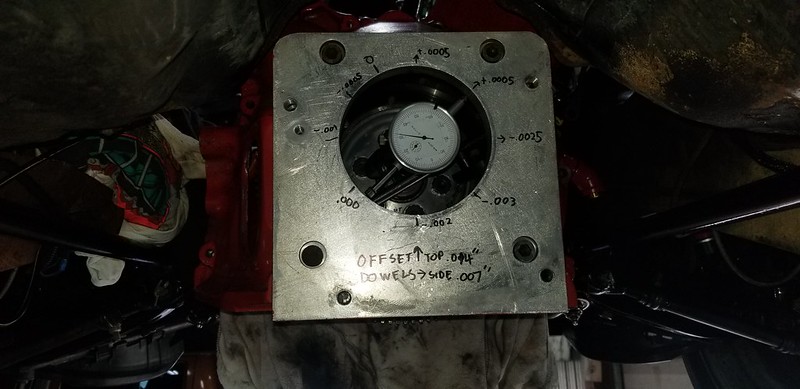
After that was done I futzed with the offset bell housing alignment pins again. Since this was a new to me block I redid the whole thing, taking time to get the measurements correct.
It was pretty close to the other block, and it required 2 different offsets in the same dimensions and places as before. All of the research I had done says to use both offsets dowels in the same offset and to not mix and match, but I could not get TIR correct so I used one in 0.007" and the other in 0.014".
I fired up the engine - and without anyfutzing, Just priming the oil pump / passages , and then priming the carb It fired on a bump of the key.
I set the idle and timing, but then there was a big leak...
UH OH.
It was the rear main seal.. no doubt... So I pulled it apart again, pulled the pan and reinstalled the RMS.. Put it all back together again... and crap.. leaky..McFrickin...sheaky part 2.
RMS was breached yet again.. I am getting tired of this, but getting quick at pulling the engine and setting the seal.
For the 3rd time....
¡YAY!
Finally Dry. I never had so much fuss with a rear main seal. I was sure off my game this June.
Fired it up again for the 3rd time yesterday and it was dry underneath! woot.

Will get some driving with it later this week.
In reply to MadScientistMatt :
Stock / modern replacement 2 piece lip seal. No rope seals for me. I would probably screw that up even more.
You'll need to log in to post.