1 ... 4 5 6
eastsideTim
eastsideTim UltimaDork
1/12/25 9:00 p.m.

I measured a lot today, although I will need to go back and double check a few things before I start attacking the chassis.  I threw together a spreadsheet of various lengths, and added (and subtracted) values I needed to figure out how much shorter the chassis needs to be between the engine mounts and the rear axle.  There is also some extraneous info there (in italics) that is not included in the calculations.  U-joints between the two different driveshafts should all be the same, too, but even if adapter u-joints are needed, it should not affect the lengths.  This will not be perfectly exact, but should be in a safe range for the yoke to work without falling out of the transmission, or bottoming out in it.  If I do flub it up a bit, I have some axle plates that can adjust the axle forward and rearward a bit, but would prefer not to use them.

Here's a screencap of the spreadsheet(Edited 1/16/2025, fixed a transription error, and remeasured the transmission length more accurately).  Please let me know if it looks like I missed anything important, or if my math is wrong:


I also made some height measurements while the engine was in.  The rear of the oil pan sump was 16" off the garage floor.  The bottom of the chassis at the transmission crossmember was 15.25" off the garage floor. 

Pulled the engine, and returned it to its roller stands, and I tossed on the long tube headers. 

This is where I have run into a possible problem.  I had read a warning somewhere that these headers sat at least a bit below the bottom of the chassis.  However, mounted to the engine, the bottom of the end of the collector sat 10" up, while the oil pan sump sat 6.75" up.   Adding the numbers up, it looks like they will be 4" above the bottom of the frame, which will put them tucked almost against the floorpan.  Depending on the shape of the pan where the headers end, I may able to run them into an S-curve, but they may just not fit if I z the chassis, and the floor sits lower than stock.  I may grab some cheap stainless ebay shorty headers as a backup.  That would also reduce the budget hit, as these are in the $200ish range, and I could get a cheap set for under $100.  With the engine and cab set back where I intend to put them, the stock manifolds might even fit, but I'll only do that if I am really short on budget.


eastsideTim
eastsideTim UltimaDork
1/12/25 9:26 p.m.

Oh yeah, being as there is only 24" between the cab and the front of the rear wheel, I'd need to actually cut part of the wheel well into the cab to make everything work with the S10 driveshaft, so it's a pretty good bet the Trailblazer's driveshaft will get used.

madmrak351
madmrak351 HalfDork
1/13/25 10:15 a.m.

Glad to see you progressing so well. This is a hard time of year to get much shop time for a lot of people. Looking good! 

eastsideTim
eastsideTim UltimaDork
1/13/25 9:22 p.m.

In reply to madmrak351 :

Thanks!  Being retired helps, but this is also becoming a bit of an obsession for me.  If I had more space to spread out into, I'd probably be even farther along.

I picked up a couple of 6' pieces of L-shaped steel today, and will try to weld up some rails in the near future to support the cab.  The plan is to still lift it in the center since it should be strong there, and just use some jack stands to support the rails.

eastsideTim
eastsideTim UltimaDork
1/16/25 11:58 a.m.

Not really much in the way of visible progress in the last few days, but I have been working on the truck a bit, and doing some thinking.  In the last few weeks I've watched tons of videos and did a bit of reading on techniques hot rodders and minitruckers use to z and shorten frames, and I think I am going to change up my plans somewhat.  I'll take a budget hit, having to buy more 1/8" plate than I originally would have, but I think it'll be safer, and more easy to keep the frame straight (or at least as straight as it was from the factory).  Also did some more looking at body drop videos, and while it is a possibility, it probably is not for me.  Since I already need a shorter wheelbase, might as well do most of the fabrication at the frame level.  Still haven't decide the exact amount of frame drop, but thinking of going with an inch more drop in the back than the front to level the ride height out, especially since there will still be a lo more weight reduction on the rear suspension than up front.

Slowly removing fuel lines, brake lines, and wiring from the frame, so they won't be in the way.  I'd really like to start cutting in the next few days, but I don't think that'll happen.  We're getting another wave of unseasonably cold weather in a few days, and I prefer to cut and grind with a garage door open.

I did manage to sell the sunroof assembly from the Trailblazer yesterday.  Sell off on it is at $560.50, and sell off on the S10 is $249.50.

eastsideTim
eastsideTim UltimaDork
1/19/25 9:38 p.m.

My attempt to lift the cab failed, but thankfully with no damage or danger to myself.  I have a different idea, but it is kind of on hold for now.  With the weather getting colder, I wanted to find something else I can work on with the garage door closed, and turned my attention to the transmissions.

Threw together this setup to make it easier to tear them down. 

I unbolted the tail housing from the S10 transmission, and will need to partially disassemble it to remove the output shaft.  Ran into a snag fairly quickly, though.  The bolts that hold the bellhousing on are torx plus, TP50 to be exact.  I've ordered a set of sockets, and they should be here Wednesday.  I still need to order a few extra gaskets and seals, and a filter for the Trailblazer transmission.  While converting it to 2WD, I'm also going to install a shift kit, in the hopes that'll make it hold together a bit longer.

84FSP stopped by and helped me prop up the transmission, and also brought over a TBSS/NNBS intake he scored a deal on, and ported.  May not get used initially, but once we throw a cam at the engine, it'll be really nice to have.  While I'm waiting on the tools to arrive, I'm going to stumble around in the garage, try and tidy things up, and maybe get some small bits of work done.


eastsideTim
eastsideTim UltimaDork
1/21/25 10:37 a.m.

Too cold in the garage to do much other than tidy up, and I'm waiting for tools and parts for the transmission teardown still, so I decided to sit down and put together a rough budget into writing, instead of leaving it mostly in my head.  All receipts are either printed out or saved on my computer or phone, so at least I am good on documentation when it needs to be put together.   Also, yesterday, while out running errands, I picked up some offcuts at the metal supply place.  Should be enough for the front z on the frame, and maybe a start on the rear.

First - cost of challenge car, donor, and what has already been installed on the car:

  • 2000 S10:  $300 purchase price - $0.50 change found in car - $249.50 sell off(as of 1/21/2025) = $50
  • 2004 Trailblazer:  $800 purchase price + $31.05 fuel to retrieve it - $1.78 change found in car - $560.50 sell off(as of 1/21/2025) = $268.77
  • LS swap conversion mounts: $48.08
  • GM LS oil pan kit:  $96.15

Total = $463.00

Planned expenditures (2026 estimates include all costs for the work, not to be added to 2025 values).  I am trying to be pessimistic, and assume things will cost more than I hope:

  • Engine work:  $100 (2025)  $450 (2026)
  • Transmission:  $250 (shift kit, seals/gaskets, torque converter if all goes well)
  • Suspension and rear axle:  $75 (2025)  $400 (2026)
  • Chassis and cab mods:  $100 (mostly metal, hockey pucks, welding wire, and hardware)
  • Exhaust:  $200-350 (depending on short or long tube headers)
  • Cooling system:  $100 (higher estimate, should be cheaper if I can use the Trailblazer radiator)
  • Fuel system:  $250 (Fuel cell, pump, and lines needed to connect to factory fuel lines)
  • Brakes: $0 (2025)  $50(2026)
  • Steering extension:  $25
  • Wheels/tires:  $200 (wheels and spacers)
  • Cosmetic work:  ???
  • Wiring:   $25 (Random connectors, maybe a small relay/fuse box)

Totals:  2025:  $1325-1475   2026:  $2050-2200

Grand totals:  2025:  $1788-1938  2026:  $2513-2663.

Looks like I will need to be aggressive about selling more Trailblazer parts, finding deals, and reusing some parts instead of buying "better" stuff.  Especially since the above budget doesn't include anything for appearance, a decent racing seat, or the nitrous kit I have laying around that I want to use.  At least I still have $1190 in sell off room, though I am pretty certain I do not have that much left to sell.

It is looking less likely that it'll make the $2025 Challenge, but a guy can still dream.  Any work I am doing right now is work I would be doing for the 2026 event anyway.


Edit:  Went back and looked at my receipts for the fuel pump and fuel cell, and my fuel system budget is probably too high.  Keeping the numbers the same to give me a little breathing room in other areas of the budget.


eastsideTim
eastsideTim UltimaDork
1/24/25 3:12 p.m.

Socket set arrived.  Needed 84FSP to hold the transmission to keep it from shifting, and a MAPP gas torch to loosen the bolts, but got the bellhousing removed.  After that, it was a matter of just following directions I'd found online.

The pan was surprisingly clean for what seemed like a neglected vehicle.  I don't want to have to borrow any extra guts from it, but if I do, this appears to be a good sign.

This is the most I've ever had an automatic transmission apart.  Before this, I've just pulled valve bodies to install a shift kit.

I threw the remaining pieces back together loosely, except for the bellhousing, and will stash this away, just in case.  And now, I have the two parts I needed from it:

Teardown of the Trailblazer transmission will be in the indeterminate future.  We are getting some warmer weather soon, so it's time to switch back to attempting chassis work.


eastsideTim
eastsideTim UltimaDork
1/25/25 10:48 a.m.


Currently held up by 4 jack stands, but most of the weight is on the 6 ton stand under the transmission tunnel.  The others are there mostly to make sure it doesn't tip over.  I'll add/adjust more in cases where I am going to have to be under it.  I can roll the chassis forward and back about 18", so should be able to do a lot of the work next to the cab instead of underneath.

eastsideTim
eastsideTim UltimaDork
1/27/25 5:39 p.m.

I got impatient waiting for good weather, so I built a portable exhaust hood out of an old box fan, furnace filter, cardboard, and a bunch of painter's tape.  I also covered the Trailblazer engine and transmission with plastic sheeting, just in case.  Intakes and alternators were already bagged up.

Today's goal was an initial cleanup of the front frame rails where the cut would be, and de-rusting the parts of the front cab mounts that would be cut, so I wouldn't instantly dull a blade when I slice them off.  I started with an angle grinder equipped with a flap wheel, and did some finer work with a drill and a wire brush.  The hood worked pretty well, sucking in and trapping a lot of rust, but when I looked up, it was still a bit cloudy in the garage, so I gave in and opened the garage door.  That helped immensely, but the cold was enough to cut down the amount of time I was willing to work.

Filter at the end of the day:

Always wear your PPE:

Next round, I will probably hang some sheet around the truck, partially to block the rust particles from getting to other areas of the garage, but also looking at the engine and transmission, it looks like the rust was getting electrostatically charged by the angle grinder, and was disproportionately sticking to the plastic sheets covering them.

The frame rails are still not perfect, and I'll need to do some more grinding where the welds will go (unless I buy a stick welder and some 6018 rod), but they are clean enough for me to start planning things out.

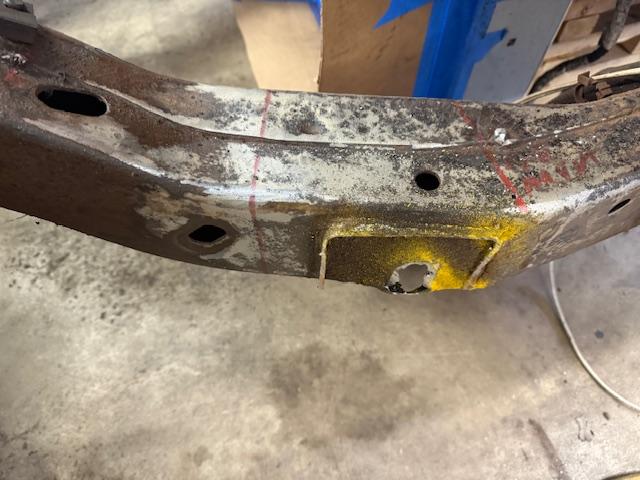
Next go around, I'll be making some more precise measurements, and probably using a punch to mark critical locations on the frame.  I'll cut the cab mounts off as closely to the frame as possible, then hit the area under it with a flap wheel.  The picture above shows where the centerline of the cab mount needs to go, and roughly where the rear part of it will need to be cut off to weld to the straight part of the frame.  Also, the forward mark is going to be the cut line.  It's the most "square" and flat part of the frame up front.  I'd rather do the cut farther forward, but it would make bracing more complicated.

I'll be using the punch, and maybe an 1/8" drill bit to mark spots on the rear part of the cut to measure diagonally to the holes in the lower control arm mounts.  As long as the cross measurements match up with each other, the frame should be square.  Or at least as square as a 25 year old GM frame can be.  There are a couple of punch outs in the frame that seem to line up, so I'll probably work close to them.

I have not decided for certain if I'll z the front by 3 or 4 inches yet.  The rear may not be z'd as much as planned, either.  I figure when I switch from leaf spring to three link, I should not need all the travel I have.  Right now, the axle could move up 7 inches before hitting the frame.


I've also accepted that I'm not bringing it to the 2025 event, so I may slow my roll a bit.  I still want to get it running in a reasonable time, so I can have my garage bay back, but now that I am not rushing, I'll run less risk of messing up, and having to redo something.


eastsideTim
eastsideTim UltimaDork
2/1/25 8:46 p.m.

Got to meet Somebeach today, sold some wheels, bought an axle, and checked out some of his projects. 

EDIT:  Took a few quick measurements.  If I want the new axle to sit in the same location as the old one, I need to shorten the frame by 1.375"-1.5" less than originally planned.  It may behoove to me not do so, as there is a decent amount of space to work with back there, and if I use the front leaf spring brackets to mount the lower links, I can make them a bit longer.

eastsideTim
eastsideTim UltimaDork
2/2/25 7:16 p.m.

Kind of stalled out a bit for the last few days, but thankfully, help arrived today.  wae, waeKid, Cooper_Tired, and 84FSP all stopped by for a few hours this morning to move the project forward.  We split up into a couple groups, one handling front end measurements and marking, and the other cutting up and removing galvanizing from some stock to use as legs on the front frame section.  Also sawzalled the front cab mounts off the car.

Up front, we drilled reference holes in the frame, that have dual job of marking the centerline of where the cab mounts will be re-welded, and as endpoints for diagonal measurements so we can keep the frame relatively square when cutting, repositioning, and welding.

At the front of the garage, the angle stock was chopped up to make 4 legs, that are each extendable, by unbolting and re-bolting extensions.  Each hole is spaced 1 inch apart, so once the rear section of the frame is leveled on jackstands, these will be welded to the front frame section, touching the garage floor.  After the cut, we can lift up the frame section with a jack, then adjust the height.  We also welded feet to the bottom of the extensions, to help strengthen them, and distribute the load on the floor a little bit.

I had already started covering the garage in drop cloths before everyone arrived, and after we were done with the "not too messy" work, we attempted to finish the job.  Turns out I did not buy enough of them.  I'll make a hardware store run tomorrow.  Also, this coming week, I should have a decent amount of free time to work in the garage, so I am hoping to make some good progress.


eastsideTim
eastsideTim UltimaDork
2/4/25 6:11 p.m.

Spent the last two days grinding/cleaning up the frame and I now have the frame leveled (within 2-3mm) on jackstands.  Probably won't get anything done tomorrow, but it is supposed to warm up on Thursday, so I'll get back to it then.

eastsideTim
eastsideTim UltimaDork
2/6/25 7:13 p.m.

Today, wae stopped in to make sure I didn't burn the garage down, cut open an artery, or get crushed under the S10.  We got to welding the legs onto the frame, and added a brace on the front section, just in case it wanted to twist in or out once cut.  For the rear frame section, I reinstalled the transmission crossmember temporarily.

Once the welds sufficiently cooled, it was time to pull out the new toy.  I picked up a portable bandsaw recently.  Passenger side cut went well, but I must have gotten a little overconfident, because the driver's side is a little wavy, as you can see below.  Still I think it is good enough to continue on.  I might have been able to do a better job with a reciprocating saw, but it would have taken forever.  There's no way I could have cut that well with an angle grinder.  Once the cuts were done, we jacked up the frame and adjusted the legs.  That idea seems to have worked out very well.

It isn't perfectly lined up, but is close enough to get an idea of the effect.  It has been raised 4", and I'm not sure I like it there.  It feels like the metal to create the z is going to have to run quite a ways fore and aft to be strong enough.  I will probably stare at it some tomorrow, and maybe drop it to 3" to see how it looks.  As it is, it will give me 4" ground clearance on the frame (after the carrier bearing crossmember is trimmed), which should work for something that will be mostly autocross, but with a little street driving.  Since I can't guarantee access to a trailer at all times, I may have to drive it to events.  If I luck into a set of drop spindles, that will put the ride height down another 2", so no way it won't get hung up somewhere.  I could raise it with non-ZQ8 springs, but that just becomes another expense.  Have to decide if the extra 1" drop is worth the risk, I suppose.  I don't want to wait too long, though.  This needs to be buttoned up before I can start in on the rear frame work.

eastsideTim
eastsideTim UltimaDork
2/7/25 10:54 a.m.

4" drop:

3" drop:

Thinking the 3" drop will also mean less floorpan surgery when it is time to reattach the cab, which means it is running and driving sooner, and has more testing time.  Trying to decide whether it is worth the time to quantify the effect on center of gravity by moving 800-900 lbs by 1".  Still keeping in mind I could lower the truck by 2" with a set of drop spindles, and have 3" of overall ground clearance, that while not optimal on the street, should be doable if I avoid some areas.

eastsideTim
eastsideTim UltimaDork
2/12/25 4:27 p.m.

Looks like there was some shifting when the cut was made, but it was fairly minimal.  It took a good chunk of the afternoon, but I got it lined up as well as possible, and tacked the overlapping parts of the frame back together.  Also converted my portaband to a vertical band saw, so next session, I can start making templates, cut metal out, weld, and make some more progress on the frame.

eastsideTim
eastsideTim UltimaDork
2/16/25 6:33 p.m.

The last several days have been making cardboard templates, cutting and fitting them, and tacking them in place.  Repeat ad nauseam.

Last few were done this morning, so it was time to weld it all up.  I'm not a great welder, I was fighting rapidly lowering temperatures, dwindling welding gas, and my welder and the circuit it was on were not overly happy with me running it at max power.  But I got it done.

I'll be making fish plates during this week's cold snap, but am not likely to accomplish anything else.  I don't want to open the garage door at all, so no grinding down the welds where the fish plates go, no cutting up the cab mounts and re-welding them, and no relocating the e-brake cable bracket.  That will all wait until it warms up a bit.  I'll see about getting the tank refilled this week, though, so it will be ready.

I also made my first ebay sale this weekend, and need to drop it off at the post office tomorrow morning.  After fees and shipping, should be between $35-36 more back in the budget.  Going to try to get more stuff listed this coming week, both on ebay and marketplace.  I want to clear out as many Trailblazer pieces as possible soon, to be done dealing with it, and to have a clearer picture of my final budget.


1 ... 4 5 6

You'll need to log in to post.

Our Preferred Partners
L7A1iQnUD5WxI3z9J4nPF7EJcLfXvwXMeHQohF5fGLHmfQivaNKKyk8S9pgBONpB