Copy - but the process typically flows from store to tech center, at least it did where I worked. The conversation can't go very far without a tire in hand, cutting it apart, etc. That's best facilitated through the point of purchase.
Copy - but the process typically flows from store to tech center, at least it did where I worked. The conversation can't go very far without a tire in hand, cutting it apart, etc. That's best facilitated through the point of purchase.
In reply to collinskl1 :
Fair enough, I figured the tech people could give me a couple minutes to talk thru the issue....
K its broken down. That was a chore. Insert isn't gonna come out.... I don't think... Plenty of run flat lube (grease....)
So this is as much as its pinching the beads, that is bolt on half popped up after bolts broken loose.
Not much

Odd bolts? Locking of some sort?

Beads were really stuck onto the wheel. Took a 3lb sledge to break the ring loose.
Lifted right off once unstuck from the tire.

Insert and bead. Insert is exactly 1"

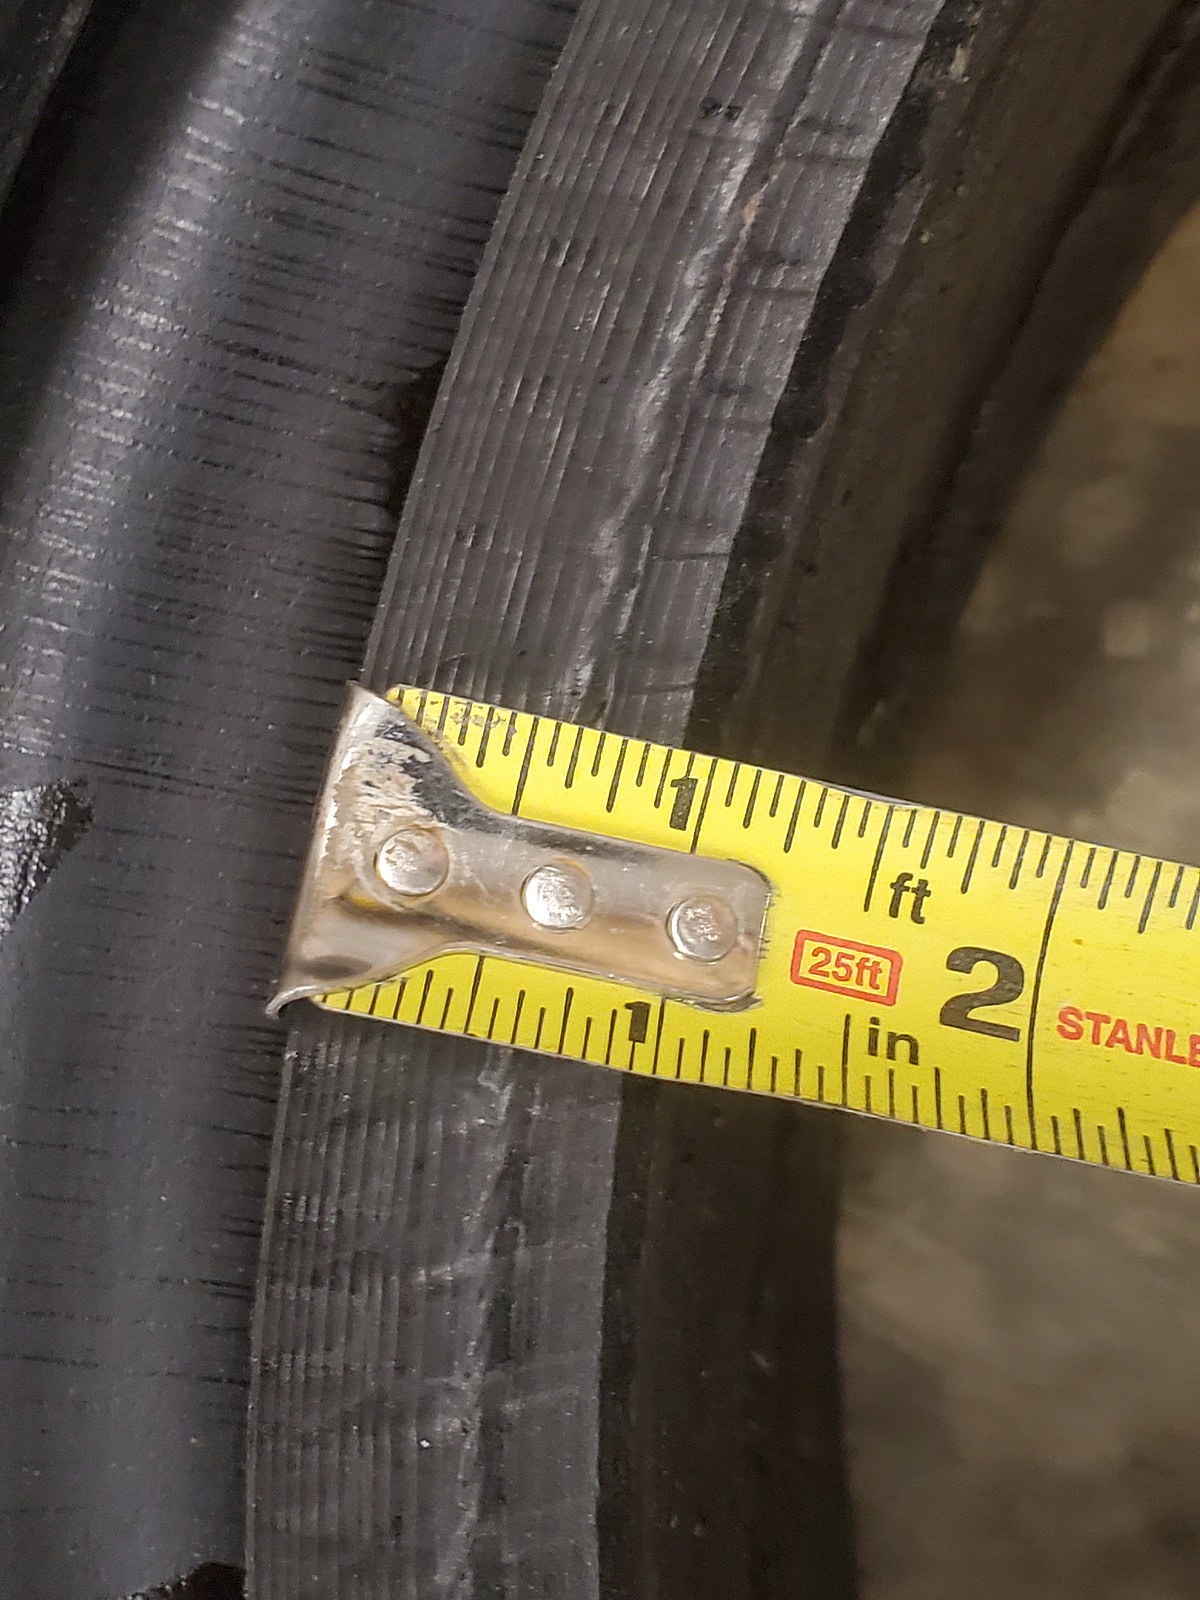
Crack in the bead is about 1.5" up. Not really looking like its right at the interface between the ring and tire.

Big runflat insert. Its HEAVY. And so much grease....
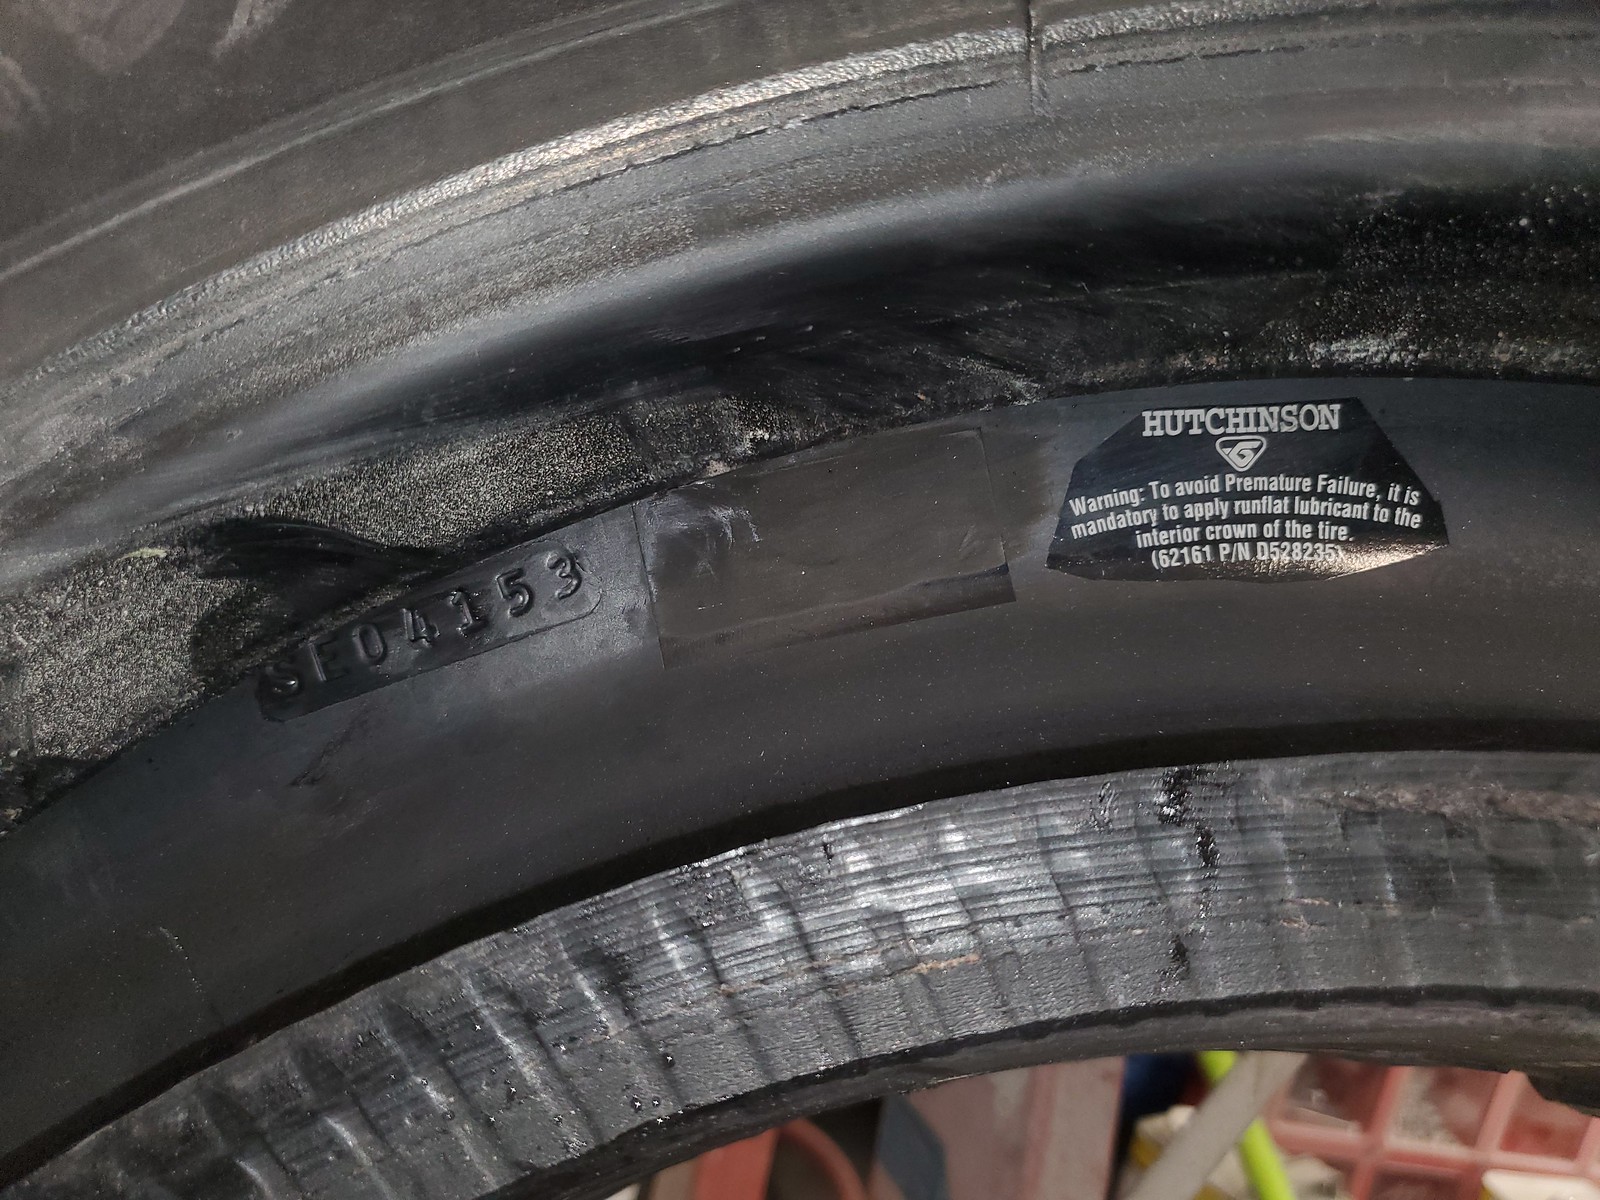
Part number

Definitely wont fit out easy!

This is a bit of wear kinda inside the bead area. Both side. Road grime? You can see the bead profile also, looks normal ish?
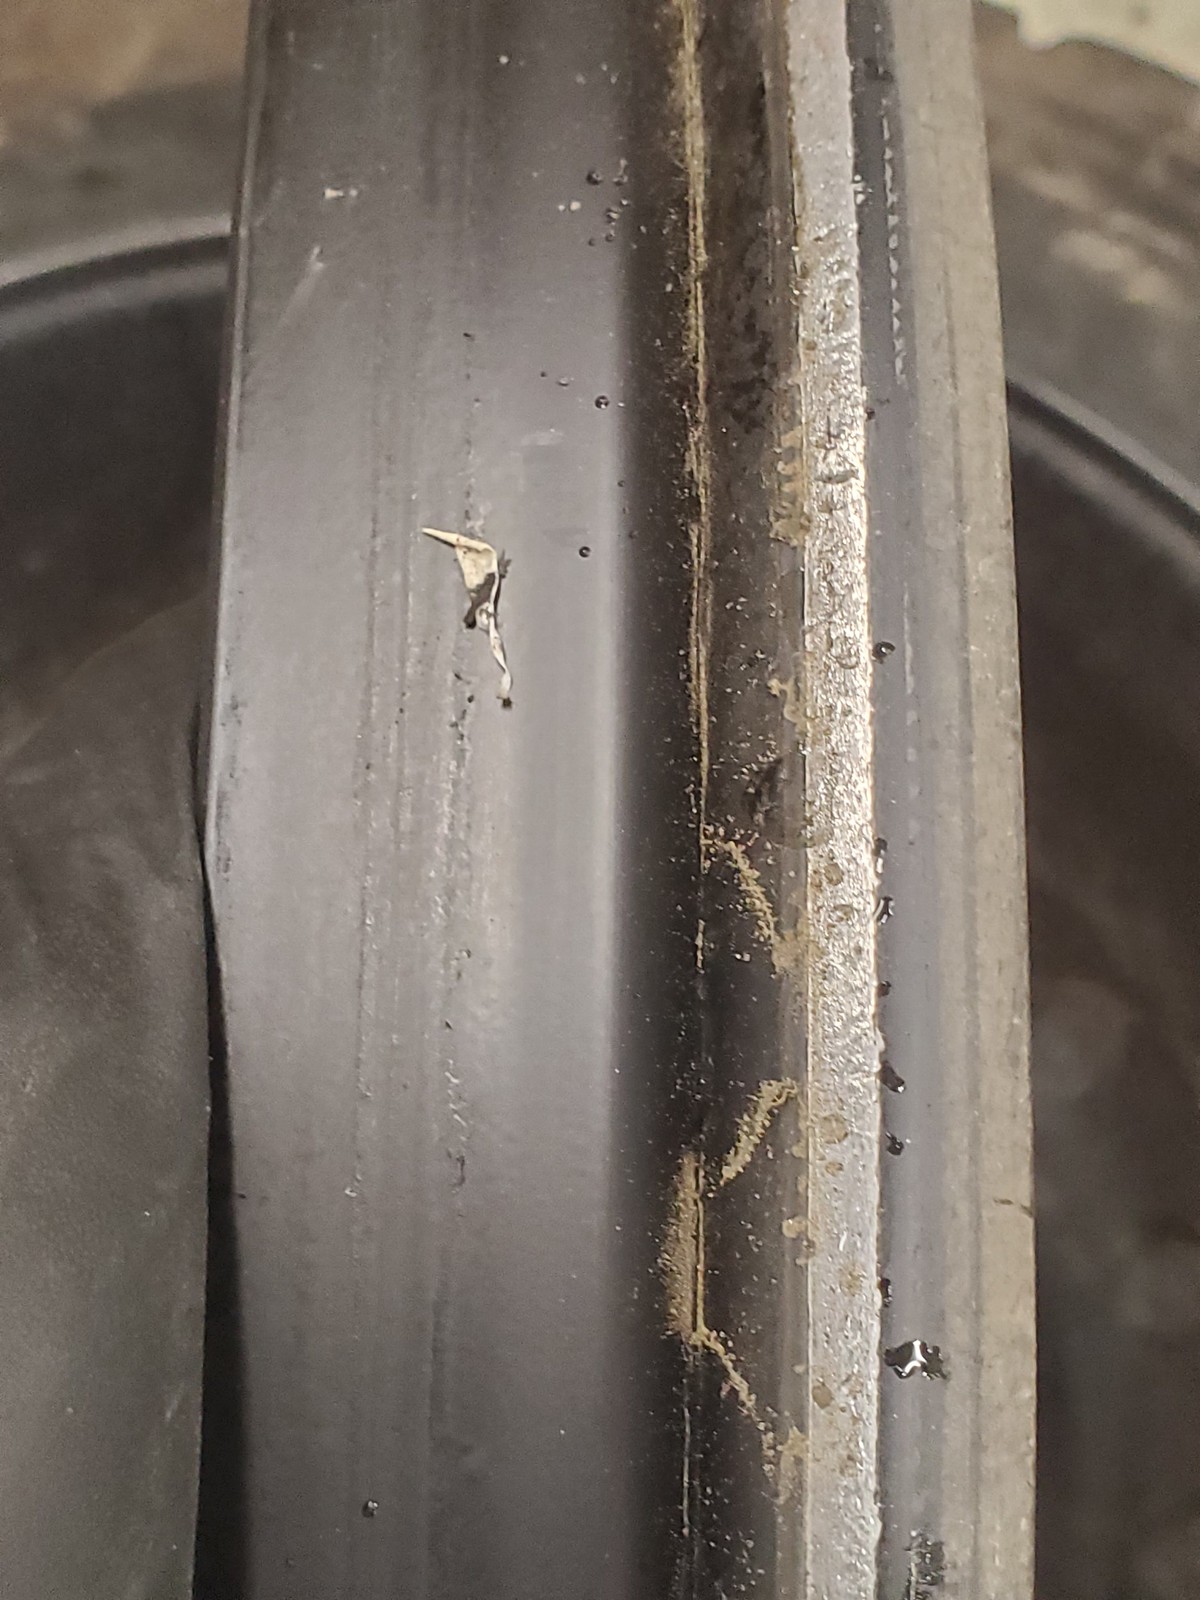
Look like a normal 19.5 bead??

there is is.... Thoughts?
Well I have officially put 40k on this truck! Nice weekend away. Spent two nights at two of our go to spots.


Back to tires. I saw this and thought it was interesting and maybe gives another clue?
Rear tire at 100psi after ~5 miles. City driving with stop and go.
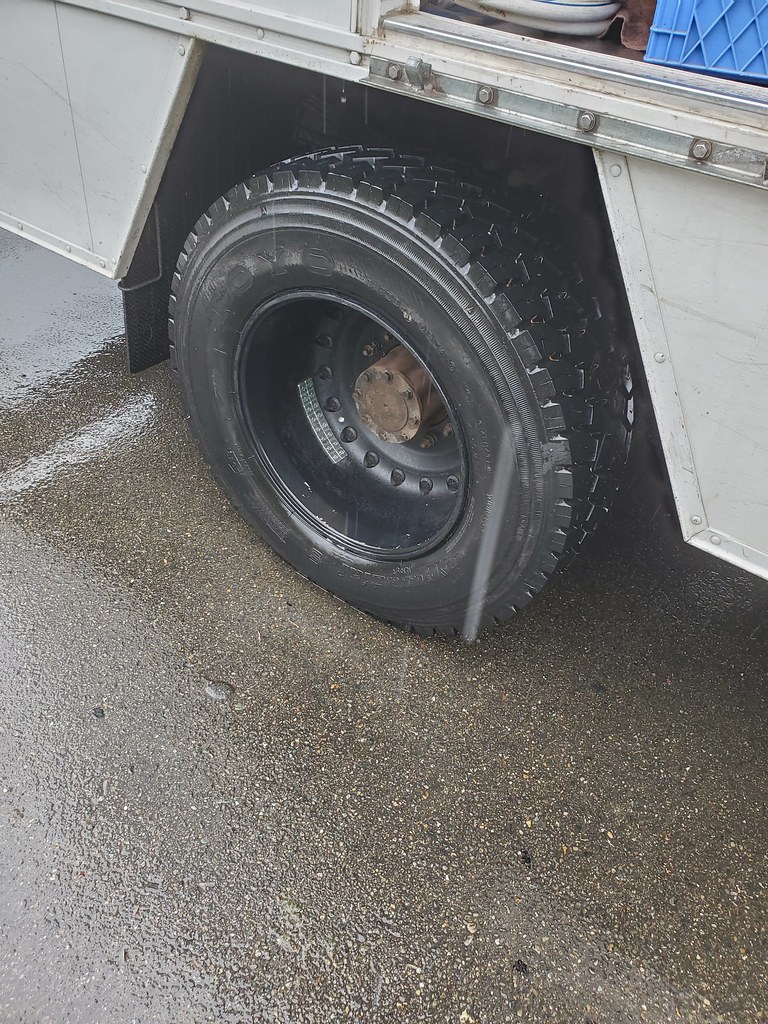
Front tires (70ish psi)

More sidewall heat in the front? Could just be more spray on the rear tires also.
And had a little run in.... Was cruising up a FS road at about 30mph, car coming the opposite direction so I slowed down to probably 20-25 ish. Moved over, and bam the ditch grabbed both pass side tires! It was muddy, and maybe the edge gave way? Flopped the truck at a pretty good angle.... split second decision was to keep the foot planted and try to steer back onto the road. Took a good 100' probably to get it to grab and pull out of the ditch. Thank god there weren't any trees hanging over!
You can see all the soupy mud all over the side. Its on the bottom of the cabover even....

Well if you have been following along, It has been eating front tires a bit. And after the ditch incident, there was a good shake at 50-58 ish.
Measured tire edge to tire edge... Toe was way off.
Made some alignment jigs. Two 50" pieces of angle iron, drilled for two of the lugs. Two tape measures, a little duct tape, boom.


Toe was 1.5" in 4'.... 1.7 degrees toe out.
Factory is 1 degree plus or minus .25, I set mine at .75 degrees in. If its too wandrey, I can jump under and give it a couple cranks.
Hopefully that helps!!! And why do it myself? The damn truck doesn't fit any local racks. Long trip coming up Thursday, and I needed it done like now.
In reply to AngryCorvair (Forum Supporter) :
It hasn't really felt wandery honeslty, just eating tires bad, and got a shimmy going on.... Got 1500 miles to do thursday, so hopefully its better.
SOOOOO on the way out of town Friday for LD weekend, blew a air bag..... I was literally just telling my wife I needed to do the trackbar and front end work since I was worried it would blow a bag from rubbing on the frame. But nope, much have gotten a rock in the convoluted area.
I noticed it was a bit harsh after a few mins, look down and gauge is pegged at 0psi. Berk. Pull over and yep. So we drove 80 miles on the bump stop.... Now the fun part.... My wife said she could hardly tell the difference. And I have never been very happy with the bags, didn't make much difference IMO. So maybe its hitting the bumps all the time?
So I am contemplating going back to coils.... It would take a couple hours to swap back I think.
SO thoughts on that. And thoughts on finding an off the shelf coil vs a custom one? I spoke with someone YEARS ago that used a f350 4" lift spring with 2" cut off or something. You may remember my custom rear coil debacle..... I am not sure custom is worth the $$
Obvious hole.

Good news is I carry a spare, and had everything I needed to swap it. Took about an hour.
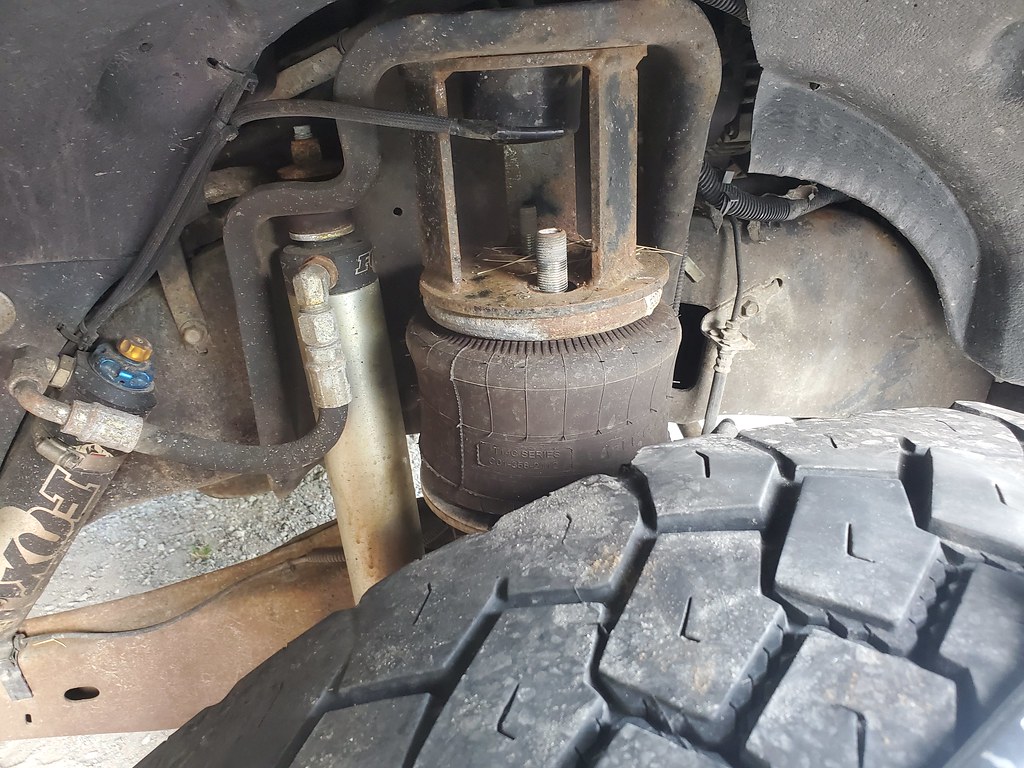
Can see the frame rub spot
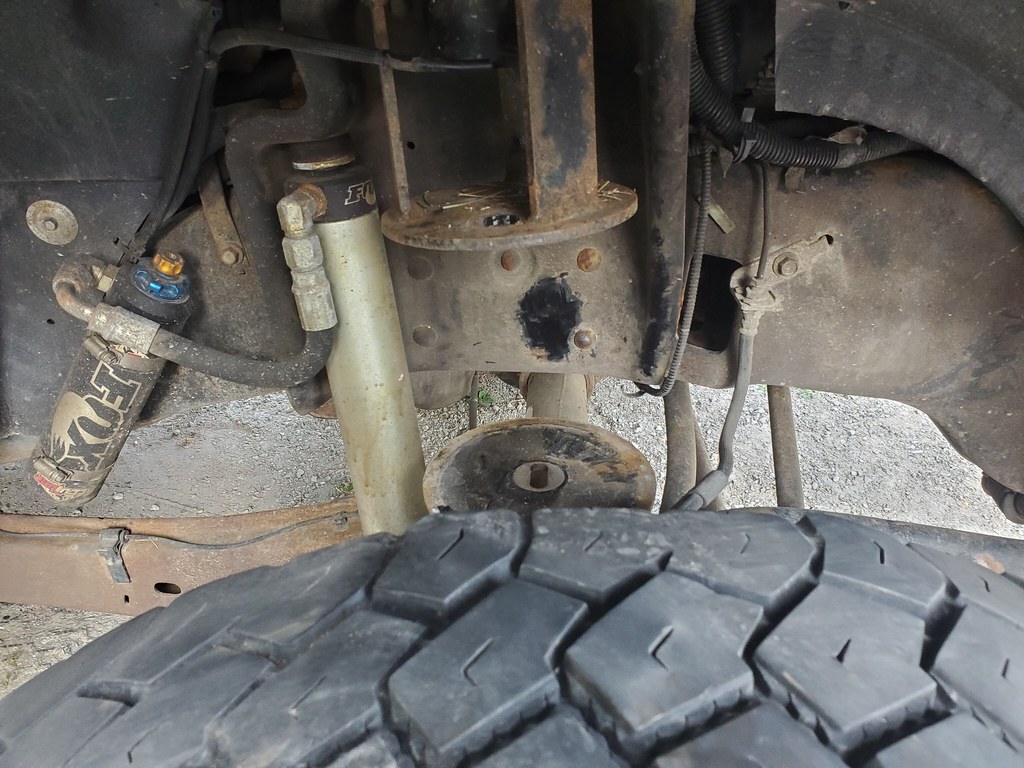
Back together.

In reply to Professor_Brap (Forum Supporter) :
Yeah they fronts are TOAST. I have one more in the garage and am goinng to swap the spare on for winter.
Front is coming apart for the following:
New tires and centramatic balancers
Track Bar
Steering Stabilizer
Check alignment and add a touch more toe in.
Probably going to do new caliper/pads/rotors too while I am there after seeing how badly stuck the rears were.
Then decide if I want to go back to coils? And it needs to stop being 100 degrees outside.
And back to the bags, the easy button is taller bags of the same diameter. I could get ~1" more uptravel.
Cut the bottom bracket down 2", use taller bag, add external bumpstop. Now the shock becomes an issue...
Here is full bump with the current bags, the OE bumpstop goes just below the frame there behind the shock. Although I dont have much shock travel left..... Its always something.

You really need to fix the air spring from rubbing the frame, and anything else. That (in addition to debris in the flexmember covolution) is a sure way to significantly reduce the life. It looks like you'd need a smaller diameter spring, which would likely have a lower load rating.
Have you tried driving your setup with increased inflation pressure in the air springs? That would raise your ride height off the bump stops in addition to the increase in spring rate.
In reply to collinskl1 :
Yes, I have the parts sitting here to do it. Just need time....
I'm already at the upper range of this spring. Really IMO they use too small a diameter. I'm at the recommended inflation height.
In reply to java230 :
So, tires and air springs are very similar - in fact, air springs are basically tires without the belts and tread... they're built the same way. Expanding on that, they both have load capacities that are directly proportional to contained air volume, but more specifically for air springs the cross sectional area of that air volume... so larger diameter springs can carry higher loads.
There may be another spring style that fits your application better. That one looks like a single convolute bellows, which would have the lowest travel range. A double or triple bellows might be better, or a rolling lobe spring like is commonly used on heavy duty trucks.
Ok, I see the piston (bottom mounting plate) now - I hadn't scrolled up and studied your alignment pictures enough.
When you say you're possibly riding around on the bumpstops, do you mean the truck's bumpstops, or the internal airspring bumper? The pictures posted 9/16 look like they're very close to eachother, and to the collapsed length of the Fox damper - I'm assuming that is with no air in the bags? The alignment pictures appear to be at nominal ride height with pressure in the bags, but there certainly isn't much up travel available in those pics. I'm leaning towards needing a spring with a higher ride height at your given load. Bonus if it is a smaller diameter to fix the frame rub. Otherwise I'd consider re-working the mounting brackets to move it outboard for more clearance.
Full disclosure: After working in OE tire engineering for a major tire manufacturer, I now work for a company that specializes in heavy duty truck components. I worked with the air springs group before a product line restructuring.
collinskl1 said:Ok, I see the piston (bottom mounting plate) now - I hadn't scrolled up and studied your alignment pictures enough.
When you say you're possibly riding around on the bumpstops, do you mean the truck's bumpstops, or the internal airspring bumper? The pictures posted 9/16 look like they're very close to eachother, and to the collapsed length of the Fox damper - I'm assuming that is with no air in the bags? The alignment pictures appear to be at nominal ride height with pressure in the bags, but there certainly isn't much up travel available in those pics. I'm leaning towards needing a spring with a higher ride height at your given load. Bonus if it is a smaller diameter to fix the frame rub. Otherwise I'd consider re-working the mounting brackets to move it outboard for more clearance.
Full disclosure: After working in OE tire engineering for a major tire manufacturer, I now work for a company that specializes in heavy duty truck components. I worked with the air springs group before a product line restructuring.
I really appreciate you reading and taking the time to help!
So lets back up a little since this thread is way long now.
I am running Firestone 5323 bags as part of a leveling kit. I am 6200-6400 on the front axle. When they built the leveling kit, they simply made the mounts taller, rather than running a taller bag.
The kit states to inflate to 7.5-8" tall for the bag, ignore pressure. I have done this, and I feel like it hits the internal bumper easily. Its ~5" tall, which is only leaving me 2.5" uptravel.
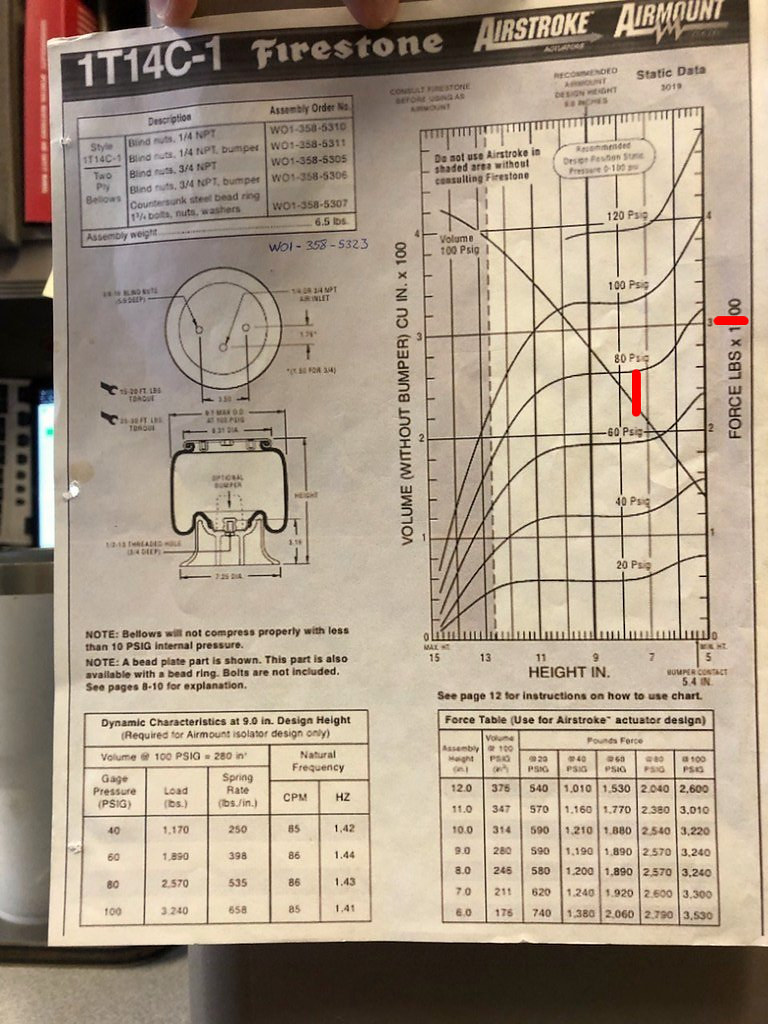
Looking at the firestone chat that puts me here, but the weight should make it further up the chart?
Here is overinflated, ~9" IIRC. At this point the ride is about the same as the spring rate in the airspring is way higher.

Your correct,this is 0psi in the bag. Clearly a little more travel to be had. But I do feel the aftermarket shocks are too long.... So only ~1" to be gained as it sits.

My thinking is run a firestone 5406. Same diameter, 2" taller. Cut the lower backet down 2" and add the factory external bumpstops back on. (no internal bumper on the 5406) My concern is the diameter being the same, the realistic spring rate is gong to be very similar, but slower to increase with the larger volume.
Thoughts?
I'd be inclined to try 90-95ish psi which should give you a spring height of about 9" based on your loads. The curves provided have a horizontal portion which is where the spring likes to operate - which is why the design height is typically right in the center of that range.
A taller spring with the same diameter will have similar spring rate characteristics. I'd have to dig up the load curves for that taller spring to compare, but at least you'd gain some travel to hopefully reduce hitting the bumpstops.
In reply to collinskl1 :
Ran 90psi today (150 ish miles) Same..... Any more and it gets tall and funky. Radius arms and track bars throw things out of whack quick.
I could use these with the shorter brackets tho? Hmmmm
Here is whacky

Yikes, that geometry is far from ideal. Getting that spring in its design height window while still being inline with itself is likely the best bet, but that might be tough depending on the suspension geometry as you've figured out.
In reply to collinskl1 :
Yeah track bar will help some!
Think that running the bag taller would help? I can cut the lower bracket down....
Big truck stuff is heavy and really tight..... And we are supposed to get 1.5" of rain today.... So I worked late last night to get as much done as possible.
Front end work list:
Check alignment again, add more toe.
Replace track bar (re-center axle)
All new brake components (after seeing how bad the rears were.....)
New tire balancers
New wheels/tires
First find 30mm socket, and proceed to bend breaker bar....

Track bar was supposed to be the easy part. As soon as I disconnected it, everything moved ~3" to the DS. Remember big truck stuff is heavy?? A bottle jack between the tire and fame wouldn't move the axle... Ended up having to block the frame up, take the wheels off, use floor jack under front axle (after dumping all air and taking it off jack stand) a BIG ratchet strap between the axle and frame, and as much strength as I had to get it back centered. And now to bitch about the track bar. Its nicely made, but its just a hiem joint on one end for adjustment. IE one side must be unbolted to spin it.... So no adjustment when its installed..... Hopefully I got it close, because this is a HUGE paint to get out apparently.


But its in....
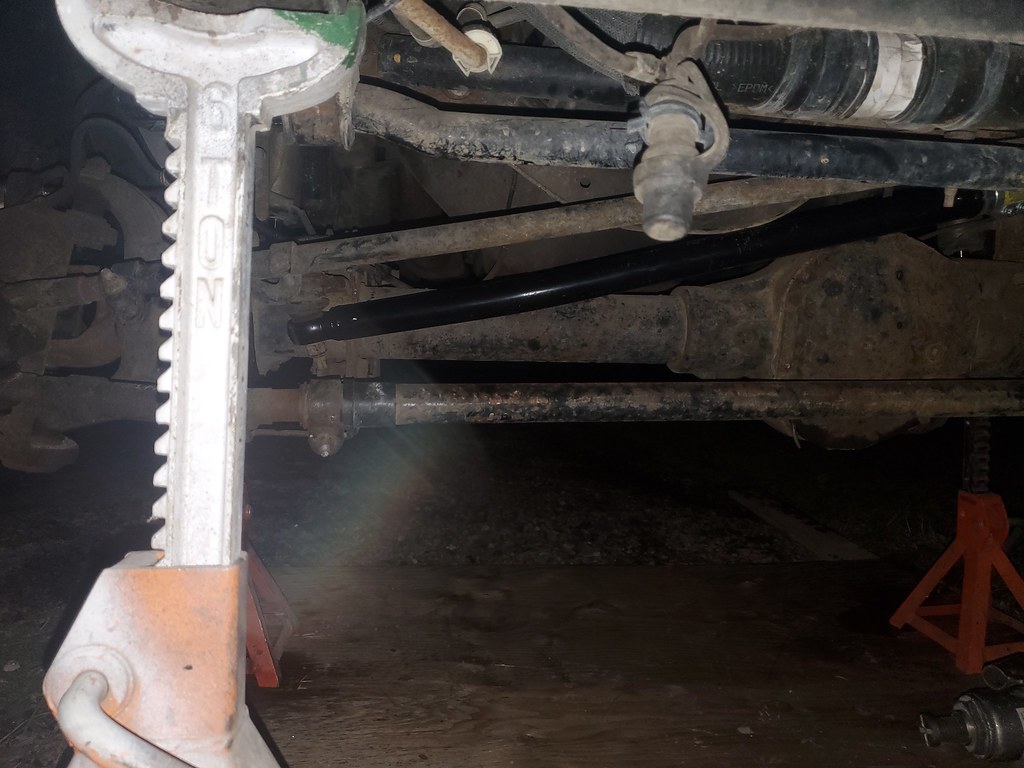
On to brakes. They are big and heavy, and hold a lot of fluid.... Kept the rotors, they are in good shape, and no grooving. Other side looks the same, just later and darker....
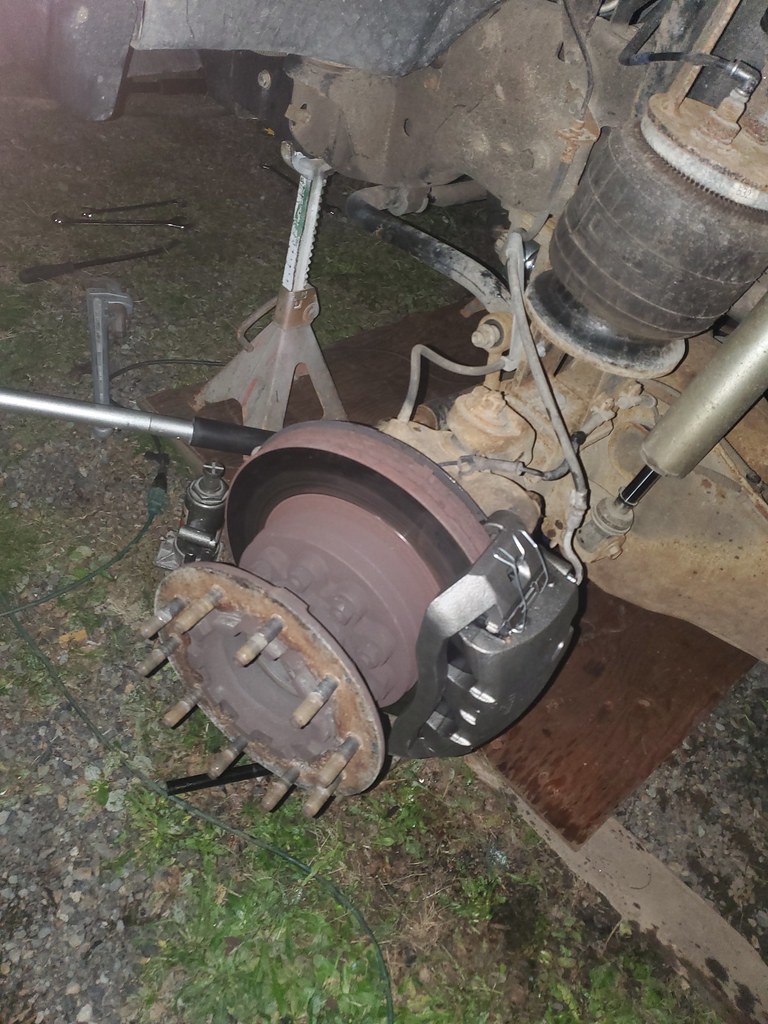
Did not get to alignment, tires or balancers....
My roof creates a super low pressure zone right where my front fan is. Its constantly pulling up on the lid. I have left it open a few times which probably didn't help either..... But the lid is cracked, hinges ovaled out, and a weld broken.... Duct tape held almost all the way home....

New maxxfan acquired. But first lets deal with a little issue with them. Here you can see the circuit board that runs everything. I have had one fry due to condensation getting on it in the winter. Maxxfan replaced it for me under warranty, bu this time I will take a little action to try to prevent it. There are 4 screws under the screen, and one in the crank knob. Pop those out and you can access the board. Its held in by three screws. Remove those. Cover the comm ports with a bit of tape and hose the whole thing down with some conformal coating. Should help a little anyway I hope. Reassemble and install.


Much better.

On to the next project. After alignment and shifting the axle over the steering wheel was off center a fair bit. Well go figure that adjuster was nice and rusty..... Lots of PB, a torch, a 2' monkey wrench and 5' cheater bar and it finally started moving..... But that took a long ass time.

Better. Weekend time now.

Centramatic and new tires on the front as well.


In reply to Mezzanine :
They are stupid simple! Big truck guys use them most it seems, as commercial tires are rarely balanced.
You'll need to log in to post.