1 ... 14 15 16 17
SkinnyG (Forum Supporter)
SkinnyG (Forum Supporter) UberDork
3/23/21 12:11 a.m.

Update.

The recycler's asked for three quotes, I gave them four selected from the seven I got.  Recycler's will compensate me.

One shop wouldn't even touch it.  A couple shops balked at the idea that this was Tremclad and a roller.  Three shops said this would be written off if it went through insurance.

I chose to repair it myself, for a few reasons:

1) I don't want the truck stripped by some hoodlums climbing into the compound overnight.

2) I didn't want the truck stolen by some more adventurous hoodlums.

3) I don't want the work to go over budget and be on the hook for that.

4) I can pay a pro to screw it up, or I can screw it up myself for free.

5) Personal skill acquisition.

6) Something else I've since forgotten because I'm old.

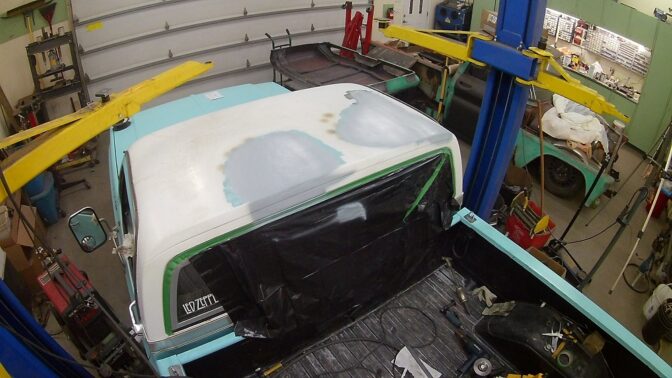
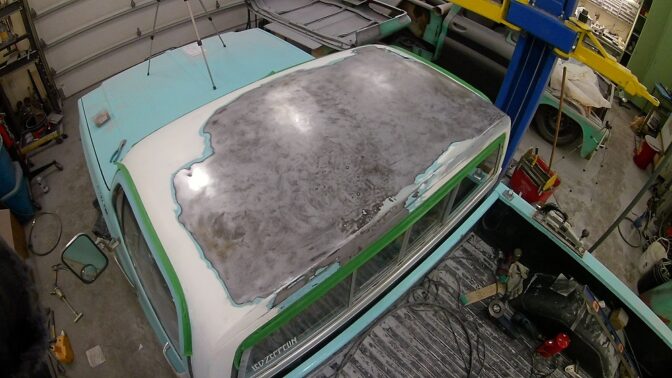
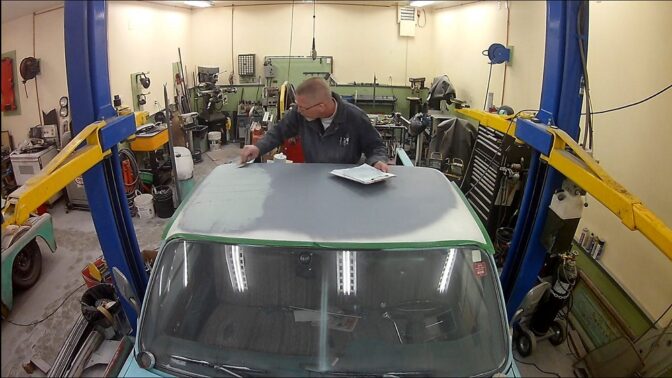
So, I took the paint off the offended areas and used a variety of failed attempts to pull it all back out.

I tried MIG welding some pull tabs and using my hoist, then a lever thingie I made, and then a slide hammer I made, but in the end found MIGing was a poor choice - I couldn't get things close enough, and the MIG beads are NOT very malleable, so ultimately I screwed myself in the edge placement.

Then I tried a stud gun to try and pull the rest of the damage up, and use my shrinking disc to put the high spots down, but just plain could not get happy.  I could bring up the crown, but it would oil can.  So I'd shrink it to get rid of the oil can, but I'l lose the crown.  Rinse and repeat.  My butt was being kicked.  I needed to be super super super delicate with the disc, but in seconds I'd lose the whole thing.

I spent probably 10 hours trying to pull it all out, and eventually called the help of a friend who does autobody.  I don't like crying for help, and I particularily don't like drawing on someone who does this for a living.  However, buddy came over, and was most kind about my attrocious butchery of the metal.  We spent about 3 hours and got things a lot better, and I learned a LOT about dent removal, more so than I would have had I not reached my wit's end trying it on my own. 

Youtube and books can only go so far, it seems. I needed a human for this. I am largely self-taught in a lot of areas, and I usually pick up a skill fairly quickly, but not autobody.  And it frustrated me immensely being unable to pick this up quickly like I usually do.

Quick tips I learned from this:

1) "The first one in is the last one out" - work the dent in reverse of the way it happened.

2) Use a heat gun to heat the metal upward, then use air to cool it off.

3) Use the Shinking Disc to take off the high spots only.

4) You're trying to ballance all the tension and looseness in the highs and lows so the whole panel works out even.

5) Any/all defects in the panel contribute to any/all the problems in the panel.

6) Torch shrinking can be risky, because it is a whole lot of action all at once.

7) Propane torch shrinking heats up slower, but in doing so affects a wider area of the metal.

8) Don't MIG anything (this created more problems than I want to admit)

9) You need to modify your angle grinder to make the shrinking disc lay flat on the panel.

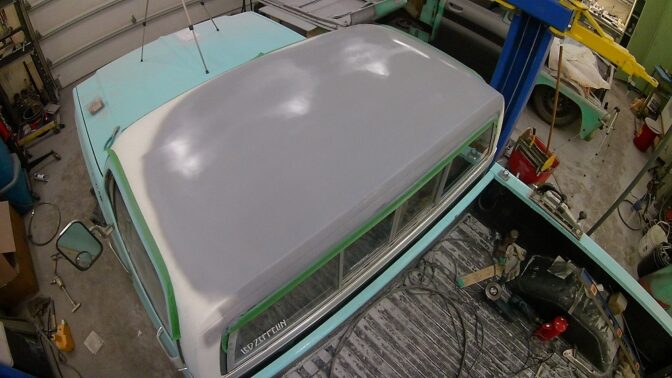
In the end, the roof is now very much "close enough." I'll work a few more low and high spots, and then a skim of filler.  It is still not completely free of oil canning, but I'm not interested in chasing this to oblivion. I will likely use some "Flutter Foam" in-between the roof skins to give the skin some rigidity.

Still: not loving the autobody skills here.

But the recycler's cheque paid for the air ride on the '61.  Priorities.


pres589 (djronnebaum)
pres589 (djronnebaum) UltimaDork
3/23/21 3:29 a.m.

Just saw this latest update.  Sounds frustrating; cool that you were able to get this done with a little help.

Racingsnake
Racingsnake Reader
3/23/21 9:37 a.m.

In reply to SkinnyG (Forum Supporter) :

Good tips, thanks. What do you use instead of MIG?

SkinnyG (Forum Supporter)
SkinnyG (Forum Supporter) UberDork
3/23/21 11:43 a.m.

I would either use a torch or TIG.  Far more malleable welds for sure.

However, in this task, what was done was done, and even if I change to a different process now, the MIG weld beneath it is still a hardened weld.

The problem with even just using a stud gun to pull out a crease, is the instant heat and quick cooling shrinks the metal at the weld, but the pressure you need to apply to make it work stretches the metal in a wider area.  Hard to win.

I -think- the crease might have come out easier if I had worked the damage from the minimal end in the center of the panel to the crease at the back last.  Perhaps "correcting" all that damage would put the stresses at the crease enough to make it pop up better.  I don't know.  Next time, I guess.

Dear God I don't want a next time....

Racingsnake
Racingsnake Reader
3/23/21 8:42 p.m.

Thanks, sounds like a hassle

SkinnyG (Forum Supporter)
SkinnyG (Forum Supporter) UberDork
3/23/21 11:23 p.m.

Spend another day with the shrinking disc and the heat gun.  The heat gun trick is freaking magic.  I was able to really tighten the roof skin nicely, though I did venture a bit outside the repair area.

Today ended with a couple coats of etching primer, and tomorrow some filler.

SkinnyG (Forum Supporter)
SkinnyG (Forum Supporter) UberDork
3/24/21 7:08 p.m.

While filler on the roof is curing, I had a case of the "whileiamintheres."

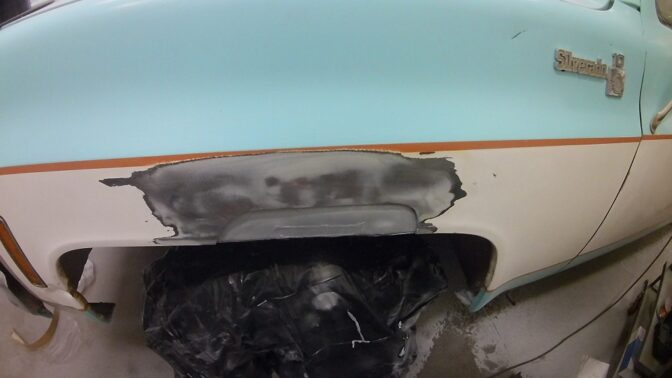
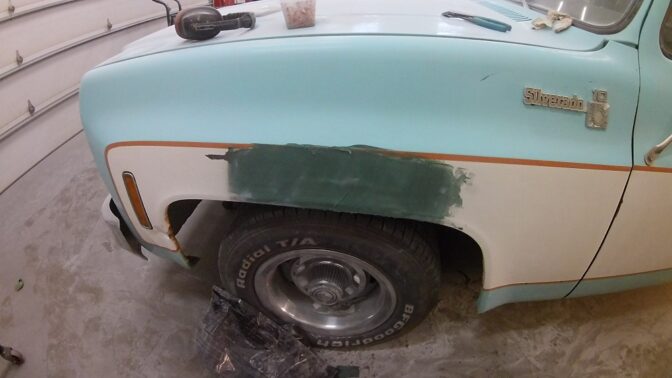
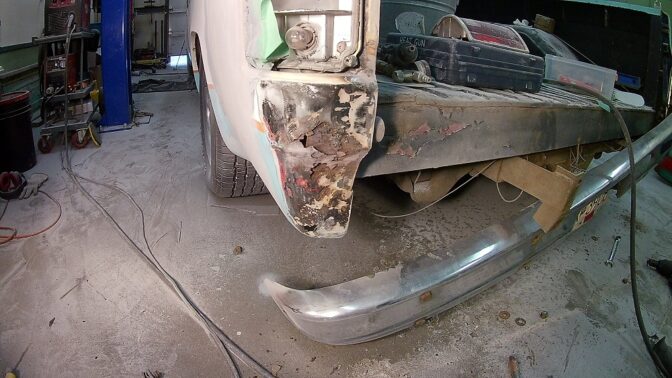
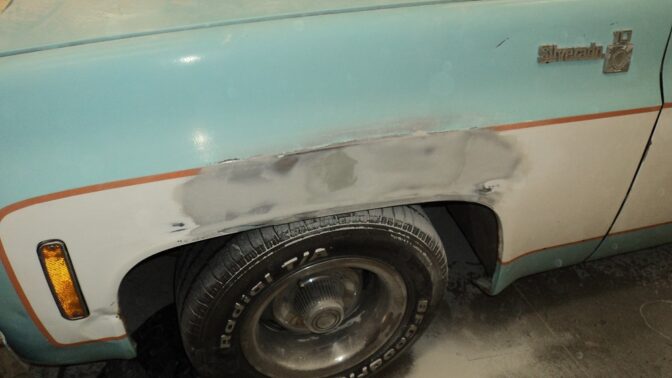
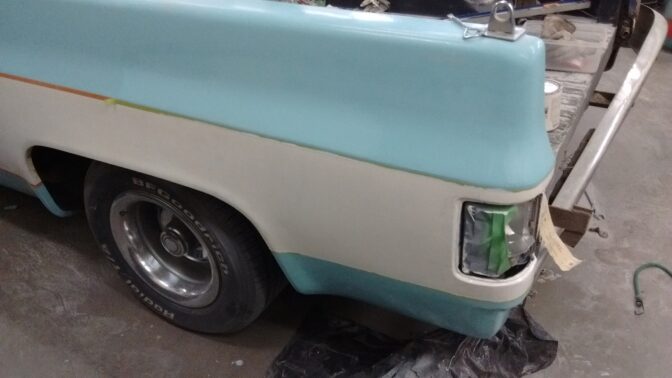
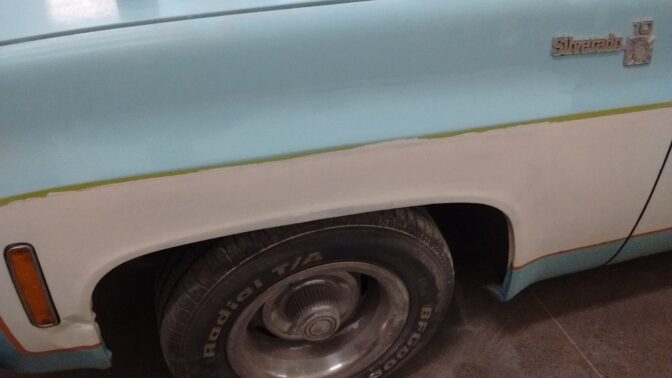
Bubbled rust coming through holes in the fender edge:

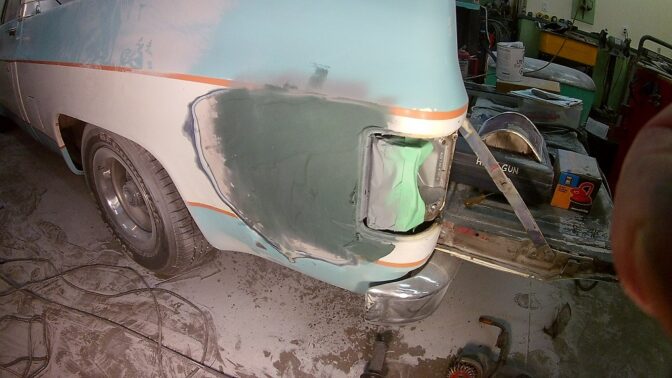
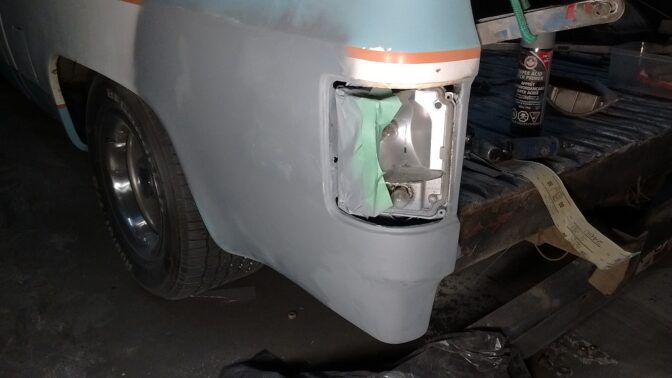
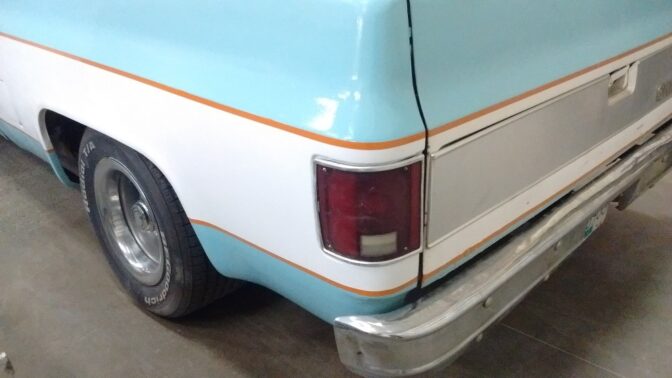
And honking big cracks in the back.  1/2" bondo here, hiding a garbage repair.  Not my repair or my bondo, but I think I can knock it down to 1/4" thick if I go forward about 8" more:

There is a reason I painted this with Tremclad and a roller seven years ago....

Run_Away
Run_Away GRM+ Memberand Dork
3/24/21 7:41 p.m.

Ahhh, that is a satisfying silver lining to the whole accident - seeing the rest of it get cleaned up. smiley

SkinnyG (Forum Supporter)
SkinnyG (Forum Supporter) UberDork
3/25/21 11:18 p.m.

I didn't notice earlier that there was a fairly large lump of crown on the front half of the roof in the center.  The crane magnet must have shoved the skin forward raising the crown there.  It looked stupid, and had to come out or it would drive me nuts.

So, I scrubbed all the filler and most of the primer I had put on, and set about shrinking the raised crown down, and moving metal to the back of the roof.

Lots of shrinking with the shrinking disc.  I had ground the angle-grinder threads and nut down quite a bit so that the disc could just "float" on the surface.

Through a combination of all the metal I had to move, I ended up with quite a valley in the front of the skin, which I was able to heat with the heat gun and draw up. I put the gun the valley, and it started to sink deeper, so I went to an edge which would raise up for me, and then slowly worked my way into the center of the valley, which came up with a loud POP! and then I carefully blew compressed air around the heated area from the outside, slowly working my way to the center. 

It's darn near filler-perfect now.

At the tailight, I ground the 1/2" filler back quite a ways towards the wheel, and spread some kitty hair in there at a less offensive level of thickness.

I'll be pleased if filler can be all done by the end of Friday.

SkinnyG (Forum Supporter)
SkinnyG (Forum Supporter) UberDork
3/26/21 11:17 p.m.

Lies.  No filler by the end of friday.
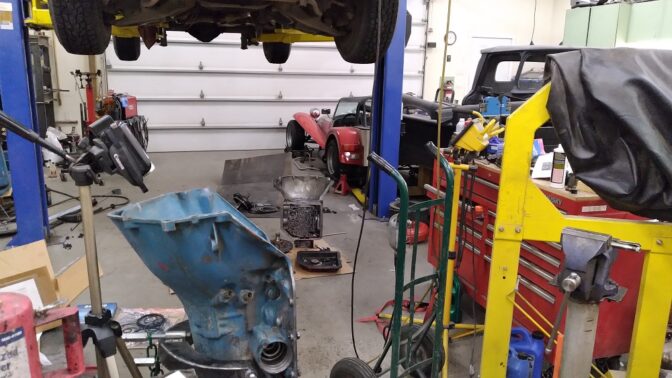
Maybe tomorrow.  Maybe Sunday.  But honestly, I've been "moments away from mastering this and completing the repair" for about two days now.

Super 7 is insured, so that will be my daily for a while.

SkinnyG (Forum Supporter)
SkinnyG (Forum Supporter) UberDork
3/28/21 2:25 p.m.

Then some short-strand fiberglass filler (kitty hair) to give the repairs a bit more crack-resistance, and was about to put some filler on the roof, but....

.... turned out I hadn't noticed a HUGE hump on the front center part of the roof; it looked like a "cone head." So, I stripped off more of the paint, and ended up shrinking the hump down with the shrinking disc, and raising up the low spots with the heat gun, all the while trying to balance "crown" with "smooth" with "tight" with zero "oil can."

This has been very frustrating for me, because I usually pick up skills relatively quickly.  This skill I am NOT picking up quickly at all.

8 days total to this point, and while this is a LONG amount of time to work on this, I am completely learning how to use these tools to work a panel with zero access from underneath.  Special thank you to Jeff from Trendsetter Automotive (Kelowna) who came and taught me the fine art of working a roof skin.  I still need a LOT more practice, but I certainly have a good start under my belt now.

SkinnyG (Forum Supporter)
SkinnyG (Forum Supporter) UberDork
3/28/21 10:06 p.m.

Filler tonight.

And I dug into the left rear bed corner where there were some bubbles.  Where there is bubbles, there's usually no metal.  Since I'm here.....

SkinnyG (Forum Supporter)
SkinnyG (Forum Supporter) UberDork
3/29/21 10:34 p.m.

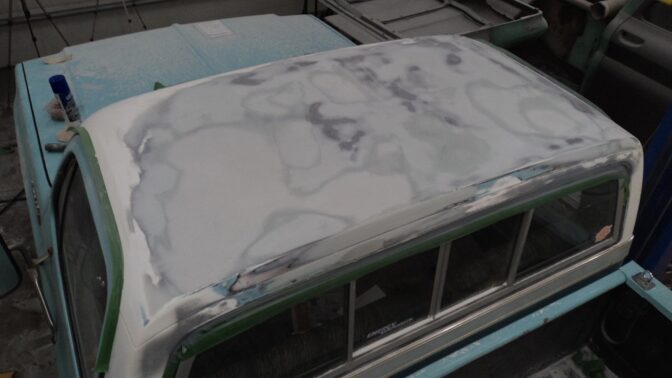
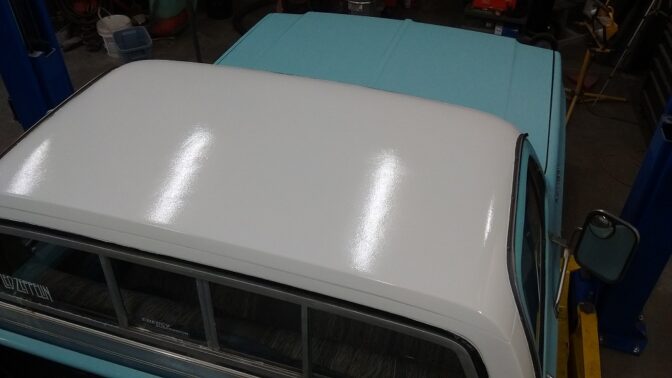
Filler done, ready for primer:

Cracked 1/2" thick filler is now replaced at 1/4" thick and primered:

Front fender is ready for primer:

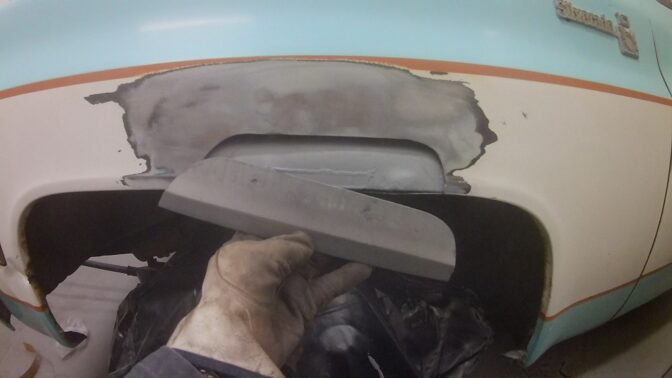
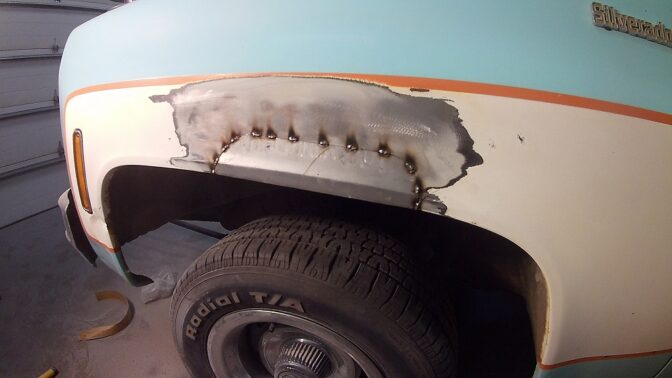
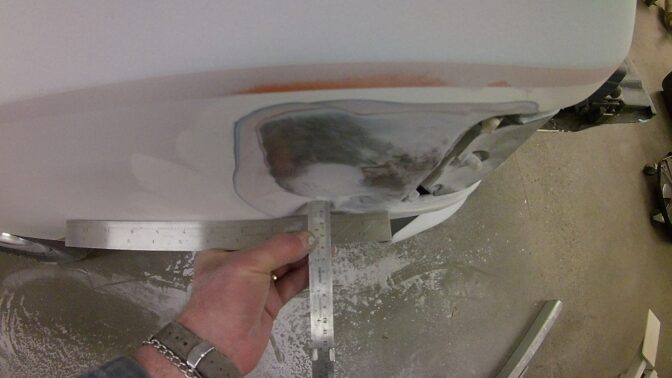
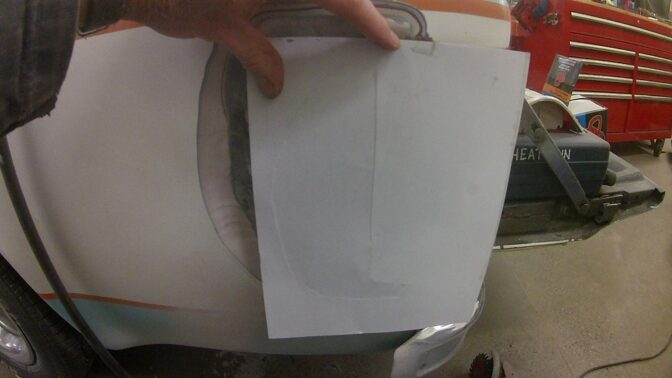
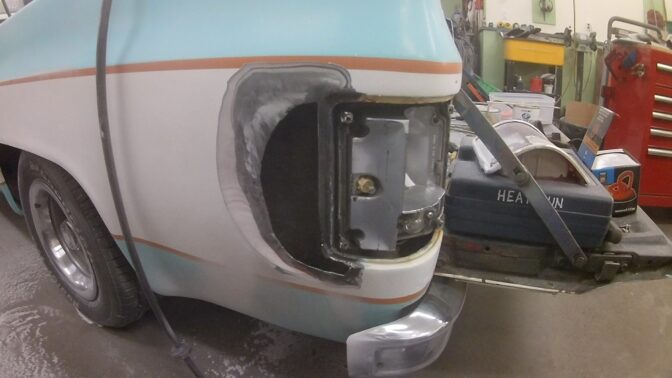
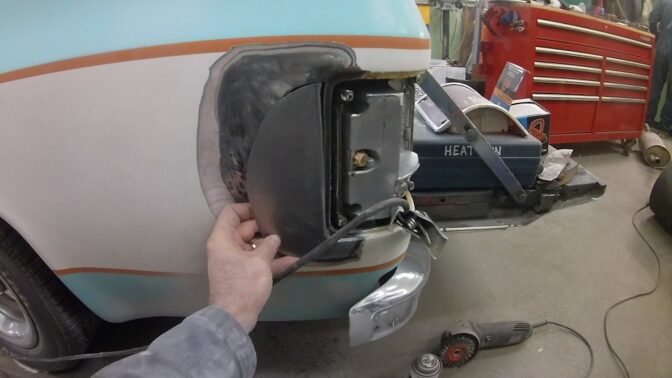
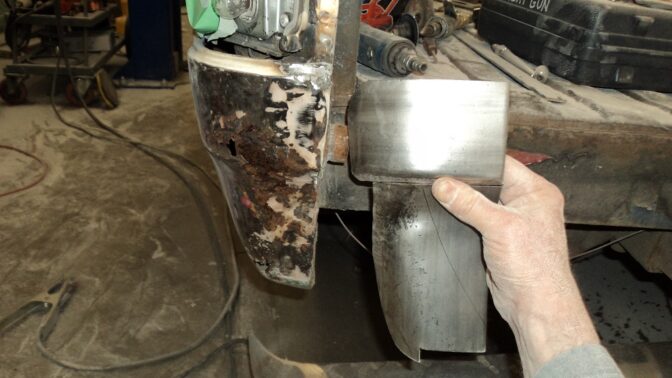
Patch is fabricated. I made it out of two pieces because I wasn't sure I could make it out of one.  Will TIG two halves together, planish all pretty-like, and weld-in some time this week.

Adrian_Thompson (Forum Supporter)
Adrian_Thompson (Forum Supporter) MegaDork
3/30/21 9:48 a.m.

Man, you never ever fail to amaze me with your skills and speed.  I hope you're getting some kind of payout for this to cover your time.  

SkinnyG (Forum Supporter)
SkinnyG (Forum Supporter) UberDork
3/30/21 9:39 p.m.

Why thank you.

This was my two week spring break.  I was supposed to be working on the '61....  With no "day job" in the way, I get a lot done.

The payout matches the average of the quotes I collected, and went straight into air ride suspension for the '61.

Rear bed corner halves got TIG'd together today, persuaded into acceptable shape (for behind the bumper),  MIG'd in, and etch primed.  Filler tomorrow.

I noticed a low area on the back edge of the cab after priming, so there is more filler there now, I'll shape it tomorrow.  The "seam" between the cab roof panel and cab back panel have a slight depression where the crane hit it.  I can't exactly remove that, but I have an idea up my sleeve to make it less noticeable.

Freaking dust e-v-e-r-y-w-h-e-r-e in the shop; not liking it.

SkinnyG (Forum Supporter)
SkinnyG (Forum Supporter) UberDork
3/30/21 9:53 p.m.

Seven years ago, when I painted this truck, I didn't have the skills or the tools to fabricate patches like this.  

Since then, I have collected a wack of the tools I need to to do this, I have developed a whole lot more skill in using them.  I am a whole lot less intimidated with these tasks.  This roof was intimidating, but I am more comfortable with it now.

SkinnyG (Forum Supporter)
SkinnyG (Forum Supporter) UberDork
3/31/21 11:28 p.m.

Rear corner primed, a low spot on the roof filled and primed, a bit more blending at the rear wheel arch, and I -think- we're now ready for paint.

SkinnyG (Forum Supporter)
SkinnyG (Forum Supporter) UberDork
4/2/21 1:56 p.m.

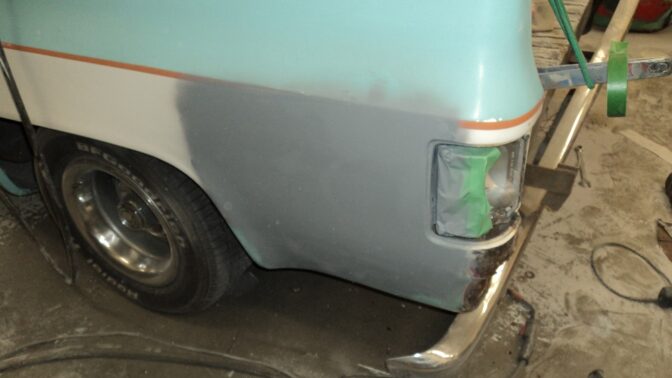
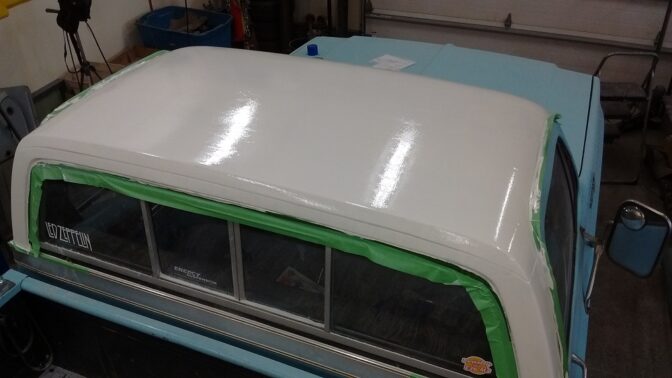
First coat of paint, un-thinned Tremclad and a roller:

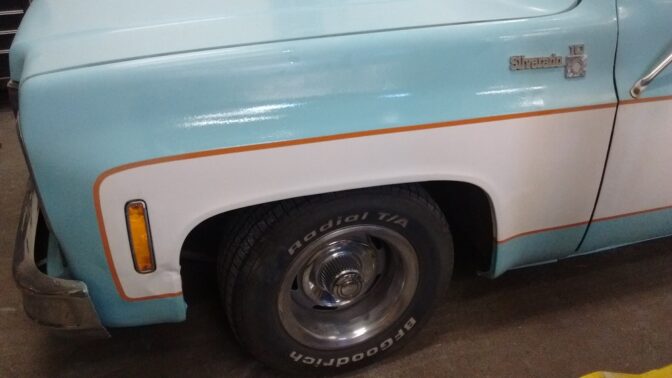
Yes, I did not fix the crease by the corner light.  The pic below is my level of worry:

06HHR (Forum Supporter)
06HHR (Forum Supporter) Dork
4/2/21 1:58 p.m.

The untrained eye will never suspect anything happened.  Great work!

SkinnyG (Forum Supporter)
SkinnyG (Forum Supporter) UberDork
4/3/21 10:08 p.m.
SkinnyG (Forum Supporter)
SkinnyG (Forum Supporter) UberDork
4/11/21 1:32 a.m.

The orange paint is still what I mixed 7 years ago.  It was not drying quickly, so I just left it all week. The Super 7 has been my daily all this time. 

Out on the street to pick up the kids today, and I am very pleased with the rust repair on the front and rear, and mostly pleased with the roof repair. Also changed the nasty rusting bolts that were holding the rear bumper on, with galvanized carriage bolts.

Today I really only spent time cleaning the shop.  Gotta get sorted out and ready to get back on the '61 Apache.

SkinnyG (Forum Supporter)
SkinnyG (Forum Supporter) UberDork
4/11/21 8:14 p.m.

Final coats of paint done, and I'm calling it finished.

SkinnyG (Forum Supporter)
SkinnyG (Forum Supporter) UberDork
4/11/21 8:40 p.m.

Just scrolling back and seeing what else I've covered over the past year.

I had been chasing transmission oil leaks f-o-r-e-v-e-r, even after rebuilding. 

I am currently running two (2) shifter seals, and an o-ring on the outside just for sumptin' extra under the shift linkage "U". I even picked up the steel speedo bullet, and tried all manner of o-rings until I finally gave up and coated it in Ultra Gray. Driveshaft yoke bleed hole even got welded shut.  Different pan gaskets, doubled o-rings on the dipstick tube.  Pffft.  Leak leak leak.

A while back, the end of the trans dipstick broke off and fell inside the trans (the stick is slotted and sort of "expands"). I did NOT want to have to go in there and deal with the mess, so I cut the bottom off a dead engine dipstick, and set the "full mark" even with the bottom of the case (top of the pan). 

No leaks ever since.

SkinnyG (Forum Supporter)
SkinnyG (Forum Supporter) PowerDork
12/17/21 3:22 a.m.

Death growl/vibration in the transmission was back and has been getting steadily worse (especially at speed) for a coupl eyears now, so I took it apart again (AGAIN!), but compared parts with another "good" short shaft TH350 I had on a shelf. The rear ring gear had a LOT of play on the output shaft, so I swapped ring gears. I also replaced ALL the thrust washers inside, I changed a planet bushing, and the Direct Drum bushing looked trashed.

I also removed the TransGo separator plate and dual-fed internally.

One of the direct frictions was taco'd and had some bent tangs (?! Previous install error?), so I swapped it out with a used friction. Also scraped down a low-reverse friction from the old trans and put it behind the Intermediate piston to tighten up the clearance.

I also changed cases, because.... long story. But in doing so, and in changing all the thrust bushings, the total end play with no shims was HUGE!  I tightened it up to 0.005" by putting a 0.030" shim behind the front planet bushing and a 0.015" under the pump bushing.

SkinnyG (Forum Supporter)
SkinnyG (Forum Supporter) PowerDork
12/17/21 8:18 p.m.

Just back from yet another "maiden voyage" in this truck.

Seems to work.  Shifts a bit different, but not bad. I had also tightened the end play of the governor, so that might be why. I did nothing in the valvebody other than change the separator plate. And remove the "down shift at ANY speed" clip, because I worry.

WAY less noise and vibration, but this truck has toyed with me like that in the past.

1 ... 14 15 16 17

You'll need to log in to post.

Our Preferred Partners
30K9Bq1Pq78end87eTg8y8cIOWo1r3rOYJBSLT0pSKihMmSGRDAlH4ULFK89ujam