1 2 3 4 ... 7
Tom_Spangler
Tom_Spangler GRM+ Memberand HalfDork
6/5/12 9:20 p.m.
irish44j wrote: keep in mind that your car probably has the dual pump setup (in-tank lifter pump and main HP pump in front of the left rear wheel). You can put an HP pump in-tank, but will need to run HP line over the fuel tank to it. A project I plan to do this winter perhaps.

Ah, good to know, thanks!

Tom_Spangler
Tom_Spangler GRM+ Memberand HalfDork
6/18/12 1:18 p.m.

Update: I installed the new in-tank pump, replaced the fuse, and still no joy. Near as I can tell, it immediately blows the fuel pump fuse as soon as I turn on the ignition. I'm not hearing the pump prime when I turn the key. So I guess I have a wiring problem, but that's going to be fun to trace when I can't even keep a complete circuit long enough to test it....

Anyhow, the Bentley manual has a bunch of test procedures for the electrical part of the fuel system, my next step will be to go through those.

Adrian_Thompson
Adrian_Thompson Dork
6/18/12 2:40 p.m.

As I said in e-mail the other day, start by making sure the new sender/pump work in the tank with a seperate temp circuit through a fuse from the battery. That will let you know it works, isn't stalled (which could blow the fuse) and that the earth works correctly. Then start trouble shooting the wire from the pump backwards through the system. Either that or accept that the whole car is a POS, give up on it and dump in it my drive way for disposal

irish44j
irish44j SuperDork
6/18/12 5:45 p.m.

well if the fuse is blowing immediately, seems pretty clear to me that you're grounding out the positive for the pump someplace. I would just skip the rest and trace the wiring. The pump wiring goes under the rear seat and past the HP pump, and then up the driver's side rocker, IIRC.

Adrian_Thompson
Adrian_Thompson Dork
6/22/12 1:02 p.m.

Inspiration for you

Tom_Spangler
Tom_Spangler GRM+ Memberand HalfDork
6/22/12 7:24 p.m.

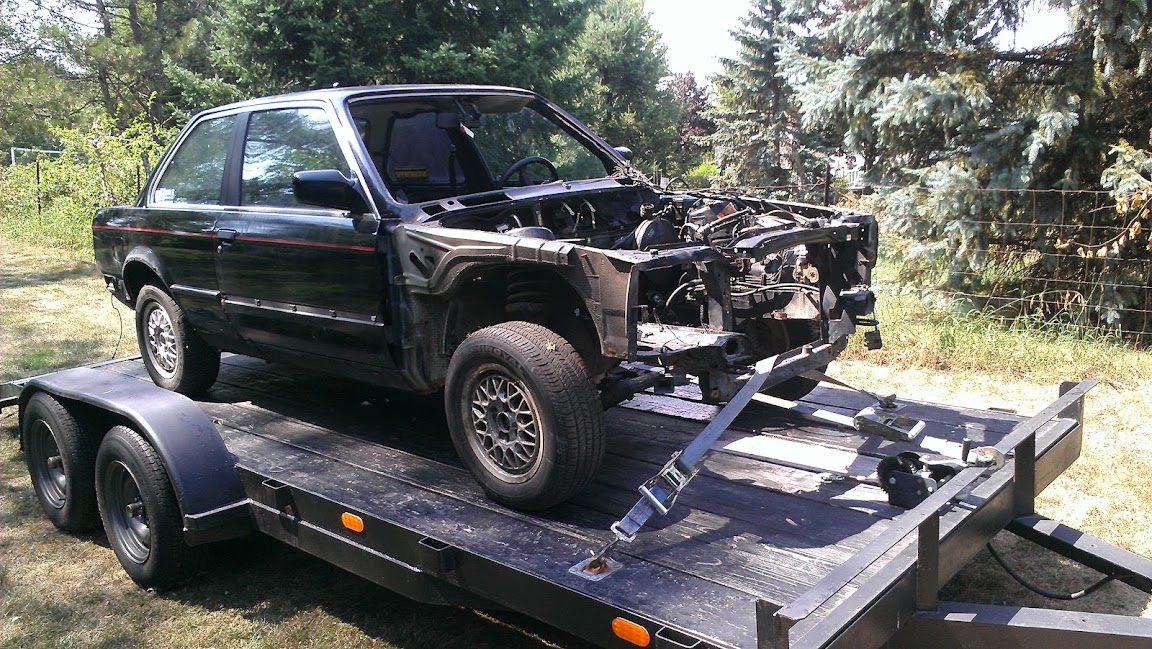
To my family's delight, I hauled another POS E30 home tonight!

This is a parts car. 87 325is with a bunch of rust and a pretty impressive amount of bondo to go with it. But it has two sets of decent basketweaves, a perfect passengers seat and an OK drivers seat, a crack-free dash, a complete M20B25, a 3.73 LSD rear end, a crack-free windshield, a bunch of other nice black interior bits, an 'is' front air dam and factory lip spoiler. None of which my current car has. Not to mention a bunch of spares like the tranny, brakes, suspension bits, the hood, etc.

So my plan is to strip off every possible thing that I can use or sell, then drag the remains down to the metal recycler. I paid $500, and I'm betting I'll at least break even. After I put in a bunch of work, of course....

Yep, it's even uglier....

BTW, Ade, that looks very nice, and more importantly, the females in the house liked it, too.

Woody
Woody GRM+ Memberand UltimaDork
6/22/12 9:07 p.m.
Tom_Spangler wrote: Yep, it's even uglier....

Nope. It's beautiful...

Tom_Spangler
Tom_Spangler GRM+ Memberand HalfDork
7/3/12 5:22 p.m.

I've begun pulling parts off of this parts car, because my pain priority right now is to get it the heck out of here.

First I had to get it into my barn. That sign in the background says "RX-7 parking only" back from when I built a CSP FB about 12 years ago. Maybe I should cross it off and write "E30" on it:

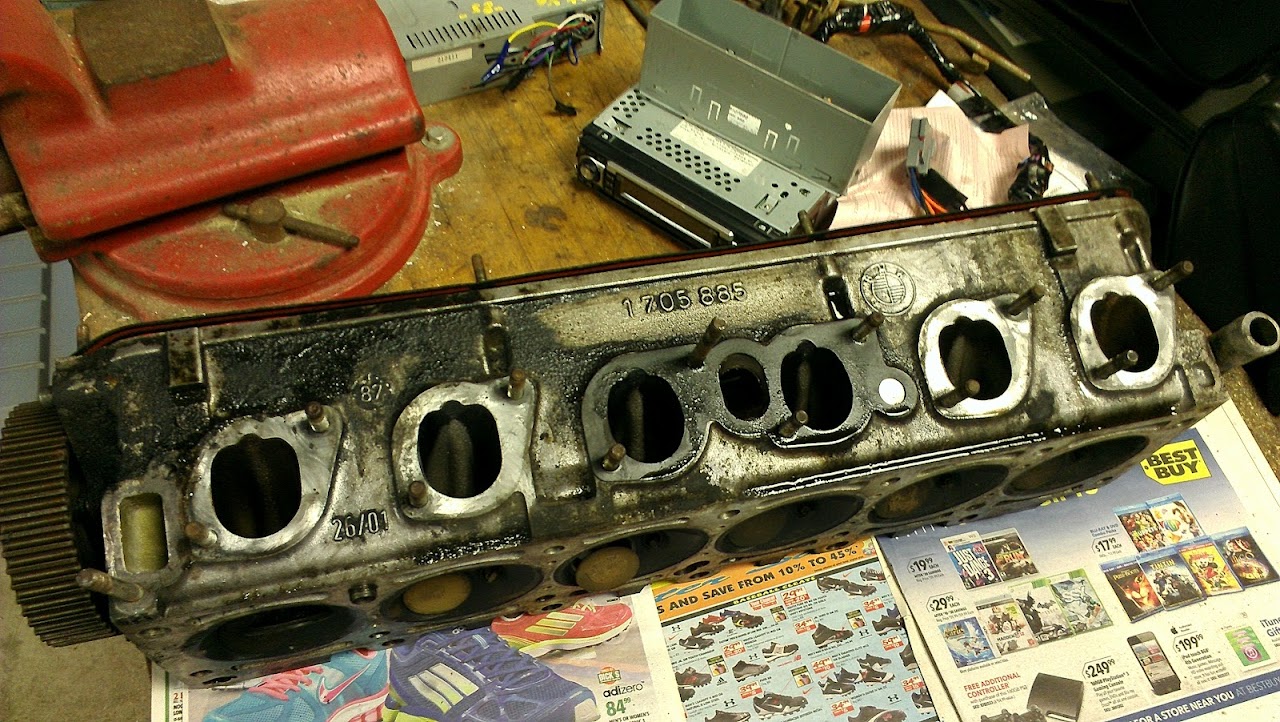
A lot of the car was already taken apart and the parts were just piled up in the interior. The head had been removed from the engine because the guy was going to sell it separately. It looks fine, if dirty:

Holy smokes, a nearly-complete tool kit!

I harvested all the rear-end parts I could. Got the bumper (mine has a crack), the trunk lid, which incidentally has "91 318is" scrawled on the underside and doesn't match the color of the car, the taillights (don't need, but why not?) the power antenna, etc.

Easy stuff done, it's time to crawl under there and start unbolting stuff. Like that 3.73 LSD diff. Those 25-year-old bolts didn't want to move, but liberal use of PB Blaster and breaker bars finally got them. Those two on top of the diff are fun. But it's out. Needs a bath:

That's it for now. I'm hoping to get the rest of it off this week. I have some friends coming over on Saturday and I'd love to have the thing all stripped so they can help me push it onto my trailer to haul it to the metal recycler.

Tom_Spangler
Tom_Spangler GRM+ Memberand HalfDork
7/13/12 1:40 p.m.

As I mentioned previously, my parts car has a nice, crack-free dash, so I certainly wanted to nab that. I did, but man, there's a lot of connectors on that thing! Here it is:
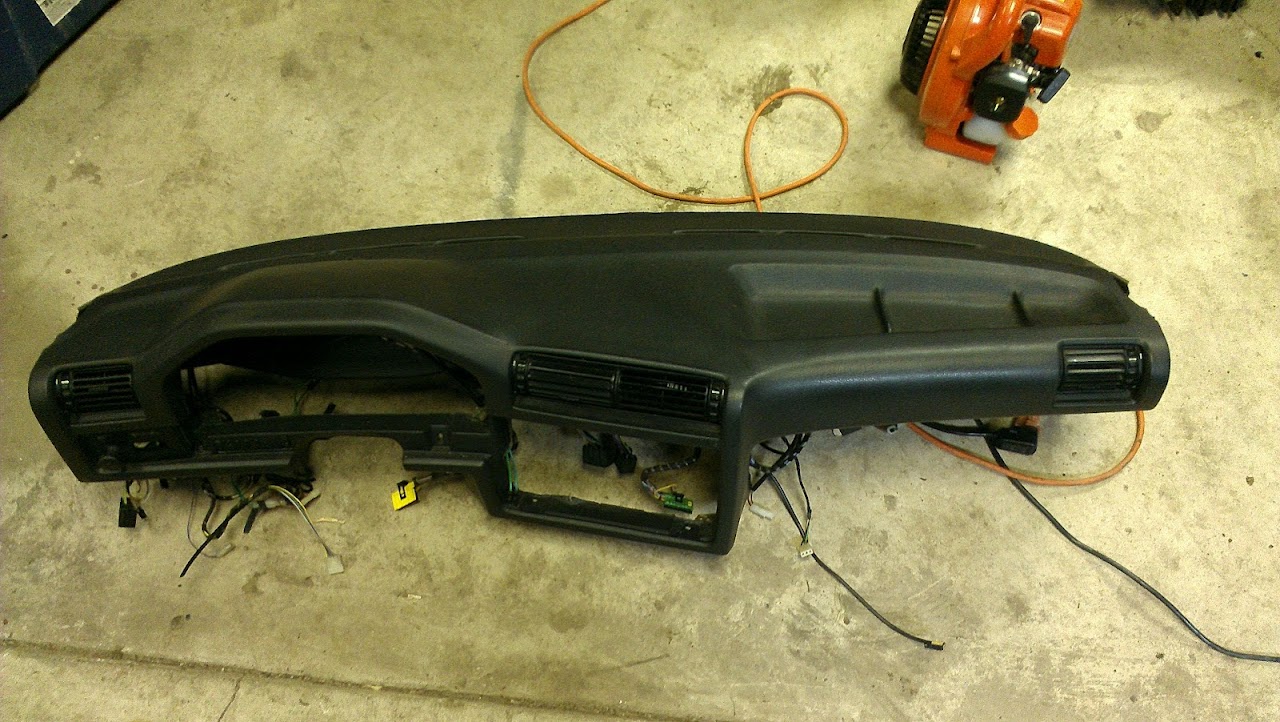
So, as I said, I think I'll live with my original one for now. It only has one crack. I'll hang on to this one for the time being and see if I feel motivated enough to put it in down the line. If not, I may sell it, a crack-free E30 dash is worth something, right?

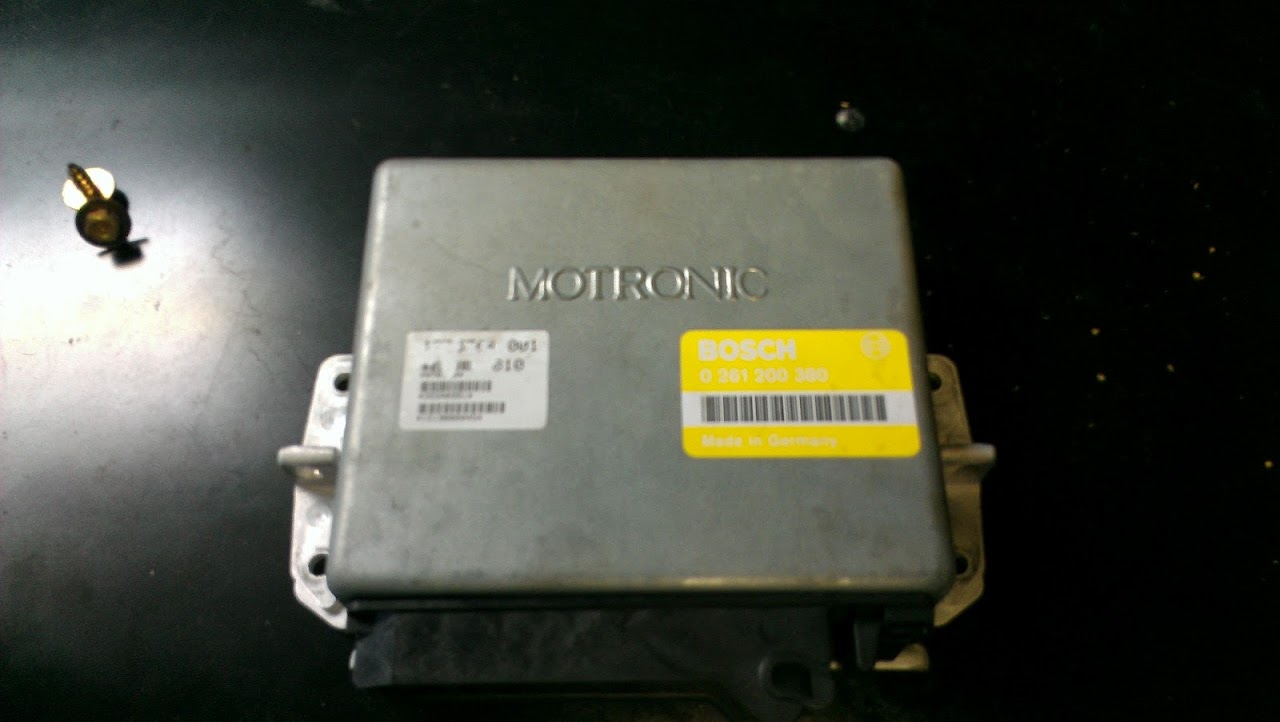
While removing the dash, I did grab this rather important little item:
My project car has a tan vinyl interior that's very rough. Driver's seat is all taken apart and ripped, passenger's seat is together but the vinyl is badly rotted and has huge holes in it. The rear decklid is dry-rotted. Surprisingly, the back seat is in decent shape. The carpet is badly stained:
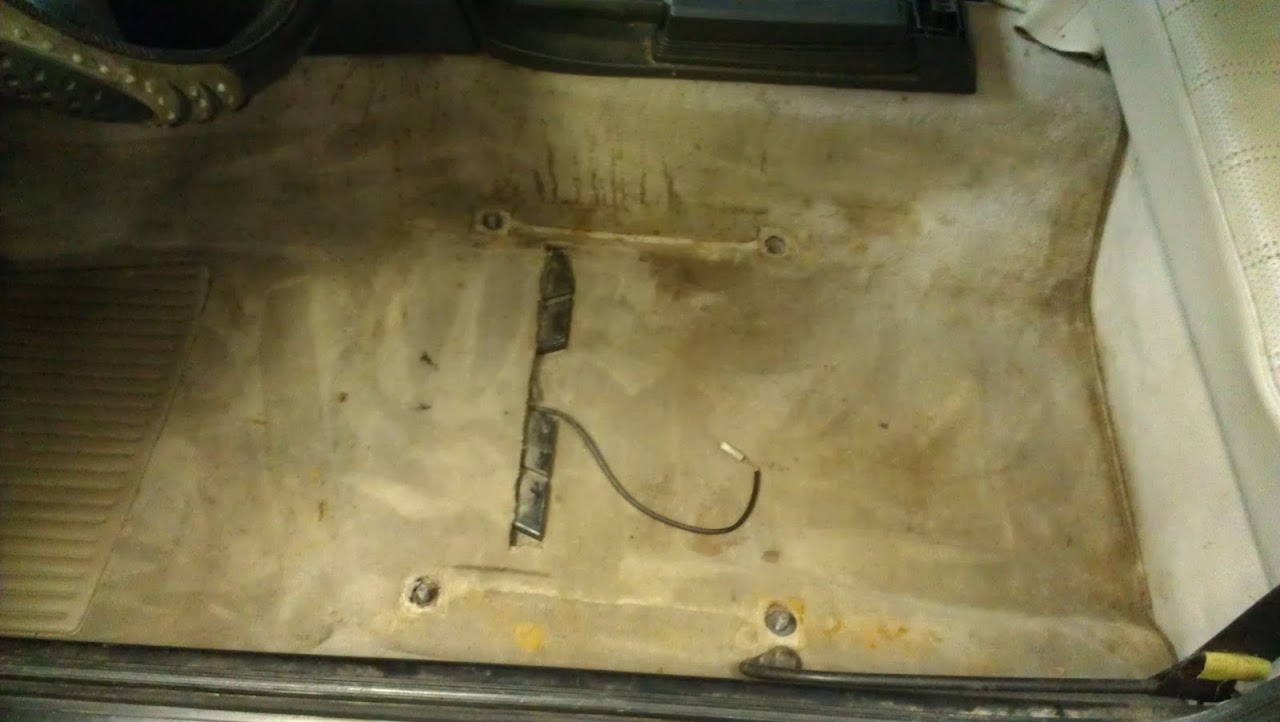
... that was after I vacuumed it. At first I thought about trying to get replacement carpet, but it doesn't seem like there's a lot of those kits around, and the ones that are are expensive. So then I was going to pull it out, powerwash it, dye it, and put it back. But after pulling the dash on the parts car and seeing how much stuff needs to come out to remove the carpet. I think I'll just clean it as best I can and dye it in the car. I'll remove the seats and center console bits and mask off everything else.

The parts car has a black leather interior, so I'm going to convert my car over using the door cards, rear interior trim panels, decklid, and rear seat from it. I'm going to keep my carpet tan because I think it'll be easier and I don't want the old color showing through when I get some wear on it like it would if I tried to go black with it. Besides, black and tan look good together.

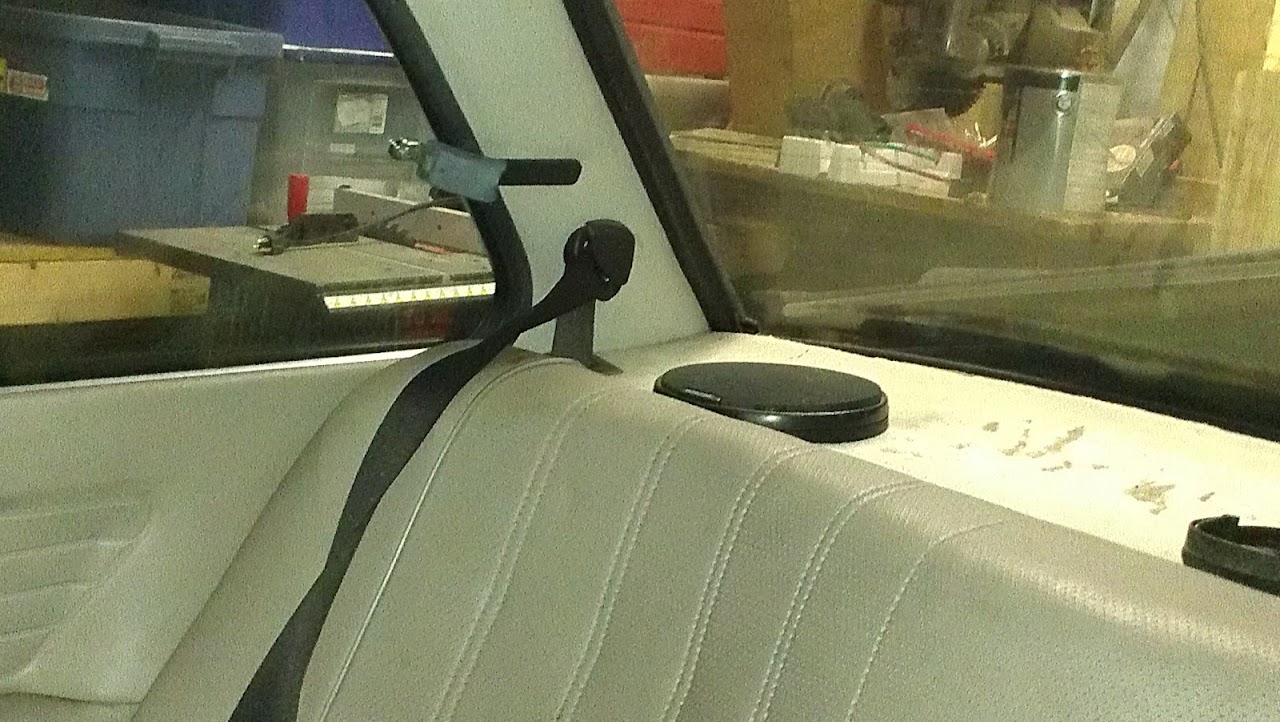
One potential issue I see is using the rear decklid. My project car has the seatbelts coming out perpendicular to the back seat with an anchor point on the C-pillar above:
Whereas the parts car has them coming out parallel to the rear seat with a little tower structure:
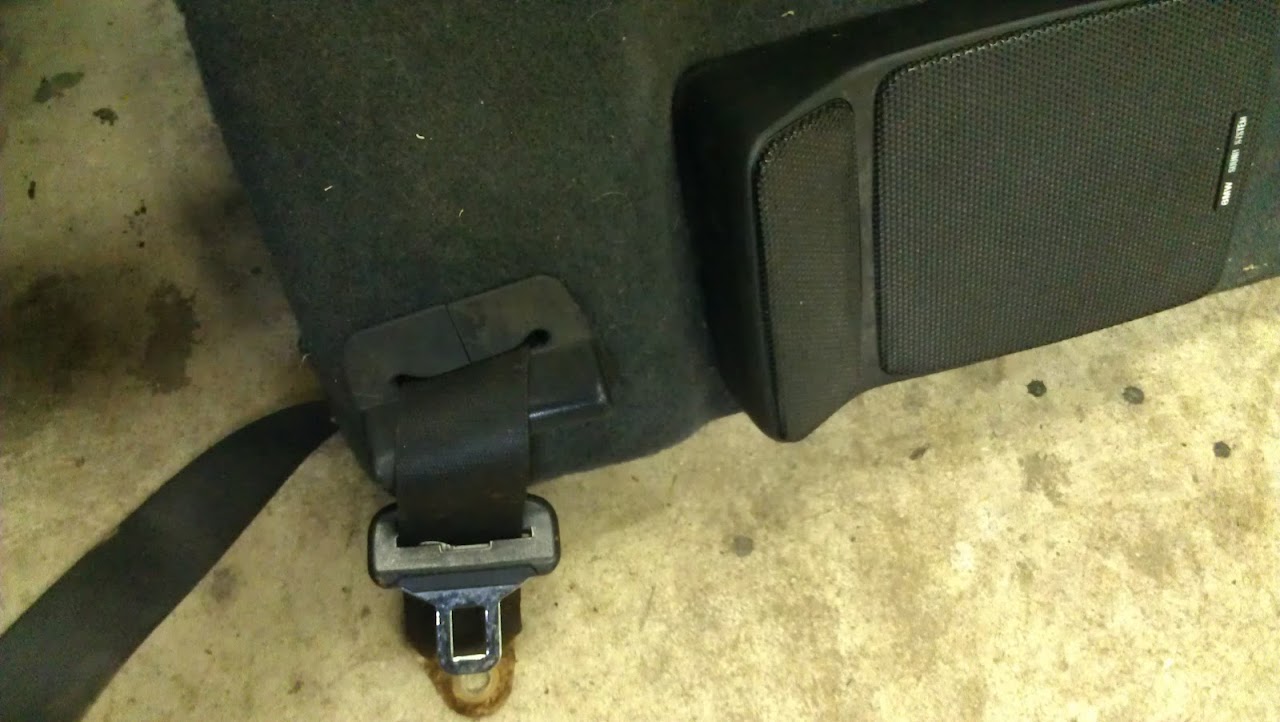
I'm assuming it's not too difficult to convert it over as long as I have all the parts from the parts car, and I think I do.

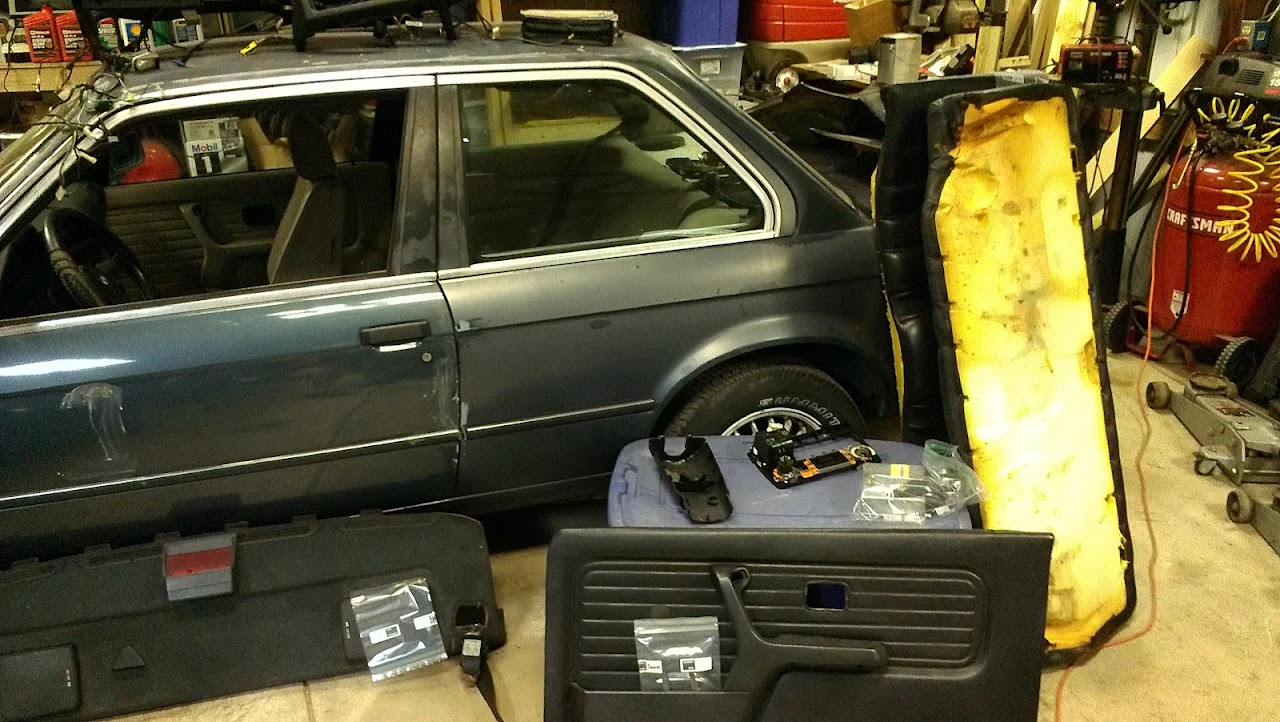
At this point I'm starting to amass a pretty good pile of E30 parts:
Whenever I take anything apart, all the fasteners and other small bits go into a labeled ziplock bag. I've driven myself nuts in the past trying to find small stuff. Never again:
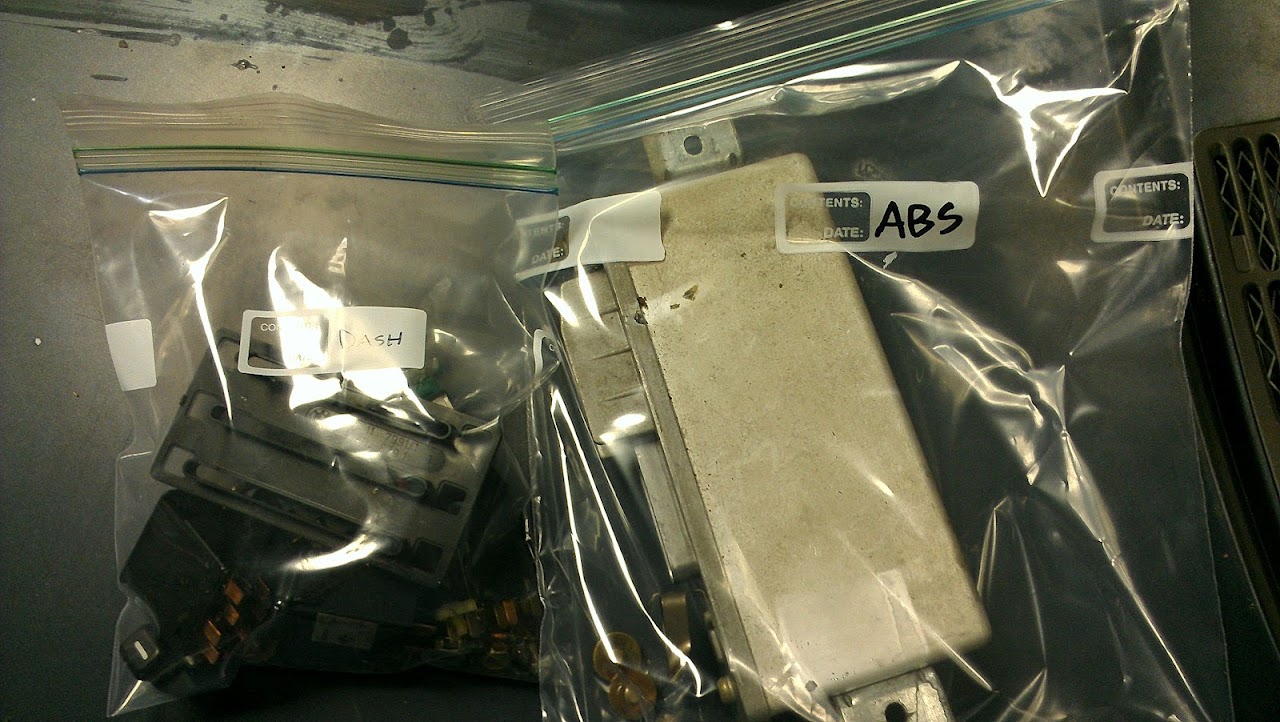
That's it for now. I have started a parallel build thread on R3Vlimited, as well.

irish44j
irish44j SuperDork
7/13/12 1:55 p.m.

nice. btw, dash swap is actually surprisingly easy. I'd say the take out and put in of my dash was a total of about 2-3 hours tops (with everything hooked up, etc).

I am, of course, not counting the time I had it out to do the flocking, which took a couple days.

Adrian_Thompson
Adrian_Thompson Dork
7/16/12 6:39 a.m.

I konw it's not my time Tom, but if It was me I'd swap the dash and dye the carpet properly. I'm all for getting the car running first to check out for other issues, but hey, winters long, you have time. Carpet and the dash really make a huge difference to how it feels to be in a car, getting that nice can make a huge difference.

Remember I work for beer and Pizza, we could do a dash swap party while the kids play on the zip line and the wives drink funny colored drinks

Tom_Spangler
Tom_Spangler GRM+ Memberand HalfDork
7/16/12 8:20 a.m.

Part of what I'm strugglling with right now is how "nice" I want this car to be. It's not going to be a pure track whore, it'll still be mostly a street car, but it was still an $800 car and will never be perfect anyhow, especially if I end up painting myself. So do I do all those extra bits of work to get it as perfect as I can, or do I say it's good enought on some of the interior stuff and concentrate on the mechanicals?

Ian F
Ian F UberDork
7/16/12 9:09 a.m.

That's definitely an interesting debate. Go too far and you can spend a lot of time and money turning an $800 car into a $2000 car, but spend $4000 doing it. The paint and body work may be your deciding factor. If you think the body is nice enough to do a pro respray vs. a DIY job, then maybe going the extra mile to properly restore the interior is worth it.

Are any of the tools from the parts car extras? As complete as my car is otherwise, the tool kit is missing quite a few bits.

Tom_Spangler
Tom_Spangler GRM+ Memberand HalfDork
7/18/12 9:06 a.m.
Ian F wrote: Are any of the tools from the parts car extras? As complete as my car is otherwise, the tool kit is missing quite a few bits.

Not many, but I can take a look and see what I have.

Tom_Spangler
Tom_Spangler GRM+ Memberand HalfDork
7/18/12 9:18 a.m.

Did a little bit last night, but as it was 100 degrees outside, I didn't get too ambitious. My main priority at the moment is to finish stripping the parts car so I can get it the hell out of my barn.

Given that the fuel pump on the project car is a known issue, I decided to grab the one from the parts car:

As I think I mentioned earlier, the project car's windshield is badly cracked, so I was budgeting a couple hundred bucks to take it to a glass shop to get a new one. Then I read that removing E30 windshields is pretty easy, so I decided to give it a go. Turns out it's only slightly less complex than falling off a log. Pop up this clip:

Then pull out the center band of the molding (the cracked, nasty-looking thing in the pic), give the window a gentle but firm push from the inside on the corner, and it'll pop out. Heck, it's a one-man job! Project car sans windshield:

Woohoo! I love E30s! I'll pop the good windshield in tonight, need some soapy water to get it in there.

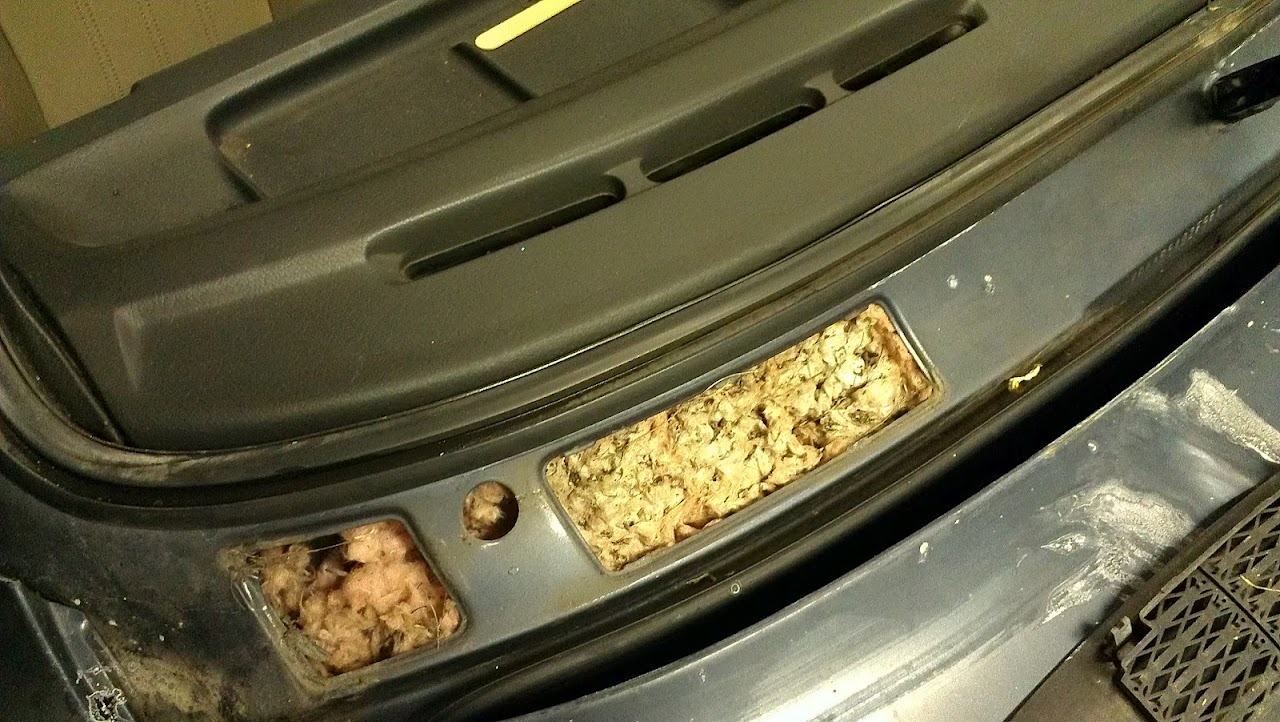
While poking around this area, I noticed some insulation under the cowl cover on the passengers side. I figured it was part of the car's insulation, then I noticed that the parts car didn't have it. Incidentally, it's nice to have two E30s to compare between to check things like this out. So I popped the cover off and found this:

Yeah, that's a mouse nest. The car was living in a barn when I bought it. Like literally a barn, with a dirt floor and horses and such, on a farm. So, no big surprise. Need to shop vac that out.

That's it for now, next step is to get everything out of the engine bay, grab the engine and trans, then I'm done stripping the parts car!

4cylndrfury
4cylndrfury UltimaDork
7/18/12 9:31 a.m.

this is a cool project, nice and straightforward...keep up the good work!

Tom_Spangler
Tom_Spangler GRM+ Memberand HalfDork
7/23/12 2:42 p.m.

Continuing to strip the parts car. This is a good exercise, because not only am I getting a huge pile of parts, I'm learning a lot about how these cars go together.

I decided to install the cracked windshield in the parts car just for the practice. I didn't want to screw anything up with my good windshield. It wasn't too bad, took me about 45 minutes:

Lessons learned: Use LOTS of soapy water to lubricate it, use a plastic putty knife or similar to work the glass back into the rubber, and go slow and be patient.

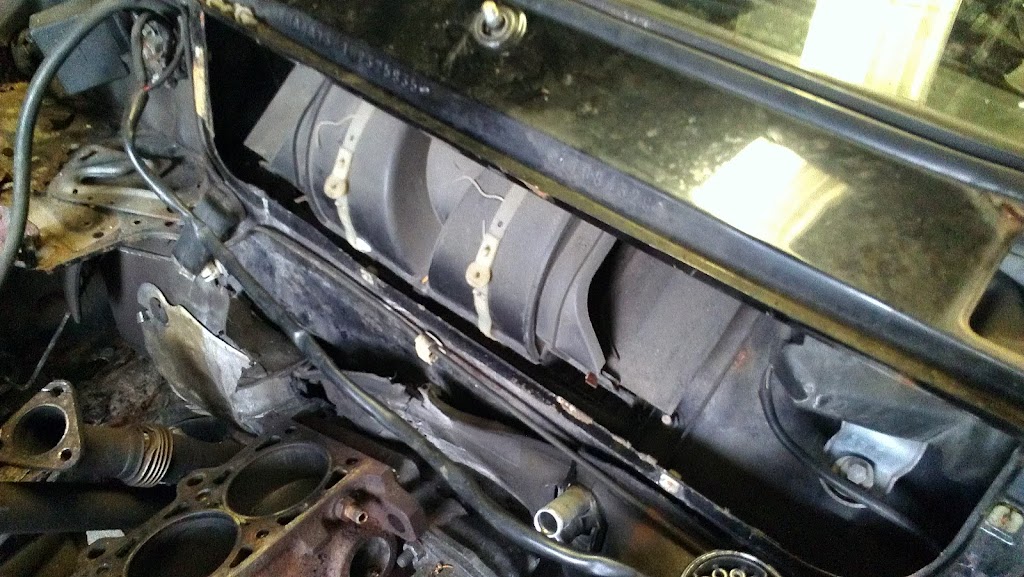
With the interior done, I moved to the engine compartment to grab what I can and make more room to get the engine out. Figured I should grab the blower motor and wiper motor. Kind of a PITA, but not too bad:

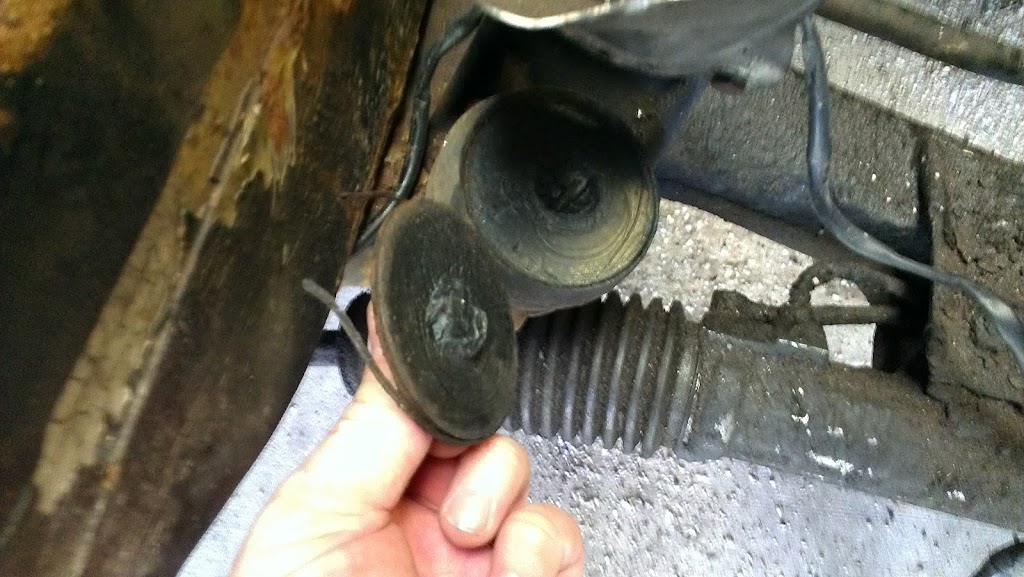
Getting ready to pull the engine and tranny together, I crawled underneath to disocnnect and unbolt the tranny. I found this:

Say, isn't that supposed to be connected on BOTH sides?

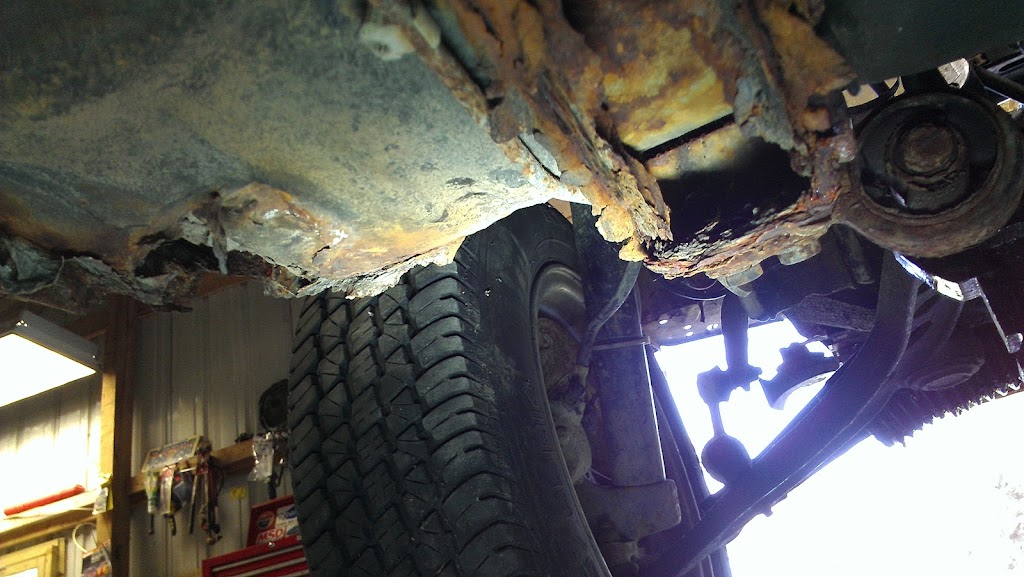
Not that I've heard any of this talk, but just in case anyone was concerned about me stripping out a "nice" 325is and hauling it off to the crusher, I give you this view from underneath it:

Laying under the car, there are at least 5 places where I could clearly see into the interior. This car is a total loss. Thank you, Michigan roads.

Getting ready to pull the engine. With no head, there was no place to really attach a lift plate or anything, so I just did it the old-fashioned way and wrapped a couple of chains around it:

After a bit of wiggling and maneuvering, it was out!

After the engine was out, I took a quick look at the mounts. I didn't think I'd want to use them, and looking more closely at the passenger's side one confirmed it:

This is the passenger's side mount, same side as the broken trans mount bolt. So the engine and tranny were pretty free to rotate that way. Yikes!

So, pretty good progress overall. I just need to go through the parts car one more time and make sure there isn't anything else I might need, then I can haul it away and get to work on the project car again.

Tom_Spangler
Tom_Spangler GRM+ Memberand HalfDork
7/25/12 7:19 p.m.

Bye-bye to the parts car:

In case anyone was wondering, this car, which had a gutted interior, no engine/trans/driveshaft/diff, no trunklid or hood, and various other miscellaneous bits removed, and had a healthy dose of ferrous oxide lightening, weighed 1560 pounds. The fenders and windshield were inside the car when I junked it. They picked it up right off my trailer with this giant forklift thingy with like 25-foot arms. Pretty impressive. And I got $109.20 for it. A rare positive entry in the log for this project.

Ian F
Ian F UberDork
7/25/12 8:43 p.m.

Umm... You didn't send the wheels to the crusher with the car, did you?

Oh yeah... save the strut housings too.

Tom_Spangler
Tom_Spangler GRM+ Memberand HalfDork
7/26/12 9:34 a.m.
Ian F wrote: Umm... You didn't send the wheels to the crusher with the car, did you?

I did. They were not real baskeweaves, I kept those, these were some kind of knockoff. And they were clearly not real E30 wheels, they were double-drilled. You can see it in the pic if you look closely. I wouldn't trust them to drive accross the street, frankly. And I needed the car to roll or I would never have been able to get it onto my trailer.

Nope, didn't grab the strut housings. I'm sure there will be other things I will wish I had, but overall, I harvested a TON of stuff from this car, so I'm happy.

Ian F
Ian F UberDork
7/26/12 10:55 a.m.

Ah... the later IS strut housings are different and generally the ones to use if you plan to go with coil-overs at some point. Plus, having extra housings makes it easier to send them out to a place like Ground Control or AST while keeping the car in service.

Tom_Spangler
Tom_Spangler GRM+ Memberand HalfDork
7/26/12 11:42 a.m.

I probably should have grabbed them, but ah well. Not planning on doing coilvers right now, and as this is a toy, having it out of service is no big deal anyhow. Besides, the suspension bits were pretty rusty and a PITA to get off.

miatame
miatame HalfDork
7/26/12 12:34 p.m.

This makes me feel great for buying a '90 325is for $800...it ran good enough to drive it home and has been bullet proof since the $2006 Challenge. It is not rust free though...surface rust has turn to rot...

Oh and it smelled like the stripper we bought the car from. You'd think buying a BMW from a stripper would be a feel-good story. It was not.

Moving_Target
Moving_Target New Reader
7/26/12 3:06 p.m.

I agree, paint stripper is nasty stuff....

Adrian_Thompson
Adrian_Thompson Dork
7/27/12 12:57 p.m.

This needs moving to the new project car forum

1 2 3 4 ... 7

You'll need to log in to post.

Our Preferred Partners
rgBjRQmFEQpkrFURTVc0h6wVvsKWTI8EAdxpyO1hLqKUl7gNIFk0aHH3KXTTUtV9