1 2 3 4
fidelity101
fidelity101 SuperDork
11/17/14 1:02 p.m.

In reply to armt350:

excellent! We had some German interns at work over the summer and they saw my truck and laughed and said I would never be able to drive it near a city in Germany, I thought they were talking about the parking. Until they corrected me. lol

ssswitch
ssswitch Reader
11/17/14 3:02 p.m.

What an awesome swap! Hope the brake mods work out really well for you because I bet this thing is a hoot to drive.

Bobzilla
Bobzilla PowerDork
11/17/14 3:49 p.m.
armt350 wrote: If it got inspected as a swap then yes euro 0 haha. But on the sniffer it puts out less than it did as a stock 350Z and meets euro 4 emissions standards. It also gets better gas mileage at cruise.

This is absolutely hilarious to me. It's cleaner, makes more power, gets better mileage AND it's "old school pushrods" and stuff.

conesare2seconds
conesare2seconds HalfDork
11/18/14 12:13 p.m.

Welcome to the board; great build. [Sidebar: I was born in Nurnburg, hope to visit Bavaria again some day, maybe for the Christmas market.]

armt350
armt350 New Reader
11/28/14 1:14 p.m.

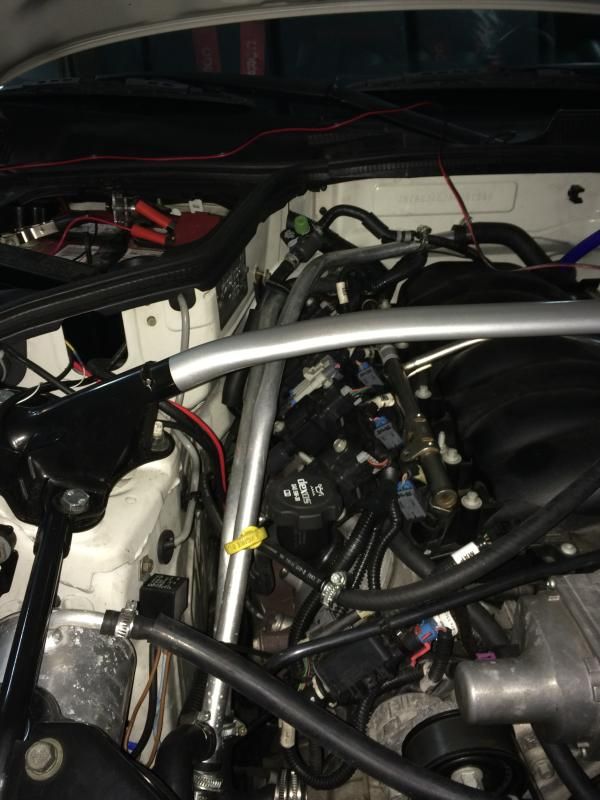
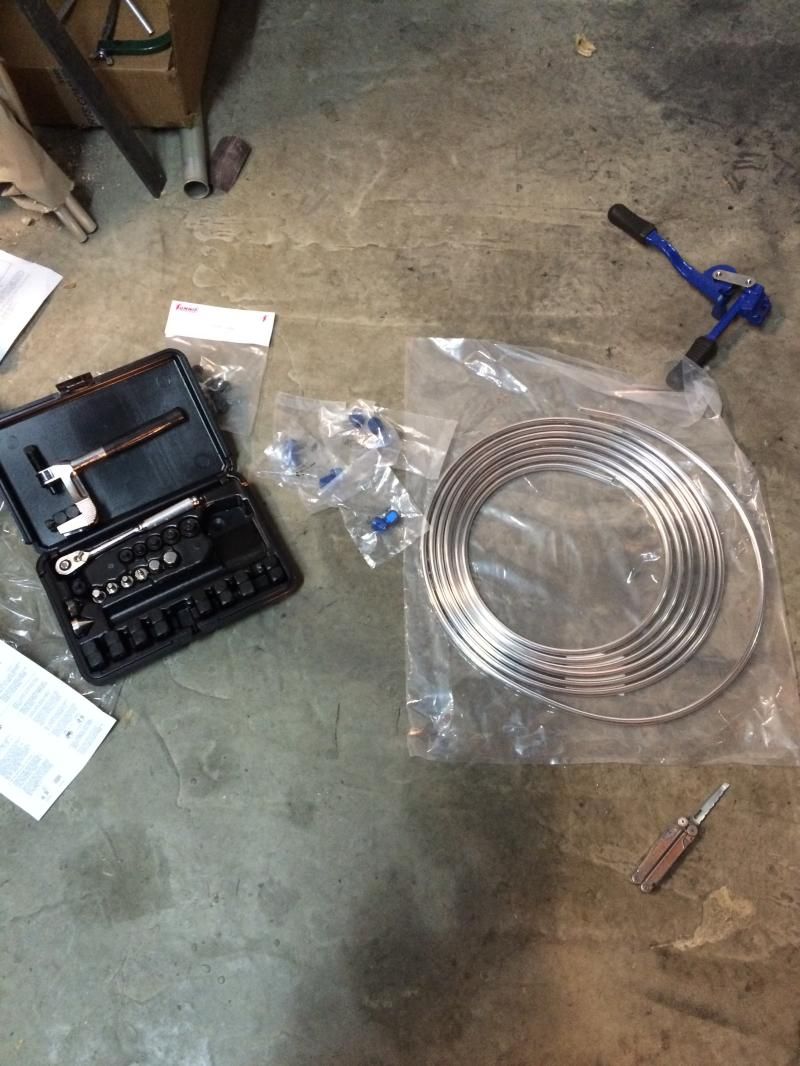
My SO finally got sick of me enough to banish me to the workshop. I spent today making up the coolant heater hardlines. I used 3/4 inch aluminum tubing. I ended up using a coil spring set of benders from eastwood.

If anyone is thinking of it, don't buy these, they are not worth the pain. Someone posted on here about using a conduit bender and that would be exactly how I would do it next time. Here are the lines installed.

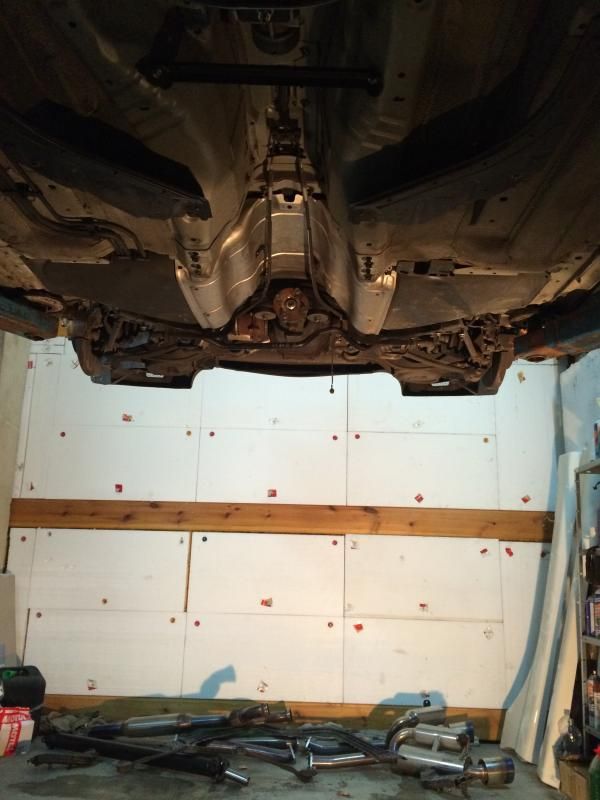
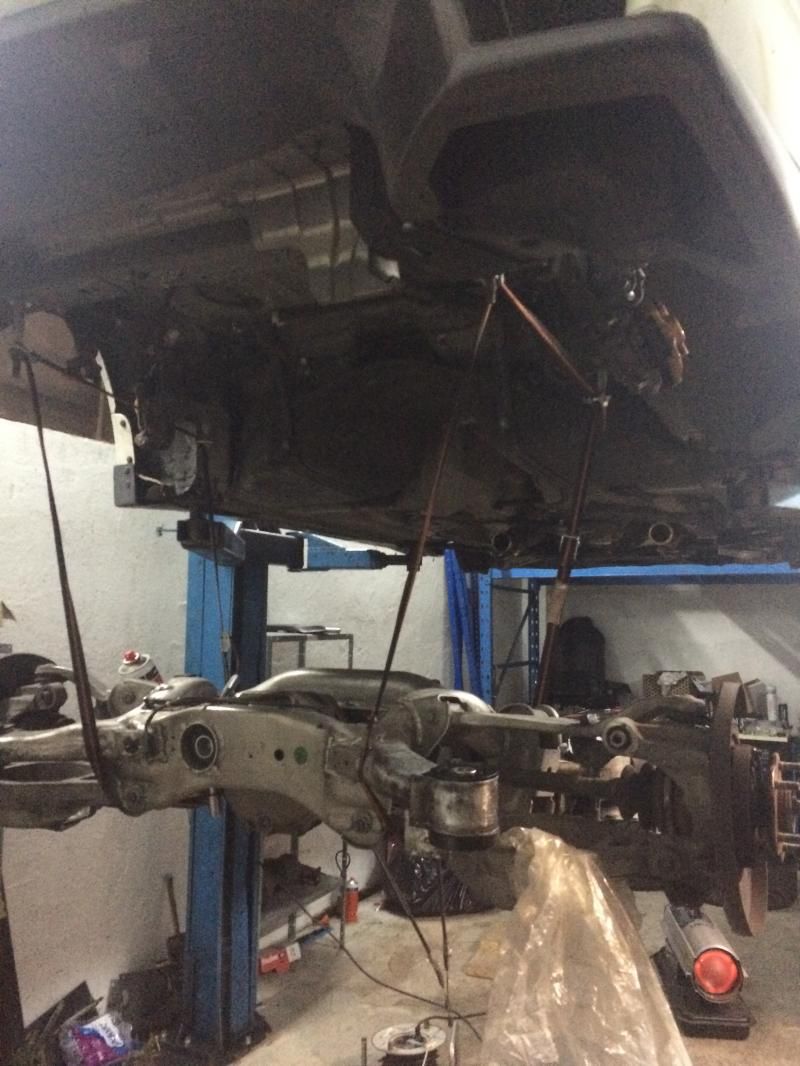
One of my other winter projects on the car is to run a better setup for the fuel system. Since the Z has a returnless fuel system from the factory my surge tank currently sits behind the plastics behind the seats and puts a bit of fuel smell in the car if it sits for long periods. I'm going to drop the fuel tank and run a return fuel line to the engine bay. After that i'm going to relocate the battery to the back of the car and locate the surge tank where the battery was. Here is the prep up for removing the rear subframe and then the fuel tank some point down the road.

Thats all for today.

armt350
armt350 New Reader
2/20/15 3:12 p.m.

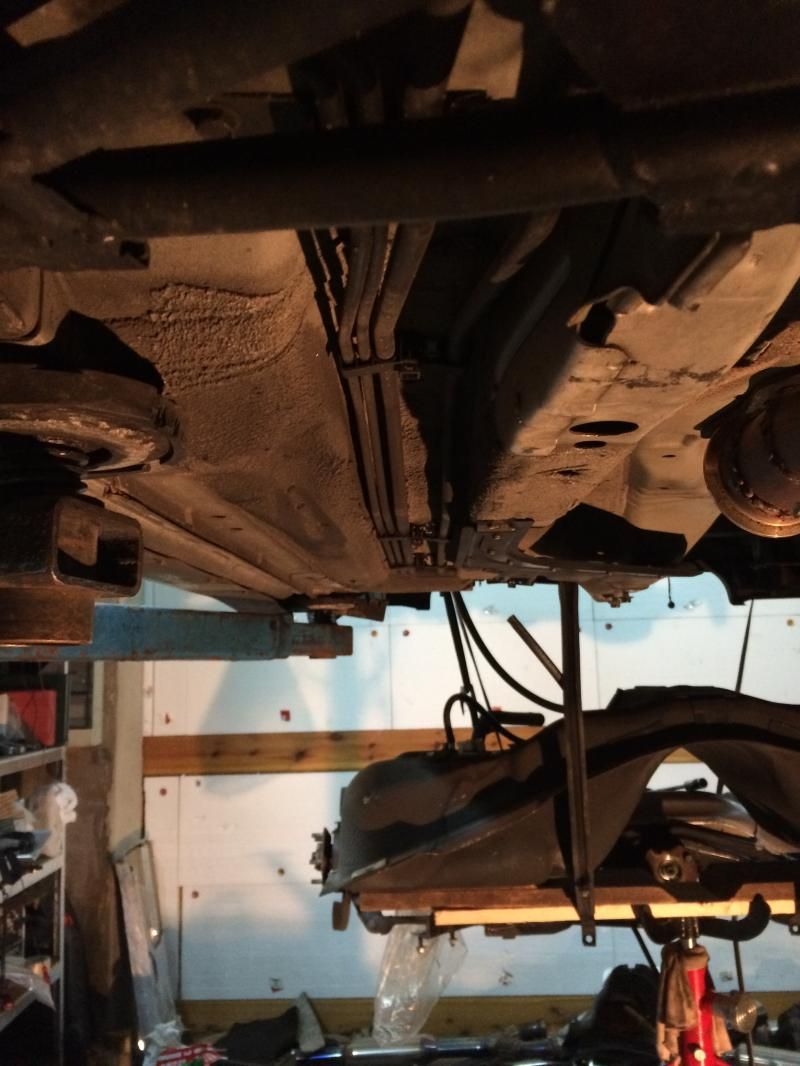
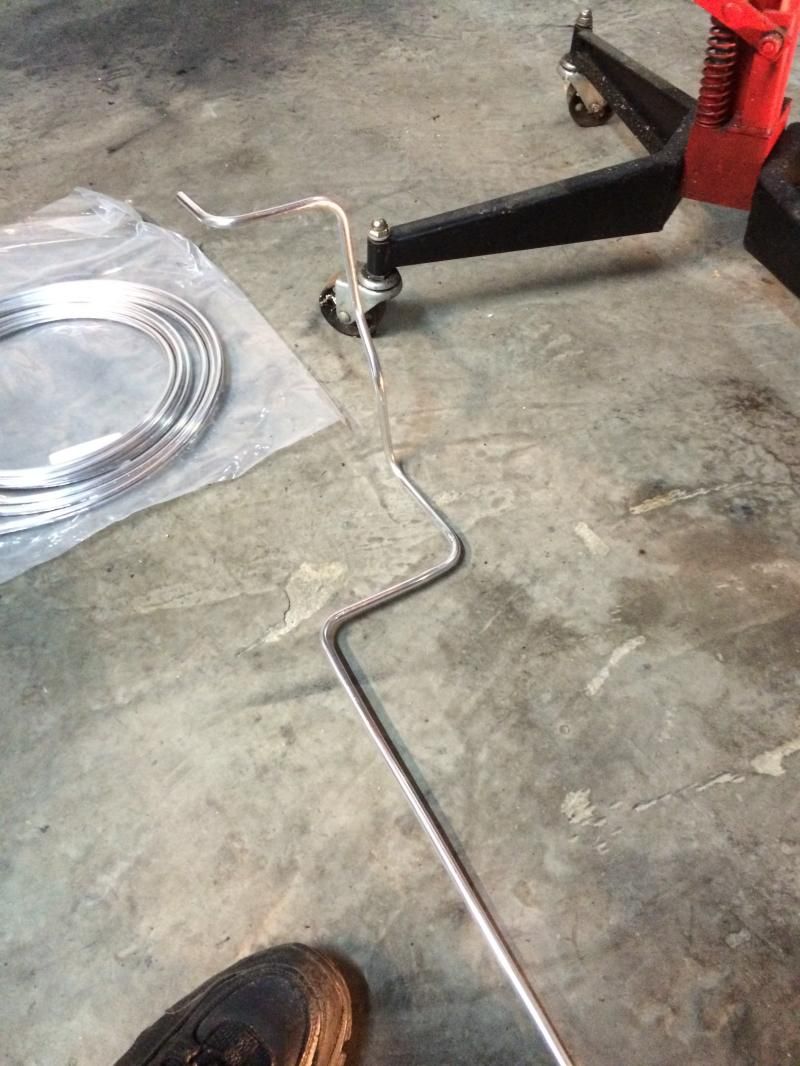
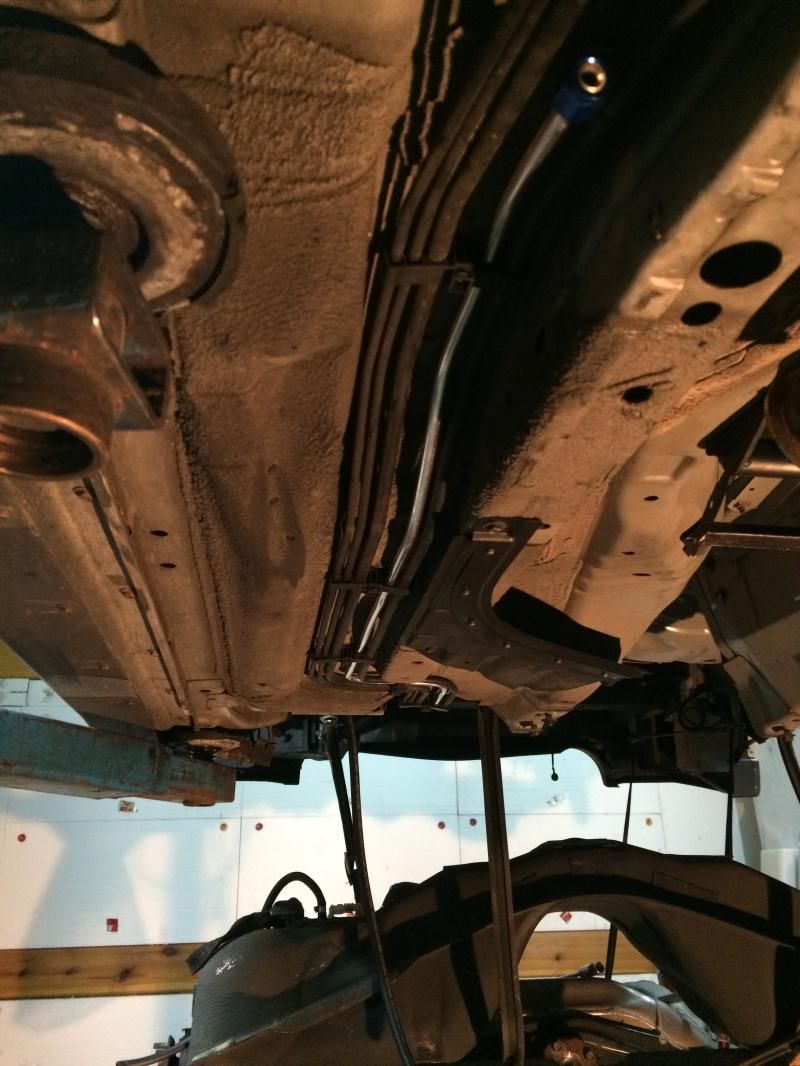
So I had some time off this weekend so I did what anyone would do and went to the garage.I finally got the subframe out of the car. Next the fuel tank came out. I fabbed up the first half of the line, I'll be breaking it up into 2 sections joined by an AN - 6 fitting. I used 3/8 inch hard line tubing since it will allow for upgrading the fuel system if I go FI later on.

Here is where i'm going to route the line. its like Nissan knew it should have a return style and made the space to upgrade. Raw materials and tools, 3/8 in OD hardline, tubing bender, swage kit/flaring tool. Here is the finished product And finally installed in the car After that I reassembled the back end and put the fuel tank back up and the rear subframe back on. Here is a little bit of a teaser for whats coming next.

armt350
armt350 New Reader
2/20/15 3:22 p.m.

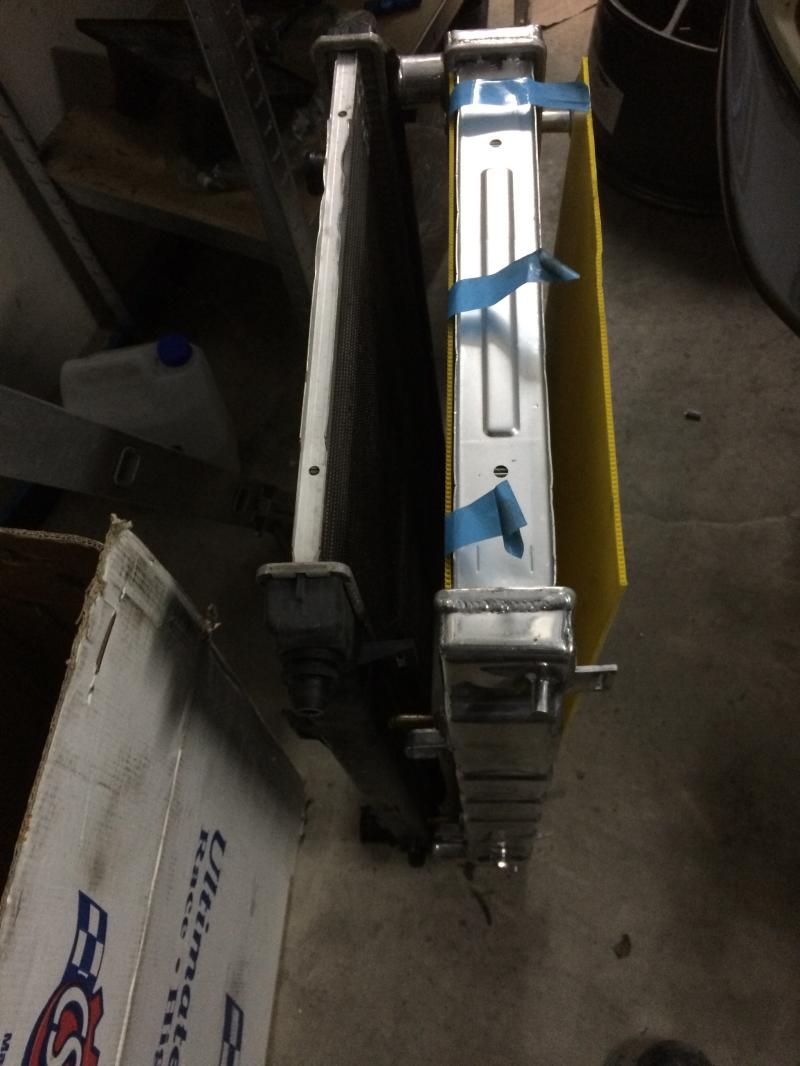
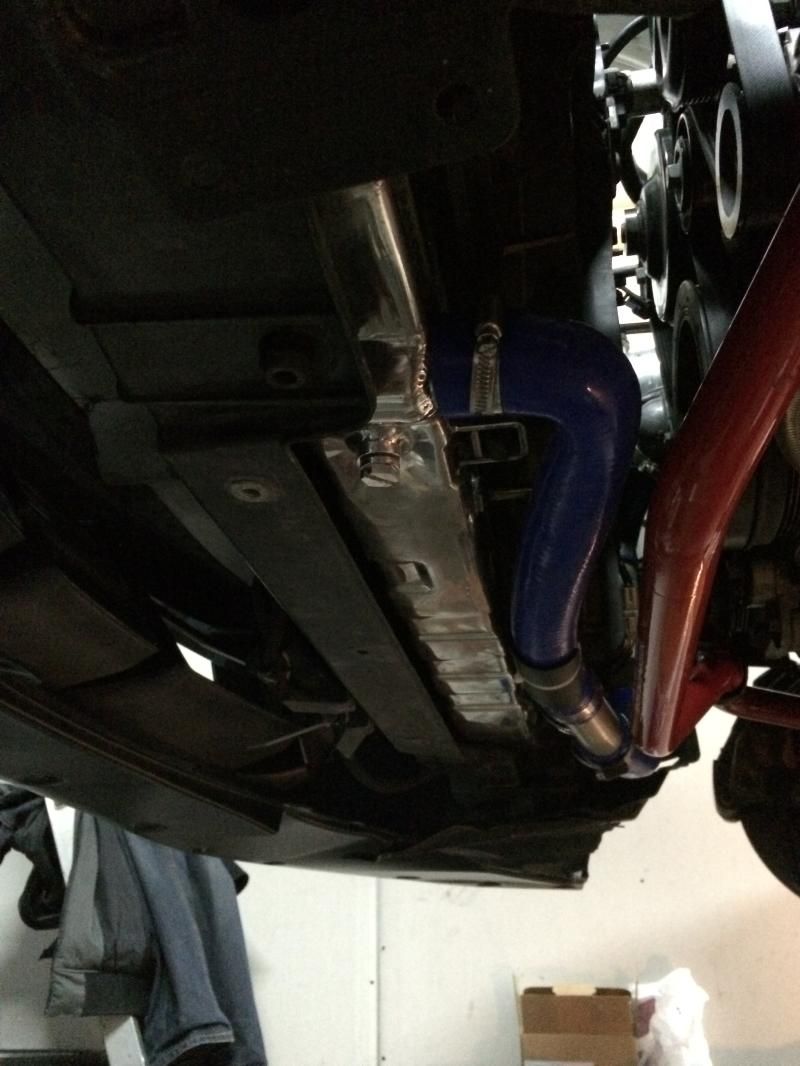
More work on the car today, I'm still chipping away at the next weak part of the car. The overheating on the track just wouldn't do so first up is a new radiator. A CSF dual pass unit should do. New vs OEM. I forgot just how thin and flimsy the OEM rad was. Its no wonder that it wasn't meeting the demand. Here it is in its new home.

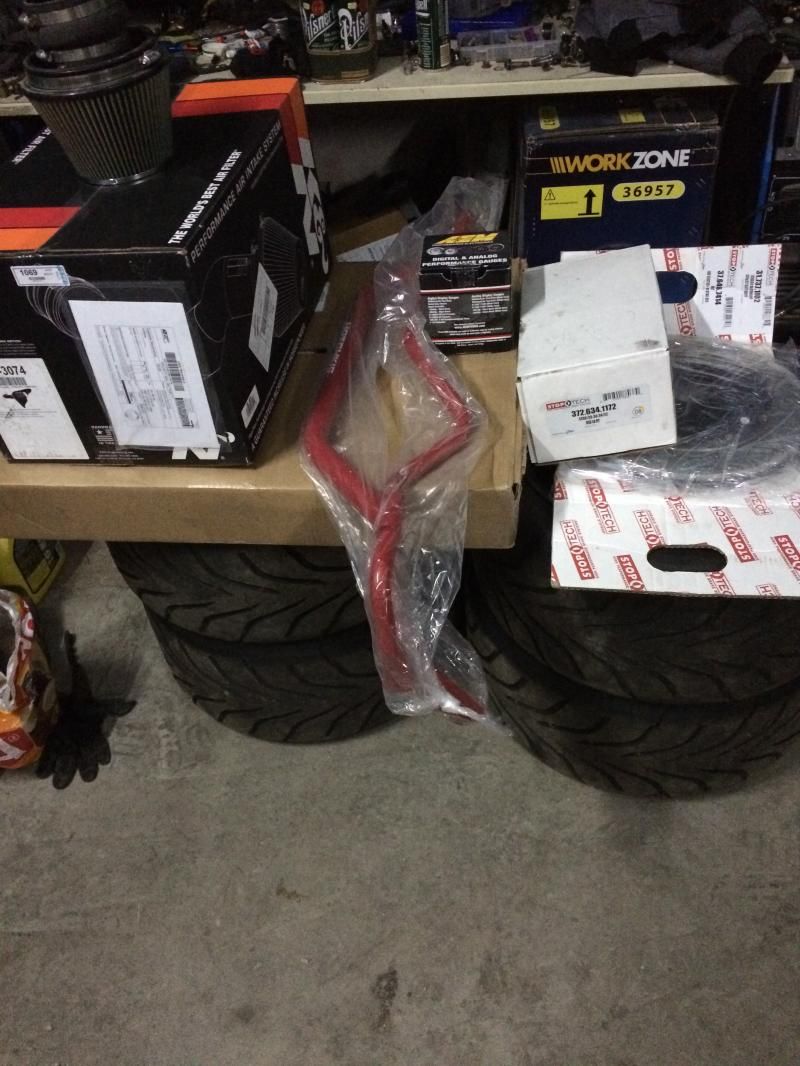
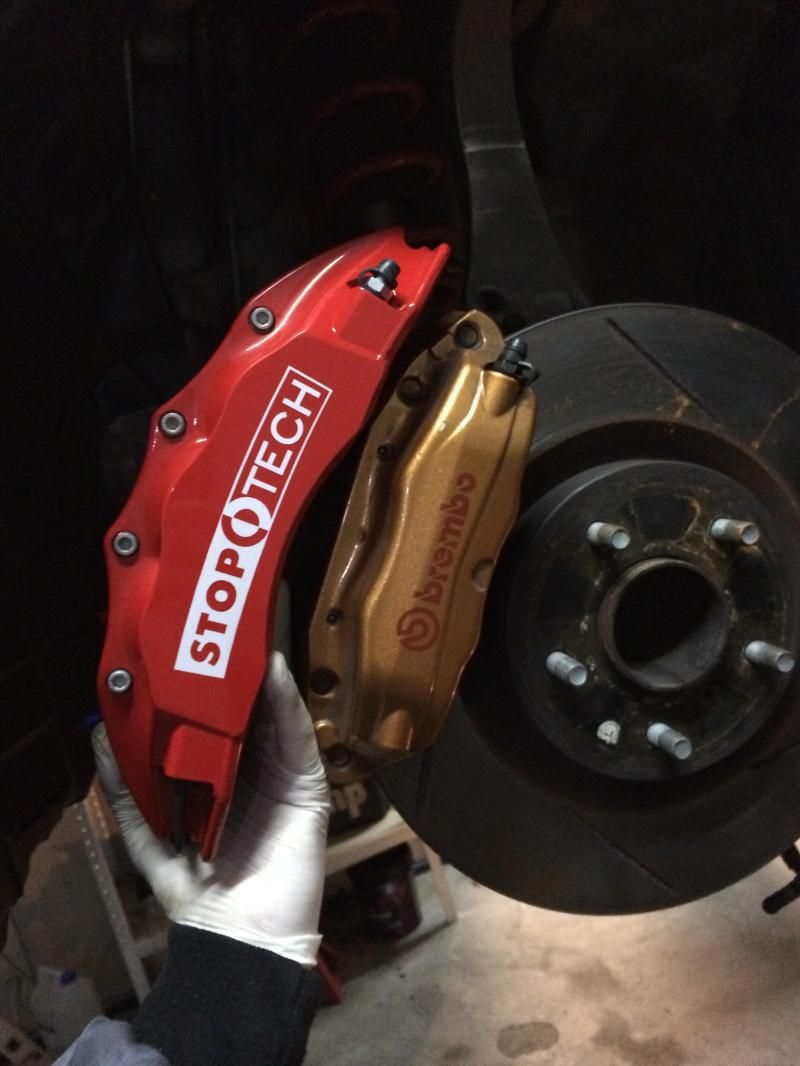
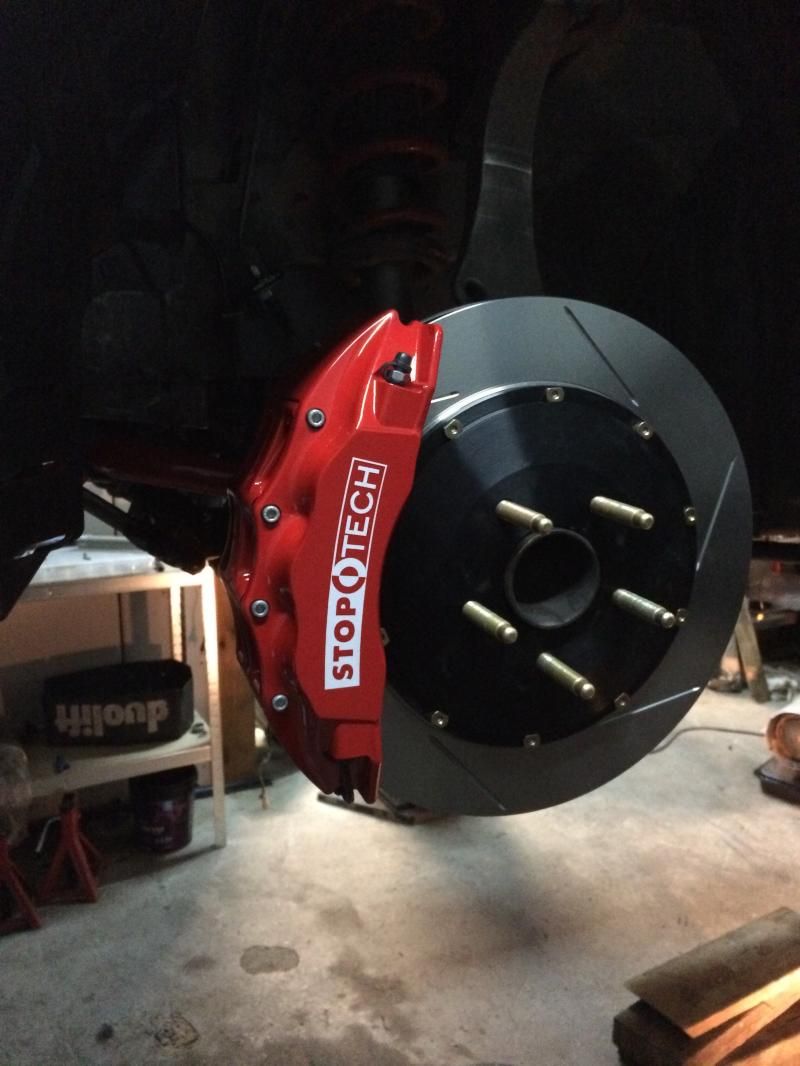
Next was the brake fade/failure. A set of Stoptech 6 pots should be just what the doctor ordered.

I also took the time to throw on some ARP extended lugs as well.

I've got another trick I'm working on for the brakes but I have to wait and see if it pans out. Maybe more on that later.

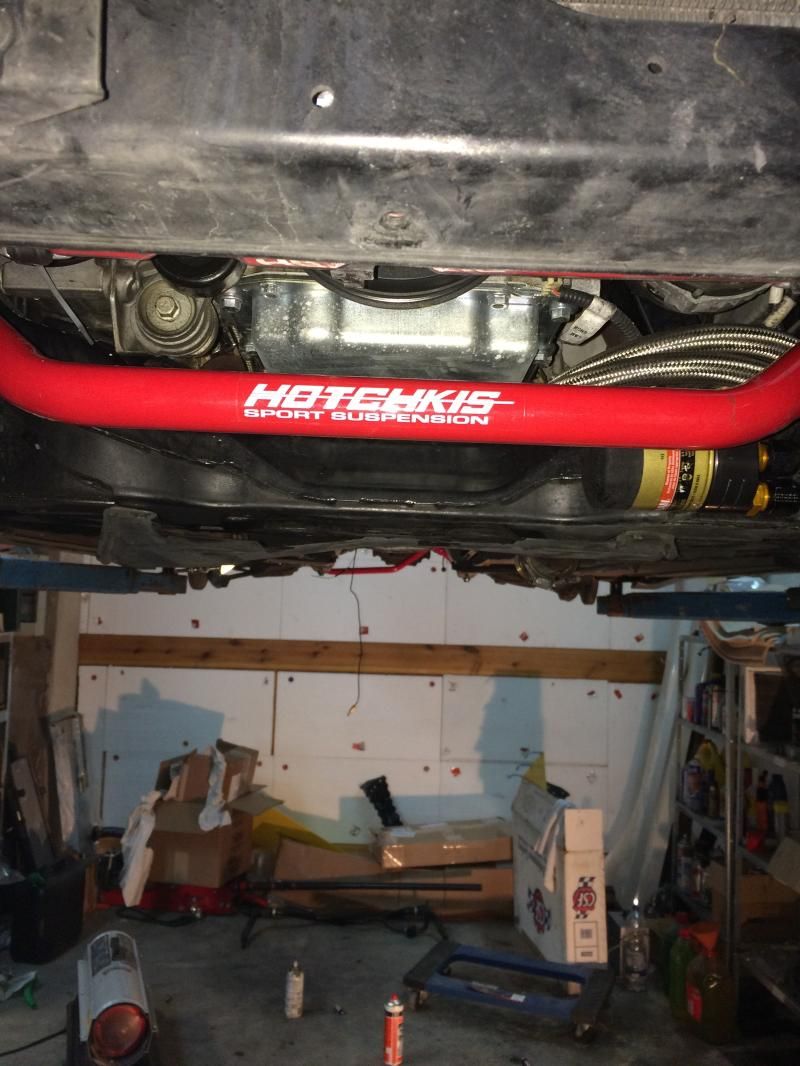
Moving onto the handling, The car is well mannered but its not confidence inspiring near the limit. The coilovers and various camber arms have not arrived yet but I went ahead and threw on the sway bars.

I've got loads more to do but time is running short before the cars winter hibernation needs to end. Its this way every year it seems but I somehow always end up with the same problem.

mbruneaux
mbruneaux New Reader
2/20/15 9:36 p.m.

Very cool build

armt350
armt350 New Reader
7/30/15 3:29 p.m.

So I kinda fell off the net a bit, but I'm back now so time to catch you all up on the car.

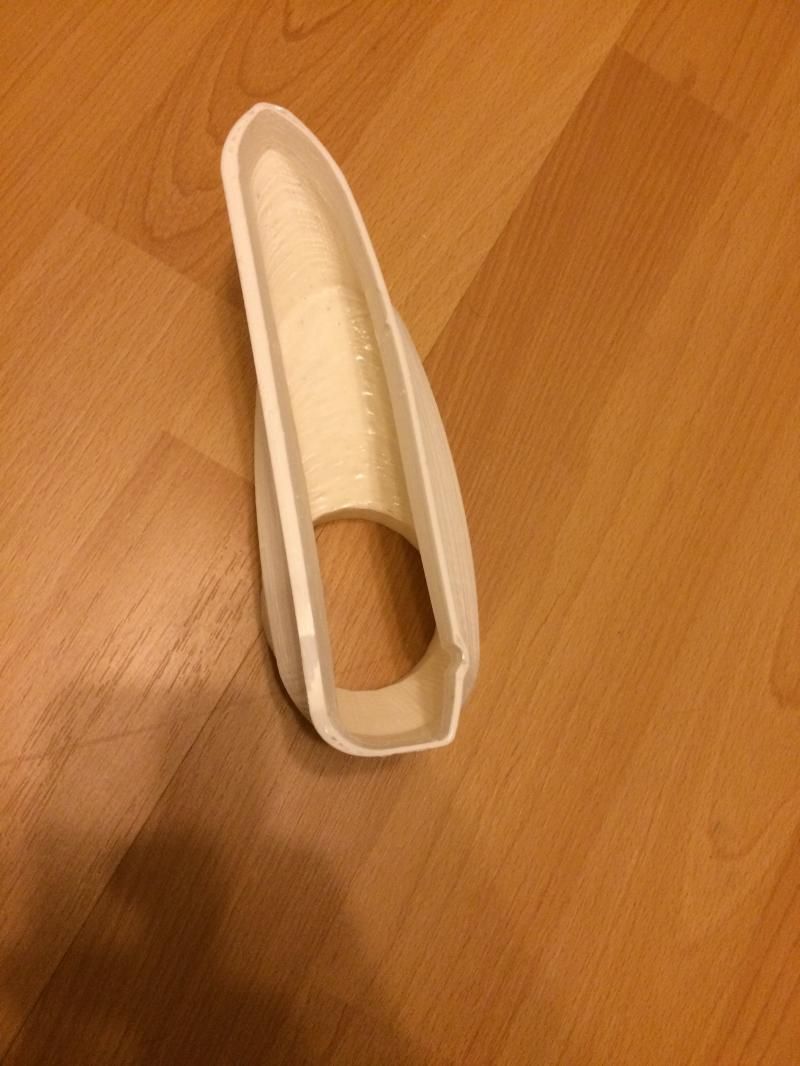
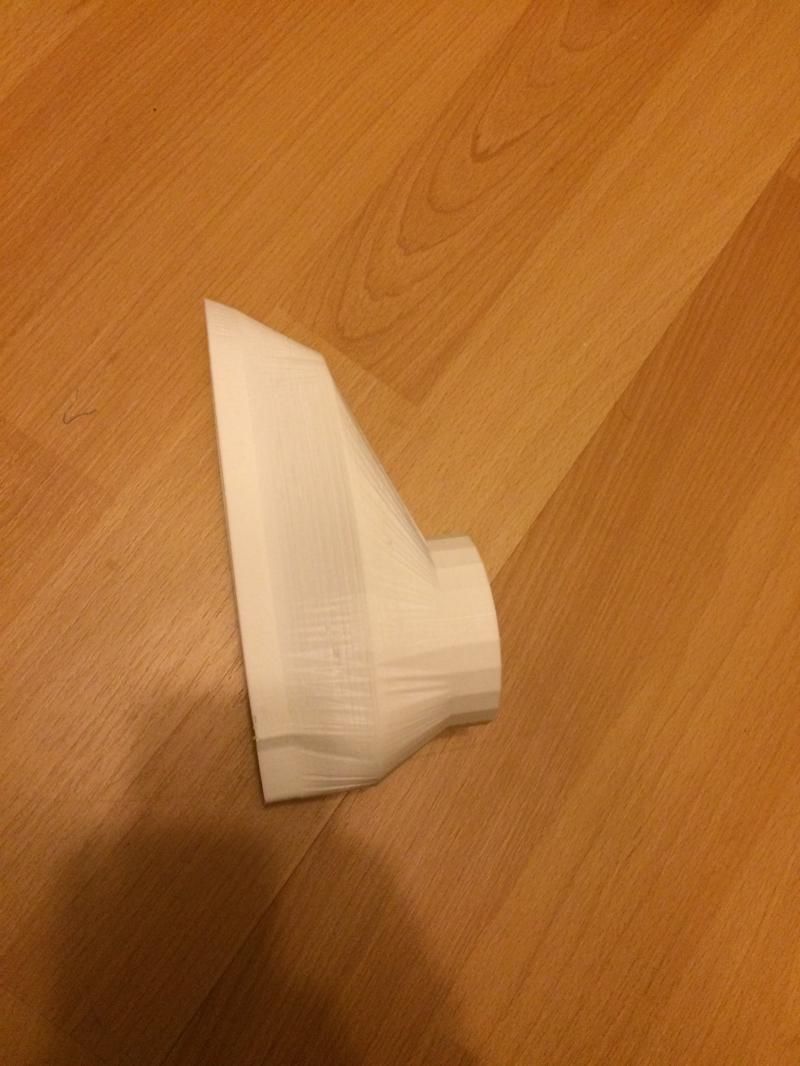
Continuing to improve the the braking system has led me to make a set of brake ducts for the car. I was not thrilled with the selection of off the shelf brake duct kits for the car so I decided to use my 3d printer I just built and rapid prototype a set specifically fitting the Nismo front bumper. I designed the parts in sketchup. While not as advanced as the solidworks suite I have at work, its a lot easier on the hardware and simple to use.

Here is the first duct printing out

Now for the test fit with a quick bracket

The plastic will likely not withstand the radiated heat at a standstill so at a later point i'm going to use the plastic printed parts to make a mold and then fab some out of carbon fiber.

The front bumper is made to fit the left and right opening and I will likely keep those plastic since there is not close source of heat.

They slide directly over the 2 opening and can be fixed on with either good 2 sided tape or with rivets or screws.

The entire system is based around 2 inch tubing.

armt350
armt350 New Reader
7/30/15 3:42 p.m.

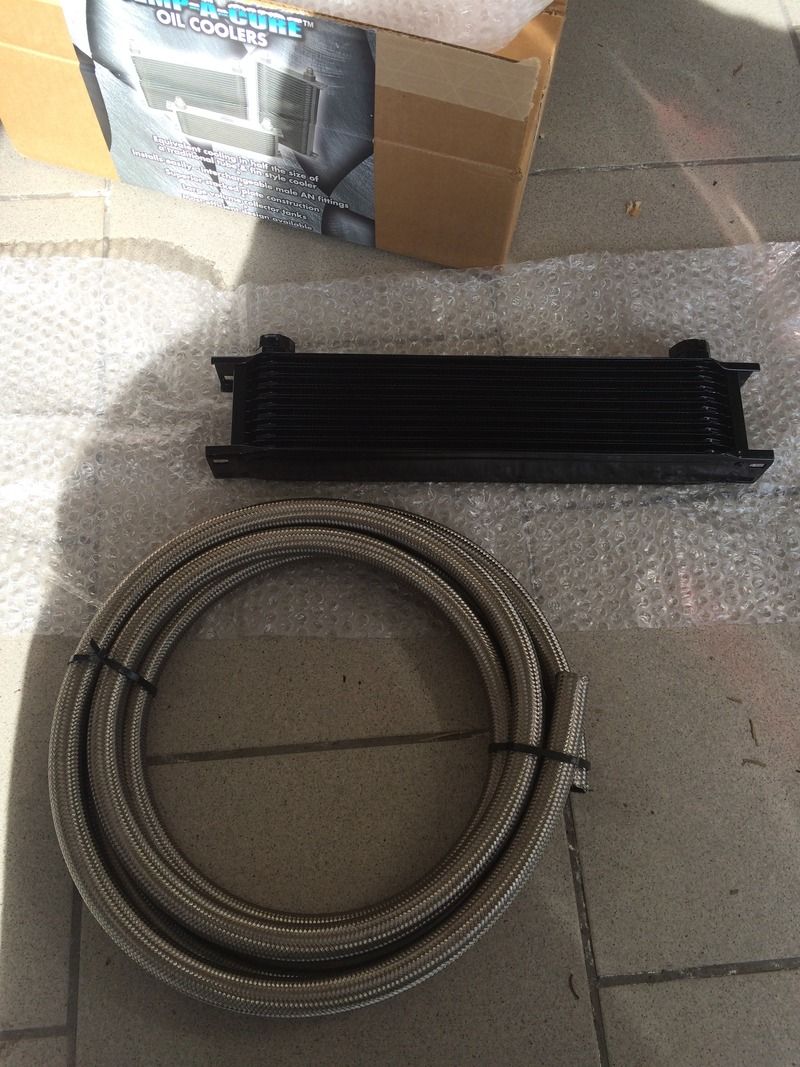
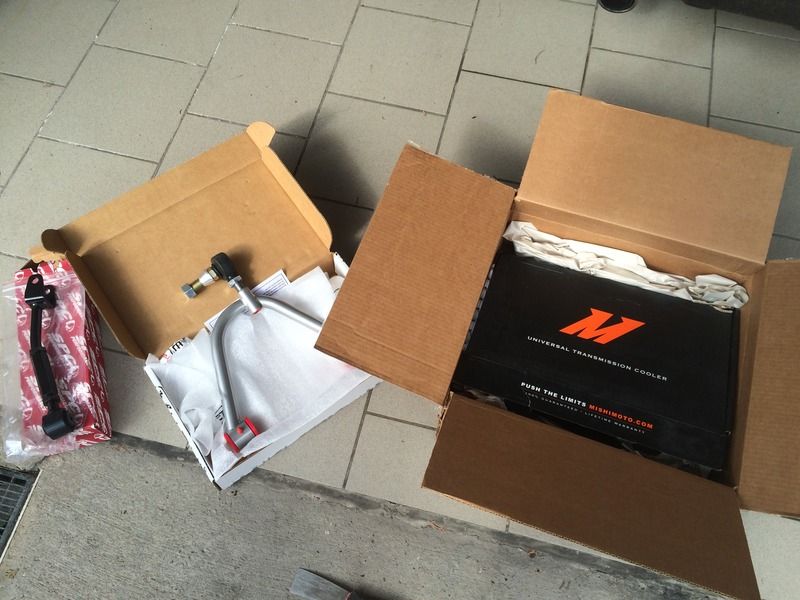
Once again the postman was good to me.

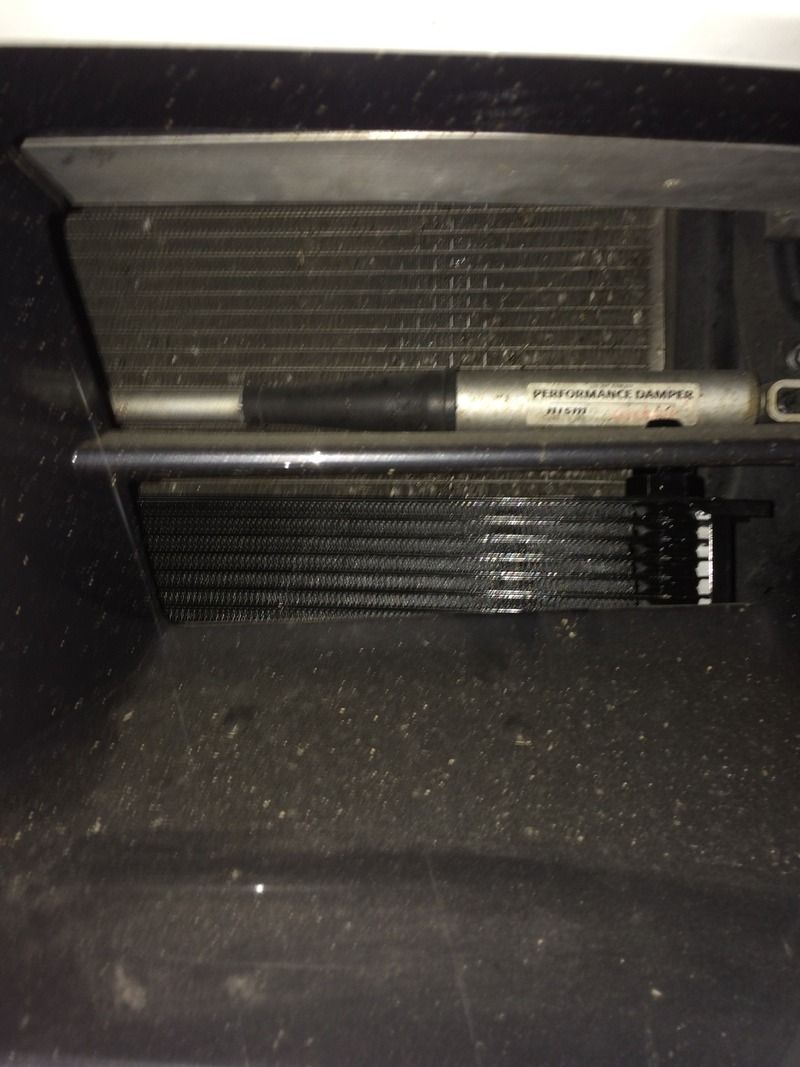
The oil temps have not been a problem on the tame tune I have but as I go for more power I can see that being an issue. The earls cooler is only 13 rows but is very wide and will let me maximize my front grill.

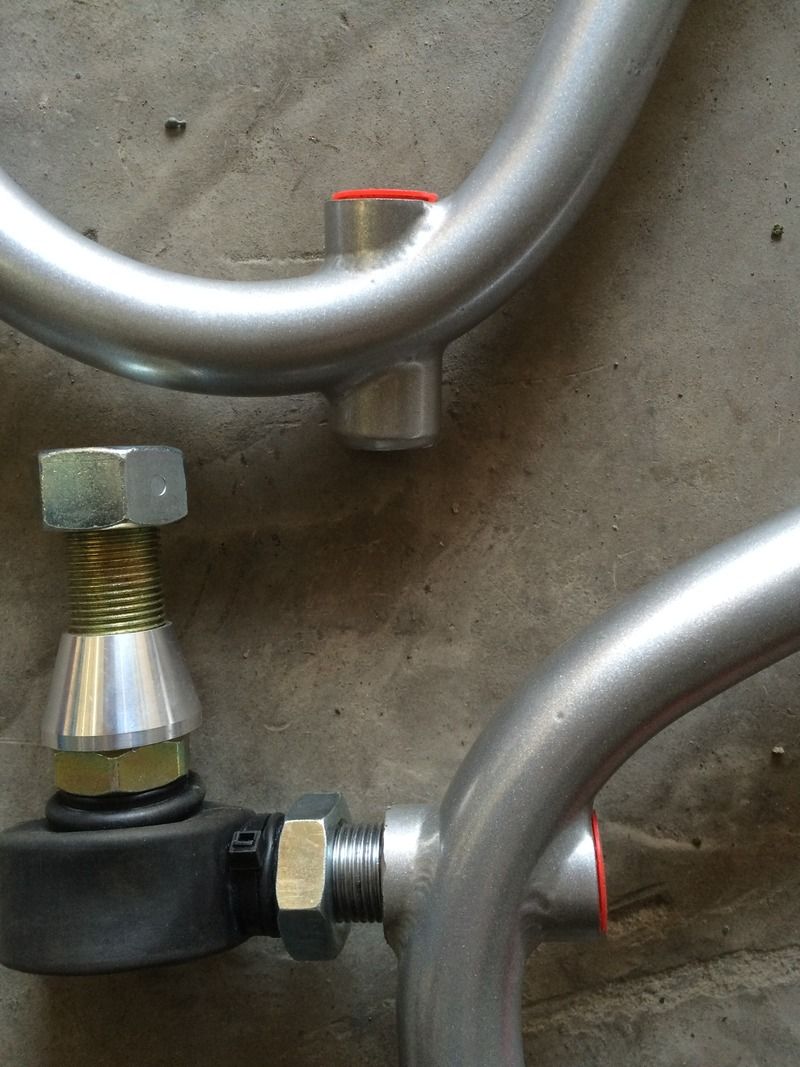
In line with cooling is a power steering cooler. I have noticed some high temps from the KRC pump so its just a precaution. Also in preperation for what is to come is some suspension arms. Kinetix for the front and SPC for the rear.

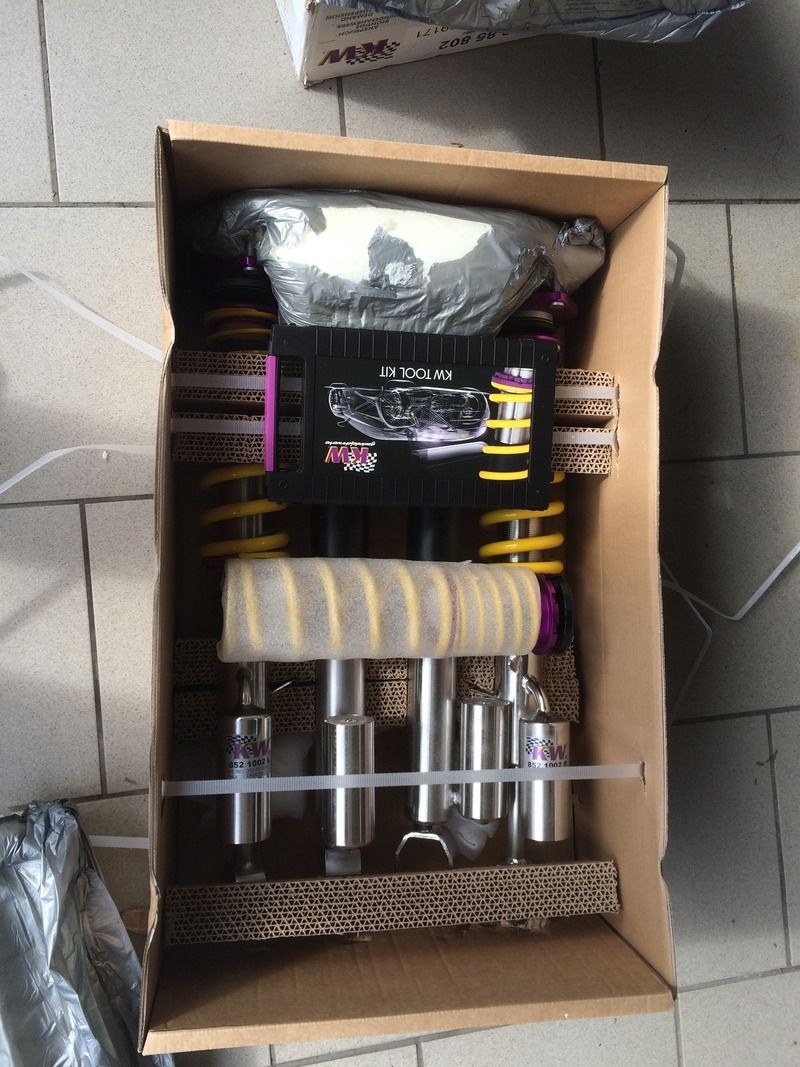
Since the car is going to see some pretty hefty track time the OEM Nismo suspension had to go. Bring in the KW Clubsports!

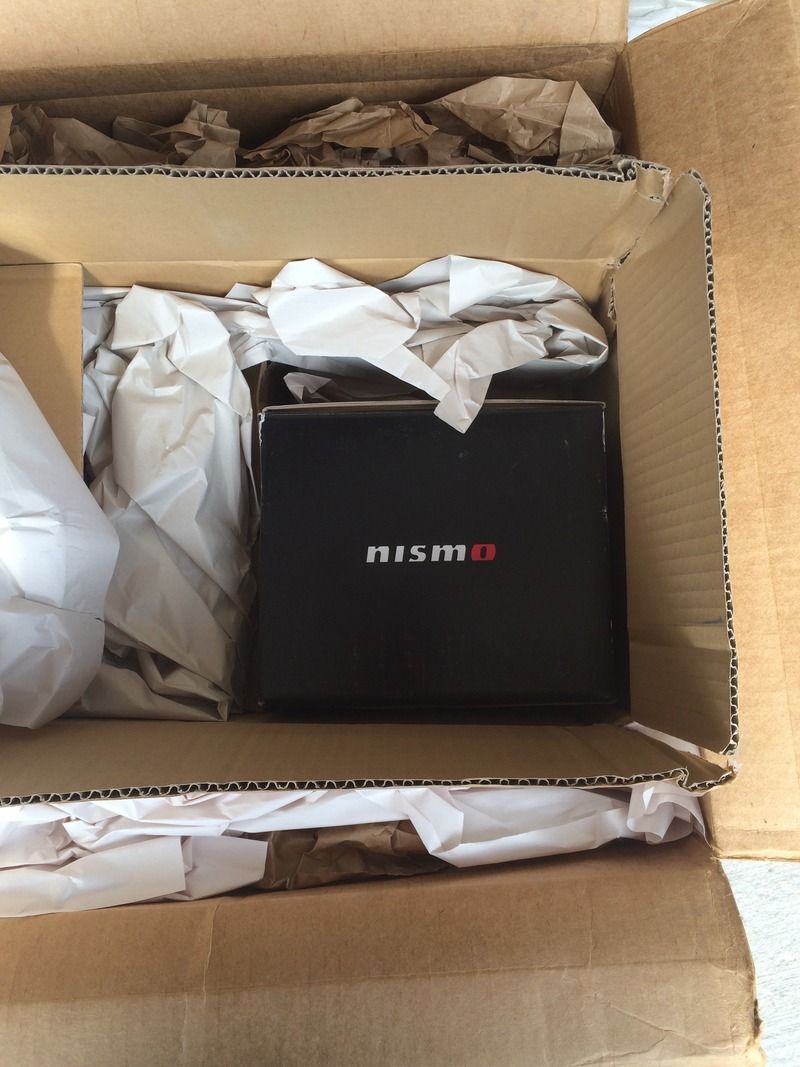
Just to wrap it all up, A Nismo GT 1.5 way LSD to get the power to the ground. Time to really make this car shine.

armt350
armt350 New Reader
7/30/15 3:50 p.m.

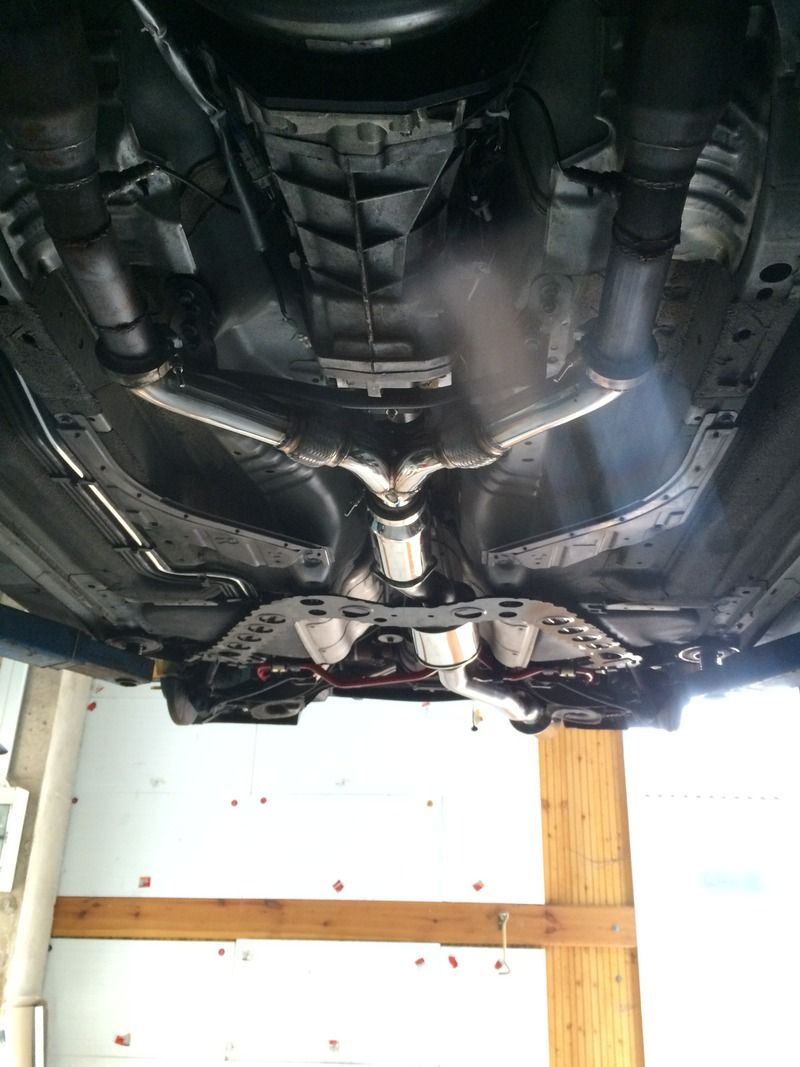
I decided to redo the exhaust system. The one I ran last year was a chinese ebay kit that was heavy as hell and I'm not entirely sure was even better for power over a stock exhaust. So I put together a lightweight single exhaust.

Admittedly, I'll miss the dual exhaust look but I can always feel better about the 30+lbs I just got rid of off the car.

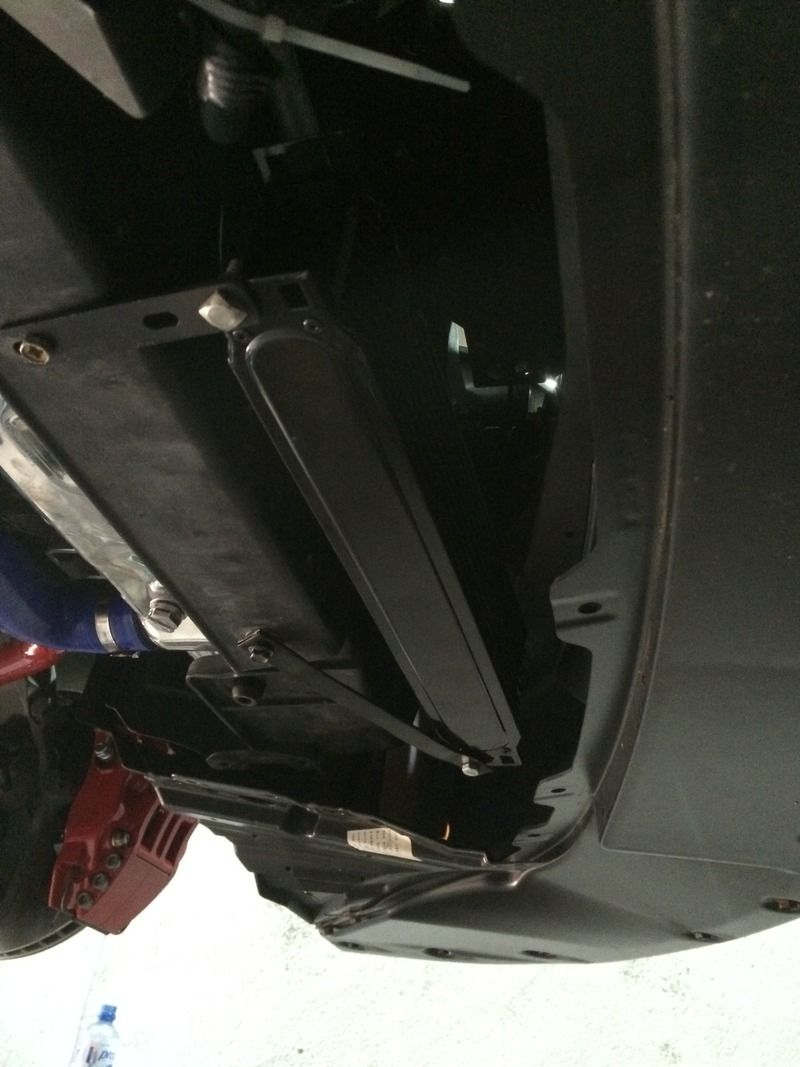
The rest of the time today was spent making the mounts for the oil cooler setup.

Its a slim cooler so it will fit nicely with the future ducting.

I nailed down the suspension today. The kinetix control arms will not give me the negative camber I wanted so I needed to modify them a bit. Here is the stock vs modified kinetix arms.

Shaving down the threaded portion should get me to just over 3 degrees of camber where I wanted to be.

After that was down to installing the KW suspension. It was pretty straight forward with the exception of the rear coilover bounce setting. The clicks for each setting are damned near nonexistent. I had to go off of feel just to make sure I got them setup right.

on another note, My OCD almost kicked in and I really wanted to make everything color matching... FML.

Fobroader
Fobroader Reader
7/30/15 4:29 p.m.

Fantastic project man!!!

TGMF
TGMF Reader
7/31/15 7:41 a.m.

nice work! I'd love to follow the same path someday with my Z. But, for now, any interest in selling some stock parts? specifically the nismo suspension and seats?

Fitzauto
Fitzauto HalfDork
7/31/15 8:49 a.m.

Looking awesome. Cant wait to see the finished product doing some donuts/drifts/killing tires!

armt350
armt350 New Reader
7/31/15 10:01 a.m.

Thanks guys, The project is actually on the road and being flogged. I just have to catch up on my posts.

@TGMF, I've got no use for those so make an offer, I'll put the cash towards my bumpstick(cam) fund. More to follow today with video!

Harvey
Harvey GRM+ Memberand HalfDork
7/31/15 11:50 a.m.

Looks cool. More vids!

TGMF
TGMF Reader
7/31/15 2:10 p.m.
armt350 wrote: Thanks guys, The project is actually on the road and being flogged. I just have to catch up on my posts. @TGMF, I've got no use for those so make an offer, I'll put the cash towards my bumpstick(cam) fund. More to follow today with video!

Apparently I failed to notice you're in Germany. It would cost me more in shipping than the parts are worth to get them here. rats. I shall enjoy the modifications through the interwebz though, so keep up with the updates!

armt350
armt350 New Reader
7/31/15 3:33 p.m.

About shipping... I can ship through USPS priced as if it was coming from Indiana ( or maybe New York I forget where the new APO transfer center is at.) Normally it ends up being around $50 or so.

armt350
armt350 New Reader
7/31/15 3:37 p.m.

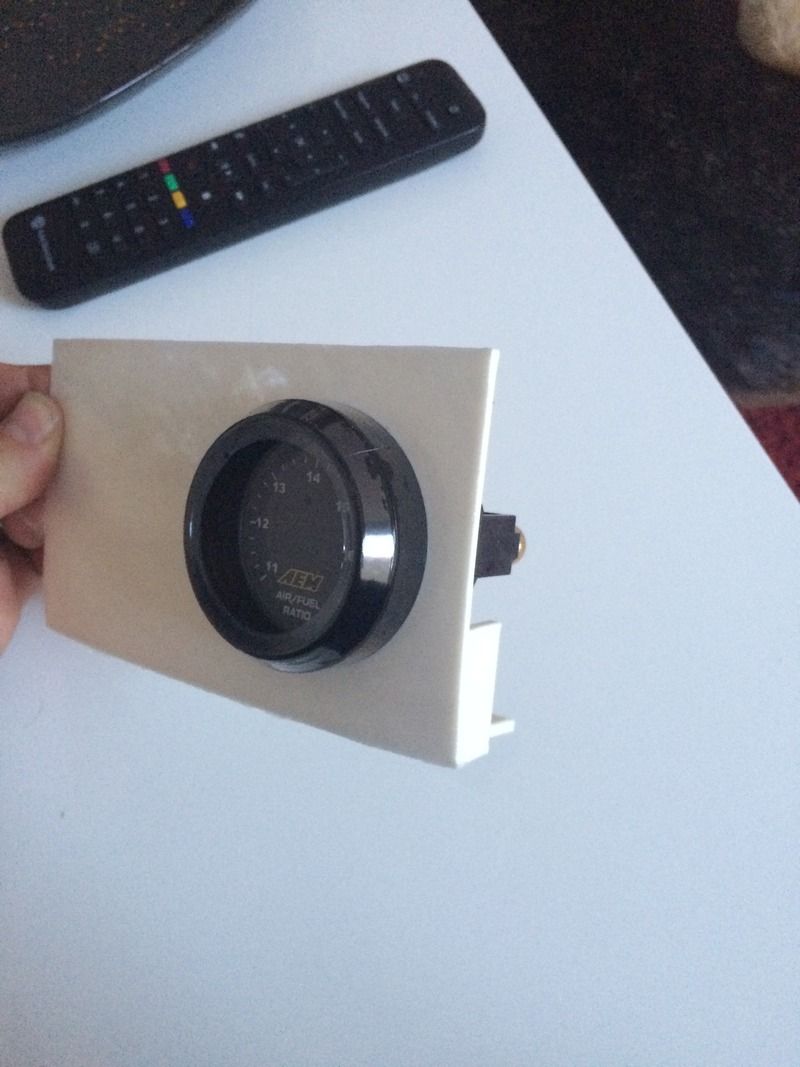
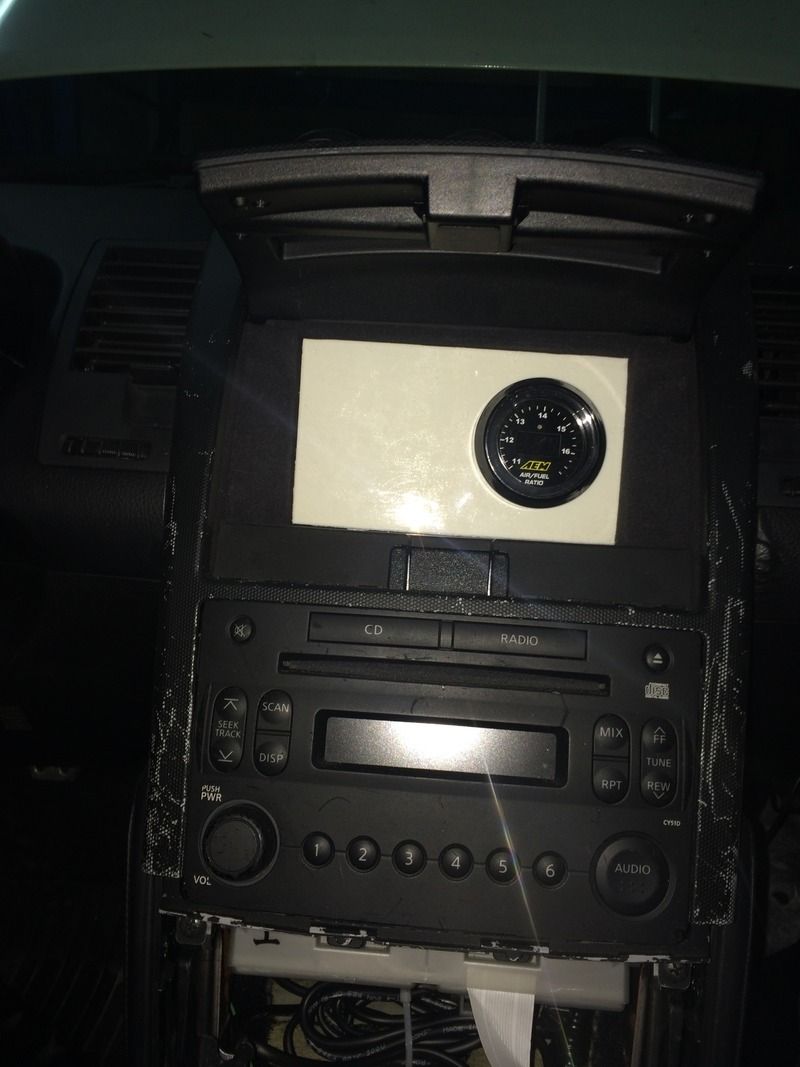
I'm running on a fairly basic LS3 intake and exhaust tune which just won't do it since pulls too much timing. I had to grab a wideband so I can do my own custom tune, but It's not something I need nor want to constantly have in my face on the track. Luckily the Z has the useless ass cubby which was relegated to holding my track pass cards and some chewing gum.  photo 6E0A146A-DBE4-4B4E-A961-24C7AB78ADA4_zpsab238pgz.jpg

5 minutes with some CAD software and now I have a mounting plate to go in the cubby. Its off center since I plan to eventually add in some auxiliary switches and possible the battery cutoff.

 photo 5EEB1867-807E-41CB-8241-D19BEA96A6BF_zpslxfohmqp.jpg

That is what it looks like in the cubby, I'll spray it with some satin black tomorrow to make it not look so odd. Looking at that picture makes me realize just how scratched up my center console is. Any ideas on improving that? I'm kinda lost on interior work that's not functional.

armt350
armt350 New Reader
7/31/15 3:49 p.m.

At this point the car is mostly don e build wise for the year. The rest of the year has been/will be used to optimizing the setup. We all no the best way to make that happen of course... and that track time!

If you don't feel like going through all of that then the spec list is here:

08 Nismo Z

Motor: LS3 EROD crate motor, CTS FEAD accesories, Fueled racing mount kit, JBA High flow cats, K&N Short ram air intake with JWT Popcharger filter, Motordyne Y Pipe, AAM 3" single exhaust , Fuellab fuel filter and FPR with a 034 Motorsports surge tank, Earl's 13 Row wide oil cooler, CSF Dual pass radiator, Tremec T-56 Magnum transmission, Nismo GT Pro 1.5 Diff, stacked for 80% lock with motul fluid

Chassis: KW Clubsport kit, Kinetix Front UCA , SPC Rear toe and camber arms/bolts, Hotchkis F+R Sway bars, Whiteline poly bushings throughout, Stoptech ST60 Front BBK, Carbotech XP12 pads Front, Factory Brembo rears with Ferodo DS2500 Pads, Braided brake lines, Motul RBF660, lots of other minor things

So to start this process I set the alignment to the following: Front : -3.2 deg Camber, 1/8th Inch toe out(Measured with longacre toe plates) Rear: -2 deg with 0 toe

I'm currently on a staggered setup with Toyo R888 GG tires 275F/295R

This was the cars first real outing since the build.

https://youtu.be/2SqsaA7snxk

Before that track day I had the car set to the recommended settings and ride height from KW then corner balanced. The recommended settings had the rear sitting very high which looked odd. It turns out it was odd, the high roll center in the back made it 'feel' very unstable, I likely lost more time than anything else due to that.

Also to note, I started the day with 29 psi cold which turned out to be way too much. After the first session I was at over 37 psi in the rear and 36 in the front. I did not have the tools to adjust the ride height nor did I have my trackside alignment kit with me so I was limited to adjusting just the tire pressures. It turns out 26 cold is the happy spot which put me at 34 hot. The car settled with those pressures but the waggling aft end stuck around.

I was only able to get in on the 2 sessions which was fine since I had reached the point of not being able to make the adjustments I wanted anyways. The positive note though was that the failures from last year which was too soft of a suspension, brake failure due to cooking the fluid and the overheating issue have all been resolved. That is a huge plus for me.

On a separate note, how do you post imbeded videos on this style board?

armt350
armt350 New Reader
8/4/15 4:18 a.m.

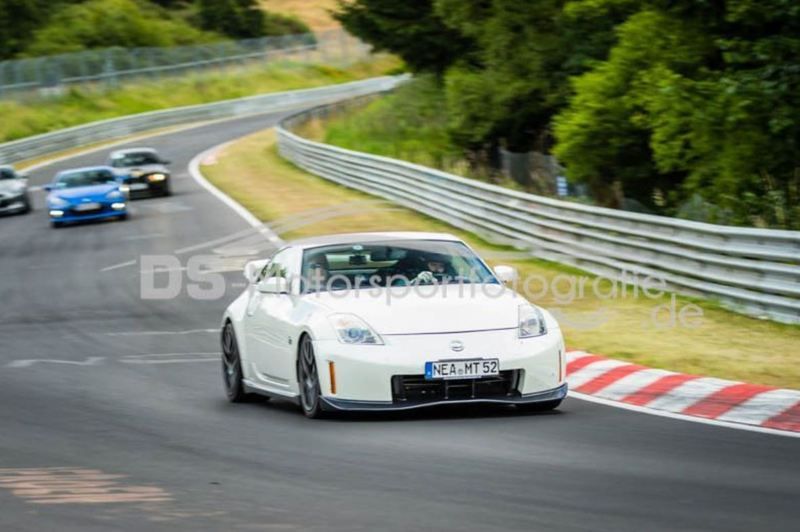
Fast forward a week and I found myself at the Nurburgring GP course. During the week I had lowered the rear end a bit and re aligned it, refreshed the fluids and rewelded the passenger seat mounts since the planted mounts would put a average sized passenger into the headliner. I had 3 15 minute sessions to drive so I tried to put the car once more through the wringer.

https://youtu.be/8FZ_1uBRIw4

The car felt much better this go around. It was much closer to the confidence inspiring feel that I know it can give me. The back end I think still needs to come down a bit but its a lot closer to where I will be happy with it. With everything else largely set. The car exhibited slight understeer which I'm okay with for the moment since I know it will be corrected with a square tire setup. Plus on the Nordschleife, I would much rather have a predictable slight understeer than anything else since there is zero runoff and any off course will be damaging.

Between the sessions I increased the compression and rebound a tick each and it netted better times and more importantly a better feel. The Toyo's are showing their faults however and were outperformed by a good friends track M3 running on a 265 square setup on michelin sport cups. I may have to change tire brands next time I need a set.

RossD
RossD PowerDork
8/4/15 7:42 a.m.

Awesome car and Awesome work! There are no embedded videos in this forum. Your links are the way to go.

armt350
armt350 New Reader
8/4/15 3:09 p.m.

Thanks for the kind words! I'm still trying to catch the thread up to today so there is a bit more so bear with me.

The day after the GP track I decided to make the best of the visit of the 'ring and take advantage of the tourist track time. Overall I logged 20 laps throughout the weekend and oddly enough out of the 20 laps the car performed well except for on the 20th lap I suffered minor mechanical issues. I wasn't able to adjust the ride height between the gp track time and here so I went into it knowing that there was probably more to be gained.

Here is the first lap from saturday. I went out with a goal of just being under 9 minutes with the car so to see 8:49 was even better.

https://youtu.be/djUjOdt-EZc

Improvements were made throughout the weekend but I am beginning to think that I might need more spring in the back right now, the car squats very hard in the rear under both acceleration and turns. All in all My best for the weekend was a 8:36. There is more in her.

Just for giggles here is the lap where the O2 sensor came out, it happens at just about the 5 minute mark. The exhaust blowing out of the bung was directly on my clutch line and boiled the fluid leading to clutch failure. Luckily I was able to get it limped off the track.

https://youtu.be/CLASYQCp1Mc

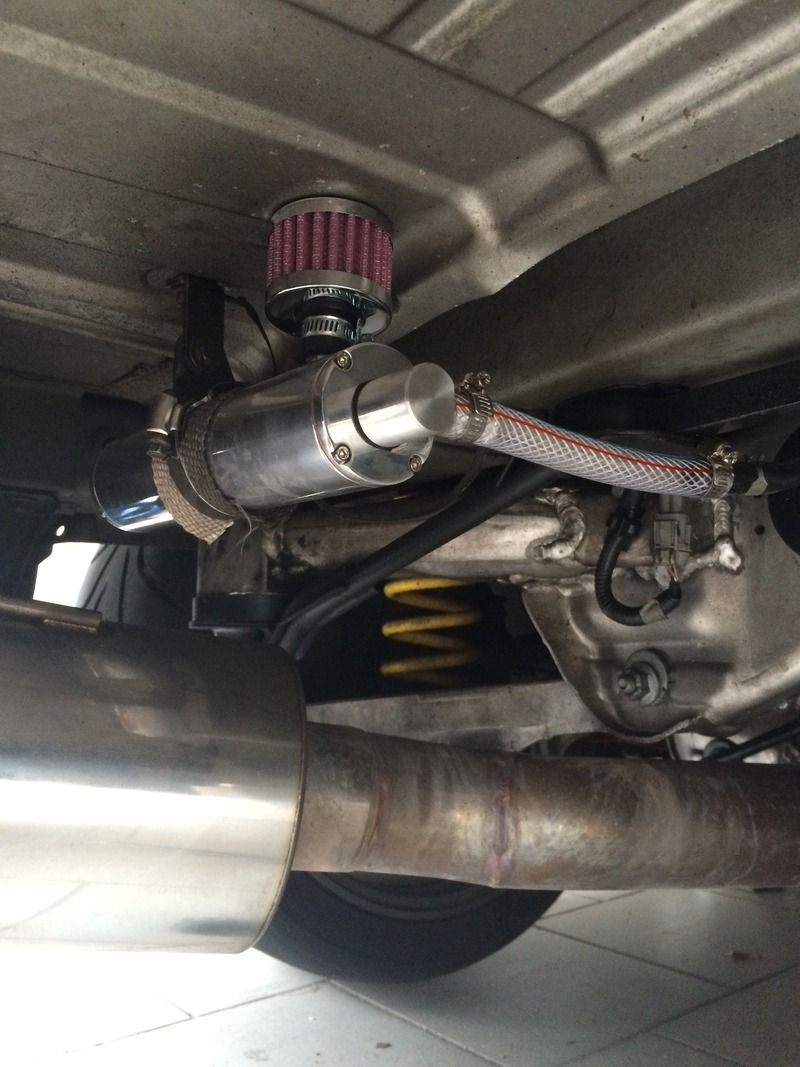
During track driving i'm having an issue with differential oil venting onto the rear tires. Whenever I service it to spec it burps about 100 to 150 ml out and it obviously gets oil everywhere.

armt350
armt350 New Reader
8/15/15 10:37 a.m.

The next track event is coming up this weekend so it was time to get back on to wrenching on the car. I serviced all of the fluids and then got around to installing the differential vent catch can.

 photo A4D5CAD7-5BDE-4D86-A713-315CDBEC0CD5_zpsieeb3xe8.jpg

All in all it was $10 off ebay. Hopefully I can say goodbye to gear oil venting onto the rear tires now.

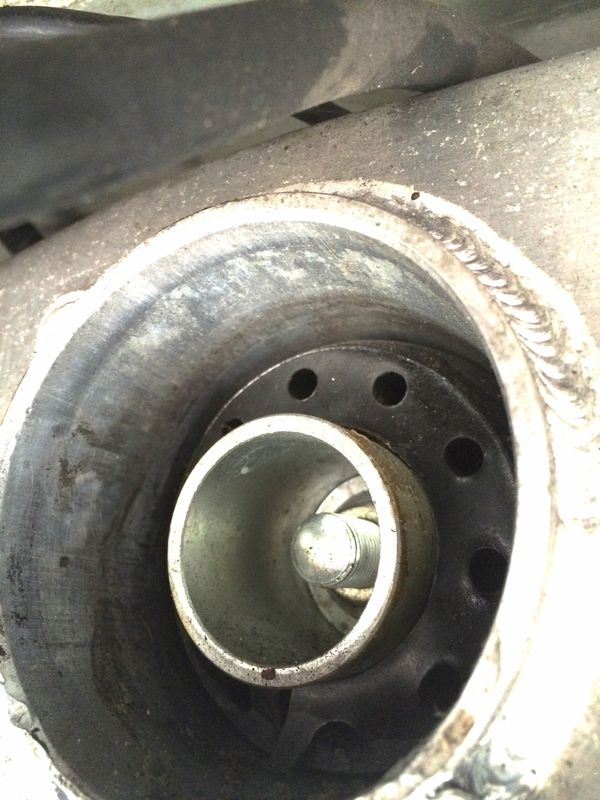
While I was down there I also noticed that the whiteline differential bushing was busted.

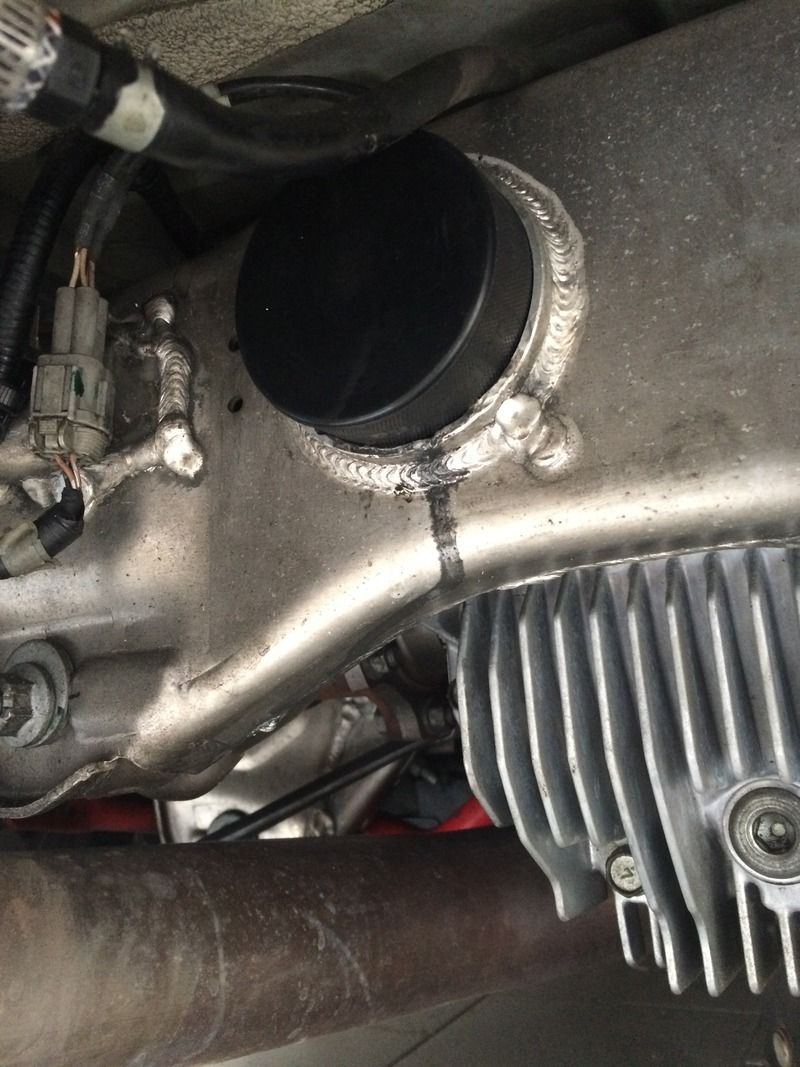
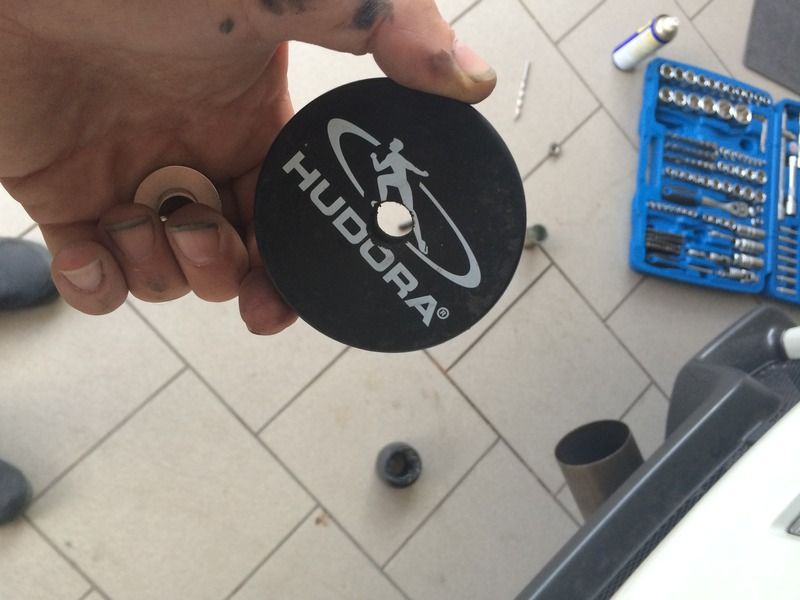
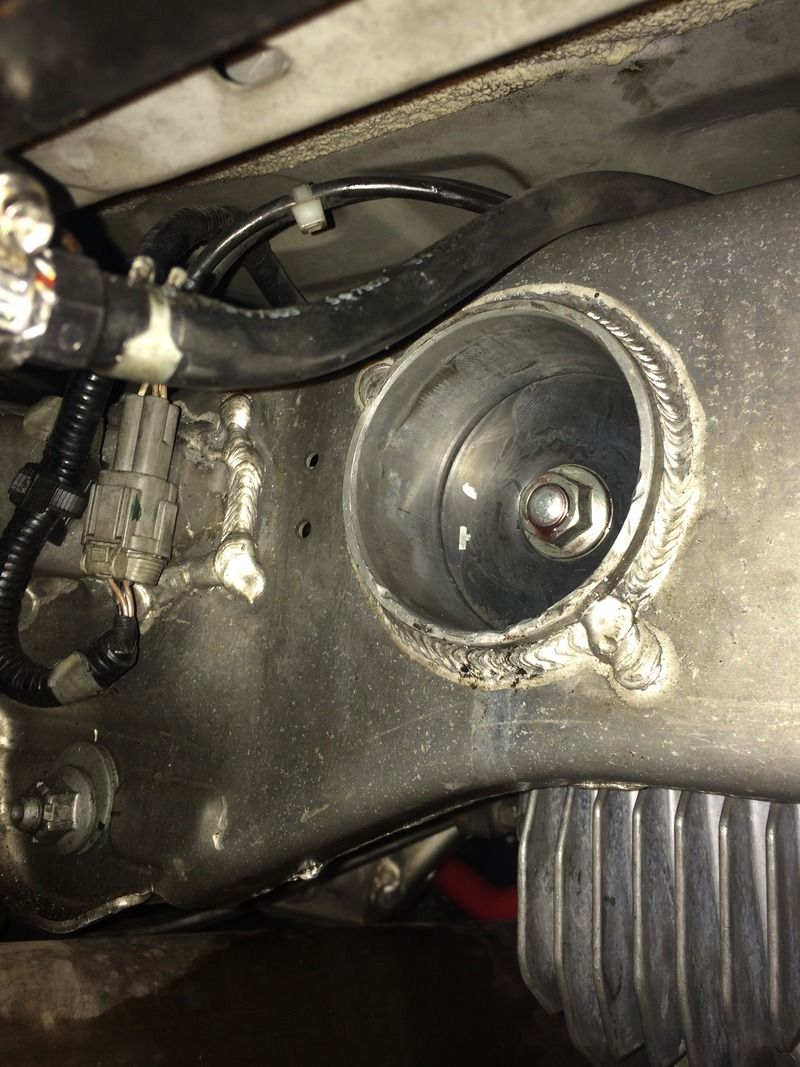
I am actually kind of annoyed with this one. Its only been on the car for about 2000 miles and I figured it could actually deal with a little track abuse. I guess not. Unfortunately both the replacement from whiteline and the solid bushings I ordered will not arrive in time. So time to get creative. I mic'ed out the hole in the subframe and it came out to 75.8mm. The search was on. The size looked VERY familiar to me I just couldn't place it. The next day it hit me... a hockey puck! I grabbed the micrometer and a regulation puck came out to 76.1mm!

 photo A3CE71F8-230C-4755-A872-64400341C16F_zps8qrptzny.jpg

I drilled out the hole and put it in. Like a glove.  photo FC64556A-683E-4EC1-87AE-B392EBEE2E28_zpslk3wkptp.jpg  photo 9D5DE277-10AE-46F0-B8A6-FC21FEC86CCF_zpsvzvrupfv.jpg I test drove it to work and back and it held up through an hour drive and some twisty roads. This is a viable option and if it would turn out well in the long run I would say screw buying a $80 bushing, go grab a $2 hockey puck.

mbruneaux
mbruneaux New Reader
8/15/15 11:56 a.m.

Not much flex in a solid hockey puck! You should paint hockey pucks neon colors and sell them for $20 as solid bushings.

1 2 3 4

You'll need to log in to post.

Our Preferred Partners
inlNhAMSfo39bSdmqYD3hkyy6T4kib1fN9V5b1LsAxgD2XANJz2ajHxAed63vm9h