1 2
mndsm
mndsm PowerDork
6/28/13 8:11 a.m.

EDITED TO ADD FULL PARTS LIST WITH NUMBERS AND TOOLS NEEDED-

To do this- you will need-

M3 and M4 hex head drivers

Medium length narrow head phillips screwdriver. I used one I had from a PC repair kit.

Traxxas Rustler (obviously) Traxxas PN 3707L

STRC LCG Slash 2wd Kit or similar http://www.teamstrc.com/index.php?route=product/product&product_id=645 (I used STRC because it was pretty)

Bag o Traxxas hardware (for the inevitable stripped screws)

Traxxas Slash front and rear wheels/tires PN 5865 (F), 6876(R) or similar

Traxxas Camber links- PN 3737 or similar

RPM rear arms- (this can be done with OE, but it's pointless. Upgrade and do it right) RPM PN 80594

RPM front bumper- RPM PN 80955

RPM rear bumper- RPM PN 81005

These are the basic parts you need to make a working and fairly bulletproof slash from your old, unused Traxxas Rustler. I don't recommend doing this to a NEW Rustler, it's slightly cheaper to start with a new Slash if you're going to build an LCG and have no truck. The main benefits being that A- no one races stadium trucks as bashers anymore. They're all running short course scalers. This means hobbyist level RC clubs are popping up with these trucks everywhere, and they're fun and cheap to race and B- this already gives you a leg up on factory slashes by dropping the center of gravity almost 2" by moving the battery to a laydown centermount, and mounting the steering servo flat as well. So, RC threads pop up from time to time, with people always seeking advice to different cars and so on. I've weighed in on nearly every one- figure you guys might like some insight as to how I roll. (be kind, it's not even 7am but I need something to do to prevent me from murdering my child for getting up at this ungodly hour)

About two years ago, I purchased a used Traxxas Rustler from a friend of mine. I didn't really need another stadium truck, I've got a full CF Team Associated T4 for that. But it was a smokin' deal (running, full brushless, 100$) and it had already had a lot of the hard stuff done to it. Full RPM arms, metal trans, speed gearing, Velineon brushless and so on. Drove it for half a summer, rolled it during a speed run and blew the steering apart. Then I got ADD and bought a drift RC car (that's a whole nother mess) and it got mothballed while I focused on getting my slide on.

Last weekend, we were without power, so I packed the wife, kid, laptop, gopro, beer and my drift car into my ms3 and we went out to some friends that were unaffected by the recent storms. While we were out there, I started teaching my short person how to drive an RC. He's not quite two, and he gets the idea (pin it and hold on). I discovered however- an RC drifter with a custom chassis, lipos, and so on- NOT ideal for teaching said child to drive. That's next year. SO- I revisited the idea of the Rustler and decided it was time to get the pig running- which brings me to yesterday.

I wanted to build something that had more use than a training tool and basher status for my soon to be two-year-old. I started doing some research into what's called an LCG Slash. (LCG stands for Low Center of Gravity, you'll get it in a second). Turns out, the LCG conversion uses a Rustler pan, upper deck, and battery tie as part of the conversion. Hey- I have those things! A little further research tells me that the whole front end is identical to a Slash (steering arms, shocks, a-arms, etc) and the rear end is nearly identical with the a-arms and the tie rods (I think?) being different, as they're slightly narrower. GO TRAXXAS FOR PARTS BINNING! This means, I have nearly an entire brushless Traxxas Slash sitting in my "toy room" waiting to be used. Thus began the collection of parts.

[URL=http://smg.photobucket.com/user/mndsm/media/IMG_20130627_123418_zps834f1403.jpg.html][/URL]
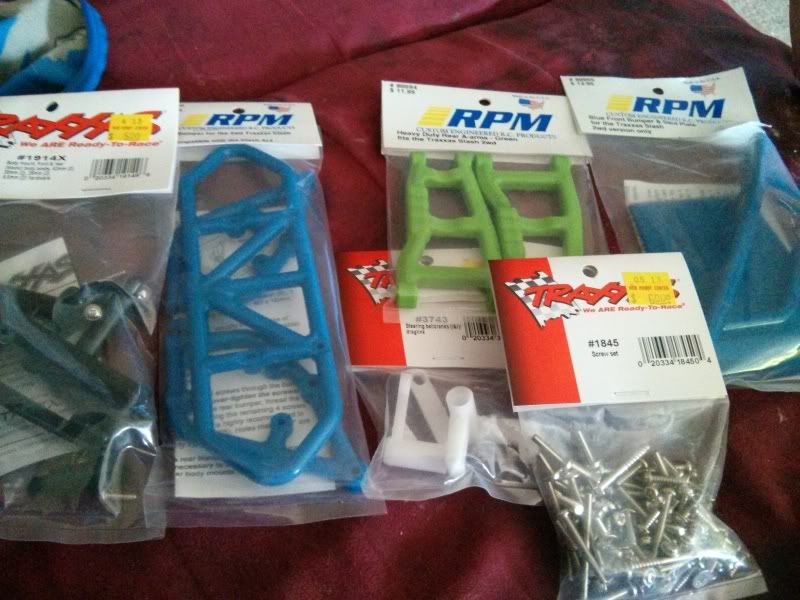
A quick trip to my local hobby store yielded this pile o' stuff. In addition to the rear arms, it was discovered I'd need Slash bumpers and Slash body mounts to complete the conversion, so you see those in there as well. I tend to build things like this ugly on purpose, because it's way funnier when I kick someone's ass racing by what looks like Playskools My First RC. It's entirely possible the body for this (when I buy a slash body to run indoor) will be pink with flowers and ponies and stuff all over it. I then ordered this-

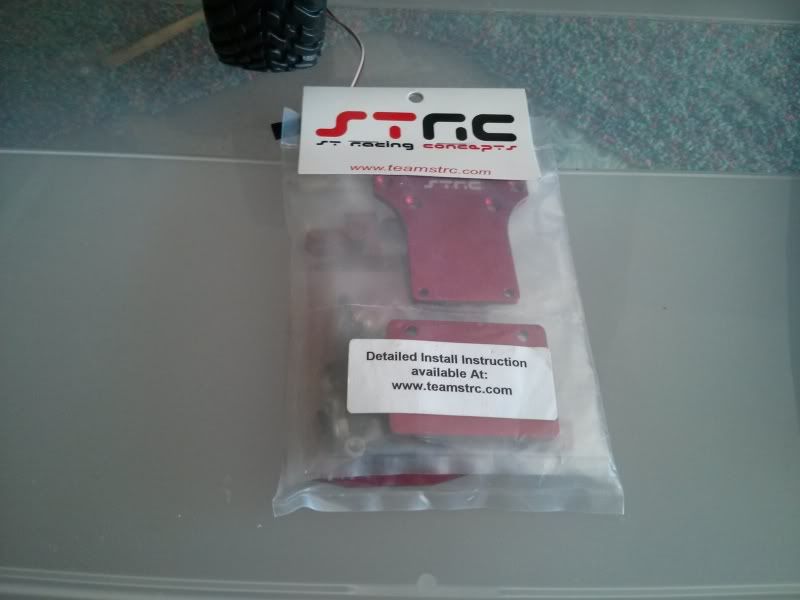
from Amazon. was like 32$ shipped. This is the lynch pin to the Slash conversion- as it lengthens the Rustler wheelbase to the correct Slash proportions. I got it in red, because well, I've got blue bumpers and green rear arms. Of course I needed red as well.

Parts ordered/collected, it is time to start the process. Step one was to assess where we were at. PO had thoughtfully provided street tires and a wheelie bar when I purchased it. Additionally, there was an RPM motor bashguard- which was sweet because it's a lot stronger than the factory one, and made mounting the rear bumper a breeze.

[URL=http://smg.photobucket.com/user/mndsm/media/IMG_20130627_195539_zps62923648.jpg.html][/URL]
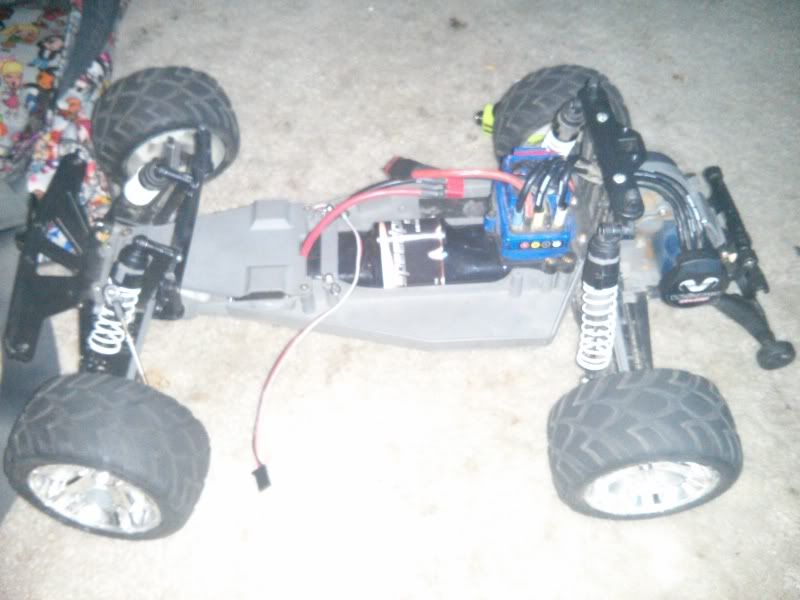
Step 2, wanted to make a little progress, so I focused on assembly/repair. I knew this thing was not running tonight, as I still need a receiver for my radio (I've got a Spektrum DX3C that stores something like 25 models, each with their own throttle/steering trims, etc etc), wheels and tires and a body. BUT- I can get the rear end together, assemble the bumper, and get that mounted. I decided I wanted to put the bumper together first, because OOOOOH SHINY.
[URL=http://smg.photobucket.com/user/mndsm/media/IMG_20130627_205628_zps0a713c93.jpg.html][/URL]
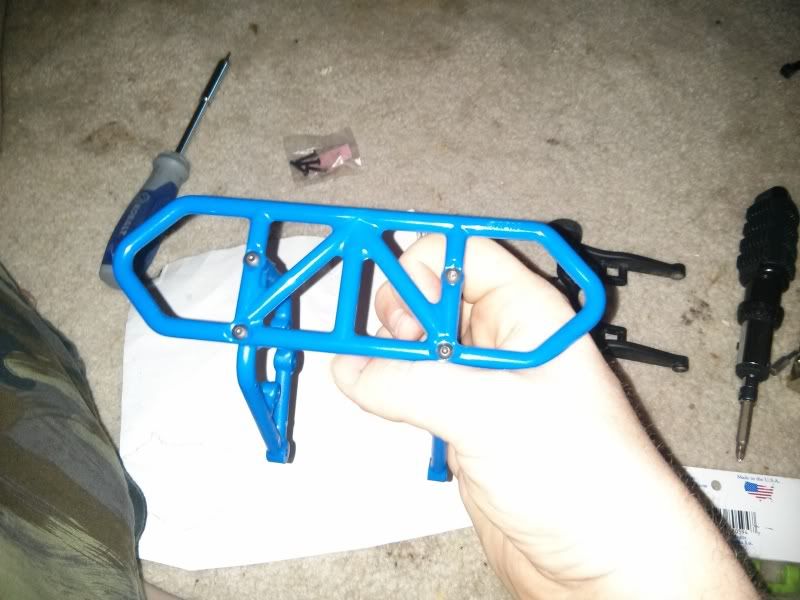
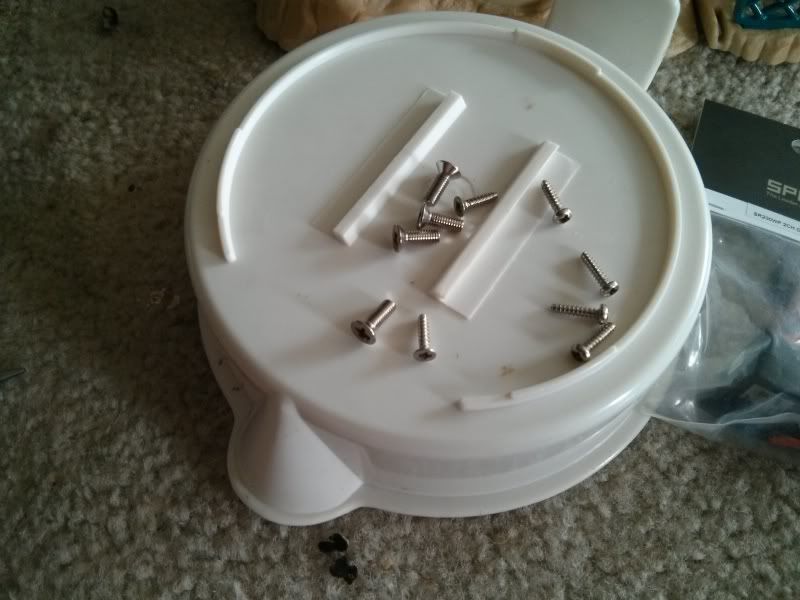
No assembly pics, but you can pretty much figure out what happened. The bash guard was attached to the uprights with 4 supplied hex screws, 4 additional provided hex screws will secure it to the motor guard on the truck.

Step 3- time to install the rear arms. This was a little more involved, as I had to remove a good portion of the rear end to get to it. Motor guard came off, wheels and tires came off.
[URL=http://smg.photobucket.com/user/mndsm/media/IMG_20130627_210755_zps68fab2ac.jpg.html][/URL]
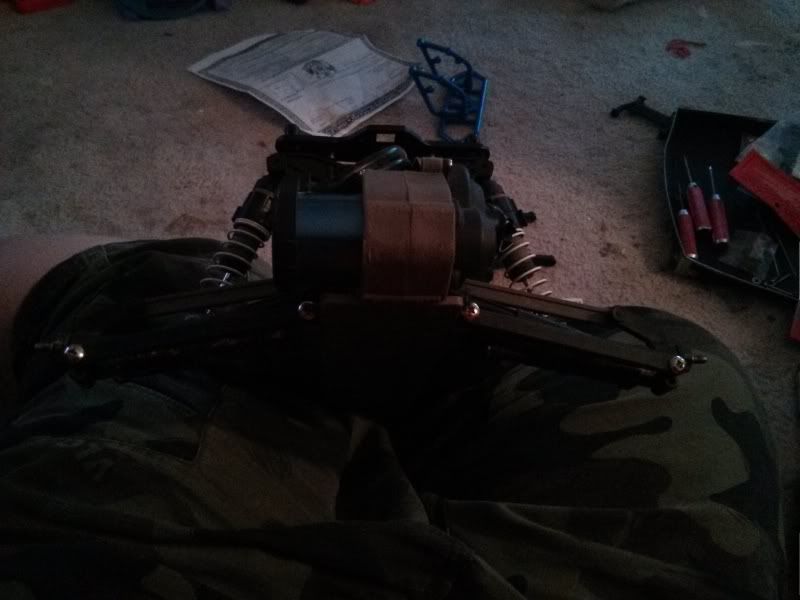
From there, it was 3 screws to each arm. One on the inboard side of the arm, one on the outside that holds the knuckle to the arm, and one to detach the shock. Piece of cake, really. I DID however learn that Traxxas had a really weird design logic when they built these things- the screws are only threaded about 5mm at the base, and the rest of the length is smooth, so it acts as a hinge pin and a screw all in one. That confounded me for a good 5-10min as I tried to figure out why the damn things weren't threading out any further. As usual, force solved the mystery.
[URL=http://smg.photobucket.com/user/mndsm/media/IMG_20130627_211138_zps074658aa.jpg.html][/URL]
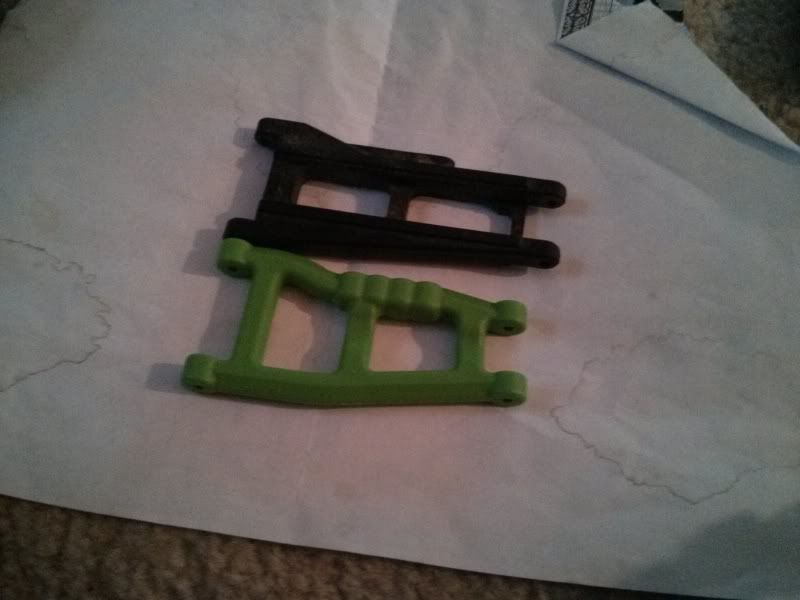
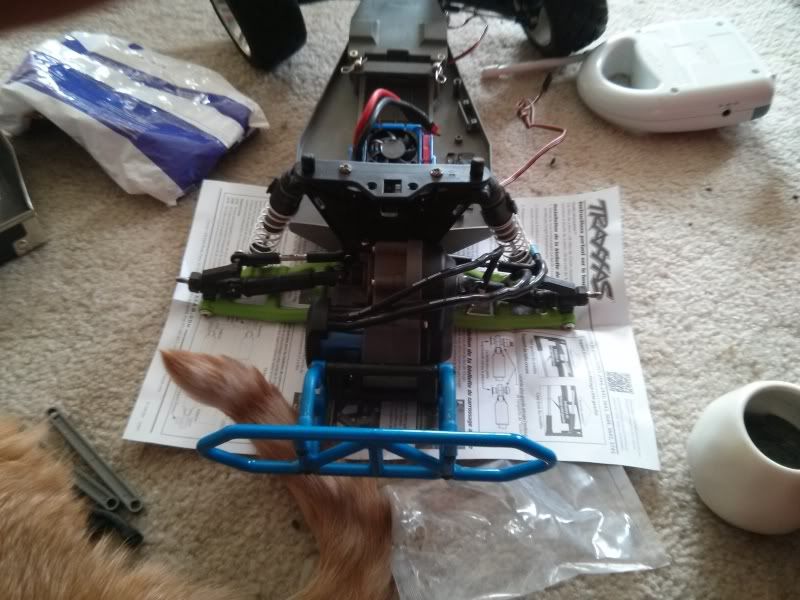
Arms removed, you can see the difference in size between the black (factory) and green (RPM, built for Slash). They're just a hair narrower and a whole helluva lot beefier. Install of the new ones was the reverse of what I'd done, so away we went. It was about this time, I noticed I might have made a mistake in my parts count.
[URL=http://smg.photobucket.com/user/mndsm/media/IMG_20130627_213030_zps253f2545.jpg.html][/URL]
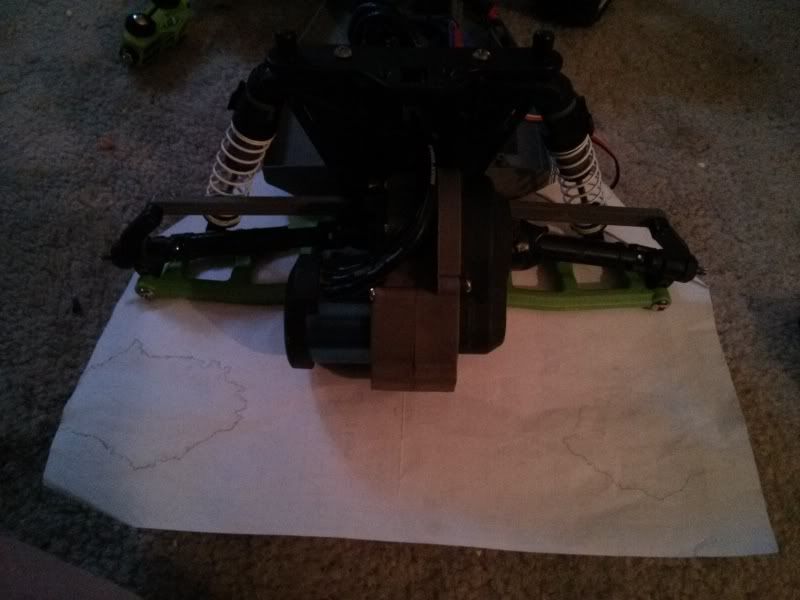
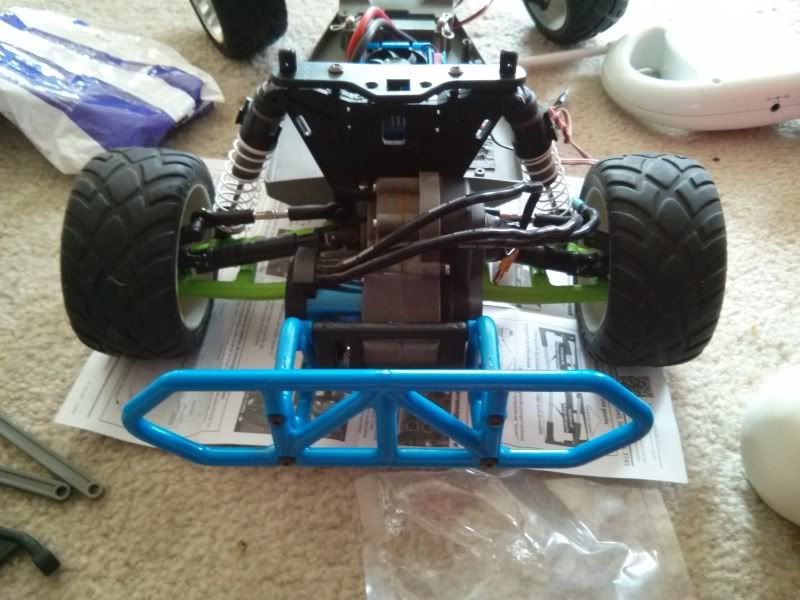
Knuckles look a little odd, huh? Maybe just a smidge of positive camber? Turns out, those upper "tie rods" I had mentioned? Yeah...completely forgot that when you shorten suspension laterally, and only do half, you run into dumb wheel angle problems. In the mood to get crap done, I decided to throw it all back on anyhow, since I can get to the tie rod screws without disassembling the whole shebang again.Plus I was tired. So- we threw the bumper back on, threw the tires back on and the gravity of my problem was fully realized.
[URL=http://smg.photobucket.com/user/mndsm/media/IMG_20130627_214520_zps26344471.jpg.html][/URL]
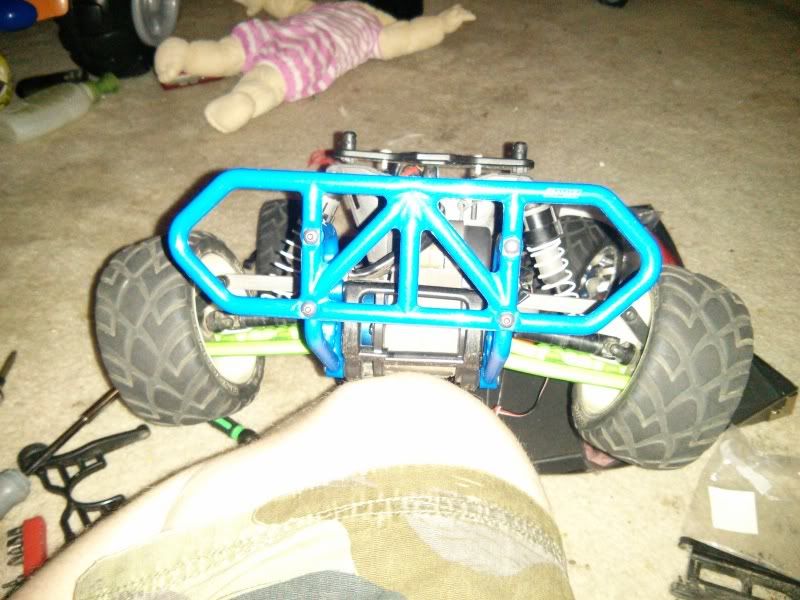
Yeah, that's not going to work. I need to get those parts in so it sits normal and not like a dog hunching to take a dooker.

Rear end fully assessed- it was time to move on to the thing that was actually broken. 4 screws allowed the top cover to come off and gave me full access to the steering box. One of the steering links had cracked, the screw came out, and the tie rod that goes to the front spindle had come loose. She's not gonna steer like that captain! I didn't take any pics, but the install was straightforward. One hex screw took the arm off, popped the bearing, replaced with new part, reassemble.

That brings me to where we are now. I still need to track wheels and tires down, and am waiting on that STRC kit before I can really move any further. In the meantime, I decided I was going to see what else would amuse me.

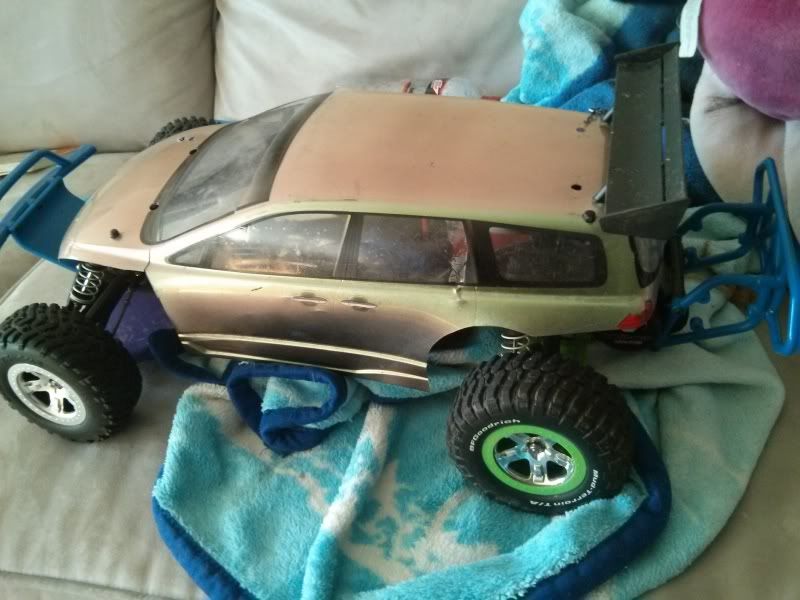
That lead to this. [URL=http://smg.photobucket.com/user/mndsm/media/IMG_20130628_075200_zps41fda902.jpg.html][/URL]
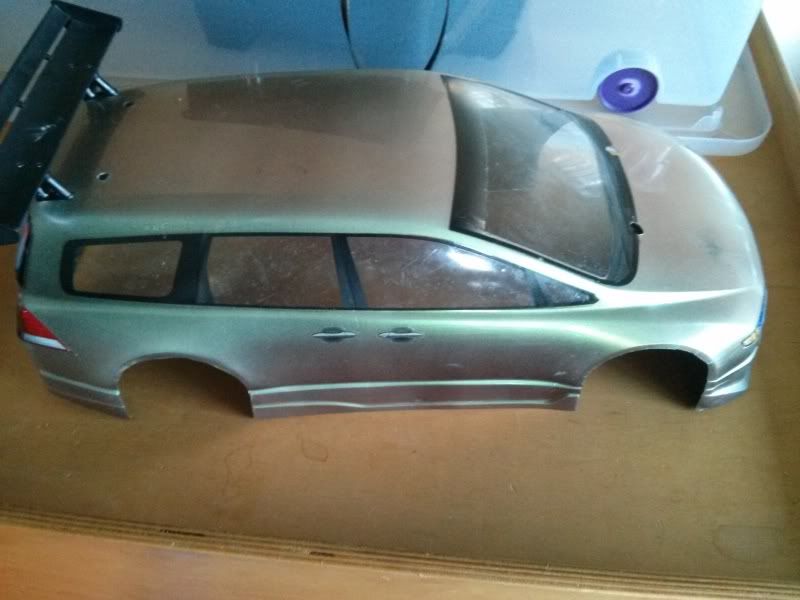
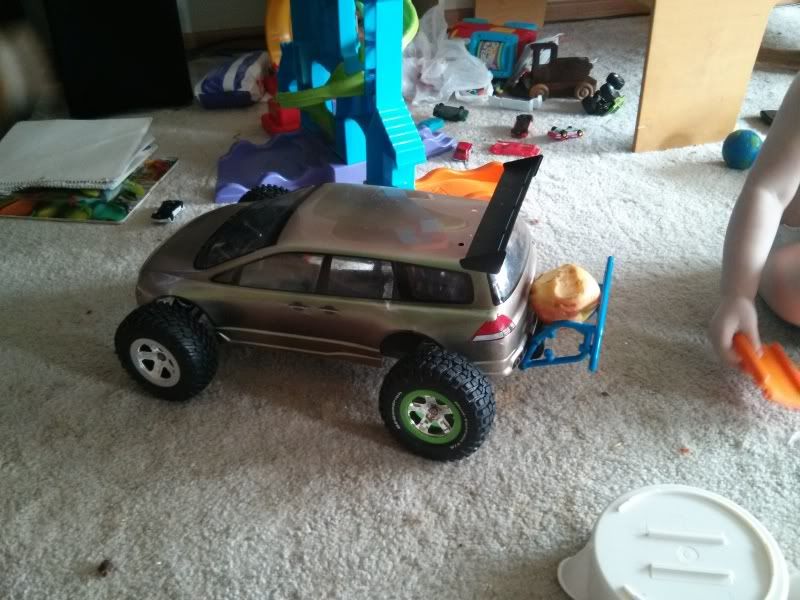
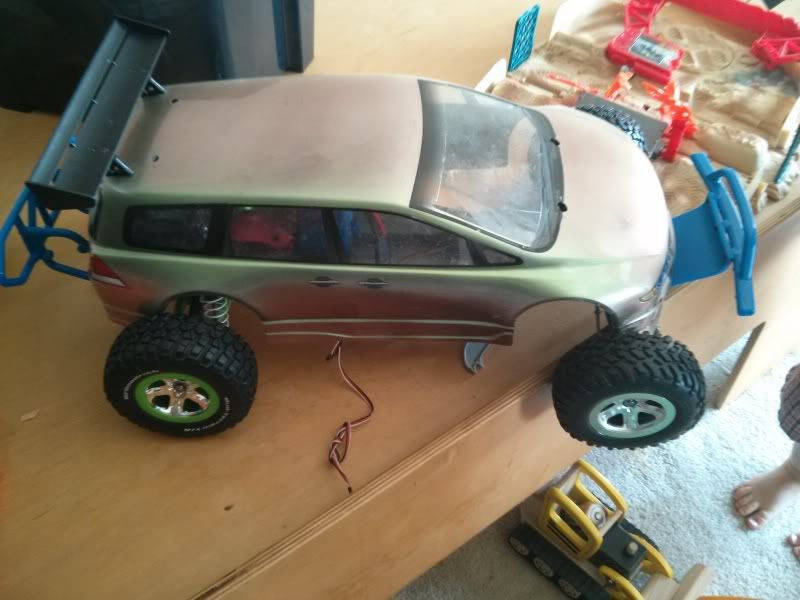
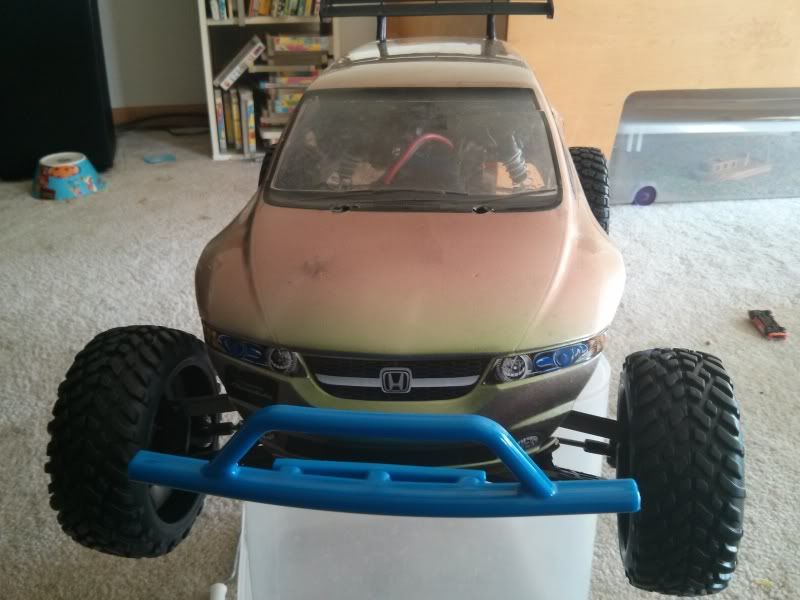
That is an HPI Honda Odyssey body, designed for on road cars. It's actually what originally lead to the build of my very first RC drifter. I saw the minivan body and had to have an RC that went under it- so the logical thing was to drop 300 bones on a whole new setup. Like I said, I like things that look strange, and there's nothing stranger than a drifting van... at least as far as RC goes. The wing is an HPI wing out of a Toyota Levin kit- I figured it needed more downforce and JDM street cred, plus I had a MUCH larger wing that went on the Levin. When I switched from a TT01D to a TB03D that was basically made entirely custom with an Eagle Racing chassis- most of my TT01 bodies became useless due to a small variance in wheelbase. Silly Japanese making my life harder.......

In any event, I've got several bodies painted and cut for a TT01 that are now effectively useless to me, so I decided....
[URL=http://smg.photobucket.com/user/mndsm/media/IMG_20130628_075253_zps1e410cfc.jpg.html][/URL]
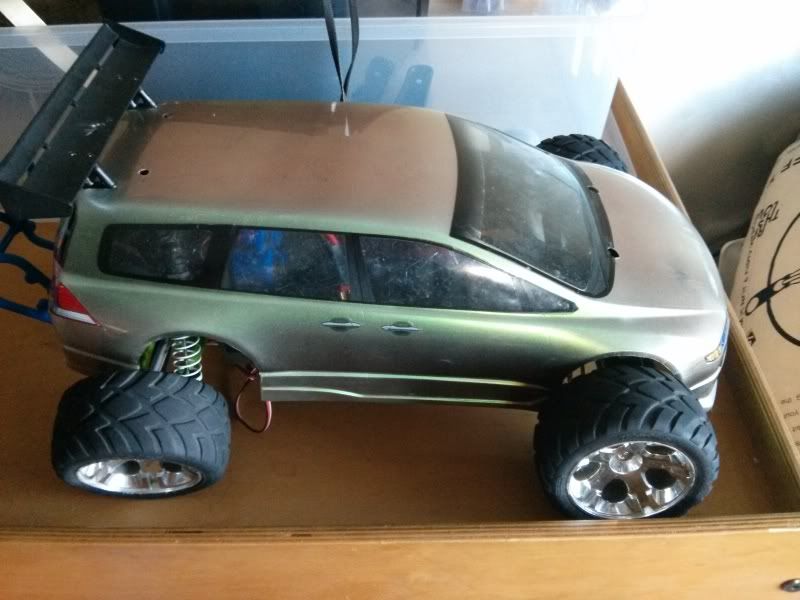
This. This is totally going to happen. It's going to take extensive redrilling/trimming to get it to fit- as you can see this was NOT designed to happen from the factory. But this is Grassroots, right? If someone can build a diesel Miata- I can build a baja set Honda minivan. Plus what the hell else am I going to do? I've got a body that's custom painted that is effectively worthless. No one runs TT01's anymore (that I know) so the body is worthless sitting.

[URL=http://smg.photobucket.com/user/mndsm/media/IMG_20130628_075321_zpsbd783978.jpg.html][/URL][URL=http://smg.photobucket.com/user/mndsm/media/IMG_20130628_075404_zps7b94a9f6.jpg.html][/URL][URL=http://smg.photobucket.com/user/mndsm/media/IMG_20130628_075351_zps5c7ab0fb.jpg.html][/URL]

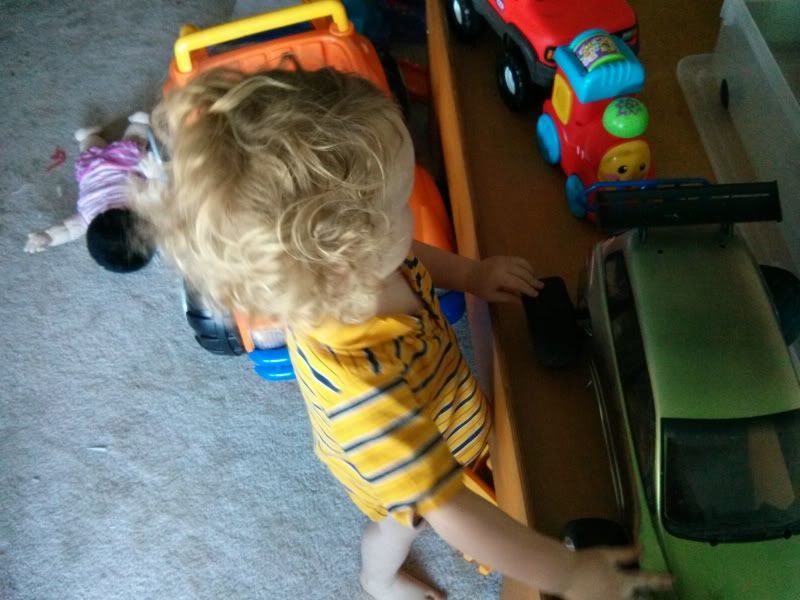
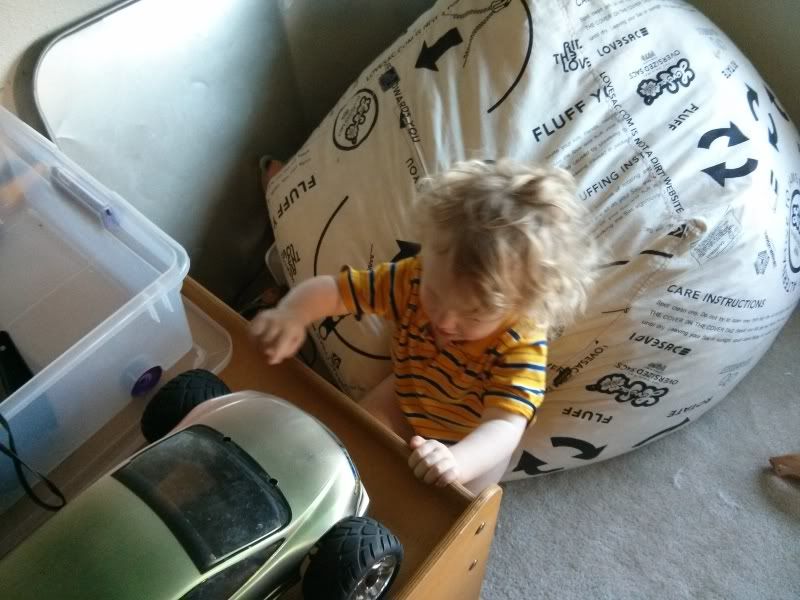
As you can see, I have a very excited small person who can't wait to get his mitts on this freakshow. He was trying to help me last night- which mostly involved him jamming screwdrivers into it wherever they fit. I imagine in another year or so, we'll be doing a fresh build on something for him- I need to find a kit that is suitably badass that won't break every time he slams it. I'm thinking a Monster Truck- he likes him some monster trucks.

All said and told, I should be into this for less than 200$, including the purchase of the truck. Seeing as a new Slash VXL is 300+, I can't really go wrong here, and it gives a lot of my dust covered spares something to do. I have to at this point mention- big ups to my dude Sam over at Scheer Bros Hobbies out of Libby Montana. http://www.scheerbros.com/ I've known Sam for a long time, and he recently opened this shop to share his love for the sport. He's a long way from me, BUT- he's always available to answer any questions, give me ideas, and he's a freakin' GURU when it comes to the aftermarket. He's built a few Slashes himself and he's been my go-to when it comes to any oddball questions I have. He's also set up a few of my drifter friends who are done with the local hobby shops (really- most of em here suck. I only use em when I need crap RIGHT NOW) and treated them quite well. Sure, shameless plug, but I'm getting squat out of it- and he really is a good dude. Check em out if you need RC things. He will hook you up.

At this point, I'm sort of sitting and waiting. Technically I could make this run TODAY- but I've got better things to do. Like go play pinball. So, the wait for parts begins. I HATE WAITING.

nokincy
nokincy New Reader
6/28/13 1:44 p.m.

Rustlers are practically bulletproof as is. With those RPM parts you're gonna have to really try to brake it.

mndsm
mndsm PowerDork
6/28/13 2:13 p.m.

Trust me, all the breaking that will ever happen to this rig happened before I got it. With the exception of a steering arm going bad, this thing is nigh indestructible. It's even waterproof!

moparman76_69
moparman76_69 Dork
6/28/13 2:19 p.m.

GRMs google ranking is pretty high apparently. One of your pictures is already page one of "minivan RC body" in google images.

mndsm
mndsm PowerDork
6/28/13 3:31 p.m.

Hah! That's awesome.

Will
Will Dork
6/28/13 5:48 p.m.

Congratulations. Your thread led me to a part of the internet where I learned that people actually restore vintage Traxxas stuff:

http://traxxas.com/forums/showthread.php?233156-Vintage-Traxxas-Electric-Picture-amp-Video-Gallery&daysprune=-1

This is not good news for me, as I have an SRT in a box in my dad's garage.

mndsm
mndsm PowerDork
6/28/13 5:56 p.m.

Jesus- I didn't even know they did that. I just like shenanigans!

Slyp_Dawg
Slyp_Dawg GRM+ Memberand HalfDork
6/29/13 12:03 a.m.

If you're interested, the Slash 4x4 steering rack is a direct drop-in, is severely beefy, adds a fair bit of ackerman, and relocates the servo saver to the rack so you can run just any old servo horn you want. Also, I can more than attest to the durability of RPM stuff, it can take a hit at WOT on an appropriately geared 13.5 Novak system (about 35mph or so) to one of the front tires from basically a curb head-on (misjudged carving a turn into my driveway...oops) and all that'll happen is the thing will hop up and spin in place a bit, nothing more. Also, if you want to get some limited slip effect, get some thick marine grease (the blue crap they sell for RC boat stuffing boxes works EXCELLENT, or Tamiya anti-wear grease, but that stuff is spendy) and pack the diff so full of it that it squeezes out when you reassemble the diff. if your fingers aren't covered in a ton of blue crap about like thick toothpaste, you don't have enough grease in the diff. trust me, it really does help keep from one-wheel-peeling on loose surfaces or on pavement in a turn

phaze1todd
phaze1todd HalfDork
6/29/13 12:30 a.m.
Will wrote: Congratulations. Your thread led me to a part of the internet where I learned that people actually restore vintage Traxxas stuff: http://traxxas.com/forums/showthread.php?233156-Vintage-Traxxas-Electric-Picture-amp-Video-Gallery&daysprune=-1 This is not good news for me, as I have an SRT in a box in my dad's garage.

Makes me miss my Bullet.

mndsm
mndsm PowerDork
6/29/13 8:53 a.m.
Slyp_Dawg wrote: If you're interested, the Slash 4x4 steering rack is a direct drop-in, is severely beefy, adds a fair bit of ackerman, and relocates the servo saver to the rack so you can run just any old servo horn you want. Also, I can more than attest to the durability of RPM stuff, it can take a hit at WOT on an appropriately geared 13.5 Novak system (about 35mph or so) to one of the front tires from basically a curb head-on (misjudged carving a turn into my driveway...oops) and all that'll happen is the thing will hop up and spin in place a bit, nothing more. Also, if you want to get some limited slip effect, get some thick marine grease (the blue crap they sell for RC boat stuffing boxes works EXCELLENT, or Tamiya anti-wear grease, but that stuff is spendy) and pack the diff so full of it that it squeezes out when you reassemble the diff. if your fingers aren't covered in a ton of blue crap about like thick toothpaste, you don't have enough grease in the diff. trust me, it really does help keep from one-wheel-peeling on loose surfaces or on pavement in a turn

This is all excellent stuff to know. I haven't pulled the diff apart since I've owned it, so I don't know for sure if there's anything going on in there LSD wise. I will probably upgrade to the slash 4x4 rack when it comes time to replace the steering again- it's pretty well set up for now.

As far as the RPM stuff- it's all over my T4 as well. I kept snapping TA graphite arms and realized I wasn't building a race truck so there was no need to keep fragile but light arms in it. RPM stuff cured that problem. AND it's made in the USA!

mndsm
mndsm MegaDork
6/29/13 5:01 p.m.

Parts!

[URL=http://smg.photobucket.com/user/mndsm/media/IMG_20130629_150535_zpsa778341e.jpg.html][/URL]

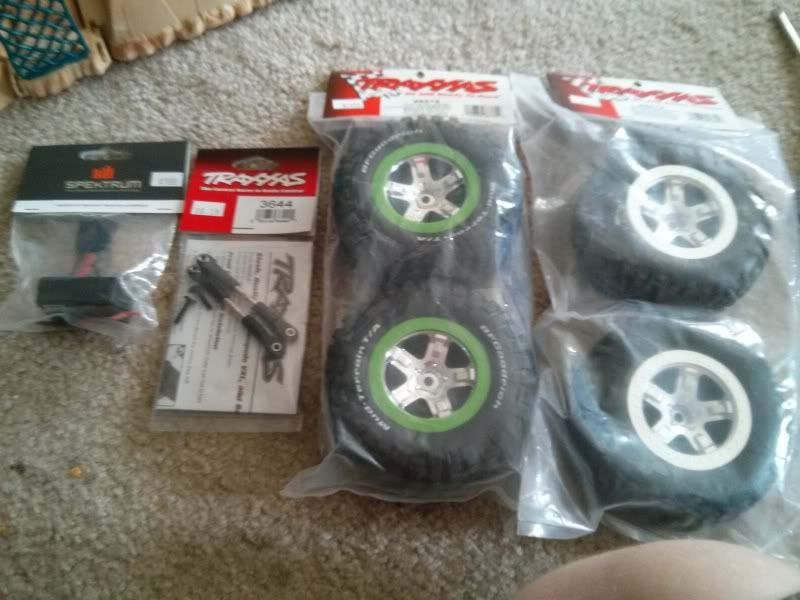
I snuck out of the house earlier today, and hit ye olde LHS (local hobby store). I found some smokin' deals on wheels and tires, the rear camber links (yeah, I was calling them tie rods) and a new receiver to bind it to my current radio. This leaves me at needing my STRC kit that should be here in a couple days, and new connectors for the ESC to be able to use my current lipos.

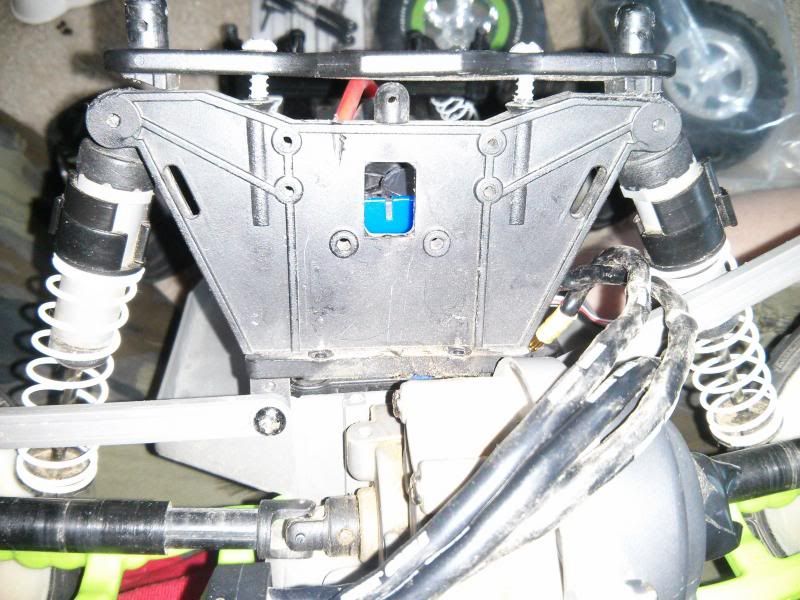
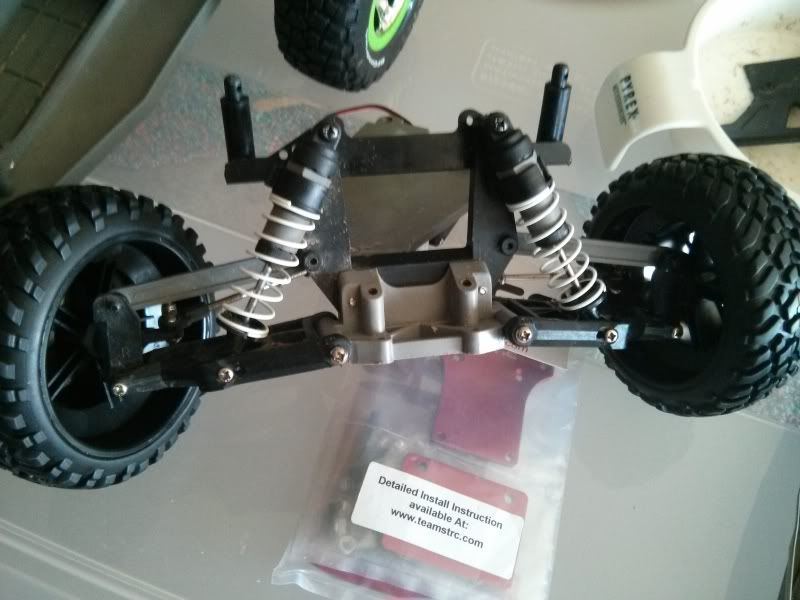
First up was the camber links. Probably the most involved job thusfar, I had to remove 10 screws to get the rear end loose enough to get to them.

[URL=http://smg.photobucket.com/user/mndsm/media/IMG_20130629_151438_zps992d12d0.jpg.html][/URL]

You can see, I wasn't getting to the inner link screws with the motor and so on in the factory location.

[URL=http://smg.photobucket.com/user/mndsm/media/IMG_20130629_151418_zps48db0c28.jpg.html][/URL]

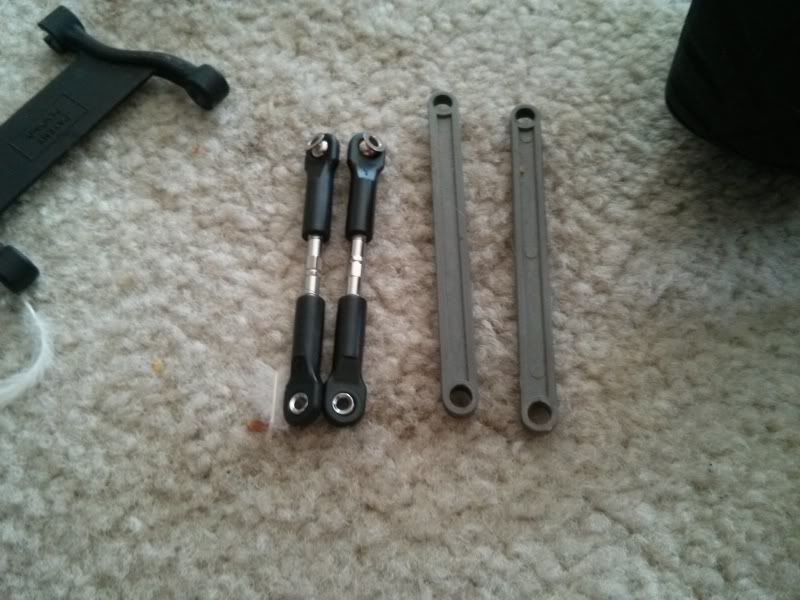
Screws removed, I had a very floppy rear section. Apparently I didn't take pics of it, but It left me more than enough room to move the rear shock mount, which is where the camber links tie in, and allowed me to get the inner screws. Camber links removed, you can see the reason I had hunched dog syndrome....

[URL=http://smg.photobucket.com/user/mndsm/media/IMG_20130629_152040_zps2f67fb8c.jpg.html][/URL]

Yeah, there's quite a bit of difference there. They went back in really easily, and with them being adjustable, that's one more think to monkey with.

[URL=http://smg.photobucket.com/user/mndsm/media/IMG_20130629_154229_zps1cfc22bc.jpg.html][/URL]
[URL=http://smg.photobucket.com/user/mndsm/media/IMG_20130629_154316_zps6ef6f7e8.jpg.html][/URL]

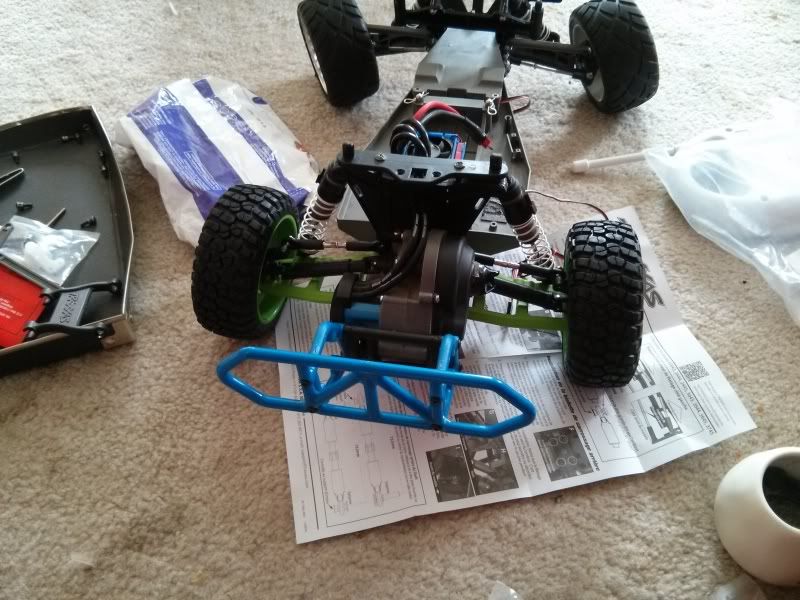
Hooray! that looks like proper angle! (not quite, now I have some solid negative camber, which I'll probably take out when I tune the thing.)

[URL=http://smg.photobucket.com/user/mndsm/media/IMG_20130629_155329_zpsc0fd71be.jpg.html][/URL]

I might have a problem with toe- I'm not sure yet. I have heard that these things like some toe in- we'll see.

Since we were already in there, decided to go for wheels and tires. I just bought the cheap Traxxas OEM ones, because I don't anticipate needing anything terribly serious.When the time comes, if it comes, I'll step up to Pro-Line beadlocks and Trenchers. For now- it's BFG mud terrain rears, and basic no-name Traxxas fronts. Yes, they mismatch on purpose.

[URL=http://smg.photobucket.com/user/mndsm/media/IMG_20130629_155856_zpsf28ee458.jpg.html][/URL]

[URL=http://smg.photobucket.com/user/mndsm/media/IMG_20130629_161943_zps028e5ebe.jpg.html][/URL]

In the last pic, you can see the one other thing I accomplished today. Turns out the rear body mounts are the only ones that are different, so it got thrown on there.

[URL=http://smg.photobucket.com/user/mndsm/media/IMG_20130629_162043_zps5326f4fa.jpg.html][/URL]

One more test fit with the body. My child decided that the rear bumper looked like an excellent cargo carrier- and subsequently gave it some cargo left over from his lunch.

mndsm
mndsm PowerDork
7/3/13 12:58 p.m.

Here we go again!

[URL=http://smg.photobucket.com/user/mndsm/media/IMG_20130702_143239_zpsc3d854ae.jpg.html][/URL]

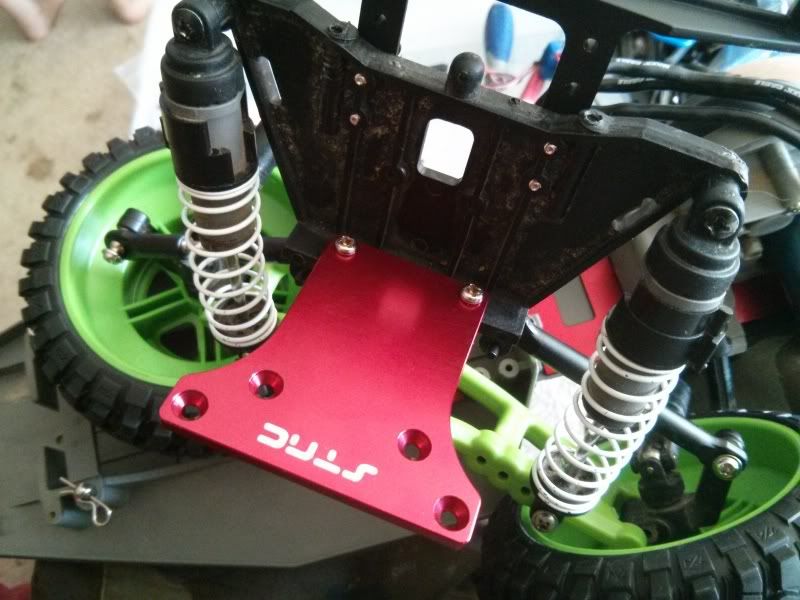
STRC kit came in. Shipping was fast, part is very well made, no burrs or anything goofy from the machining. This means, I can move ahead with this project! Reading the instructions, It looked like I needed to remove the front end, so off we went.

[URL=http://smg.photobucket.com/user/mndsm/media/IMG_20130702_143246_zpsa5b89885.jpg.html][/URL]
[URL=http://smg.photobucket.com/user/mndsm/media/IMG_20130702_143254_zps35d912ea.jpg.html][/URL]

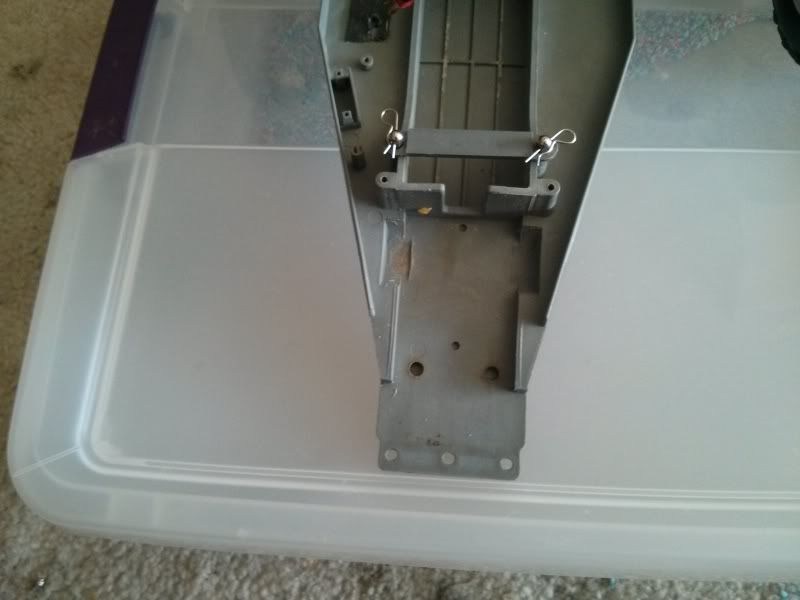
Per the instructions of the kit, I needed to remove the center mount on the top plate of the Rustler chassis. I couldn't find any of my Xacto knives as I'd hidden them from my 2 year old, and subsequently myself. Being resourceful I went and got the biggest serrated knife I could find. 2$ questionable bread knife FTW! It's not perfect, but it's not a showpiece. I'll try harder if I have to replace it.

[URL=http://smg.photobucket.com/user/mndsm/media/IMG_20130702_143307_zps8426205b.jpg.html][/URL]

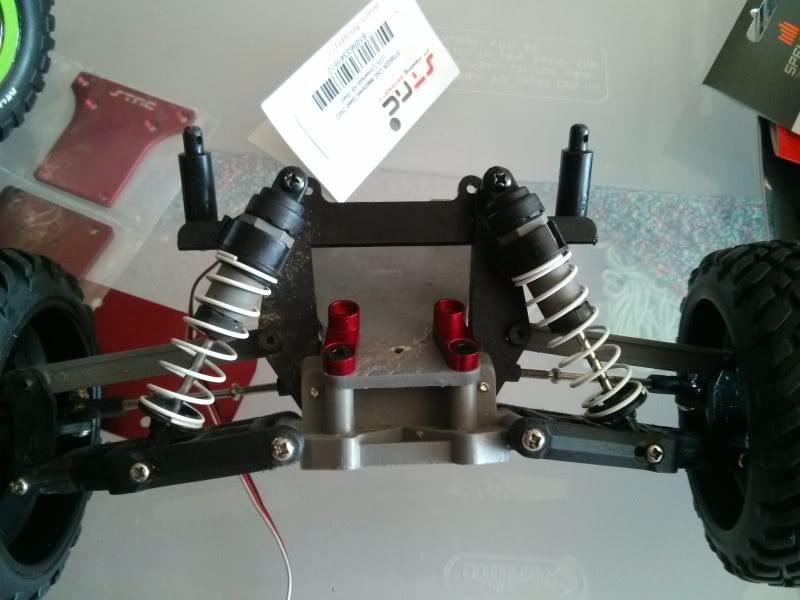
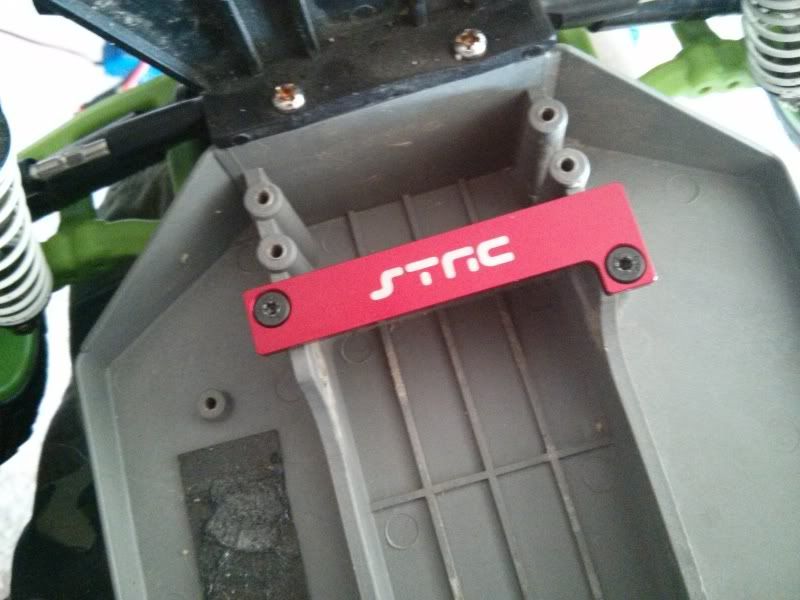
Next, was adding the bumper support mounts that were provided with the STRC kit. This labors under the assumption you're using the factory bumper. I am not, so this ended up being superfluous. They're swanky lookin' though, so I put them in anyhow. Andonized red!

[URL=http://smg.photobucket.com/user/mndsm/media/IMG_20130702_144056_zps087a68be.jpg.html][/URL]

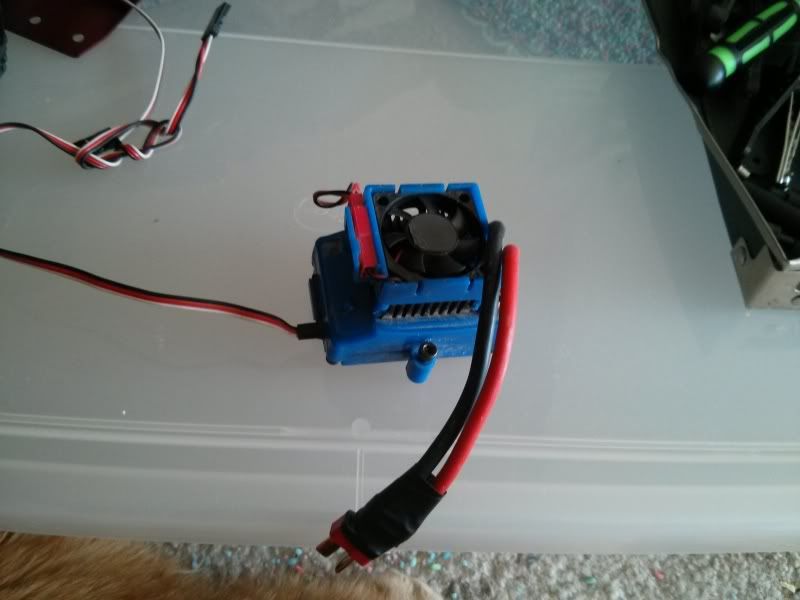
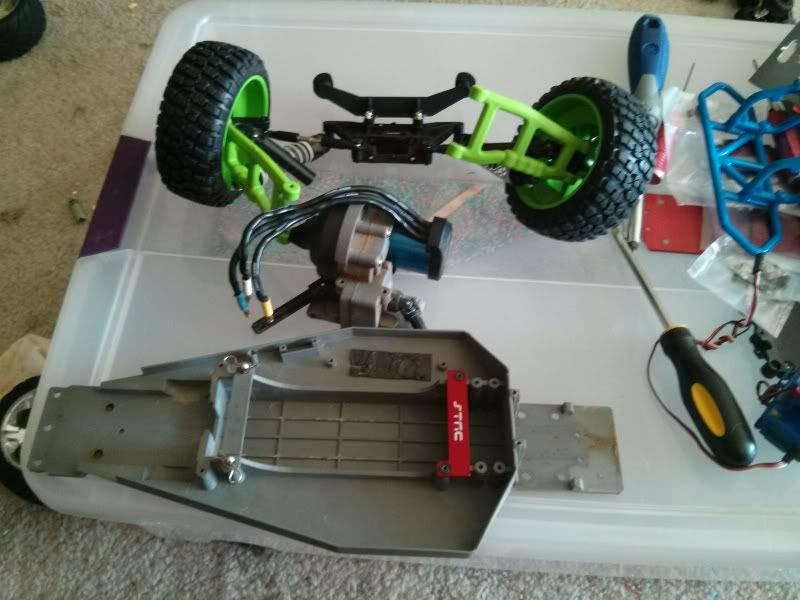
Next, was the battery tiedown strap. This required removal of the ESC and cooling fan, as well as the mounting plate they were.....mounted to. Funny how that works out.

[URL=http://smg.photobucket.com/user/mndsm/media/IMG_20130702_144342_zps0126604b.jpg.html][/URL]
[URL=http://smg.photobucket.com/user/mndsm/media/IMG_20130702_144359_zps0f73cbad.jpg.html][/URL]
[URL=http://smg.photobucket.com/user/mndsm/media/IMG_20130702_145509_zps1a7ffb9d.jpg.html][/URL]

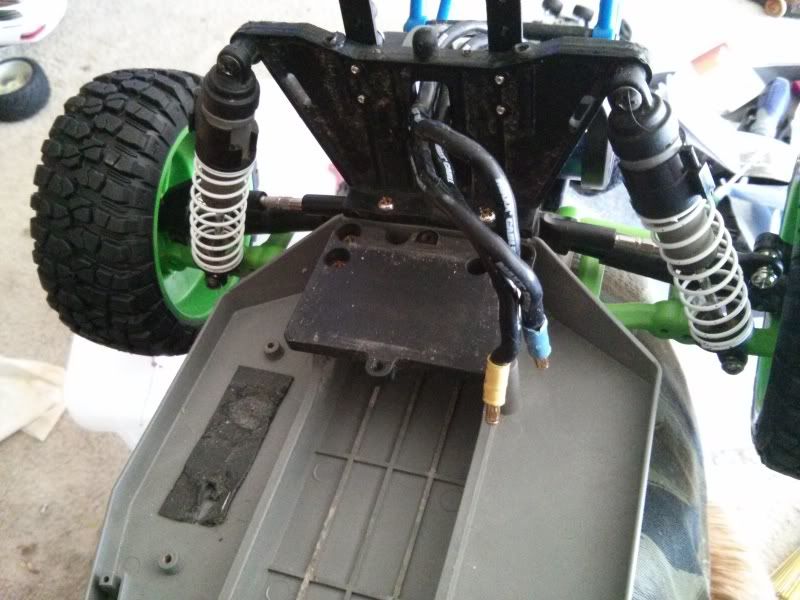
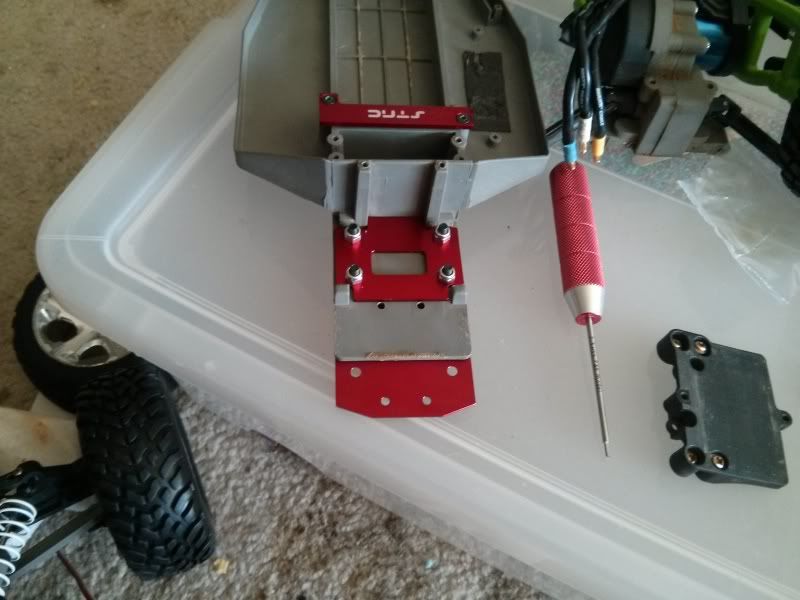
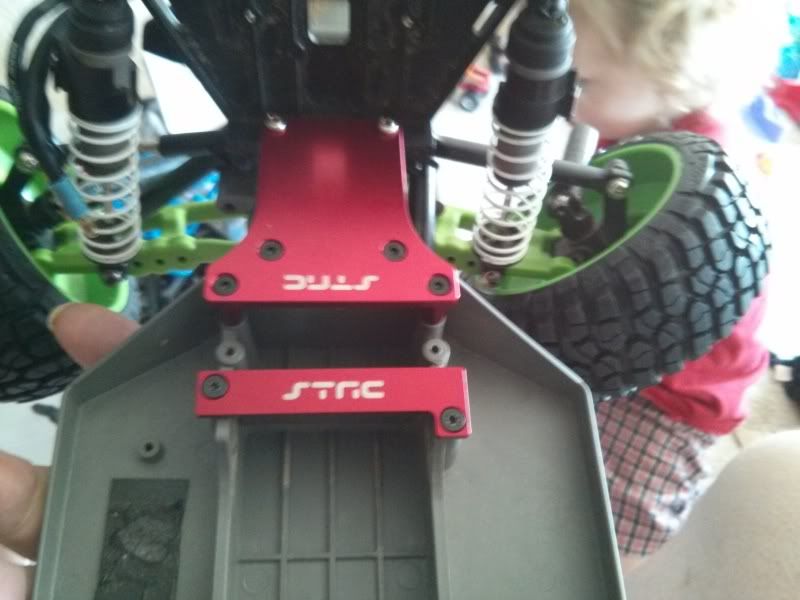
Now for the FUN part. 80% of this kit is the 3 plates that make the rear end extension. The lower skid plate, the lower brace, and the upper brace. Because of this, you need to remove.... the entire ass end of the truck. This is apparently a LOT easier if you start with an actual slash, because the rustler chassis pretty much does not allow the removal of the rear section as one unit. I had to pull the kingpins for the rear a-arms, the entire rear guard assembly (which of course meant it had to be taken apart before it could be removed) the shock tower had to be disassembled.... yeah. This was sort of an ugly step. Not bad really- just a E36 M3load of screws.

[URL=http://smg.photobucket.com/user/mndsm/media/IMG_20130702_150928_zps8a7810bc.jpg.html][/URL]

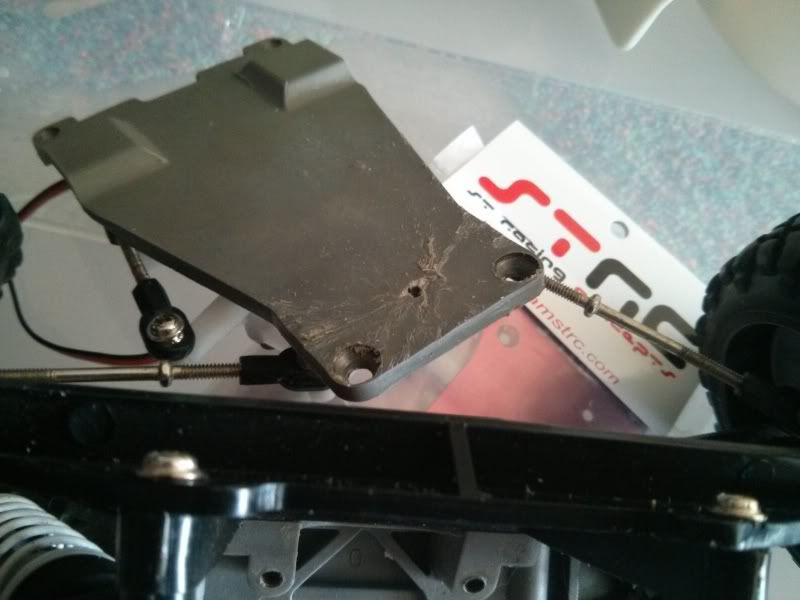
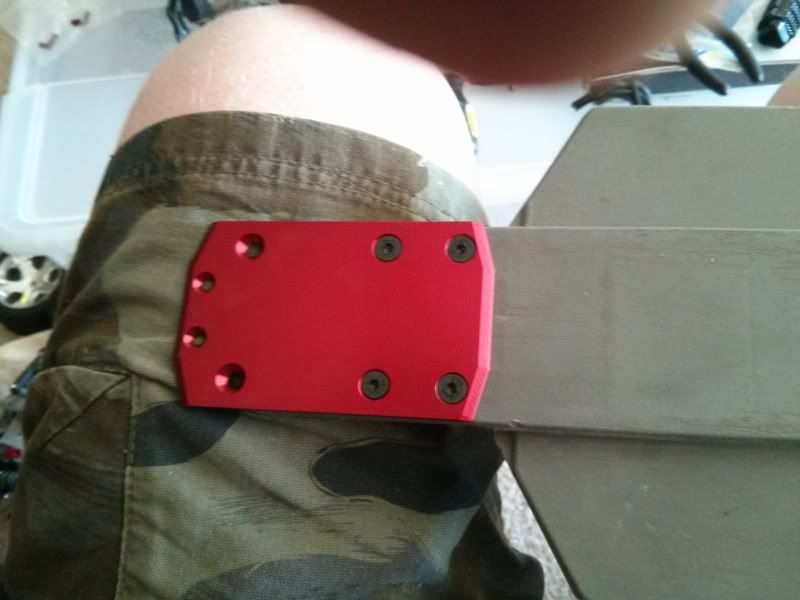
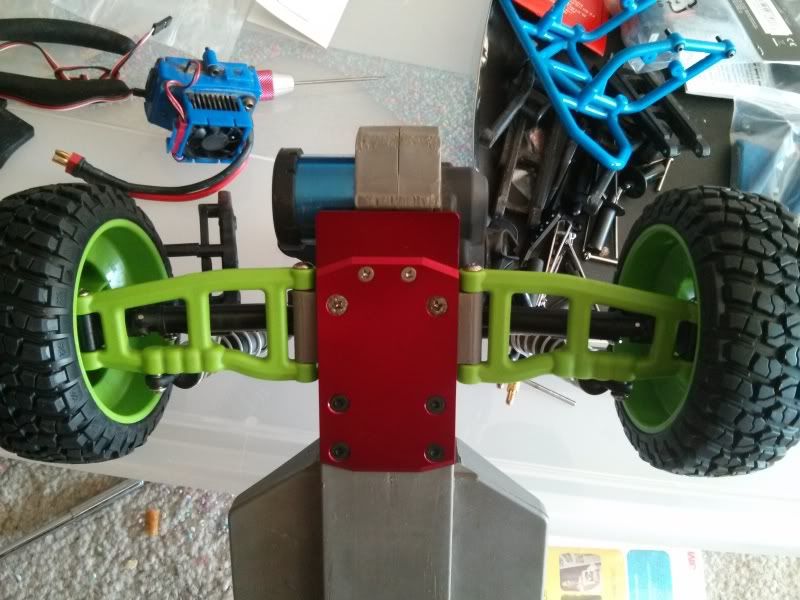
Well...see..hm. I guess I shoulda probably waited to install all the other upgrades I had purchased, since they all had to come BACK off to do the rear plate install. All in all though, it's a nice straightforward bit of kit when it's installed. The lower goes in with 4 m4 hex screws and some lock nuts- all the hardware if provided for you. One thing I didn't do however- and you should- is make sure you read the instructions correctly. I had installed the underside plate, tightened everything down, and then got the deer in headlights look.... and had to take it out. You see, the lower plate and the upper plate that sandwich to the rustler tub need to go in as one unit, and lock nuts are a PITA when they're this small. my forearms got a work out.

[URL=http://smg.photobucket.com/user/mndsm/media/IMG_20130702_152720_zps93bc36e6.jpg.html][/URL]
[URL=http://smg.photobucket.com/user/mndsm/media/IMG_20130702_152733_zpse794b77f.jpg.html][/URL]

Looks good though! Too bad it's going to be beat all to hell in about a week. Last major bit of kit was the upper tie plate, that ties the rear section/shock tower to the chassis itself. Strangely, STRC elected to use the factory hardware for the screws themselves (this is in their instructions) and just add lock nuts to the lower side, since it would no longer be screwed to the chassis at the tower. [URL=http://smg.photobucket.com/user/mndsm/media/IMG_20130702_153758_zpsd8b1eaea.jpg.html][/URL]

After that, it was bolting it all back together time! Not as easy as one would anticipate, but not terrible. There were two included standoffs/spacers meant to bridge the gap between Rustler Tub, and STRC upper plate. They were a bit difficult to line up, but once done so properly, it was just a matter of installing 4 more screws- and here we are. Right along with it was sticking the rear section back in the truck.

[URL=http://smg.photobucket.com/user/mndsm/media/IMG_20130702_154849_zpsb72d65aa.jpg.html][/URL]

[URL=http://smg.photobucket.com/user/mndsm/media/IMG_20130702_155803_zpsee1d1a51.jpg.html][/URL]

One thing that presented itself that I didn't see before- for whatever reason, the STRC rear mount does not play nice with the Traxxas Rustler upper mount for the ESC/fan. I had to move it one screwset forward, which wasn't a HUGE deal, but now there's only two screws holding it instead of four. It's plenty strong, and less screws=weight savings, right? I mean if it worked for Chrysler and the Neon- why not me?

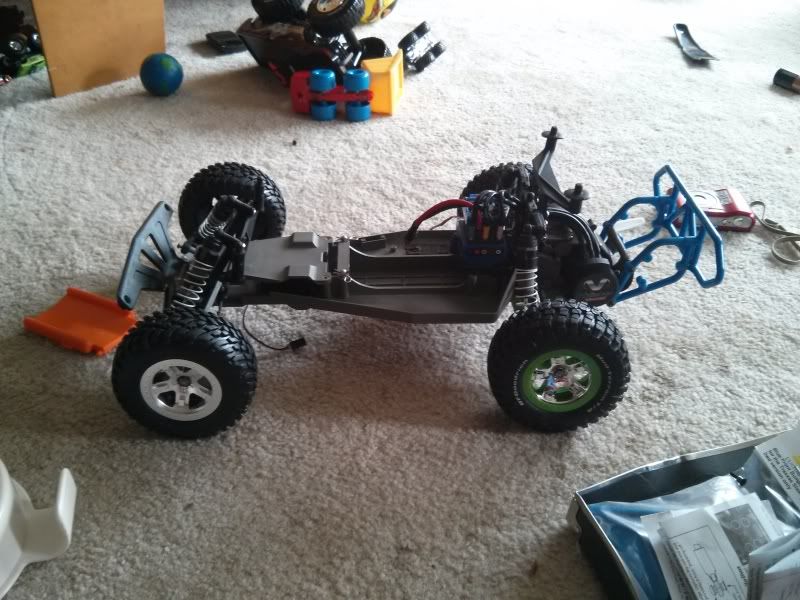
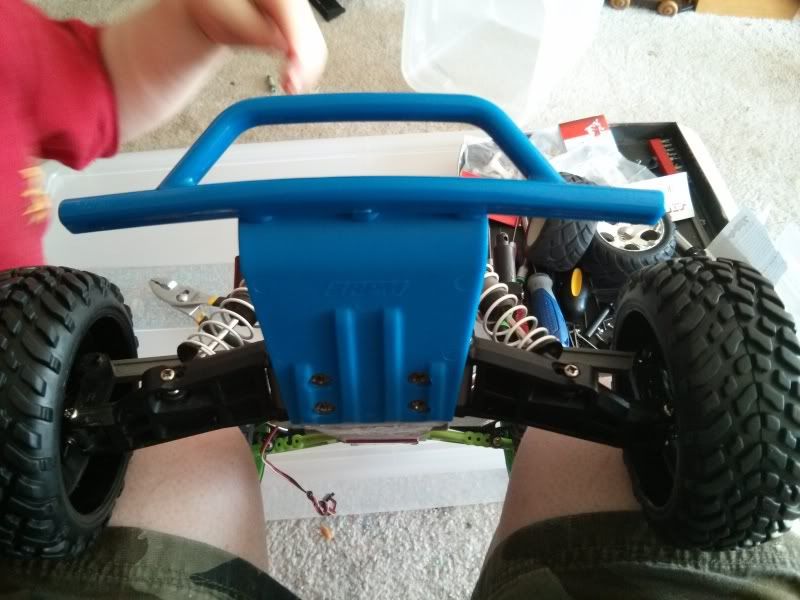
After that, it was a simple matter of throwing the RPM bumper on. You won't use a slash bumper support mount, so all you need to do is yank the screws, and stick them back in with the Slash skidplate/bumper.

[URL=http://smg.photobucket.com/user/mndsm/media/IMG_20130702_162637_zpsfed55eb5.jpg.html][/URL] [URL=http://smg.photobucket.com/user/mndsm/media/IMG_20130702_162621_zps728d6c1c.jpg.html][/URL]
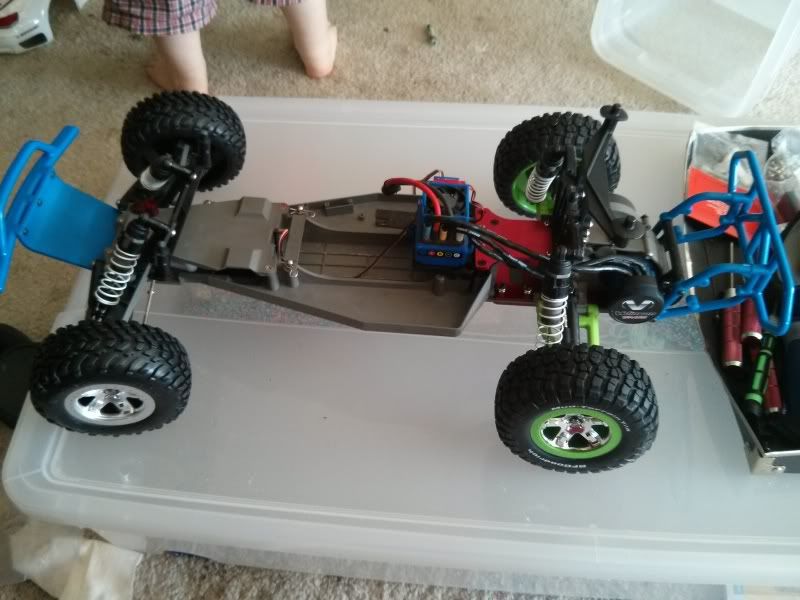
And there she is!

And of course, I had to try the body one last time. What I had COMPLETELY forgotten about- was the chassis extension. You know the one? The one that makes things longer? Yeah....

[URL=http://smg.photobucket.com/user/mndsm/media/IMG_20130702_163055_zps486687cc.jpg.html][/URL]

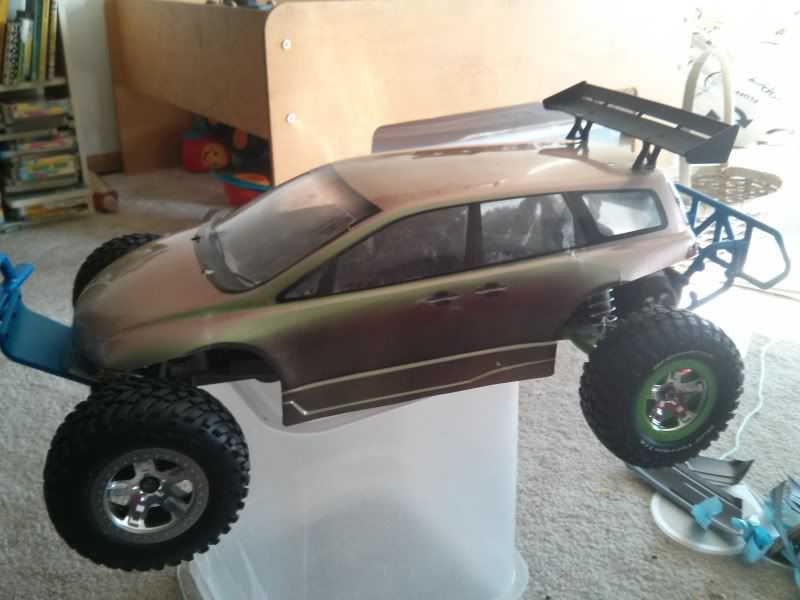
It doesn't fit and look NEARLY as cool as it did. HOWEVER- all hope is not lost. I think I'm going to cut it down similar to what would happen to a Baja bug. It will have open/exposed front and rear tires, good portions of the suspension- and possibly the motor. My goal is to at least SOME coverage for the motor- but IDK if that's going to happen, or if it really even matters. BUT- we will see. The hard part is done, and worst case scenario, I go buy a shell and project Playskool (as I've gone to calling it) will get a Princess Rainbow of Unicorn makeover.

blackzx3_13
blackzx3_13 New Reader
7/3/13 9:30 p.m.

This is a nice conversion. I raced it for a while before I converted my race Slash over to the Anza chassis.

mndsm
mndsm PowerDork
7/11/13 11:01 a.m.

Thanks. I spent a lot of time backtracing catalogs to make sure I had it as right as possible, and I think I got it.

mndsm
mndsm PowerDork
8/23/13 8:54 a.m.

Hey, it's been a while since I updated this pig. Not nearly as many pictures, but you'll get the idea.

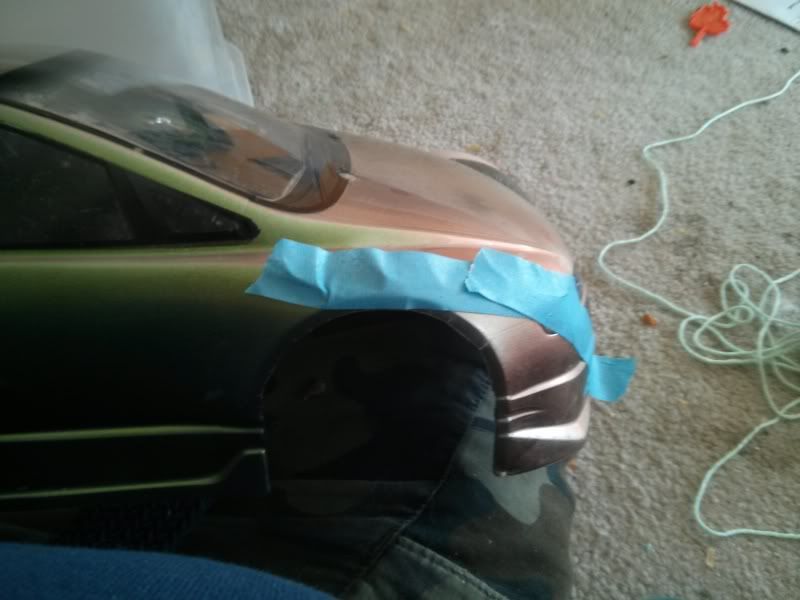
First up- remember that body waaaay back? I decided it was time to cut it down, desert rat style, to give me tire clearance.

[URL=http://smg.photobucket.com/user/mndsm/media/IMG_20130703_172516_zps9d1633c7.jpg.html][/URL]

This is masking off the front. I wanted to make sure the lines were as clean as possible, you know, even and stuff. So i masked it up all professional like.

[URL=http://smg.photobucket.com/user/mndsm/media/IMG_20130703_172823_zpsbf1dd9fd.jpg.html][/URL]

And here are the front fenders after the initial trim. I eventually had to trim quite a bit more off to make tire clearance on the front, I forgot that this this turns as well, and had to make sure I had clearance lock to lock. No big deal, Just more work.

[URL=http://smg.photobucket.com/user/mndsm/media/IMG_20130703_182550_zps257d6abf.jpg.html][/URL]

Here you can see roughly what it ended up looking like. There was more trimming done after this fitment, as I wanted to make sure I wasn't getting rubs anywhere on it.

After that, I discovered that my batteries (Turnigy 2s lipos) didn't fit for squat in the battery tray, so I had to do some...trimming. Using my expert skills, I turned my cordless drill into a handheld vertical mill (read I jammed it in there and used the sides of the bit to get what I need cut) until the battery fit. It's a tight squeeze, but, it's not going anywhere. Unfortunately, I don't have the pics of that right now.

Last but not least, was the custom adapter I made to fit Deans connectors on one side, and 5.5mm bullets on the other. I have bullets on everything else I have- the deans is what came on the traxxas when I initially bought it. Rather than cut down the already short ESC pigtail, I made an adapter so everything worked together. Got to test my soldering skills. Turns out I suck at it.

EPILOGUE- Truck is almost there. The body fits, now it's just a matter of cutting down the posts a little as this truck was never designed to have the body on it, and I need some clearance on the post side as well. Also chasing a bug in the ESC- has a typical traxxas forward stutter, and refuses to reverse. I've confirmed my radio and the reciever I purchased are 100% functional, and pretty much ruled that it's the ESC somewhere. Sadly, Traxxas doesn't have PC support for their ESC's (at least in this generation), so I'm on my own diagnosing it with blinky lights. I've reset it, it's in sport mode so it should have reverse.... low volt cutoff is set up- No idea beyond that. I did take a brief pull on the trigger though, and this thing RIPS.

blackzx3_13
blackzx3_13 New Reader
8/25/13 12:54 p.m.

If there is a forward stutter, and no reverse it's most likely an issue in the ESC. The stutter is called cogging. That and the lack of reverse are usually signs that the ESC has overheated at least once.

mndsm
mndsm PowerDork
9/5/13 8:00 p.m.
blackzx3_13 wrote: If there is a forward stutter, and no reverse it's most likely an issue in the ESC. The stutter is called cogging. That and the lack of reverse are usually signs that the ESC has overheated at least once.

Oh it has, no doubt. the e-fan on it was a POS. I dislike Traxxas stuff anyhow... I'm just gonna run it til I can get a castle in it.

mndsm
mndsm PowerDork
9/9/13 6:21 p.m.

[URL=http://smg.photobucket.com/user/mndsm/media/IMG_20130909_181547_zpscd3f620d.jpg.html][/URL]

I figure the 3 people that read this thread deserve ONE MORE update. This is how it looks right now. Still chasing the cogging issue- I haven't had a chance to talk to Traxxas. I did talk to the PO, this motor combo is from at least when it was in college, which was before I knew him, so it's at least 6 years old. Debating the merits of attempting speed records with the drift setup, or strapping something truly wicked to it.

blackzx3_13
blackzx3_13 New Reader
9/9/13 9:41 p.m.

You've already talked to Traxxas, I work there! If it's 6 years old, the only option through us is a lifetime service plan replacement. $50 for the esc, $35 for a motor. You would have to send the old stuff in first though. eBay used part pricing on brand new items. Although, of you're thinking of going for Castle stuff, probably wouldn't bother with our swrvice plan. More speed/power potential in aftermarket stuff.

bluesideup
bluesideup Reader
9/9/13 10:12 p.m.

My brother just sent his Rustler VXL to me so I've been checking out your thread. My little guy is 3 so he of course freaked out when the box arrived. I warned the wife to not charge it as he'll end up t-boning the dog while I'm away on a trip.

First thing I can see it needs bumpers so I'll order those. For screwing around in the yard what kind of other longevity mods do you recommend?

mndsm
mndsm MegaDork
5/22/15 10:54 p.m.

Zombie updaaaaaate. So- this truck sat for most of last year. All of my RCS did. I didn't have much in me, and pretty well isolated from all the homies. But, my little dude is almost 4, so its time to give this a go. Plus, I got a friend having a thing in a few weeks, so I'm working to get everything track worthy by then.

Step one- order SCT wp/3800 kV combo. It ships Tuesday. Step 2- install retarded micro pro/6800kv setup in 18mt. Pray I can keep the diffs together for more.than one.trigger pull. I just need to solder the deans connection onto the ESC and were gold. Shell fire this weekend. And I will probably need new diff's Tues. Step 3, purchase another truck?

Why not. I bought my son a truck I had owned previously. Its a team associated t4rs rtr. I bought it from a friend who bought it new. I turned around and sold it to my uncle for his daughter. She's now a tween, therefore rc is not her jam. So, for the paltry sum of 50 bucks, I picked up a total creampuff. This thing has never been raced hard. I fired it, and handed the stick to my kid. He went wot, straight into a retaining wall. I didn't know you could break that much at once. Rpm bits, installed. Driver mod inbound.

SnowMongoose
SnowMongoose Dork
5/22/15 11:29 p.m.

As someone who has personally had an encounter with a retaining wall, ouch.
(though I bet your bill was less than the cost of emergency splenectomy)
Must... not... get sucked into... new... hobby!

mndsm
mndsm MegaDork
5/23/15 7:55 a.m.
SnowMongoose wrote: As someone who has personally had an encounter with a retaining wall, ouch. (though I bet your bill was less than the cost of emergency splenectomy) Must... not... get sucked into... new... hobby!

Yeah, I think the whole fix, with updated parts was like 15 bucks. I keep forgetting that even stock 17t brushed motors are fairly quick.... I'm so speed blind from my others that I get lost when running something non-castle infused. With the change from velineon to mamba power in the junk pile, that makes three trucks I've got on castle brushless......

And as far as the hobby, there's really a couple ways to go about it. I've taken the road less traveled. I've been mostly hoarding up peoples old castoffs and making them into things I like. I actually have......5 more vehicles inbound for that very reason. 3 tt01s that I used to own that I sold to finance my tb03 build, an old rc10gt roller, and yet another rc10 t4. I think I'm going to try my hand at reverse engineering the team associated catalog and make one of those tructs into another SCT..... Probably the the gt. That might be harder, because if its a gt and not a gt2, god only knows the generational differences between that and where we are now. Gt2s are close enough to t4s that I can figure that out. I'm just not sure an strc plate exists for this one- so I may have to either have one made, or cheat somehow.

Most other people however- go in and spend a retarded amount of money on hopups and can barely figure out how to turn the damn thing on. Every time I'm at the hobby store, I see some asshat haul in a gigantic truck just dripping with expensive parts and huge aftermarket wheels and all this stuff and they set it on the counter and go "idk what's wrong, you fix". And I'm just standing there like " you've got like 1500 bones into that e maxx. That thing has to be a beast. But since you're a moron, you probably berkeleyed up most of your installs. So its broken and you suck" while I'm digging through the clearance bin looking for lost treasure. The fun with rc is being able to mod and monkey to my hearts content without fear of needing to drive it. If its broken, its broken. Nbd. Can't say that about my real cars.

But as far as it goes its really not that bad. I have two shelves and a medium tackle box, and they hold most of my stuff. I have driving cars in two states. Rc takes up waaay less room. If you're careful, you can do it cheap. I have a guy I order most of my parts from. I also use my LHS for replacement parts, and I do my research. I bet I've got like....500 bucks into the stash I have now, and most of that is motors.

tjbell
tjbell Reader
5/23/15 8:46 a.m.

What have you done, I had plans of cleaning out my storage unit today, which of course, has tons and tons of RC stuff. berkeley. now I want to do this to one of my old school nitro rustlers. Damn you and Damn this hobby!

mndsm
mndsm MegaDork
5/23/15 9:50 a.m.
tjbell wrote: What have you done, I had plans of cleaning out my storage unit today, which of course, has tons and tons of RC stuff. berkeley. now I want to do this to one of my old school nitro rustlers. Damn you and Damn this hobby!

You could have a nitro slash! Or for more fun, convert to brush less. 120$ will get you a castle setup like the one going into my junker up there.....

1 2

You'll need to log in to post.

Our Preferred Partners
IWjPTyEgKtI4RbXzy5NhBec57ZsE3KzI1rQI6Xpj0SYank9jb3OdxbxavMmrBnno