The hell with building a locost. Im gonna save my pennies fir a cobalt and a kit.
In reply to Dusterbd13:
These little FWD car based space frame cars are the modern iteration of the locost.
I was watching the midlana build and had convinced myself that it looked like fun. At this price point, this looks like more fun.
I have less than the proposed "naked" kit price in my Midlana project, and the only big things left to buy are axles and shocks.
Just sayin' ![]()
bgkast wrote: I have less than the proposed "naked" kit price in my Midlana project, and the only big things left to buy are axles and shocks. Just sayin'
Yes, but there is a big difference in sourcing all the materials, parts, and doing your own fabrication and purchasing a ready to bolt together kit. Building from scratch is very satisfying but I don't think most of us that do that count the value of our time.
jmc14 wrote:bgkast wrote: I have less than the proposed "naked" kit price in my Midlana project, and the only big things left to buy are axles and shocks. Just sayin'Yes, but there is a big difference in sourcing all the materials, parts, and doing your own fabrication and purchasing a ready to bolt together kit. Building from scratch is very satisfying but I don't think most of us that do that count the value of our time.
And, sometimes the easiest tool to use from my toolbox is a pen and check book. It can make up for some missing skill set.
To each their own. I don't keep a check book in my tool box so I don't get in trouble with the wife. ![]()
Dusterbd13 wrote: I was watching the midlana build and had convinced myself that it looked like fun. At this price point, this looks like more fun.
The situation seems similar to RC airplanes: some people enjoy the process of completing an unassembled airplane kit and others don't mind paying a little more for an almost ready to fly kit. I don't know if bgkast has any experience with RC planes, but I'm willing to bet he is like us and enjoys a full build. But for those that either don't have time, skill or patience for an extensive fabrication project, we want to make an "almost ready to fly" car. As bgkast said, "to each their own."
jmc14 wrote: Building from scratch is very satisfying but I don't think most of us that do that count the value of our time.
Our day job in the machine shop requires us to be very good at estimating labor time so that we can make accurate quotes when bidding projects. Also, we often have to take into account that many of our projects require us to make custom tooling and machinery. We used this experience and quoted the Goblin kit car as if it was any other DoyleFab project to come up with our prices.
Adrian_Thompson The front hoop has bends out and up from the front members. That is probably a big no no for any organizing body if you want to do time trials, hillclimbs etc. I'd grab a copy of the SCCA and NASA rule books and have a look before you commit tubing to the CNC bender!
We aren't entirely sure the current design passes all constraints but we will check in to it before finalizing anything. It appears that the front down tubes can have two bends a piece so we might be good. Just to be safe, we've made most of the chassis and the cage out of 1.5 inch .095 wall tubing. Based on the rule books, this tubing is over-sized for a car as light as ours.
Now for an update.
I've shown a few pics of the mold we were making for a vacuum formed windscreen. Since then we've finished prepping the surface of the mold and built a quick rig to do the vacuum forming. This morning we fired up the heating elements to attempt to make a windscreen.

You can see we only sanded the portion of the mold that is part of the windscreen. The rest has leftover guide coat sprayed on it.
(If you look at the back wall on the right of the picture, you can see our wall of shame. Those parts serve as a reminder to double check your work.)
First we heated the plastic for an hour. We weren't sure how long to heat it so we just kept poking at it until it was very flexible all over.

The heating elements are from an old oven we had in a corner of one of the buildings. The element on the right was the broiler in the top of the oven and the other was the main element in the bottom. We were disappointed to find that they do not reach the same max temperature. To help the plastic heated evenly, we put an aluminum plate over the cooler element. It seemed to work but we did use a heat gun as supplemental heat in the cooler areas.
Once it seemed hot enough, we removed the heating elements and lifted the box over the mold. We flipped on the vacuum (my mom's old Dyson) and dropped the box down onto the mold. The plastic pulled down to the mold and a windscreen was born.
We used a sharpie to mark the edge of the part and band sawed the basic shape.
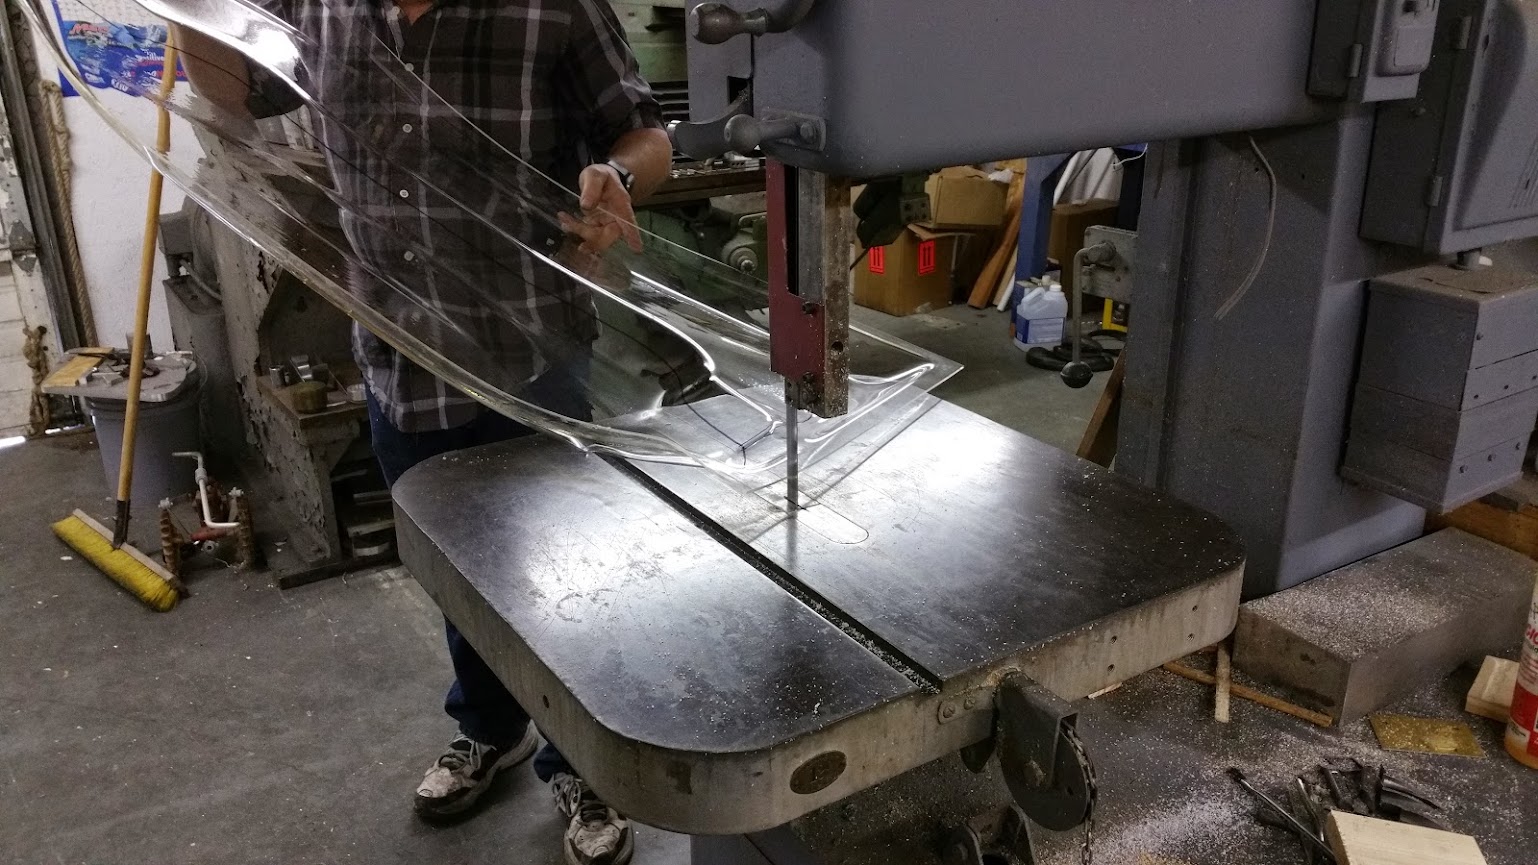
Next we mocked it up on the car to see how it fit. It looked great.
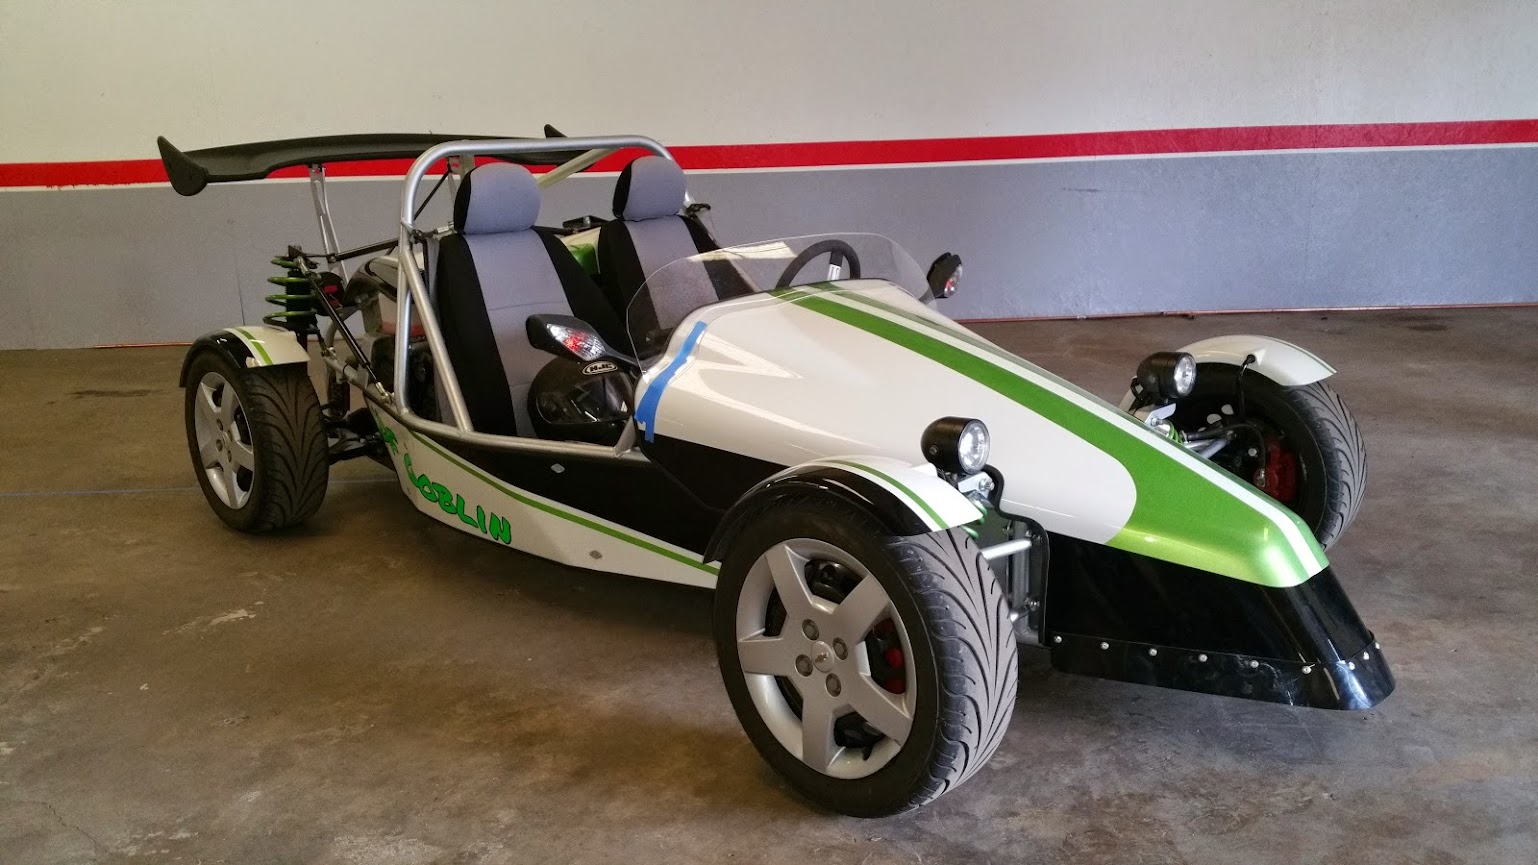
After stopping for breakfast, we took our time measuring and marking where we wanted to cut the screen. We used the band saw again to get close to the final shape and finished it up with an orbital sander. We drilled holes through the windscreen and used those as guides to poke the holes in the fiberglass nose.
Using stainless steel carriage bolts and plastic washers as spacers (so the screen would rub against the nose) we bolted the windscreen on.
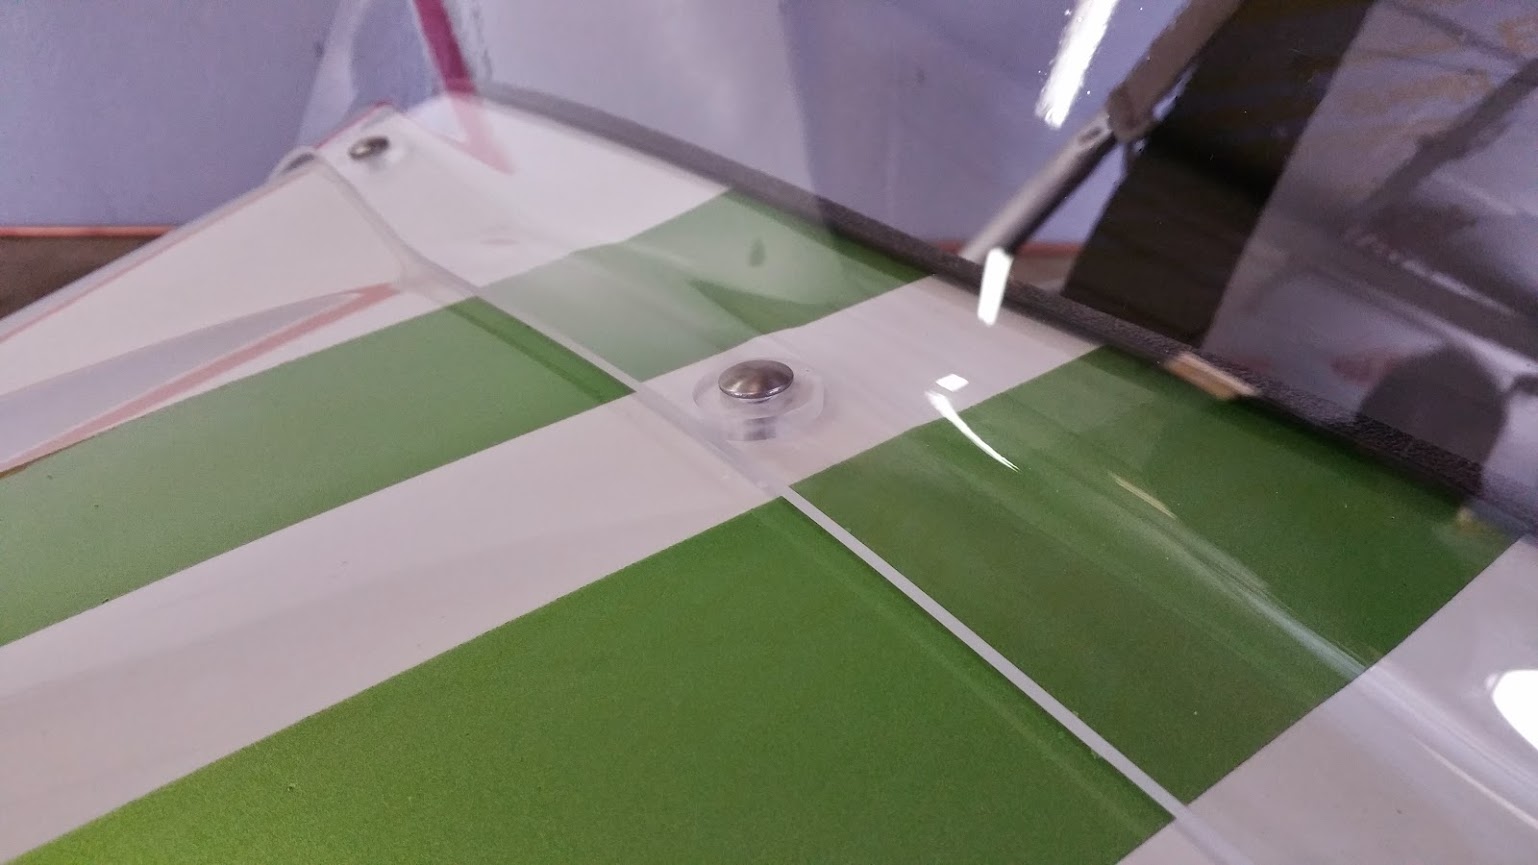
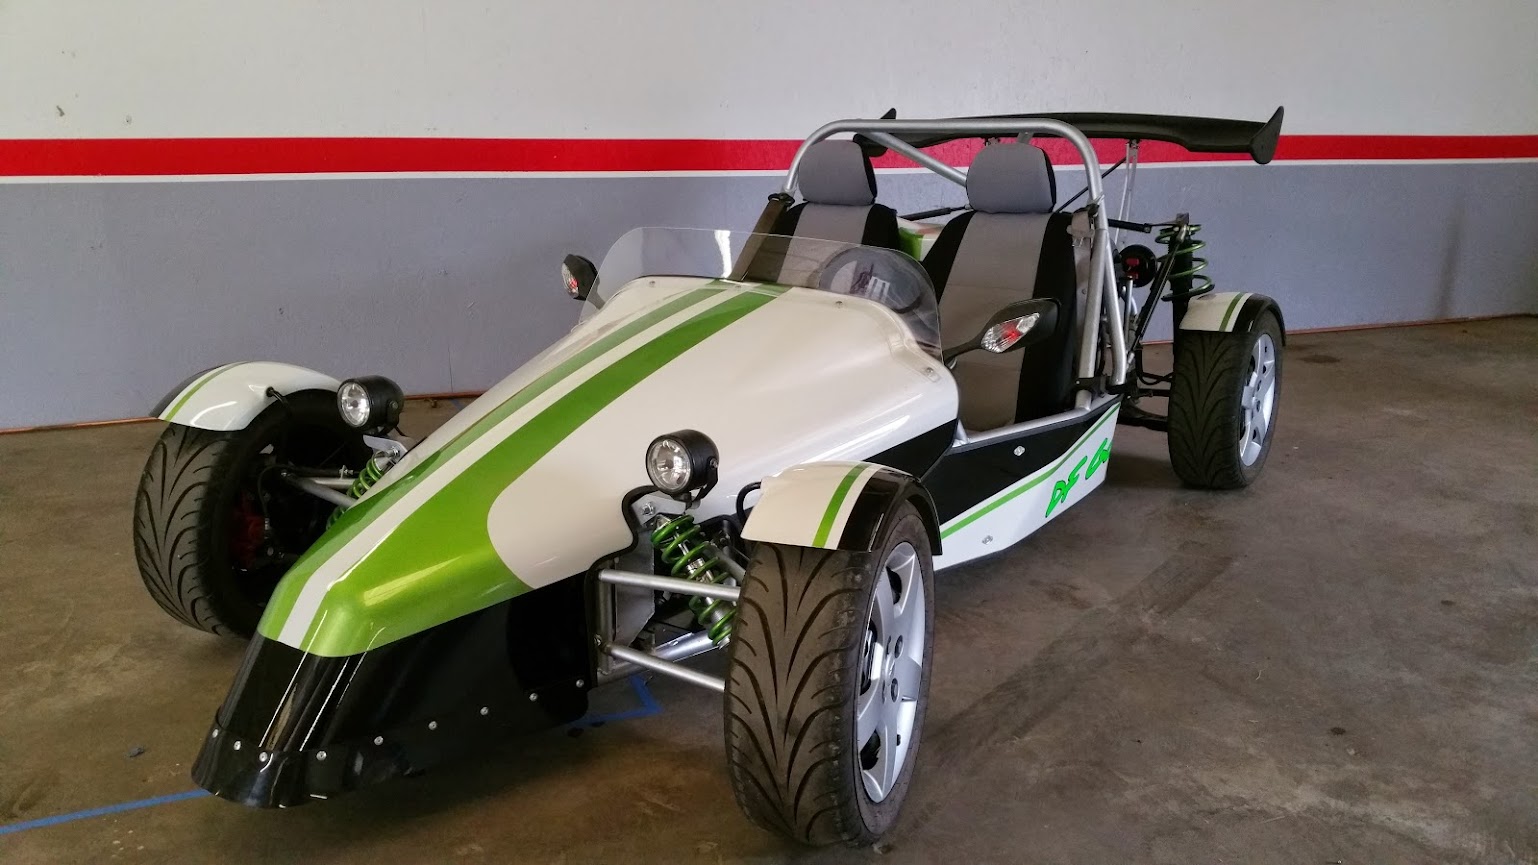
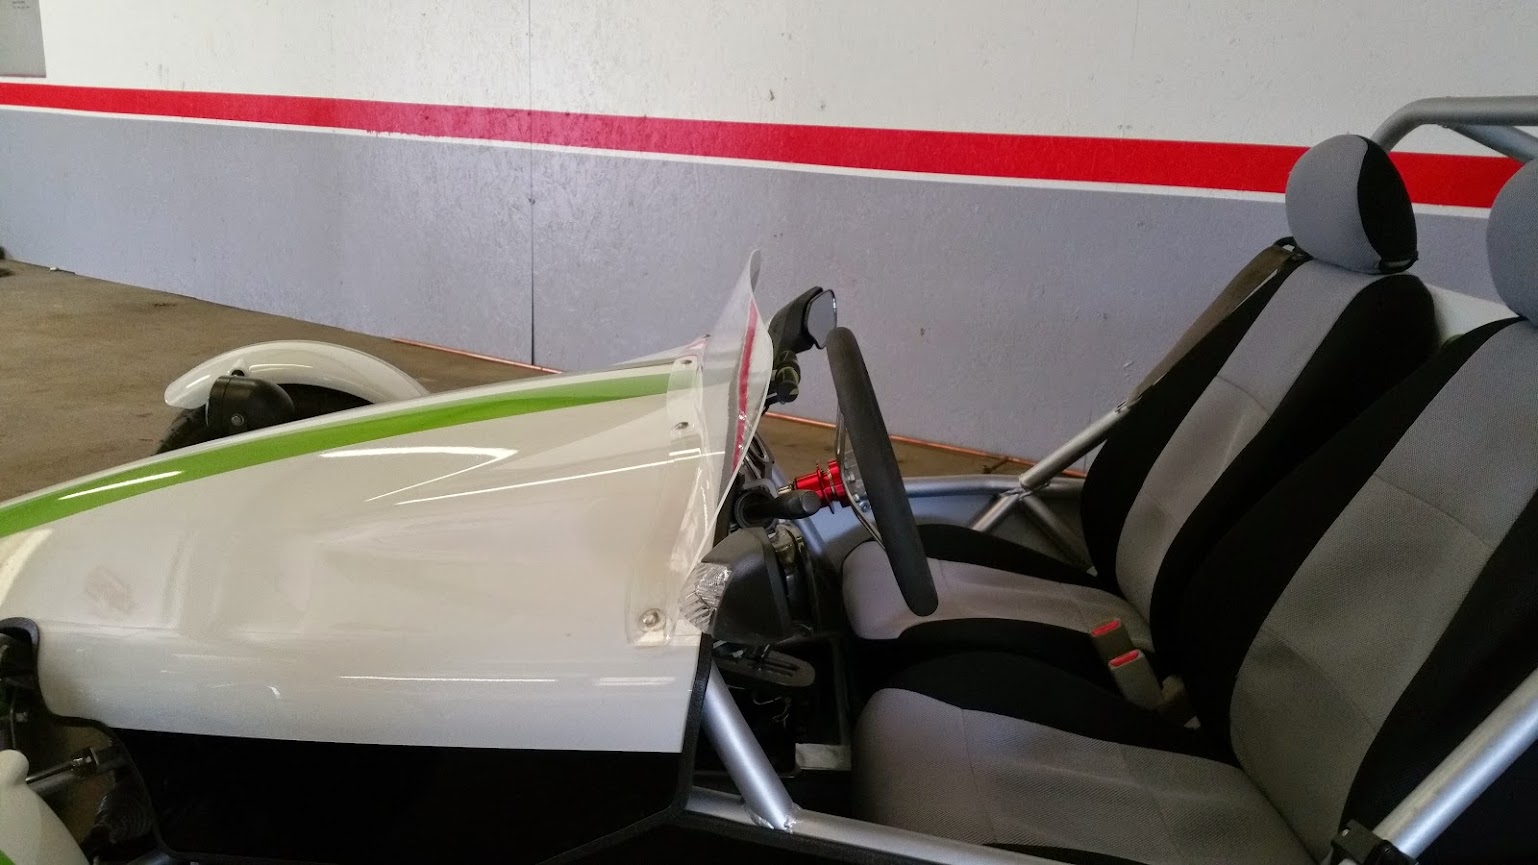
You can see from the side view how the screen not only fits the nose but also leans back and curves to make it more functional and aesthetically pleasing.
Unfortunately, just as we were bolting it on, it started sprinkling outside. We drove it down the driveway but couldn't tell if the windscreen will keep the wind out of your eyes on the road.
In reply to adoyle88:
I do have experience with RC airplanes. I usually built from kits or scratch built. ![]()
For what it's worth that seems to be a very reasonable price for the kit. I'm just a tight wad that likes to build.
Your mould making is very impressive. The windscreen turned out great.
In reply to zracre1:
I'm sorry I missed your earlier message about the manual version. We have thought it out more. Yesterday we pulled the shifter from my donor car (which has a manual transmission) and looked at making it work in the Goblin.
It looks pretty straightforward. We are going to reverse the motion of the shifter in the same way as the auto gear selector by using bell cranks extending down into the tunnel. The main difference from the auto is that there are two push-pull cables. We are also going to have to extend the clutch hose but that will be easy enough.
We are probably going to leave the first Goblin the way it is as an example of what you get with a completely stock setup but with mine, we are looking into adding a turbocharger.
You probably know this. So, forgive me if I'm stating the obvious. The plastic for the windshield will expand and contract some with temperature changes. The holes the bolts pass through should be slightly larger than the bolts to all for this. Otherwise the plastic will crack.
Learned this the hard way. ![]()
In reply to jmc14:
I did not know this, but to make installation easier, we cut the holes slightly over size. Hopefully it is enough. Thanks for the info.
We have a Cobalt as well, and driving in winter made me realise just how much the traction control truly sucks! Is T/C still a "feature" on the Goblin, or is this controlled by some part that's removed? If it's still present, is there a way to disable it, without the check engine light coming on?
Please have someone film you taking the Goblin in to the Chevy dealer for the ignition recall and post the link here. ![]()
![]()
"Unfortunately, just as we were bolting it on, it started sprinkling outside. We drove it down the driveway but couldn't tell if the windscreen will keep the wind out of your eyes on the road."
not to be too smartass about it, but if you drive it in the rain and the rain doesn't beat your face to death, it's probably working and will work for the wind too. :)
edwardh80 wrote: Is T/C still a "feature" on the Goblin, or is this controlled by some part that's removed? If it's still present, is there a way to disable it, without the check engine light coming on?
With so much rear percentage and a relatively low amount of horsepower, we haven't encountered tire spin yet. We plan to use HP Tuners to tinker with the computer so we will look into modifying the traction control system then. The way the car is registered, nothing is ever plugged into the OBD-II port for inspection so we have free reign on changing the computer.
Beagle wrote: not to be too smartass about it, but if you drive it in the rain and the rain doesn't beat your face to death, it's probably working and will work for the wind too. :)
We didn't drive it at any appreciably speed in the rain because we don't want to get the car all grimy before the upcoming Dallas Autorama. We have driven the car on the road since then. With the racing seats the windscreen would be tall enough but with the Cobalt seats putting us up higher, we need the windscreen to be a little taller. Right now the wind hits you halfway up your forehead. Keeps the wind out of your eyes as is, but we are going to make it taller next time.
I recently added a kit customizer to our website that let's you configure the options you want in your kit. I'd appreciate some beta testers that could try it out and see if there are any problems. If you don't mind trying it, follow this link: DF Goblin customizer. The customizer definitely looks better on a computer than on a phone thanks to a live preview of the kit.
In preparation for the upcoming Autorama, we've started mocking up a booth in an empty area of one of our buildings. Here's a preview:

We've been to a few expos with my dad's rotary engine so we are using that experience to design this booth. We are going to have TVs showing the video I made on either side of the banner (we got the banner printed by a local company called Amerigrafix) and we are bringing pieces from my donor car as a show and tell explaining what you strip from the donor. We will be at the event next Friday - Sunday so if you are in the DFW area, come by and check out the car.
Link just goes to the order page that says pre-order soon.
Do you know the legality of running wo/ body panels? might be a nice thing to be able to add later. I know the windshield is required in WA anyway.
In reply to java230:
It appears the new file had not updated. I purged the old one and it should work for you now. Let me know if it doesn't. It will be below the subscribe section on the order page.
You'll need to log in to post.