1 2 3
mikeonabikesmith
mikeonabikesmith New Reader
4/20/20 2:28 p.m.

Those front spring top mounts actually look like that, it 's concerning but I believe correct. You're more likely noticing a busted spring seat, not that big of a deal to replace and IPD sells more robust options. I think xc70s use the same design but are considered more durable. My memory is questionable, though.
In any case, they're awesome cars and it looks like you'll be up and running without too much work

KonaBoss
KonaBoss Reader
4/20/20 2:57 p.m.

In reply to mikeonabikesmith :

Yeah I have the IPD HD spring seats in the basement, and my research has also lead me to the conclusion that it is likely the spring seats. Thanks for the confirmation though, and hopefully it is up and running soon!

KonaBoss
KonaBoss Reader
4/20/20 9:42 p.m.

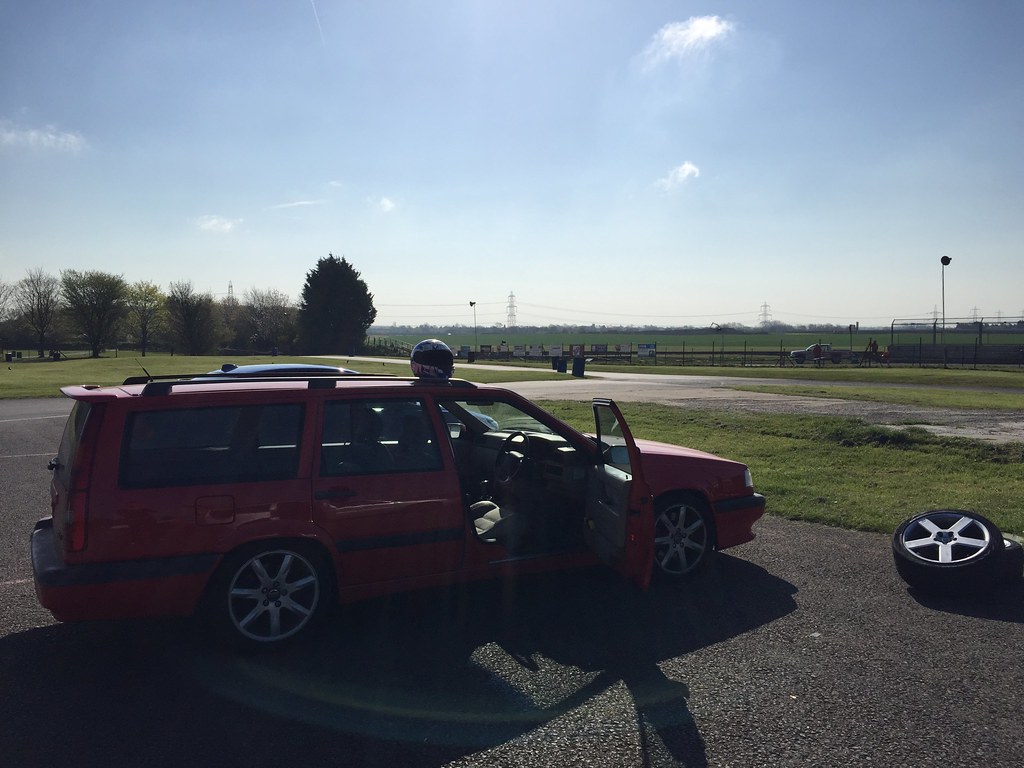
Ownership day 3 update: Making good progress and finding some carnage along the way laugh

Task #1: Get the engine up and running better. This step consisted of an oil change with Rotella T6 5W-40, about 6 gallons of fresh 93 octane fuel in the tank, and swapping the ACdelco TCV for the factory P2 Volvo TCV and connecting it to the harness. After doing all of that it fired right up and after about 3 minutes running and a little tiny bit of RPM, the lifter tick went away and it purs like a kitten. If anyone knows an easy way to upload videos here, I can provide a pretty distinct before/after comparison video. I did take a picture of the MAF wiring I fixed as well:

Also a picture of the P2 TCV swap - definitely need to get my hands on some new vacuum lines and clamps, they are about toast and pretty dry-rotted:

Task #2: Start addressing the completely worn out front spring top mounts. When disassembling the front suspension I found a nice surprise - Bilstein dampers! Although old and pretty crusty, when I disassembled them on the bench they still had some damping left in them:

So, I was able to remove the dampers from the car and take them over to the workbench to disassemble them. I put in replacement upper spring mounts, new bump stops, and new shock boots. Some pics below:

This is what was left of the driver and passengers side existing upper spring mounts.... One could say they were long overdue...

So, as of right now the front struts are rebuilt and loosely bolted back into the car. This brings me to task #3... The front brakes.

When I was pulling the front suspension apart, I found this. Definitely explains the squishy pedal feel....

The passengers side one literally fell apart in my hand... Have never had a brake pad do that to me before. Thankfully the spares kit from the PO included new front brake pads, and the rotors still looked half decent (minus needing some resurfacing with a flap wheel). I also found that the front rubber brake lines were pretty cracked, and will be installing new ones of those with the front pads. With how bad the front pads were, I'm going to go ahead and order some new rear pads as well as a precautionary measure. I'm hoping all of the calipers are still functional, but we will find out. So, tasks for tomorrow:

A. Install new front brake pads and new front brake lines

B. Put front suspension back together and torque everything down

C. Take rear wheels off and inspect rear brakes

D. Order new TCV vacuum lines and new rear brake pads

E. Beg/borrow/steal an air grinder and flapper disk from a buddy to resurface the rotors.

F. Reinstall driveshaft

All in all I'm pretty happy so far. The engine running smoothly with no obvious issues today really makes me think this could wind up being a half decent car in the end. 

KonaBoss
KonaBoss Reader
4/21/20 9:08 p.m.

Quick update from today's work. I was able to resurface the front brake rotors: 

Before:

After: 

Was able to knock most of the crud off of them. Didn't want them to foul up the new brake pads. Speaking of which, I next installed the new front brake lines and pads. I think the front passengers side brake caliper might be ceased up, it was very hard to retract the piston. The drivers side was really easy. The old front brake lines were definitely toast:

And once everything was re-assembled:

Nexts steps are to :

1. Look at condition on rear brakes, at a minimum clean up the rotors. Going to check the state of the rear brake lines as well and see if they are as rotted as the fronts were

2. If the rear brakes check out, I'm going to bleed the brake system

3. Order the parts mentioned above pending rear brake inspection

4. Reinstall rear driveshaft

5. First test drive! I'm sure the alignment is probably a bit off from the strut rebuild..

KonaBoss
KonaBoss Reader
4/22/20 11:28 p.m.

Well, ran into a speedbump... 

Looks like I'll be buying new calipers after all... Probably for the better, the seals on these ones were pretty worn out. Going to grab new rear brake pads and new rear brake lines while I'm at it. Rock auto is going to like me this month! :)

TED_fiestaHP
TED_fiestaHP Reader
4/23/20 8:13 a.m.

  It helps to put those little caps on the bleeder, keeps stuff out of them.  But sometimes they just get stuck, and it is very difficult to remove the little broken part in the caliper.

Woody
Woody GRM+ Memberand MegaDork
4/23/20 8:16 a.m.

In reply to KonaBoss :

Choose your calipers carefully, as Volvos of this era used two different manufacturers and they are very different. Make sure you order the right ones. Same with pads.

westsidetalon
westsidetalon HalfDork
4/23/20 8:23 a.m.

About to tackle spongy brakes on my T5 wagon as well. Pad is not making full contact on rotor and assumed caliper, but was told it could be also be pads/hardware are all crusted up and stuck.

KonaBoss
KonaBoss Reader
4/23/20 12:08 p.m.

In reply to TED_fiestaHP :

Interestingly enough, the caps were still on. And agreed on how difficult removing the broken part is. Will be getting new calipers..

KonaBoss
KonaBoss Reader
4/23/20 12:14 p.m.

In reply to Woody :

Roger that. Yes, have been doing a bunch of research on it. The fronts between '98 and '00 went from 280mm diameter rotors to 302mm diameter. The changeover happened sometime in mid '99 as far as I can tell. My car has the 302mm front rotors. Rears changed as well. Went from thin and non-vented in '98, to thick and non-vented in '99, to thick and vented in '00. As far as I know '98 and half of '99 used all the same rear calipers, then late 99 used different calipers, and '00 went to a potentially different caliper again to support the wider vented disks. And this is all related to just the R.. There are different layouts for all of the other V70's of the different years. Definitely alot more churn within model years than I'm used to lol. Last platform I messed with was the crown vic panther platform, and they didnt change anything for like 10-15 years...

Woody
Woody GRM+ Memberand MegaDork
4/23/20 2:55 p.m.

In reply to KonaBoss :

I think that your calipers were made by ATE. The older 850 style calipers probably had smaller pads, but they are much, much easier to change. It takes longer to remove the wheel on an 850 than it does to swap in new pads.

KonaBoss
KonaBoss Reader
4/26/20 7:41 p.m.

Alright everyone, time for an update!

Yesterday the goal was to get the car up and driving and go for a test drive. In order to accomplish this, I needed to do 2 things:

1. Replace front drivers side caliper and bleed brakes

2. Re-install rear driveshaft

So, with those goals in mind I went to work. I was able to source a V70R specific front brake caliper and caliper bracket from Oreilly's up the street. Surprisingly enough they had one in stock in their warehouse and it was at the store the afternoon after I ordered it. To @Woody's point above, it was a re-man'd ATE caliper. I also picked up a front passengers side caliper and caliper bracket assembly for a 280mm specific car, and was able to swap the caliper brackets over and use the new caliper with my 302mm rotors, verifying that indeed the front calipers are the same between a 280mm rotor car and a 302mm rotor car. 

After swapping the calipers I was able to bleed the braking system, and moved onto the rear driveshaft installation. Originally I took this out to allow me to dolly the car home behind the flex. When I was taking the driveshaft out I accidentally managed to knock the rear CV joint out of whack, so I had to spend a few minutes re-assembling that whole thing before putting it back in the car. A helpful tip to anyone doing this job in the future: They are bolted in with 6mm head Allen bolts, so if you have a long 6mm Allen bit for your impact gun, it makes the job go much quicker. Also, if you throw the trans in neutral while you are doing the job you can rotate the driveshaft which makes lining the bolts up with the flanges much easier.

After all that was done I put the wheels back on the car, checked the tire pressure, and took it out for a test drive! Drives pretty good for the most part, and is honestly way faster than it should be devil

So, with a productive Saturday behind my belt, I got the motivation to do a deep cleaning on the interior and engine bay today. Started off with vacuuming the interior, and man it was disgusting in there... Found a couple really small mold spots, which prompted me to go full on seat-removed deep clean mode. Looked something like this (this was after the first round of vacuuming...):

Once I had the seats pulled out, I went at the carpet with the vacuum again, then deployed some tricks I learned by watching various YouTube videos. Basically I mixed up some chemical guys upholstery cleaner in a spray bottle, and wetted the carpets down. Then I used my drill with a drill brush attachment (white bristles seem to be the correct stiffness) and went to town on the carpets with that until most of the stains disappeared. After that, I took a microfiber cloth with water on it and wiped out most of the upholstery cleaner solution, and finished by vacuuming over the area again to suck out most of the remaining water. Once I was done I let the car air dry for about 3 hours with the doors and rear hatch open, and this is what it came out like:

Suffice it to say, I was pretty amazed at how well that method worked out! After that I turned my attention to the seats. I further diluted the upholstry cleaner solution and wiped them down, then re-installed them in the car. After installation, I turned my attention to the door cards and dash, and then finally finished up the seats with some leather conditioner. Final results:

I am in dis-belief at how well it came out. Wish I would have taken some better before pictures to better demonstrate how dirty it was before I started, but lets just say I'm very happy with the results. Also used some engine bay degreaser to clean up under the hood as well:

That's all for this weekend's update. Next things to come:

1. It's going in for a timing belt job at my local Volvo mechanic on Friday this week

2. Have a line on some 2000 V70R vented rear disks, calipers, and caliper brackets that will be going on shortly after

dculberson (Forum Supporter)
dculberson (Forum Supporter) MegaDork
4/26/20 7:48 p.m.

Dang man that looks sharp. Good job on the interior cleanup. 

KonaBoss
KonaBoss Reader
4/28/20 12:33 p.m.

Scrapped the idea of the '00 V70R rear brake setup, parts are hard to come by and the seller and I could not reach an agreeable price. So, I ordered reman calipers, brake pads, and new brake lines from the rear from RockAuto. And now I wait... 

KonaBoss
KonaBoss Reader
4/28/20 8:41 p.m.

I did wind up getting a few things done today. Last week I bought a Volvo "eggcrate" grille for the car, and some C70 jewel headlights (depo brand) from a local Volvo guy. Here are some before and after pics: 

Before: 

And after:

I really like the headlights, they help to modernize the design, and another upside is much better light output at night! Still need to source a set of the jewel corner lights to go with them to complete the look. 

While I was working in the engine bay on the headlight swap, I noticed some pretty janky wiring going on with the fuel injectors... First off, the loom had pretty much disintegrated..

And then there were the really terrible butt connector splice jobs and the cut in one of the other wires..

I gently tugged on this splice and it fell apart...

I make a jumper wire and soldered it in, with proper heat shrink:

Finally loomed up the rest of the harness and now it looks back to factory!

A small improvement, but really cleans up the look of the engine bay. I find as I do more wiring, it seems to become more enjoyable... I guess I'm weird.

KonaBoss
KonaBoss Reader
5/4/20 8:48 a.m.

Minor update:

Car is coming back from getting the timing belt done today. Will be happy to get it back. While he was in there, he replaced the coolant reservior with a new OEM volvo one that came in the parts pile (old one was cracked) and replaced the lower engine mount. Old one looked something like this..

Completely and utterly shot. Upper mounts on the drivers side are toast as well, need to order up some replacements for those as well. Was thinking about going with the IPD poly pieces, but not sure I want the increased NVH. Goal of this isnt to be a racecar..

rothwem
rothwem New Reader
5/4/20 9:02 a.m.

Were the stitched door cards a V70R thing?  I used to have a 1999 S70 (5mt!)  and the door cards peeled after ~110k miles.  The interior held up pretty well otherwise though.  

KonaBoss
KonaBoss Reader
5/4/20 9:05 a.m.

In reply to rothwem :

The stitched seats were a V70R thing, but the doorcards are solid color. No peeling on mine, but the center inserts on them are starting to peel away from the rest of the door card, so at some point in the near future I am going to peel them off and re-glue everything

KonaBoss
KonaBoss Reader
5/4/20 9:58 p.m.

Got the car back from the timing belt change today! Big shout out to Paul Stallard here in Michigan, if anyone needs Volvo work done in the Midwest, Paul is your man! Super nice guy, reasonable prices, and quick turnaround. Really knows these cars well! While he was changing the timing belt he also swapped in a new OEM Volvo coolant reservoir I had, along with a new passengers side lower engine mount. Even took the time to do a general inspection on the car and fix a couple of small issues I wasn't aware of. Even with the top drivers side engine mounts being shot, the car is so much smoother already! PCV system checked out as well, so this R should be pretty close to buttoned up. I have new spark plugs on the way for it, along with a new fuel filter and new TCV hoses. I also have rear calipers, pads, and rear brake lines to install along with some new tires. Looking forward to getting that stuff done then enjoying it for a while!

dculberson (Forum Supporter)
dculberson (Forum Supporter) MegaDork
5/4/20 11:17 p.m.

I'm gonna agree with you that the poly stuff tends to be too much for daily drivers. I've had squeaks and more squeaks.

Woody
Woody GRM+ Memberand MegaDork
5/5/20 7:29 a.m.


The Cross Country grill makes such a huge difference in the way these cars look.

KonaBoss
KonaBoss Reader
5/5/20 9:54 p.m.

@Woody, agreed. Also think the jewel headlights made a big difference as well, now just have to source some matching corner lights. 

Another update, I was able to get the new rear calipers, lines, and pads swapped tonight:

Drivers side fought me a bit at the connection to the chassis hard line, but with some heat and working back and forth I got it. Also got some fresh BFGoodrich Advantage T/A sports mounted and balanced at Costco. I got them used with ~2k miles on them off of Facebook marketplace for cheap. Costco will mount and balance used tires for you, they just require you to bring in the wheels and tires separate from the car. Runs $75 for a set of 4, which I thought was pretty reasonable. 

Took the car for a quick spin, and what a difference! Definitely confirms my suspicion that the rear brake calipers weren't really doing much... Stops on a dime now. Also the nicely balanced tires are a sweet touch, doesn't feel like it is trying to shake itself apart on the highway anymore lol. 

Last couple items are as follows:

1. Fresh OEM Volvo spark plugs

2. New silicone TCV lines 

3. New upper drivers side upper engine mounts, both engine and chassis side (decided to go rubber and not poly)

4. New fuel filter

5. Trans fluid drain and fill

6. Angle gear fluid flush

7. Perhaps a line on a '00 R dual tip exhaust devil

KonaBoss
KonaBoss Reader
5/8/20 7:26 a.m.

Alright, an update from some work I did yesterday:

Started off by working on replacing the upper engine mounts, both chassis side and engine side. In order to do this, you have to pull the cowl cover off to get to the bolts on the chassis side mount, and the decorative engine cover has to come off as well for the bolts on the engine side mount. 

I'm glad I am going through the effort to replace these, both mounts were totally shot:

While at it, I threw a couple new coats of paint on the support bar that goes between the mounts, it had a bit of surface corrosion going on:

Shiny new mounts and everything re-assembled:

Next on the list was new spark plugs. I read alot of information stating that these cars are really picky about spark plugs, and that the OEM Volvo plugs were the ones that everyone recommended. The ones I pulled out were autolite plugs.

With that done, the cabin air filter needed cleaned out badly.. It is located under the cowl, so I figured I would do it while everything was apart. I thought I had a replacement that came with the car but turns out it was the wrong size, so I just blew out the original for the time being. It was nasty..

Eventually I'll need to get a replacement for it. Another thing I wanted to knock out was replacing the TCV rubber lines. The old ones were definitely on their last legs...

I got a kit from IPD that is color coded so it is easy to remember what line goes where! They are silicone lines and are much nicer to work with.

I got the blue (line to the inlet air tube) and yellow (line to the wastegate) hooked up, but still need to get the red one installed. It goes around to the bottom of the turbo somewhere, and I couldn't get to it from above. 

So, with all of that installed I went out for a cruise. I think the car really likes the new spark plugs and TCV lines, it really runs alot smoother now and pulls better. The following is still on the list:

1. New fuel filter after I use up this second tank of fuel

2. Trans fluid drain and fill

3. Angle gear fluid flush

4. Potential '00R exhaust

5. Install red TCV line

KonaBoss
KonaBoss Reader
5/11/20 1:18 p.m.

Another update from this weekend. Knocked a couple things off the list.

First up was installing the additional red silicone vacuum hose that goes from the compressor side of the turbo to the TCV. Turns out this line is really friggin hard to get to... Had to pull out the airbox and intake tube...

Next I flushed the angle gear fluid. Old stuff was pretty dark (hey wait, that isnt Dr. Pepper!)

Dammit
Dammit Reader
5/11/20 3:23 p.m.

Great car, I had the generation before - built engine with a 20T, AP Racing brakes on the front.

1 2 3

You'll need to log in to post.

Our Preferred Partners
3z2MAtRjuaJjuB4Y9F0E7GNjwccMLmzE2phP5wwTpNH2ENwssWc0TLyBkPOOQbvB