I really freaking <3 the E36m3 outta this berkleying thing!!!
i'm going to be honest bro this thing looks like complete junk. i would just scrap the entire build...
God I feel like such a slacker. The engine bay on the crx needs to be cleaned/painted before I pop the motor in. I've been slacking on this for over a year now.
In reply to indymx6:
It should have suffered a similar fate to the MX3 I kilt the core support on......![]()
This thing is awesome! Glad to see someone going a route other than the civic one in SMF. I hope to see you at some pros/tours this coming year in SMF! My father and I drive the CRX that won this year ![]()
My other unique SMF build "idea" is a first gen neon ACR with the turbo srt-4 motor in it with 315's up front :P No idea how possible this is, however.
Flood of backdates upcoming!!
3/18/12
General things i've discovered/learned the hard way along the way.
1) Don't ever bother buying OEM Mazda washers for anything, even if the ones you pull off might look special and weird shaped. (The hexagon shaped ones in the back come to mind.) They've been superceded with washers you can get at Ace Hardware.
2) Thinking that buying all new OEM hardware to use with your suspension that consists of... nothing stock: STUPID idea. Your wallet will hate you, and so will your brain when you try to match it all up.
3) MX3 passenger mounts DO NOT FIT in Escort passenger mount brackets. Lesson #237 in the Series: "Things HalfTrac should have kept off the MX3 before scrapping it."
4) Don't buy things until you're ready to install them. This way you're less likely to forget that Ryan's pimpy spherical bushings require the use of 92-94 MX3 rear bushing brackets. Also see: Lesson #238 in the Series: "Things HalfTrac should have kept off the MX3 before scrapping it."
5) If your rear suspension has never been apart and the car has more than 80k miles on it, just break out the sawzall. Don't even bother touching anything else.
5.5) Buy Lenox blades for said Sawzall.
4/30/12
Ugh this car sucks so bad.
Tried to depower the MX3 rack. Inner tie rods wouldn't come out.
Just ordered a new rack. UGH.
5/21/12
This car will be the death of me.
Steering rack from MX3 turned out to not be salvageable. Had to buy a new one. (That i'm just going to tear apart anyways. ARGH.)
Noticed that my stacks are patterned for a normal KL head, not a KLZE head. (Oval port vs. square port.) GREAT. Looks like i'm finding a set of DE heads to slap my ZE cams into so it all actually works. Nothing ever goes according to plan on this damn car.
Replacement arm FINALLY came back from powdercoating.
Sourced a late 626 distributor block off seal. FINALLY.
Wade did some pimp work on my valve covers after i blasted them with 80 grit glass bead media. (Which really sucks to get in your eyes if you have contacts, btw.)
Still haven't found MX3 LCA rear bushings brackets. Can't put car on ground until i have those.


5/14
Anyways, as par for the course, one step forward, two steps back.
The good news, everything fits as it should (mostly), geometry will be pretty good once adjusted, and it seems that i really do have all the nuts, bolts, and washers that i need.
The bad news is that the sleeve/spacer setup that goes through/around the rodend on the body side of the trailing arm is just not going to work. The sleeve is 10-12 thousandths too big, and the spacers are another 20 thousandths bigger ID than the sleeve OD, so they rattle around like crazy. None of it will work as is.
This is NOT Jim's fault. He warned me head of time that i'd have to turn down the sleeves, i just forgot. I should be able to have that done this week. :)


92CelicaHalfTrac wrote: Flood of backdates upcoming!! 3/18/12 General things i've discovered/learned the hard way along the way. 1) Don't ever bother buying OEM Mazda washers for anything, even if the ones you pull off might look special and weird shaped. (The hexagon shaped ones in the back come to mind.) They've been superceded with washers you can get at Ace Hardware. 2) Thinking that buying all new OEM hardware to use with your suspension that consists of... nothing stock: STUPID idea. Your wallet will hate you, and so will your brain when you try to match it all up. 3) MX3 passenger mounts DO NOT FIT in Escort passenger mount brackets. Lesson #237 in the Series: "Things HalfTrac should have kept off the MX3 before scrapping it." 4) Don't buy things until you're ready to install them. This way you're less likely to forget that Ryan's pimpy spherical bushings require the use of 92-94 MX3 rear bushing brackets. Also see: Lesson #238 in the Series: "Things HalfTrac should have kept off the MX3 before scrapping it." 5) If your rear suspension has never been apart and the car has more than 80k miles on it, just break out the sawzall. Don't even bother touching anything else. 5.5) Buy Lenox blades for said Sawzall. 4/30/12 Ugh this car sucks so bad. Tried to depower the MX3 rack. Inner tie rods wouldn't come out. Just ordered a new rack. UGH.
Helps to not live in a Rust-prone area.
Also, don't scrap donor vehicles until the donee is up and running.
Finally, why isn't this in the build-thread forum? :)
6/20/12
Pictures should be fixed....
Some more progress. Having an issue with steering wheel going back on column. If i bolt it down, as you turn the wheel, it's catching on the turn signal and tripping that. Any input from anyone?
STILL need MX3 LCA rear bushing brackets. I will pay anyone $50 for a set of 92-94 MX3 LCA rear bushing brackets.
Cleaned the interior up some:

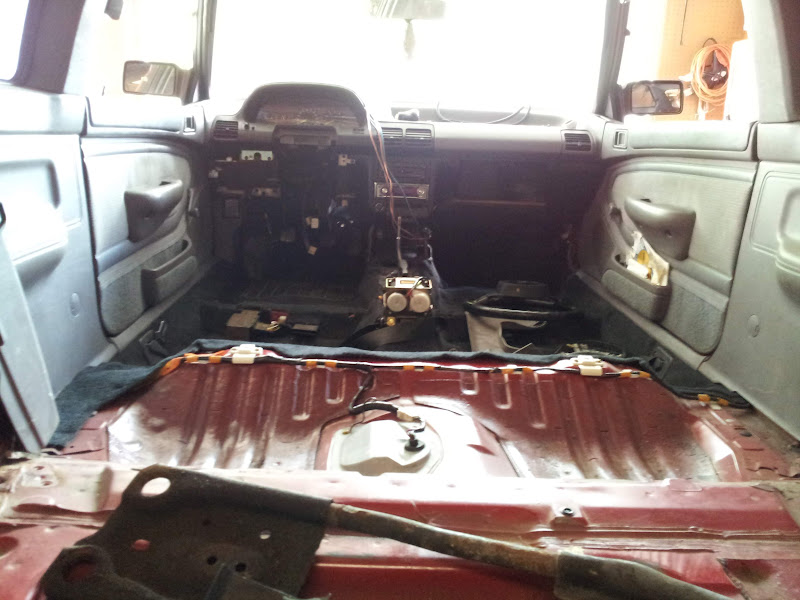
Finished mocking up the rear end. Sleeves are getting turned down this week, so i'll tighten everything back there this coming weekend.
(Pictures make the car look rustier than it really is. It's all just surface rust, brake lines will be replaced.)


Dark picture of the whole rear with tie brace installed:

Crossmember and some mounts installed. Minor fitment issues with the side mounts. (My fault, i didn't send the brackets with the mounts to be fitted.) I can fix them. Crossmember drilled for AWR Probe front mount.

Question: In this picture, you see the driver's side mount and the bracket it attaches to on top of the box. The bracket attaches to the bare metal portion in the right hand side of the picture, and offers a second "plane" for the mount to attach to for a 3rd and 4th bolt. How necessary is this bracket? Mount would still have the two bolts up top of that "beam."

Delrin bushings installed:

turboswede wrote:92CelicaHalfTrac wrote: Flood of backdates upcoming!! 3/18/12 General things i've discovered/learned the hard way along the way. 1) Don't ever bother buying OEM Mazda washers for anything, even if the ones you pull off might look special and weird shaped. (The hexagon shaped ones in the back come to mind.) They've been superceded with washers you can get at Ace Hardware. 2) Thinking that buying all new OEM hardware to use with your suspension that consists of... nothing stock: STUPID idea. Your wallet will hate you, and so will your brain when you try to match it all up. 3) MX3 passenger mounts DO NOT FIT in Escort passenger mount brackets. Lesson #237 in the Series: "Things HalfTrac should have kept off the MX3 before scrapping it." 4) Don't buy things until you're ready to install them. This way you're less likely to forget that Ryan's pimpy spherical bushings require the use of 92-94 MX3 rear bushing brackets. Also see: Lesson #238 in the Series: "Things HalfTrac should have kept off the MX3 before scrapping it." 5) If your rear suspension has never been apart and the car has more than 80k miles on it, just break out the sawzall. Don't even bother touching anything else. 5.5) Buy Lenox blades for said Sawzall. 4/30/12 Ugh this car sucks so bad. Tried to depower the MX3 rack. Inner tie rods wouldn't come out. Just ordered a new rack. UGH.Helps to not live in a Rust-prone area. Also, don't scrap donor vehicles until the donee is up and running. Finally, why isn't this in the build-thread forum? :)
Eh... rust isn't bad here, really... this car just has 300k miles on it and i was pissed at the time. ![]()
I can't keep donors around. Only have one garage space. ![]()
Hasn't been moved since i haven't updated it in forever. But we're catching up now!
8/16/12
Front suspension assembly. HOUSTON WE HAVE A ROLLER


Hitting the ground. Big thanks to Thymighty for the help!


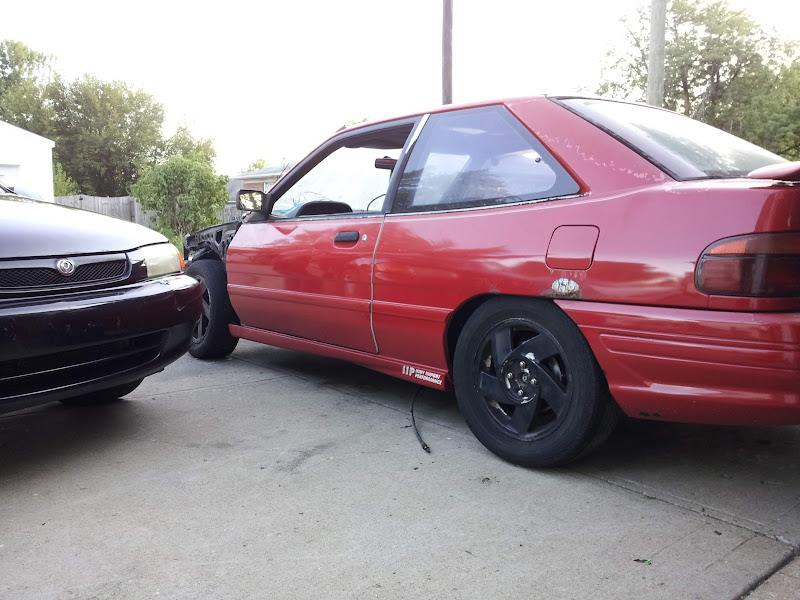

Threw it on a trailer to take it to where it'll be finished.


7/14/12
Updates!!!!!
7/14/12 Tore down the motor for the Escort.
Despite a surprising amount of carbon build up and dirt, the motor itself looks great and is exactly as advertised. I'm excited.


7/22/12
This looks kinda fun.


12:1 Wiseco forged pistons on Scat mustang stroker I-Beams with ARP fasteners. Clevite race bearings, ARP head bolts, and some stainless steel custom exhaust manifold flanges.
Got a new set of heads yesterday as well. Stock oval-port Millenia heads with the square top cam caps and updated valvetrain locks. This is rapidly becoming the ultimate "mutt" motor.
This season: KLZE bottom end, Millenia heads with KLZE cams, MX3 trans.
Next season: KLDE block, KLG4 crank, Mustang rods, MX3 trans, late 626 heads w/ Neon dual springs and retainers.
8/7/12
New valve seals came in, should have many more parts coming in the next couple days. Interprep valve springs ordered, and have two sets of solid lifters with shims on the way.
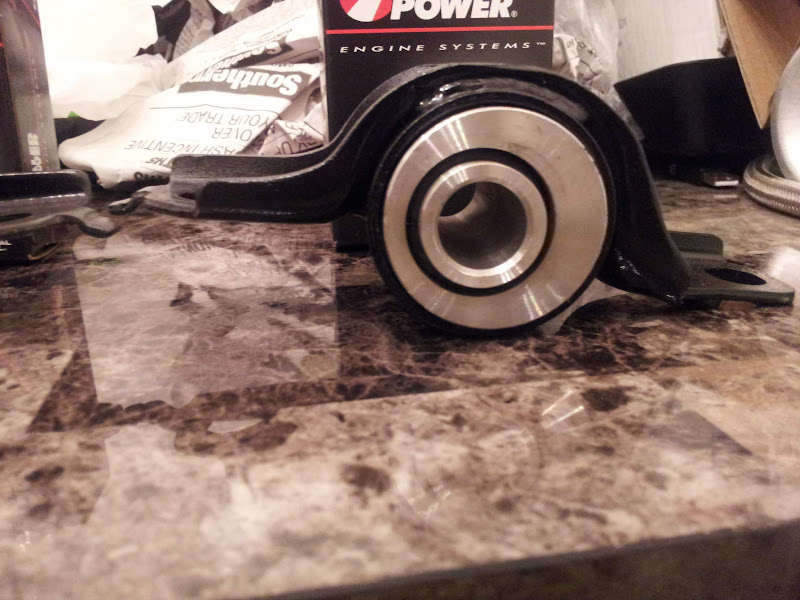
And finally got my lower control arm rear bushing brackets sorted out. Pretty?



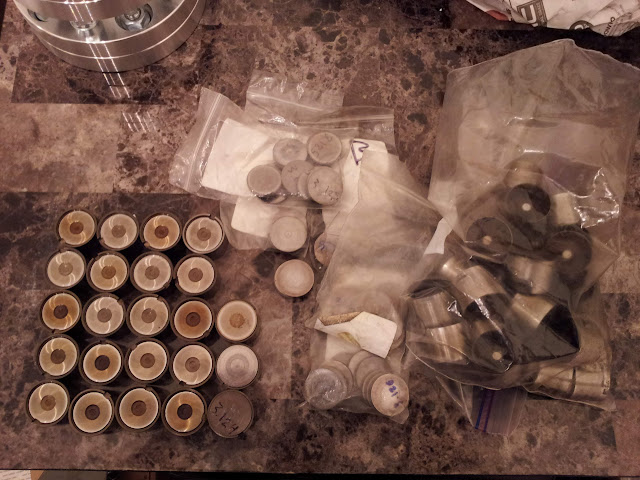
I got 99 problems, but limpdick HLAs ain't one.

8/21/12
Interprep springs arrived.

Checked on my heads at the machine shop. (And dropped off the valve seals, Interprep springs, solid lifters, and a set of CZT 218 race cams.) Oh, did i forget to mention the cams earlier? :D

Cleaning up the motor. It was NASTY.


8/20/12
New water pump, and a "Beck Arnley" brake master cylinder.

Nice "Beck Arnley," bro. (This later turned out to be the wrong master cylinder. I ended up getting no less than 4 different master cylinders, none of them being the right one. I improvised. You'll see later.)

8/24/12
Spent yesterday wrestling with shift linkages. UGH.
Had to move the PaceE36 M3ter adjustable over to the MX3 linkage, which at some point had had its bushings removed and the bolt/pin hammered flat. Had to grind it out, then figure out how the hell the Corksport bushings work. (I'm not buying that kit again, it's not complete) Ended up with Delrin bushings in the shifter, Corksports on the trans end, and ES stabilizer bushings.
Just need to grab bolts/nuts today to put it all together.
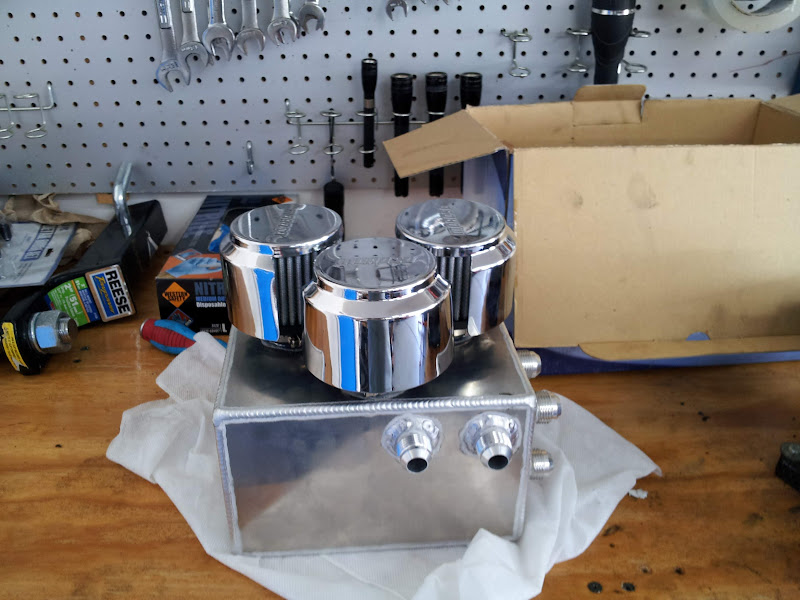
Took some measurements in the bay... the Griffin radiator will be mounted forward of the support, coolant overflow tucked in driver's fender, oil catch can mounted in front passenger fender where a/c and PS stuff used to be. Going to have TONS of room in this bay. Excited!
Race car kit?

8/26/12
Anyways, ran into an issue today, full update will follow tomorrow.
But for now....
[size=10]BOUNTY!!!!!![/size]
$50 for the u-joint thingy that goes between steering rack and steering column.
Seems i threw out my old one off my old MX3 rack... with the MX3 rack.
And obviously, the Escort unit doesn't work. So i need that.
It's the thing attached to the splined input coming out the top of the rack in this picture:
(PS: Energy Poly Escort steering rack bushings work just fine on an MX3 rack, in an Escort, with Escort rack straps just fine with one very minor modification.)
8/27/12
Updates from the weekend!!!!
Installed new clutch master cylinder. No pictures, but this sucked pretty bad.
Rebuilt the shifter assembly and linkages.

Note that this car has already suffered a "dropped shifter."
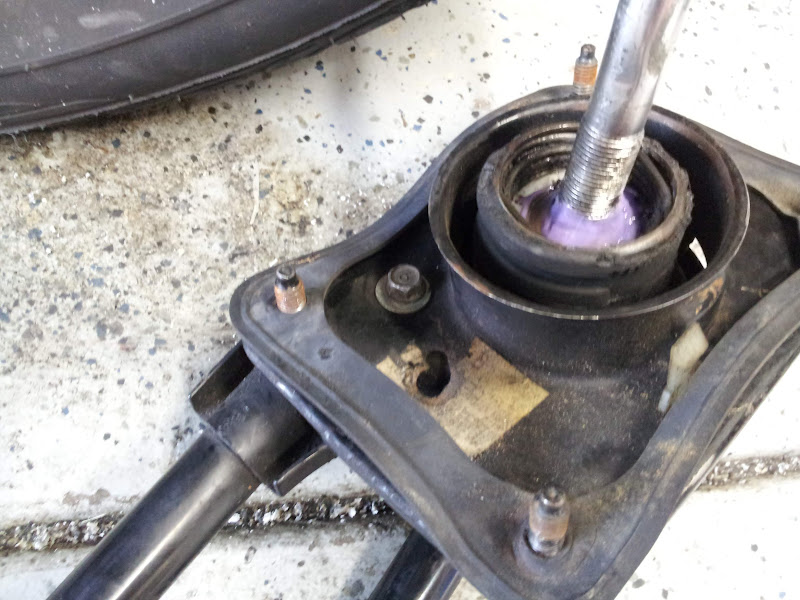
Sandblasted some things. (Then painted them, but forgot pictures.)
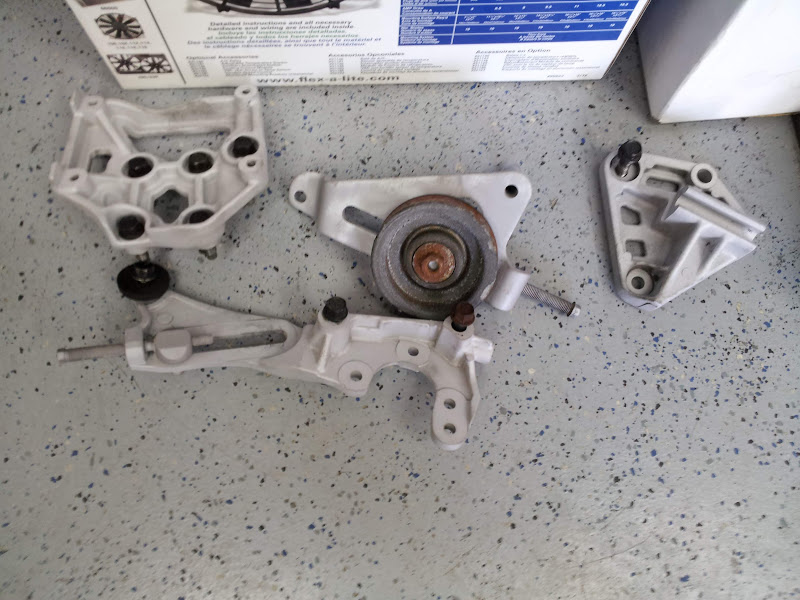

Put shifter back in car. (Has to come back up, the linkages are UNDER the 4-point brace up front. Durrrrrrr)

Steering rack was installed. (And picture is REALLY out of focus. FAIL.) Got two big brass plugs from Lowes for the rack, had to cut the fittings off the lines and fill them with metal putty to use as plugs, since i couldn't find any metric fine thread bolts locally, quickly. It works, lookes fine. :)

Tie rod setup works!!!! Also installed front Corksport brake lines. Didn't do rear yet since i may have to replace the rear hardlines.

Removed a BUNCH of stupid little brackets from the front of the car that will no longer be used. (I love wire wheels.) I repainted the ground down spots, but apparently forgot to take a picture. Oh well.


Disassembled one of my alternators to clean it up, decided to get a little crazy with the baskets. :)

Then managed to get 21.999mpg out of the Cherokee on this fillup!

8/27/12
Didn't get a TON done today... Rockauto sent me the wrong brake master cylinder AGAIN, and it seems to be unavailable pretty much anywhere. Not sure what i'm going to do about it. They sent me the right cylinder, but wrong reservoir.
Threads were dicked up in the hub on this corner, took a good 45 minutes just to get the caliper on the hub snugly. Also: i hate this pad retention design. So stupid, and not real great for braking, either. Fiddly.
Sandblasted and painted the headlight mounting brackets before re-installing them after Cody set me straight. Cleaned up alternator, will reassemble on Wednesday.
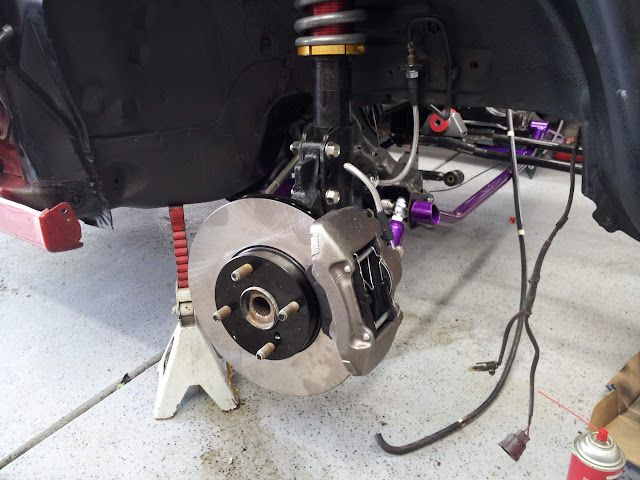
9/5/12
No progress over the weekend, was out of town helping to move a warehouse.
Got some bad news from the machine shop on Friday, concerning something that i should have caught beforehand.
My cams were ground down so much that they can't take up the lash safely on a shim-over-bucket design. I need either shim-under or shimless buckets. I'm out of money, so i'm just going to put the HLAs back in and only spin it to 8500 for now. I'll use Zetec shimless buckets on the next iteration when the 12:1 bottom end goes together.
Picking up heads today, going to try to get the HLAs rebuilt this evening.
Rear driver's caliper that RockAuto sent me is defective. Piston won't go in the caliper far enough to clear the pads. This caliper was purchased a year ago, RockAuto will not do anything about it due to time. Lesson Learned: Do NOT EVER buy parts in advance from RockAuto.
Also figured out what to do about the master cylinder issue. Just going to use an EG Civic remote reservoir for the clutch master cylinder. Easy. (Thanks goes to Atomic for this tip!)
Gonna be a busy week, the goal is to have the motor and trans in the car by Sunday.
9/7/12
I think i'm pretty much done with Mazdas after this thing...
Worked on it all day yesterday.
Out of 36 HLAs out of 4 heads, (The exhaust side on the ZE heads i'm not using is 33mm instead of the 31mm i need.) i got a total of 19 good ones. So the rest are soaking in gasoline right now, i'll rebuild them tonite i guess. What a berkeleyin' pain.
Then:
1) Realized that i hadn't shimmed the oil pump before i put the oil pan on. Yay.
2) Found that both bolt holes for the timing belt tensioner are stripped. Also yay.
Did get some work done in the last two days, though, much as it doesn't look like much.
Disassembled, cleaned, and reassembled an alternator. Oh, and sandblasted and painted the basket like a ricer. I think next time i may just buy a new alternator. This wasn't the most fun job in the world.

NOS oil pan installed. (And has to come off again.)

Got these.
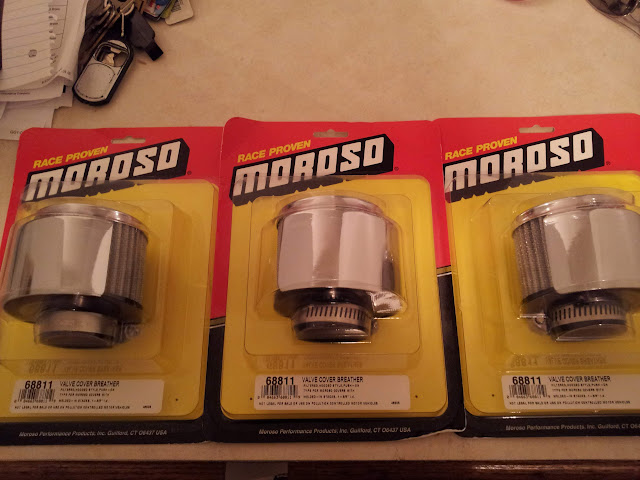
So this happened.

My buddy "clearancing" the driver's side trans mount.

DAYUM.

Heads are going on today, and hopefully rest of accessories. Will run tomorrow morning to grab my hoist and then motor goes in.
You'll need to log in to post.