Robbie (Forum Supporter) said:
Little update here.
I started drilling a hole in the middle with the plan of drill hole plus weld but and try to remove.
Then my 1/8 drill bit broke off almost all the way through, but left about 1 solid inch of bit inside what's left of the rod end. Then I got pissed and hit it hard with the welder, large hammers, heat, and the impact.
Now the nut moves about 1/8 turn back and forth, but doesn't go past that. I'm pretty convinced that whatever theads inside are totally shot.
Whelps, looks like I'm first going to try and cut this out and replace only the threaded tube portion. Good news is speedway sells the exact threaded tube that I need.
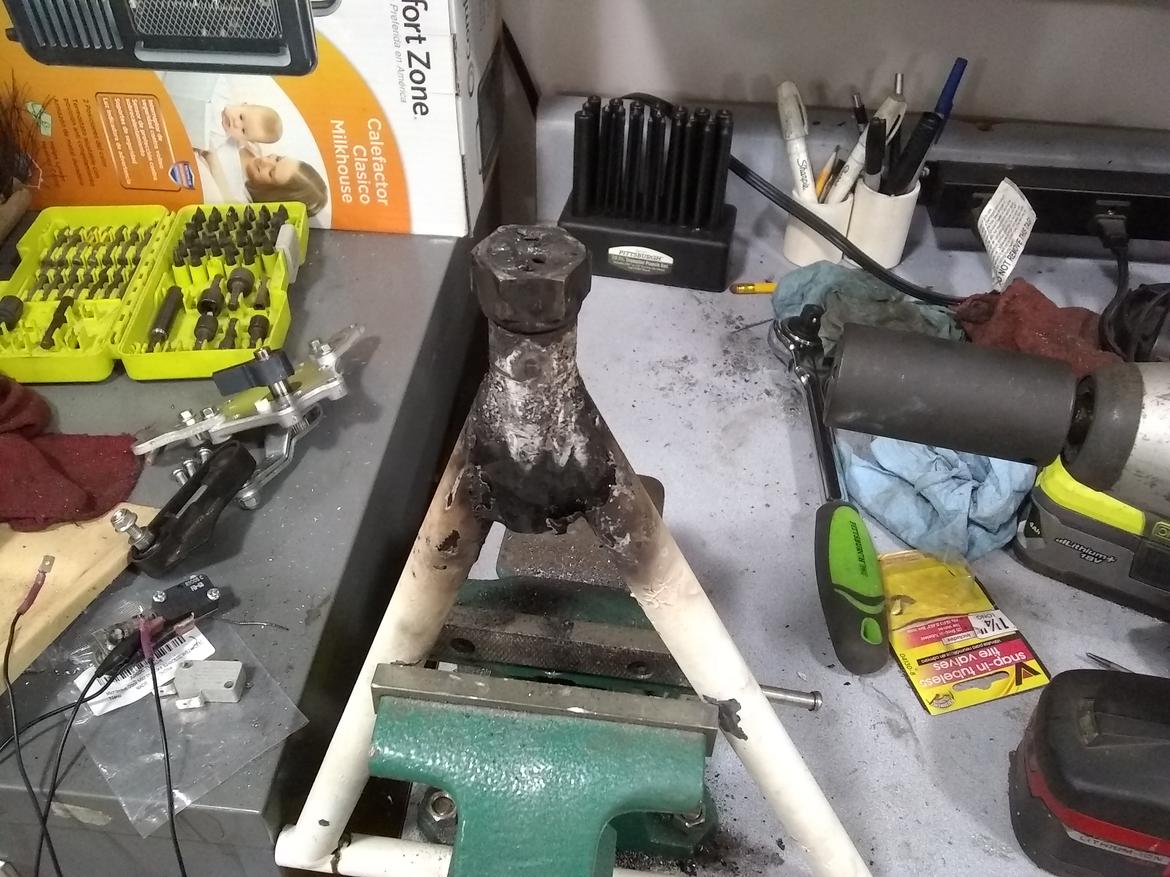
Congratulations! You have hit Destruction Level 10!
Sucks, doesn't it?
Not that it would have made much of a difference since the threads were already boogered, but when trying to remove something that is stuck, ratchets are your friend and impact guns are pralines and dick. Impact guns work with small little hammer blows, this allows the threads to re-grab after every hit, and can make galling happen in the first place. If you have to heat something, use as long a ratchet as you can swing, and try to turn the fastener in a minimum of 90 degrees before stopping to reset.
You might try asking on the FM facebook group if anyone has a spare arm for that chassis. Fair chance that someone will have one.
At this point it might be worth cutting a slot in the tube to release the tension in the threads.
Then you can use the threaded tube as a guide to create a fixture before cutting it out and welding in the replacement.
Does anyone even know what brand chassis this is? I have read the entire thread and don't recall anyone "branding" it. Forget buying a whole arm, Robbie's Speedway replacement fitting is the easy button, and cheap.

allen_m
New Reader
9/24/20 11:40 p.m.
And anti-seize on all the new parts.
More updates:
1. Twisted the welded on nut off with a bearker bar.
2. Cut the slot like suggested here, then was able to turn the stub some with my pipe wrench. But quickly the galled threads and twisting pulled the metal apart!!! This is .150 wall or so.
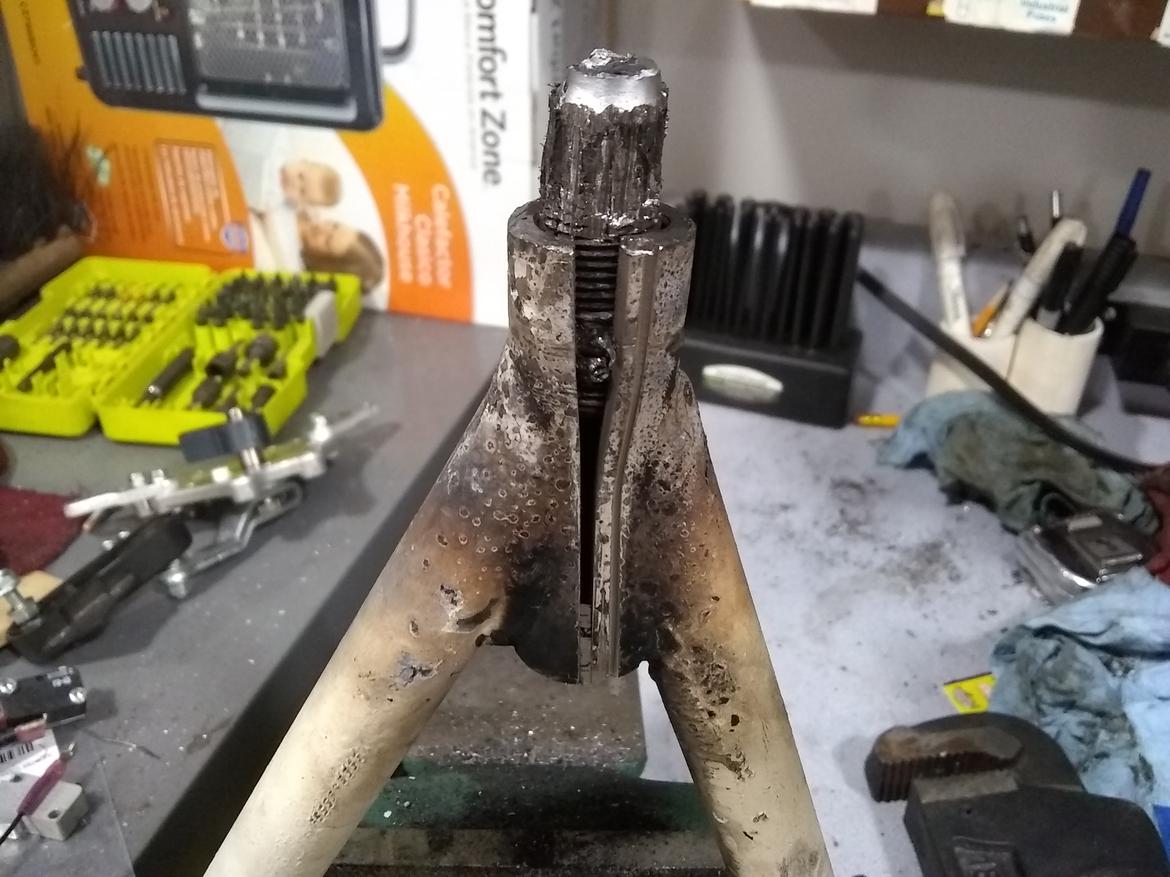
3. I started cutting into the remnants of the bolt. Same saw used for both, you can see how much the threads pulled the metal apart while twisting.
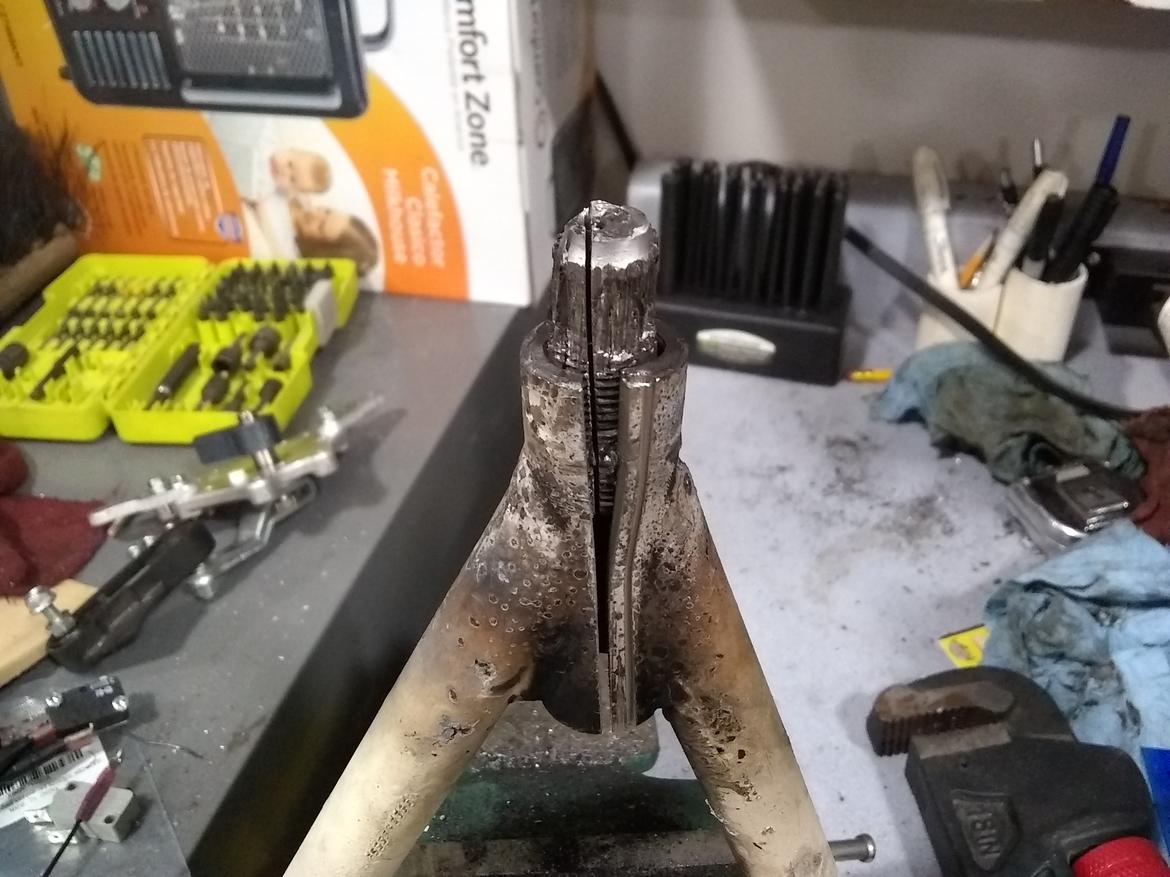
4. Then I got to the point that the stub was turning easily, but it wasn't coming out. The galled threads actually we're now keeping it in.
5. Cut stub a few more times, add hammer
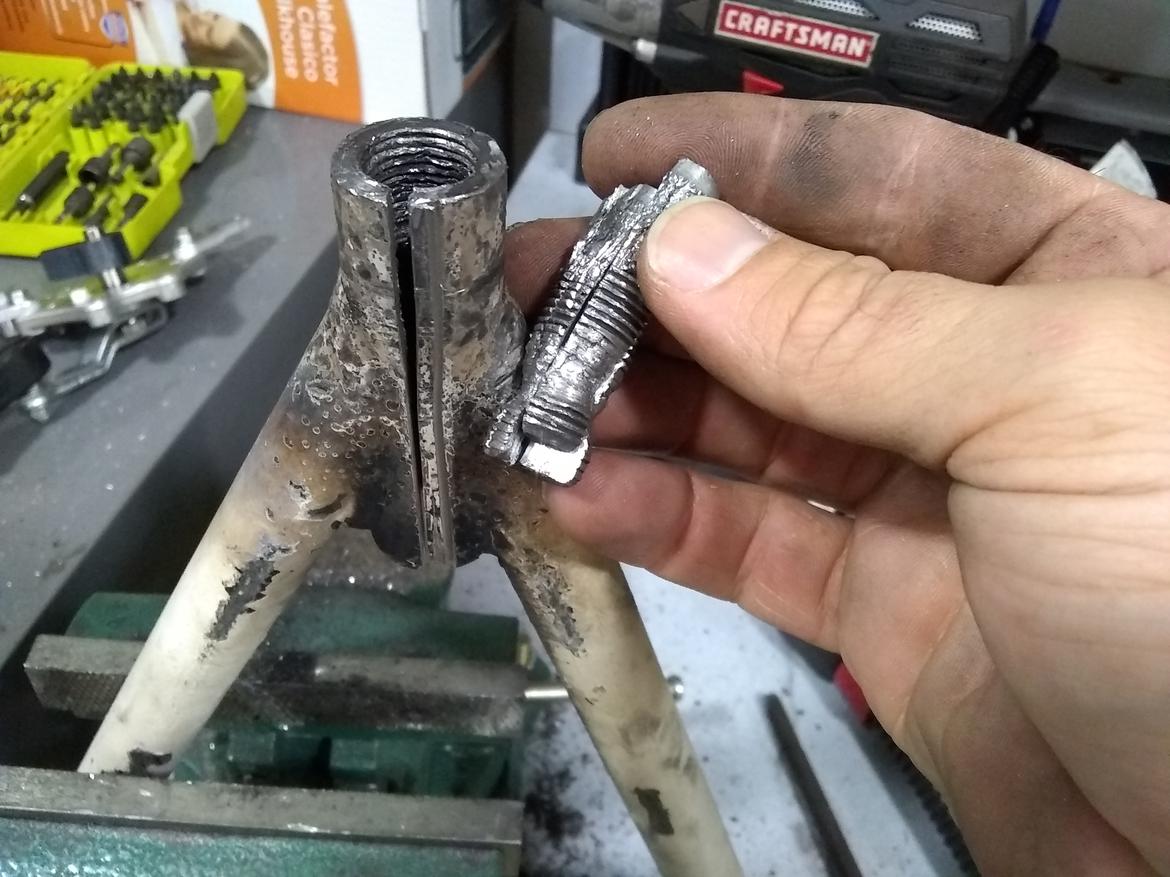
6. Found my drill bit!
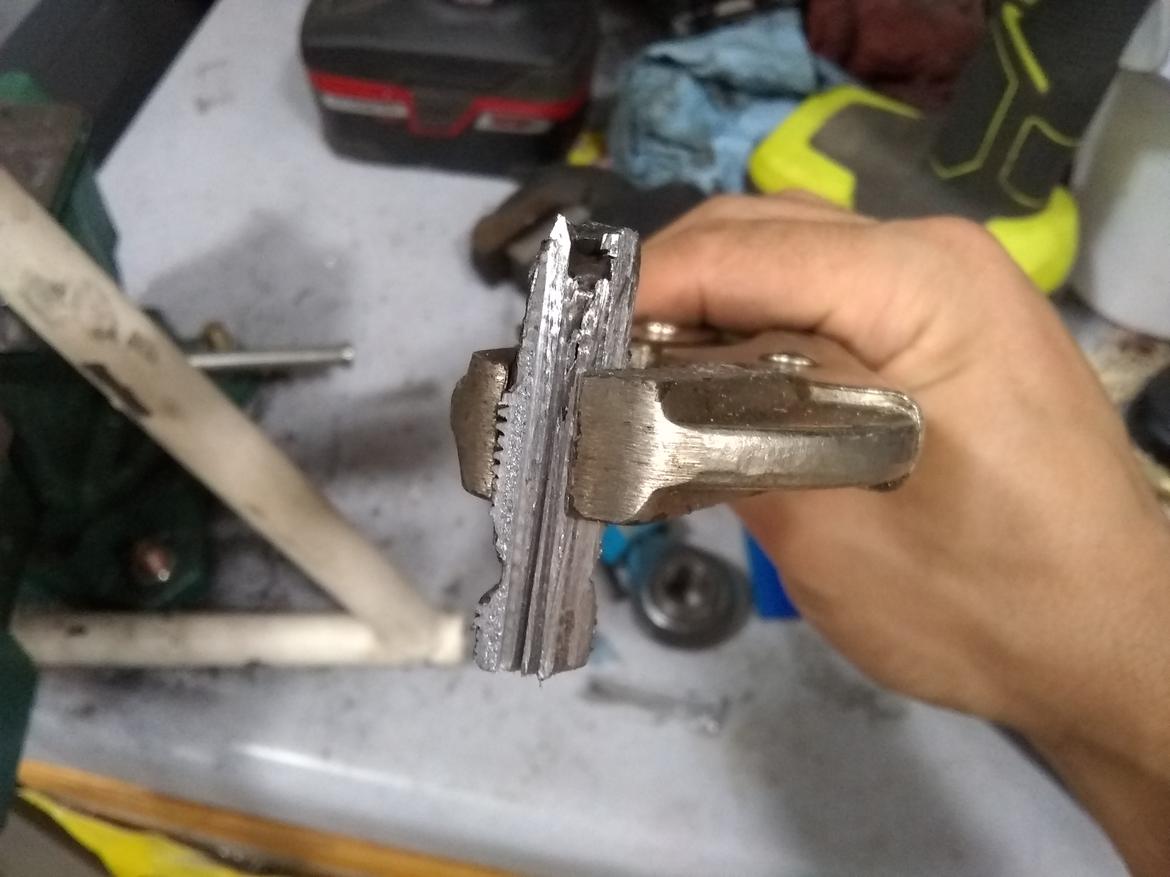
So now on to reconstruction.
Anyone think it's a good idea to simply hammer the tube back together, weld up the seam, and run a tap through?
In reply to Robbie (Forum Supporter) :
No, please, i like you
If you cut a big enough slot out of it that when you weld it back together you've shrunk the hole a decent bit and would cut all the way through the old stuff into 'new metal', then maybe. But at that point i'd be suspicious about the amount of heat and bending that's gone into the thing. It doesn't really sound easier than replacing the tube, either.
A welded seam is exactly what I would not want in a suspension component that sees the loads that does in the directions that does.
Yes, clearly a forging is needed. I'm going to go inspect all 80 welded together control arms i own, just in case. 

I should really check all the way to the end of the thread before I post...
Look like you are on the right path with replacement receiver.
Do not weld the sliced tube for rethreading. You will just add difficulty and remove strength form the finished part.
Since you are going down the cut it out and replace it path, slice thru the top OR bottom of the threaded receiver and see if the stud will come out. Slicing one side should free it up and leave you enough material to jig up the replacement accurately. Worst case you have to slice the other side too. Then you can take the receiver out in fairly big chunks without removing too much to change the final geometry.

Strizzo
PowerDork
9/25/20 10:00 a.m.
Stampie (FS) said:
Robbie (Forum Supporter) said:
Little update here.
I started drilling a hole in the middle with the plan of drill hole plus weld but and try to remove.
Then my 1/8 drill bit broke off almost all the way through, but left about 1 solid inch of bit inside what's left of the rod end. Then I got pissed and hit it hard with the welder, large hammers, heat, and the impact.
Now the nut moves about 1/8 turn back and forth, but doesn't go past that. I'm pretty convinced that whatever theads inside are totally shot.
Whelps, looks like I'm first going to try and cut this out and replace only the threaded tube portion. Good news is speedway sells the exact threaded tube that I need.

Congratulations! You have hit Destruction Level 10!
This reminds me of the time i had to literally cut a control arm apart to get it off the xterra. drivers side took like 2 hours, passenger side took all day. ended up grinding the head off the control arm bolt, cutting the arm off the bushing, and then cutting the bolt, bushing and remaining control arm bits in half to get it free.
That is a fantastically ugly mess you've got there.
I like the idea of replacing the whole threaded tube.
Vigo (Forum Supporter) said:
Yes, clearly a forging is needed. I'm going to go inspect all 80 welded together control arms i own, just in case. 

It's a bit touchier when it's a rod end hanging out a ways, loaded perpendicular to the threads instead of on axis. Especially a lower "ball joint" that gets all the braking loads.
That said, all of my suspension tubes that are internally threaded are DOM swedge tubes, no welded seams 
Looks like you got the start for a punkin chucker there, if it will pass tech.
Robbie (Forum Supporter) said:
So now on to reconstruction.
Anyone think it's a good idea to simply hammer the tube back together, weld up the seam, and run a tap through?
No. No, I do not. But you knew that already. Replace the tube. Also, anti-seized is not only not recommended it might actually hurt. That damage came from the jam nut being loose. That's why it's important to nut and bolt race cars on a regular basis.
First I removed some paint.
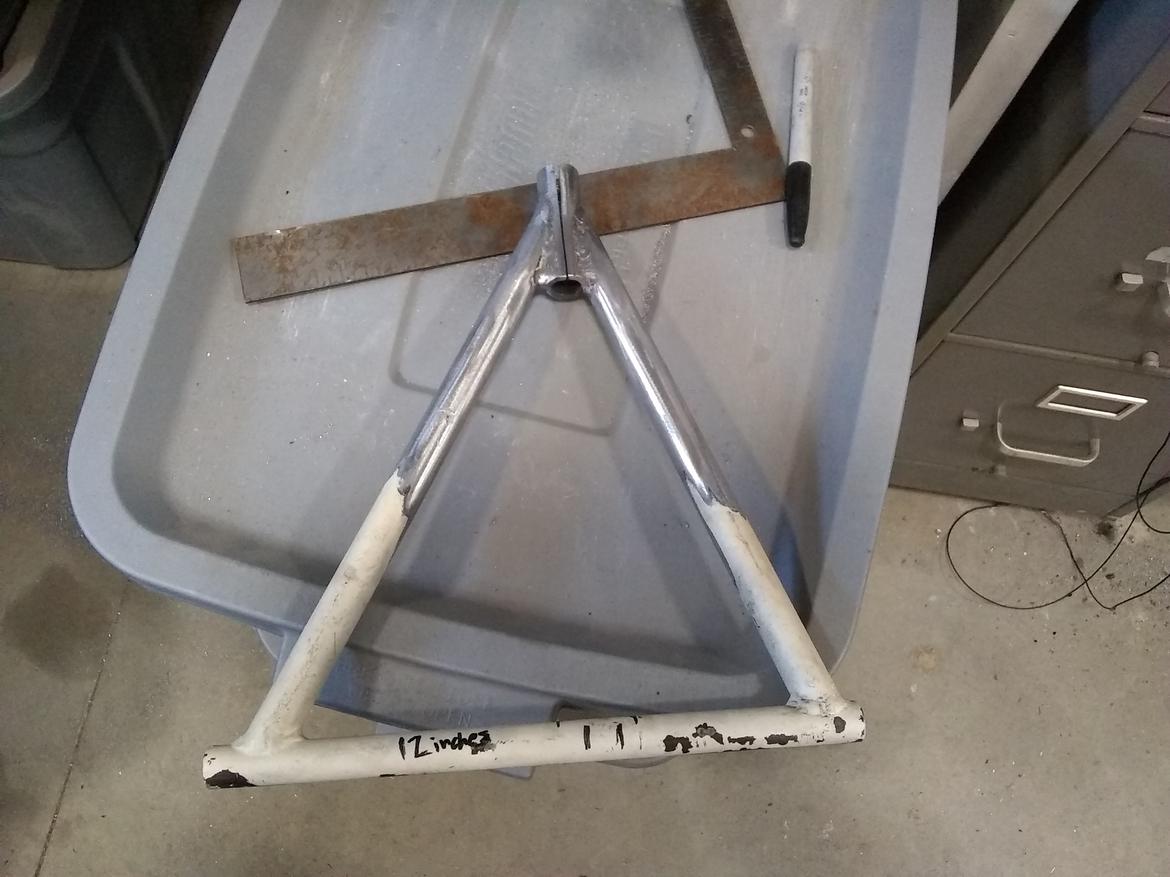
Next, wield the angle grinder with skill and precision.
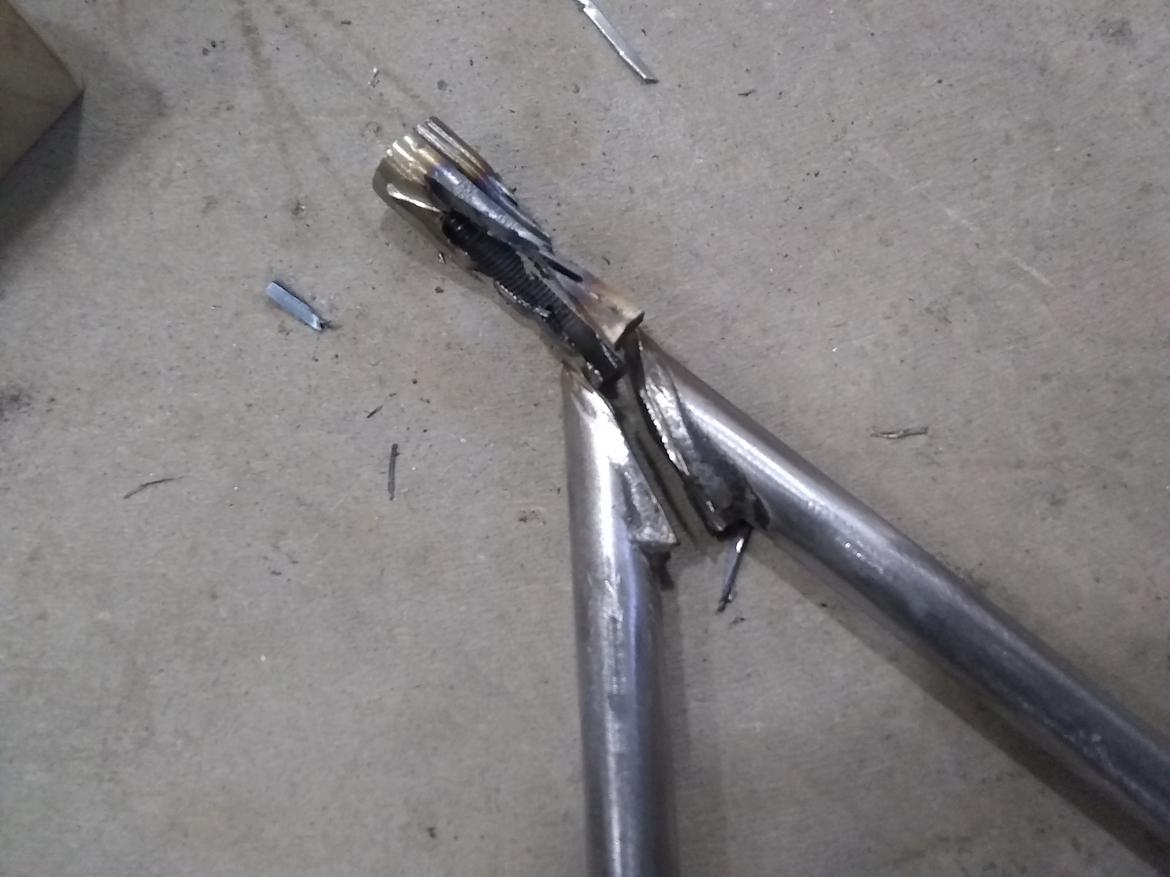
Finally a whole lot of time with grinder, and die grinder on my Dremel.
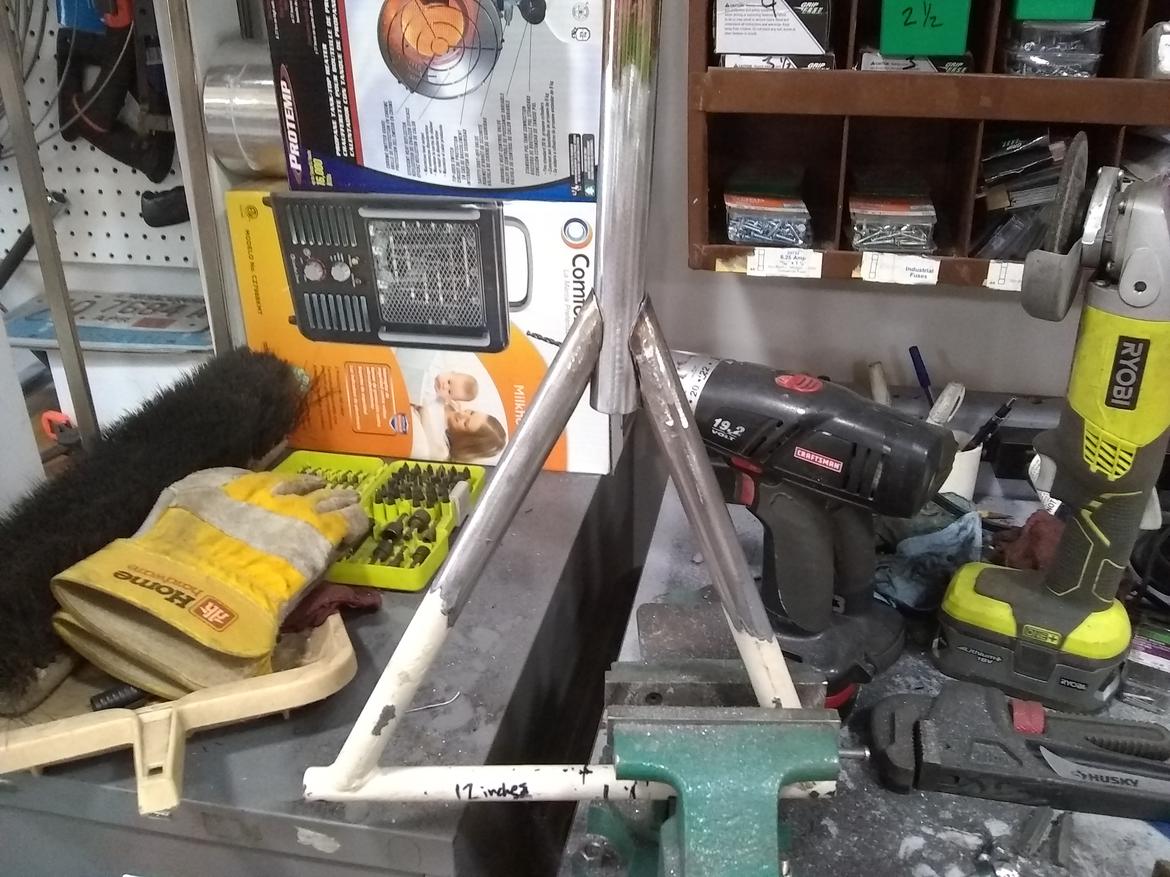
Just need to make final adjustments and weld it back up!
Should I put a bolt in the threads while I weld? Or leave it empty?
A bolt inside should keep it from shrinking.
I'd leave it empty, because if it distorts, you'll have a bolt stuck in it. Second verse, same as the first!
You should be able to run a... not a tap, the thread reamer tool I can't think of the name of right now... through the threads to re-form them after it is all welded up and cooled off.

Mr_Asa
SuperDork
9/27/20 7:07 p.m.
Pete. (l33t FS) said:
I'd leave it empty, because if it distorts, you'll have a bolt stuck in it. Second verse, same as the first!
You should be able to run a... not a tap, the thread reamer tool I can't think of the name of right now... through the threads to re-form them after it is all welded up and cooled off.
Thread chaser?
With good enough penetration, an actual tap might be necessary.
In reply to Robbie (Forum Supporter) :
While I know it's prewelded up I just want to say that looks a lot better than I expected. Congrats on a good job.
I always weld them empty and run a tap in afterwards.
Do not weld with a bolt in the tube. It will likely get stuck.
Will this be TIG'd? Is that control arm chromoly?


