That was a blast! Thanks for hosting! And thank you JW for the surprise pizza. I definitely ate more than my fair share.
That was a blast! Thanks for hosting! And thank you JW for the surprise pizza. I definitely ate more than my fair share.
Who loves ya?
I thought sending Pizza would be a fun surprise and a little way to join in. Had it been a different weekend I probably would have been there.
Real sorry I missed it, but I was just too busy/sick. Having work out in Naperville midday both days killed it.
Robbie,
How long are you going to make us wait before you post up some pics of the progress and your write up?
I'm on the edge of my chair here. ![]()
![]()
Indy-Guy said:Robbie,
How long are you going to make us wait before you post up some pics of the progress and your write up?
I'm on the edge of my chair here.

Hahaha I'm sorry. Im in NYC for work this week. I'll get a big update for everyone tonight.
I had an idea: anyone know of a material that I could make bed rail caps out of? I was thinking wood, but if I could form some plastic with a heat gun that could be a good way to make a finished look as well.
I'm struggling with the idea of doing Bondo on the top of the bed rails, since it seems like a likely place to take a lot of damage if I even do anything sort of like truck things with this.
In reply to Robbie :
I bet that ABS heated would form pretty well and not take all that long. Melt then trim with a razor.
So, we started the day with a pile of materials that would make any challenge builder blush:
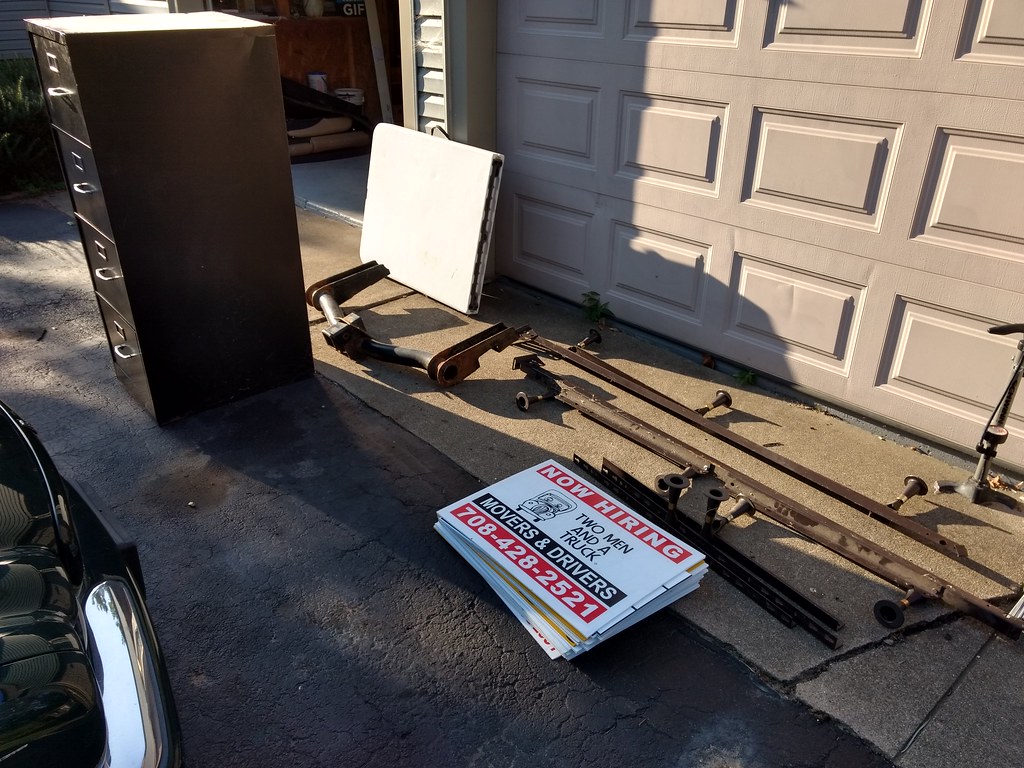
Yes, that's an old bed frame, a pile of coroplast signs from the trash, an empty (but locked) file cabinet and a class V trailer hitch from a chevy 3500.
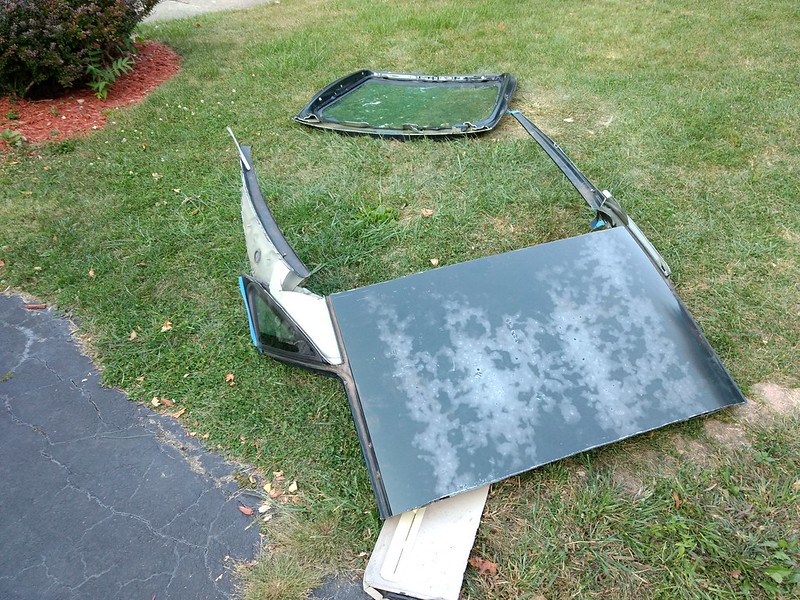
We immediately got to work tearing out interior, laying tape lines, and cutting off the roof.
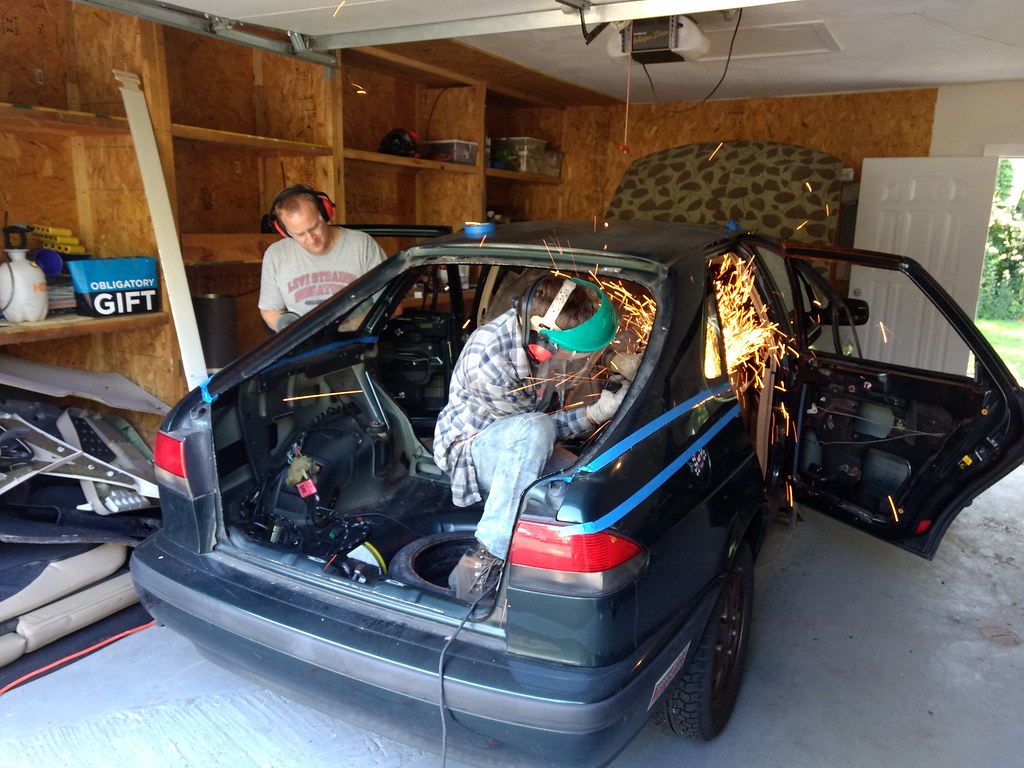
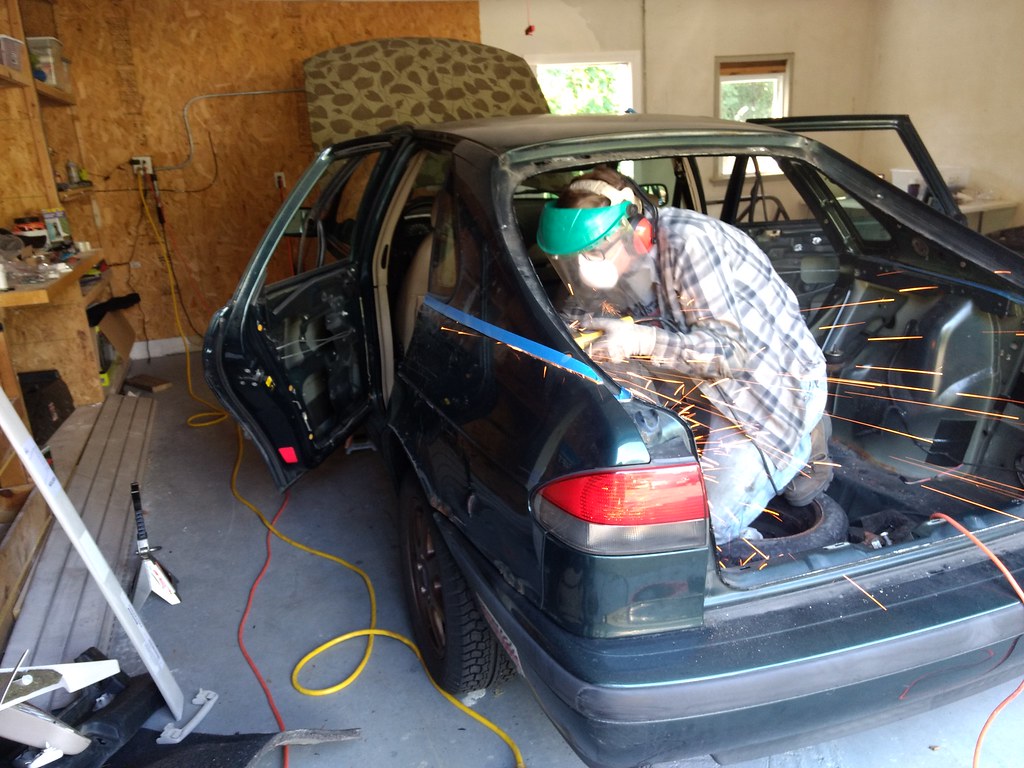 While real work started about 9:00 am, the roof was off by about 10:30.
We quickly realized that we slightly miscalculated the position of the sunroof cover before we started cutting: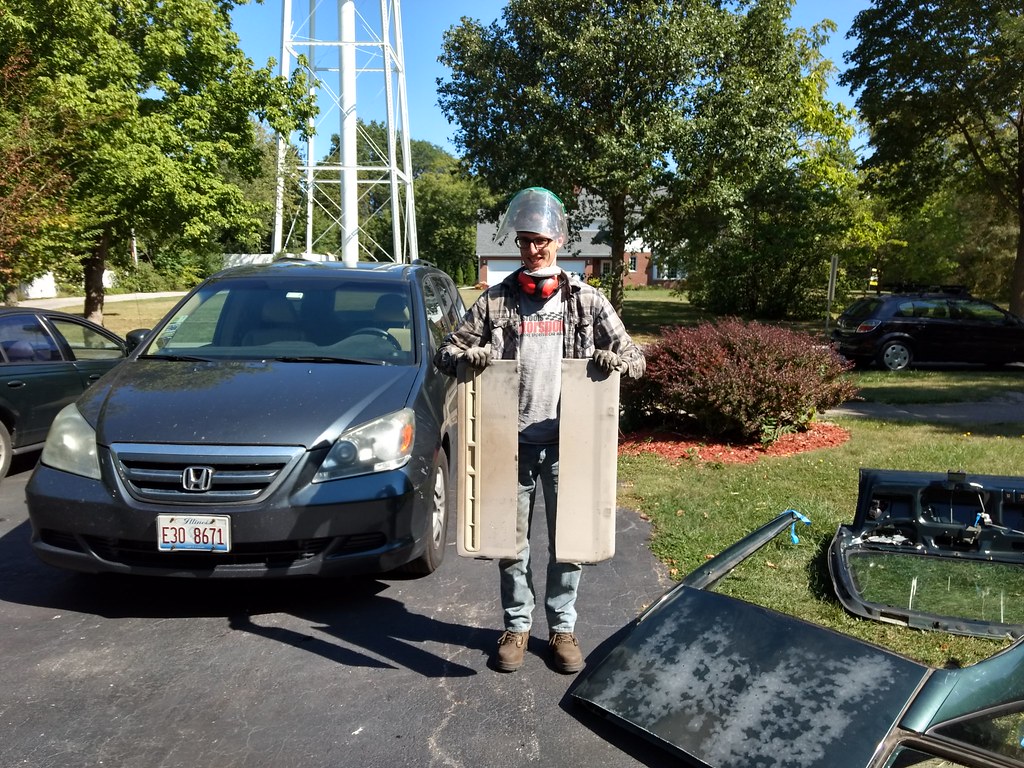
By now, we had enough GRMers around that we could split into different efforts. Some started mocking up the sides, and some started prepping paint (ie fixing the hood - I had decoupaged it for the prior challenge with a fabric shower curtain and made it mostly permanent with a few thick coats of polyurethane - off it came).
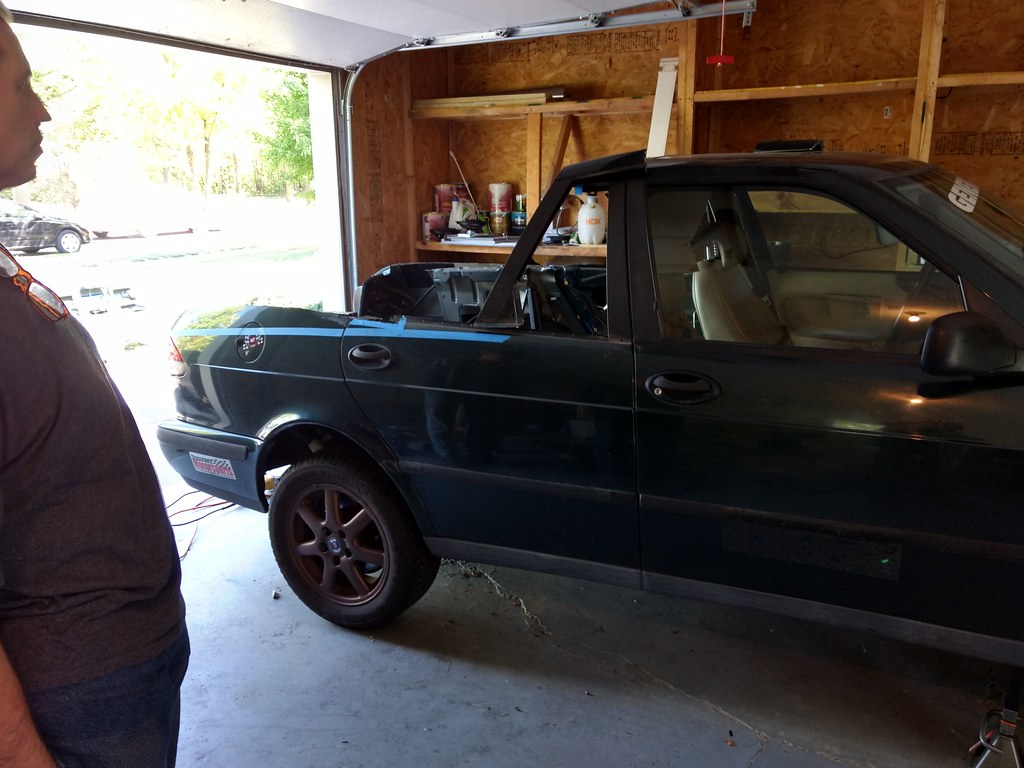
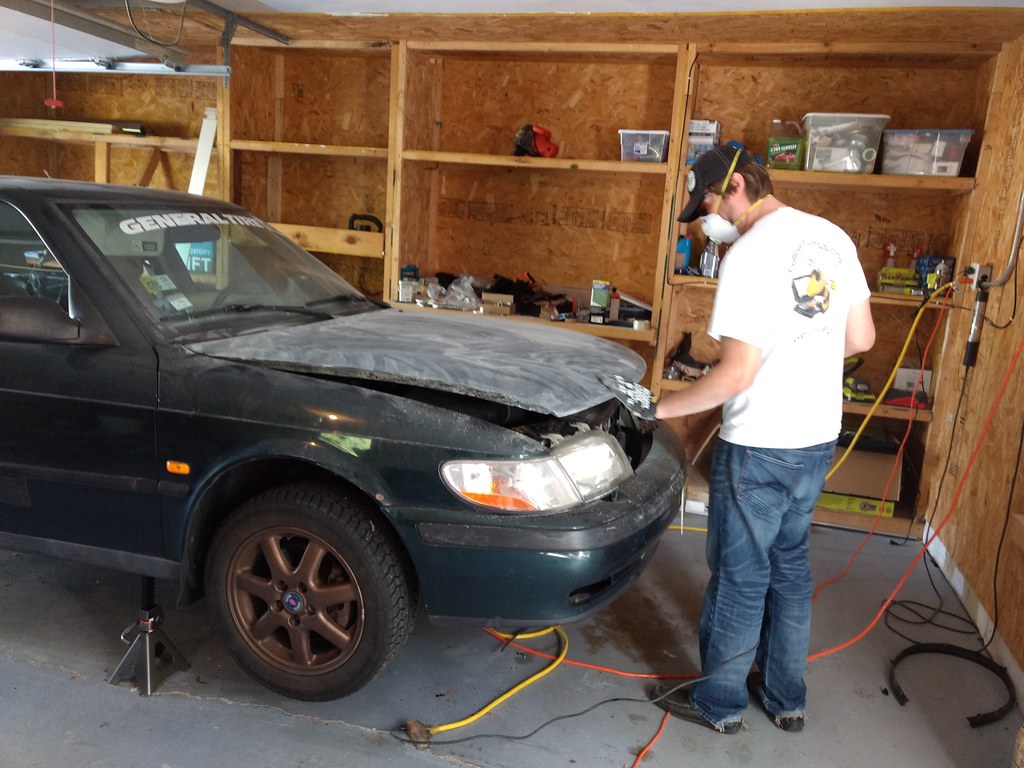
Lunch arrived promptly at 11:45, and we stopped to take a couple quick group shots:
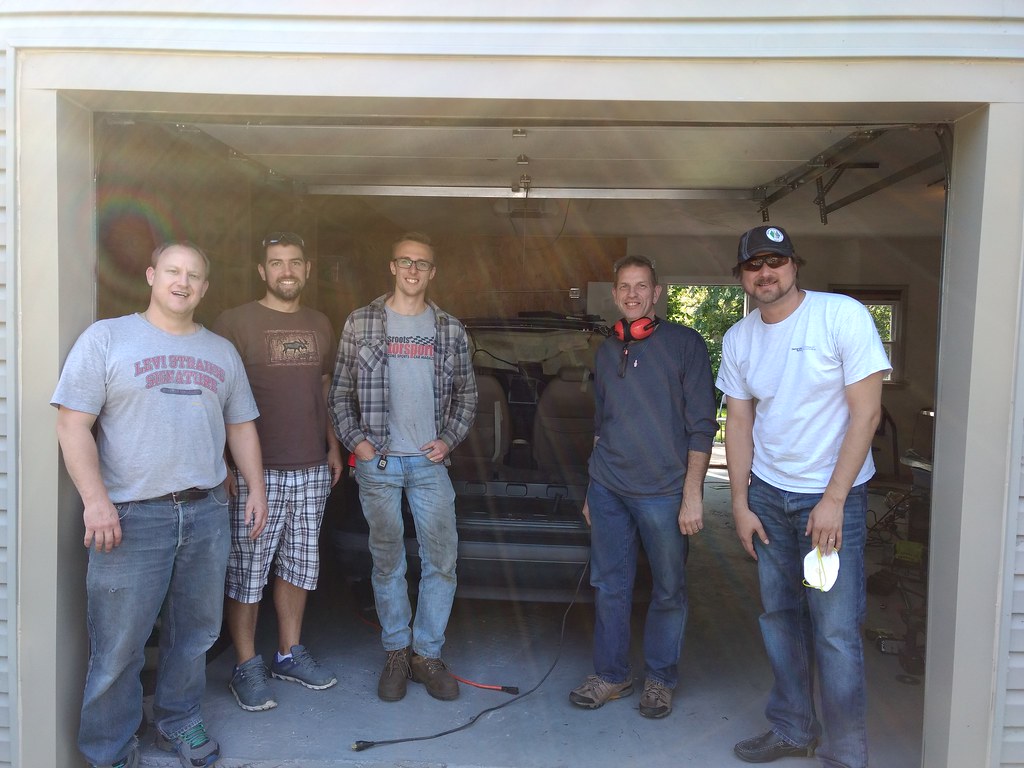
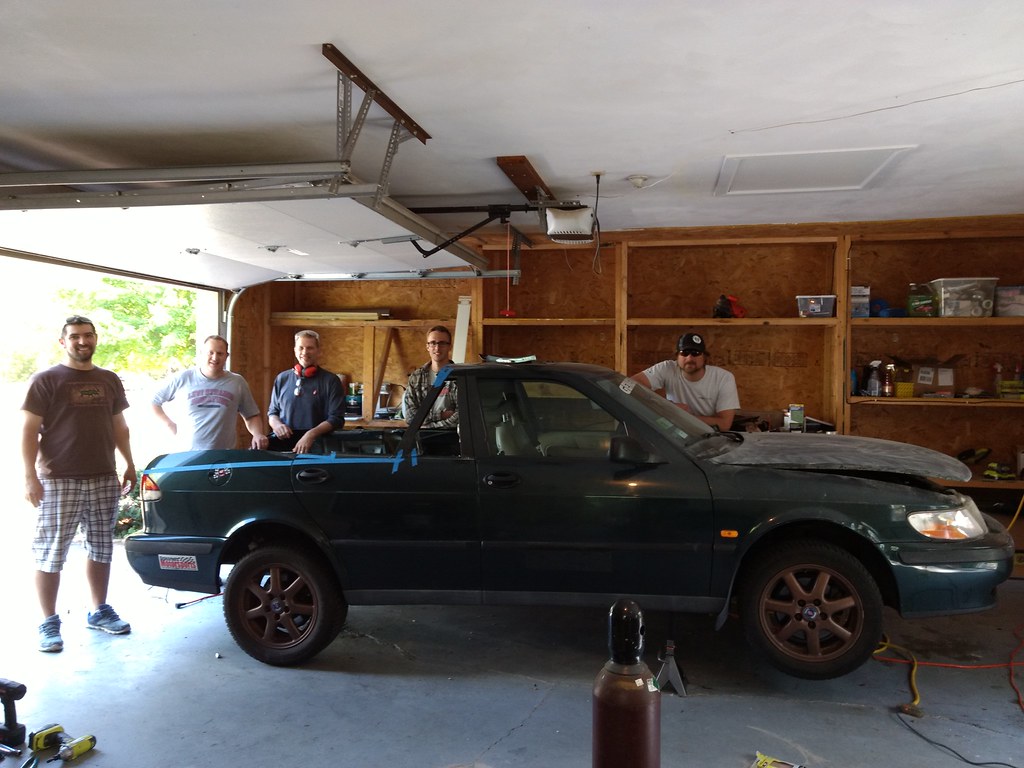
Lunch is its own funny story, so that will go in its own post, next.
As I mentioned earlier, lunch.
Planning for the event, I had been making lists of parts, tools, food, materials, etc, all week. In my natural fashion, I was procrastinating going to pick them up. As a result, I had everything the night before the build day but the food. I asked my wife for some help.
We talked about getting pizza delivered, for I had just been at a friends house a few nights ago and someone there ordered Marcos pizza. While Marcos is kind of considered 'second tier' pizza in our neighborhood by some - just down the street from the Chicago-famous (and very expensive) Aurelios Pizza - I told my wife how the order was two pizzas and a cheese sticks, and how it was perfect for a group of a few guys. Before long we scrapped the idea however, in favor of the original plan, brats. My wife would go buy brats at the store, and she was running the next morning anyway, so that became our plan.
As my wife was heading out the door the next morning, I asked her to buy a few bags of ice for coolers. When she returned however, she had forgotten the ice (but not the brats), and of course felt horrible. Not much she could do though, as she was corralling the kids and getting them out the door to go on their way for the day.
So along comes 11:45 and a Marco's Pizza delivery woman shows up, asking for "Rob" (that's me). She has two pizzas, a cheese sticks, and a 2 liter of pepsi. Since this is literally the exact order I talked about with my wife the prior night and my wife left earlier that day feeling awful about forgetting the ice, and since I of course had not ordered the pizza, I assumed that she had ordered pizza for us.
We feasted, and rested, and readied ourselves for the next round of fabrication.
4 or 5 pm rolls around, and my wife comes home with the kids. "Thanks for the pizza," I say, "It was PERFECT!"
"Pizza? What pizza? I thought you guys were having brats for lunch?" Came the response.
I quickly spiraled into confusion as my mind feebly attempted to re-trace its steps and draw a new conclusion. Who ordered the pizza, then? Surely if one of the guys here ordered it, they wouldn't have sent it for Rob. Was this pizza intended for a neighbor who also happens to be named Rob? Nothing quite made sense. My world and sense of truth was rapidly disintegrating.
machinenbau got smart (or maybe just is smart, more likely) at that point however, and checked the receipt stapled to the now-empty pizza box. It was a familiar name - John Welsh.
Mystery solved, bellies full, saab relieved of rear hatch and much of its roof, I will leave the story for now even though there is still more to tell...
Ha. I intended the pizza to have some impact and be a surprise but I never figured for this much impact.
On Friday afternoon you listed your address and the idea hit me to send lunch. I did some googling around the address and my first hope was to have Jimmy John's deliver. When I went to their website it stated that you lived outside of their delivery zone. My next choice was Marco's. I know Marco's well. It was founded in Toledo, OH (my original home town) by Pat Giamarco. In this area, they are everywhere. The website says they now have over 800 locations.
It's not the greatest pizza (but it's good) and no one ever looks gift-pizza in the mouth.
Thank you again for lunch John, it really was perfect.
After lunch we got right back to it, one new project was to start mocking up and mounting the tow hitch,
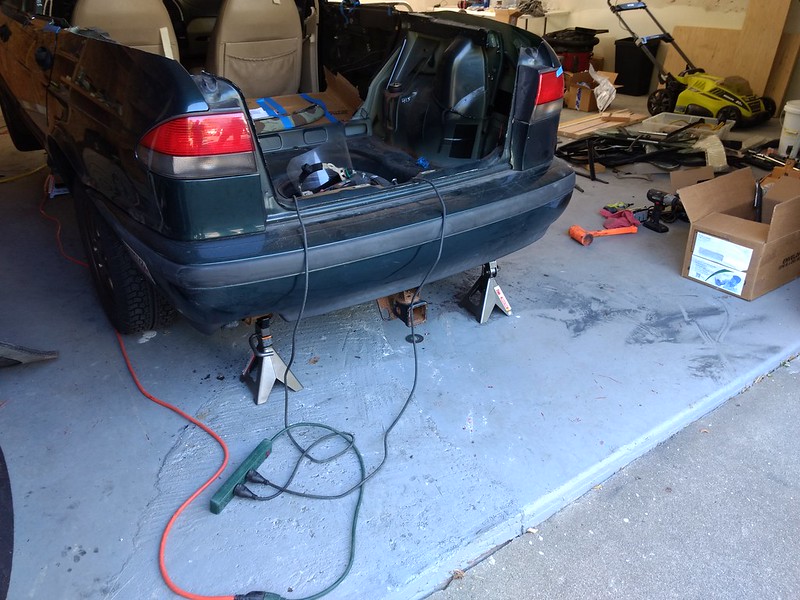
I knew from some simple measurements that the tow bar 'should' be an easy fit (we all know how those 'shoulds' usually go), since apparently the chevy 3500 rear frame rails are almost exactly the same width as the body rails underneath a saab 9-3. Coincidence, or is this just more evidence of the corporate engineering GM pushed onto saab!
The hitch was cut back a bit to get around the exhaust, and the saab's rear tie-down point on the passenger rear rail had to be removed in order to fit the bar. All in all was pretty crazy how well this fit - may have had more to do with the fab skills of those working on it!
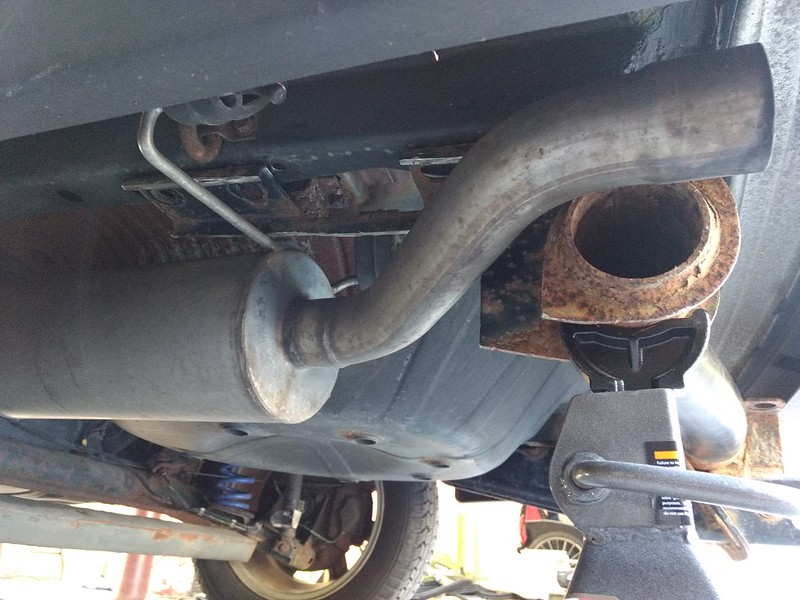
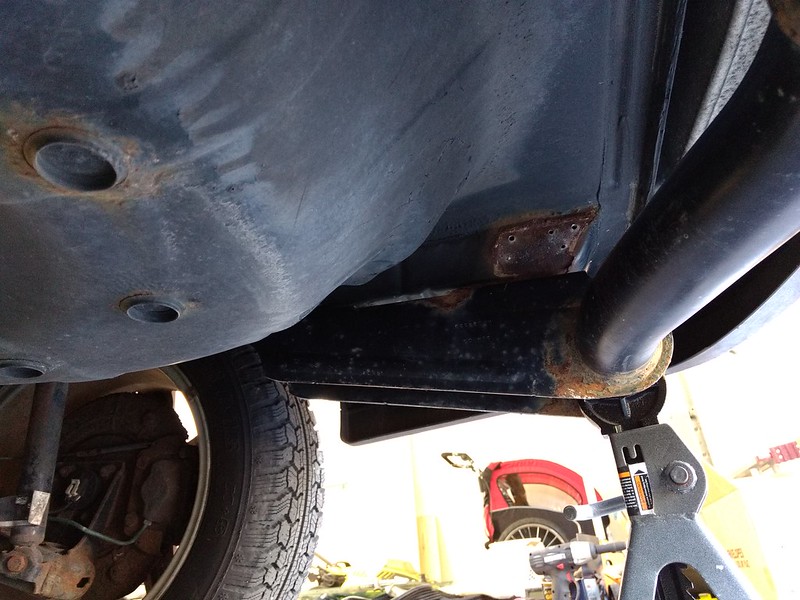
Here's the saab with the completed hitch - bet you've never seen a saab with a class V hitch before.
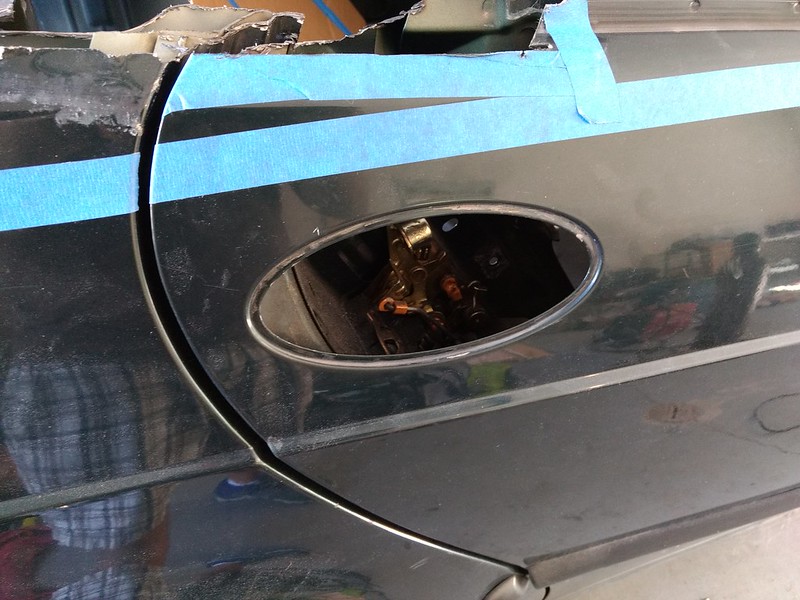
Back to bodywork, the saab has a very nice flange built-in for shaving the door handles. Its almost like they wanted us to do this.
C-Pillar position finalized.
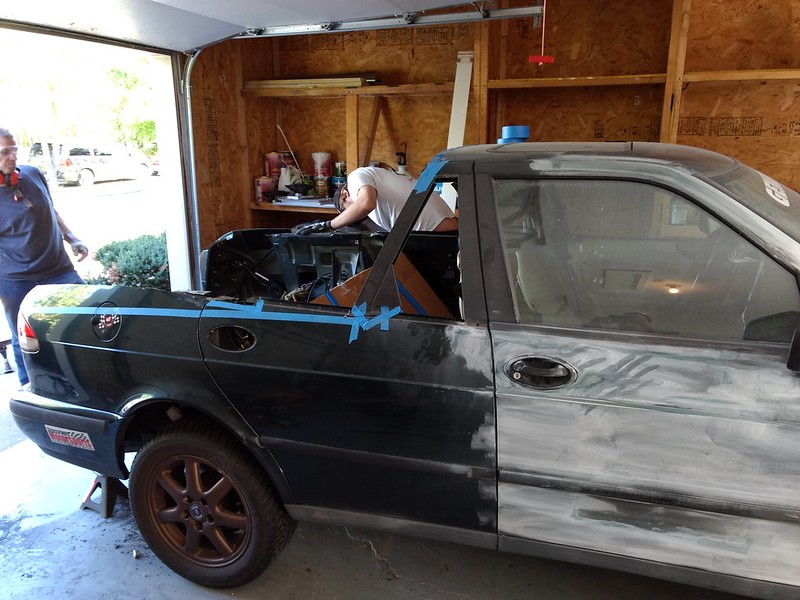
Here you can see we started on the tailgate, and some GRMers are getting work done!
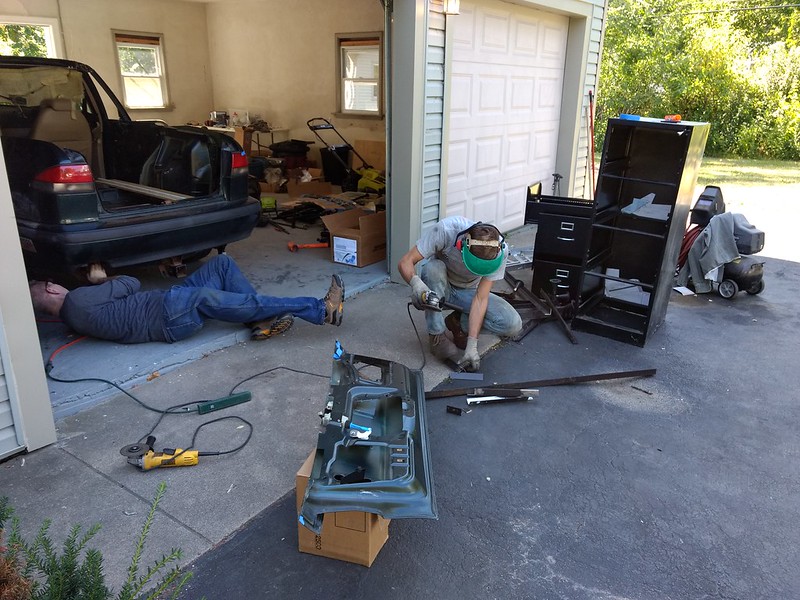
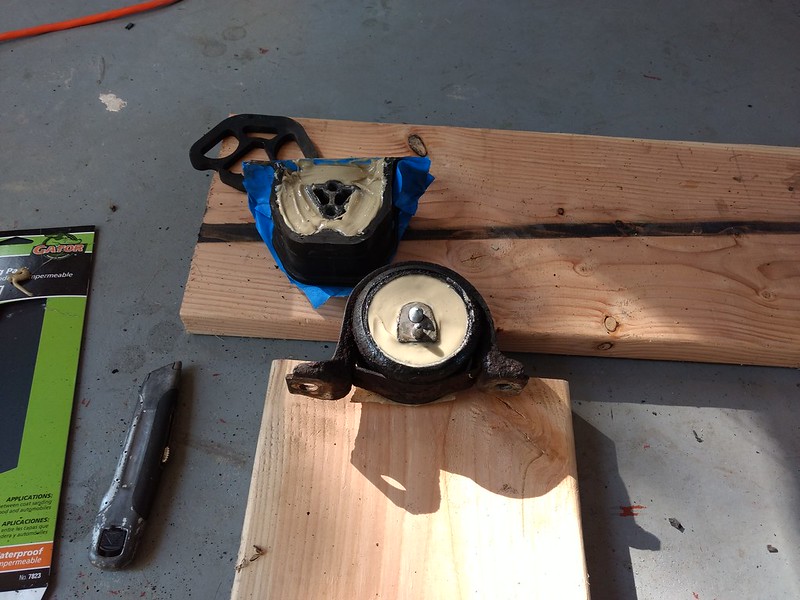
More GRMers showed up and got to work on stiffening up the perished engine mounts using construction adhesive. I've seen this done on YouTube before, so it must work! This first bushing was not too bad so we just filled in the gaps with adhesive.
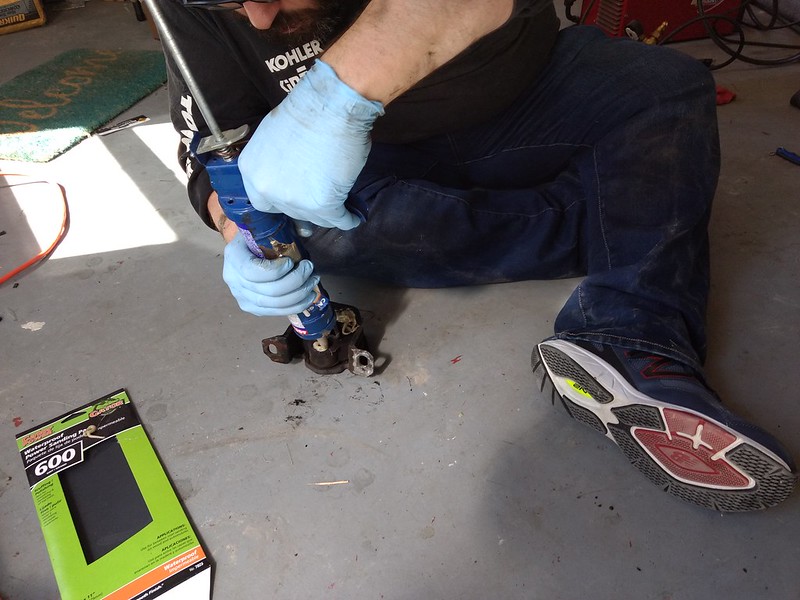
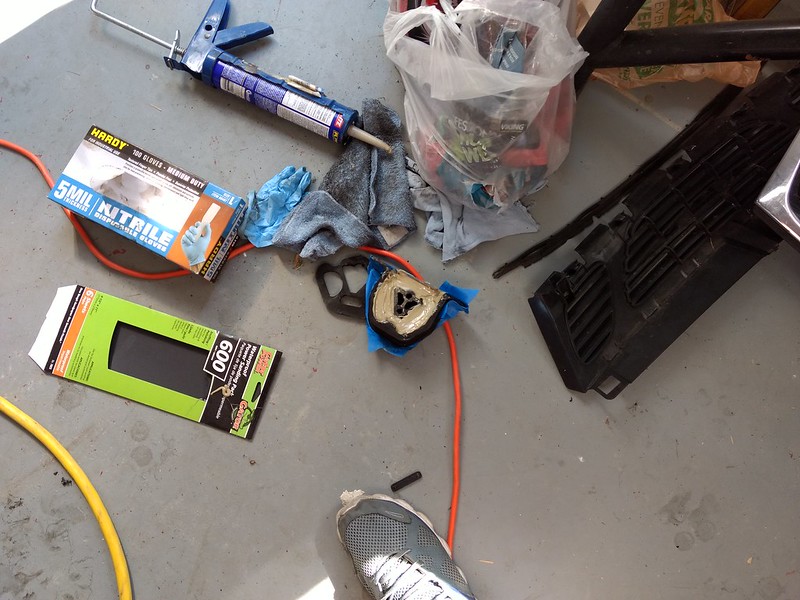
This second mount though, was basically wasted so it was time to start fresh. Tearing out the middle was quite the chore!
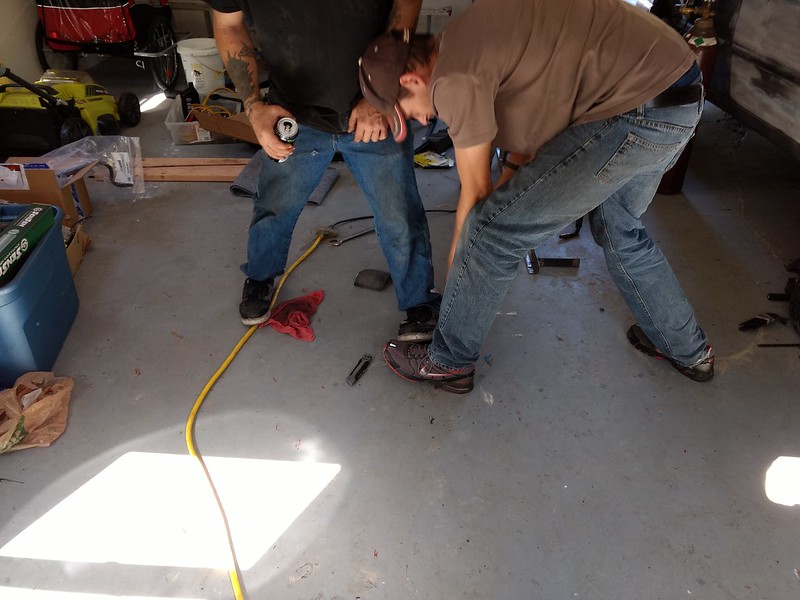
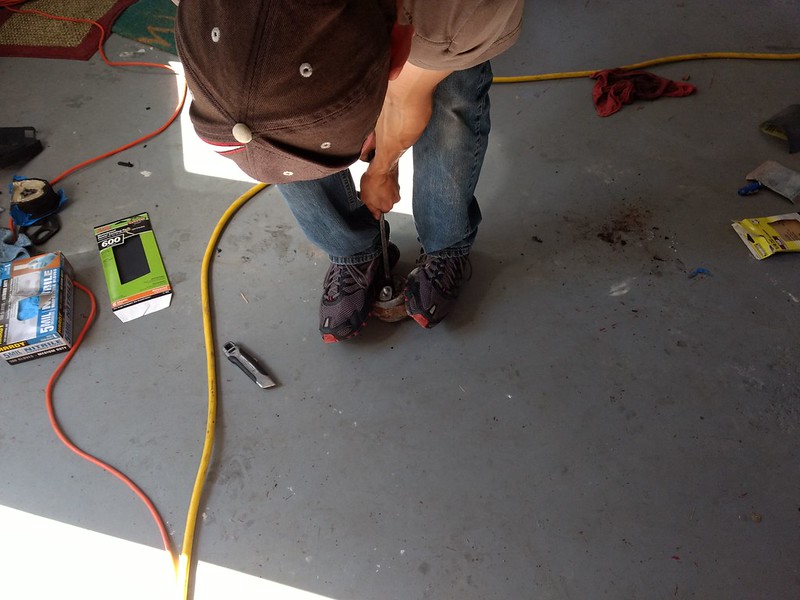
We finally had to end up burning this motor mount out to get the perished rubber out of the way and get the center free. Here we are getting it ready for adhesive:
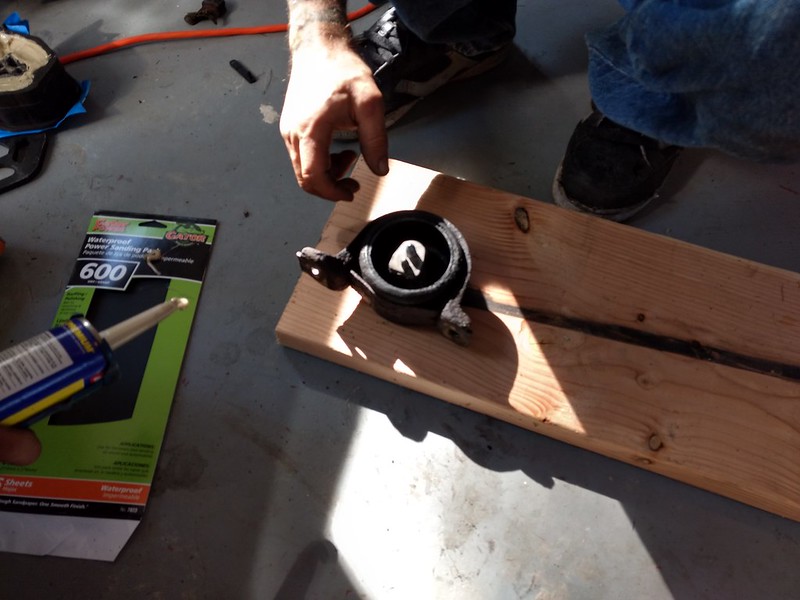
And filled
Here's a GRMer making the new truck's bed frame out of the angle iron from a bed frame. Can you believe the irony? Irony of angle iron? Ahh! I can't stop, there are just so many angles!
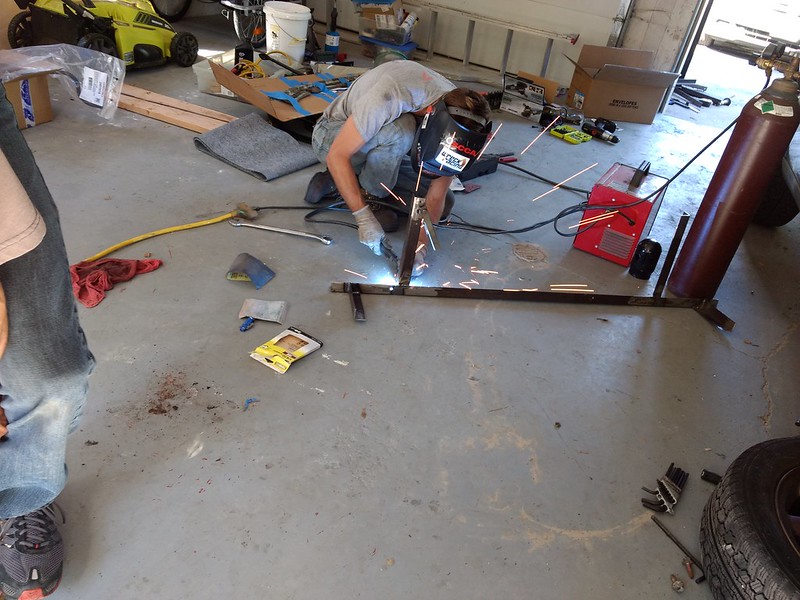
Its such a good joke I could repeat it. Plus welding action shot.

Mocking up the tailgate
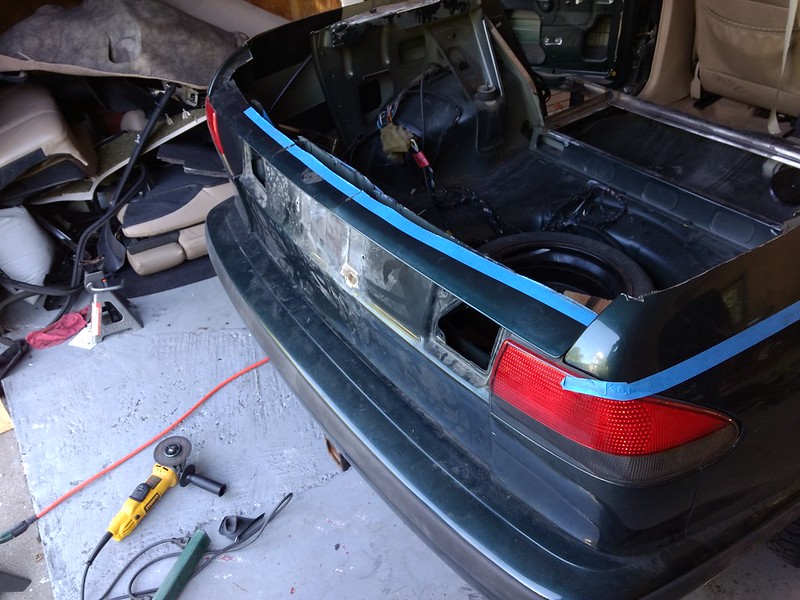
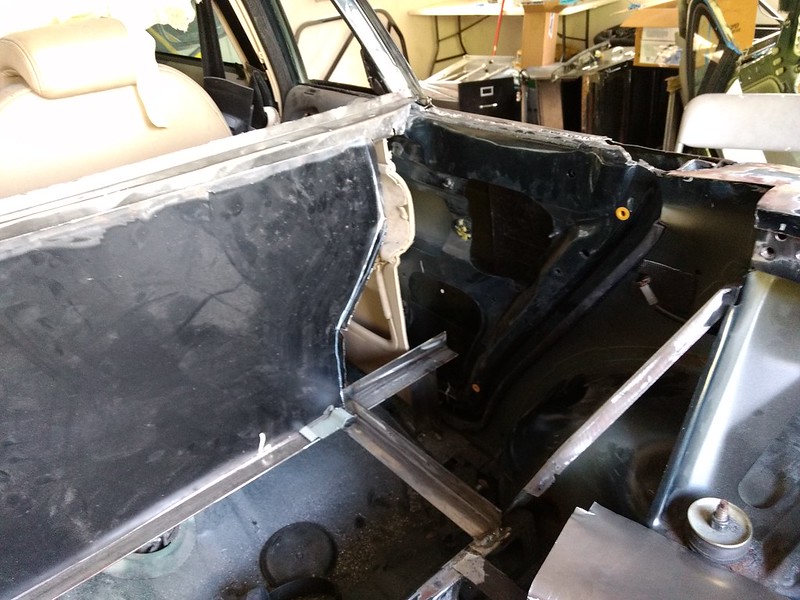
Although it was slightly higher that our original planned bed rail line, we chose this for the final bed rail height because there was some flat and serious suspension and rear seat mounting structure right at this level that was perfect for us to weld to. Also, it turns out that the sheet metal from the stock saab d pillar was perfect for the curvature of these bed rails. Again we asked the question - are we lucky, or did saab want us to do this?
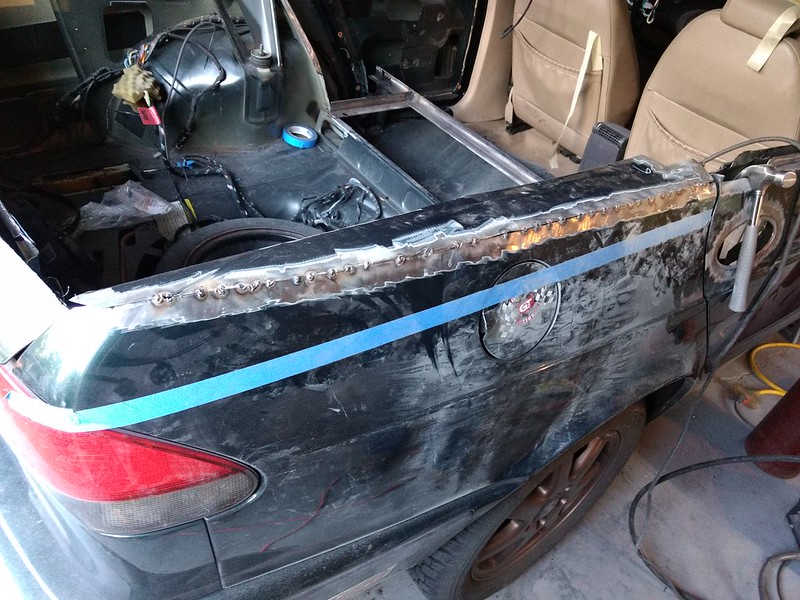
We had quite the debate over this piece of z-channel that would become the middle of the bulkhead. Fortunately we found a piece that was almost exactly what we needed on the filing cabinet, unfortunately it was a few inches too short (if I had a dollar for every time I heard that). We were able to bend up a flat piece to almost match, and we saved ourselves a trip to the hardware store. Also, repping.
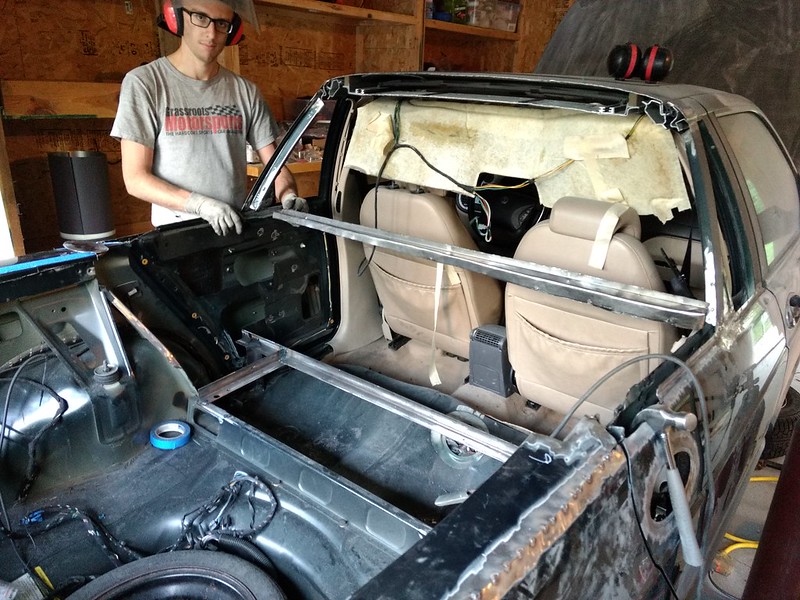
Filing cabinet is donating more and more of its metal.
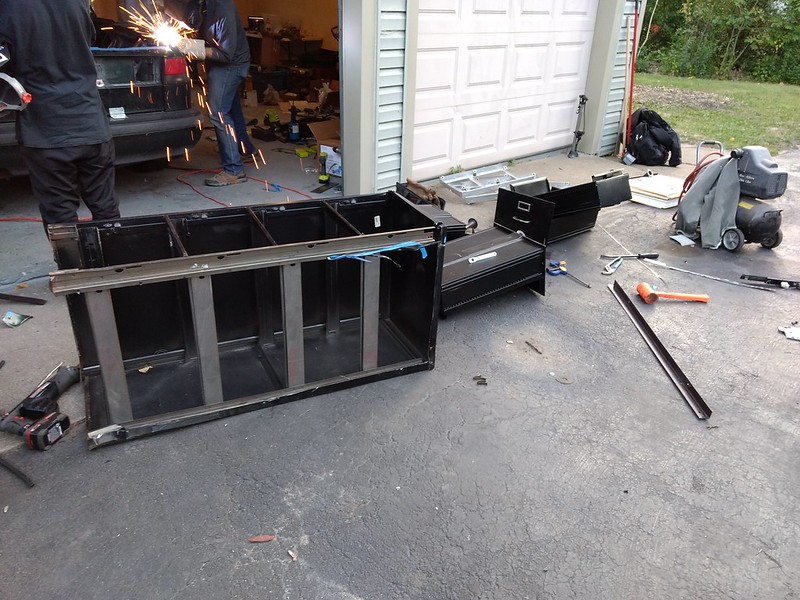
At some point we broke for beers, and a little after that we took a longer break for dinner. My brother in law was over and grilled us up some really nice brats. Many GRMers had already come and gone by that point, but there were still a couple of us left ready to keep building into the night. So that's what we did.
Another bed rail starting to take shape.
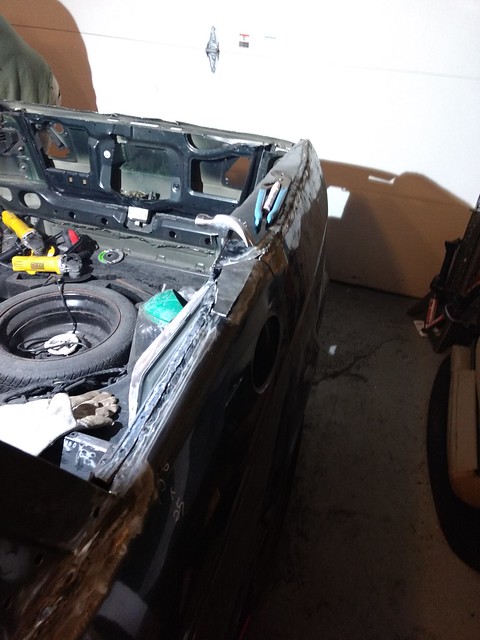
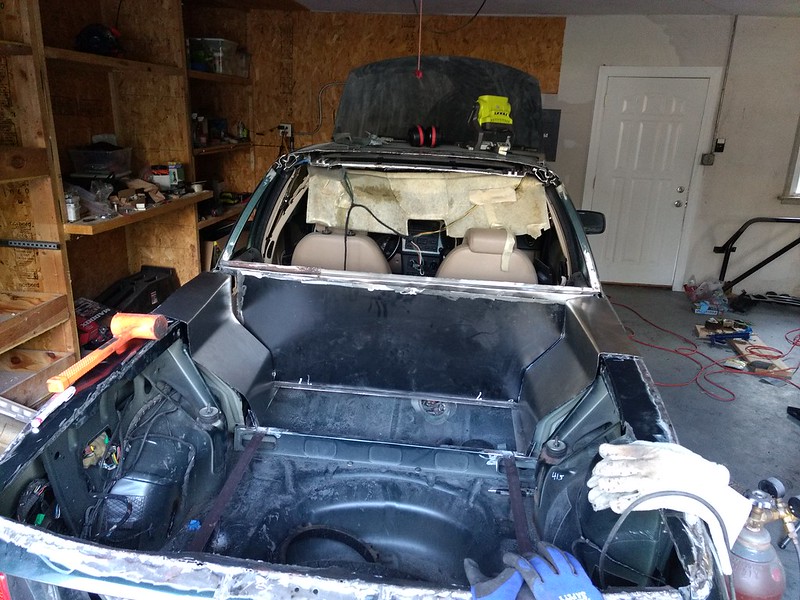
Here's about where we cut it off for the night, I think between 11 and midnight. The tailgate was hinged with some leftover household door hinges, but the factory latch mechanism was retained and works. It is not pictured but a main bulkhead piece is cut and ready to be fit. The rear interior door panels were cut so that the interior will still have a finished look, and they were re-installed before we welded the center bulkhead cross piece in which effectively prevented us from opening the rear doors ever again. One of the door handles is patched over and welded in. Lots of sheet metal is welded and ground back (sorta) smooth, The front of the bed frame is built and welded in.
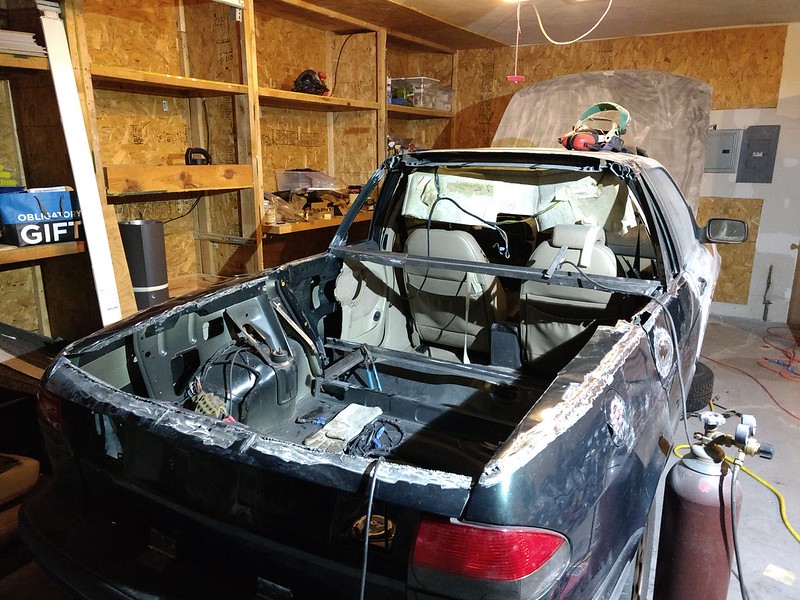
Incredible progress for one day, we called it a night.
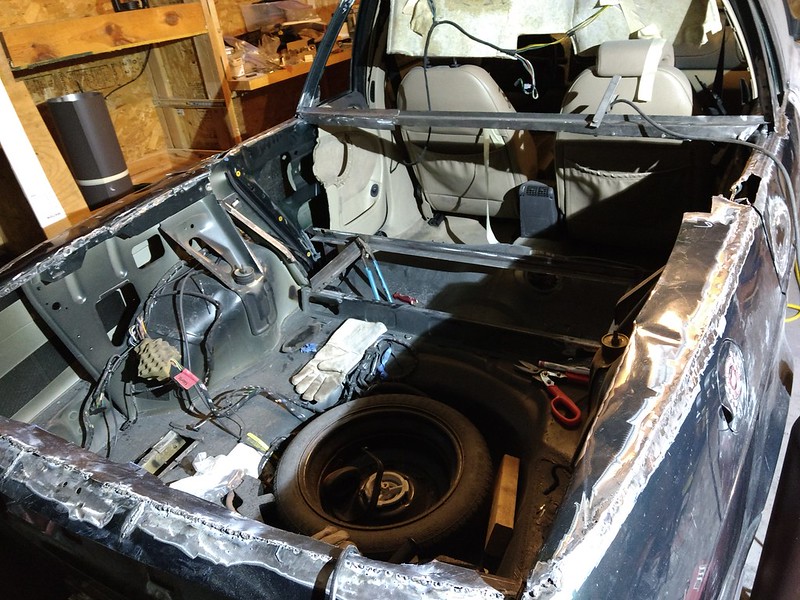
Sunday we had a couple more GRMers would could not make it satureday but still wanted to swing by and help. We started with more welding, as we got the doors seamed shut. Yes, I did this, and yes, I am a pretty poor welder. Get all your welding jokes out of the way now.
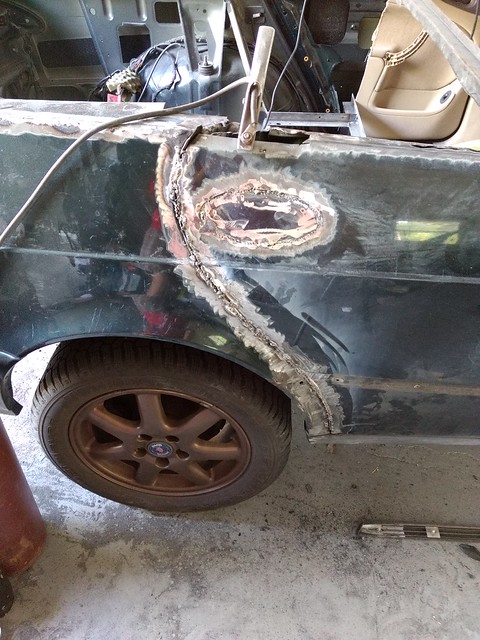
Welding. And grinding. And welding. And grinding.
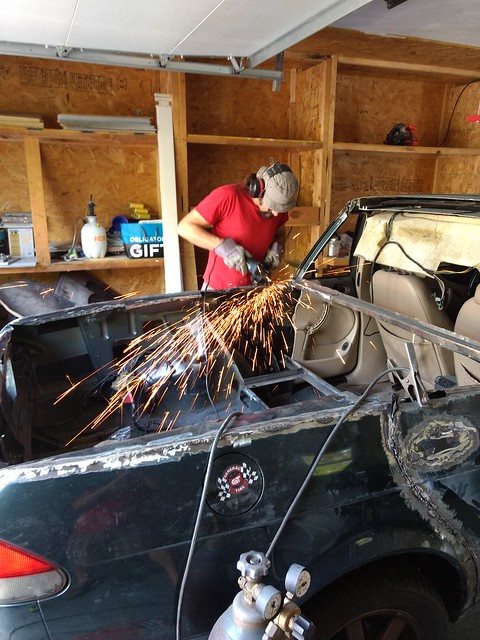
We finished the rest of the bed frame.
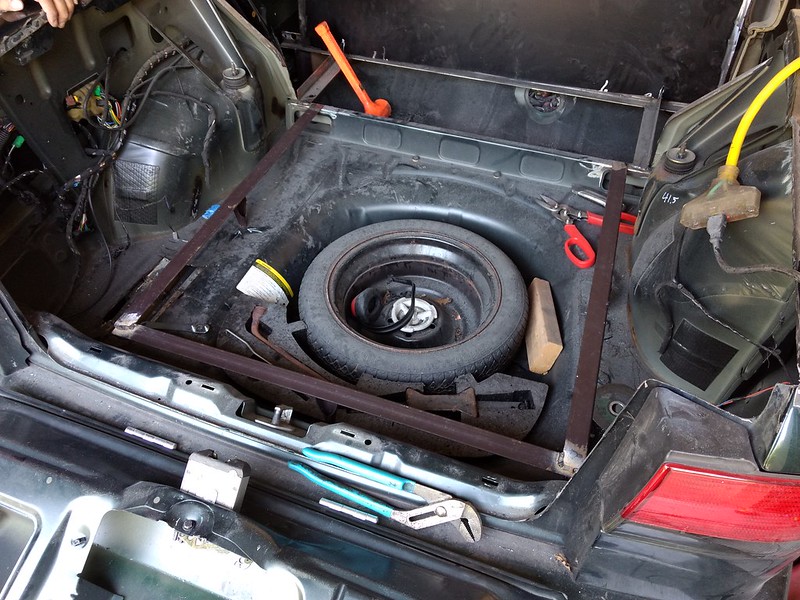
Not shown in this picture, but we were able to cut down the feet just slightly and then grind back the paint and weld the feet to the saab. I still can't believe how perfectly those worked out.
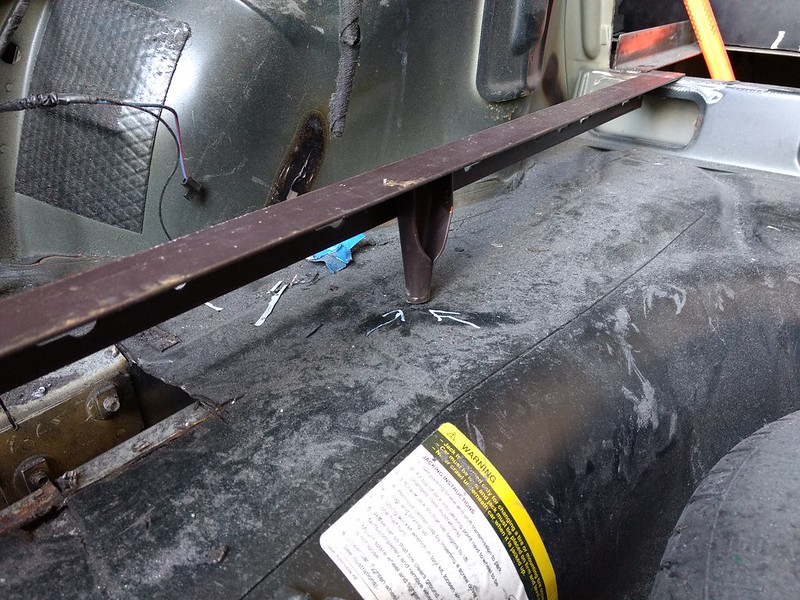
Here's the plastic foot we pulled off
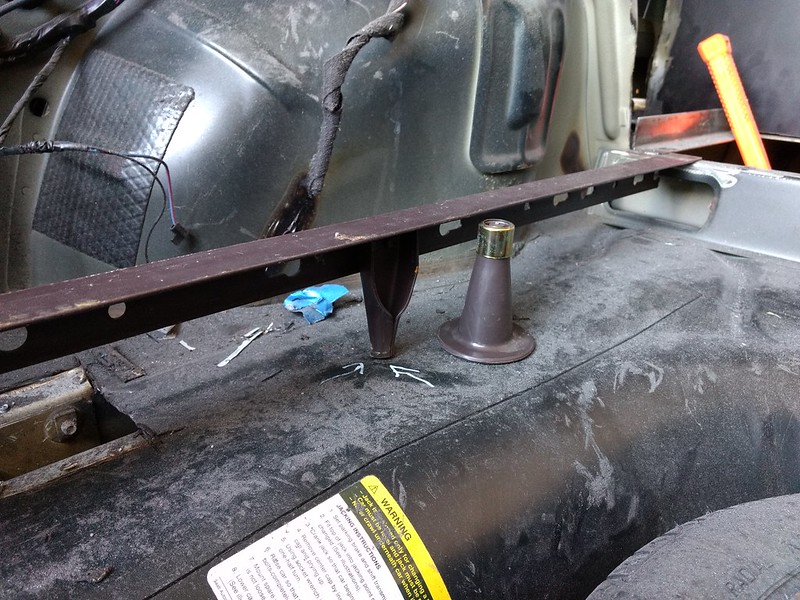
Here's two GRMers, grinding AND welding at. the. same. time.
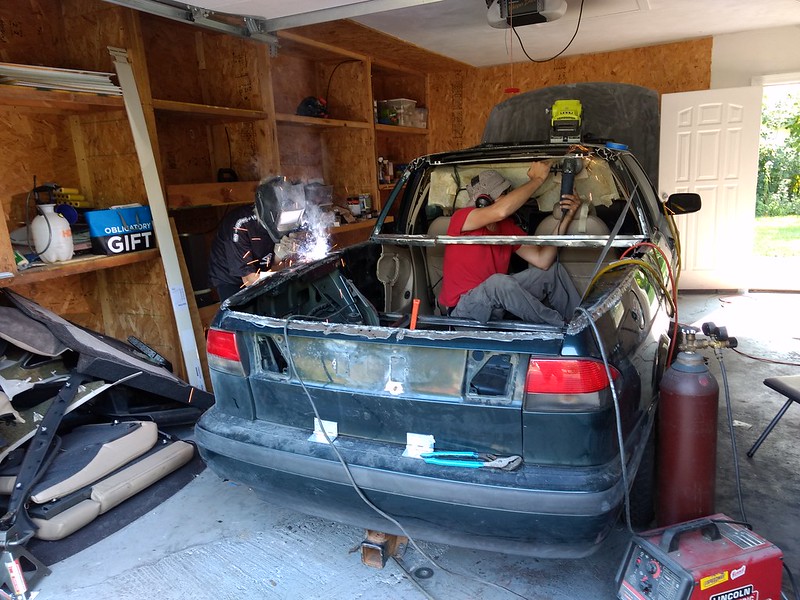
And that is about were we got for day 2 (I had to call it reasonably early since I wanted to spend some family time before heading off to New York for work the next morning).
Both doors welded shut, but door handle patches welded in, bed frame fully complete and welded in.
All in all what a giant success!
Want to post a thank you post. Thank you for coming to work on the car. Thank you for your ideas and time. Thank you for teaching me new tricks. Thank you for the great time!
- Indy Guy - the first to arrive, he cleared the way
- machinenbau - the man with the plan, the c-pillar and bulkhead is almost all due to him
- drdisque - paint prep and de-decoupage the hood
- oldtin - brought the welder, the man behind the tow hitch
- John Welsh - lunch, from hundreds of miles away
- lugnut - engine mount specialist, and worked on a fun surprise!
- my friend Ben - lots of cutting, fitting, grinding, welding, and the tailgate
- my friend Trent and his brother Alec - setting a motor mount fire in the backyard
- Luis, who is a friend of Gearhead Workspace, came out for learning and emotional support
- my brother-in-law - general heckling, grilled brats, was doing some welding by the end!
- appleseed - "sloppy seconds" (his words)
- quark - never welded before, and now has welded a door shut!
- my wife - its like thanking your mom at the Oscars, when you really think about it, she made ALL of this happen!
More work done! I'm trying to take the Nelson advise and get at least a tiny progression each day.
CAD - with "coroplast"
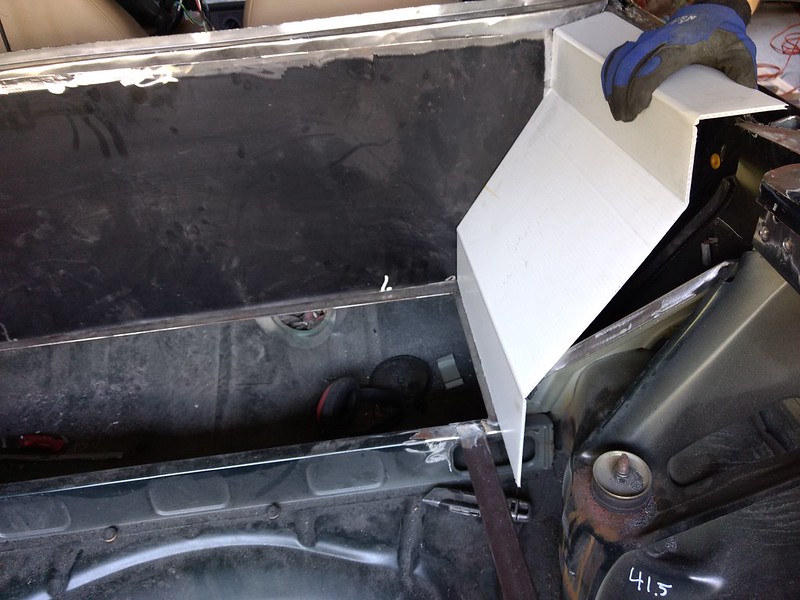
Bending with my ultra-high tech tooling (I bit the bullet and bought two sheets of metal from Menards, the scrap I had just wasn't big enough)
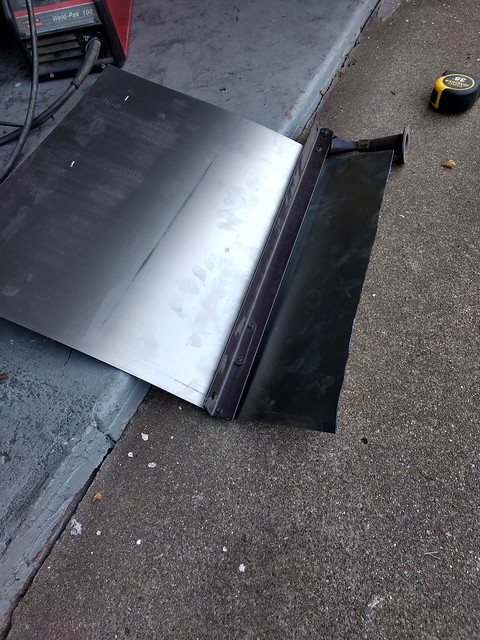
Test fit
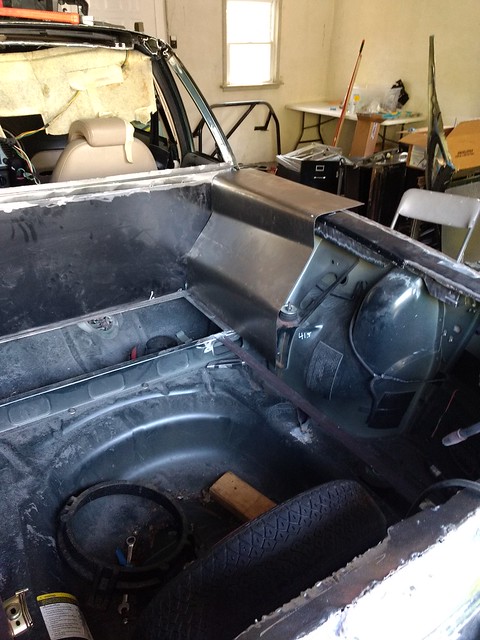
Trim
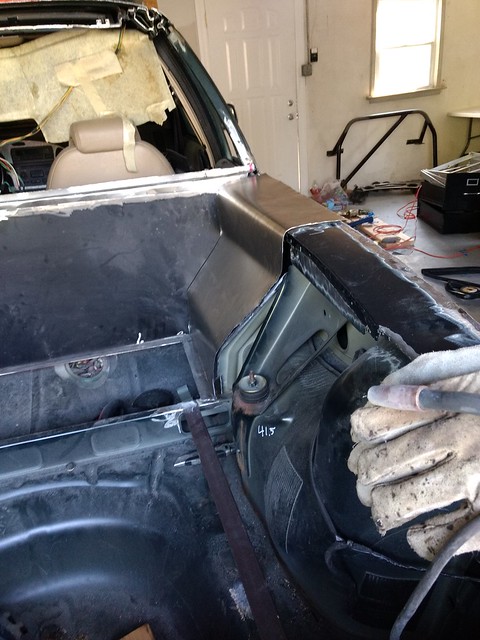
Very nice! (Borat)
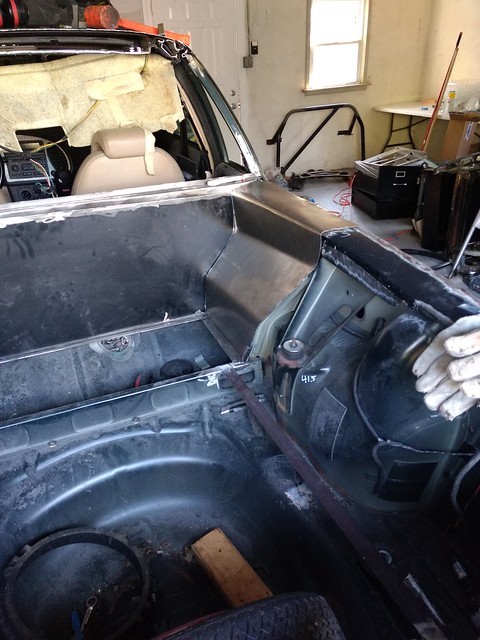
Repeat on other side:
Mark line, cut, and make flange for joining the two
More CAD
Get a good helper
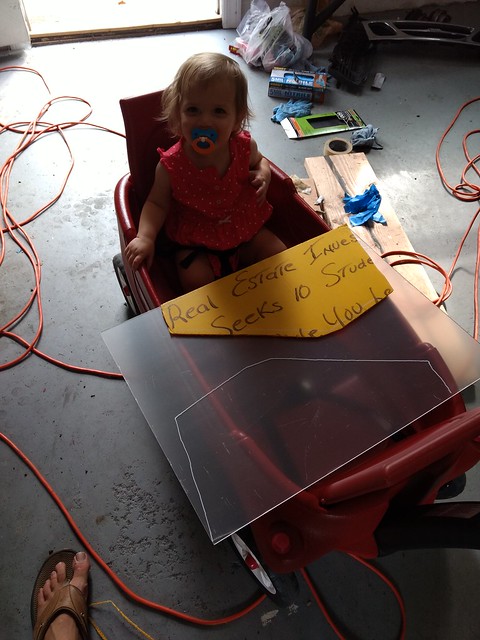
machinenbau is so good that the same template fits both sides!!
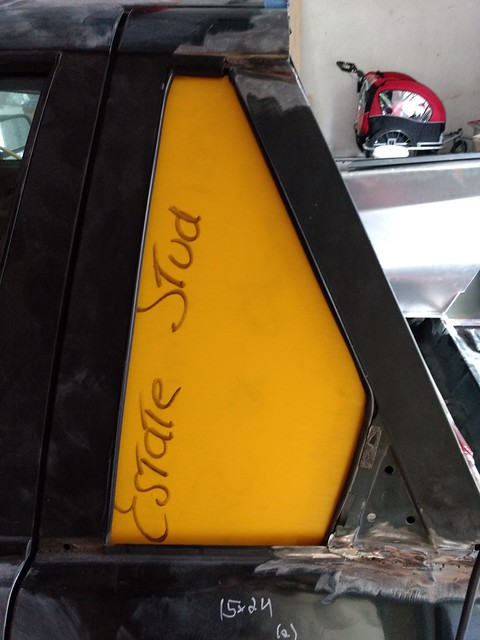
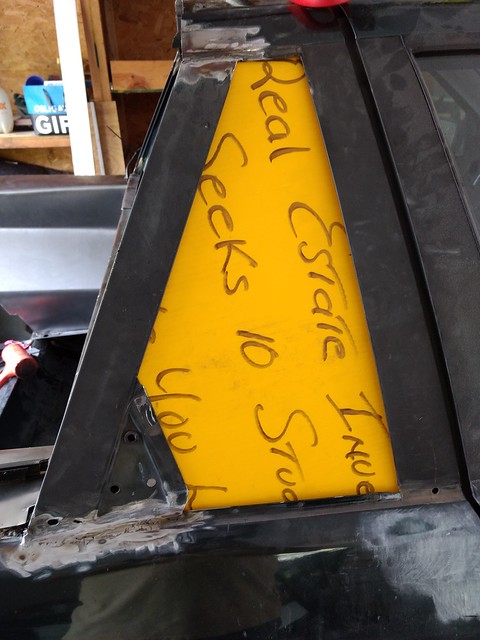
Boom, done. Most of the window trim reused in cut down form. Window is light so a friction hold is all that is needed.
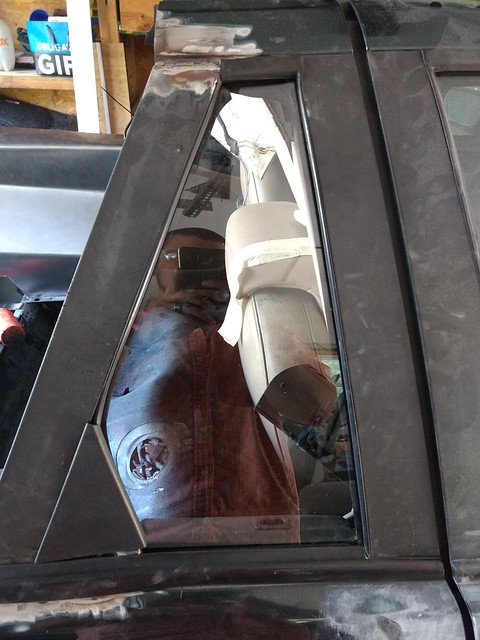
Very nice to see the updates and how things went. Sounds like a fun time. While you all where doing that, I was shooting this on Sat night. This pic was from my cell phone to make a quick post of the late models that where racing at Wilmot Raceway.

Updates:
Coming down to the wire! No pictures today but I hope to make lots of progress over the next few days. I have to go out of town for work next week and then basically its challenge week.
I didn't let the poly motor mount dry long enough, and it made a mess when I installed it and set the engine down. Doh! Ordered a new one and installed it. Last night I started sealing up the sunroof (the sunroof cartridge at the back, I hope to still allow the sunroof itself to tilt), and installing the bulkhead. I was using construction adhesive and rivets, but I broke like 4 drill bits, grrr. Had to get more drill bits today. Still to-do:
Great progress yesterday! I did a ton of 'engine tune up' work, including fixing many "that's probably a boost leak" spots (turbo to IC hose had a visible cut that didn't go all the way through the hose, intake pipe to BOV had some visible cracks, evap lines very loose to canister purge valve), and reinstalling battery. I also ground down the driver side rear door weld.
I finally also finished up the rear bulkhead and seam sealed everything. All the metal is held together with rivets and the seam sealer (construction adhesive). I finished removing all the lights and trim and old stickers for paint. Finally I took the car down off the jacks and took some photos.
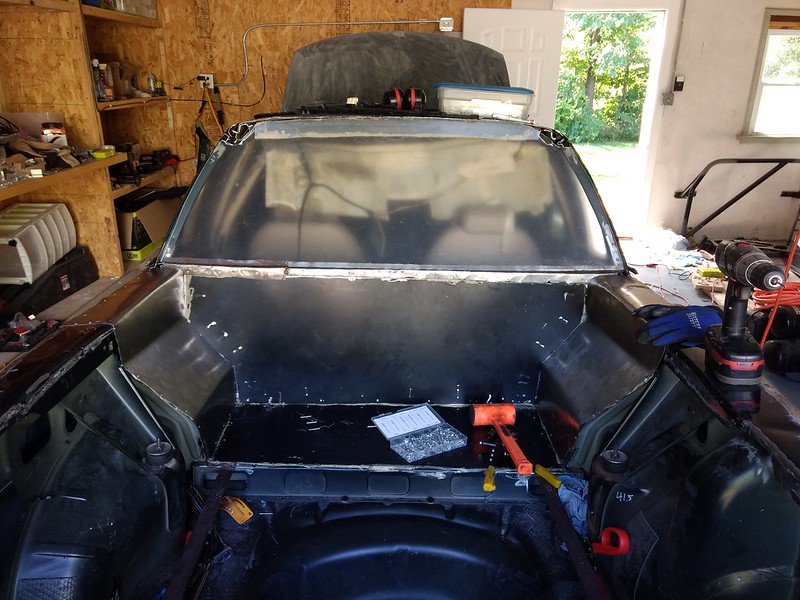
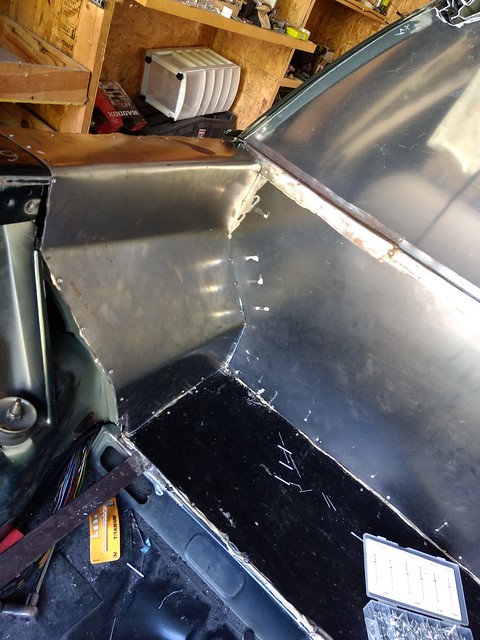
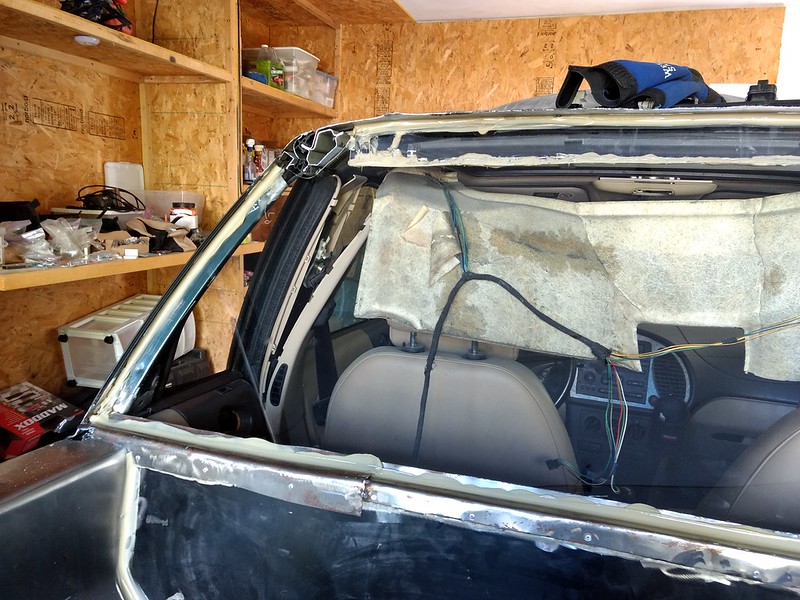
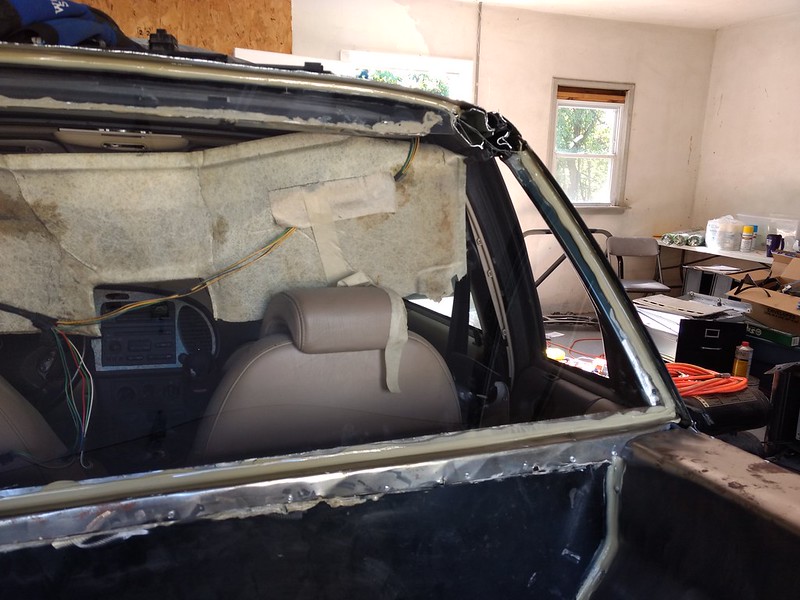
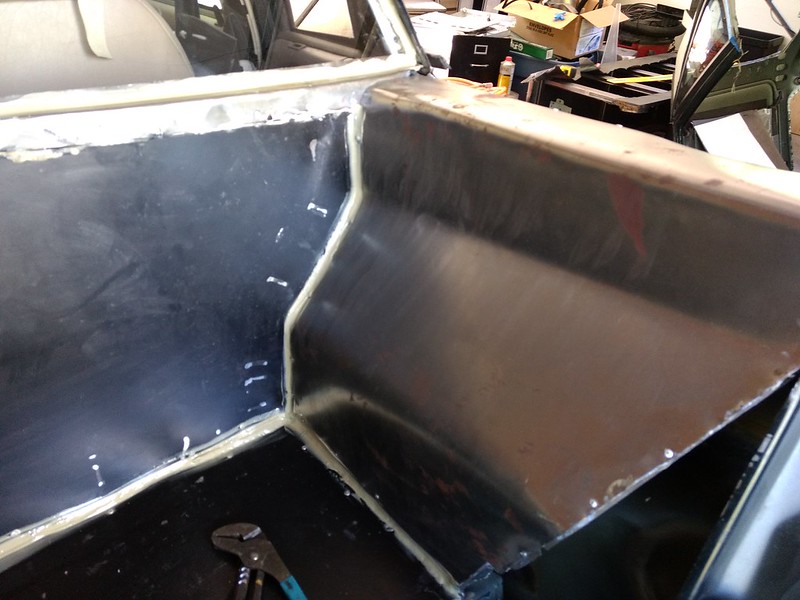
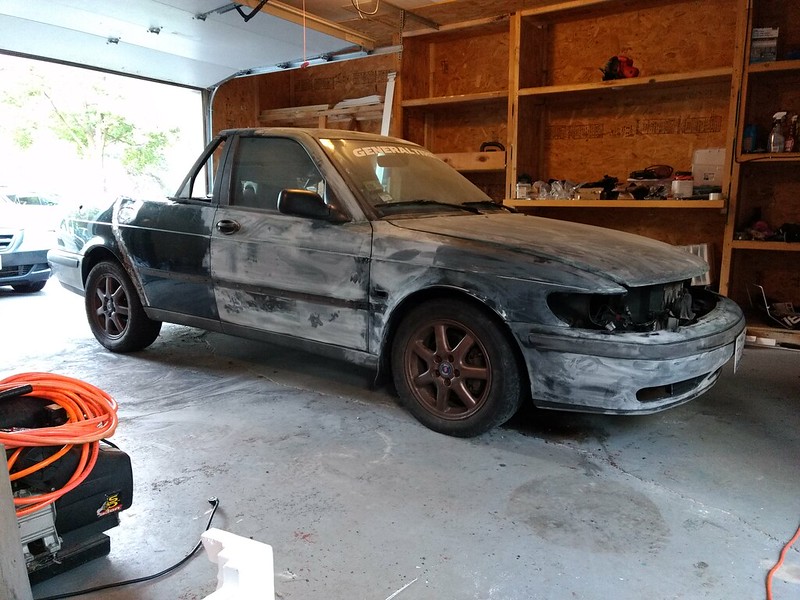
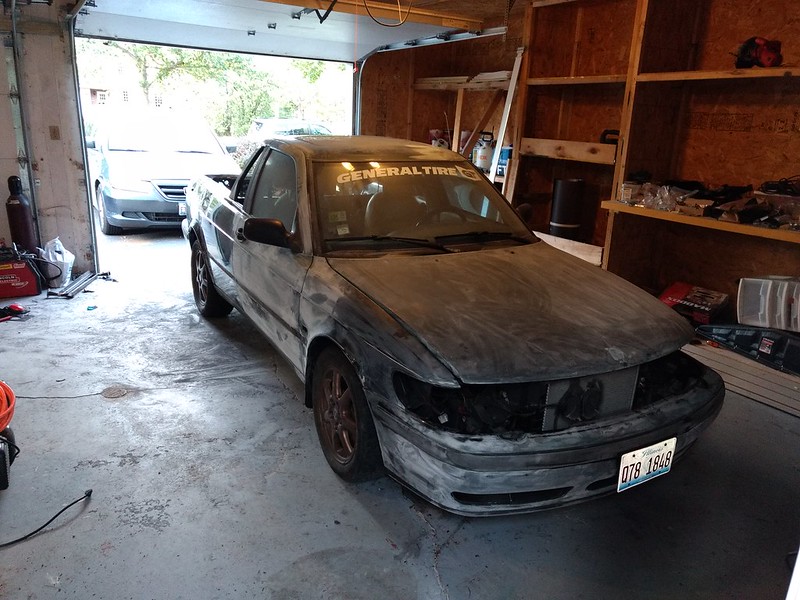
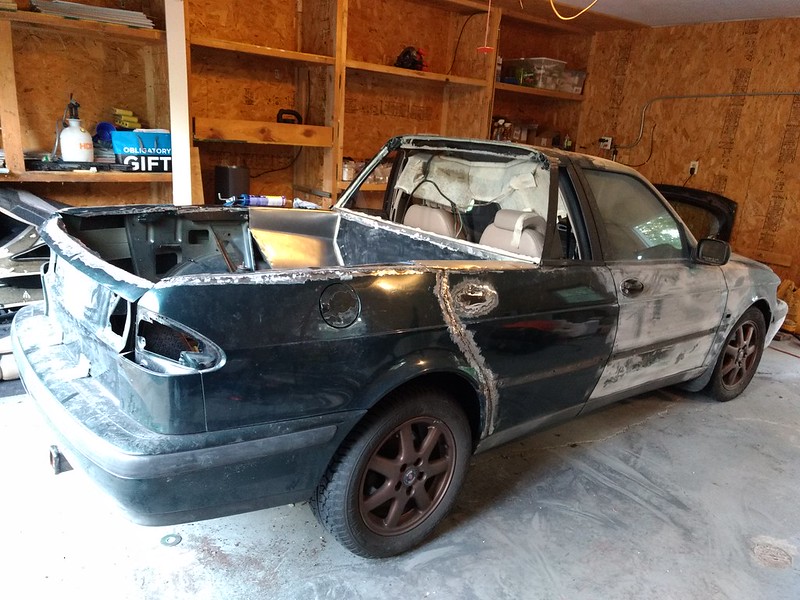
Still to-do:
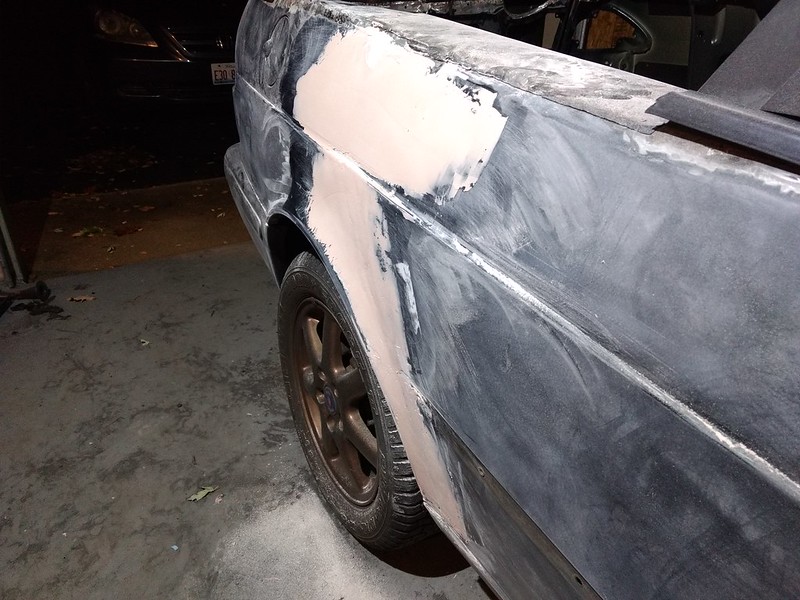
Spent some time tonight doing the bondo on the rear doors. First time I ever worked with Bondo, who knew it was so awesome!! Now, I would not be the guy to try and make this look perfect, but from really bad to passable is quite easy to do.
This is the third bondo coat, not sanded yet. Probably my last pass before I call 'good enough':
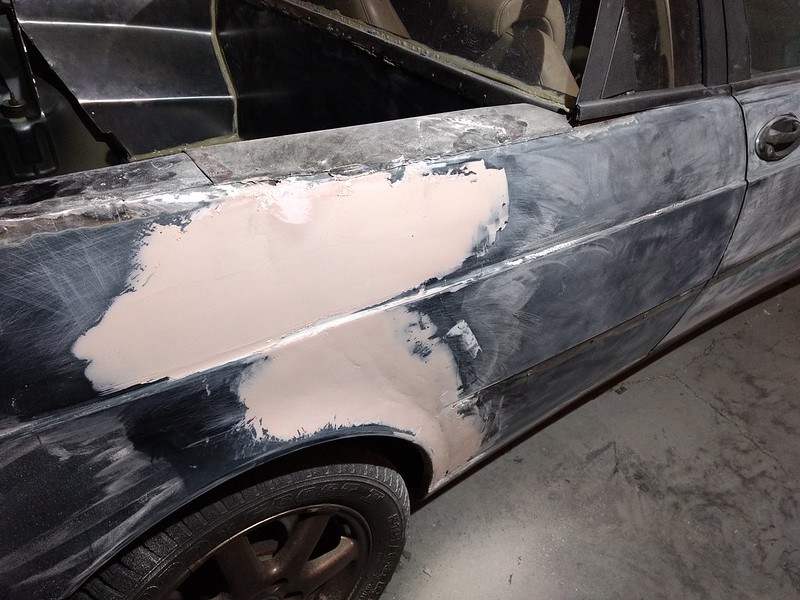
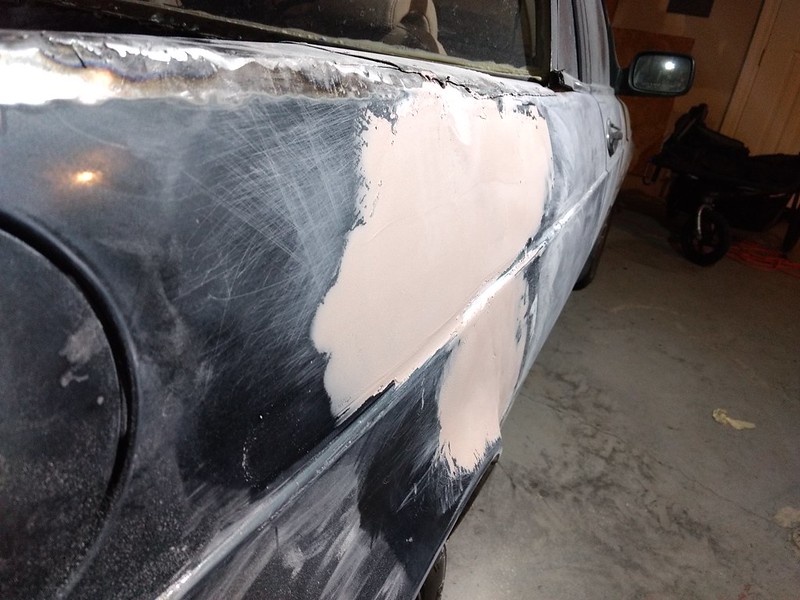
Still to-do:
It's looking dang good! With how much the rear went up, it must have lost a lot of weight. Should be competitive next weekend!
looking very good and can not wait to see it next week. i was going to work on my car today, but the rain nixed that. and i can not get into my garage cause of familys crap in it.
You'll need to log in to post.