1 2
4cylndrfury
4cylndrfury MegaDork
8/20/14 9:23 a.m.

Thats right, I went full on ghetto, and am installing hockey puck engine mounts...this is for my 99 5spd Infiniti G20. So far, Ive only converted the 2 lower mounts, of the 4 total in this model. Theyre not installed yet, so I havent had a chance to feel the difference, but its probably going to be considerable.

First, what I did (sorry for so few pics - and no making fun of the carpet on the workbench, its my grandfathers bench, and he jumped out of airplanes, on purpose, and shot Germans. My grandpa could beat up your grandpa).

I started with an aftermarket ANCHOR brand mount. I replaced the tired stock units some time ago with these cheapo aftermarket joints, and of course, they failed a few months later (because Anchor brand is full on garbage on an epic scale).
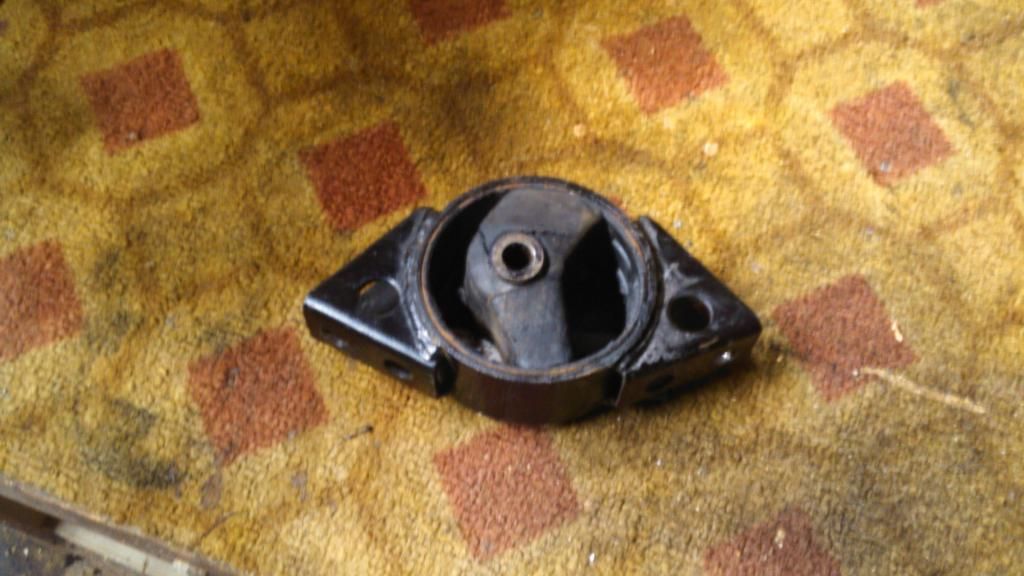
I used a very sharp fillet knife to cut thru the failed rubber. I used some motor oil to lubricate the blade, and I had it out in about 10 min or so. I hear all these horror stories of guys using presses, torches, power saws and all types of other nefarious and sundry processes to get the old rubber out. The fillet knife did a great job, fast, without mess, and left a perfect platform for the puck - leaving a thin ring of rubber still attached to the mount body.
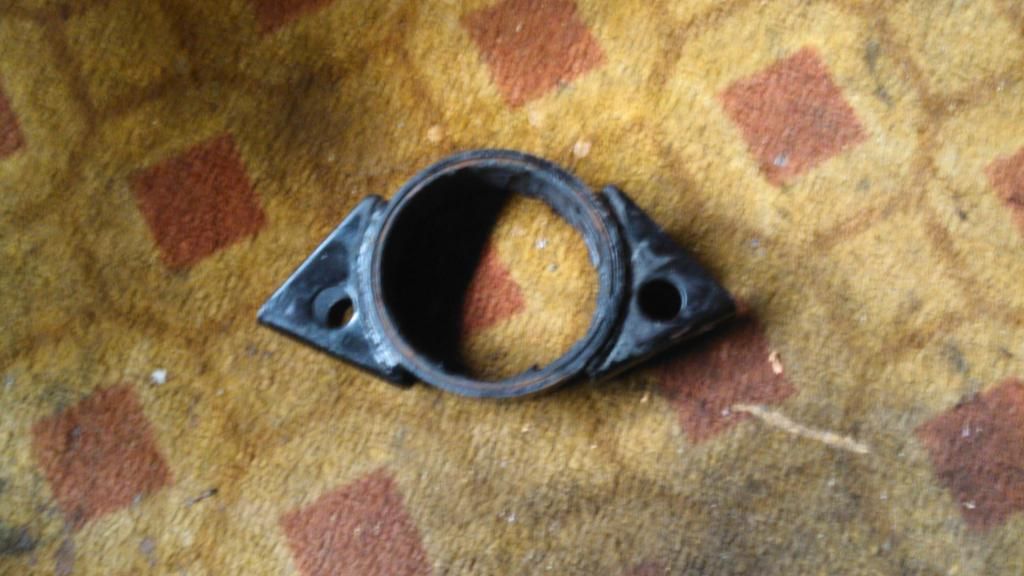
NOT PICTURED - I used the knife to liberate the steel bushing. I just clamped it in a vice and cut the rubber away. This took maybe another 15 min or so. I used a bench grinder to slightly smooth the front edge of the bushing, this will help it press into the rubber puck.

Here is the test subject - youre average vulcanized rubber standard size and weight hockey puck - $1.35 at the local skating rink pro shop - Northlands in Evendale Ohio, here is your shout out. They also have lightweight Blue pucks, I might fart around with those if these are too harsh...more to come on that topic at a later date.
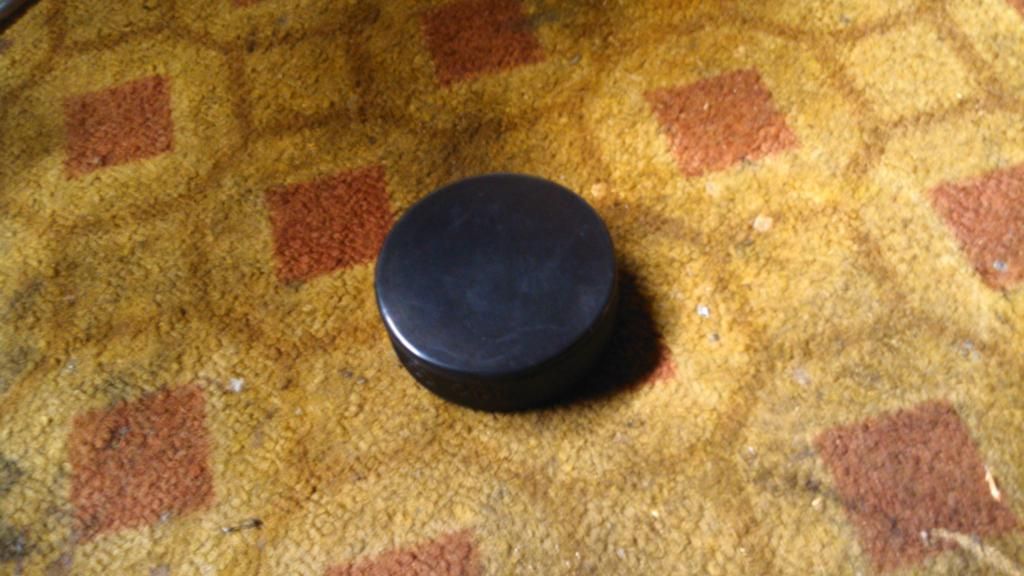
I marked the center and used a 5/8" paddle drill bit to bore the hole for the bushing. The bushing is actually closer to 11/16", maybe 3/4" diameter. I heated the mount with a plumbing hand torch to help expand it. I used a hunk of lumber cut to size to press the puck into the mount housing with a bench vice. IT was a great fit, and no mods to the puck diameter were needed. Bazinga!!!

The ring of rubber the fillet knife left behind when removing the old mount material helped lock the puck into place when the mount shrank back down as it cooled. I again used a bench vice to press the bushing into the puck. Since the bushing is slightly larger than the hole it was being pressed into (thats what she said), it forced the puck to expand slightly, also helping to lock the puck into the mount housing with additional force. I drilled three 3/16" holes around the middle of the puck to help ease vibration. I also ran a thin bead of RTV on either side of the puck, just as a precaution. I might stack some fender washers on the bushing to help keep the rubber centered. We will see...
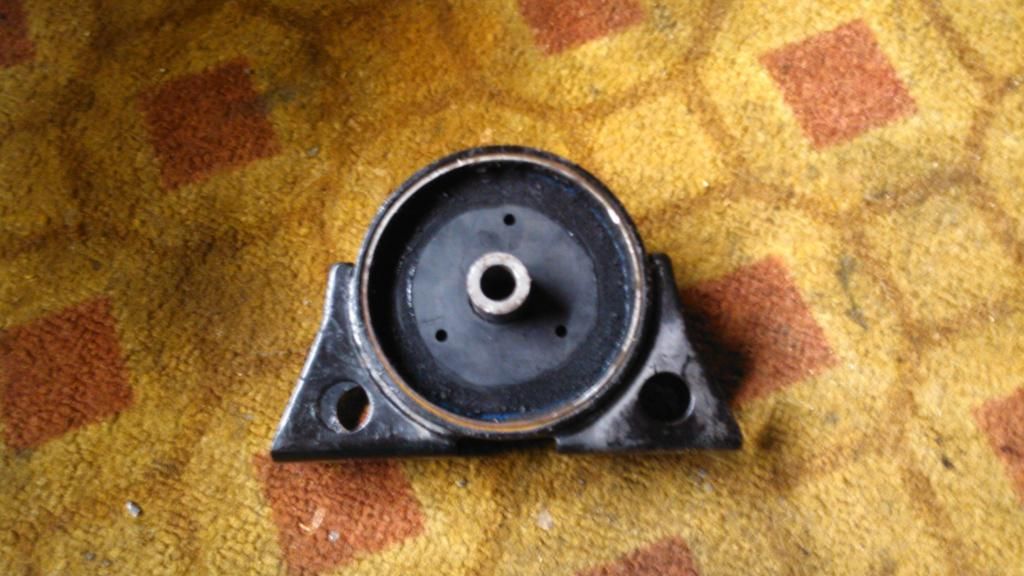
A few notes - those paying close attention will notice that the mount at the end isnt the same as the mount housing in the first pic...thats because Im a lazy ass and didnt take a lot of pictures with the first mount, I was kind of experimenting, and seeing where this would go. So you guys will have to use your imaginations and pretend (thats what she said).

I have another set of anchor mounts still in the car (Im a glutton for punishment - I was hoping my first $45 was spent on a bad set, and hoping the next $45 would get me a good pair...wrong!!!). These are failed worse than the mounts pictured above. Im pretty sure the front mount has failed completely, and the bushing is resting on the mount housing, I get the most annoying, loud buzzy noise as the bushing vibrates on the mount housing at anything but WOT, and Im probably going to set my car on fire if I cant make it stop...hence the hockey puck treatment (cuz besides being lazy, Im also a cheap ass - If I had a few extra duckets, some real urethane mounts would be top of the list). Like I said, depending on the harshness of these mounts, I may try the lightweight blue pucks (for youth league hockey). Im pretty sure theyre the same size, just less dense, so should damp vibrations more (though may be weaker, so who knows). Ive read online that the rubber in a regulation puck is in the 80a durometer range. I think some of the aftermarket urethane mounts appear to be in the 70a range, so hopefully the black rubber isnt too much worse. Like I said, perhaps I will experiment on the blue pucks if the vibes warrant it.

My upper mounts are also in bad shape, but dont do as much to support the engine as the lowers, so they will (may?) come later, the lowers are priority. I do know that my shifting isnt as crisp as I wish it could be. The trans mount will probably be on the surgical table before long (along with a urethane shifter bushing, and probably the ghetto short shifter mod, aka - bashing the plastic ball that locates the shifter lever in the mechanism up toward the shift knob a half inch...I have a spare shifter, so we will see).

...more to come, these will probably go in tomorrow evening. Hopefully I will have an update on Friday.

GameboyRMH
GameboyRMH GRM+ Memberand MegaDork
8/20/14 9:32 a.m.

You could also fill the stock mounts with urethane for the same effect - it can be stiffer this way since you're not limited to the size of the puck. But prep is very important and you should get a powered caulk gun or your hands will be sooooore!

4cylndrfury
4cylndrfury MegaDork
8/20/14 9:39 a.m.

I tried window weld, they didnt last too long. I think I may have had air pockets in there though. I basically chiseled most of the stock rubber out, leaving just enough to keep the bushing centered. I filled with the urethane goop, and youre right, both the caulk gun and my hands were mangled afterward. THat method only lasted a few months before it failed too, so either Im driving a torque-monster, or I did something wrong...probably not the former, I banging out a solid bill forty at the wheels...

I thought about castable/pourable air hardening urethane, you can get some 70-80a for around $40 or so from various sources online. But it will shrink slightly as it cures, and I was worried about that. I thought about casting some blanks, and essentially doing what I did with the pucks also. I guess for the total $4.05 for the 3 pucks I bought (1 extra in case I screw up), I thought this was at least worth a shot...Some castable would be next on the list. I think I remember SF1 taking a shot with castable urethane mounts (for the Deathscort?). Cant remember how they fared long term?

GameboyRMH
GameboyRMH GRM+ Memberand MegaDork
8/20/14 10:12 a.m.

I've had some DIY urethane mounts made by others last a good long time. I made some myself recently but I'll have to see how they hold up long-term, I prepped the hell out of the existing stock rubber surface, scuffing and cleaning and degreasing, and cleaning....

I've only driven on them for less than an hour so far, but they're doing better than the first time I tried to do this where two perfect urethane moulds popped out the sides on the first drive.

Grizz
Grizz UltraDork
8/20/14 10:31 a.m.

My grandpa shot Germans as well, bring it.

Also, neat.

ncjay
ncjay Dork
8/20/14 5:01 p.m.

Hmm, hockey pucks. Why didn't I think of that? Looks very nice when finished.

Swank Force One
Swank Force One MegaDork
8/20/14 5:10 p.m.

In reply to 4cylndrfury:

I did the castable eleventy billion duro for both MX6s. (Mndsm's and my own.)

Have not put sufficient miles on either, but...i went pretty extreme and essentially gutted the mounts before filling. They may as well be concrete. Super fun. Ladies will love it.

mad_machine
mad_machine GRM+ Memberand MegaDork
8/20/14 6:24 p.m.
Grizz wrote: My grandpa shot Germans as well, bring it. Also, neat.

very cool...

My Grandfather landed on Omaha Beach to shoot Germans...

Sadly though, if he were still alive, he would have liked that carpet

vwcorvette
vwcorvette GRM+ Memberand Dork
8/20/14 6:42 p.m.

Hockey pucks as standard upgrade for Corrado and Passat front mounts.

My grandfather was too young for the first World War, too old for the second.

Kenny_McCormic
Kenny_McCormic PowerDork
8/20/14 7:41 p.m.

I've been meaning to fill my tired stock ones with cheap liquid nails polyurethane and see how well that works.

My grandpa didn't jump out of airplanes, but he did shoot down German ones. My other grandpa thought it was fun to run up to tanks in Korea and disable them with a thermite grenade or two. So I'd say they wouldn't do too bad in some hypothetical fight 40 years ago.

f6sk
f6sk Reader
8/20/14 7:46 p.m.

There is a place called "mighty mounts" in California that will make whatever you want and mail it back. The've done several Isuzus that you can't get mounts for.

The0retical
The0retical HalfDork
8/20/14 7:53 p.m.

Cool project and nice write up. Interested to see how they hold up and hear about how much noise, vibration, and harshness you experience.

driver109x
driver109x HalfDork
8/20/14 8:02 p.m.

Ha! That's the same thing I did when I had a G20... I used jb weld on mines and drilled a couple of holes around and use some screws to keep the puck from sliding out ... cool beans!

neon4891
neon4891 UltimaDork
8/20/14 8:38 p.m.

Nice job, hope it works out.

Also, my granddaddies didn't Bob Costasfoot around with no Germans, they where too busy with the Japanese, and other illicit activities in the south pacific.

Rob_Mopar
Rob_Mopar SuperDork
8/20/14 10:53 p.m.

In reply to 4cylndrfury

Check that carpet for bullet holes. It may be of German origin.

Keith Tanner
Keith Tanner GRM+ Memberand MegaDork
8/20/14 11:33 p.m.
4cylndrfury wrote: ...I drilled three 3/16" holes around the middle of the puck to help ease vibration.

Ha ha ha! Yes, those three tiny holes will make all the difference

My grandfathers worked on radar prototypes and grew food for guys who shot at Germans. But I don't care, I love the whole idea of this.

4cylndrfury
4cylndrfury MegaDork
8/21/14 10:34 a.m.

Lol, yeah - I guess the three holes were a little optimistic. I didnt want to lose the swelling effect I got from pressing the bushing into the undersized hole, but wanted to try at least something to reduce the qty of fillings my daily driver rattles out of its passengers. Ya know what they say about having your cake and eating it too...

Grandpa LOVED him some cake...

Swank Force One
Swank Force One MegaDork
8/21/14 10:43 a.m.
Kenny_McCormic wrote: I've been meaning to fill my tired stock ones with cheap liquid nails polyurethane and see how well that works. My grandpa didn't jump out of airplanes, but he did shoot down German ones. My other grandpa thought it was fun to run up to tanks in Korea and disable them with a thermite grenade or two. So I'd say they wouldn't do too bad in some hypothetical fight 40 years ago.

Liquid Nails and Window Weld do not work. Don't bother. The correct kits are $40 or less to your door.

4cylndrfury
4cylndrfury MegaDork
8/21/14 2:24 p.m.

Another plus juan for skipping the window weld...Doesnt work that well, breaks your hands off...OFF...using a standard caulk gun, gets everywhere, is kinda expensive, and again, doesnt work that well. You should get some castable urethane from SMOOTH_ON or McMaster Carr, or hockey pucks from Northland Ice Center in Evendale Ohio

4cylndrfury
4cylndrfury MegaDork
8/22/14 7:55 a.m.

The jury is in...LOVE EM! I get a few rattles and squeaks, but nothing too bad. Under 1k is totally silent actually. Between 1 and 1.75k is the worst, but only in 1st. I can take off in 2nd if Im not needing to take off quickly, and Im golden.

The thing that amazes me most though is the impact on the shifting. Its monumentally better. Crisp notches between gears and no guessing if thats 3rd or 5th. Also, the shifter used to move considerably when rolling on or off throttle as the engine/trans rocked back and forth on the boogered mounts. Now, its stable and stays put. Didnt see that coming, Bonus!

The install was pretty straight forward, but anyone who has replaced motor mounts on compact cars knows theres precious little room to manuver leverage tools. WIth softer OEM mounts, a screwdriver or the like is often enough to get the bushings to line up with the mount brackets and slide the long bolts into place. With these super hard mounts, theres almost no movement to be had, so creativity ensued to get things aligned. Of course, necessity being the mother of invention, a unique combination of clamps, spreaders, elbow grease, and curse words went into use. Apparently, installing hockey puck mounts also requires the installer to bleed fairly profusely from the back of their head. Floor jack wheels are remarkably sharp...who knew? Of course, the simplest fix is often the last to be employed, and the most logical of the 17 ways you tried in total.

In all, its only my first day with the mounts in place, but I think Im going to like em. There's a few threads over on G20.net where users mention having the same pucks in place for years, with little noticeable fatigue. Hopefully, Im going to experience similar results.

Kenny_McCormic
Kenny_McCormic PowerDork
8/22/14 3:27 p.m.
Swank Force One wrote:
Kenny_McCormic wrote: I've been meaning to fill my tired stock ones with cheap liquid nails polyurethane and see how well that works.
Liquid Nails and Window Weld do not work. Don't bother. The correct kits are $40 or less to your door.

I'm talking about the poly formulation of liquid nails(or PL premium 3x, hell maybe even the 8x), stuff sticks to everything and remains somewhat soft. Not sure why it wouldn't work, too hard?

xflowgolf
xflowgolf Dork
2/4/15 9:03 p.m.

Bumping this thread as I'm going to try the same tact. The rear motor mount on my mk2 VW Golf is ripping, and the 2.0 16V going in the car could use some upgraded support. I'll be attempting to put hockey pucks in here, might have to stack 2 for thickness, and need to see how overall diameter matches up.

xflowgolf
xflowgolf Dork
2/4/15 9:07 p.m.

Not sure if there's any good way to improve the Trans mount: ideas?

Tyler H
Tyler H GRM+ Memberand SuperDork
2/5/15 6:54 a.m.
vwcorvette wrote: Hockey pucks as standard upgrade for Corrado and Passat front mounts.

+1, but that is the ONLY cheap and easy fix on a VR6 Corrado. Hockey puck is a direct replacement for the front mount. And if that mount goes bad the pretty intake on the front of the VR6 will clearance the hood. The gearbag on the O2A transmission doesn't need any help being vague with bad mounts, either.

I thought it was a great, cheap upgrade.

My grandfather survived the Pacific theatre just to die in the coalmines here.

BeardedJag
BeardedJag New Reader
2/5/15 6:58 a.m.

Hole saw on a hockey puck maybe? Other than that, I got nothin.

1 2

You'll need to log in to post.

Our Preferred Partners
ZPiFTOj8Ls2zfigb3nf5C4cpiu3bHJPXiLojM3TMtrFe19bRqHXMP2NYUOSA309X