I tried fixing the torn diaphragm on mine with inner tube strips and rubber cement. It looked great and worked for one ride. I used a harbor freight orange strap to make a bit of a butt hammock under the seat bottom as a temporary fix 3 years ago
I tried fixing the torn diaphragm on mine with inner tube strips and rubber cement. It looked great and worked for one ride. I used a harbor freight orange strap to make a bit of a butt hammock under the seat bottom as a temporary fix 3 years ago
02Pilot said:In reply to vwcorvette (Forum Supporter) :
I believe that's the newer style. The older is three separate straps (which is what's on the seats I got from Woody). If they're interchangeable, you can get a kit with new webbing and hooks for relatively little money here.
I've purchased those very suspension straps before.
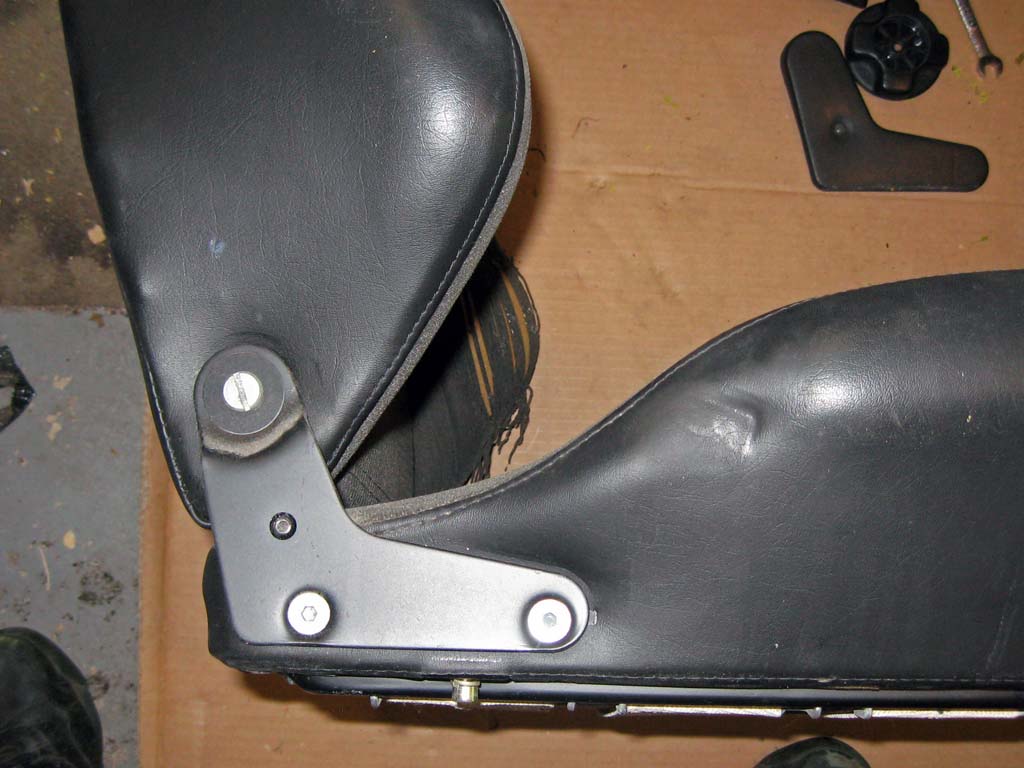
I set about disassembling the seats and failed. Well, not so much failed as gave up when I encountered resistance early on, in the form of the bolts that attach the brackets joining the upper and lower portions. There are two internal hex bolts per side, and they are all stuck. Hard. No rust (at least none visible), but they resisted every reasonable effort to remove them. I found witness marks on all of them suggesting someone had tried before with a degree of force. Given the choice between resorting to unreasonable force and possibly snapping one or more off, and leaving it alone, I opted for the latter.
I did accomplish something, however. I cleaned up all the plastic brackets, and freed up the recline mechanisms (one was very stiff, the other less so). I then decided to use a Bissell spot cleaner, specifically the handheld brush head, to give them a quick clean. This resulted in some moderately dirty water in the collection tank, so it did something at least. I'll wait for everything to dry, inspect, and possibly do it one more time before steaming them.
After that, I have to figure out exactly how to rig them up in the car. The original 2002 seats sat up on pedestals, and they're pretty wide, so I ordered a set of adapters designed for E21 Recaros going into 2002s. That's only half the battle, as the seats didn't come with sliders, so I ordered some universal ones. I have to figure out exactly how all those pieces are going to go together, which may involve drilling a couple of holes in the sliders.
For reference, there isn't much material out there on the Ideal-C seats. This page covers the E21 Recaros that are often swapped into 2002s, but the construction of those seats appears very similar to the seats I have.
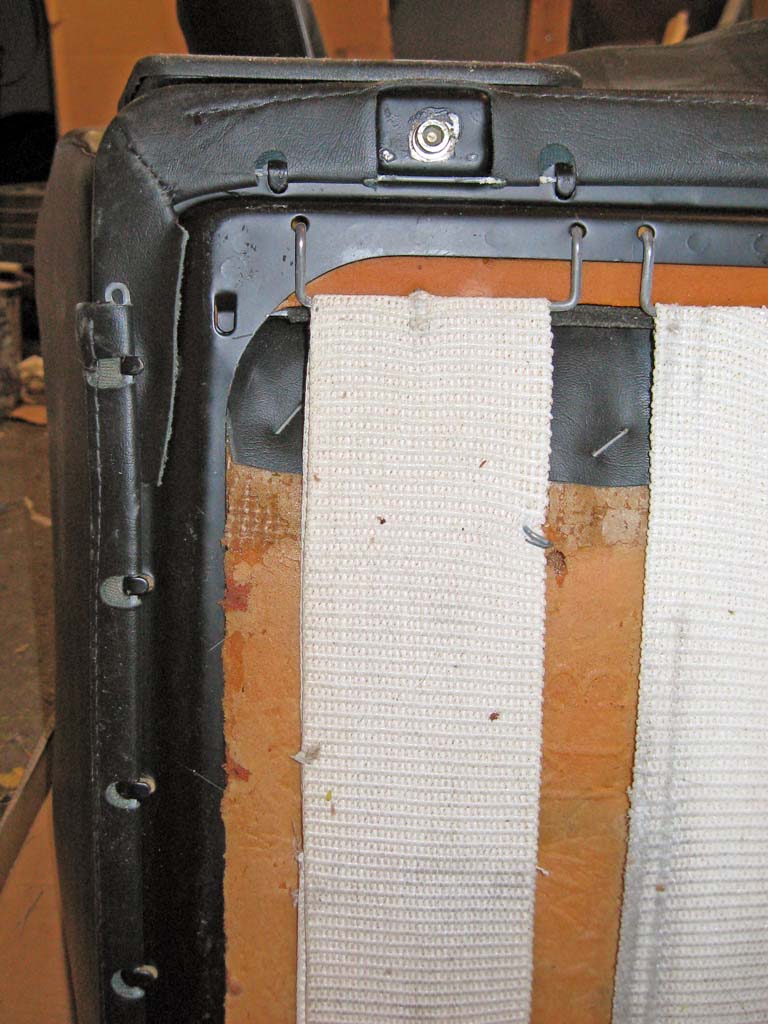
Because the fabric is held on by long pieces of stiff wire that is connected to the frame by fixed tabs, I'm not even sure how I would tighten up the fit if I were able to get them apart. For example:

The stubborn bolts are the lower silver ones shown in this photo:

In reply to 02Pilot :
The one time I tightened the upholstery on a Recaro, I stitched a new listing wire pocket on the inside of the bolster. You have to completely tear down the seat to do that though.
In reply to DeadSkunk (Warren) :
That's about the only way I figure it could be done on these, and that's beyond my capabilities. Thankfully, the seats are in great shape overall, and the slight looseness in the fabric really doesn't bother me. I'll double-check to see if there any tweaks I can make, but otherwise I'm leaving it alone.
The cleaning yesterday was successful (I can tell because I can clearly see the few spots I missed), so I'll do one more pass today, then hit them with the steamer. The straps do need to be replaced, so I'll order those, then they should be ready to go in the car.
In reply to 02Pilot :
Those covers likely have no foam backing in them (mine don't) . Should you ever decide to tear them down just add a 1/2" layer of foam over the bolsters and they'll fill out the covers nicely. What are you using to clean them? Mine need a litttle something.
In reply to DeadSkunk (Warren) :
The bolsters are really fine; the worst of the loose fabric is in the center section of the driver's seat, especially on the backrest. Adding a layer of thin foam would be the easiest route, I think, if only I could get the seats fully apart. If they were worse I'd be more motivated, but as it stands the issue is solely cosmetic, and quite minor.
I used a Bissell spot cleaner, similar to this one but an older model. It does a nice job. The brush bristles are quite stiff and pull the fabric some, so I was careful not to use too much pressure. Spray more liquid than you think you need for best results.
In reply to 02Pilot :
I have to say that I don't think anyone ever tried to get those stuck bolts out. They've only had two owners prior to yourself. I know that I never tried to take them apart, and the original owner also owned a large machine shop. If he had any reason to remove the bolts, he would have gotten them out.
In reply to Woody (Forum Supportum) :
Then maybe they're torqued in at the factory hard enough to show deformation at the corners? No idea, and no other signs of activity under the covers, so I'm sure you're right. Just unexpected. In any case, I don't want to be the one to wreck them.
In reply to 02Pilot :
I'll take a look at the bolts on the brown seats in the morning and see how they compare. They came from the same guy.
Unexpectedly had a little time this afternoon, so I set about seeing how the Recaros should mount in the car. This, inevitably, was a bit of a faff, as the seats mount to adapters that mount to sliders that mount to the floor, and getting everything lined up was time-consuming. The sliders are the only non-Recaro-specific parts, and needed some new holes drilled.

The adapters came from Blunt. They are designed to mount the E21 Recaros, but these have the same bolt pattern, so no issues there except for clearance to the screws that attach them to the sliders.

After trying all the other ways, I finally figured out that I needed to mount the adapters to the sliders, then the adapters to the seats, then put the whole assembly into the car and bolt it to the floor. There was no other way to do it that allowed the necessary access to all the bolts.

I started with the passenger side just in case I failed hard and needed to drive the car back into the garage, which tends to be easier with a driver's seat. Both of them are getting new webbing, so this will be coming back out, but everything going forward should be relatively straightforward.
Oh, and I pulled the upper back cover off the driver's seat to reattach a bit of the fabric that had come loose and found the production date (14 Mar 84) and what I assume is the initials of the person who put them together.

Received the new webbing from Aardvarc and swapped it in. The old straps were 100% no longer elastic. Not broken, or even really worn, just old and tired. The swap over was easy enough.

In reply to DeadSkunk (Warren) :
I'm pleased, especially that they sit at about the same height from the floor as the old ones. That was my only real concern in swapping, knowing that I would have to come up with a new mounting arrangement, but they are remarkably close. Of course, it will be a few months before the salt is gone from the roads, so I won't be able to really put them to the test until then, but I think they're going to be a nice upgrade.
You'll need to log in to post.