I've decided to semi-permanently remove the rear seat. One reason is I can't find a matching pattern for my Recaro seats...
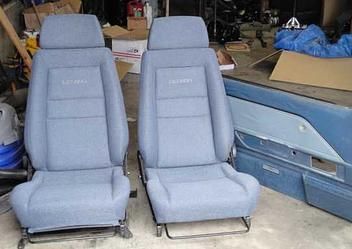
another reason is to afford myself concealed secured (lockable) storage.
So... below is my initial design. the green outlines the shape of the panels (yes 2 panels) needed.
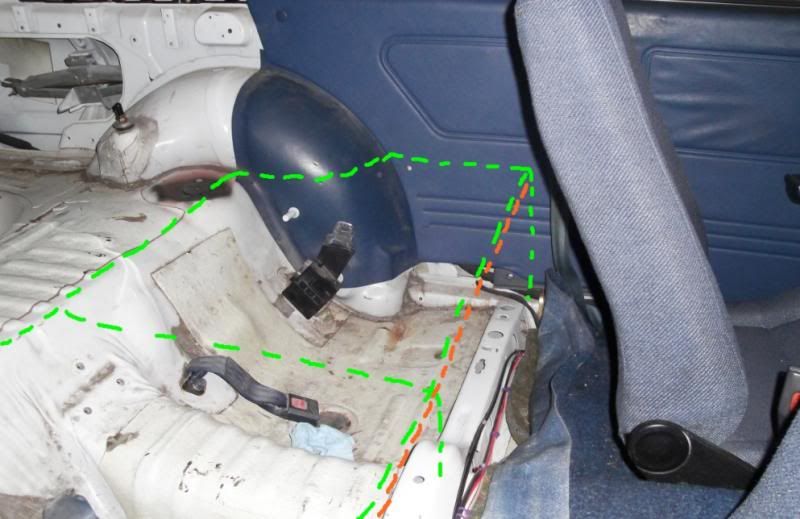
The first panel would be a vertical panel that mounts to the cross member and rises to the orange line. The second panel would be hinged (piano type) at the rear hatchback floor level, and would close on top of the first panel. I will have a carpet go from the back of the car to edge of the new cover, and add a piece to the vertical.
How do I build this... and keep it lightweight, as well as strong? Materials required? Special tools required?
Bare minimum, I'd say, aluminum sheet, coping saw, straight edge, hammer, and some 1x2's. Of course there's the hardware too, screws, hinges, and such.
Build it just like a speaker box. Fiberglass the bottom and sides. Lay in a few 1X2 to screw into and go to town. Use duct tape to protect the sheet metal and turtle wax as a mold release.

JThw8
PowerDork
9/5/13 9:13 p.m.
t25torx wrote:
Bare minimum, I'd say, aluminum sheet, coping saw, straight edge, hammer, and some 1x2's. Of course there's the hardware too, screws, hinges, and such.
Id agree, sheet aluminum will be easiest. If you have access to a bead roller you can roll some ribs in it to help with rigidity, otherwise you'll need some aluminum box tube to make a framework (probably need that either way but you can get away with less if it was ribbed)
google stressed-skin panels. I used 1/4" mdf and some 2x2 lumber to make a floor kinda like that. Wood glue or epoxy and a brad nailer and you're good. It will be very torsionally rigid, but as you can imagine the 1/4" MDF won't take heavy weight in between the frame pieces.... unless you fill it with urethane foam 
For ultra cheap (but ultra light), get a free hollow house door off CL and fill it with foam. Cut to fit and then wrap it with glass cloth and some resin to tie it all together. That is what I plan to do for the cargo area of my van to build side boxes.
Heck, you can buy new hollow doors at HD for $15 or so.

SVreX
MegaDork
9/5/13 9:47 p.m.
Ummm... plywood?
Am I missing something? This looks uber-easy with a couple of plywood scraps. I could build it faster than I could have done the photoshop picture. 
JY the cargo bin setup from an FC rx7
Depends how secure you want it to be. You could stretch the carpet over a balsa wood skeleton but then you could break into it with a butterknife. Sheet aluminum should be enough of a PITA to get through.
t25torx wrote:
Bare minimum, I'd say, aluminum sheet, coping saw, straight edge, hammer, and some 1x2's. Of course there's the hardware too, screws, hinges, and such.
I would forgo the 1x2s and rivet in some ribs to add strength.
MrJoshua wrote:
JY the cargo bin setup from an FC rx7
I have a set I'm looking to get rid of actually
I did something similar in the back of a VW Bug. Just used plywood and my non-existent fabricating skills. Worked fine, but plywood is heavy.
David
Seriously, an rx7 cargo bin setup is exactly that shape.
I had an RX-7 cargo bin setup mounted in place of the rear seats of one of my Eclipses. It was fantastic. Still strong enough for the sort of women that can fit in the back seat of an Eclipse, tons of storage, and once carpeted, looked factory.
2x2 (wood) frame, 1/4" wafer board and indoor/outdoor carpeting.
i would not hinge the top to the rear sheetmetal. I would want a plate, secured to the sheetmetal and front panel. Then cut holes in the plate, attach hinge to the plate and make a lid to attach to hinge. Much stronger that way.
oh my... I thought I had been updating this thread....
hmmm, so let me post up what I've done so far....

Using the tried and true version of C.A.D., I go from dotted lines to a template.....
version number one (note lack of handle holds on this one....
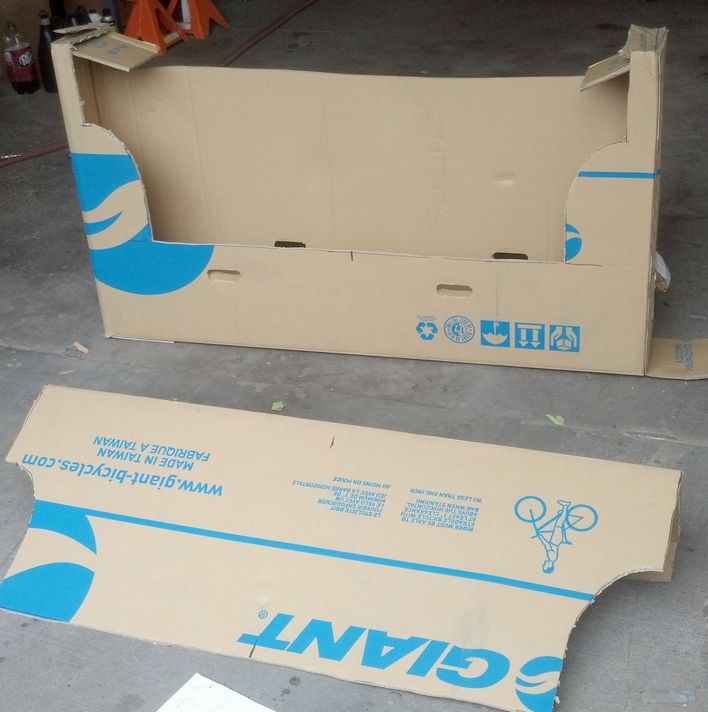
version #2 with corrections made after fitment of #1
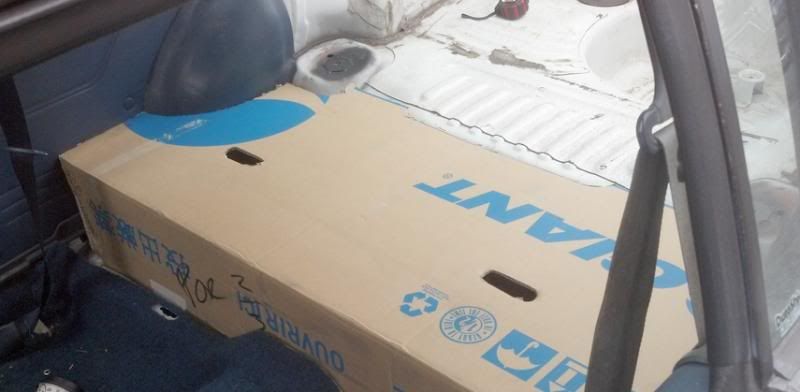
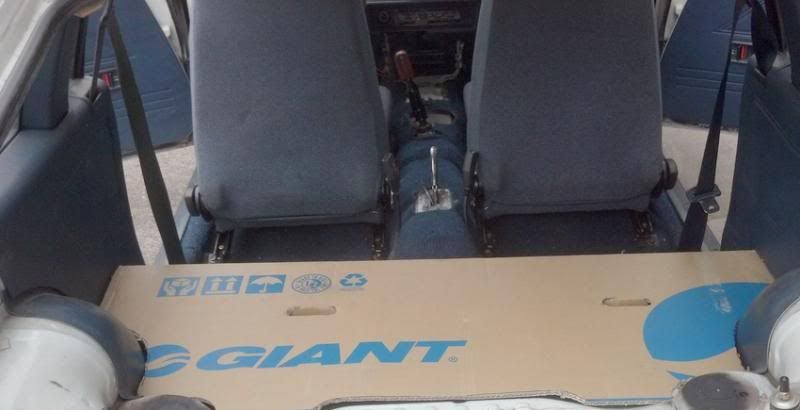
Digging out the original rear carpet... the new carpet will need to be a bit larger... but you get the idea....... :)
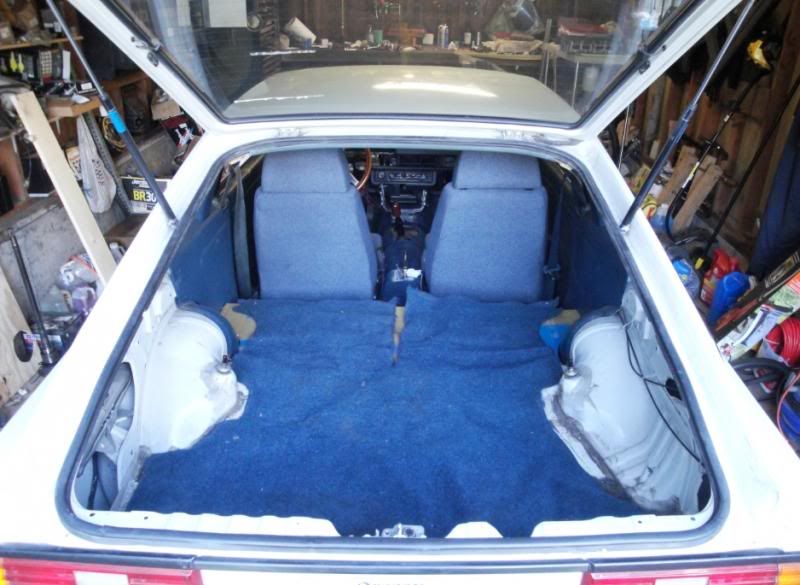
Now I go out and get a bit of plywood, and some hardware...
Followed by the wooden version....
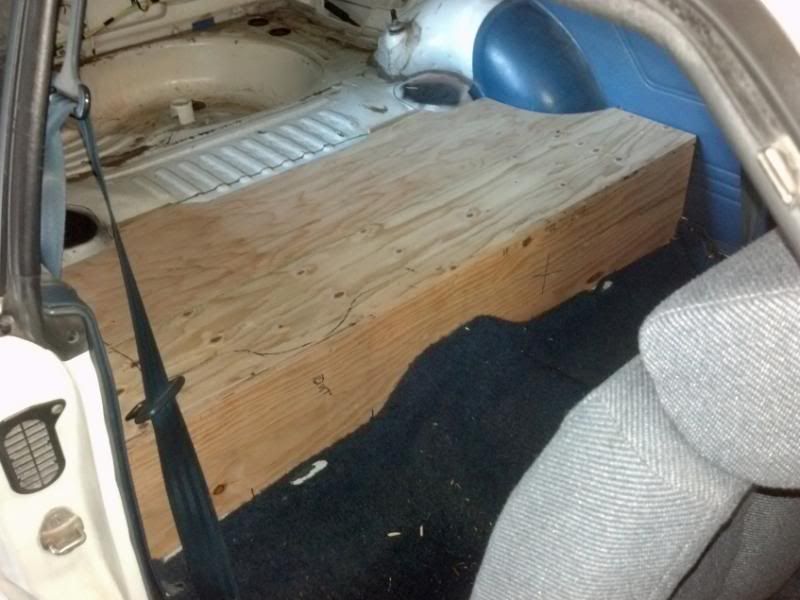
and now that this is up to date......
The fresh problem.... what size for the hatch? Design aided by shop towel 
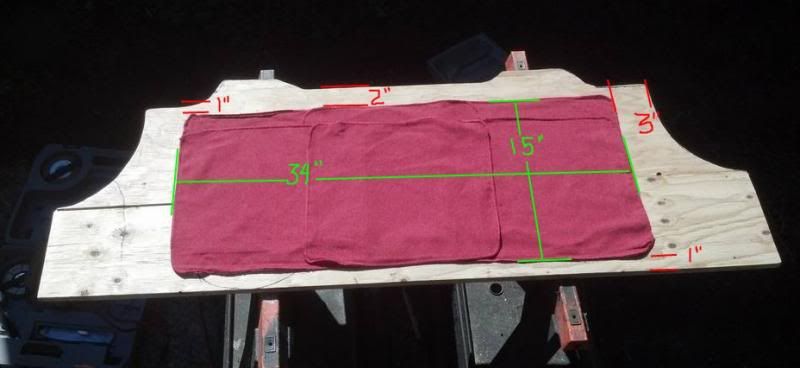
brown is top reinforcement, and ledge for hatch to stop against, blue is hatch lid reinforcement,(both reinforcements to be in wood 1x2s) and green is mounting points.
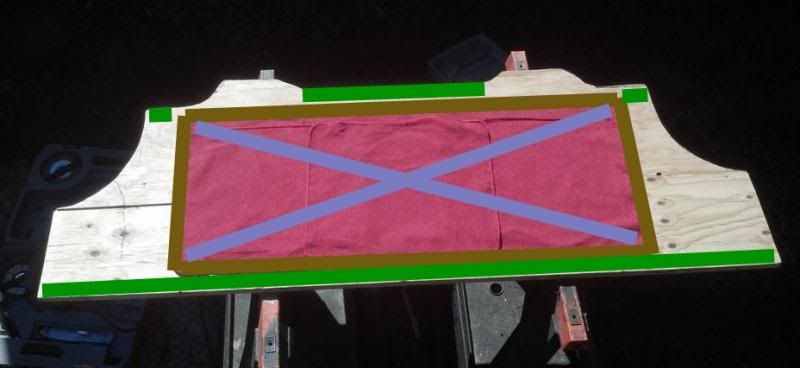
Is this TOO BIG??
U need bamboo flooring for the back to cover it. Im waiting for someone to do that...
Oh. And cant u just hinge the whole top piece to come up?
What kind of Giant was in that box?
And, seconded on why not hinge the whole top?
SnowMongoose wrote:
What kind of Giant was in that box?
http://www.giant-bicycles.com/en-us/
about hinging the whole top.... I'm not entirely sure... I'm still open to ideas... but my fears are:
1) the top will move in relation to the front and squeak
2) the fixed mounted top adds structure to the whole, a none fixed top adds no structure
2a) because of better structural integrity (ASSUMED) the hatch version can support more mass
I would take the cardboard box and use it. Wrap it in fleece like the subwoofer guys do, some fiberglass resin, sand and paint, and it would be awesome, lighter, and less hillbilly than plywood.
Hmmm,(glassed over cardboard) how would I gain access under it? How strong would it be? I'm not to worried about mass, the 3 pieces of the rear seat that have been removed weight in at about 30#. I'm not even to 20# yet.
entertaining the whole top being hinged.... it would need a substantial mount.
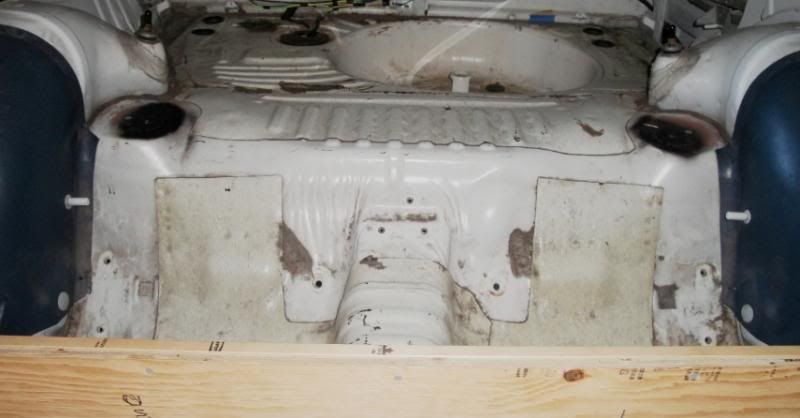
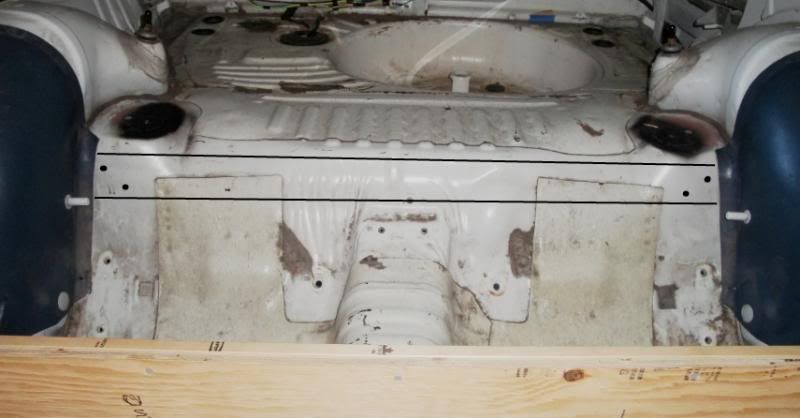
Hmmmmmmm, A properly sized 2x4, planed on one edge so it can "fix" the less then perpendicular spring towers(under black spots), so the top hinge,rests squarely on it when closed, bolted in from the outside using substantial lag bolts.....
OR.........
A piece of angle iron welded in and adjusted similarly to compensate for the less then vertical that the spring towers (under black spots)
Well... I tried...
The whole lid hinged thing will not work. The interior sides angle in, and so the lid can only be raised about 3" before contact with both sides occur....
so I'm back to the hatch.
I have made another determination... once all the pieces have been finished, but before final assembly, I have plans to multiple coat all the pieces with Thompsons' Water Seal, or similar type product. To try and keep everything a bit more stable.
the 2x4 must get a 17 degree cut to allow me a mounting surface that will be flush/flat with the mounted board.
17 degrees... doesn't sound like a lot....
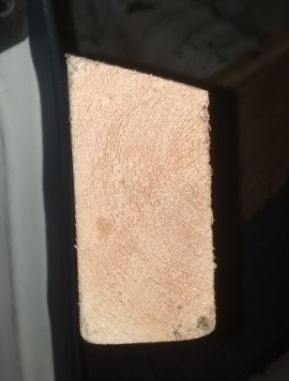
here is how the modified 2x4 will fit across the rear, intersting how the eye doesn't "catch" the 17 degree cut in this view... The hash markings show areas that will need clearancing to avoid vibration. The small 2x4 is there just as a prop, it will not be there once finished.
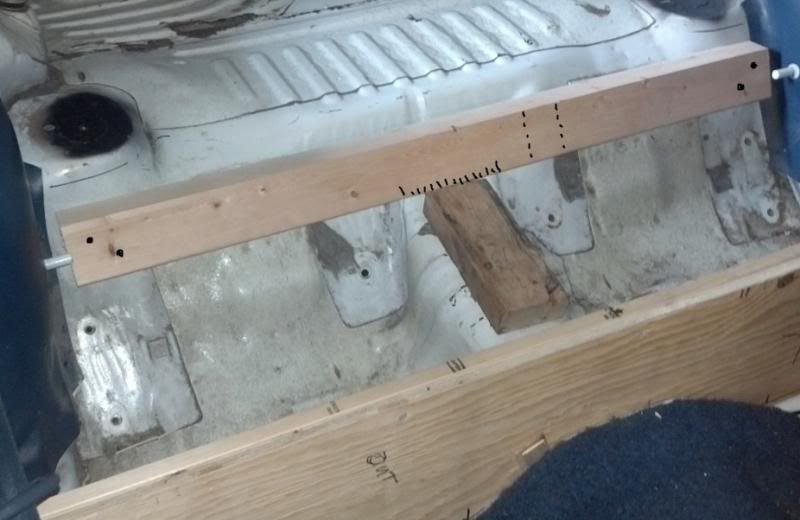
The round markings on the end show proposed fastening points. I've found stainless steel lag bolts.
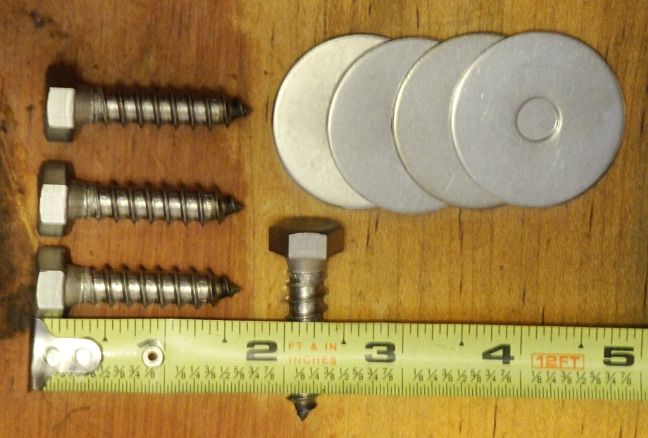
Once the holes are drilled, I'll run these in from the back side - coating the hardware with silicone to keep the water out.
more to come....... 


