I poked a hole in my house. Did 100% of the work myself.
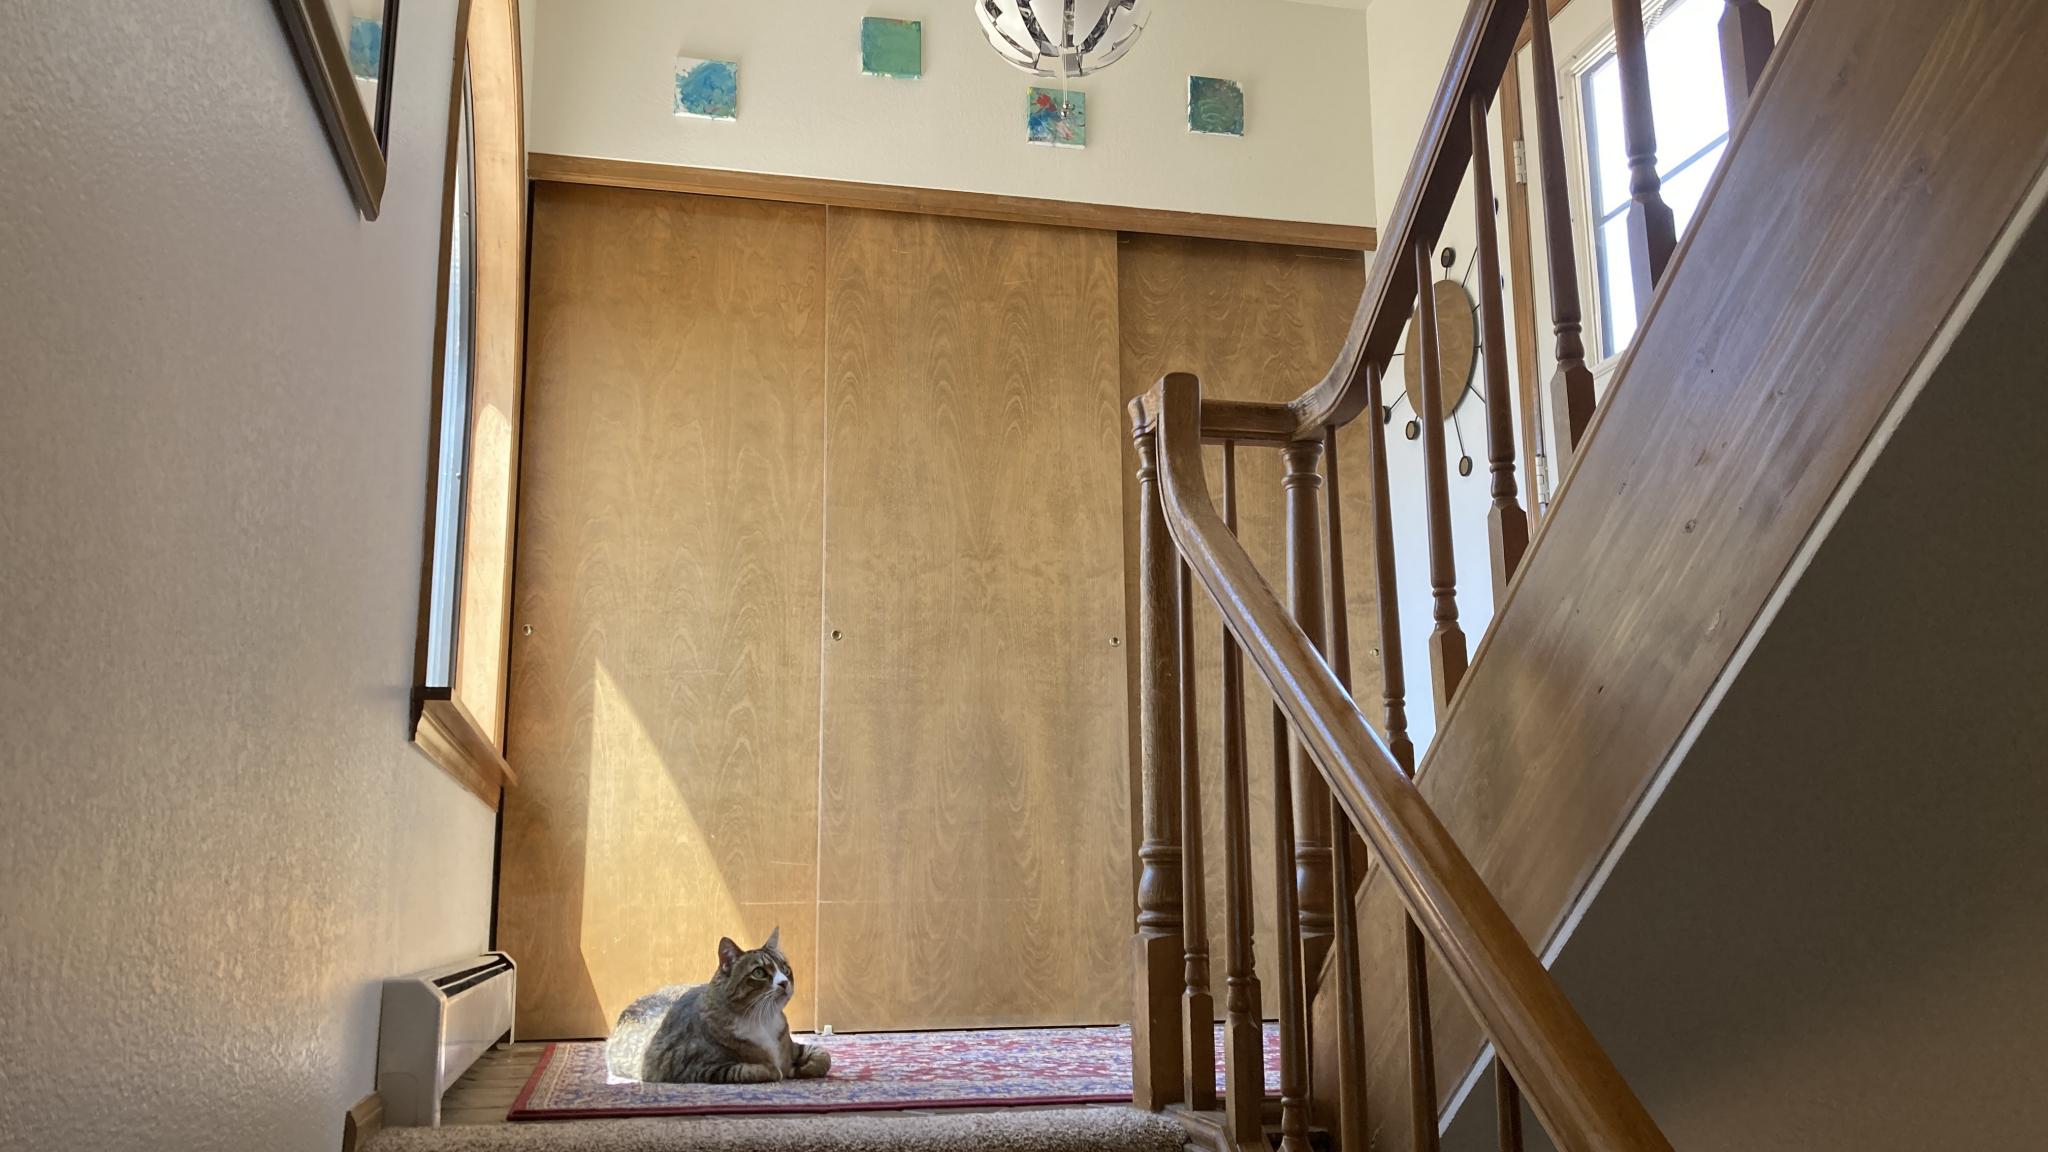
Before: a closet on the landing.
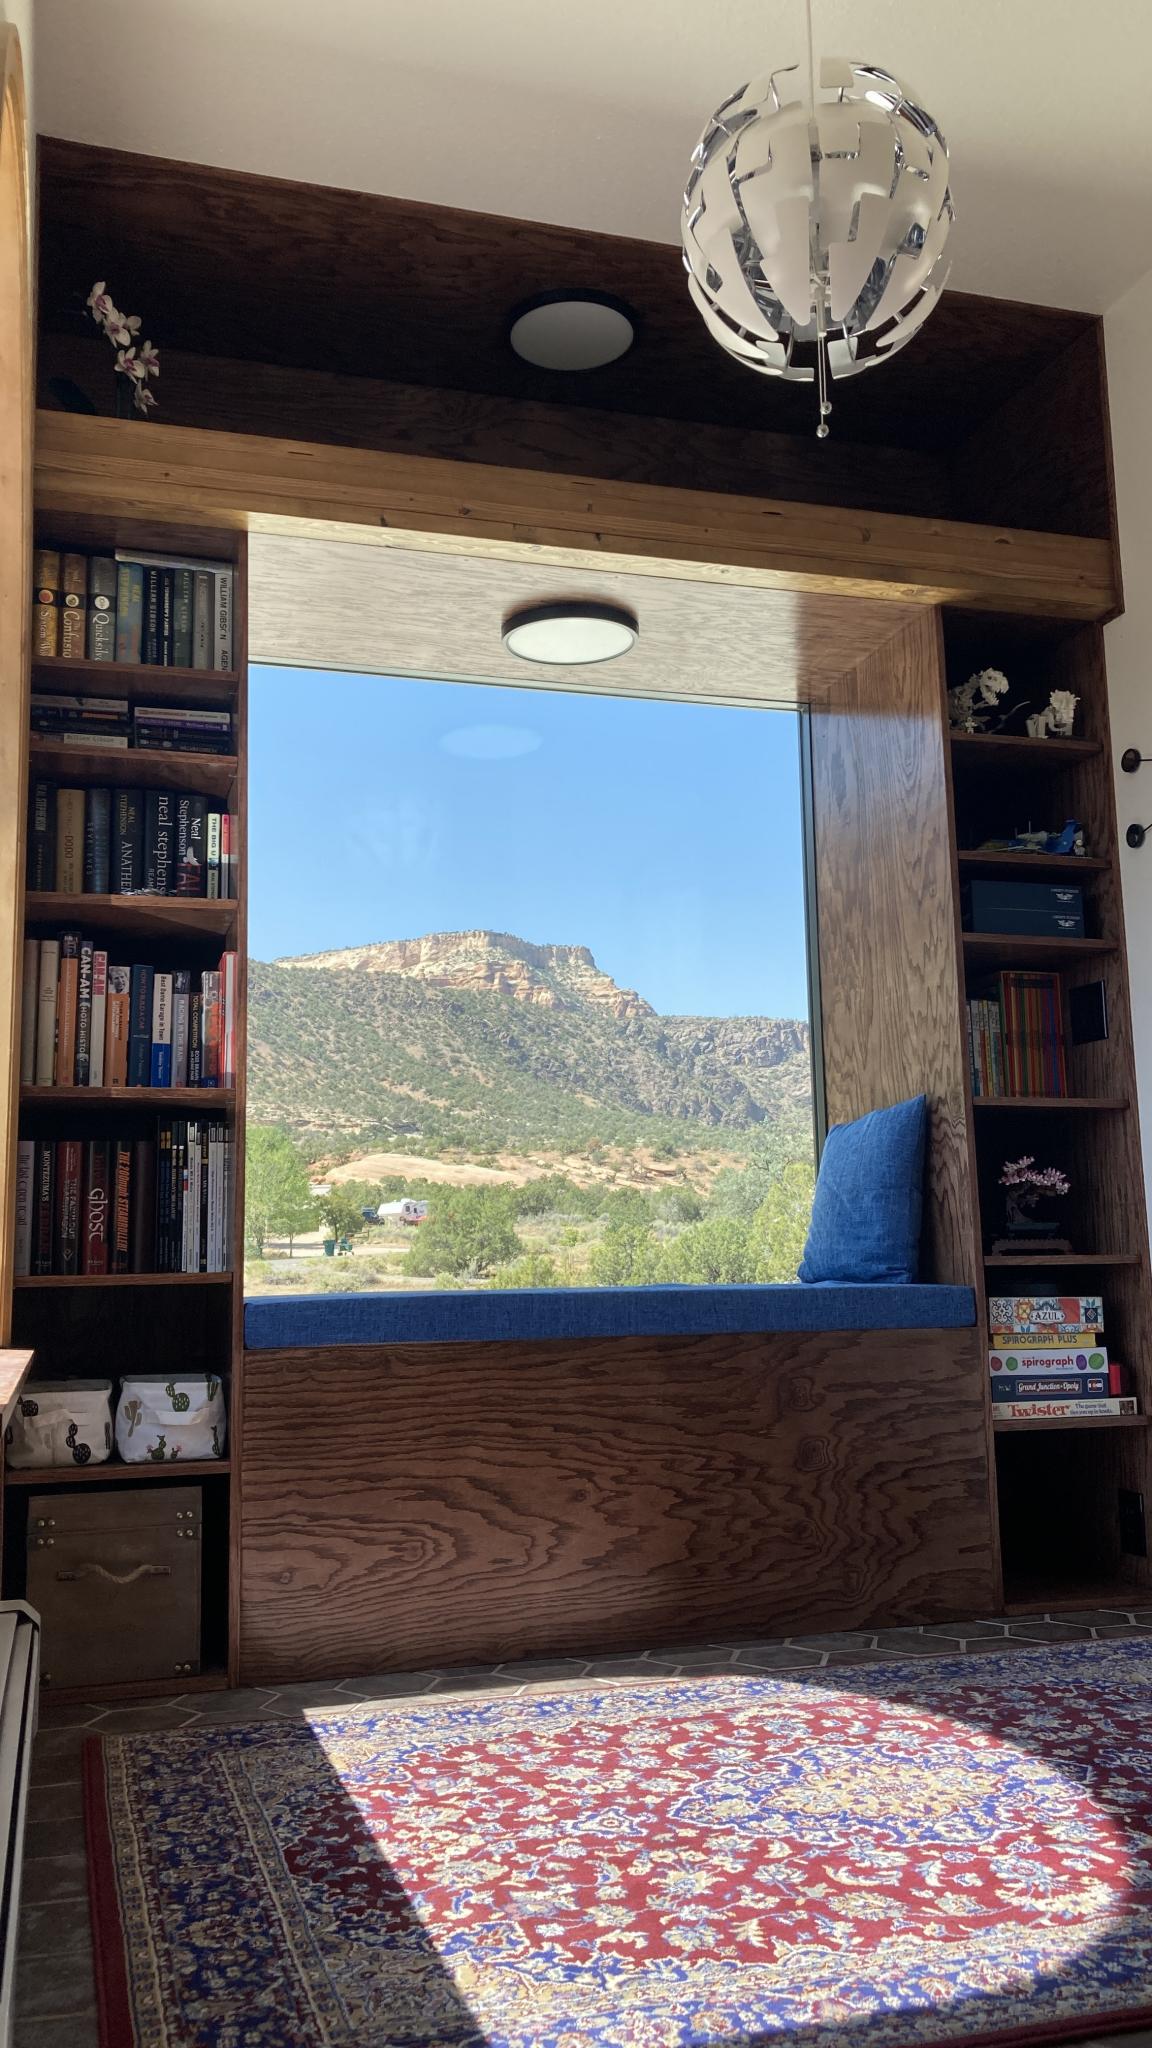
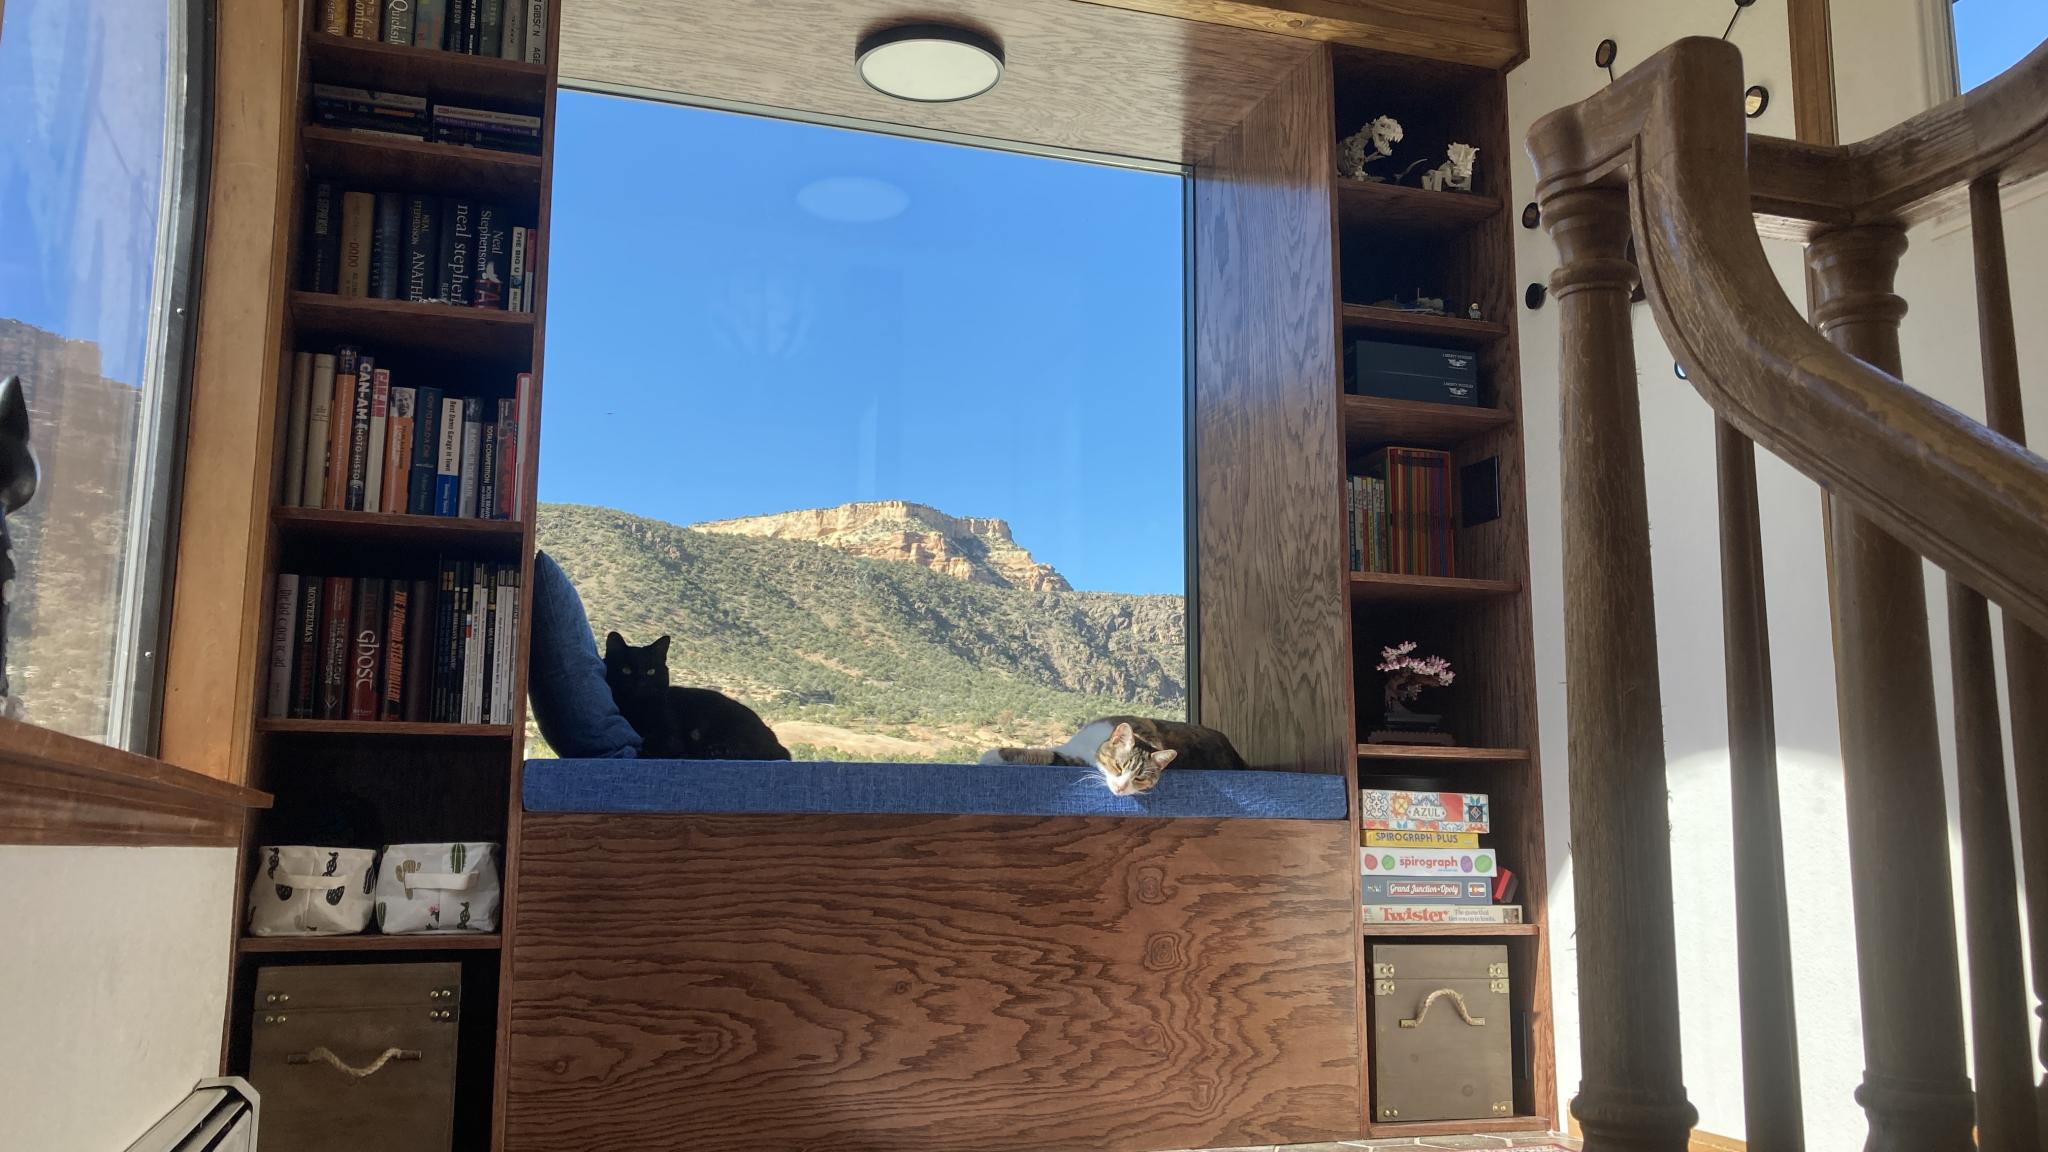
After: 5'x5' window with an oak reading bench and shelves. The bench has a hinged top and is lined with cedar. There's a deep shelf up top with lighting to stash stuff like cool Lego builds. The beam above the window echos similar beams around the house, and hides the fact that the shelf behind it is 5" thick. The shelf is structurally as strong as a floor and there's wiring inside :) The goal was to make it look like shelves with a window in them instead of a window surrounded by shelves, so there's no step around the sill. Not sure if I pulled it off, but it's one of those things that looks like it's been there forever so that's a good sign.
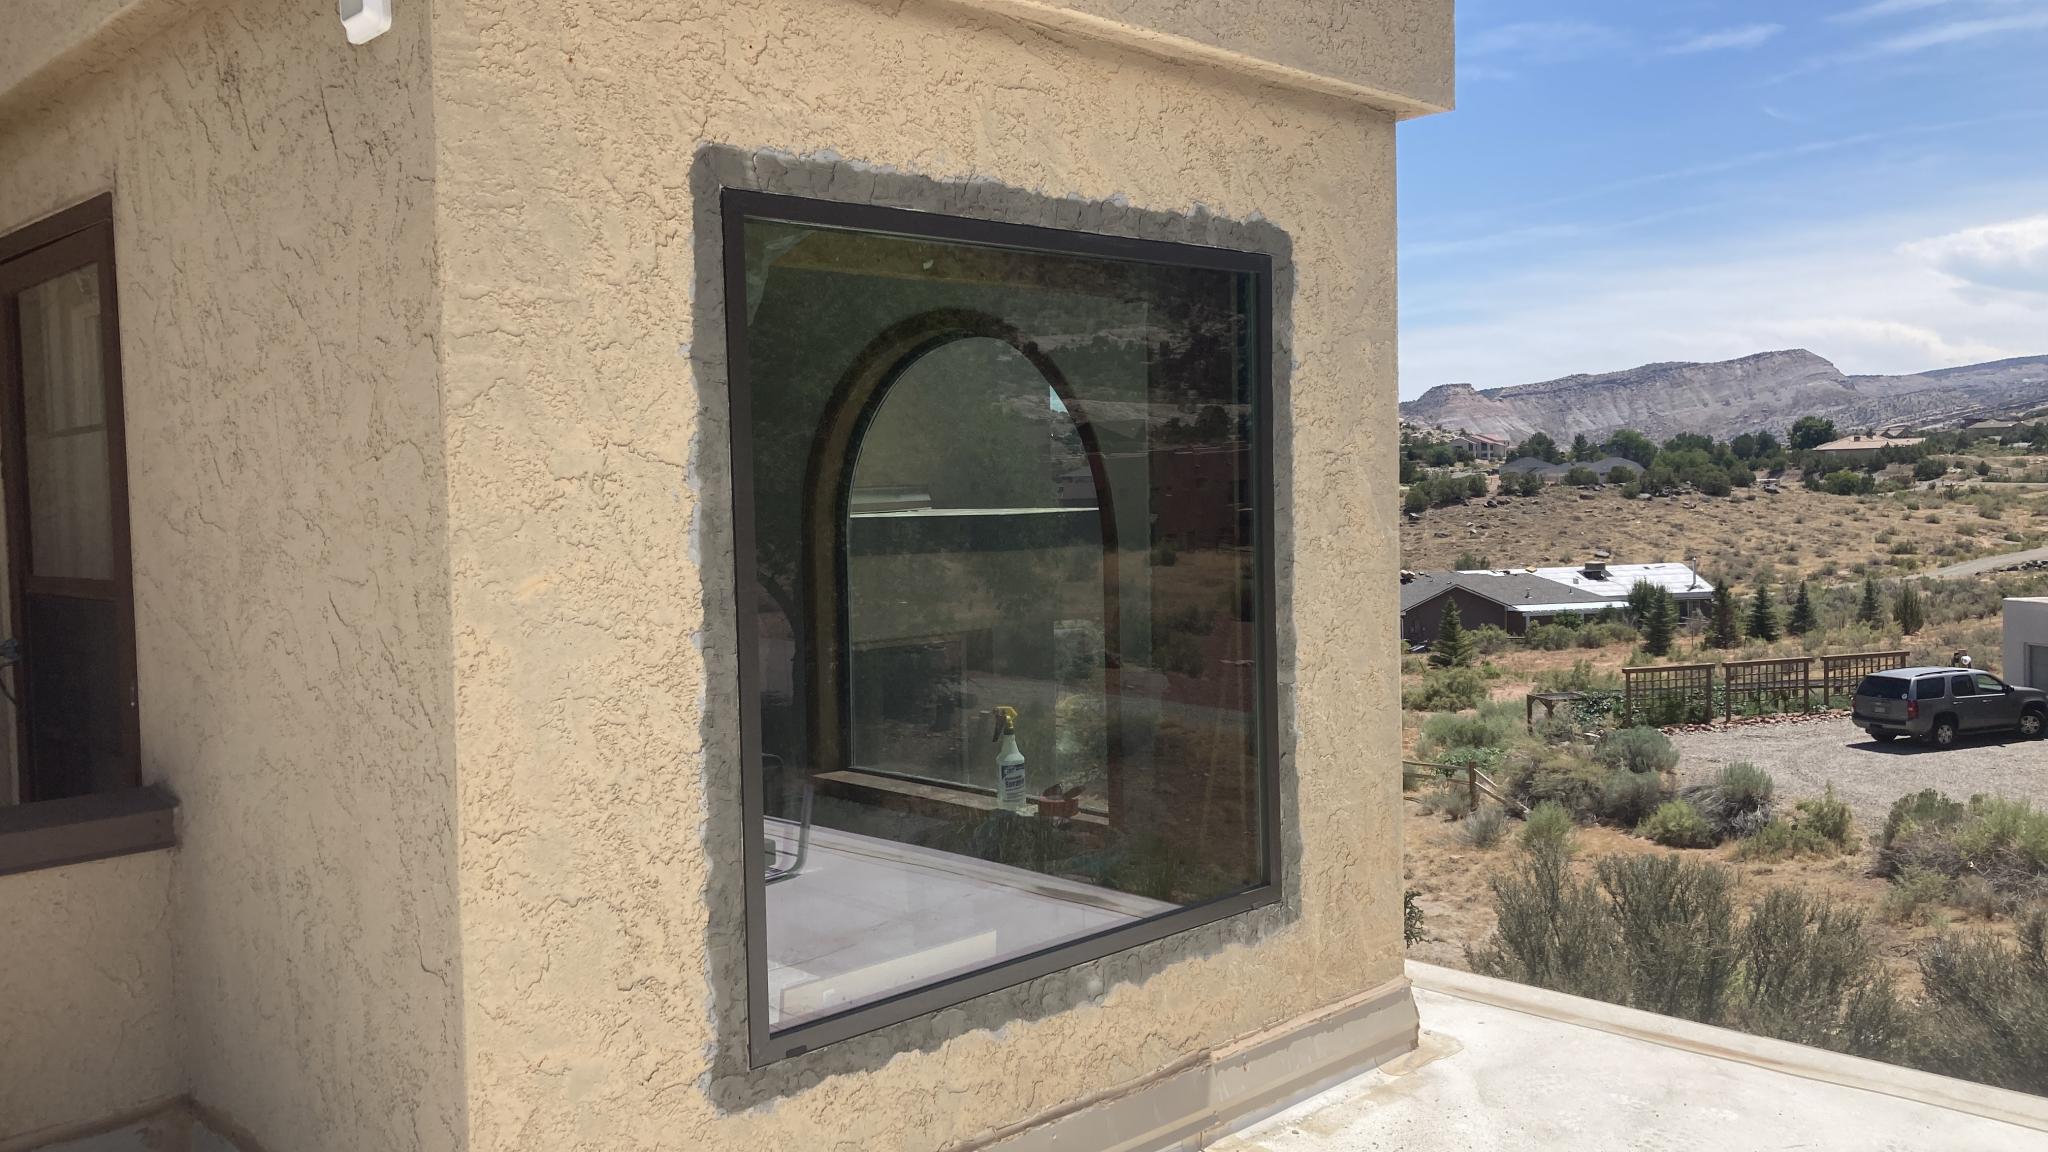
Stucco repair.
During construction.
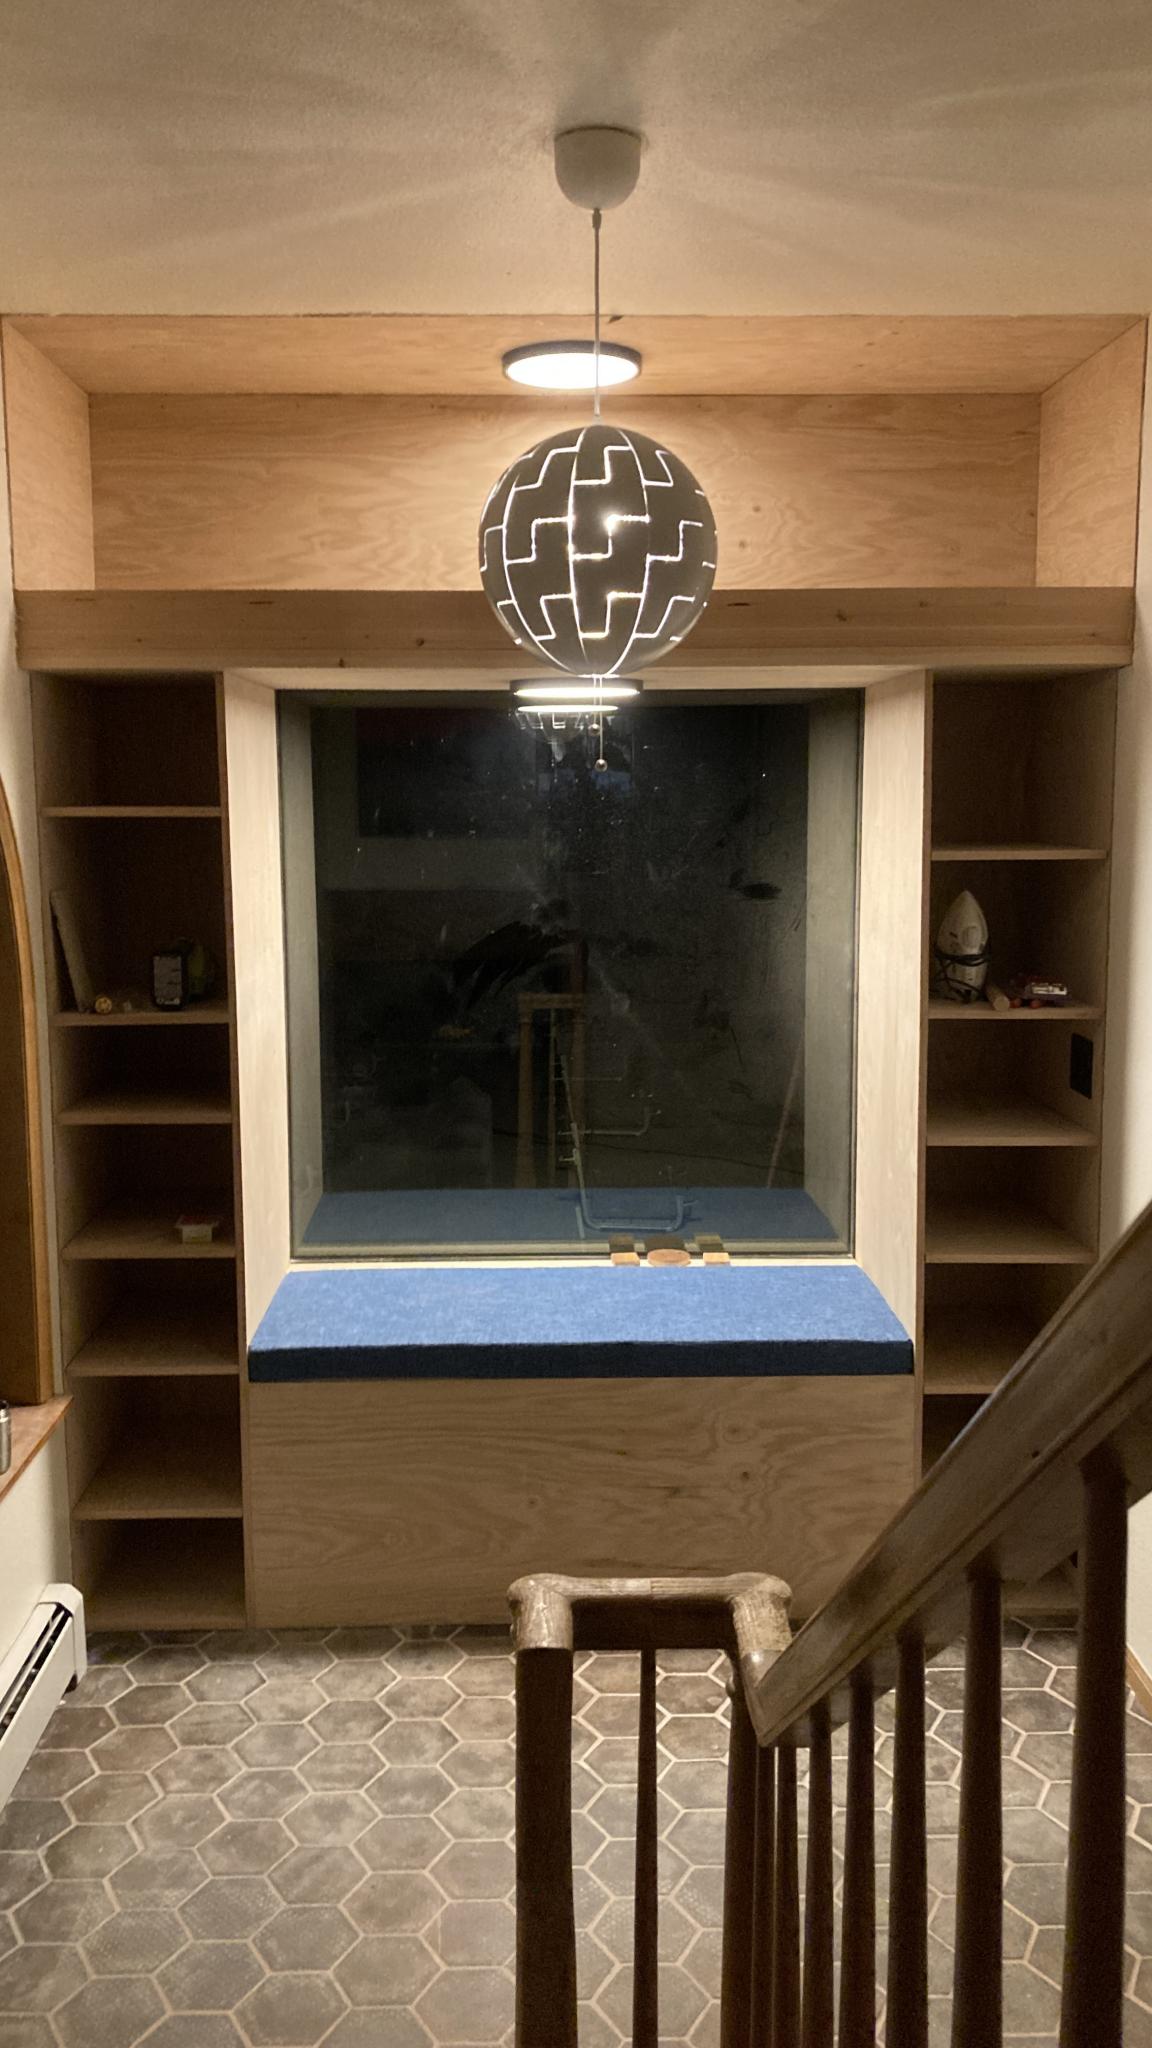
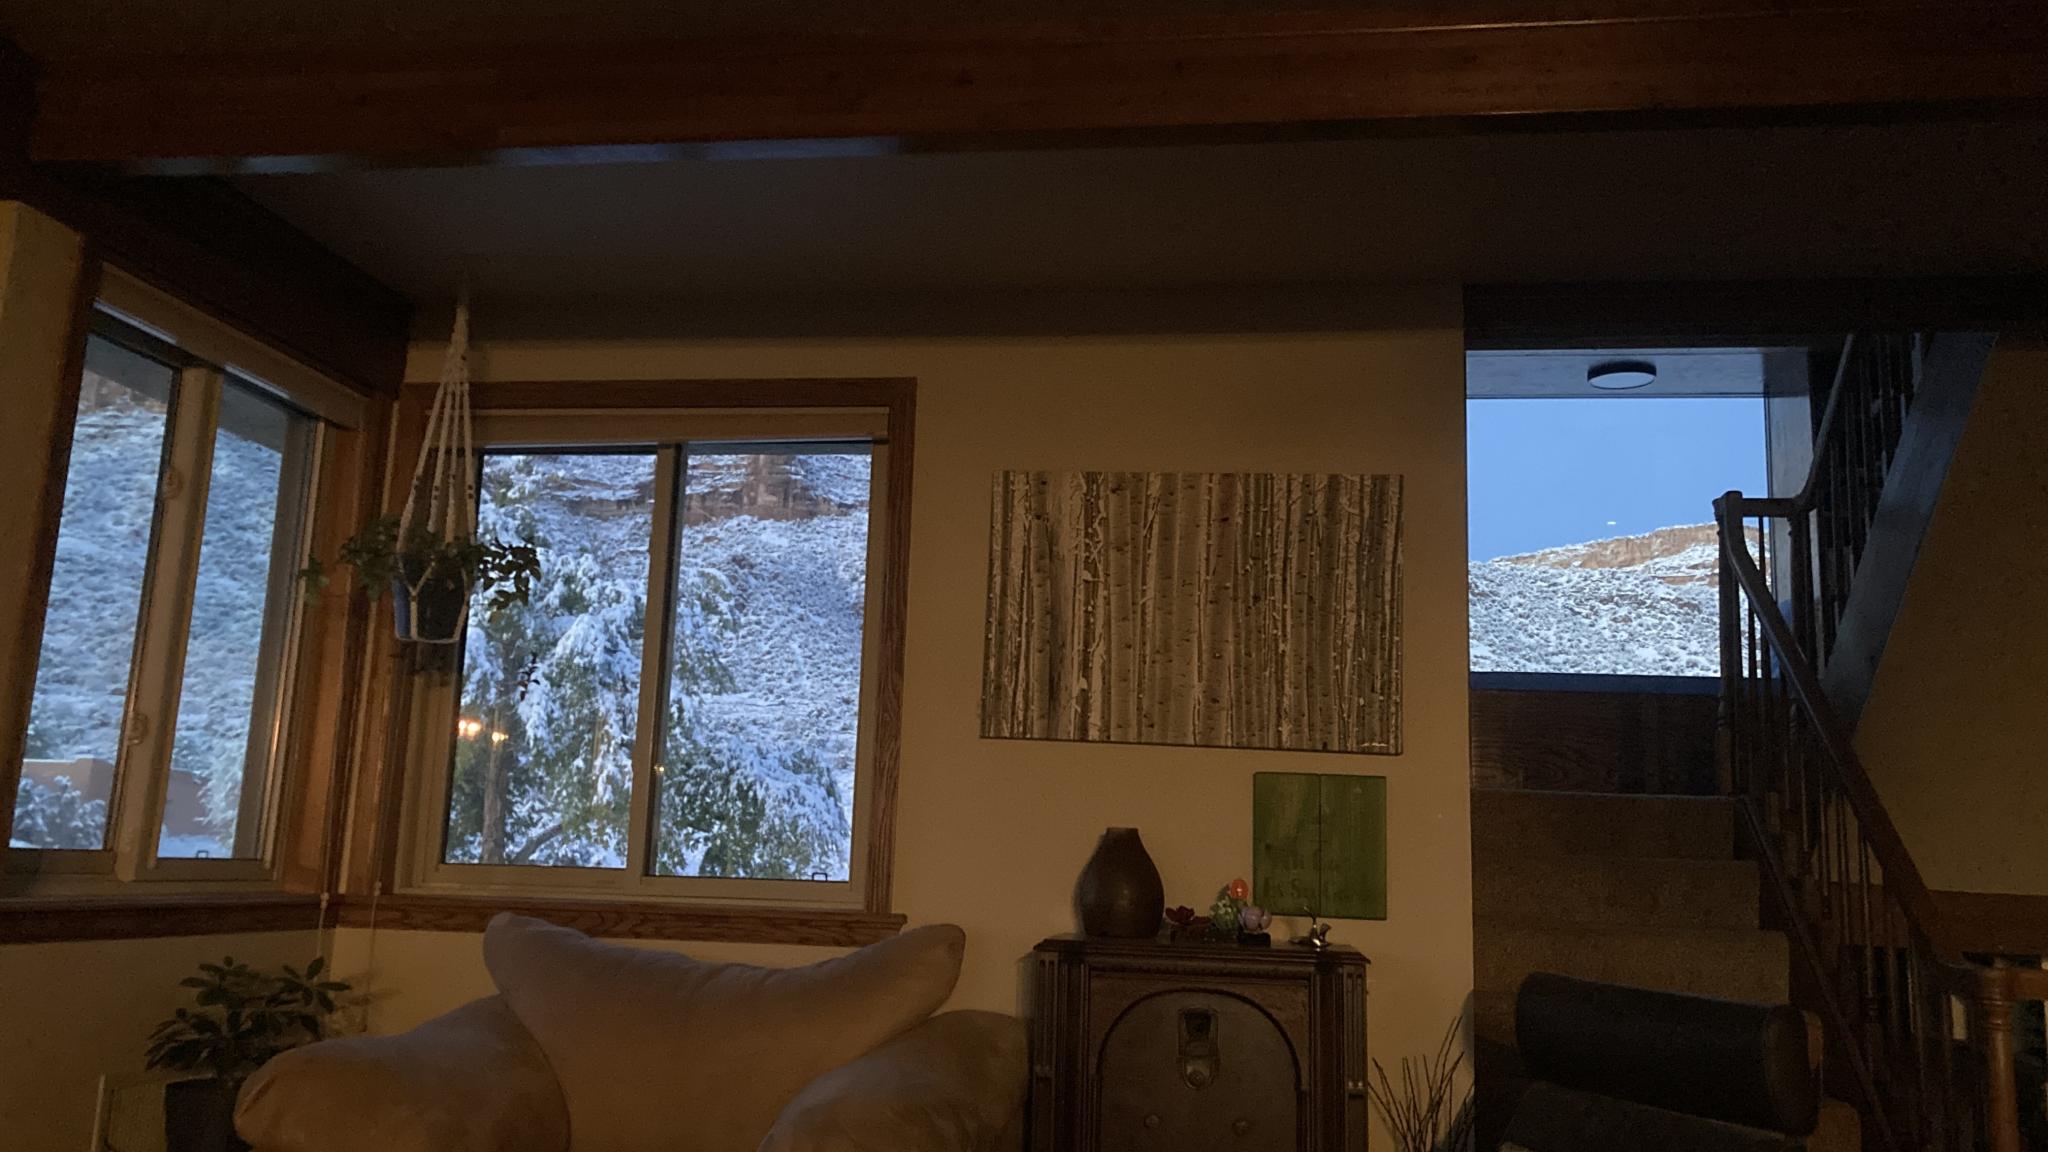
The effect it's had on the main room - that's it on the right.
Cats approve.
That looks incredible, Keith!
Seconded. And I love the expanding hanging light fixture from IKEA. So much fun to watch the mechanism as you move it.
Thanks folks :)
You mean the "exploding death star lamp" :) It's actually handy in adjusting light levels beside being cool as heck and fun to play with. Both of the round surface lamps in the new construction are on dimmers so we can dial all sorts of light up and down. I'll often leave the top shelf one on to give some nice diffuse light at night before we go to bed.
This was not the only construction this year, but some of it was related to an earlier build thread so I'll throw it in there...
In reply to Keith Tanner :
Okay, the effect it's had on the main room looks wonderful, but what effect has it had on the cats?
What a transformation! That is amazing!!
GIRTHQUAKE said:
In reply to Keith Tanner :
Okay, the effect it's had on the main room looks wonderful, but what effect has it had on the cats?
Thankfully, they finally have a place to sleep.
Mostly finished the five lug conversion on the R53.

Now just need to finish the automatic trans swap. And either get some 14" 5x100 wheels or 1.8 Impreza brakes or preferably both.
I'm remodeling the house and decided to make a sheetrock/plywood handle for carrying. The plastic store-bought versions don't last. This one will last. All four pieces of metal were in my scrap stash.


11GTCS
Dork
11/23/22 3:43 p.m.
In reply to Keith Tanner :
I'd like to apply for any open "cat" positions at the Tanner household.  That looks amazing, what a great idea.
^ Nice drywall carrier! I just bought a plastic one the other day and now feel like I'll be waiting for it to break...
This is a little older but I'm proud of it:
I got a small metal lathe and to get familiar with it I turned (literally) this scrap of Walnut into a shift knob.


Every so often I rock the sheet rock. This cutout for the box was as good as I get. I was tempted to leave the cover plate off.

But then there's this one!

Some friends picked up a track sled to groom mountain bike trails and commissioned me to build a custom 2 axis hitch and sled for it.
Pushed the locost to the slide and dragged the snowpuppy in and got to work!
Here it is, functional but 90% done:

Moved the handlebar mount forward and down.
The hitch and sled are way over built, but I'm hoping it lasts a good long time before I need to start fixing broken bits.
Next step is to mount some UHMW plastic to the bottom of the sled and build a grippy platform to stand on.

So a certain friend of mine works for a winery/restaurant and got me a commission to make Charcuterie boards for the restaurant. Here's the nicest looking one, but all 36 of them came out great. Black Walnut and Beech, 10"x14". I figured out a lot of things about batch production, and figured out that the "Econo Walnut" pile at my hardwood dealer is where you find most of the cool figuring and sapwood transitions, because most furniture builders are looking for a consistent grain and color. Their loss.
Thanks for the commission, singleslammer!
Keith Tanner said:
I poked a hole in my house. Did 100% of the work myself.
Before: a closet on the landing.

After: 5'x5' window with an oak reading bench and shelves. The bench has a hinged top and is lined with cedar. There's a deep shelf up top with lighting to stash stuff like cool Lego builds. The beam above the window echos similar beams around the house, and hides the fact that the shelf behind it is 5" thick. The shelf is structurally as strong as a floor and there's wiring inside :) The goal was to make it look like shelves with a window in them instead of a window surrounded by shelves, so there's no step around the sill. Not sure if I pulled it off, but it's one of those things that looks like it's been there forever so that's a good sign.

Stucco repair.

During construction.

The effect it's had on the main room - that's it on the right.

Cats approve.

Ah Colorado is so beautiful. That's a great change to the house.

kb58
UltraDork
12/15/22 10:00 p.m.
My first attempt at a mud base (dry pack) shower base and tile. Came out pretty nice, and since I haven't turned on the water yet, it doesn't leak at all!

Not made, just made better. Old fireplace insert, heats great but looking kind of shabby and a bummer that you can't see the fire in the fireplace

A couple repairs and a couple of minor modifications...


for the record that terrible weld bead on the vent housing was not my handywork - I mean I'm very adept at making really crappy welds, but I didn't make those crappy welds. 
Not pictures, but I did grind them down a bunch and weld up the voids. Looks a lot better, but not like artful welding.


a lick of BBQ paint...

And fire! (forgive the crummy phone pic, looks way awesomer in person)

Last month I participated in a fashion/people photo shoot called Pop of Red. After, I figured, I should do something more than just leave the photos on my hard drive.
How about a photo zine?
So I made one.
Copies just returned from the printer.


My 2022 Bronco has a "modular" front bumper, with lots of openings and bolts and sensor scattered here and there - but no obvious place to mount a front license plate. I'd rather not mount one at all, but Texas requires it. Don't want to drill any holes in the bumper. So, here we go.
Rummage through the scrap pile, come up with a piece of angle iron that looks about right. Cut it about 10" long, drilled it with multiple mounting bolt patterns (depending on which way looks better), gave it a quick coat of flat black.

Used 3 existing Torx bumper bolts to mount it in one of the open areas at the end of the bumper.

Used black button head allen screws to mount the plate to the bracket. Cost: $0. Time: maybe 30 minutes (let paint dry overnight).

I needed to make a small gift for my girlfriend's niece, so I took it as an excuse to finally fire up my new (to me) drill press and make her a Cracker Barrel game out of some scrap wood and some golf tees. It only took a few minutes but I'm pretty pleased with it and I admit I spent a lot of time playing it afterwards.

This may be a little premature, but I am so excited about this project. I've been commissioned to do a children's book to teach principles of dealing with anxiety for children. This is just a rough sketch but I think it's a really cute frame from it

P3PPY said:
This may be a little premature, but I am so excited about this project. I've been commissioned to do a children's book to teach principles of dealing with anxiety for children. This is just a rough sketch but I think it's a really cute frame from it

In for Audi Quattro Sport! Keep us posted on this. Many children I know struggle with anxiety.





 I made a shirt


