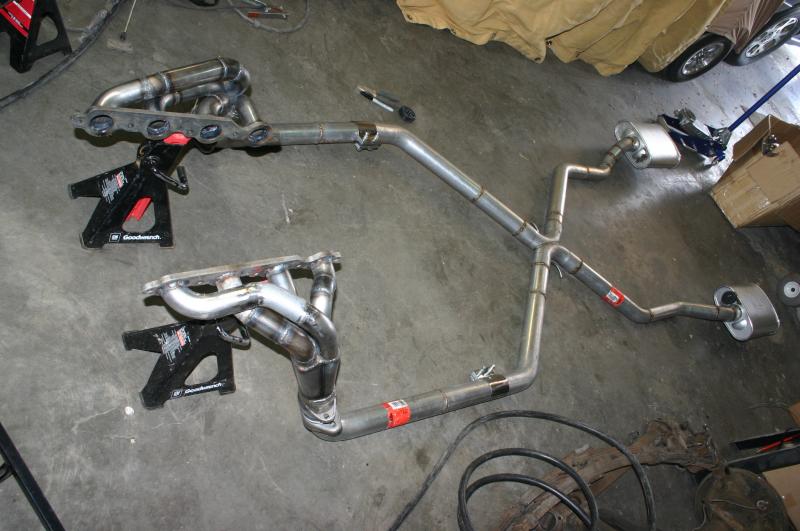
I'll see what I can do about exhaust pictures. Until the alignment yesterday, the car had never been on a lift so I don't have any pictures of it in situ. When I do get the car on a lift, I'll shoot an under-car shot. Here's the exhaust laid out on the floor but you don't get a feel for how it's tucked in there.
Dave - from a wheel and brake setup, the car is a Miata. So I could probably use those DR21s. But it's too modern a wheel for this car, I'm sticking with the Minilite-style. Shouldn't be hard to find a buyer for them though.
Hold on a second...you did an alignment on it? It's not going to go straight when you mash the gas anyway...what's the point? 

Very awesome! Nothing like driving a small, light car with a monster engine. I have never had a car that has driven like the FFR Cobra I used to have.
Enjoy!!!
Actually Keith... THAT is the picture I wanted.
When do you start selling the swap header? ;)
rabbitparts.com! Pretty easy to remember.
Link that will hopefully work to their patch panel selection - I used 2-door rear panels on this car. They've also got Scirocco and Jetta stuff.
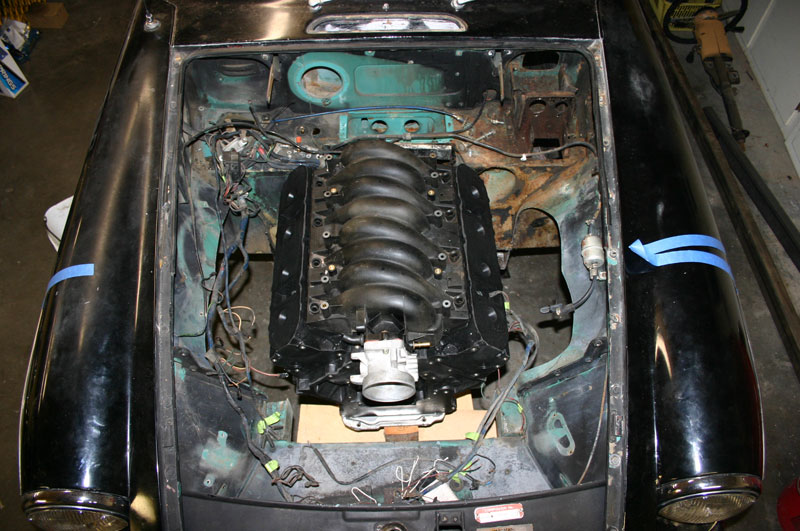
I've had a couple of people ask about swap kits. The instruction sheet would say "cut your frame rails off at the firewall"...

Ian F
Dork
12/2/10 3:12 p.m.
Damn... every time I see this car I want to do the same thing to my crusty 1800ES... 
The flares look great. I can't wait to see the fronts as well. $200 for a set of 4 flares is surprisingly not too bad...
Keith wrote:
rabbitparts.com! Pretty easy to remember.
Link that will hopefully work to their patch panel selection - I used 2-door rear panels on this car. They've also got Scirocco and Jetta stuff.
I've had a couple of people ask about swap kits. The instruction sheet would say "cut your frame rails off at the firewall"...

OOOOHHHH! Composite engine block!
Keith,
are the flares metal? Or are they the plastic flares that were on GTIs and some other trim levels?
My '82 Rabbit had the black plastic flares on it -- very butch, especially when running a 175/70/13!
Man, I walked into that one.
Zoo, they're metal. All the Rabbits had metal flares molded into the body, but the GTi had plastic extensions or overlays.
Saw your build diary post on the fender roller: Neat stuff. I have a few questions about it. Is the end result like bending a lip on a sheet metal brake? How does it work to get paint in there?
Señor Dwayne Elizondo Mountain Dew Herbert Camacho - if you want more pictures of exhaust bits, head to slowcarfast.com or ask me if you want a particular shot. There are no secrets here 
Hamburglar, I've never used the roller on unpainted fenders before. That's a good question, I'll make sure to get paint inside the seam. The end result has a larger radius than a sheet metal brake bend, it's usually fairly smooth. The roller is really intended to be used on an existing car that's already been painted. Great tool, a good purchase for a club. You can get them from Tire Rack or Eastwood.

Treb
Reader
12/6/10 7:28 p.m.
The 1-piece front turn signal lenses that you took off are NLA (or were a couple years back when I needed one) so hang on to them. Ditto the tiedowns that were on the front bumper brackets in the "before" pic... car show guys will want them.
I like the shaved marker lights... did that to my '70. I like the no-overrider look (factory endurance racers, sometimes, did it that way) but the clean chrome overriders are a good choice, too. And I especially like adding good grounds to MG electrics. ;-)
Looking good with the flares on.
Now, about that kit...
Keith, you and Janel done a helluva fine job there. But now I keep having evil thoughts... somehow I gotta scratch that itch. 

Treb - thanks for the info. I don't destroy things if I can help it, and the one-piece lenses are safely stored. I kept the tiedowns on the car, I figure they might be useful someday. You just can't see them in the "after" picture because of the lighting.
I tried the no-overrider look when I first got the car, didn't like it in person when viewed without historical context. It's easy enough to play with, though. I might pull them again when I'm done to see how they look with the wider body.
For those who are wondering what Treb is on about, I did a little mixing and matching of various MG parts to make the car look a bit cleaner. I haven't had it out of the garage yet to get any real distance, but I'm really happy with the new taillights in particular.
Before:
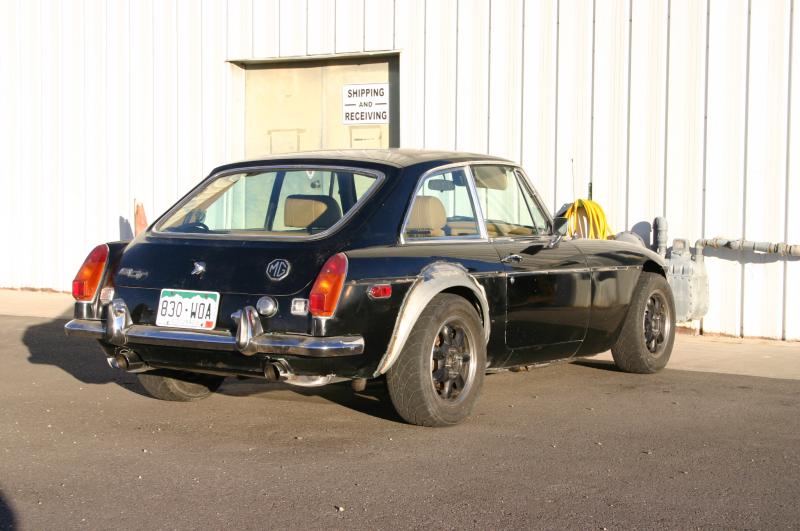
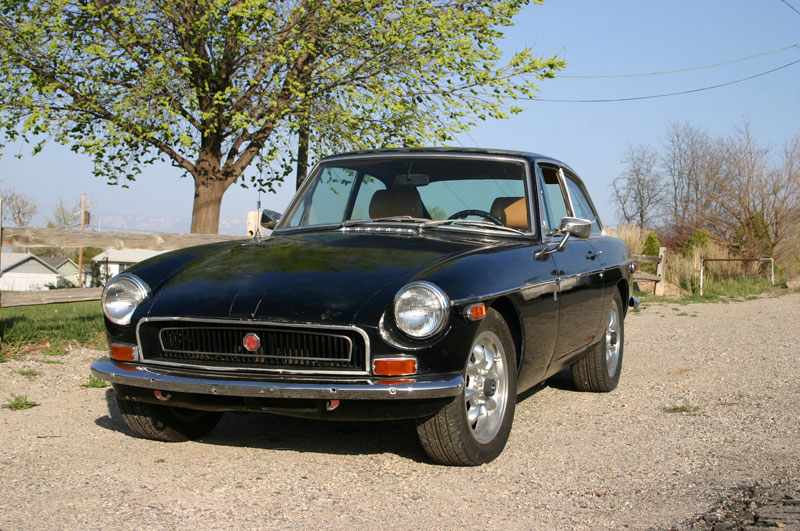
After. New taillights, shaved side markers (ie, holes covered with black duct tape), new bumper overriders, new front lights, new grille. I'm also changing the mirrors, but that's a particularly subtle and mostly functional alteration.
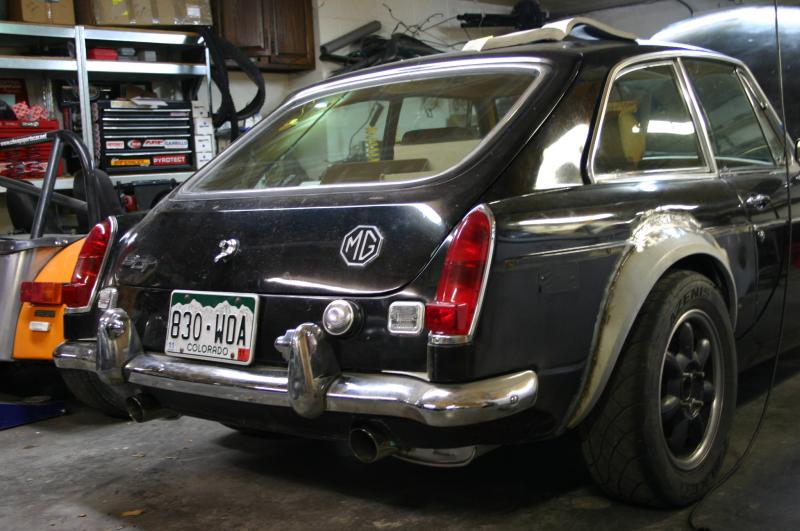
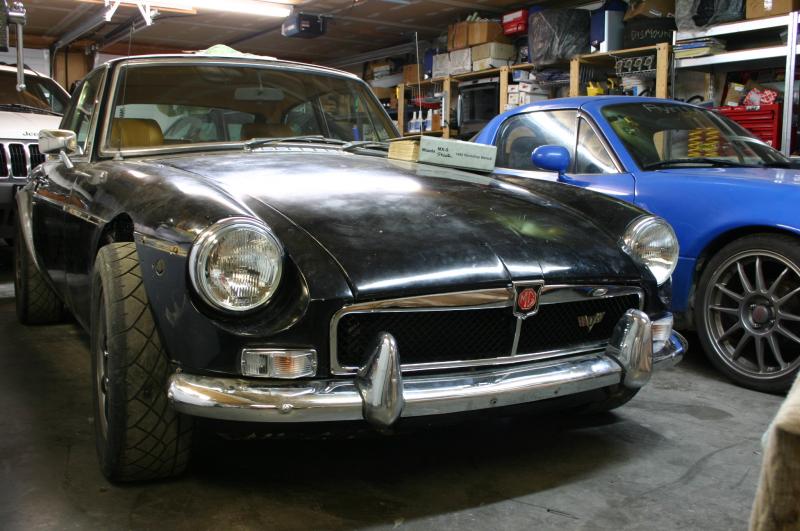
I cannot wait for the sheetmetal to get here for those front flares. It's driving me nuts, Rabbitparts sent the shipping information to FedEx on Dec 2nd, but didn't actually ship the parts until today. I'm going to be away for a few days, but you should see those front flares go on in about a week. Then the car should have the mouth to back up the trousers.

Treb
Reader
12/8/10 5:35 a.m.
Historic context for no-overrider bumpers:
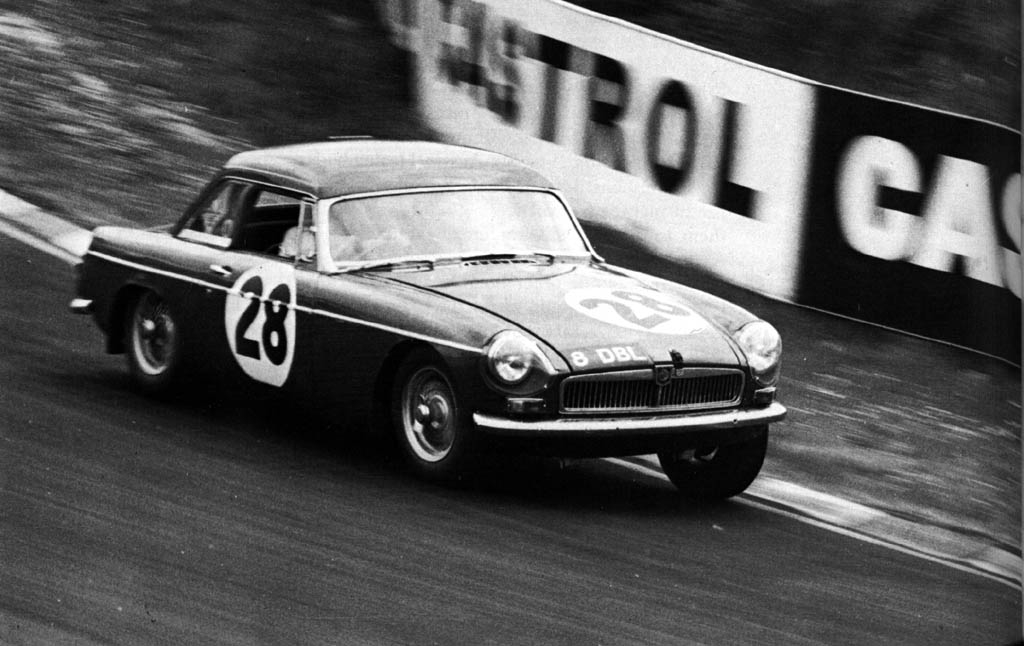

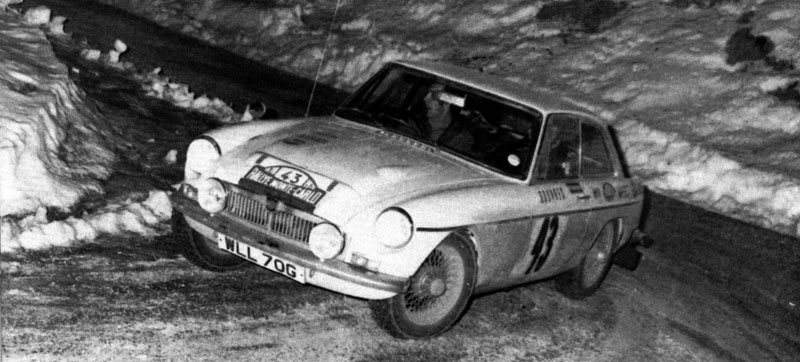 Brands Hatch, the Nurburgring, and the Monte Carlo Rally.
I've had a set of the older taillights on the shelf for years... I might try them out. They make the later ones -- which are by no means large -- look clunky.
Matt

GPDren
New Reader
12/8/10 11:17 a.m.
I'm trying to cut back on my automotive habbit and you're not helping at all. Very cool build. I'm a fan of the small/light car big engine formula.
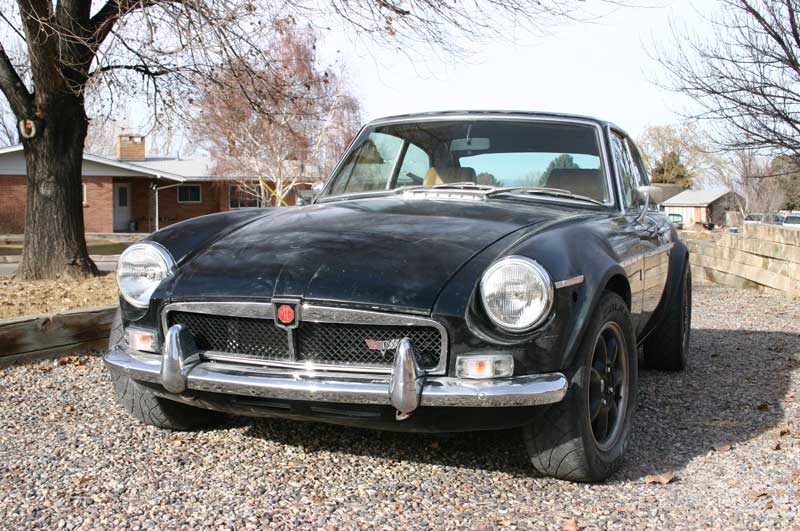
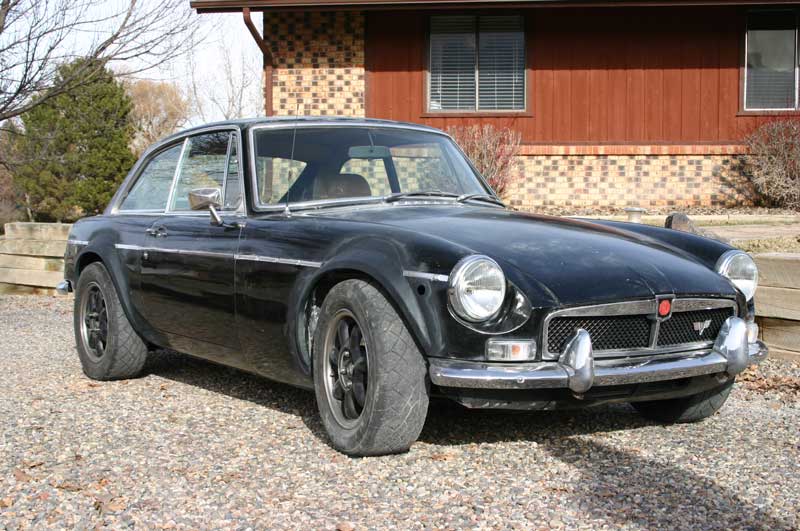
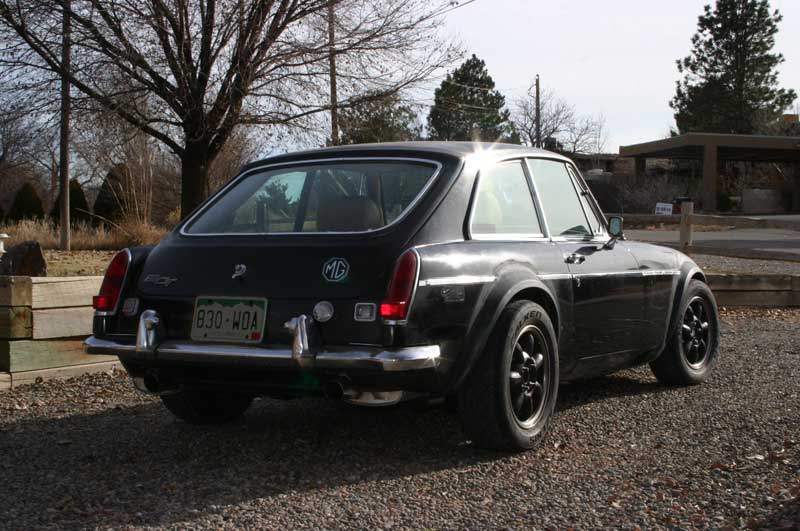
Hot fender action! I've been out of town for a while and just got home. So of course the first thing I did was finish the front fenders. And here she is.
They're just shot with black primer right now and I haven't done any finishing work other than grinding the welds down a bit, but it should give an idea on the future look. I'm pretty happy. Right now, I mostly see the small details I'm not happy with yet, but I think the look worked out pretty nicely. They're not 100% symmetrical in the front but you have to know what to look for 

Hasbro
HalfDork
12/17/10 9:10 p.m.
In reply to Keith:
Wow, it's looking really good!
What size are those 14" tires?
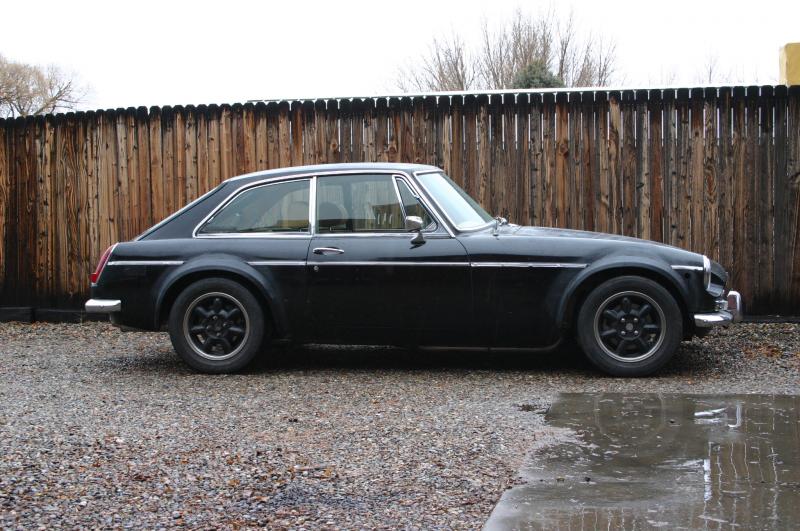
Keith, do you have a straight on side shot? I'd like to see the flare's shapes. These are the rear peices? http://www.rsjparts.com/catalog/product_info.php?cPath=29_30&products_id=71&osCsid=a85edec3b00f018d87dbd3d68f332445
195/60-14 tires at the moment. I'll get a straight side shot next time I have it out of the garage, I couldn't get a good one from the place I had it parked.
Yup, those are the parts I used. One left, one right. I used them on the "correct" sides of the car, although it's possible the fronts could have been flipped left to right.
Nice, must keep that link for my project/s, flares are really nicely done Keith, very Group C style yet not so obnoxious.
I was a little worried about how they'd turn out, but I'm really happy. There's one small change to make to the trailing edge of the fronts, I'll tackle that this week probably.
As requested, here's a side-on shot of the flares. I think the other side looks a bit better on the front, but, well, there you go. The side trim is really just foil tape laid down so I can get an idea of how it will look. I'll work over the real trim later when I do the final body shaping before paint.

bluej
HalfDork
12/21/10 7:58 a.m.
Further proof I want to be keith when I grow up. :D
Actually, I don't think you're that much older than me. I better get on that 


 Brands Hatch, the Nurburgring, and the Monte Carlo Rally.


