The other thing that will eventually happen is the bump rubber and the hatch where it mounts, will destroy themselves, as all of the downforce is transmitted in that one little square inch. This also encourages that twisting motion we discussed earlier.
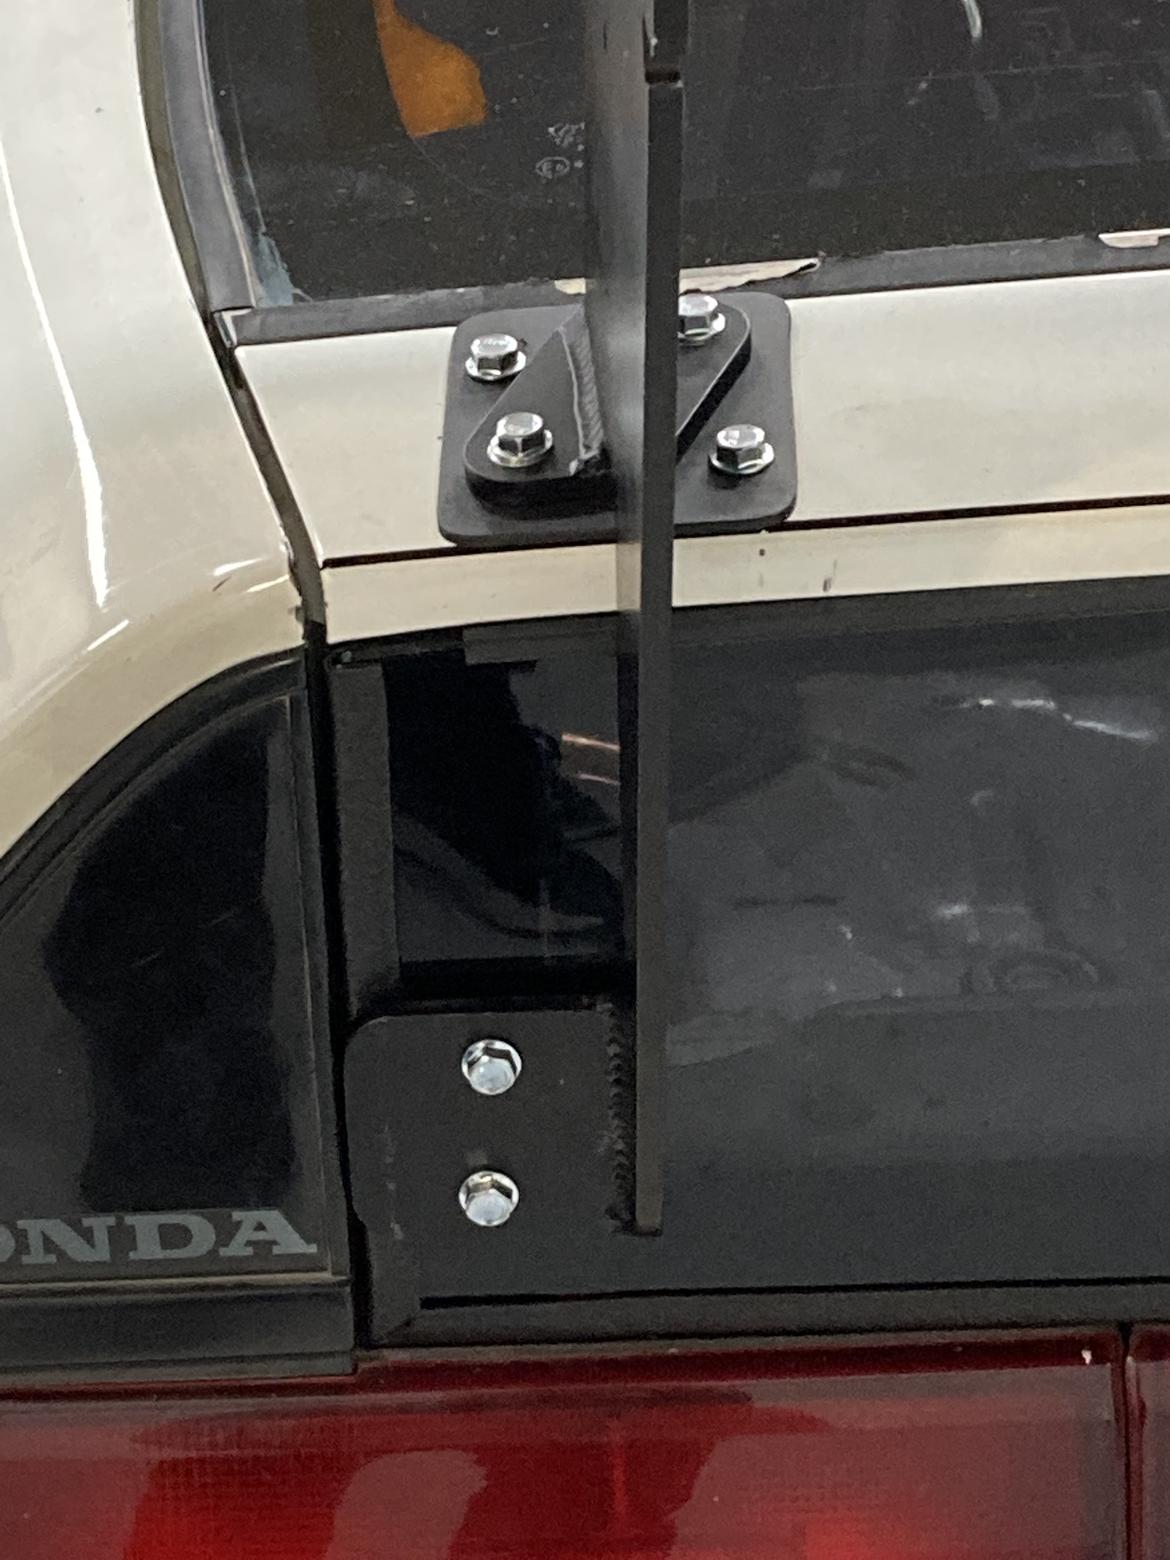
We added bumper extensions to the bottom of the hatch that make contact with the body to triangulate the force application, removing the twisting tendency of the as-designed setup.
Here it is, still-unpainted...but you can see how we extended the contact area inwards and cantilevered the support. The area directly under the hatch is a plastic light lens...the body shelf itself is inwards.
The finished product...


But wait, there's more!!!
As seen in the foreshadowing mock-up, we had bigger fish to fry...much more downforce to be able to send through that mounting. Here's where things really get fiddly and complicated.
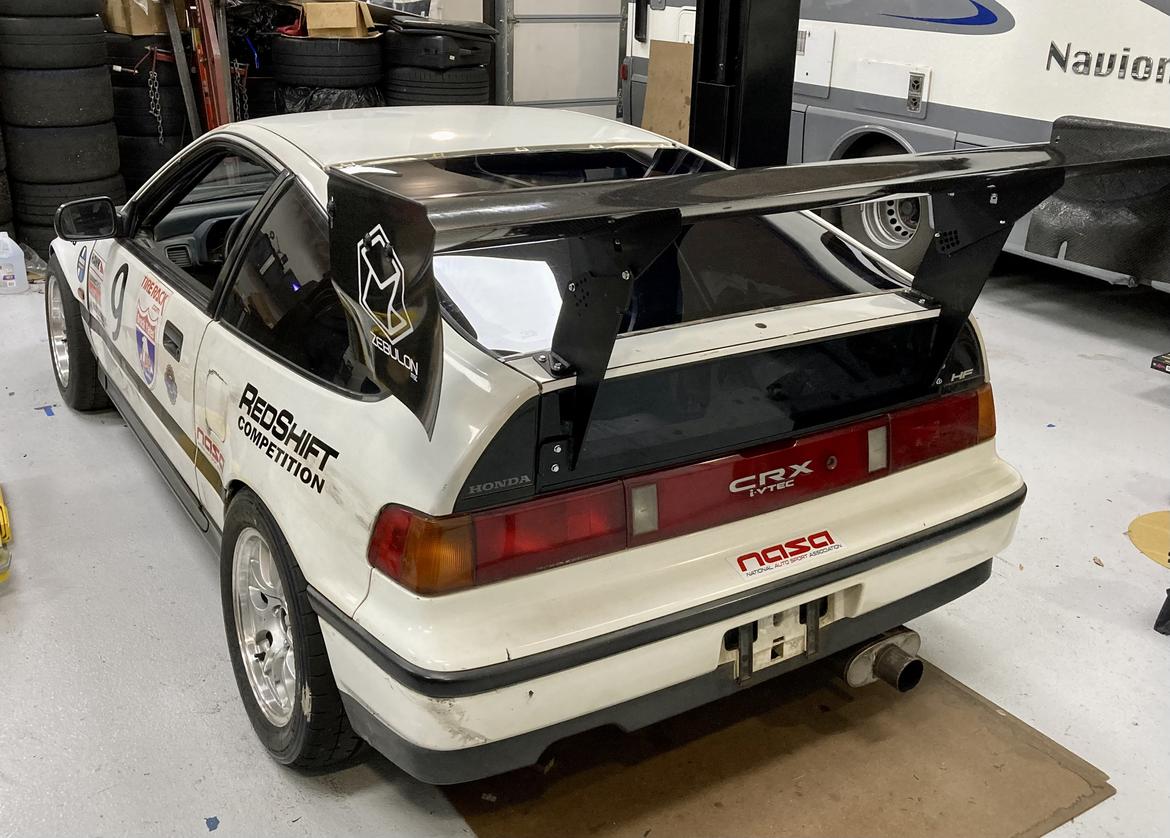
The 9LR wing mounts only attach at the top and use leverage onto the rear glass window to keep them mostly vertical. Our previous efforts shored that up enough that things were now very solid, or at least solid enough for a 9LR Medium Downforce wang.
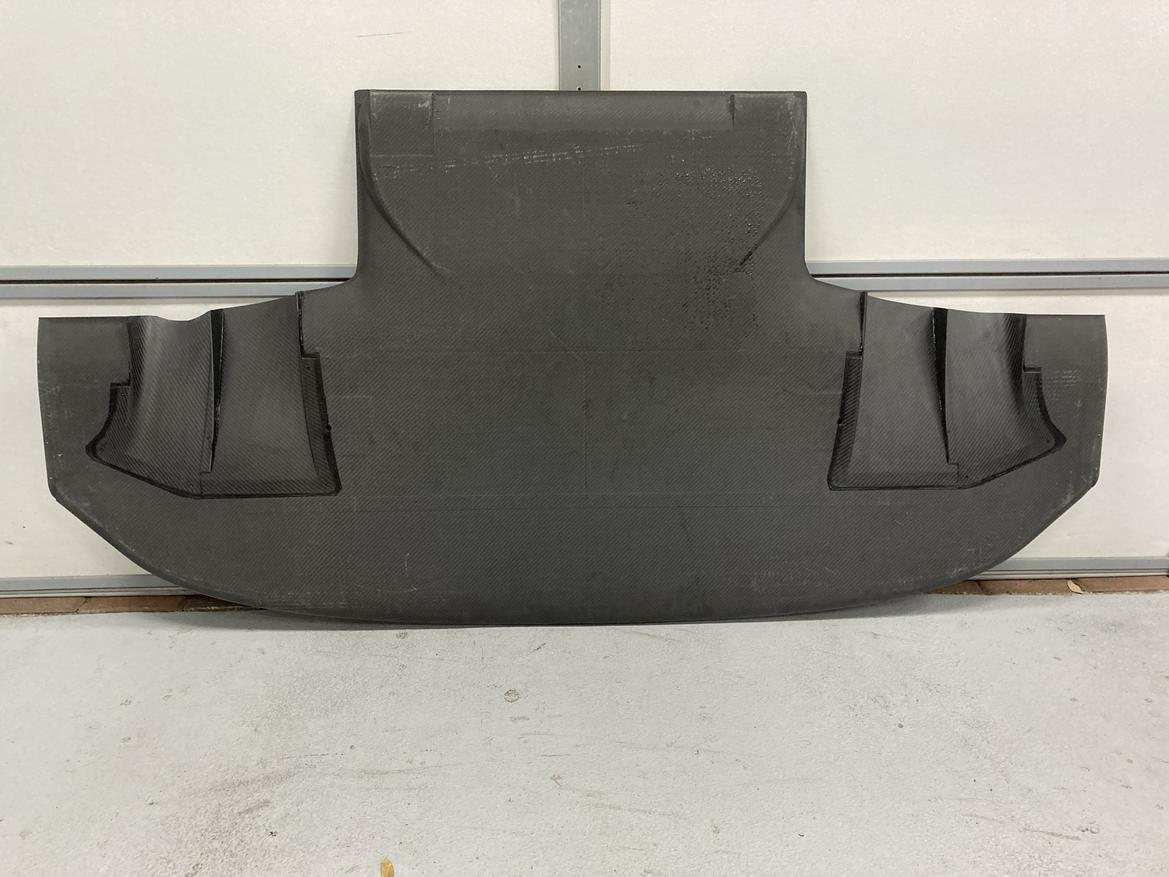
Enter Zebulon...we had them build us a custom 3D splitter (currently being reworked to solve an oil pan clearance issue) and spec'd one of their big wings to match it.
So we needed a way to connect that bracket to the hatch to better solidify everything. Unfortunately, there is no easy way to get to any metal to do so, without drilling through the glass. Which is possible, but fraught with disaster. After much head scratching, a video call with co-driver Tom led to the eventual solution...Lexan.
$40 from Amazon gave us a piece of 3/16" lexan, large enough to build three hatch windows. Getting the old glass off was a major PITA and took the better part of a day. We used a combination of scrapers plunged into the goo and .024" MIG wire to get it apart. Rivnuts were installed into the hatch sheet metal behind it and holes drilled in the lexan to match.
"Glue day" arrived and after much conflicting Internet sleuthing, choose Sikaflex 291 as our adhesive. It's more pliable than traditional windshield urethane, but fairly similar. Certain Lexan windshield suppliers recommend it.
After a week's family vacation, which allowed the adhesive to fully cure, we got back to work.
The stock rear vertical panel comes from the factory with an embossed tint on it to reduce headlight glare from trailing vehicles. Further, Lexan easily scratches with contact. Killing two birds with one stone, we installed a tinted PPF over our panel...well, we actually farmed this out to Bespoke PPF here in Austin. We also had them tint the hatch itself with normal inside tint film to keep interior temps in check during transits in our no-ac "race car with a license plate".
With that in place, final bolt-on of the mounting stand hardware and the wing itself could proceed. Note the trim job around the LExan panel...some leftover C-channel moulding from McMaster thats been collecting dust.
The whole thng is super-solid, and gives a satisfying "twang" resonance when struck with your hand.
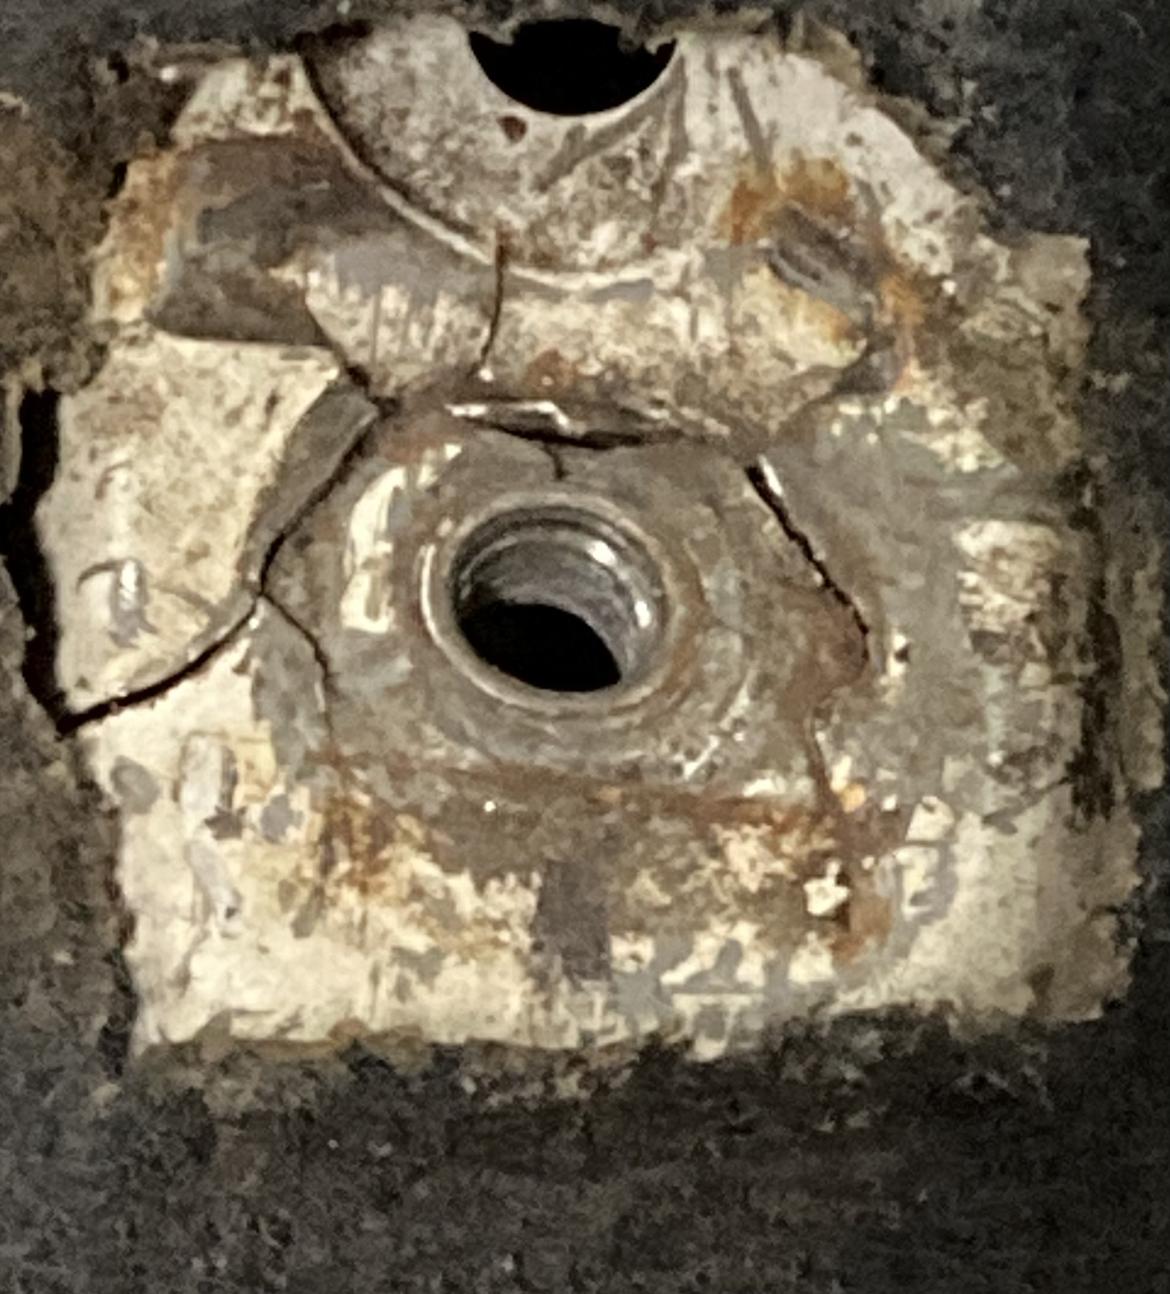
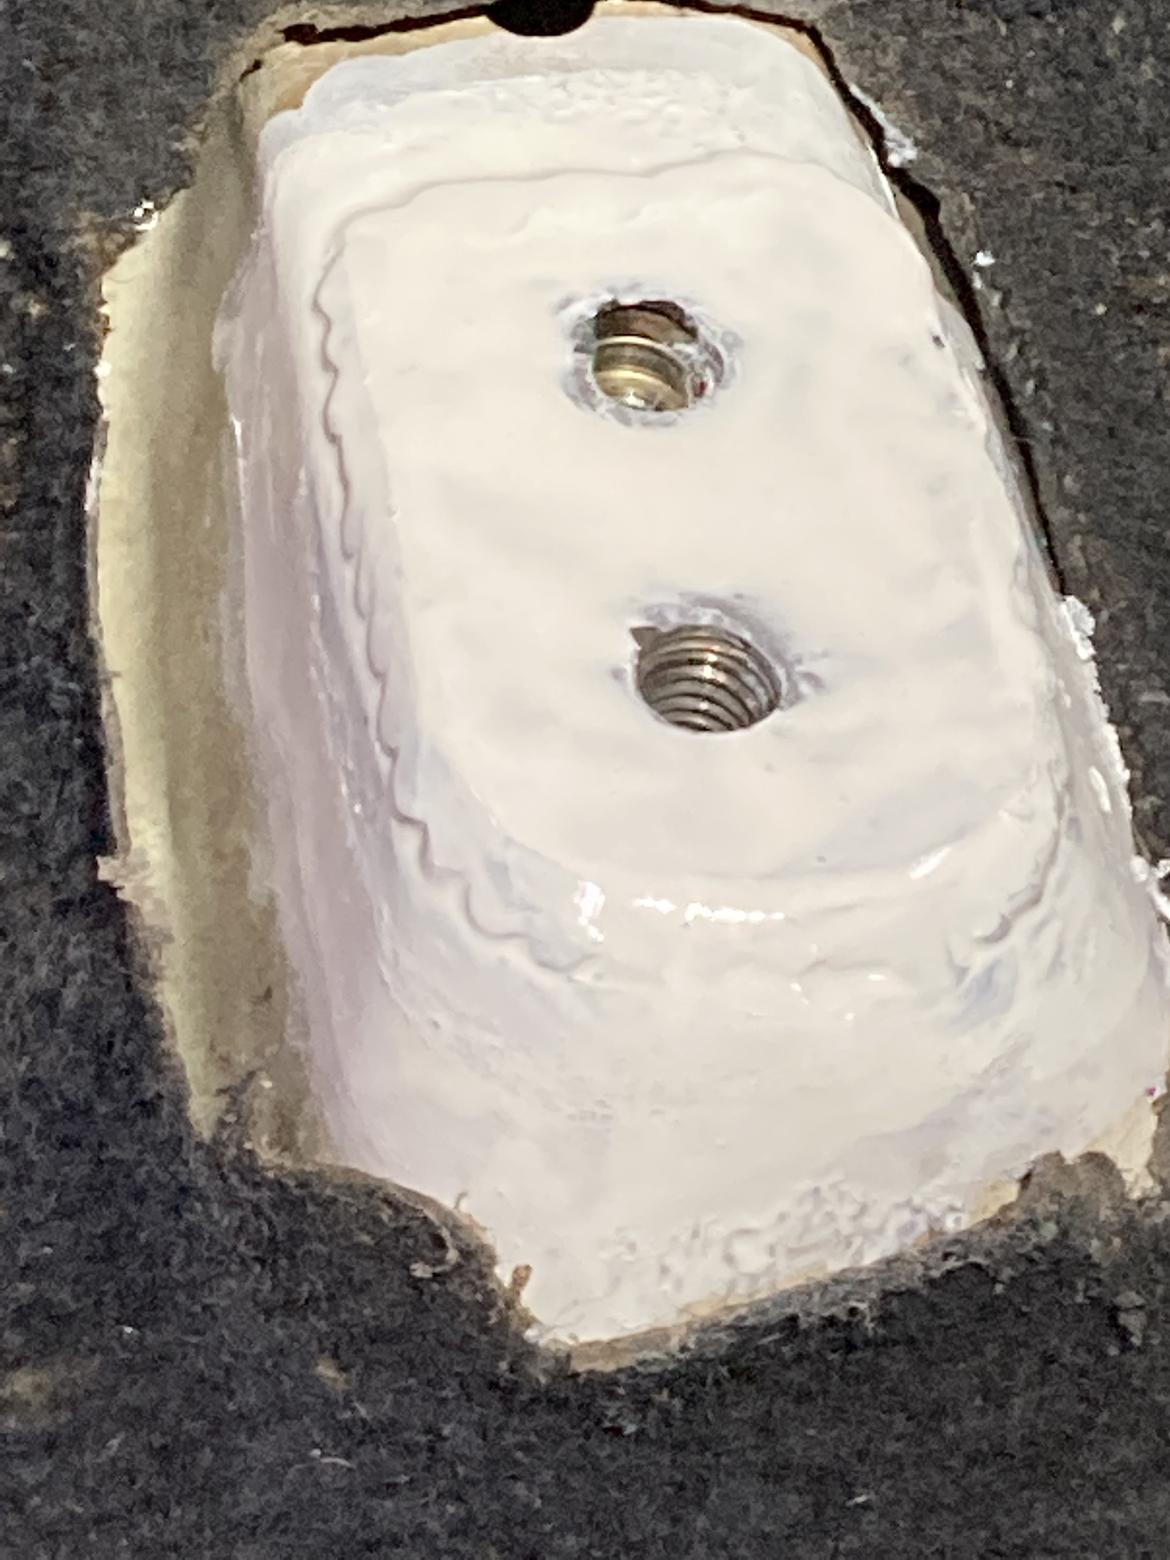
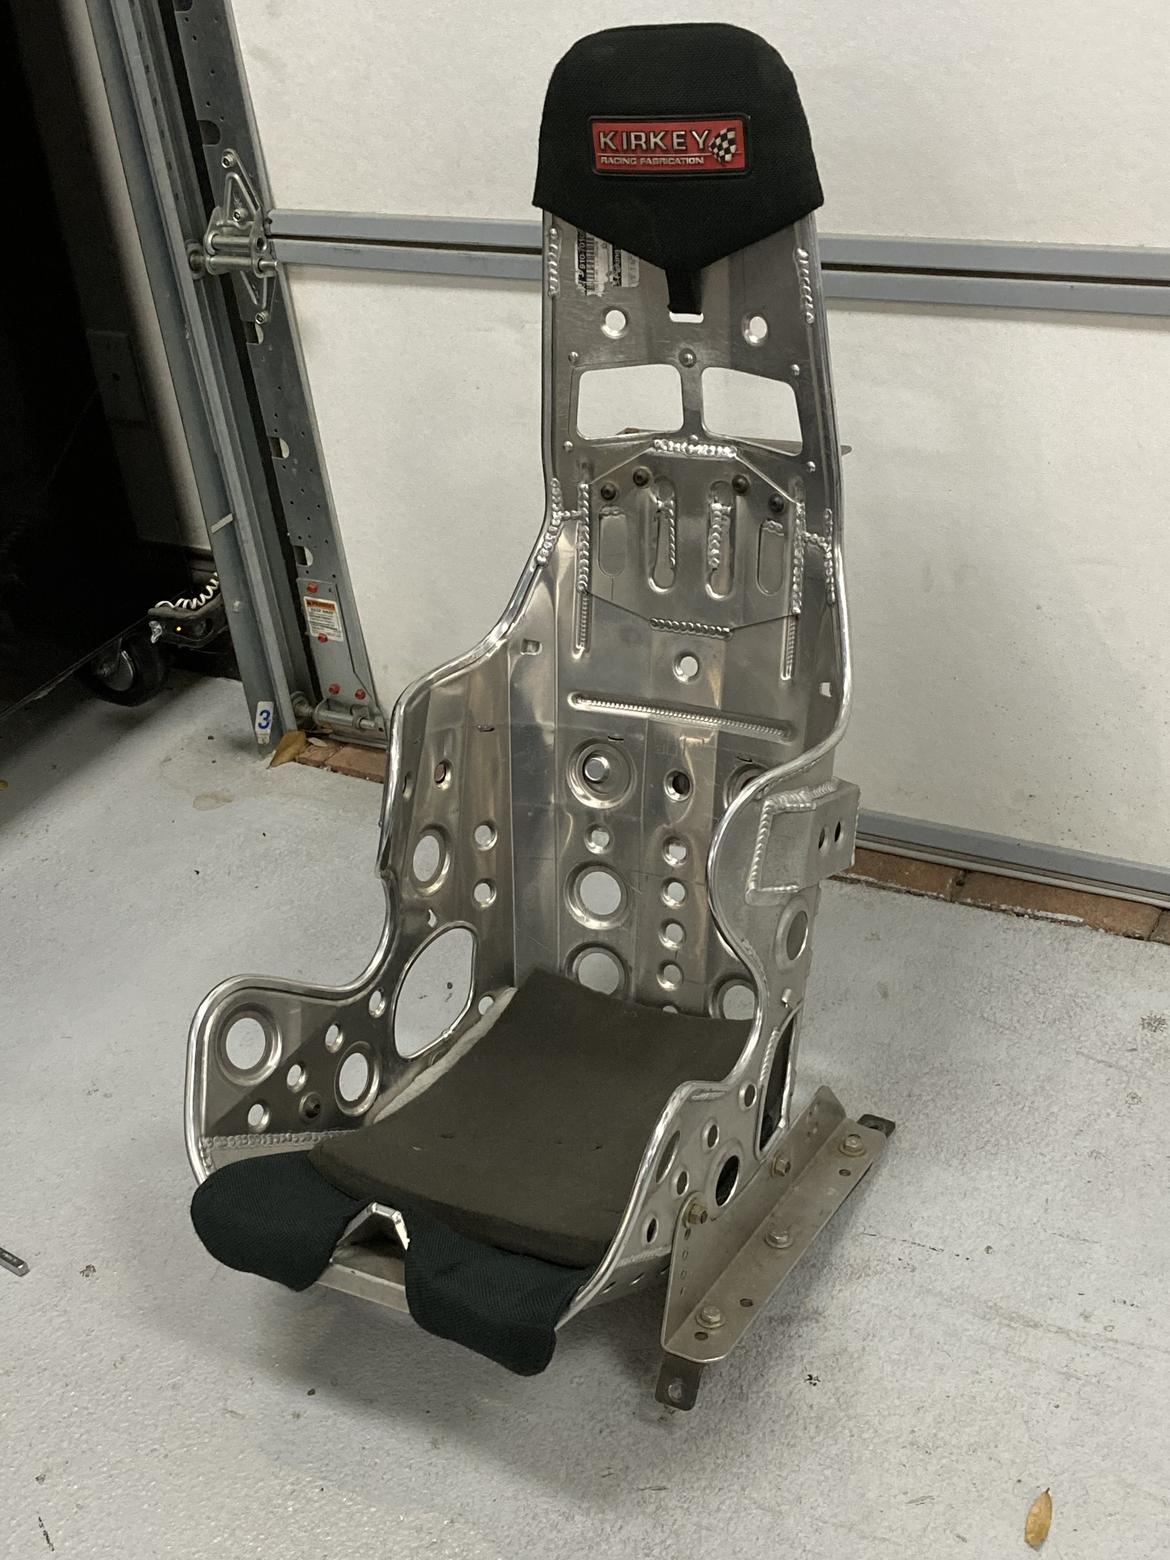
In the shop today fabbing seat brackets for Tom's seat and I discover this. Oh how I love working on old cars ... not. Another victim of race car vibration.
I have a pic somewhere of the splitter I built for our K20 crx complete with tunnels and naca duct to the oil pan etc.
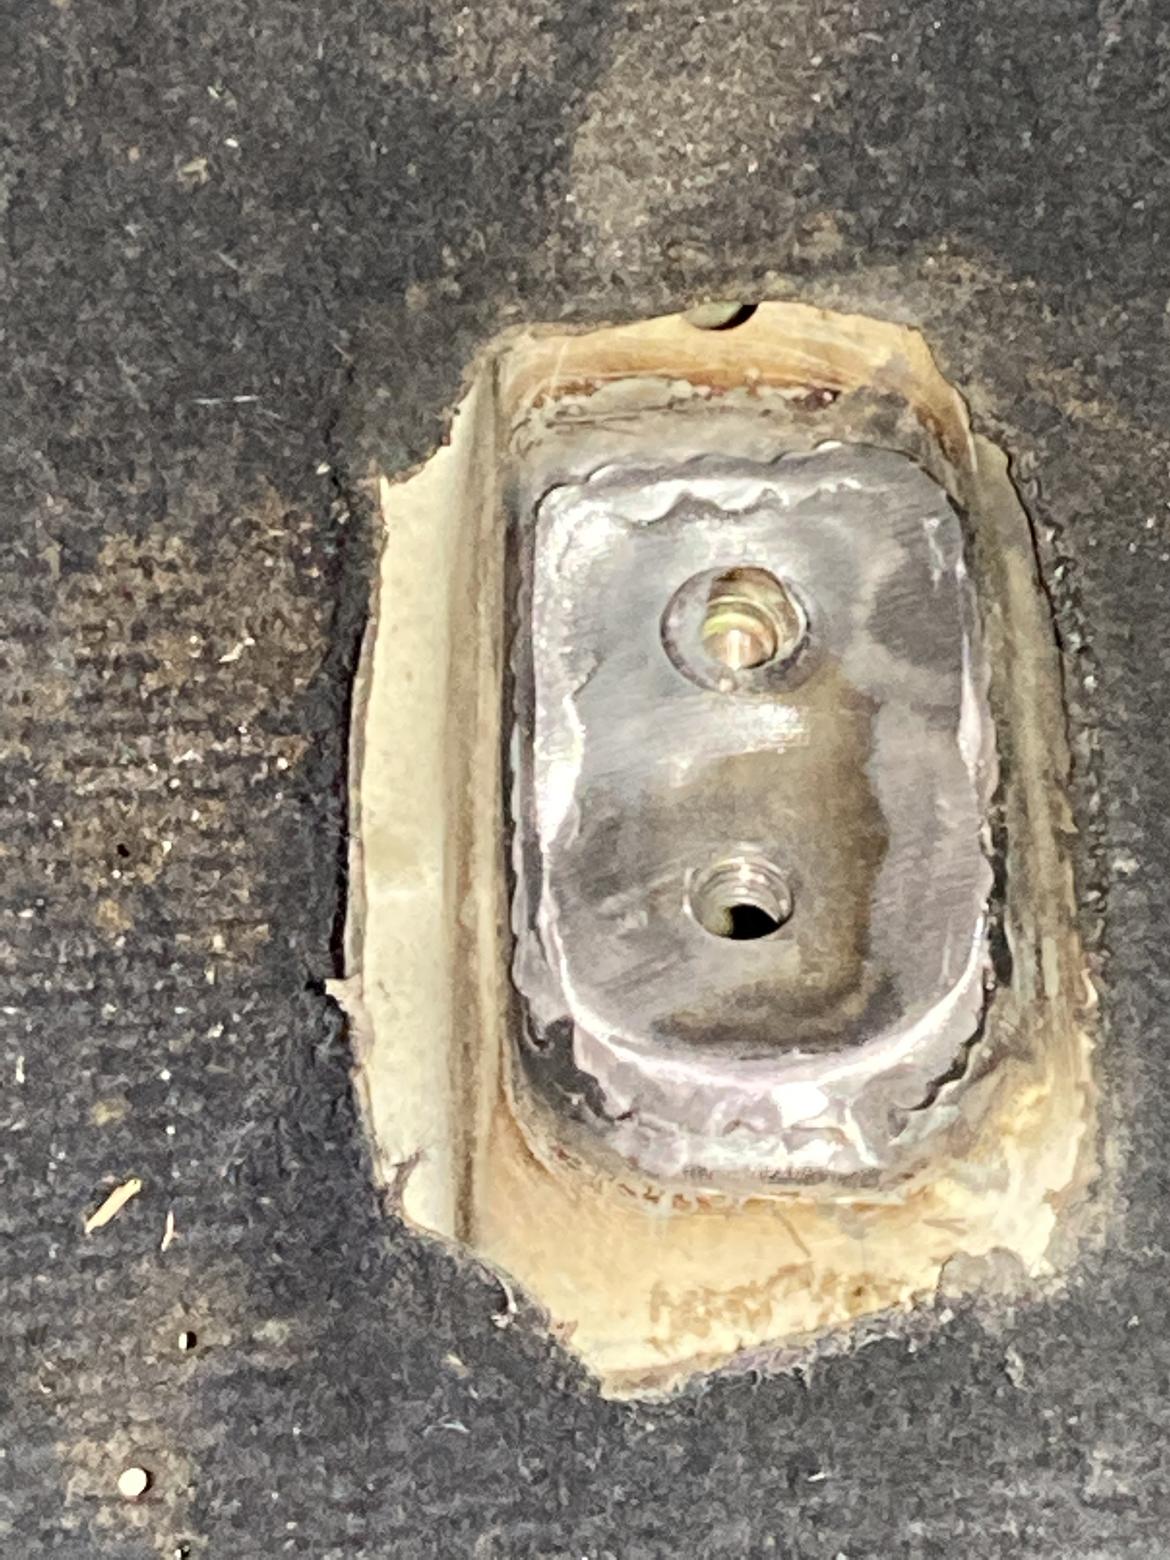
This should work. Some scrap plate, formed into shape and welded in place. I put a rivnut in that extra body hole to help pull more of the old sheet metal into the plate.
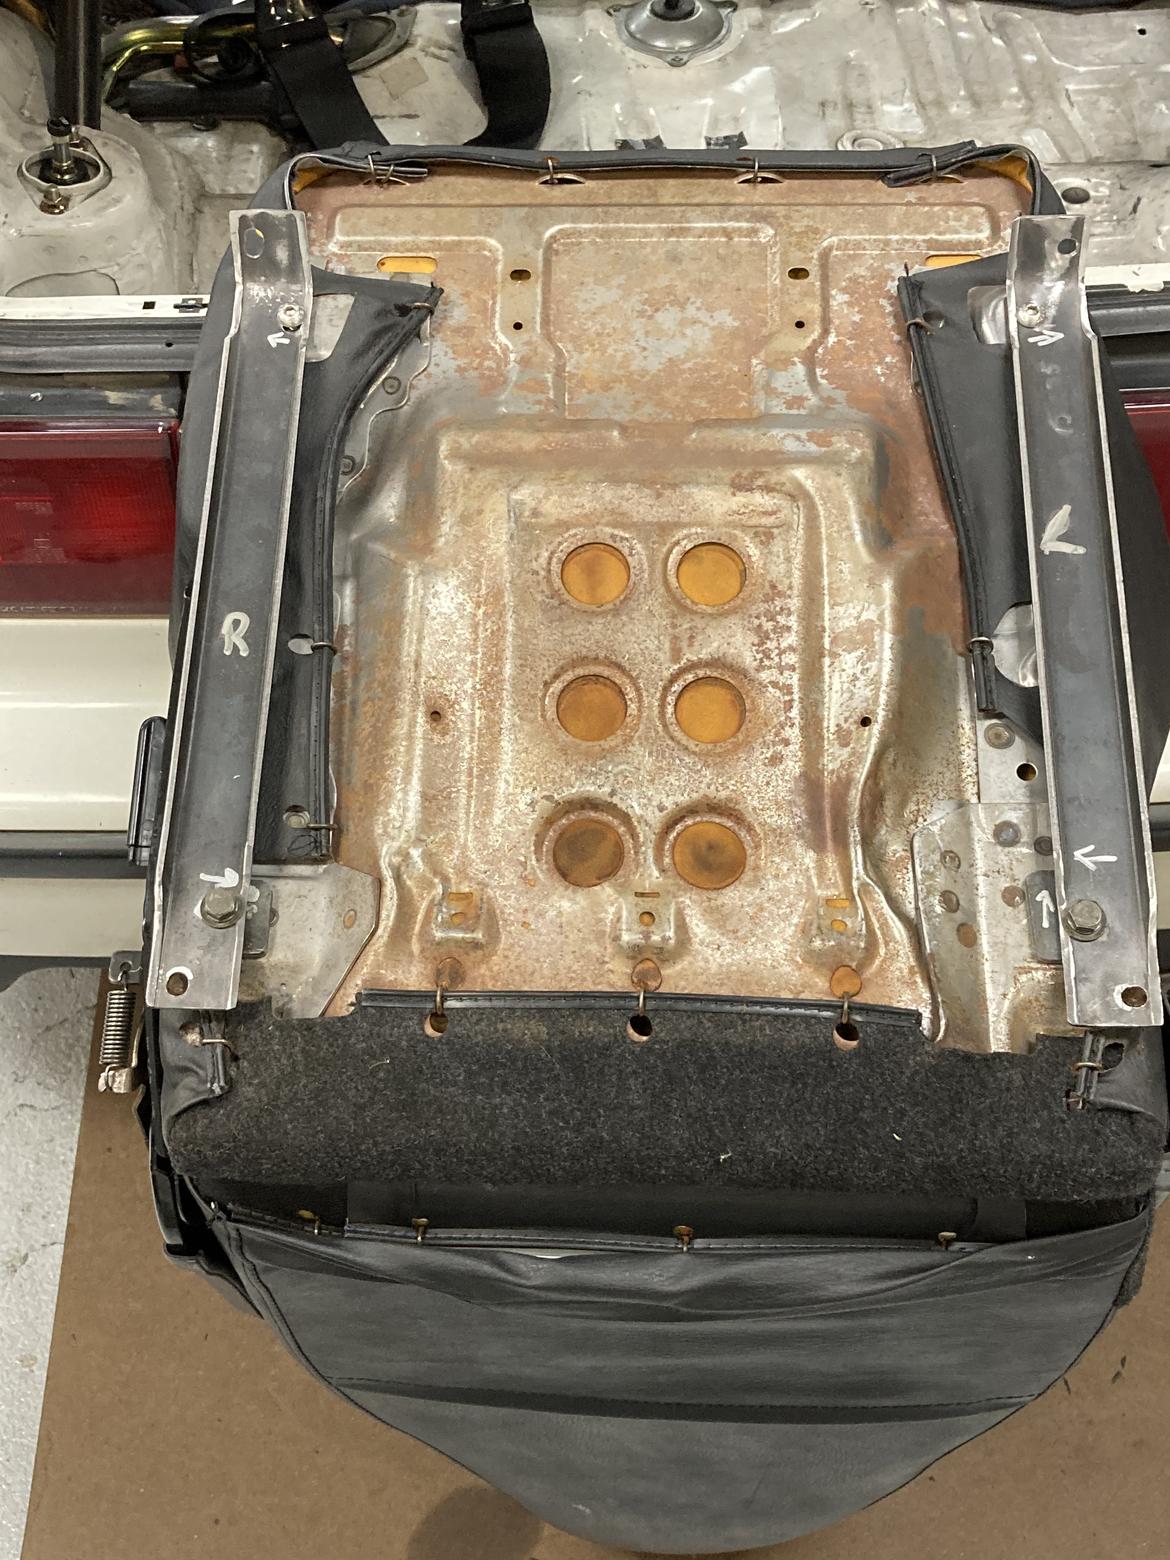
I ground the welds down to better fit the seat rails, but this came out way better than I expected. Welding to this super-thin (think beer can) Honda OE body is extremely hard to do w/o burning holes in it.
Painted for rust preventation, not cosmetics (it's a race car)...don't judge me!
Here's our passenger seat, 99 Miata Sport seat. Lots of fiddly fab work to get it as low as possible to avoid the roll cage and also get some leg room. This setup maximizes both, so we can get some sleep during transits.
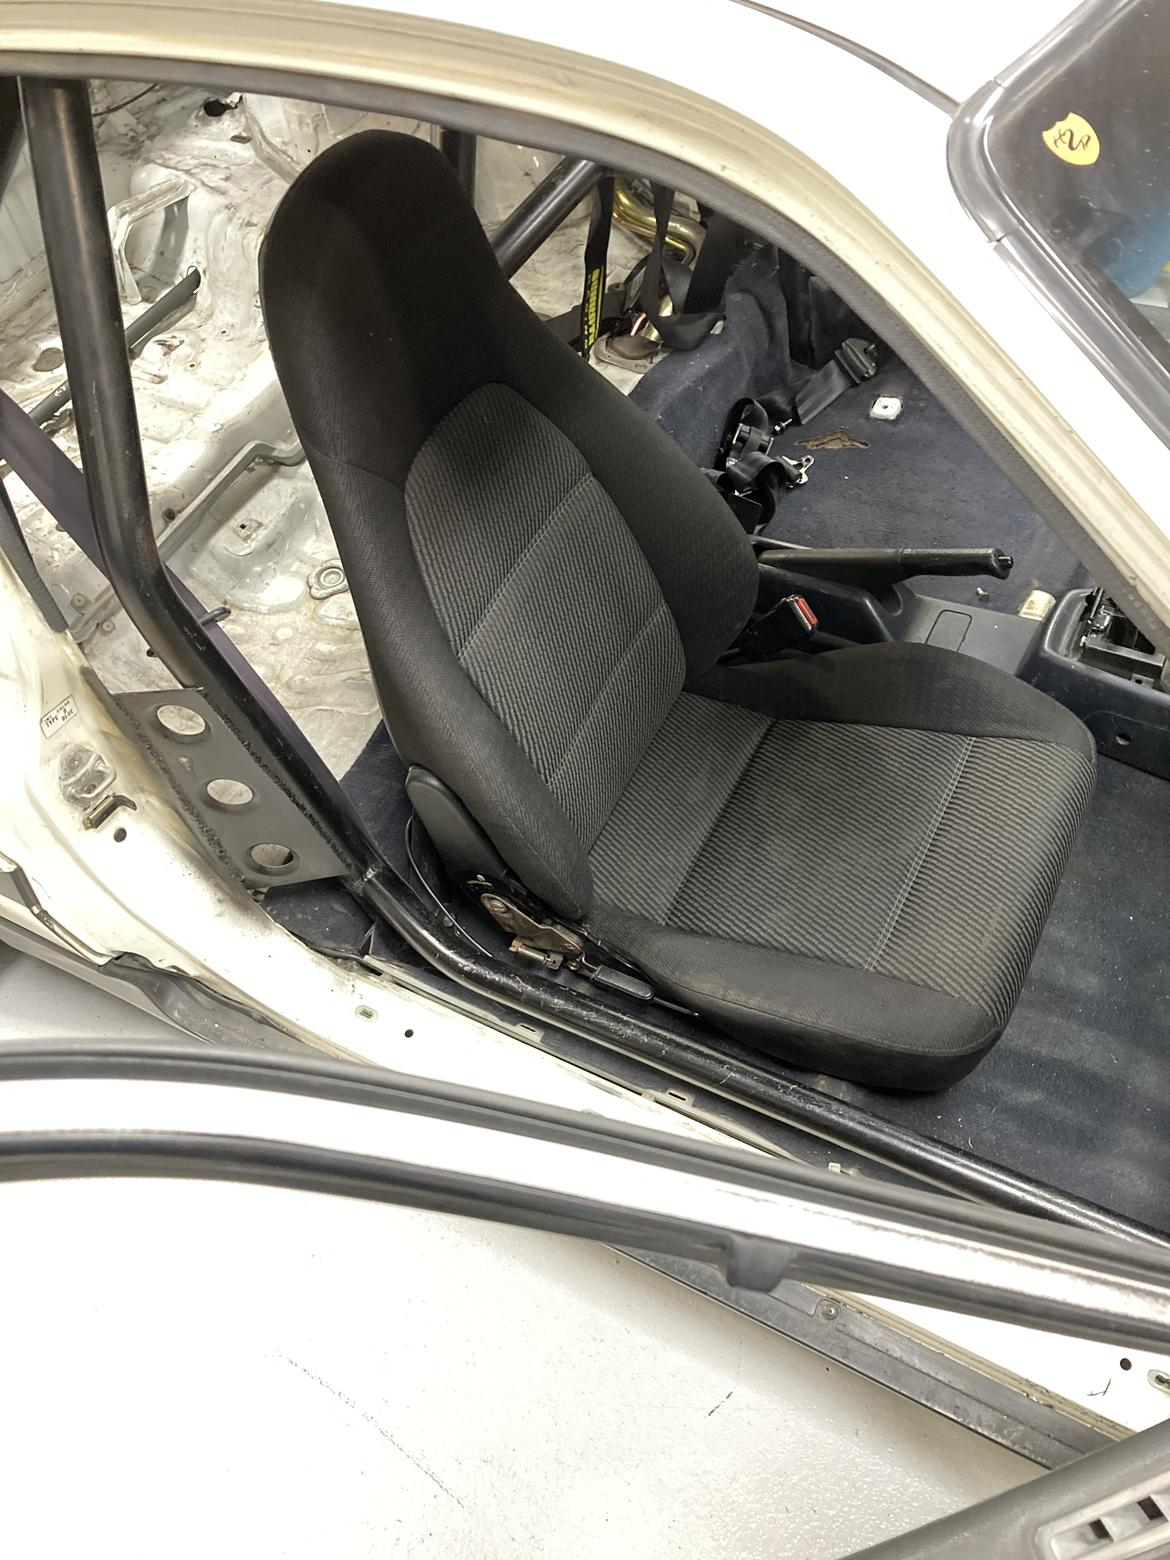
Here's how we did it. Bolts to the factory seat mounts. Weighs 24 lbs total. Can be removed for the track, but that amount of weight is worth maybe a tenth a lap. Hardly worth the effort.
No, we didn't paint it. Not likely to stay in the car other than for OLOA.
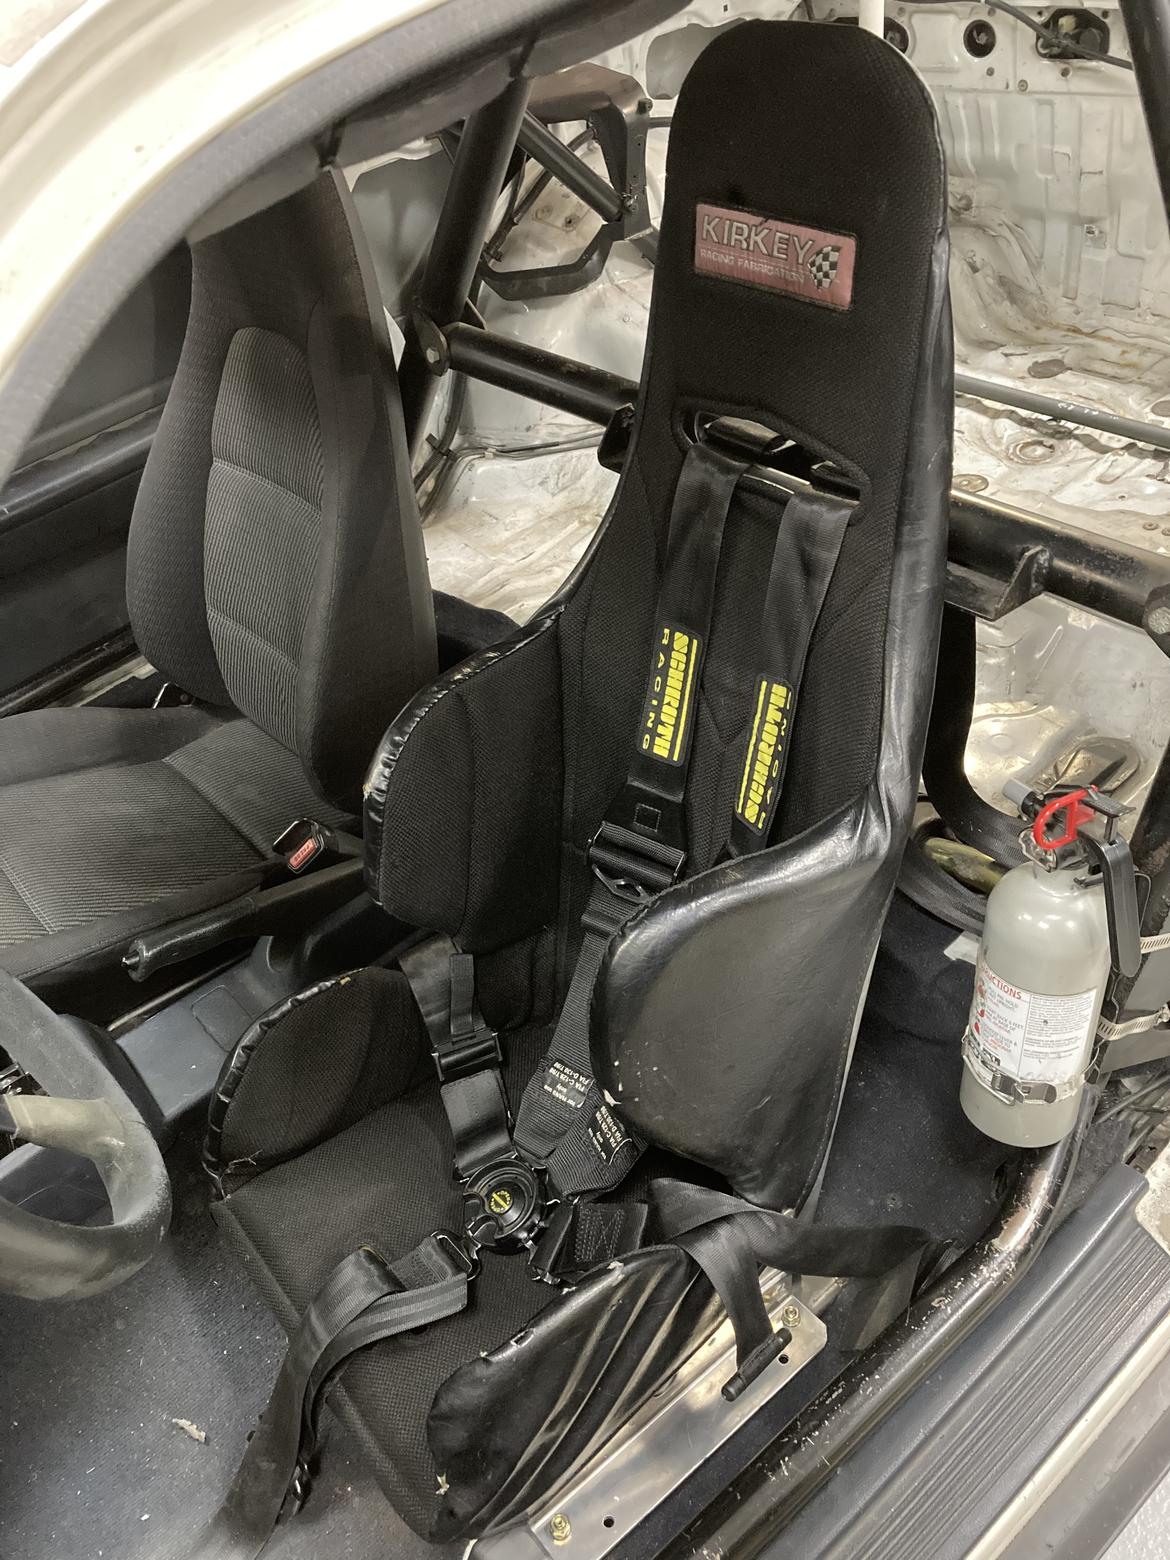
Tom's driver's seat mounting is complete, with back brace. It's my old autocross seat, mounted much more securely. He has longer legs so our seating positions are quite different. But our waist sizes are similar.
Here's my seat...been using this for years. Perfectly dialed in.
We'll be swapping seats once a day.
Added some roll cage unhelmeted head protection on the passenger side for transits. We use double-durometer padding, which has a softer outer layer for street use and an SFI rated hard inner. Perfect for this application.
The prodigal son returns...
initial fitment of our custom Zebulon 3D splitter revealed some contact with the oil pan. The maker clearanced it for us, for free. We just had to get it to him.

Yes, we could have just cut into it ourselves with an angle grinder but we'd risk compromising the strength. Ryan's team at Zebulon did the digging and then used more composite to properly seal it up. A coating of heat tape will keep temps in check.
And here's where the real work gets done...

Sonic
UberDork
3/21/24 1:14 p.m.
Looking forward to seeing how you attach this. I'm about to build one for my k24 EG, and with how low the oil pan is there isn't a whole lot of clearance, plus need it to be sturdy enough, but also able to be removed without a huge effort, etc.
In reply to Andy Hollis :
Nice,the one I built had more curve to the tunnels to dump that air outwards to cv's/hubs/brakes for cooling.
Sonic said:
Looking forward to seeing how you attach this. I'm about to build one for my k24 EG, and with how low the oil pan is there isn't a whole lot of clearance, plus need it to be sturdy enough, but also able to be removed without a huge effort, etc.
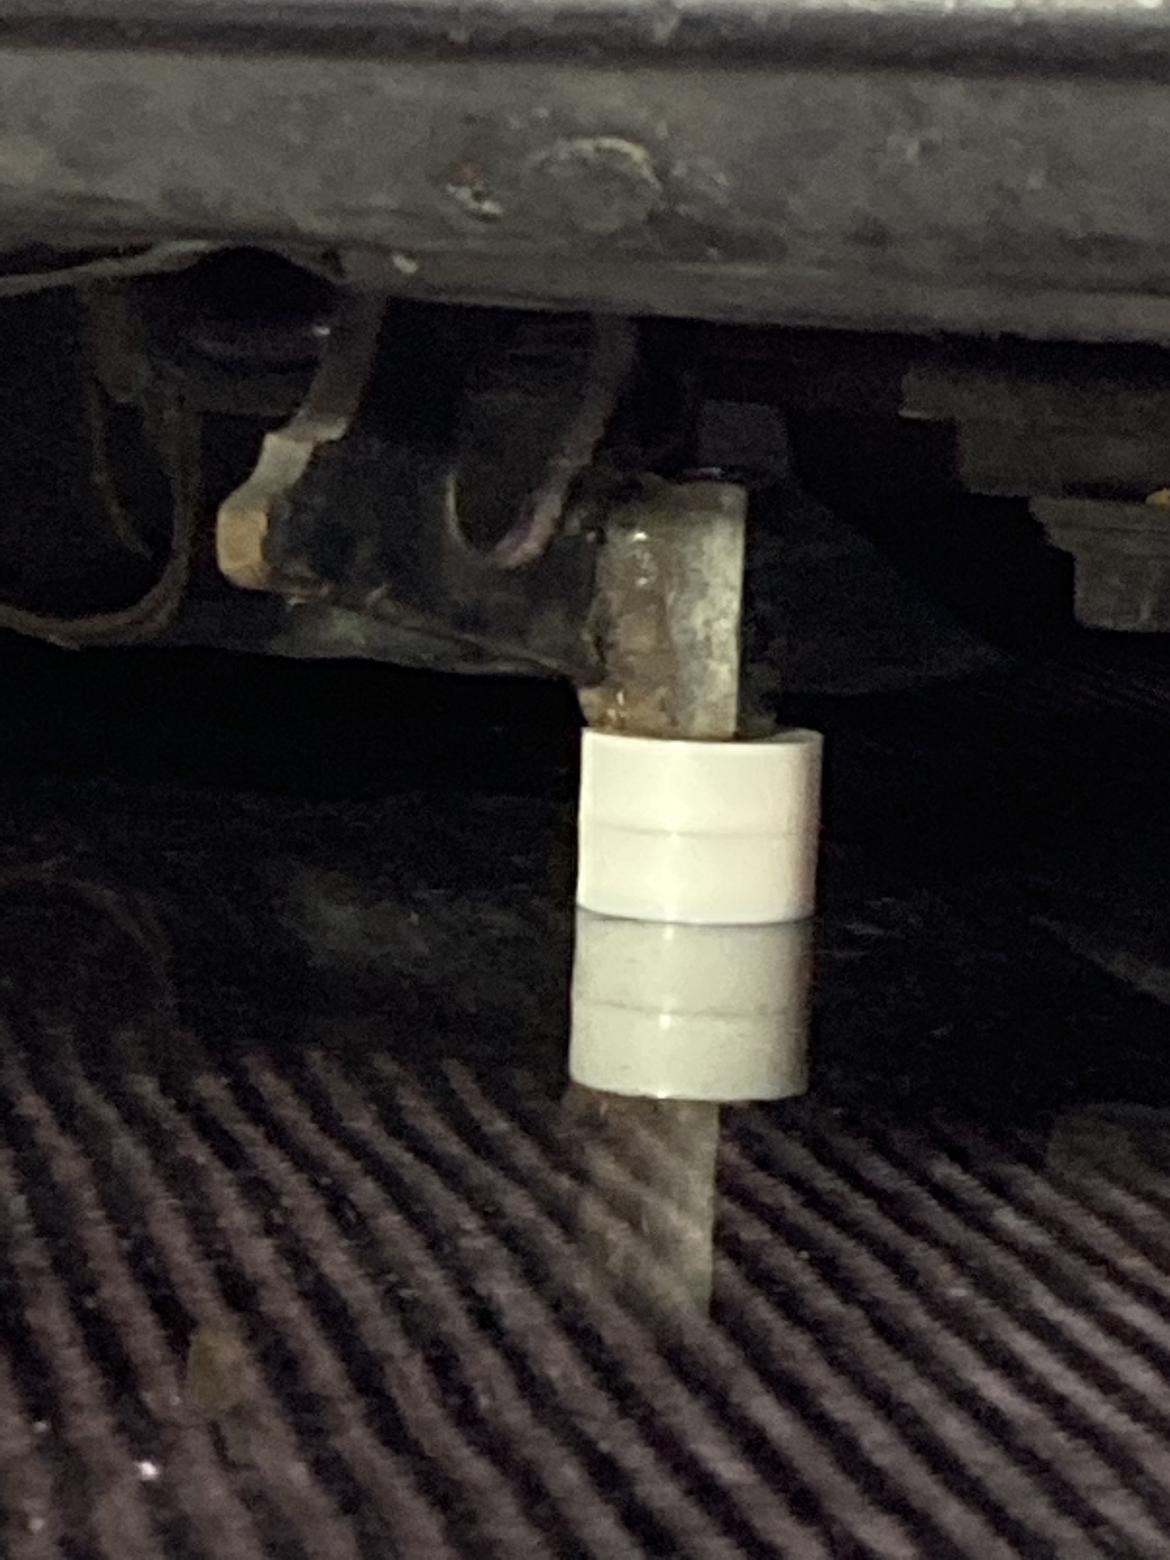
The front attaches as I do all my EF splitters...I have couplers welded vertically to the factory tow hooks (which drop down from the frame). If you zoom in on the splitter blade, you'll see the two holes. Bolt goes straight up through that into the coupler.
I'm doing the rear mount right now. It connects to a square tube strut bar I built that connects the two LCA points. Perfect place for the rear. See those two blocks on the splitter? That gets a bracket that interfaces to the cross bar.
Sitrep...splitter is on, building air dam now.
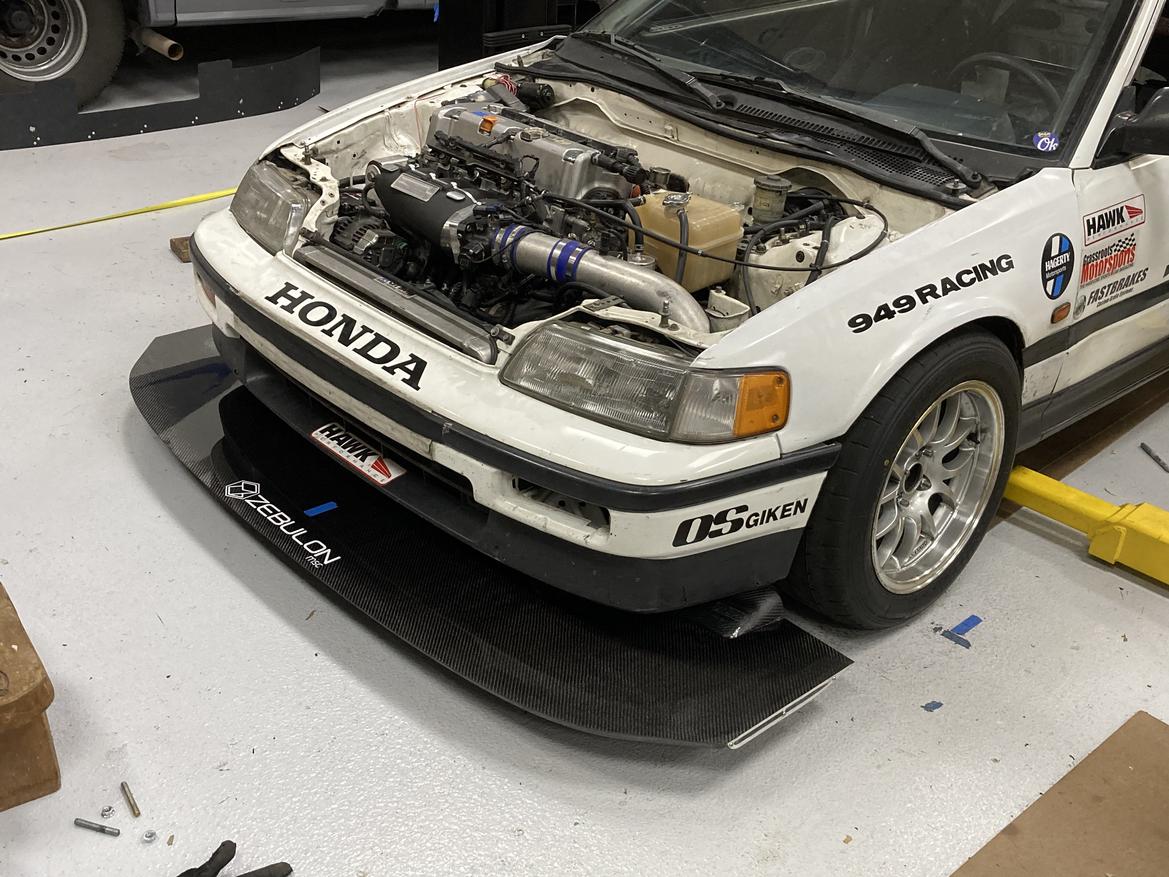
Here's the front mount. Thread coupler welded to factory tow hook. Spacers from Lowes and a 3/8" bolt through it all. Splitter has four hard points molded inside to take and spread the attaching load. Can be shimmed to dial-in AoA.
More Lowes motorsports supplies.