
SV reX
MegaDork
2/13/24 8:21 a.m.
In reply to carbidetooth :
I agree that tile backer doesn't make a floor stiffer, but Advantech definitely does. You mentioned OSB... Advantech and OSB aren't similar at all.
Yeah, maths is a pretty good idea. The good news is the existing floor joists were most likely designed to span longer distances (over bigger rooms), they are old growth heart pine (which is VERY stiff, and a bit hard to calculate), and the Advantech will increase the stiffness from the existing.
Do some quick calculations, but don't obsess too much about them.

In reply to SV reX :
Advantech is certainly a variety of OSB (oriented strand board). It's enhanced in many ways over garden variety, though. The subfloor, Advantech in this case, and floor framing work together to provide necessary stiffness for application. Floor deflection has two components, overall stiffness and between joist deflection. Both are important.
Most of my work was in old buildings and, surprisingly many were a by guess and by golly proposition. Building codes and span tables and building science were not just not as much a part of the overall picture. Most all lumber will stiffen (case harden) with age, but that doesn't necessarily make it stronger. Outside of that, it's rare to find old floor structure which is flat and that's really important with tile. By today's standards a lot of old building floor joists are over-spanned. Floor framing was sometimes beefed up for tile installations but those were frequently mud beds which are almost never done now.
Here's a link to an easy to use calculator than can get one pretty close to goodness. It does get tricky with old dimension lumber but I'd encourage paying close attention now, as it's a hard thing to fix later.
The Amazing John Bridge Forums Deflect-O-Lator :-)
I should probably add that I'm kinda nuts about this stuff and sought to quantify rules of thumb and ACE (awww, close enough) engineering throughout my career.
Following along, learning a lot. Not to derail the thread, but what are the preferred materials for alcove style tubs? Planning to renovate our bath/shower combo soon and replace the old fiberglass unit with a tub + tiled wall. There are options for plastic, fiberglass, enameled steel, enameled cast iron, etc. Any downsides to the heavier, more expensive ones, other than the weight?

SV reX
MegaDork
2/13/24 11:30 a.m.
In reply to carbidetooth :
I think this is straying into semantics. While Advantech is technically an oriented strand panel, the acronym OSB generally refers to commodity OSB, which is a completely different manufacturing process. Advantech is built with more precision in the strand sizes and orientation, and different resins which make its performance vastly different.
There are many technical difference and specifications, but here's why I use Advantech. I built a house over 20 years ago which was a very slow build process. It was the first time I used Advantech. It was a year and a half from the time the floor was laid until the roof was dried in. In that time it was exposed to multiple rain storms. There was no swelling or warpage AT ALL. We didn't have to replace a single panel. I've used it ever since on hundreds of buildings.
Commodity OSB? Forget it. It would have been 100% replacement.
We can discuss deflections, spans, and modulus of elasticity, but final performance is really all that most people here need to know.
Old growth heart pine is significantly different than modern fast growth timber. A 2" dimensional cut is 30% more wood than 1 1/2", but the density is also vastly different. It is not uncommon in old growth heart pine to find 15 growth rings per inch. SPIB current grading rules for dense Southern Yellow Pine is only 6 growth rings per inch. It's a totally different material.
In reply to SV reX :
Agreed on the semantics, but for folks without a building background and knowledge, I think there's some need for definition of products within a category, but that's me. I'll digress.
In reply to maschinenbau :
Porcelain enameled cast iron was the gold standard for years, but even expensive ones now can be lame by comparison. Assuming you use the tub for bathing, steel and cast iron can both be cold to the touch. Enamel is really tough but also hard to repair. There are reasons to go with acrylic or fiberglass, but often boils down to cost and looks. They will take less abuse than cast iron. Cast iron is usually self supporting and has almost no "give" when standing in the floor.
As long as your floor can accommodate the weight, it's within your budget and extra work of installation, cast iron is a pretty good bet. Tub installation, like many things in the building world, can be done well or poorly. Perhaps start another thread as your project progresses or visit the John Bridge forum for a boatload of knowledge in a single place.
Tile Forum/Advice Board - Ceramic Tile Advice Forums - John Bridge Ceramic Tile
Ok, here is my solution for cutting out the T&G pine flooring next to the left side bathroom wall as seen when looking in from the doorway. I assume that is a bedroom beyond.
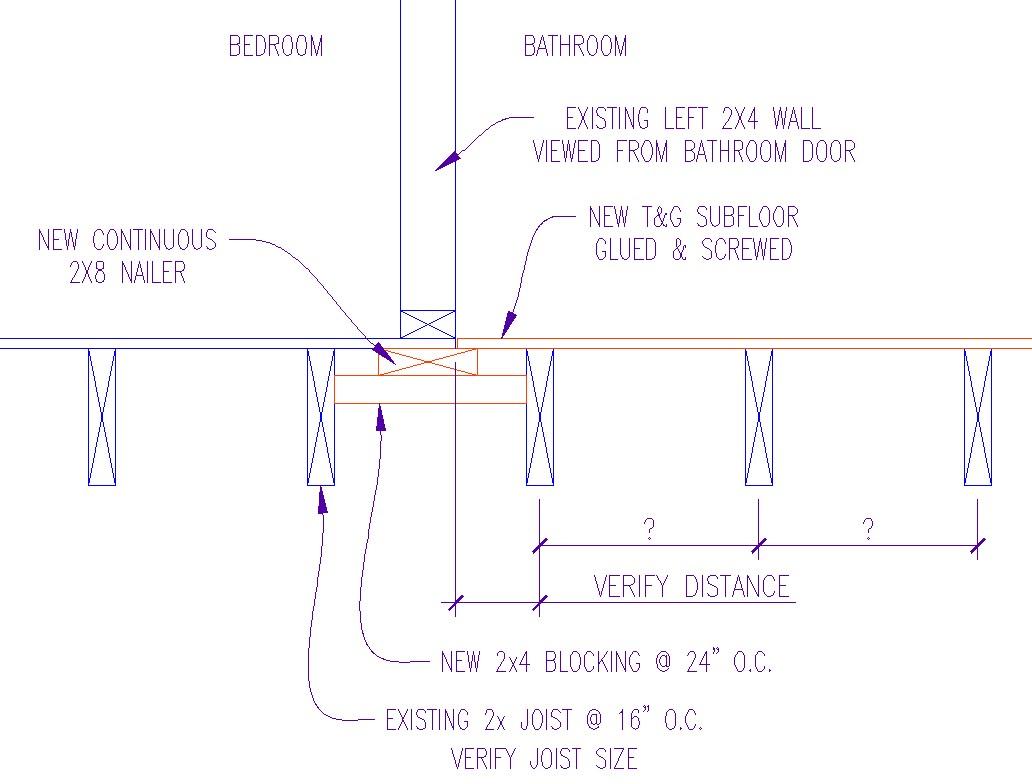
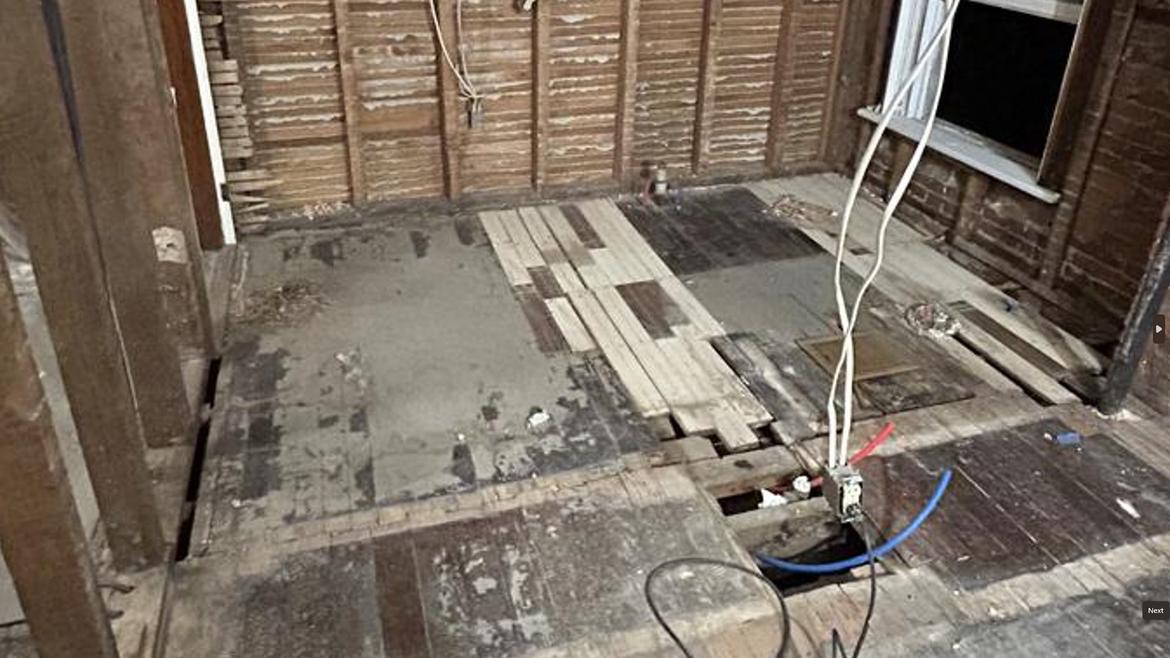

SV reX
MegaDork
2/13/24 3:01 p.m.
In reply to VolvoHeretic :
That's very clean
In reply to SV reX :
That continuous flat board might already be under the flooring and wall and just needs to have the nailers installed to support the new subfloor and old wall, just like the right side wall with the old closet. Sure seems like a complicated way to build - needing a lot of planning before hand.
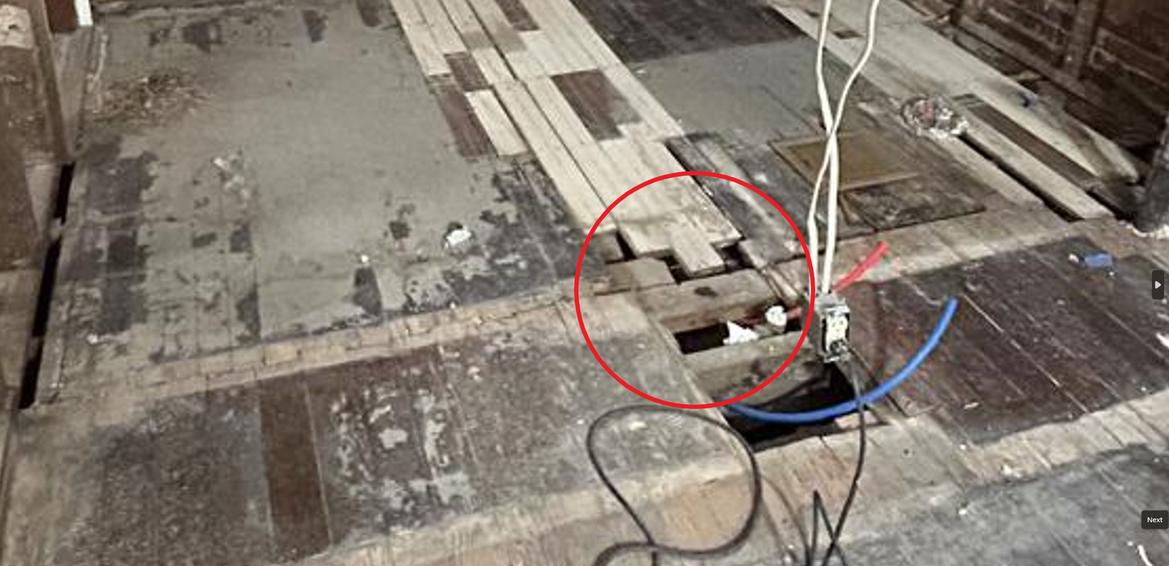

SV reX
MegaDork
2/13/24 5:32 p.m.
In reply to VolvoHeretic :
All good building includes good planning in advance.
SV reX said:
In reply to VolvoHeretic :
All good building includes good planning in advance.
Just think back in the times when they probably built this house, a crew framing 14' balloon frame exterior walls, hanging the second story floor hanging from a 1x4 let-in rim joist cut into the wall studs, and then a hand framed hip roof, ALL WITH JUST A HANDSAW ,SQUARE, AND A HAMMER! 

I try and plan as much as I reasonably can, and then just get into it because I know plans change.
I specifically lined up the new wall on a joist so it kept it a lot simpler. The bedroom floor beside is basically untouched, resting on the half of the joist that was there already. Need to get a picture of the new wall for you.
I also decided to re-frame the hallway wall where the bathroom door is. What was existing was already a bit pieced together, so cobbling it more to move the doorway would not be ideal.
I did at least get a picture of the joist-exterior wall connection. 9.5" tall, true 2" wide joists.
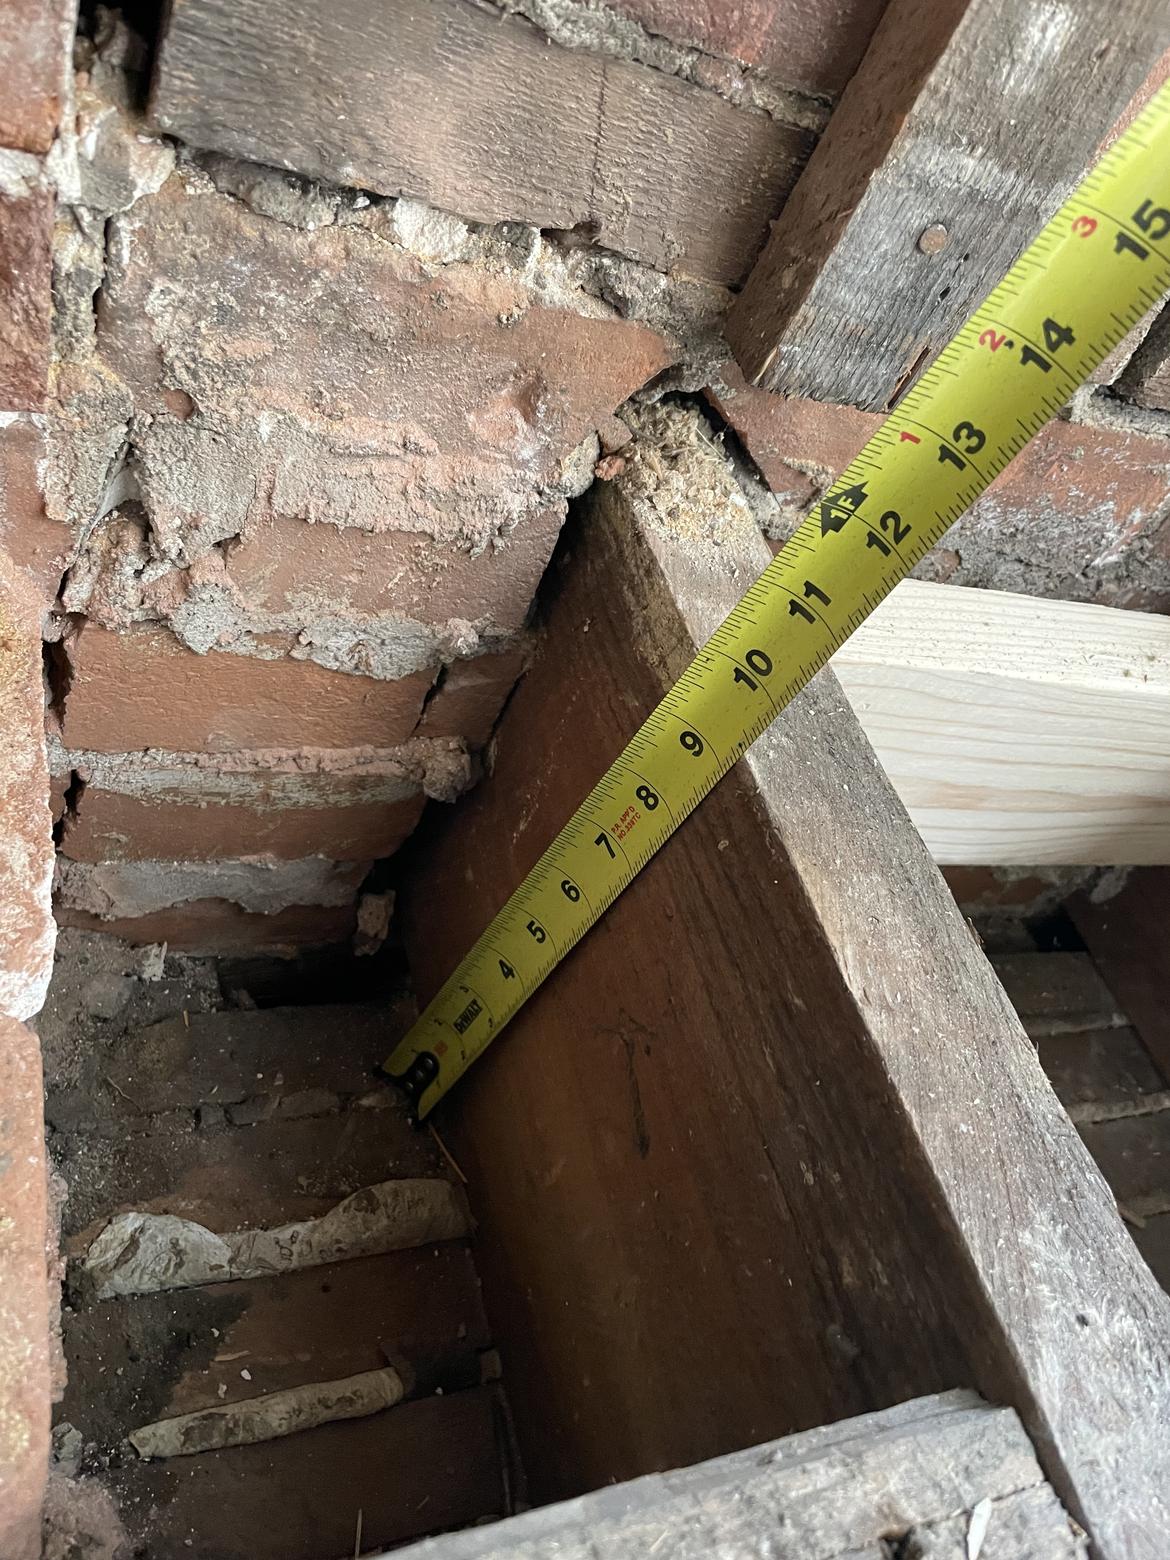
Also found a bit of a hiccup with my wiring. Not completely unexpected. The bathroom will have new circuits for outlets, a circuit for the heated floor, and also a circuit for the dryer in the bedroom (not sure if I touched on that yet.) Existing wiring on the other hand, is something else. I've known that "some" knob and tube wiring exists in the house still, but a lot has been upgraded to romex. All the upstairs light fixtures have had romex feeding the box, and the switch boxes, but I have since found that it's fed by knob and tube, running up the wall right where the bathroom door needs to go.
It will be dealt with, though certain aspects of this project of definitely going to extend past going back to my job on the 20th.
In reply to AWSX1686 (Forum Supporter) :
Years and years. 
VolvoHeretic said:
In reply to AWSX1686 (Forum Supporter) :
Years and years. 
It never really does end. Finish one thing just in time for something else to need attention.
In reply to AWSX1686 (Forum Supporter) :
I never finish anything, I just get far enough along to get by and then start work on another disaster.

Pictures kinda suck because I killed all the upstairs lights while figuring out my knob and tube remediation.
Bedroom/bathroom wall, looking from the bedroom. As noted, the wall is built right along a joist, so 1" of the wall plate is directly on the joist, the rest rests on 2x6 blocking I added between the joists. 16" on center, etc. similar tie ins up top. 2x6 wall to be able to hide my dryer vent, though I hear now that I could have gotten oval vent pipe and stuck with 2x4 walls. Oh well, overbuilt is the best kind of built.
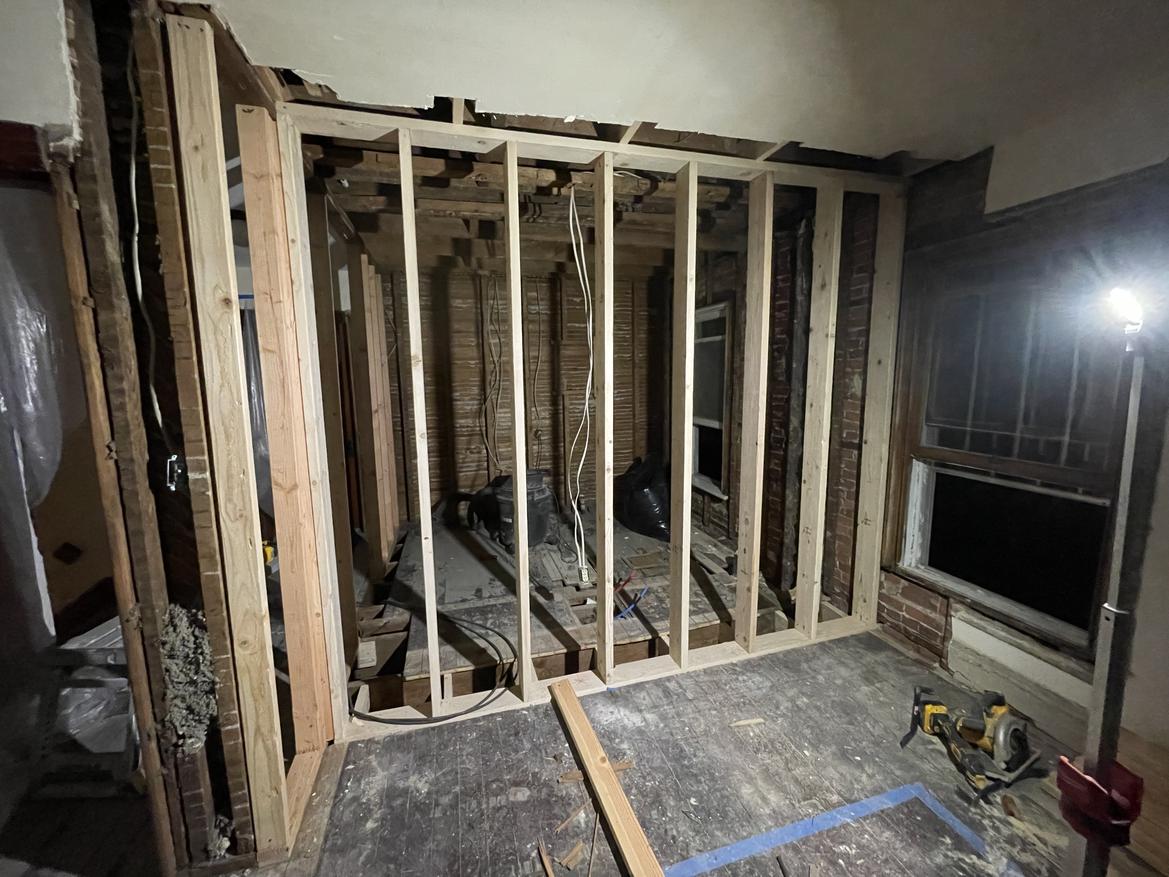
Hallway wall re-framed as well. The existing wall had the bottom plate in 3 pieces already and other mishmash that didn't make sense to keep. I kept the top plate, as it was in good shape, and already in place. I did not install the door header and jack studs yet, going to wait till I'm mounting the door frame to make sure all is good there.
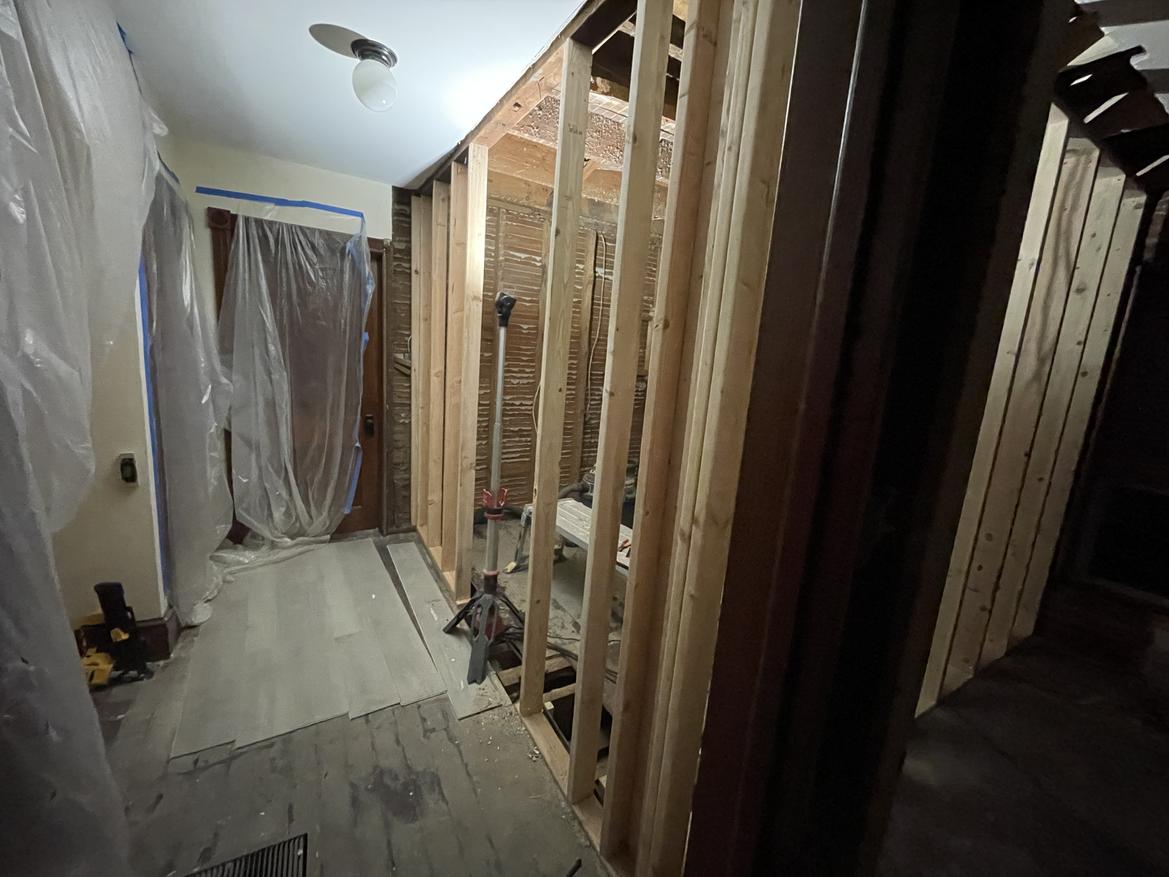
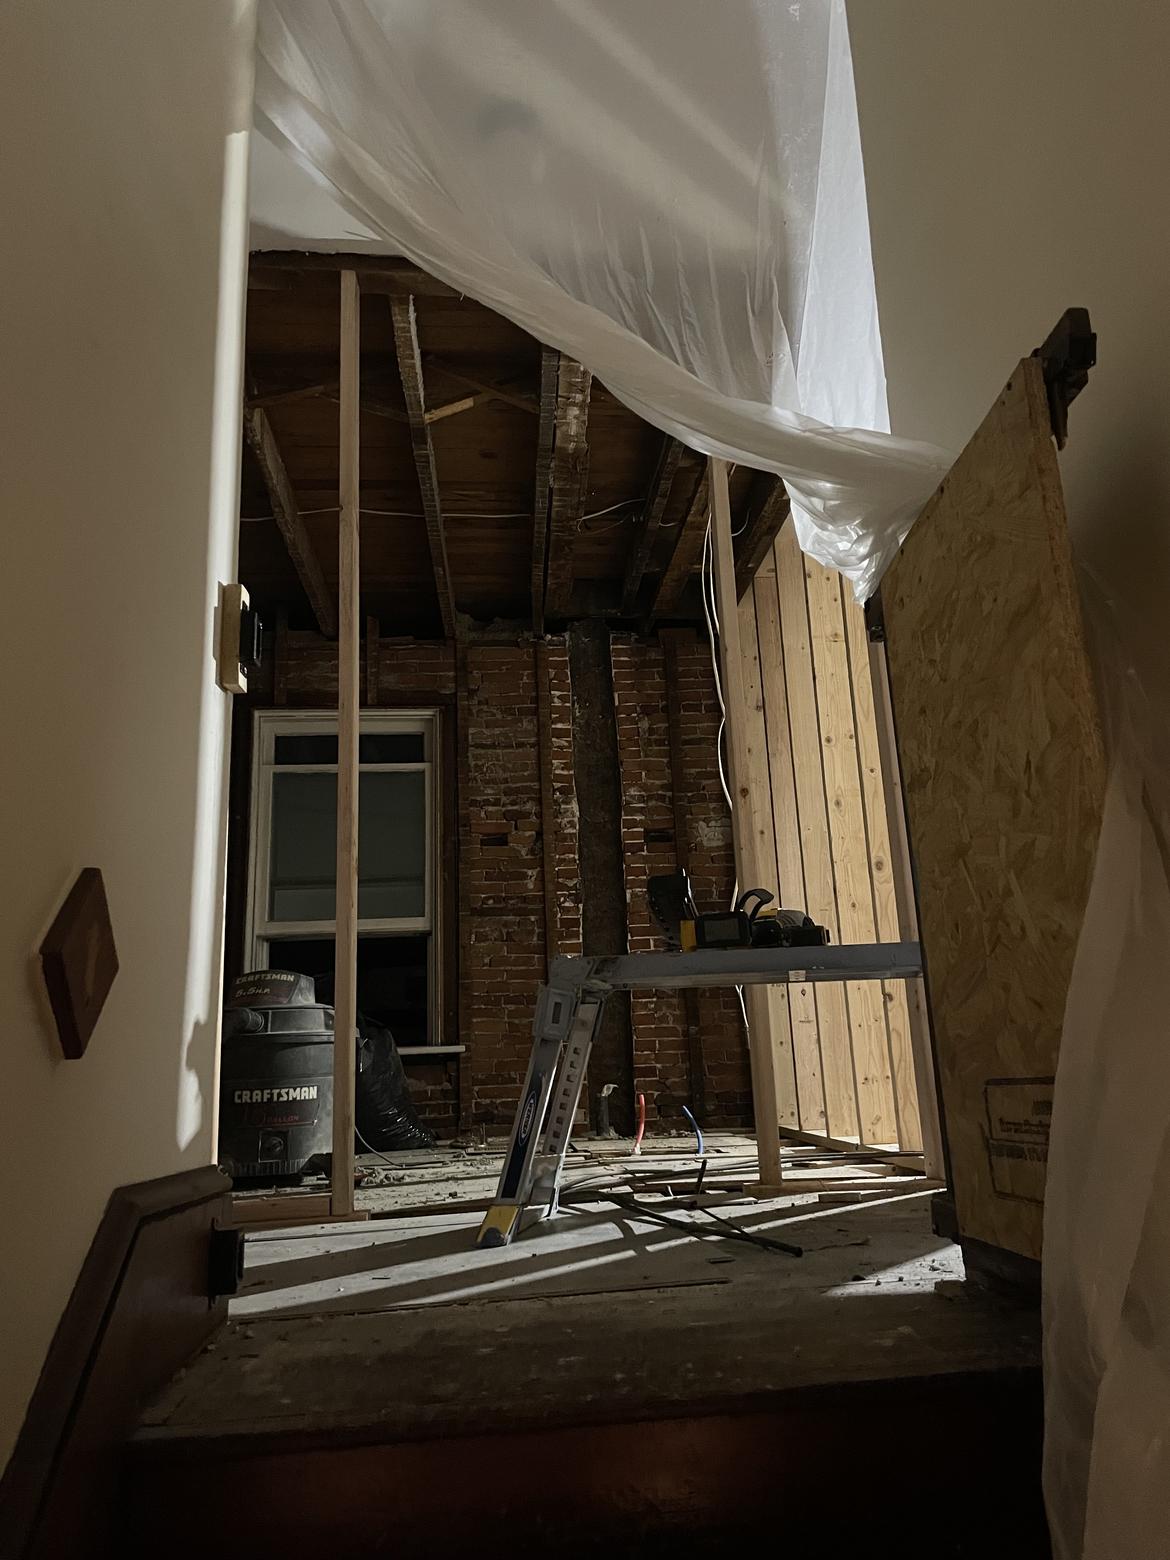
The door relocation actually worked out quite nicely it ends up being centered on the hallway wall, and lined up directly with the staircase, so it's just nice and even, plus more convenient for the floor plan in the bathroom too.
Not sure how well you'll be able to see, but this picture is from the steps going up, looking into the bathroom door.
Once you get to bare joists, you can pull a string across joist tops to get a feel for how to proceed. Can also be done by measuring down from a level laser line but level tops isn't really the goal. Flat now equals less work later.
carbidetooth said:
Once you get to bare joists, you can pull a string across joist tops to get a feel for how to proceed. Can also be done by measuring down from a level laser line but level tops isn't really the goal. Flat now equals less work later.
Makes sense. Should be close to bare joists by the end of today if all goes well. Main goal for the day is roughing in my plumbing.
In reply to AWSX1686 (Forum Supporter) :
You're are doing a great job from where we are sitting. Don't forget to get the joist layouts so we can look for the 3 drains/joists interference issues. 

SV reX
MegaDork
2/14/24 2:26 p.m.
In reply to AWSX1686 (Forum Supporter) :
That is a really lofty goal. I hope you make it, but I'm pretty sure I couldn't do it.
Thanks, lofty goal indeed, not there yet but the night isn't over. Sink and washer drains are at least located.
Somewhat on hold, waiting on my brother in law to stop by so we can remove some of the old cast iron drain stack.
Plan is to cut it more or less half way down, then fernco to PVC with room in that wall pocket to have multiple drains into it. I got the downstairs half bath wall cut open earlier in preparation for that.
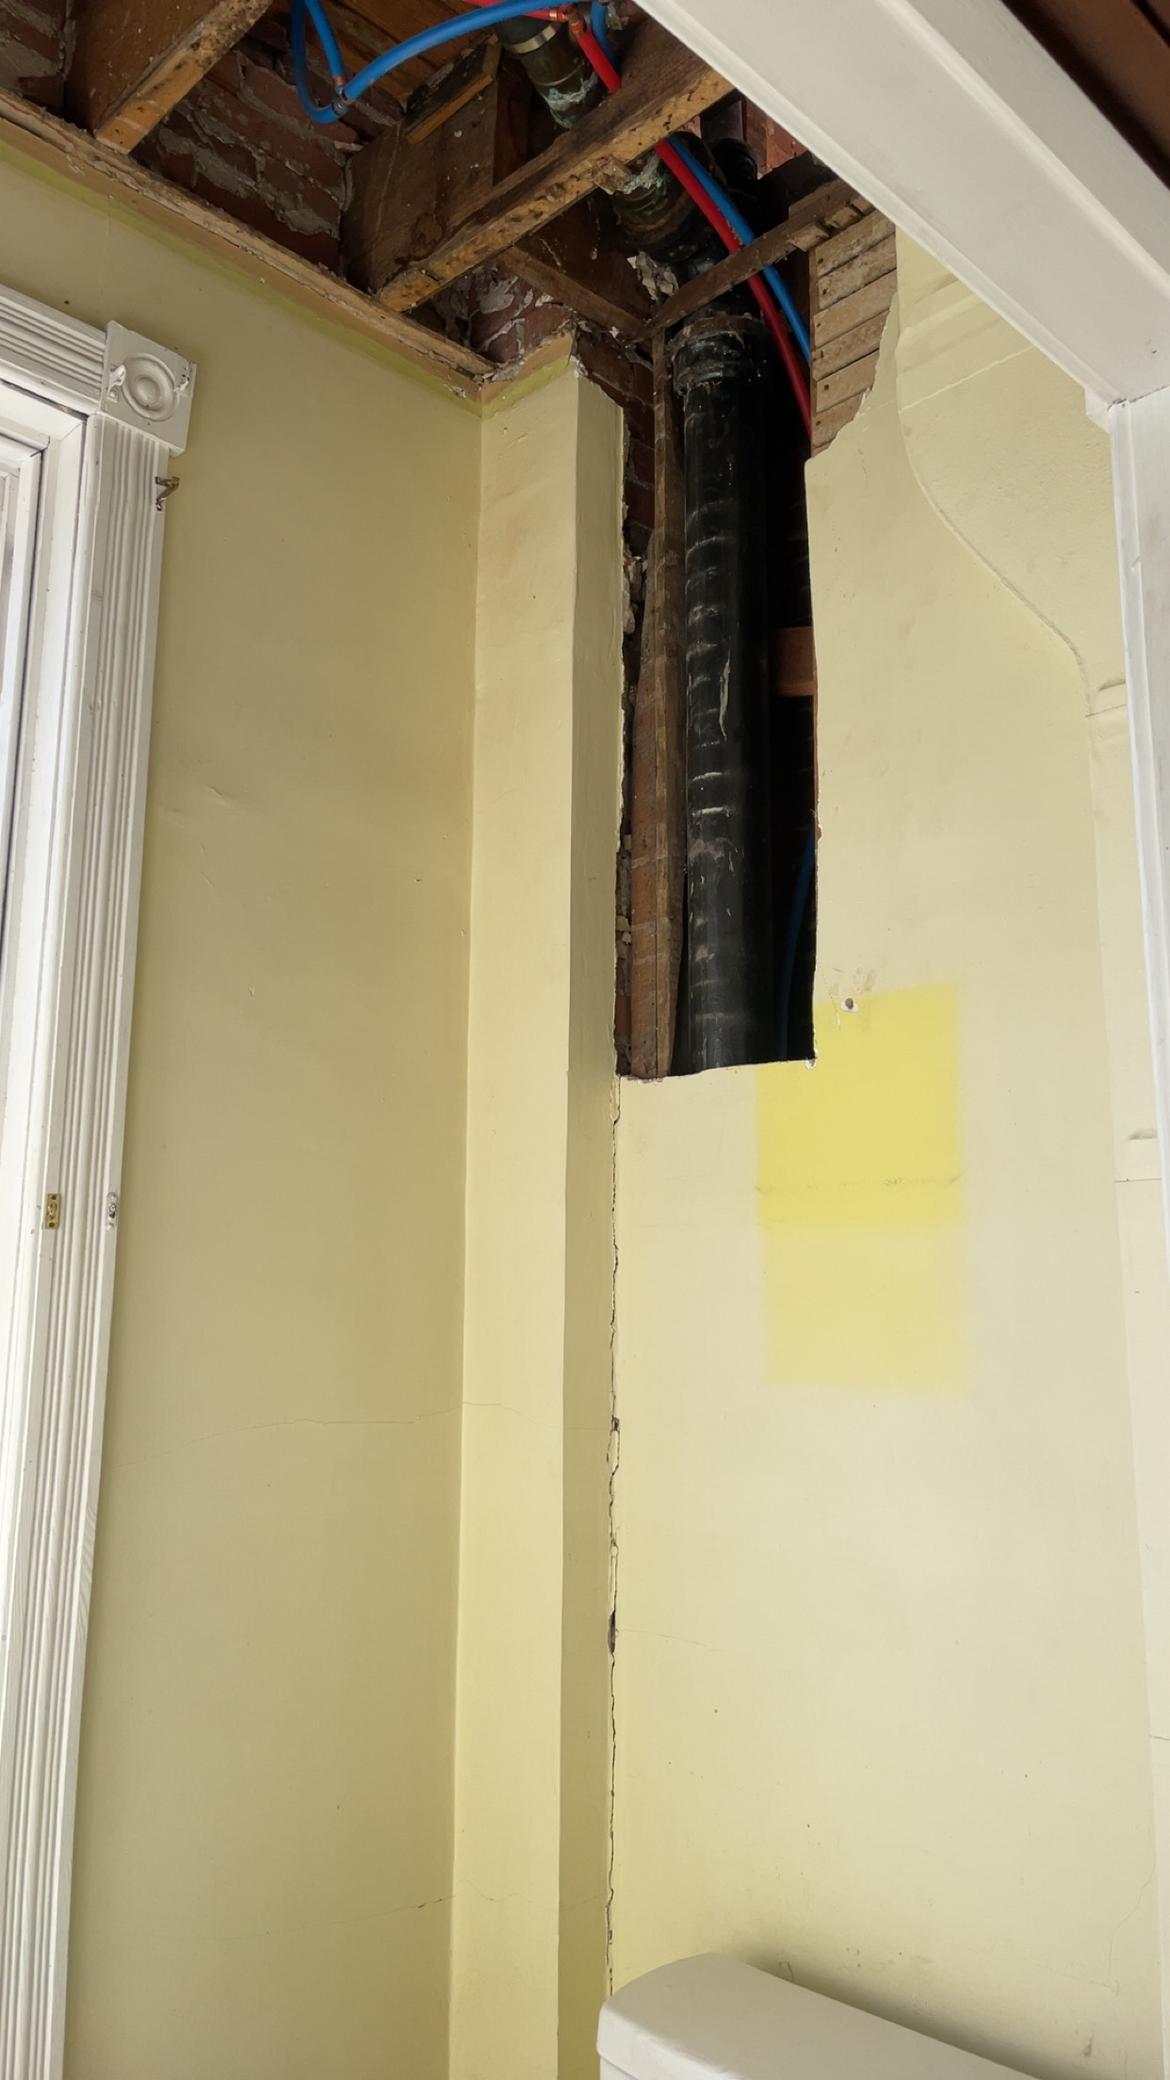
That pex that's there already I ran a year ago when we got the place. Going to trade that for 3/4".
As far as the trouble drains, the toilet looks like it will line up ok. Might be 14" out from the wall instead of the standard 12". Gotta wait till the cast iron is out of the way to see if I'll be able to use 3" or 4" for the toilet.
The shower.... lines up right on a joist. :) Looking closer at that here shortly to see the best plan. I think I might just space the whole shower out from the wall. Hate to waste space, but I looked last night for alternative shower pan sizes and there wasn't an easy button swap there.
Tub I still have to measure out and confirm, but that could set a little farther out from the wall if needed.
Also, some people should not be allowed to touch saws...
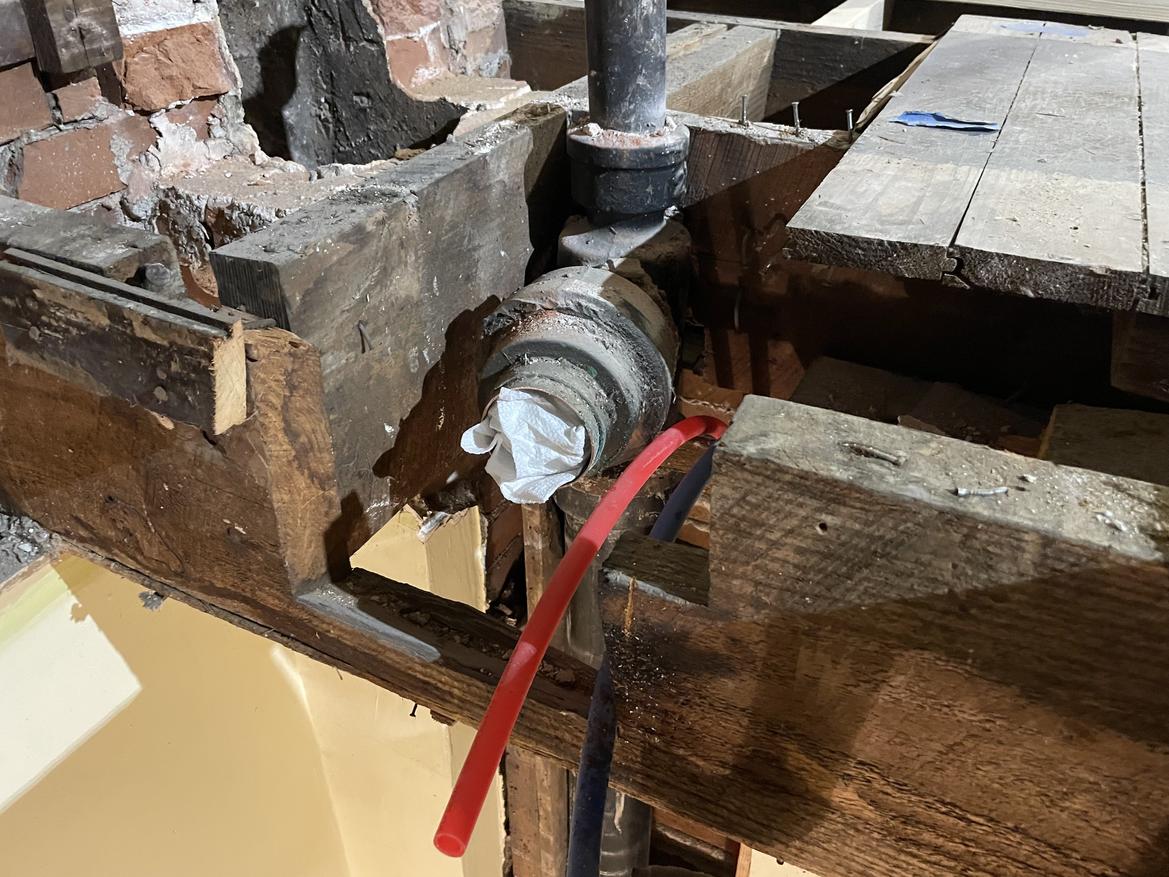
I'll be sistering some support to that joist.


