Years ago I bought a forge as I was planning on making some aluminum bronze tiles for the hearth extension in front of my fireplace. I have been slowly accumulating copper over the years and just hit the motherlode. I disassembled an old radiator heating unit from a warehouse that had a steam boiler. The radiator is probably 60 lbs of copper with brass pipe fittings brazed on. Aluminum scrap is pretty easy to find, especially as little as is needed.
I've been watching videos and reading about doing it, but a sand mold isn't very effcient in this case. I will need about 20-30 tiles so I was hoping for a not-sand mold that could be used multiple times... almost like a brick or ingot mold, but only about 1/2" deep. Is that possible? What material would I use?
My thought was to find a suitable material, then have my buddy CNC cut the tile into it.
Just came here to say forges and foundries are not the same thing.
You can try a refractory floor tile as a permanent mold, but the surface finish is gonna suck and the guy cutting them is gonna murder you for what the ceramic does to his CNC.
There are ways to do permanent mold aluminum bronze but it costs real money. Steel dies, pressure molding, argon bath, coolant lines, etc etc etc.
The most McBudget option is going to be a proper pattern and casting from green sand, thats backyard doable and you can have a pattern whittled out of plywood, plastic, 3D printed, etc. Just set your shrink and your draft and have at it.
My only experience with casting is inspecting them. One company submitted bronze bushings, a tube about 1.5" diameter, 4" tall with a 1/2" hole through the center. Using Dye Penetrant, I found 8 of 10 had cracks. The contractor came in, defended his product and offered to replace any with cracks; then he whipped out one that was finish machined. I shot Dye Pen inside the bore, llet it swell for 10 minutes and then shot developer to the outside diameter. The penetrant pulled right through the sidewall.
Investigation showed the guy's mold was stone cold when he poured. The metal was cooling as it went in and the leading edge was scabbed over when it touched the other side. That's all I got, heat your molds.
Are you familiar with the lost wax process?

In reply to 914Driver :
I am familiar with it, but it seems even more involved than just sand. I was hoping to make these like making a chocolate bar. Melt, pour, cool, remove, repeat.
How big are the tiles ?
and can you pour 4 at a time by pouring in the middle and let the metal flow into the each void ?
In reply to 93gsxturbo :
Can I just do an impression of my desired tile into sand and make a well as opposed to a two-sided cavity? Rinse, repeat? I assumed that would be fraught with inconsistency and shrink cupping. I realize there will be some machining needed to make the mud side flat, but it is a potential walking surface and I don't want it to look like the first time I ever did casting and tile work.
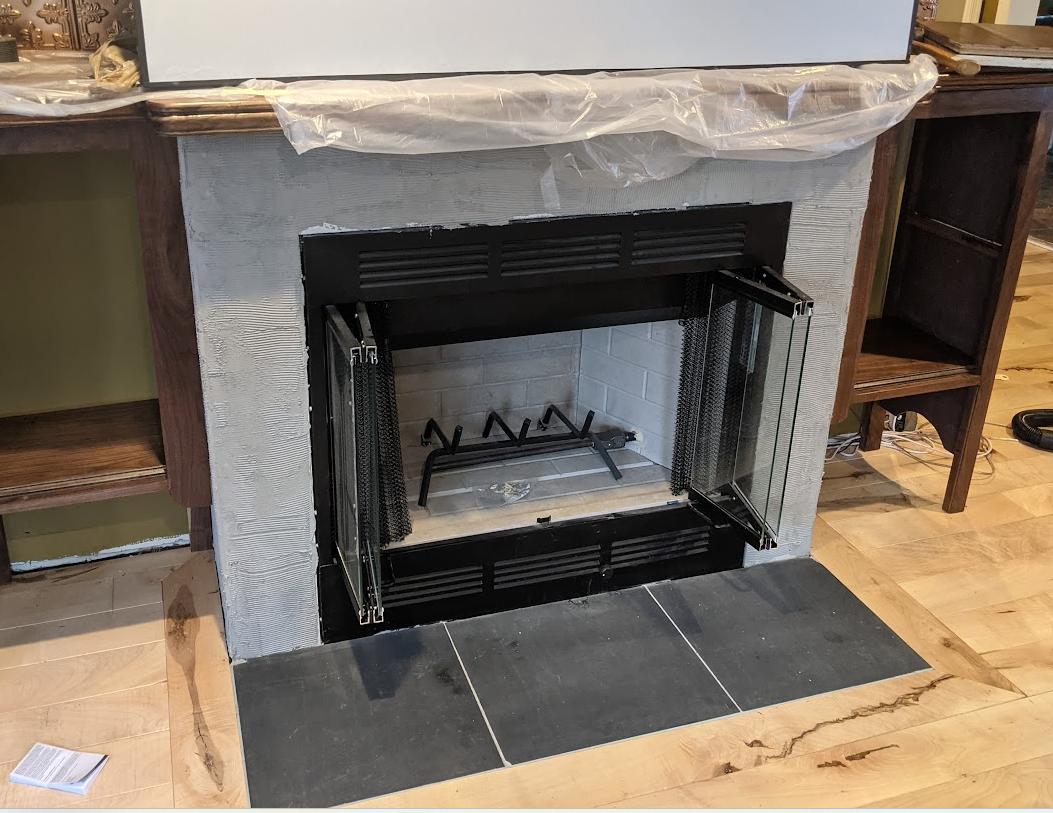
For reference, here is the space. For the time being, I cut up an old chalkboard to make slate tiles. These tiles would go where the slate is now.

Seems like there should be another material that would give a smoother, more detailed product than the cope & drag system. Finer sand?
In reply to californiamilleghia :
Probably? But being a total noob, I don't know if that would cause it to cool too fast at the frontier of the flow.
I haven't figured out how big the tiles will be. I would LOVE to make three big tiles like the slate, but I don't know how big I can realistically go in my back yard. I'm hopeful fo 6" x 6" or maybe I could subway tile some 4" x 8".
The current area is 54" wide and 22" deep (if memory serves correctly)

Mr_Asa
UltimaDork
1/26/24 11:54 a.m.
Tiles are going to be a bear just because of how they are going to cool. It's the primary benefit of a sand mold here. Without a mold on all sides to retain heat it's just gonna cause issues.
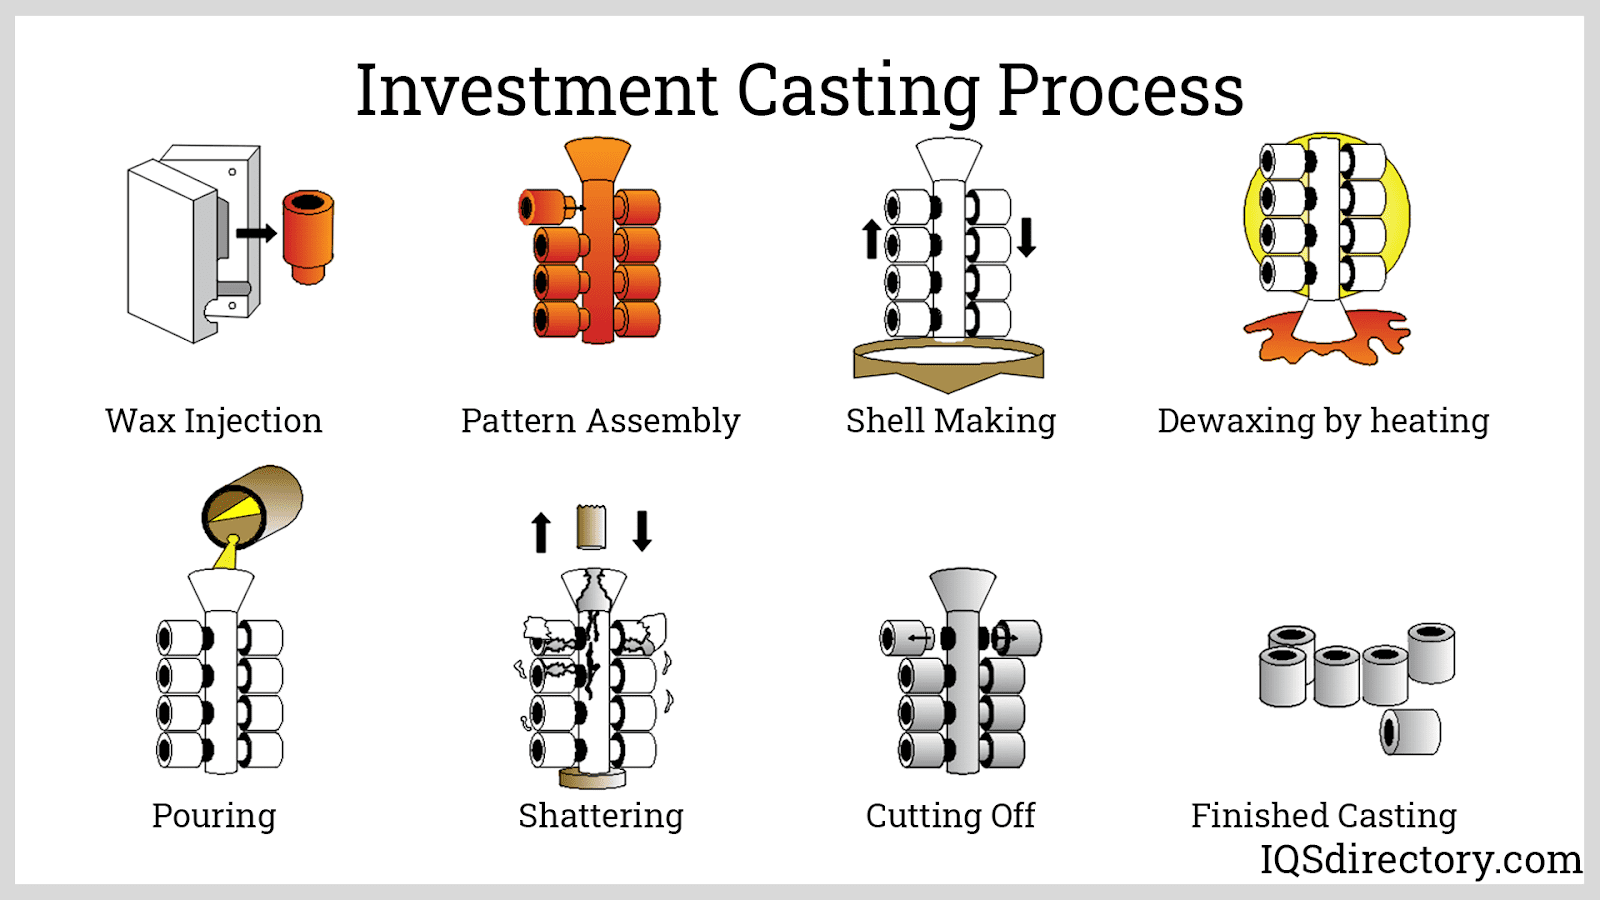
An idea i had while thinking of this. Most greensand molds are cope and drag, top and bottom? You also have multi-piece molds that are cope, cheek, drag. You could do a multi-cheek setup that are all the same tile shape. Add a runner and you could easily make a setup very similar to the Pattern Making setup in 914Driver's diagram above.
Anything above that is going to get costly in terms of time or money.
914Driver said:
Seems like there should be another material that would give a smoother, more detailed product than the cope & drag system. Finer sand?
I'm not terribly concerned with finish since I know I could put in the extra elbow grease and sand/polish/machine to a desired finish.
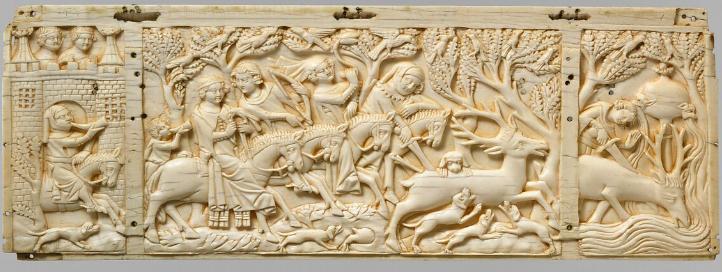
The theme of the living room is a kinda half way between Old English Gentleman's club and Scottish Lord's Hunting lodge. I'm hoping to cast tiles that have this feeling to them, although not nearly this intricate. These are just themes and research:


Mr_Asa said:
Tiles are going to be a bear just because of how they are going to cool. It's the primary benefit of a sand mold here. Without a mold on all sides to retain heat it's just gonna cause issues.
An idea i had while thinking of this. Most greensand molds are cope and drag, top and bottom? You also have multi-piece molds that are cope, cheek, drag. You could do a multi-cheek setup that are all the same tile shape. Add a runner and you could easily make a setup very similar to the Pattern Making setup in 914Driver's diagram above.
Anything above that is going to get costly in terms of time or money.
Good thoughts. I'll have to dig out the forge and check the capacity of the crucible. That will likely be the limiting factor on how much area I can cast with each pour. If I figure out how big I can pour tiles with each load, I might find that a full sand mold might be worth the trouble if I can do 6 tiles instead of 30
Since these are decorative parts you could make a wood pattern of what you want (3° of draft, 1/8" radii min, add 3/16"/ft shrink), get yourself a wood box that is 6" deep and 6" bigger than the part you want to make length and width, and direct pour the part into the sand with an open backed pattern. You would have some shrink and suck-in, but because these are decorative parts you should be fine as long as the pour temp is reasonably close.
You could also easily do a flat-backed pattern if you want to make these a little more sciency with proper gating and risering. I don't have my bronze riser calcs on hand but all that stuff is out there. You basically need a riser with a more favorable volume to surface area ratio to make sure it cools slower and will pipe good metal into the tile as it cools to keep voids and suck-ins to a minimum.
Depending on how heavy you want to run the thinset you will need the backs of these parts ground flat because you will have some cupping and warping.
I've only played with aluminum casting, nothing with the higher heat. Would sodium silicate/sand mix be easier to keep the details in a multiple tile pour? I used green sand mix with the Kent state K bond mix. It was tough finding Bentone 34 clay powder down here though. After dealing with mulling etc, I decided to go with sodium silicate a activate it with C25 welding gas.

93gsxturbo said:
Since these are decorative parts you could make a wood pattern of what you want (3° of draft, 1/8" radii min, add 3/16"/ft shrink), get yourself a wood box that is 6" deep and 6" bigger than the part you want to make length and width, and direct pour the part into the sand with an open backed pattern. You would have some shrink and suck-in, but because these are decorative parts you should be fine as long as the pour temp is reasonably close.
You could also easily do a flat-backed pattern if you want to make these a little more sciency with proper gating and risering. I don't have my bronze riser calcs on hand but all that stuff is out there. You basically need a riser with a more favorable volume to surface area ratio to make sure it cools slower and will pipe good metal into the tile as it cools to keep voids and suck-ins to a minimum.
Depending on how heavy you want to run the thinset you will need the backs of these parts ground flat because you will have some cupping and warping.
I also thought about casting them extra thick and milling them down to the correct thickness, but I imagine that would turn a lot of my material into dust that is hard to re-collect.
I'm also thinking that shrink might be my friend. If I want a 6x6 tile and they all shrink 3/32", that might make a pretty nice grout line. If I also leave a significant-enough border around the design, I can trim the tile a bit if they don't all turn out uniform.
There are also a lot of words in there that I'm googling.

Mr_Asa
UltimaDork
1/26/24 3:38 p.m.
I did have good results with 3D printing and using that and plaster for a lost wax style casting. That is also something you could extend multiples of and cast several at once.
Was enough detail on the casting to see the lines from the 3D print.
I worked with several foundries on my stuff and went with a pattern and they made sand molds, runs were 50-100 at a time. Hate to say it but now a CNC machine may be more economical for your stuff. Bronze foundries are tough to come by and you may find it is harder than you think to learn how to DIY
are you going to use one pattern for all you castings
You could find an interesting design on google , put it in Photoshop / Illustrator and make it into a 2 color image ,
Then have that 3D printed or cut out by CNC
Or go real old school and do what old car club plaques makers did and cut the pattern out of linoleum
You could comfortably get away with a 3/8" to 1/2" thick main body, dont have to go any thicker than that for success.
Also dont forget to do your volume calcs. 12x 12 x 1/2" thick is close to 25 lbs in copper. 50% yield would be very good, likely closer to 33% if you want a sound casting for low volume work. So whatever surface area you need to cover estimate that at 25 lbs/sqft. I would want to start with 3x that much weight of copper to have a wing and a prayer of success. So for simple math - doing 4 sqft you need 300 lbs of copper.
Current copper scrap is around $2.50/lb.
That buys some nice ass tiles.
In reply to 93gsxturbo :
heheh... you said "ass tiles."
It does buy nice tiles, and if I hadn't searched for three months for something I liked without finding it, I would have gone that way. I guess it warrants another look now that I've circled back to this a few years hence.
The depth of the cavity where the slate is kinda escapes my brain right now. I thought it was 1/2", but that's the thickness of the hardwood, and I know there is thin hardie backer under the slate. I also remember that the slate was certainly not 1/2" thick. I'm likely at about 180 lbs of copper right now. I guess my brain doesn't remember, so I'll have to take up the slate to know for sure.
Keep in mind not every oz you pour in the mold turns out as finished product. Thats where your yield calcs come into play. If you plan on starting thicker and decking them to get them where you need, thats lost yield. Grinding, flash, spillage, gating and risering, thats lost yield. You can remelt the gating and risering once they are cleaned and assuming you include the returns in your charge calculations, but cleaning them is also a whole thing (tm) to do it right.


