We’re *this* >< close to having the “creekhouse” move-in ready. One of the last things on the list is doing *something* with the shower.
The tub is in great shape, but the current surround was probably done in the 70’s/80’s with that plastic(?) stick on/nail in stuff. It needs to go, but not sure what to replace it with.
Honestly if the same stuff still exists, but in white, I’d be cool with it. This is “temporary housing” while we build, so I’d rather not get into tile, or hiring someone for a “remodel”
Hive thoughts?

If you are looking for cheap and easy there is stuff called polywall that you can just cut to size, glue, and caulk.
It is availible in white. Probably the easy button here and less than $100 to do the whole shower

Ian F
MegaDork
4/5/19 1:45 p.m.
Following, because my bathroom is similar.
Poop - be prepared for some nastiness around that window.
Two part epoxy paint will be waterproof and basically just seal whatever is under it. Do several coats.
I used to remodel and repair (self employed 15 years) and there are plastic sheet kits with soap dishes and shelves molded in, or FRP panels are an option. They seem pricey at first, but are a 2 or 3 hour time investment and last a good while.
PS, FRP or Fiberglass Reinforced Plastic is the white stuff you see in restaurant kitchens and public bathrooms with the bumpy texture
I am currently living in "temporary housing". Due to some unforeseen circumstances its been 6-7 yrs. Having lived with several different iterations of just for now shower surrounds I would go ahead and get a 5 piece tub surround and glue it to the walls. its about the same work and is "purpose built" for such things. they have them a malwart for 80.00 bucks

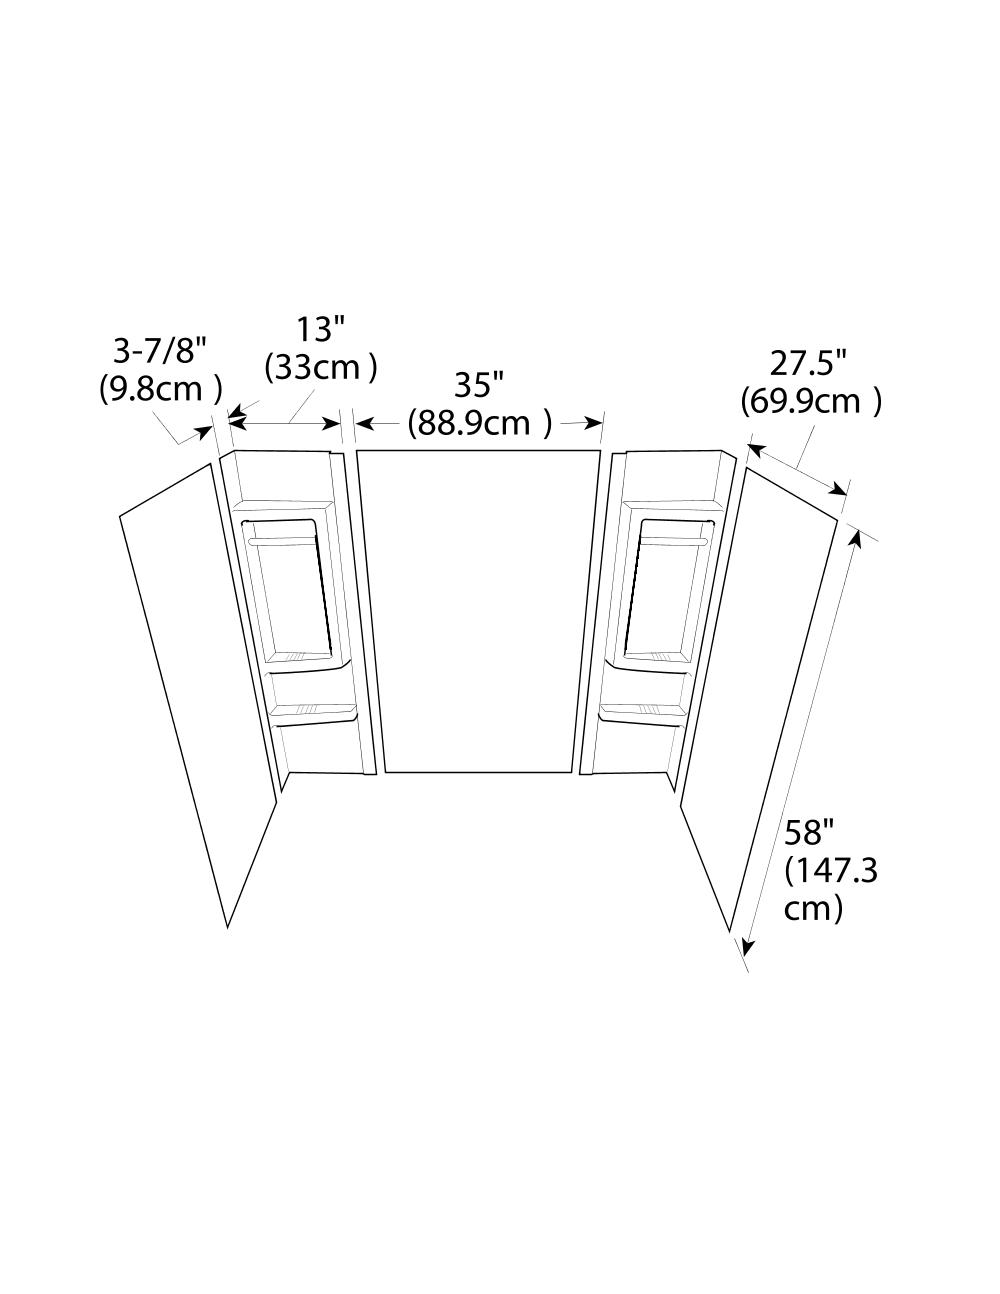
I did a home depot surround kit like this one
I think it was on sale for $153 but its $179 now. That plus two tubes of loctite and it was super simple. Mine had a wee bit of trouble in one corner because the wall wasn't plumb. The corner piece wanted to buckle away from the adhesive so I had to put one pin nail in it which I later took out and filled with silicone. Can't see it unless you look really hard.
FRP is another good way, but I find it very hard to cut and the pebble texture is way too hard to clean.
In reply to Curtis :
We looked at those but I couldn’t seem to get an answer on how easy it would be to cut for the window. And yeah, I’d definitely want smooth vs textured for cleaning purposes.
I altered the height of mine because the wall at the end of the tub didn't go quite the whole way to the ceiling. It had a little "shelf" on top of the wall.
Cutting is easy. It's not fiberglass, its just acrylic or ABS or something. My first cut I used a jig saw, but the flexible material liked to bounce a lot. Subsequent cuts I used a straightedge and scored it several times with a utility knife and snapped off what I didn't need.
In these directions for that enclosure it says to use a utility knife or a pair of scissors, but I would also imagine some tin snips would work well.
The above image that buttplug posted is what I was talking about
Justjim75 said:
The above image that buttplug posted is what I was talking about
Damn! I actually laughed out loud.
In reply to Curtis :
Sounds like the hot ticket. Thanks for the pro-tip!
2o years later Mine is still up, Very Worse for the wear, It was Temp. Made the whole run. A Straight Edge and Large Scissors, I think it was 110 back then.
My phone did that! Sorry, um, not sorry?
No worries. i got a good chuckle out of it.
Buttplug gives the best DIY advice.
 In reply to poopshovel again : What is your ambition level?
I put in a white plastic surround upstairs for my Daughter when she was forced to move back in.
Later on for the same money and very close to the same amount of effort I put in tile.
It was my first attempt.
In reply to frenchyd :
Both sons are master plumbers. Their advice is ALWAYS use a good brand product like American Standard or Moen. You will thank them during the installation and years later


 In reply to poopshovel again : What is your ambition level?


