No relay?

We soldered the inline fuse block segment to the wire coming off of our positive electrical terminal.

Heat shrink tubing should prevent any corrosion of the soldered connection.

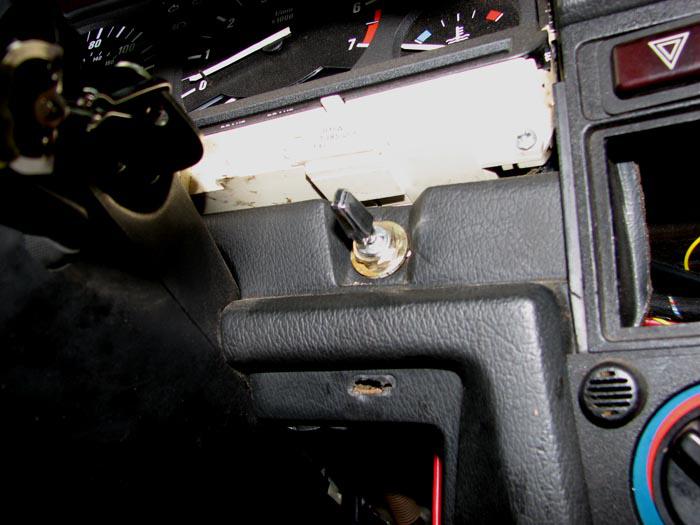
The only switch that met our amperage needs at AutoZone was a three-way switch, hence the unused pole.

We used a washer to ensure that the switch won't pull through the soft dash material.

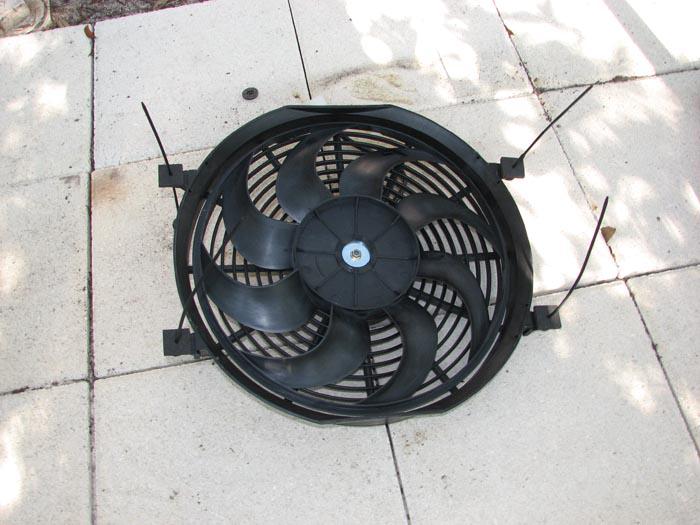
TorqFlo makes several electrical fans; this one is a 16-incher from AutoZone.

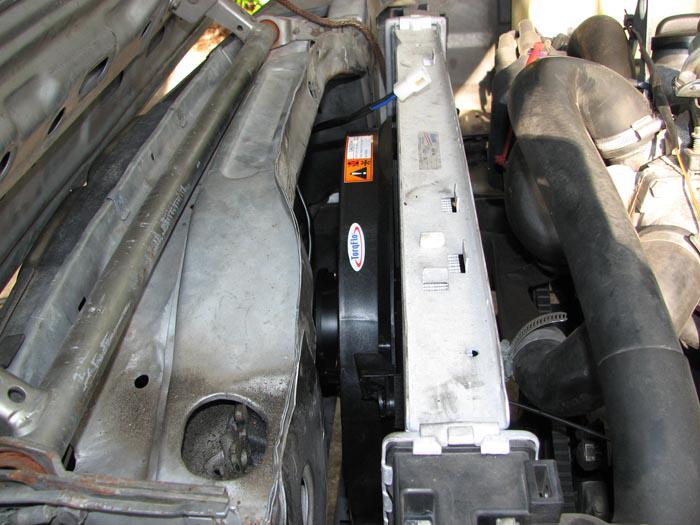
We opted to mount the fan in a pusher configuration to maximize working space between the engine and the radiator.

The fan comes with zip ties that slide through the radiator fins, making installation a no-tools affair.

Don't forget to trim the extra zip tie material so it doesn't get ingested by any of the pulley belts.

The fan will keep things cooler at idle and at low speeds.

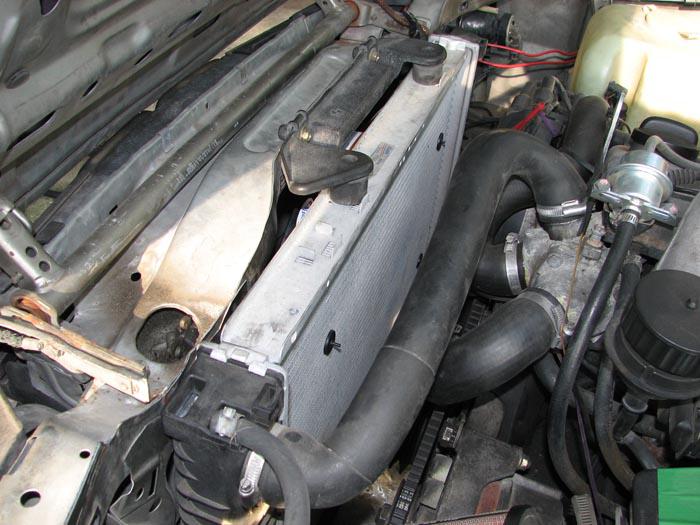
In order to keep the elements out, we liberally applied electrical tape where our wiring meets the fan's harness.

Our fender, post-Porsche.

The same fender after a few solid whacks from the inside with a sledge and a wood block.

Kids know that Band-Aids make it all better; the same applies to race cars.
Important safety tip: Be sure the fan is secured before you give it power. You don’t want to inadvertently create a Pain-O-Copter.
A few people told us that we shouldn’t worry too much after we lost our radiator fan at Roebling Road, but the insanely hot temperatures and too-slow lap speeds during yellow flag conditions at HyperFest led us to believe otherwise. The easiest and least horsepower-sapping solution would be a replacement electric fan, and the friendly neighborhood AutoZone has several sizes to choose from.
Our BMW has a pretty big radiator with lots of space on both sides, so we opted for the largest fan in their arsenal, a 16-inch TorqFlo. The fan can be wired to work as either a puller (mounted to the side of the radiator facing the engine) or a pusher (mounted in front of the radiator).
For the record, the puller configuration is the most efficient mounting position for such a fan. The only downside to a puller configuration is the fact that the space between the block assembly and the radiator can be tight. While it looked like our big 16-inch electric fan would fit with a little bit of room to spare, we were attracted to the idea of having enough space to fit our hand (and a wrench) between the block and the radiator. The pusher configuration should give us a sufficient bump in cooling effectiveness to counteract heat sink at idle and during low-speed pit area or yellow-flag cruising, all while leaving lots more room for potential work on the pulley side of the engine.
It cost us $139.46 to purchase the fan assembly, a large spool of 12-gauge wire, an inline fuse block, a small box of 25-amp inline fuses and a heavy-duty 30-amp switch for the dashboard.
Finding a solid power source was easy, since our master kill switch is located near the windshield on the passenger’s side of the car. We connected a short length of wire to the positive terminal of the kill switch and then soldered our inline fuse block into place. Since this is in an external area, we weatherproofed the connection with some heat shrink tubing.
We then slid the wire through one of the firewall’s harness holes and connected it to our switch. Mounting the switch to the dashboard was simply a matter of enlarging an existing unused hole and using the provided flat nuts to snug the switch in place. A washer will keep the switch from pulling through the somewhat spongy dash material.
With the switch now connected to the positive terminal, we ran a second wire from the other terminal on our switch to the fan itself. When performing this kind of installation, make sure you read the directions that come with the fan and adjust the blade and wiring to match either a puller or pusher configuration. In our case, we had to flip the fan blade over. Then we tested it outside the car by grounding it temporarily and flipping the switch to make sure it was blowing in the desired direction. Important safety tip: Be sure the fan is secured before you give it power. You don’t want to inadvertently create a Pain-O-Copter.
Confident in our wiring, we carefully marked our wires with color-coded tape to ensure that future repairs can be completed easily. We used the provided zip ties to attach the fan to the radiator, then found a good, permanent electrical ground under the hood to complete the installation.
Having spent much time at the front of the car, we didn’t want the back end to get jealous; after all, it was still a bit bashed in from an extremely late-braking Porsche at HyperFest. Our means of repair were crude but effective: a very large sledgehammer, a block of wood to spread out the blows and some spirited pounding. Since the dent was entirely in the trunk area, it was easy to get to. No such repair is going to look perfect, but a couple of additional decal bandages later, our car more than passes NASA’s 50/50 rule. (It only has to look presentable from 50 feet away at 50 miles per hour.)
Nope, the switch we used has a sufficiently high amperage rating. If it becomes an issue, we'll put a relay in there.
It looks like you've wired it to run only from the switch, Scott. Are you sure you don't want a thermoswitch to get the fan moving just as the clutched fan would have and use the toggle as an on-demand fan?
Displaying 1-4 of 4 commentsView all comments on the GRM forums
You'll need to log in to post.